

Page 1

POU Scaleless
Model# SL10-1, SL20-2 and SL20BB-5
Installation, Operation and Maintenance Manual
This manual contains important maintenance procedures for the continued proper operation of your unit.
These MUST be performed regularly for your guarantee to remain valid.
54990.0212
Page 2
NOTICE TO INSTALLER:
• Do not discard this manual after installation. This manual contains important operation, maintenance and precautionary
information. Please present this manual to user/operator/owner after installation.
• It is strongly encouraged that you read this manual before installing system to ensure the best possible installation.
• Installation must conform to all local and state plumbing codes and regulations.
• Connect system to cold water supply only. Water temp. Can not exceed 100°F/28°C.
• System must be installed in a vertical and upright position.
!
• Scaleless systems must not be used in conjunction with polyphosphate or any other scale inhibitor.
• Do not use with water that is microbiologically unsafe or of unknown quality without adequate disinfection before or after
the system.
• Notice to user/operator/owner: Please retain this manual for future reference for parts, maintenance or trouble-shooting.
• It is recommended that all personnel responsible for operation and maintenance of this product read the precautions,
operation and maintenance sections of this manual.
Introduction
Your new Scaleless Filtration System will filter and condition the tap water providing optimum water characteristics for their
specified applications. The result is reduced equipment maintenance requirements, longer equipment life and improved
quality & consistency of your products. Proper system installation and routine filter changes will ensure years of trouble-free
operation and performance.
The Scaleless System is built with the finest and most advanced materials and each system is quality inspected and pressure
tested prior to shipment. With proper installation and routine maintenance, you will have years of trouble-free operation.
Please refer to this manual when performing routine filter changes. The instructions make periodic maintenance quick and
easy, and ensure you will receive maximum benefit from your system.
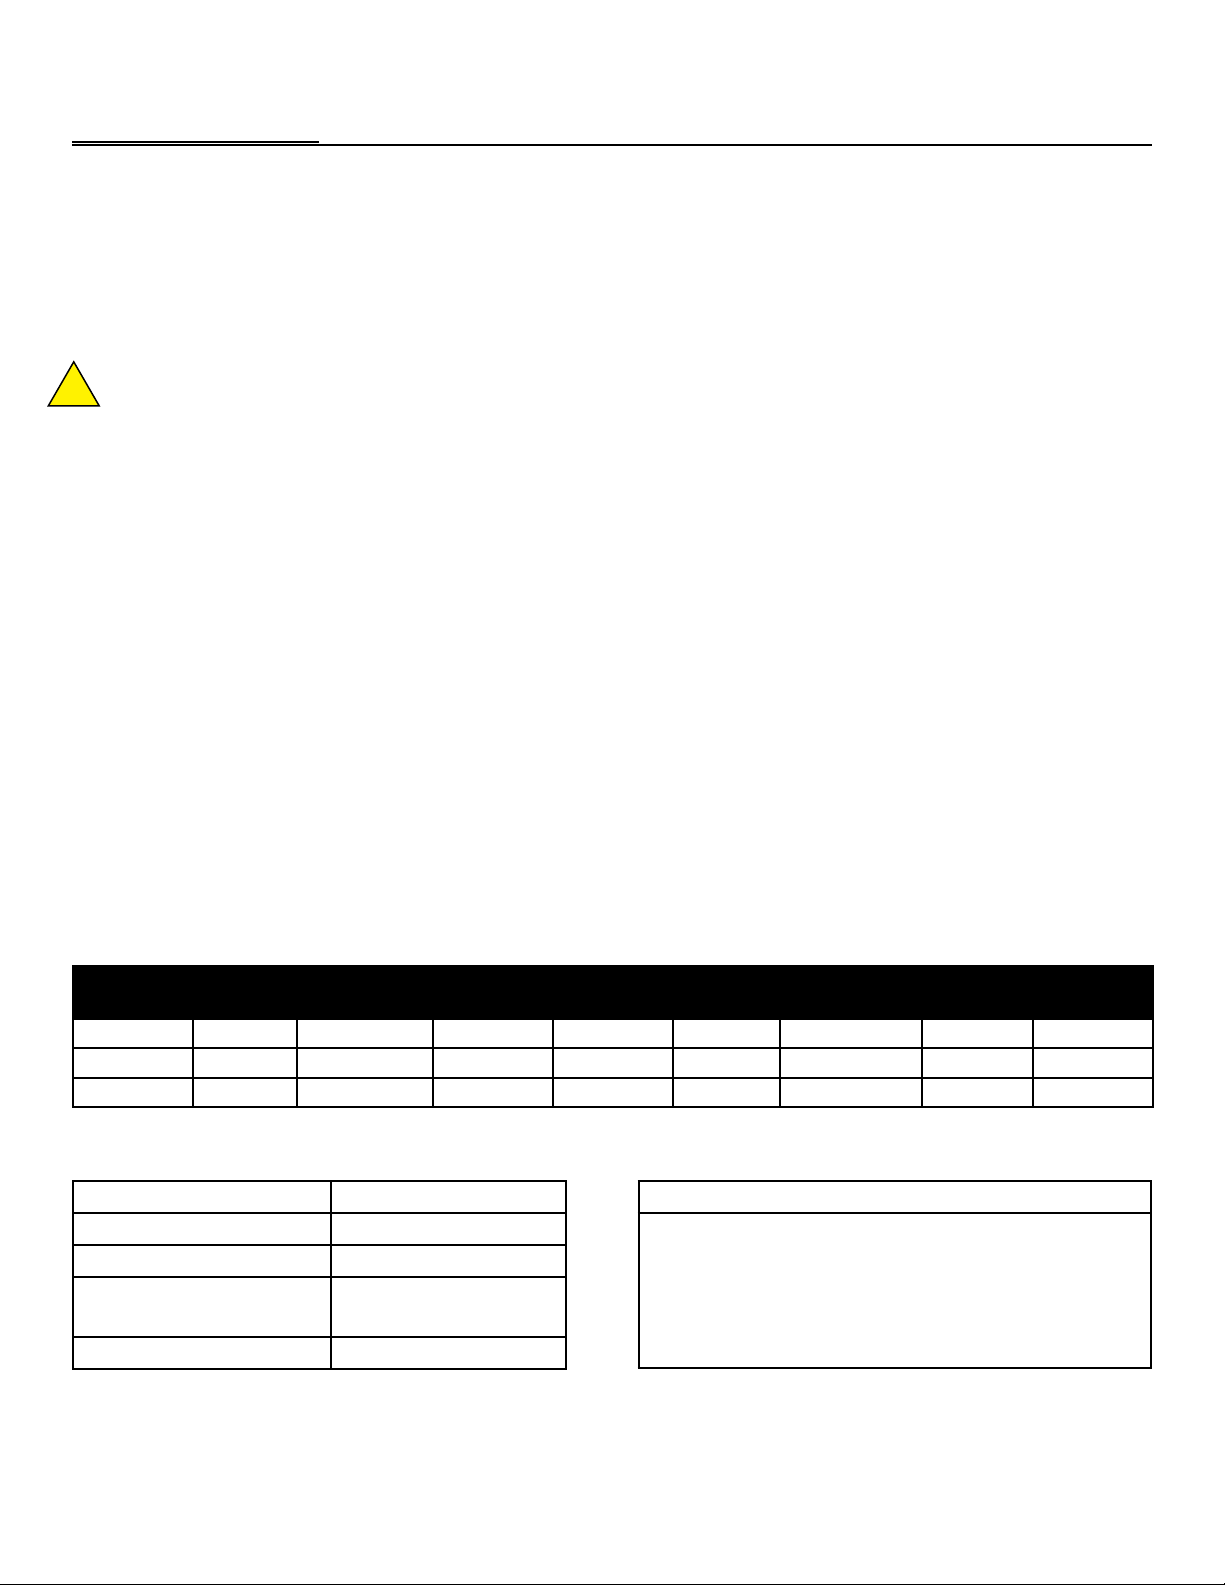
Maximum Flow
Item # Model #
26171 SL10-1 1 525,000 1 Year 1/2” 15” X 5.5” X 5.5” 10 26270
26172 SL20-2 2 1,050,000 1 Year 1/2” 25” X 5.5” X 5.5” 16 26271
26173 SL20BB-5 5 2,100,000 1 Year 3/4” 28’ X 7.5” X 9” 18 26272
Rate (GPM)
Capacity
gallons
Frequency of
Replacement
Connections
I/O
Dimensions (H x
W x D) Weight (lbs)
Replacement
Filter Item #
Technical Specification
Max. Water Temperature 30 Deg C (100 Deg F)
Min. Water Temperature 2 Deg C (35 Deg F)
Max. Water Pressure 125 psi (861 kPa)
Maximum Recommended
1 GPM (3.78 LPM)
Flow Rate
Service Life One Year
Capacity (Grains)
These Cartridges do not have grain removal capacity,
however, other contiminants present in the water will
gradually degrade the effectiveness of this cartridge. It is
recommended to change the cartridge altleast once
a year
Do not use where water is microbiologically unsafe without adequately treating the water before or after the system
At the stated service flow rates, the pressure drop through these devices will not exceed 15 psig.
2
Page 3

Installation Precautions
• Do NOT install system on line pressure above 125 psi.
• Do NOT install system on HOT water line. Failure to limit line temperature to 100°F may result in housing failure
and damage.
• Do NOT install the system backwards with the feed water line connected to the outlet.
• Do NOT use liquid pipe compounds for fitting connections. USE two to three wraps of teflon tape.
• Do NOT solder plumbing connections attached to filter housing. Filter housing will be damaged by high temperature.
• Do NOT allow system to freeze. Turn off water supply to housing and drain housing if temperature falls below 32°F.
• Do NOT install system in direct sunlight or where system is exposed to harsh chemicals or may be subjected to being
struck by moving equipment, carts, mops or any other item that may cause damage.
• ALLOW a minimum of 3” under the housing to allow for filter replacement.
• IF water hammer is evident, install water hammer arrestors before the Scaleless unit.
• Do NOT overtighten fitting connections into inlet valve our housing outlet.
• Do NOT install the unit behind equipment where it may be difficult to access the system for filter replacement.
Position the Scaleless unit in a suitable location. The direction of flow through the Scaleless unit is always left to right; keep
this in mind when determining installation location. Do NOT mount the Scaleless system near any source of heat. Also, do
not mount the system above any device or area that would be adversely affected by water.
Installation Procedure (See Installation Drawings for Detail)
1. Turn off all equipment to be fed by the Scaleless System, locate water supply cut-off valve and turn OFF
2. Determine if the water line has an existing water treatment system. If so, examine system for use of polyphospate or
other scale inhibitors. Scaleless will not be effective if used in conjunction with other scale inhibitors. Remove the scale
inhibitors from the water line or discontinue installation.
3. Install a 1/2” full-flow ball valve on the water supply side that will feed the water system.
4. Anchor the Scaleless System on a wall stud or suitable mounting material spanning wall studs. System must be vertical
and upright.
5. Run a suitable line from the 1/2” full-flow ball valve at the tap water source to the inlet ball valve on the left side of the
Scaleless system. Use 2-3 wraps of teflon tape and brace the inlet ball valve on the system with a wrench when connecting the feed water line. NOTE: DO NOT OVERTIGHTEN CONNECTION FITTING INTO BALL VALVE.
6. Select the appropriate size tubing for the equipment being fed and connect it to the outlet of the Scaleless System. NOTE:
DO NOT connect the tubing to the equipment at this time. Prior to making connection to the equipment this line will be
used to facilitate flushing the system. As an option, a drain valve in a tee on the outlet side of the Scaleless system could
be provided in the line to facilitate flushing when changing filters.
7. With System inlet valve closed, slowly open the 1/2” full-flow ball valve at the tap water source. Check for leaks.
8. If a drain valve was not installed on the outlet side of the system, hold the tubing that will connect to equipment in a clean
bucket or over sink or drain. Open the system inlet feed valve and allow water to flush through system for 2 minutes at
the specified system flow rate to allow air bubbles to escape. NOTE: NO ACTIVATION IS REQUIRED FOR THE SCALELESS
SYSTEM TO PERFORM PROPERLY. FLUSHING IS RECOMMENDED TO ALLOW AIR TO ESCAPE THE SYSTEM.
3
Page 4

Installation Procedure - Continued
9. Make certain that the end of the tubing to be connected to the equipment is clean and sanitary.
10. Connect tubing to equipment. Open all water supply valves and check for leaks.
11. If no leaks turn on equipment and check for normal operation.
Installation Drawings & Dimensions – MODEL# SL10-1
3”
Direction of Flow
N I
3”
3”
4
Page 5

Installation Drawings & Dimensions – MODEL# SL20-2
3”
Direction of Flow
N I
5
Page 6

4.5”
3.0”
28.375”
Installation Drawings & Dimensions – MODEL# SL20BB-5
8.0”
4.31”
28.375”
3.0”
22.125”
Clearance
6
Page 7

Operation
With sufficient pressure, operation of the Scaleless System is completely automatic. Dependable operation involves only
periodic filter changes and service documentation.
Maintenance
Routine maintenance of your Scaleless System involves periodic filter cartridge changes and/or replacement of sump
O-rings. If the system sizing recommendations have been followed the Scaleless System the Scaleless Cartridge
(NSS-C10) should last one (1) year.
Filter Change Frequency
The filters should be changed in response to the following conditions.
• 12 months since installation or last filter change.
Please refer to the table given on page 2 of the manual for information of replacement cartridge part #. the replacement
part list is also included at the end of this manual.
3.
6.
Filter Cartridge Replacement Procedure
IMPORTANT: Determine whether all equipment connected to the Scaleless System must be
turned off prior to shutting off water supply from filters.
1. If required, turn off equipment.
2. Turn OFF water to Scaleless System by closing Inlet Ball Valve.
3. Press the red button to release pressure.
4. Remove housing(s) - use filter wrench if necessary.
5. Clean inside of housing sumps with warm water. If desired, disinfect housings using a
4.
7.
teaspoon of household bleach in a filter bowl of water. Let stand 5 minutes, and then
discard.
6. Insert new cartridges into filter housings. Match cartridge model numbers to model numbers on bracket or housing.
7. Make certain the O-ring is properly positioned and reinstall filter housings (hand tighten
only). Check O-ring for damage and replace if damaged or distorted.
8. Slightly open the inlet ball valve; push the red pressure relief button to release trapped air
until a small amount of water comes out - release the red button and fully open the ball
valve.
8.
9. Open the flush valve downline from the filter housing (if equipped) and flush the new cartridges to drain or bucket for two (2) minutes or until water runs clear. If no flush valve is
present, disconnect line from equipment to flush to drain.
10. VERY IMPORTANT: With water supply inlet valve OPEN and water flow confirmed, turn on
connected equipment. Failure to supply water to equipment may cause serious damage.
11. Record filter change on the service log.
7
Page 8

Replacement Filter Cartridges
Scaleless Systems can only be used with Scaleless filter cartridges. Use of replacement
cartridges other than those specified will void warranties, certifications and may compromise
equipment protection, water quality and equipment life.
4.
4X
Optional
Drawing # Description
1 Replacement Cartridge 26270 26271 26272
2 Housing 150067 (1/2”c/w PR) 150069 (1/2” c/w PR) 150467 (3/4” c/w PR)
3 O-Ring 151120 151120 151122
4 Bracket c/w hardware 150578 150578 150061
5 Flow Restrictor (Optional) 1 GPM 2 GPM 5 GPM
Part # (Model #
SL10-1)
Part # (Model #
SL20-2)
Part# (Model #
SL20BB-5)
1.
2.
WaterGroup Warranty
Subject to the conditions and limitations described below, WaterGroup warrants its Scaleless Systems (excluding
cartridge filters), when installed in accordance with WaterGroup specifications, to be free from defects in
materials and workmanship under normal use within the operating specifications for a period of (2) years from
the date of purchase (with bill of sale) or 2.5 years from product date code,whichever occurs first.
This warranty shall apply to the original end-user of the system only.
3.
Other than the cartridge filters, any part found defective within the terms of this warranty will be repaired or
replaced by WaterGroup. If any part is found defective, WaterGroup also reserves the right to replace the system
with a comparable WaterGroup water system of equal or greater quality. You pay only freight for repaired or
replaced parts from our factory and local dealer charges, including but not limited to labor charges, travel and
transportation expenses and handling fees.
This warranty shall not apply to any part damaged by accident, fire, flood, freezing, Act of God, bacterial attack,
membrane fouling and/or scaling, sediment, misuse, misapplication, neglect, alteration, installation, or operation
contrary to our printed instructions, or by the use of accessories or components which do not meet WaterGroup
specifications. If the drinking water system is altered by anyone other than WaterGroup the warranty shall
be void.
U.S. Headquarters
WaterGroup Companies, Inc.
193 Osborne Road
Fridley, MN 55432, USA
TOLL FREE PHONE: 1-877-581-1833
www.watergroup.com
Canada Headquarters
WaterGroup Companies, Inc.
490 Pinebush Road, Unit 1
Cambridge, ON N1T 0A5, Canada
TOLL FREE PHONE: 1-877-288-9888
Distribution Locations
Durham, NC
Libertyville, IL
Pottstown, PA
Rancho Cucamonga, CA
Cambridge, ON
Calgary, AB
Regina, SK
54990.0212
 Loading...