

Hydro AutoDose 1170, AutoDose 1190, AutoDose 1180 Installation Manual
AutoDose™ Automatic Dispensing System
!
The AutoDoseTM is a battery or A/C-powered peristaltic pumping dispenser that runs automatically at preset times as
programmed with an electronic timer / control. Product operates reliably and consistantly, even in demanding environments.
This guide contains instructions for installing, programming, and troubleshooting
the AutoDose™ Dispensing System. Throughout the guide, the following icons are
used to indicate the model(s) to which each step pertains.
Models:
Mounts:
Power:
11 7 0
Pail Mount
(3.5 – 5 gal pail)
8 D-cell batteries
11 8 0
Wall Mount
8 D-cell batteries
11 9 0
Wall Mount
A/C Power or 8 D-cell batteries
This package should contain:
• One AutoDose
INSTALL PACKAGE CONTAINING:
• Ceramic weight and strainer for inlet tubing
• Polyethylene tubing (10 ft)
• Cable ties
• Mounting Bracket (Some Models)
• AC Adapter (Some Models)
• Injection Fitting
TM
dispenser
Please use this equipment carefully and
observe all warnings and cautions.
ALWAYS observe safety and handling instructions of
the chemical manufacturers.
ALWAYS direct discharge away from you or other
persons or into approved containers.
ALWAYS dispense cleaners and chemicals in accordance
with manufacturer’s instructions. Exercise CAUTION
when maintaining your equipment.
KEEP equipment clean for proper operation.
WEAR protective clothing and eyewear when working
in the vicinity of all chemicals, filling or emptying
equipment, or changing tubes.
ALWAYS re-assemb le equipment ac cording to
instruction procedures. Be sure all components are
firmly screwed or latched into position. Ensure that
hoses and electrical wires are properly placed and not
kinked or pinched.
AutoDose™ Dispenser Specifications:
PUMP
Flow Rate Approx 3.5 oz / min
Tube Material EPDM
Inlet Vacuum 20+ in Hg
Outlet Pressure 20 psi
SYSTEM CABINET
Material Polypropylene and ABS
Size (Model 1170) Approx. 7 3/4” tall X 14” diameter
(does not include container 1170 model system sits on)
Size (Models 1180 and 1190) 4 3/4” X 6 3/4” X 8 1/3”
PROGRAMMABLE TIMER / CONTROL
Program Duration Daily / Weekend / Week Days/Special
Maximum # of Events 24
Dispense Amount per Event 1 oz – 30 oz (dispensed in 1 oz increments)
or 30 – 900 ml (dispensed in 30 ml increments)
10094778 Rev B 11/10 © Hydro Systems Company, Inc. 2010 HydroSystemsCo.com Toll Free: 1.800.543.7184 1
ONLY USE ALKALINE BATTERIES.
Tube life will vary depending on the type of treatment
product used. To prevent emergency service, schedule
replacement at least once per year.
NOTE: The batteries should be scheduled for periodic
replacement. Using a total of 40 running (pumping)
hours, create a schedule for servicing the unit and
changing the batteries. Maintaining the power source
as such will help to provide the proper dosing by
providing a more consistent pumping rate.
Installation
11 7 0
1A
11 8 0
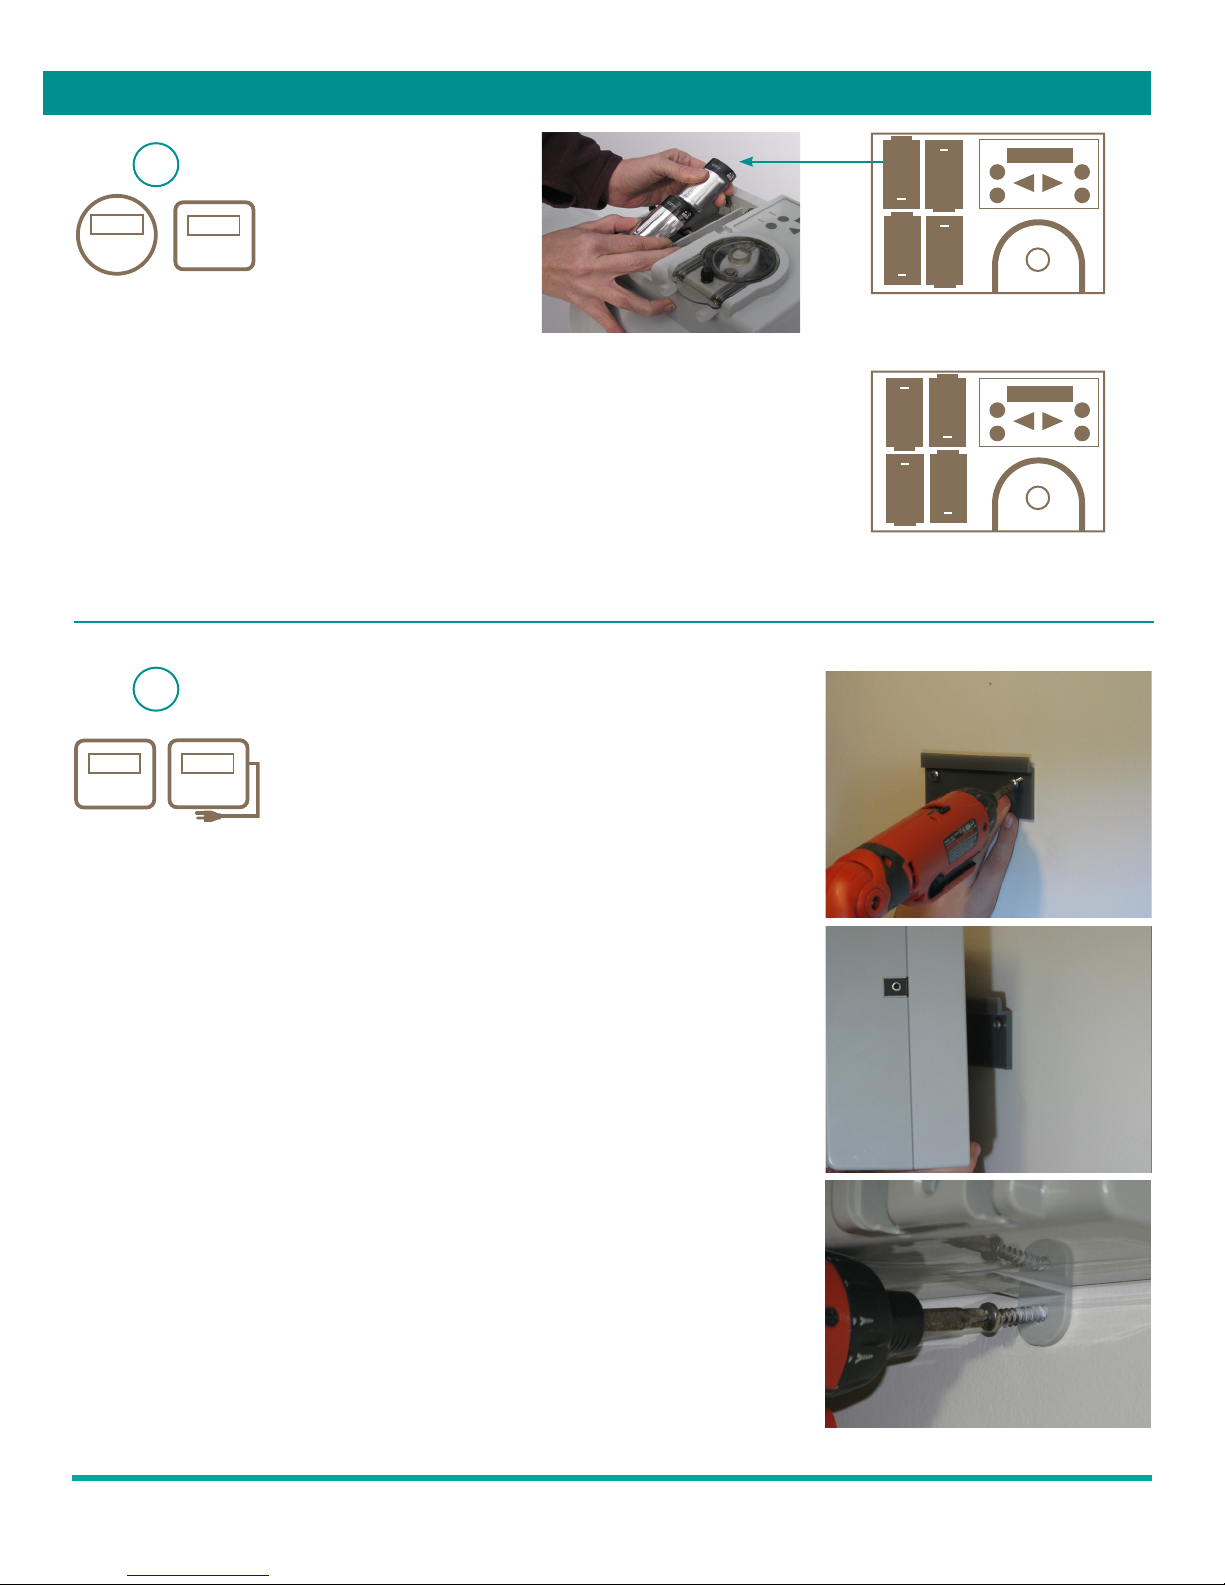
STEP : Install the Batteries
+
+
+
+
a. Loosen the battery door screw.
b. Open the battery compartment.
c. Place eight, fresh alkaline D-cell batteries into the holder as shown in the battery
compartment—and in the diagram on right.
Battery life is typically 40 running hours. A “low battery” indicator will alert you to a low voltage
condition indicating battery change. Program settings will be maintained if dispenser is
disconnected from power source.
11 8 0
1B
11 9 0
STEP : Mount the Dispenser
For Models 1180 and 1190, you’ll need to mount the dispenser before attaching the power
cord (if supplied).
Upper Level Placement
+
+
+
+
Lower Level Placement
a. Choose a location near the pipe or grease trap into which it will be dosing. In kitchens, the
unit may be mounted beneath the dish machine work tables or on the wall.
b. Use the mounting bracket to mark the appropriate locations for the mounting hardware.
c. Drill the holes accordingly and insert the anchors (if necessary) and screws provided.
d. Affix the mounting bracket to the wall.
e. Mount the dispenser onto the mounting bracket.
f. Secure the dispenser with the remaining screw provided.
10094778 Rev B 11/10 © Hydro Systems Company, Inc. 2010 HydroSystemsCo.com Toll Free: 1.800.543.7184 2
Installation
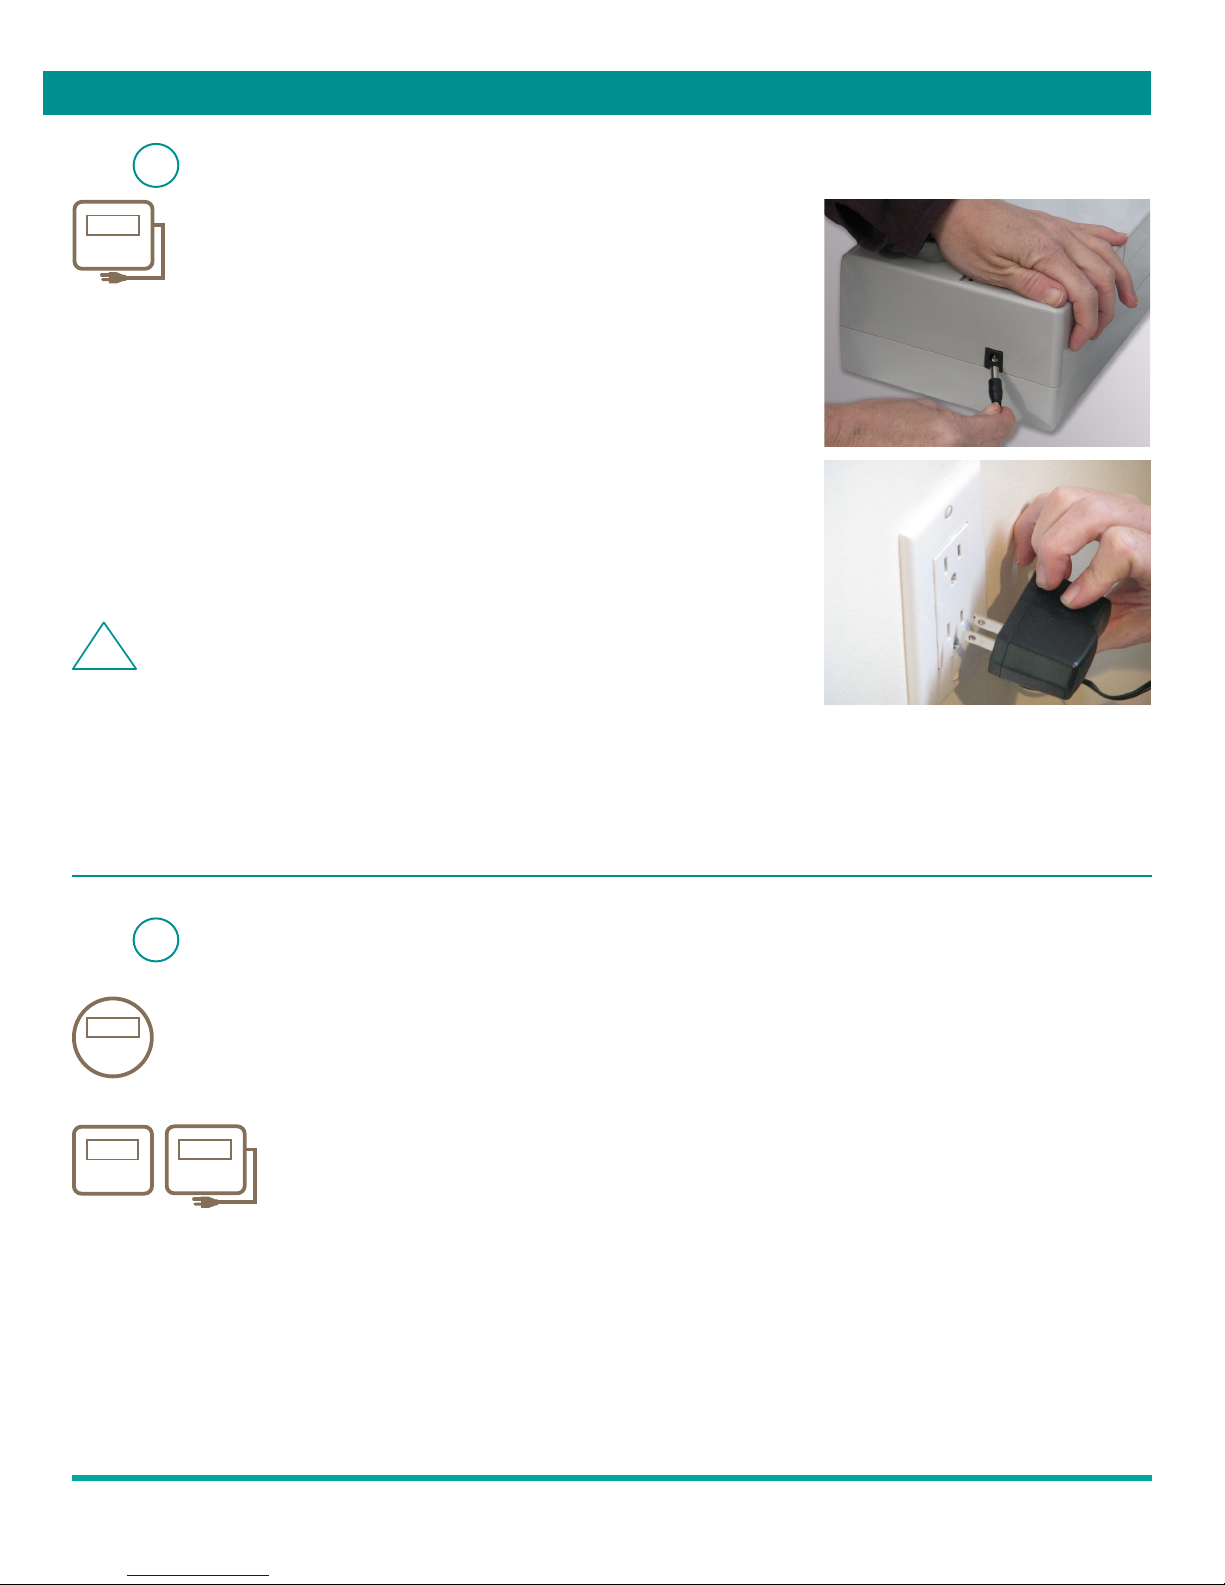
STEP : Install the Power Cord (if included)
For certain models, either batteries or a 12v DC adapter may be used.
For the model 1190, use only the adapter specified from the manufacturer to ensure proper
operation.
NOTE: Usage of AC adapter must conform to local laws and codes.
a. Locate the jack on the side of the unit.
b. Install the adapter plug into the jack.
c. Plug the adapter into the wall receptacle.
Wires left hanging loose may be a tripping hazard, or may accidentally cause the adapter
to become unplugged.
1C
11 9 0
CAUTION/CUIDADO:
11 7 0
11 8 0
2
11 9 0
STEP : Determine Appropriate Dispenser Location
For Model 1170, choose a location away from traffic. Bumping the dispenser may knock it over if the pail is
almost empty.
For Models 1180 and 1190, please refer to step 1B on page 2 for guidelines on determining the appropriate
dispenser location.
10094778 Rev B 11/10 © Hydro Systems Company, Inc. 2010 HydroSystemsCo.com Toll Free: 1.800.543.7184 3
 Loading...