

Hybrid Racing HR EG DC Kswap Mount Kit User Manual

K-Series Engine Mount Install Guide for
92-95 Civic EG / 94-01 DC Integra
This product may not be legal for highway use. Hybrid Racing is not responsible for any direct or indirect, actual
or incidental expense attributed to the use of any performance parts sold by Hybrid Racing LLC. Purchasers
agree to all of the terms of this agreement upon the purchase of parts.
Mount Features:
Lifetime Hybrid Racing tech support at
support.hybrid-racing.com
Package Contents:
X 3 Brackets
X 3 Billet Mounts
Bolts
Washers
Recommend Tools / Parts:.
Basic Hand Tools with 14mm, 17mm and 19mm sock-
ets and wrenches.
Mount Bolt Paint
Drill
Drill Bits 1/2”
Spot Drill
Hoist or Car Lift
Make sure that your engine has the bracket located on
the side of the engine. If you are running a K24 you
will need to use the one from a K24 and if you are running a K20 you will need to use the one from a K20.
Important!! Read the entire install guide twice before starting your install. No,
really it’s a good idea to read it twice so everything goes smooth ;)
1
Install Guide
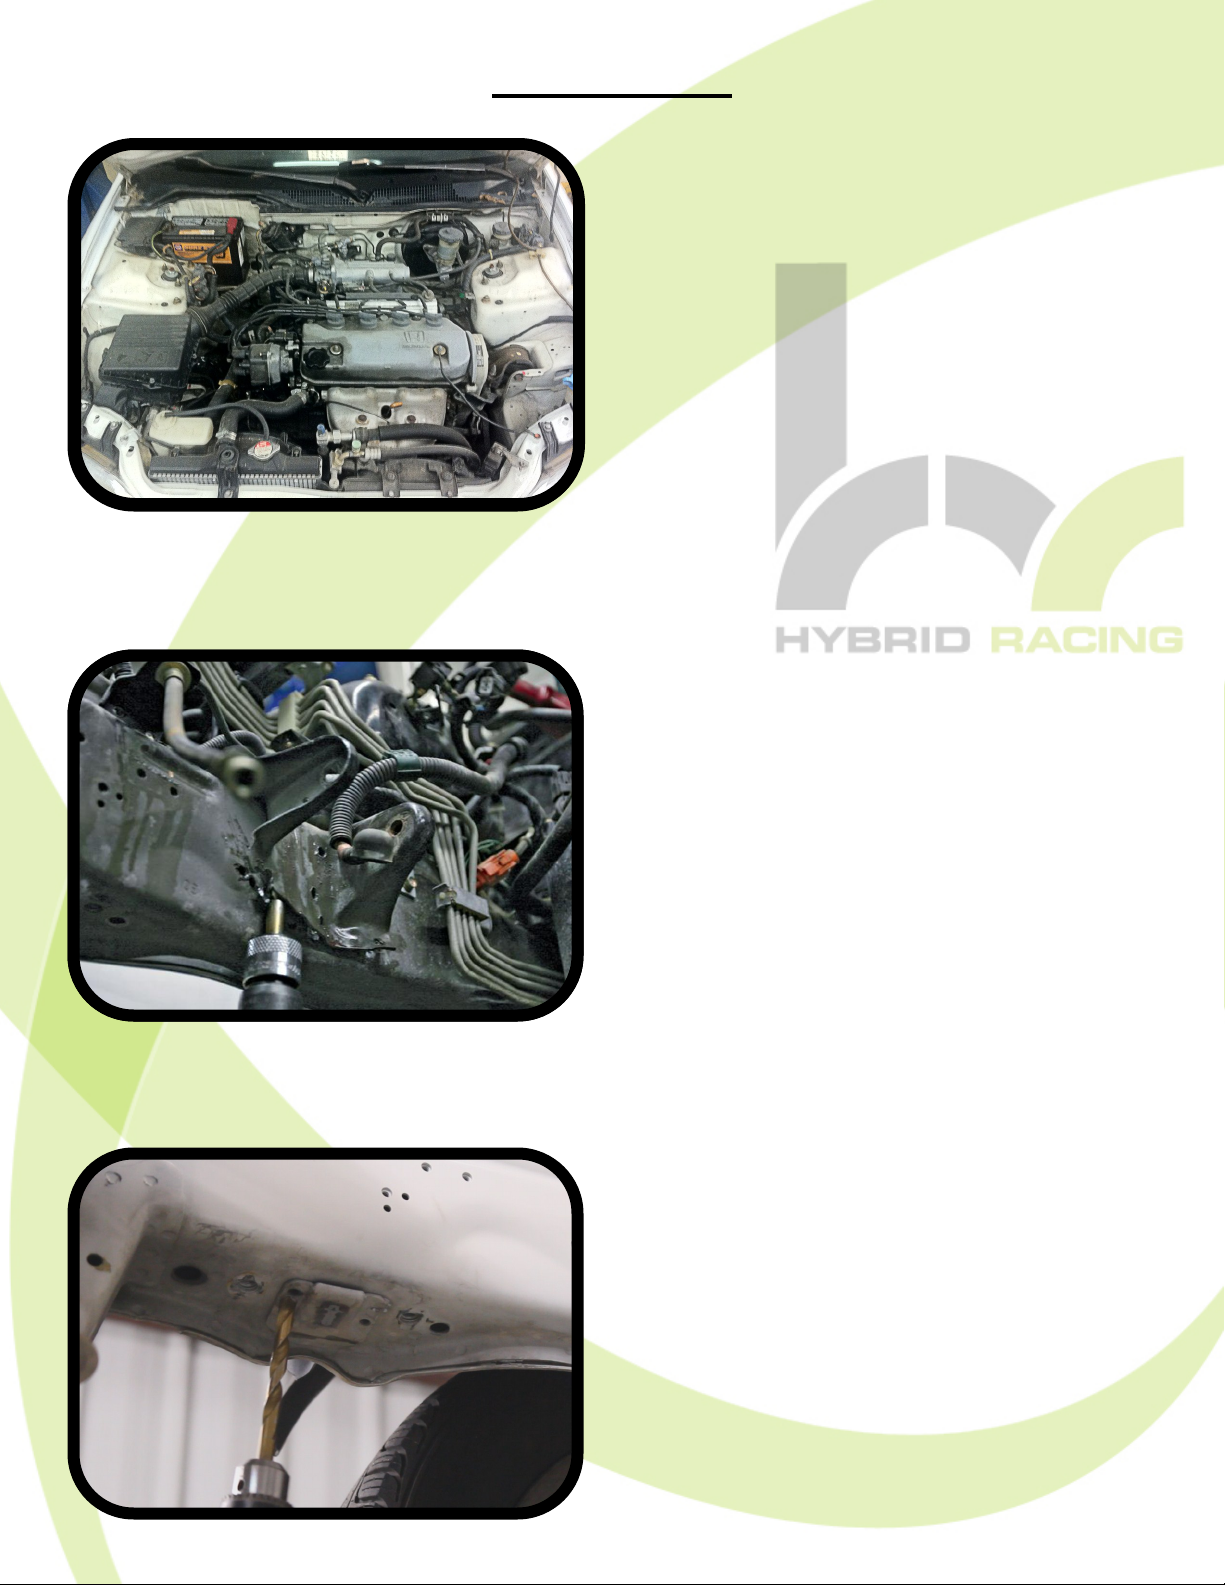
STEP 1: Remove OEM engine
and all of your OEM engine
mounts. While the engine is out it
is a good time to give the bay a
good pressure washing. Once
the cleaning is done go ahead
and move to step 2.
STEP
STEP
STEP
STEP 2
STEP
STEP
STEP
1
1
1
2
2
2
STEP 2: On the passenger side
(US SPEC) there is a bracket
welded onto the frame rail. Using
a 25/64” or larger drill bit drill out
all of the spot welds and remove
the bracket.
STEP
STEP
STEP
3
3
3
STEP 3: On the passenger side
under the frame rail drill out and
remove alignment tab for the
front transmission mount. You
should have two spot welds.
Once the bracket is removed use
a grinding wheel to clean up all of
the spots where you drilled for
steps 2 and 3.
2
Install Guide
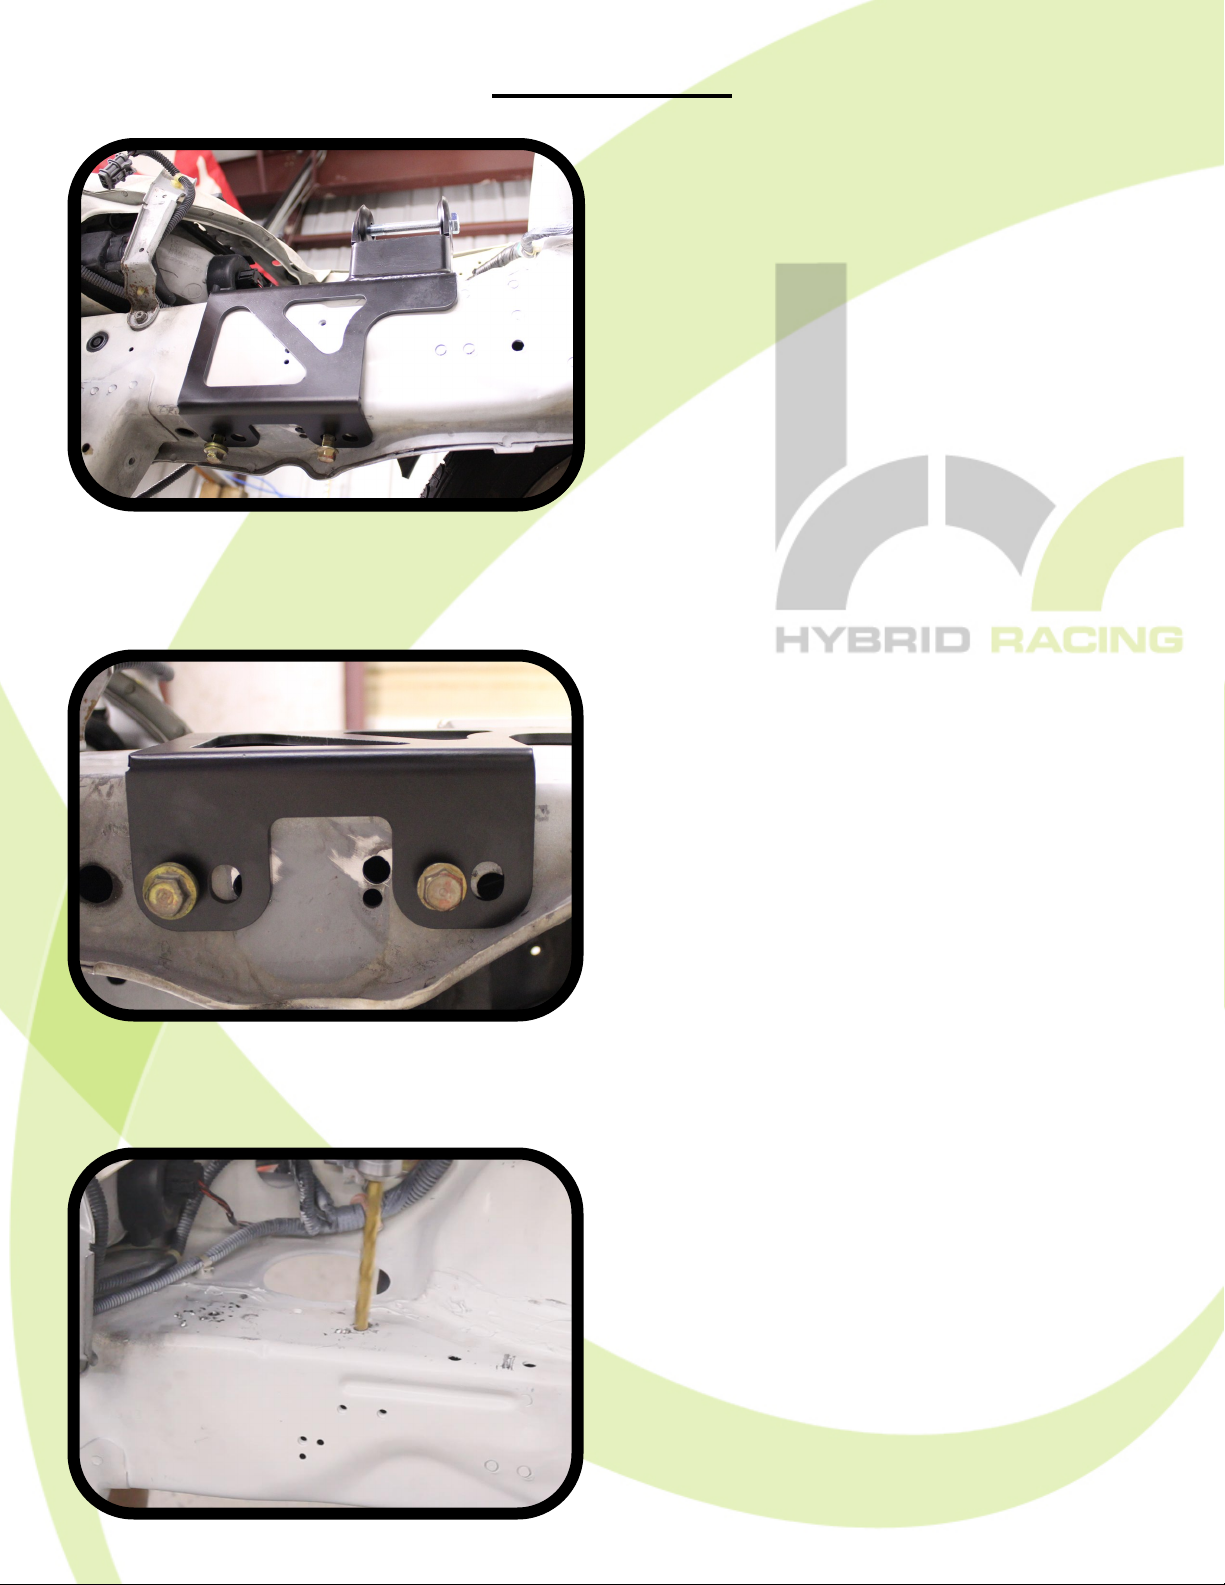
STEP 4: Slide the HR bracket
onto the passenger side frame
rail and secure it from the bottom
using one of the options in STEP
5.
STEP
STEP
STEP
Z X Z X
STEP
STEP
STEP
4
4
4
5
5
5
STEP 5 :
OPTION Z: If you are running
level 0 or OEM axles install it just
like it is shown in the image to
the left.
OPTION X: If you are running
power steering or level 2 or higher axles slide the bracket so that
the holes labeled X line up with
the nuts in the frame rail.
STEP
STEP
STEP
6
6
6
STEP 6 Once you have the
bracket secure move to the top
side mark the holes, remove the
bracket and using a ½ drill bit drill
two holes that line up with the
nuts on the bottom of the frame
rail. If you selected OPTION Z
drill through these holes into the
frame rail from the top. If you selected OPTION X drill through
these holes into the frame rail
from the top.
3
 Loading...