

Hybrid Racing HR 02-06 User Manual

RSX Short Shifter Install Guide
This product may not be legal for highway use. Hybrid Racing is not responsible for any direct or indirect, actual
or incidental expense attributed to the use of any performance parts sold by Hybrid Racing LLC. Purchasers
agree to all of the terms of this agreement upon the purchase of parts.
Features:
MIND BLOWING PRECISE SHIFTS
10%-50% adjustable throw reduction
10%-50% adjustable gate spacing
Adjustable shift knob height
Oil impregnated bronze bushings
1,500,000 shifts on automated test rig
A6 Steel and 6061-T6 Aluminum construction
Recommend Tools:
Flathead screwdriver
5 and 6mm allen wrench
Phillips head screwdriver
12mm socket/ratchet
Package Contents:
(1) Short Shifter assembly
(4) Mounting bolts
(4) Washers
Important!! Please read the entire install guide twice before starting your instal-
lation. No really, it’s a good idea to read it twice before you begin so everything
goes smooth.
1
OEM Shifter Removal
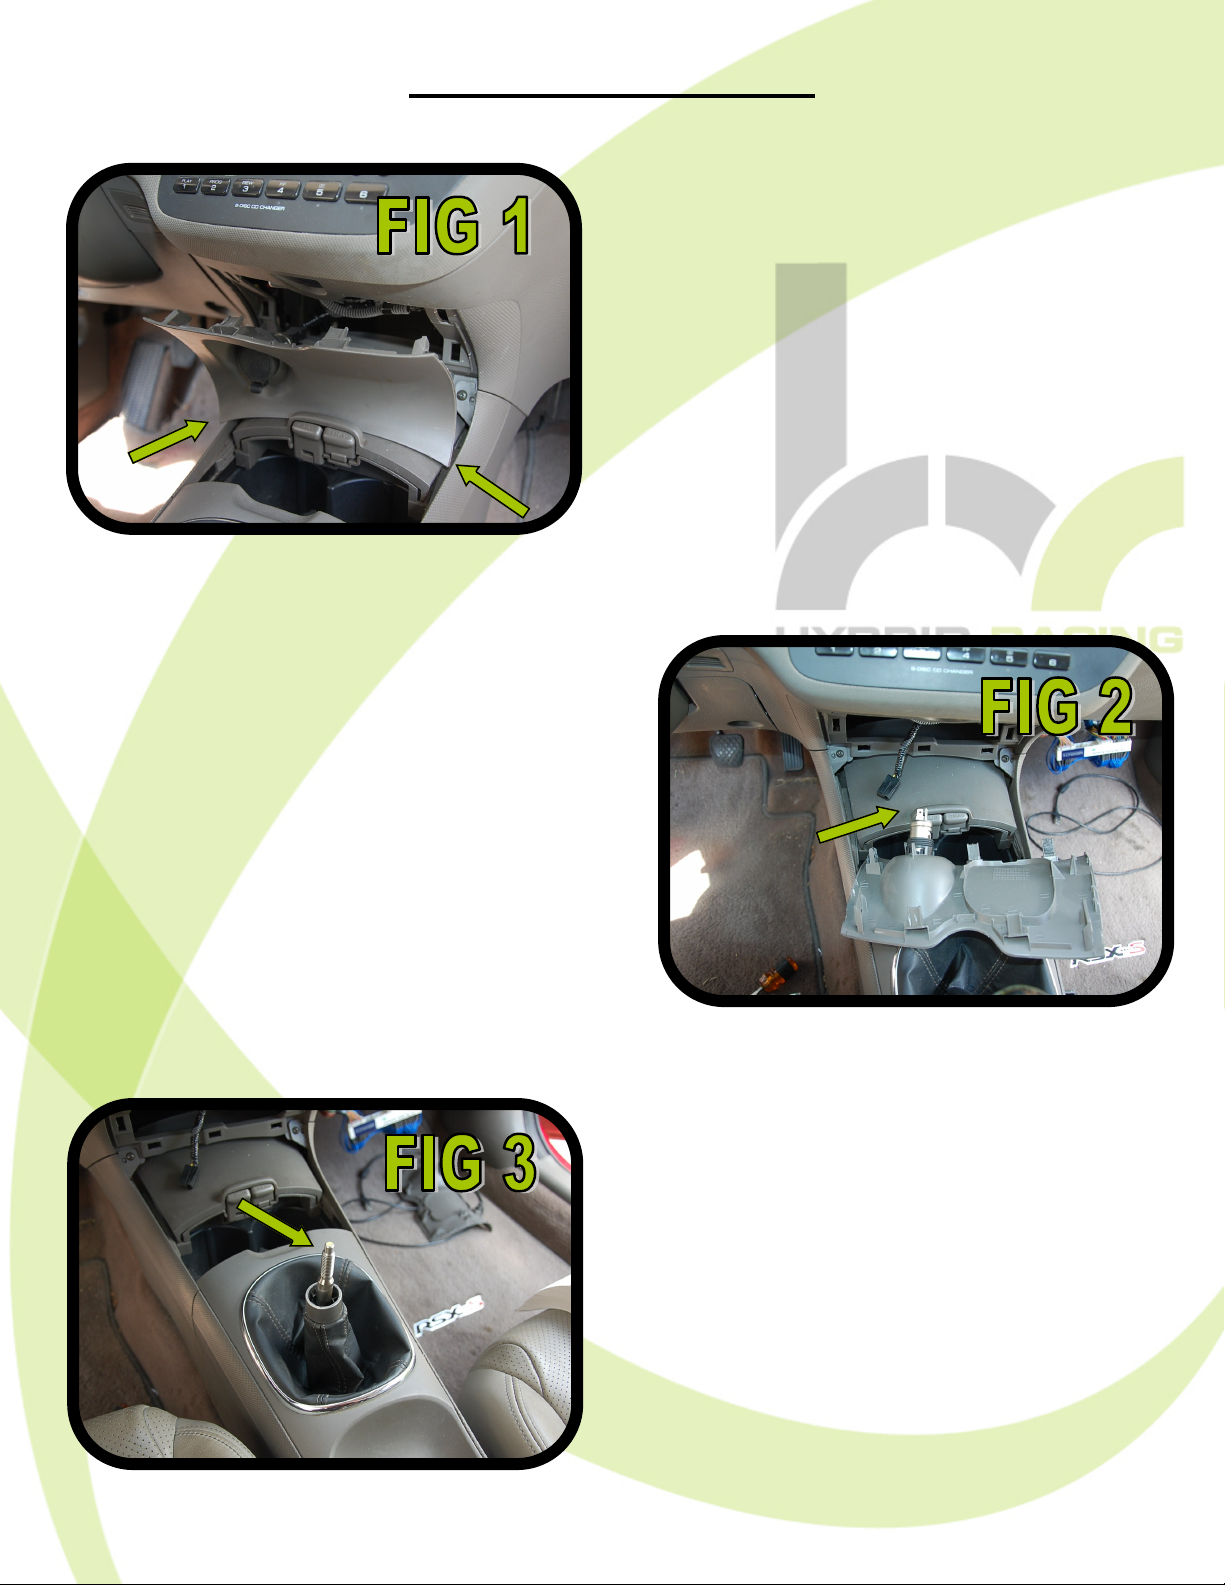
STEP 1:
First start by removing the plastic cover
under the radio by pulling at the bottom
corners as shown in FIG 1.
STEP 2:
Unplug the connector from the aux power
port and remove the cover as illustrated
in FIG 2.
STEP 3:
Loosen you shift knob and remove (FIG
3).
2
OEM Shifter Removal
STEP 4:
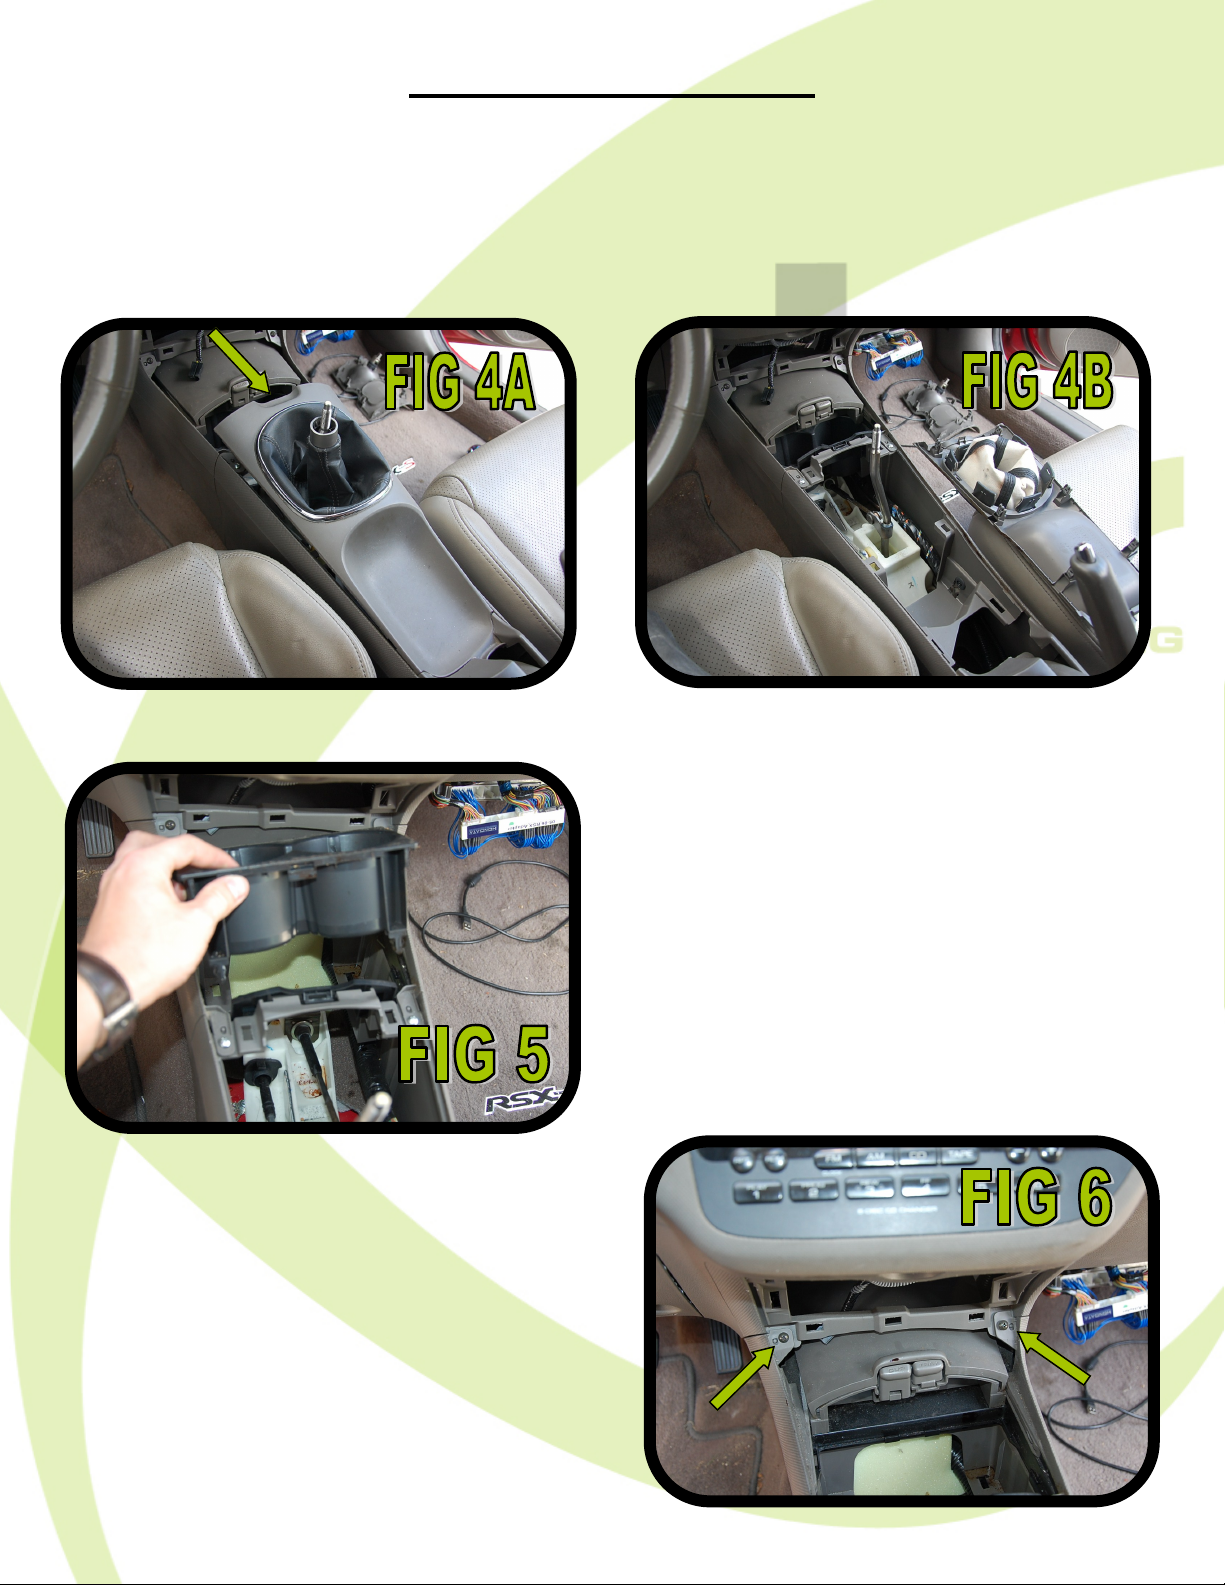
Unclip the center console cover by pulling straight up under the front by the shifter boot
side as shown in FIG 4A. Once unclipped, remove the center console cover and place it off
to the side (FIG 4B).
STEP 6:
Using a Phillips head screwdriver remove
the (2) screws closest to the front of the
car as shown in FIG 6.
STEP 5:
Slide the center console slider forward
and remove the cup holder as shown in
FIG 5.
3
OEM Shifter Removal
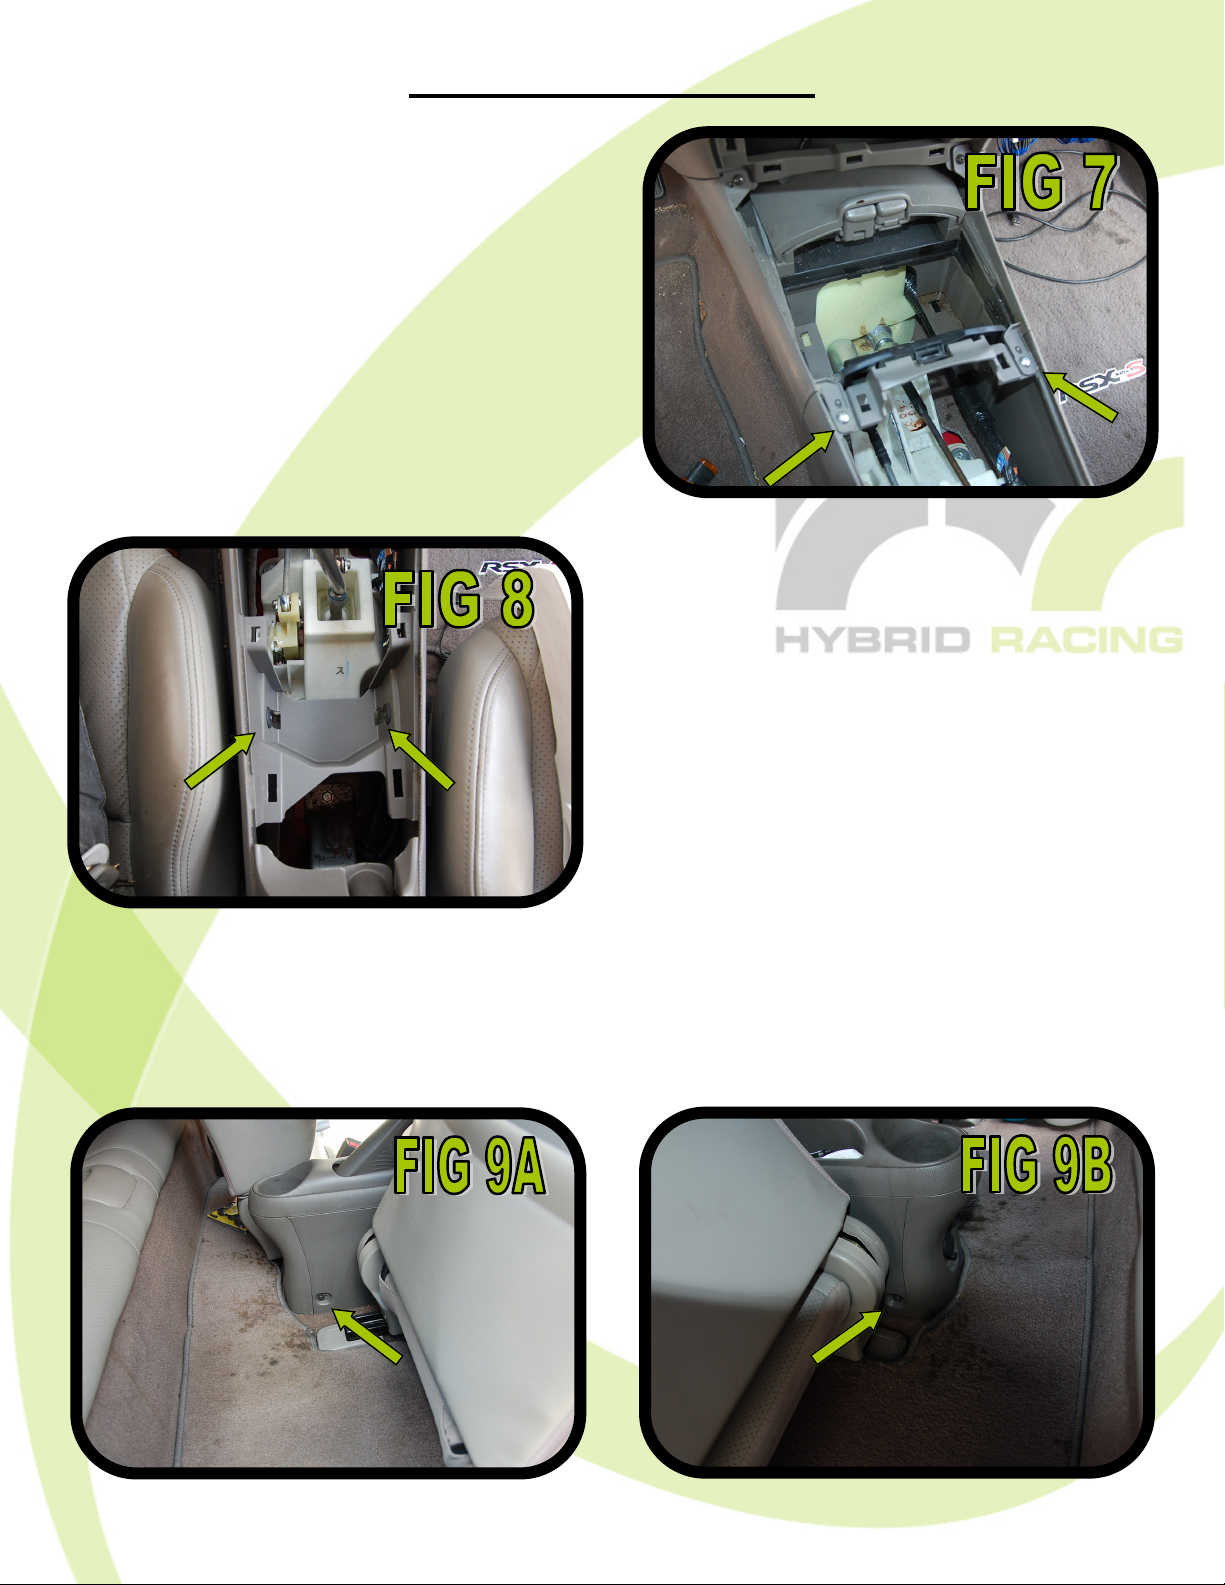
STEP 7:
Using the same Phillips head screw driver remove the next set of screws just below the first ones in front of the shifter as
shown in FIG 7.
STEP 8:
Again, using the same Phillips head
screw driver remove the next set of
screws just behind the shifter as shown in
FIG 8.
STEP 9:
Slide both front seats forward to reveal the final (2) screws holding the center console
in. Using the same Phillips head screw driver remove each screw as show in FIG 9A
and FIG 9B
4
 Loading...