

Page 1
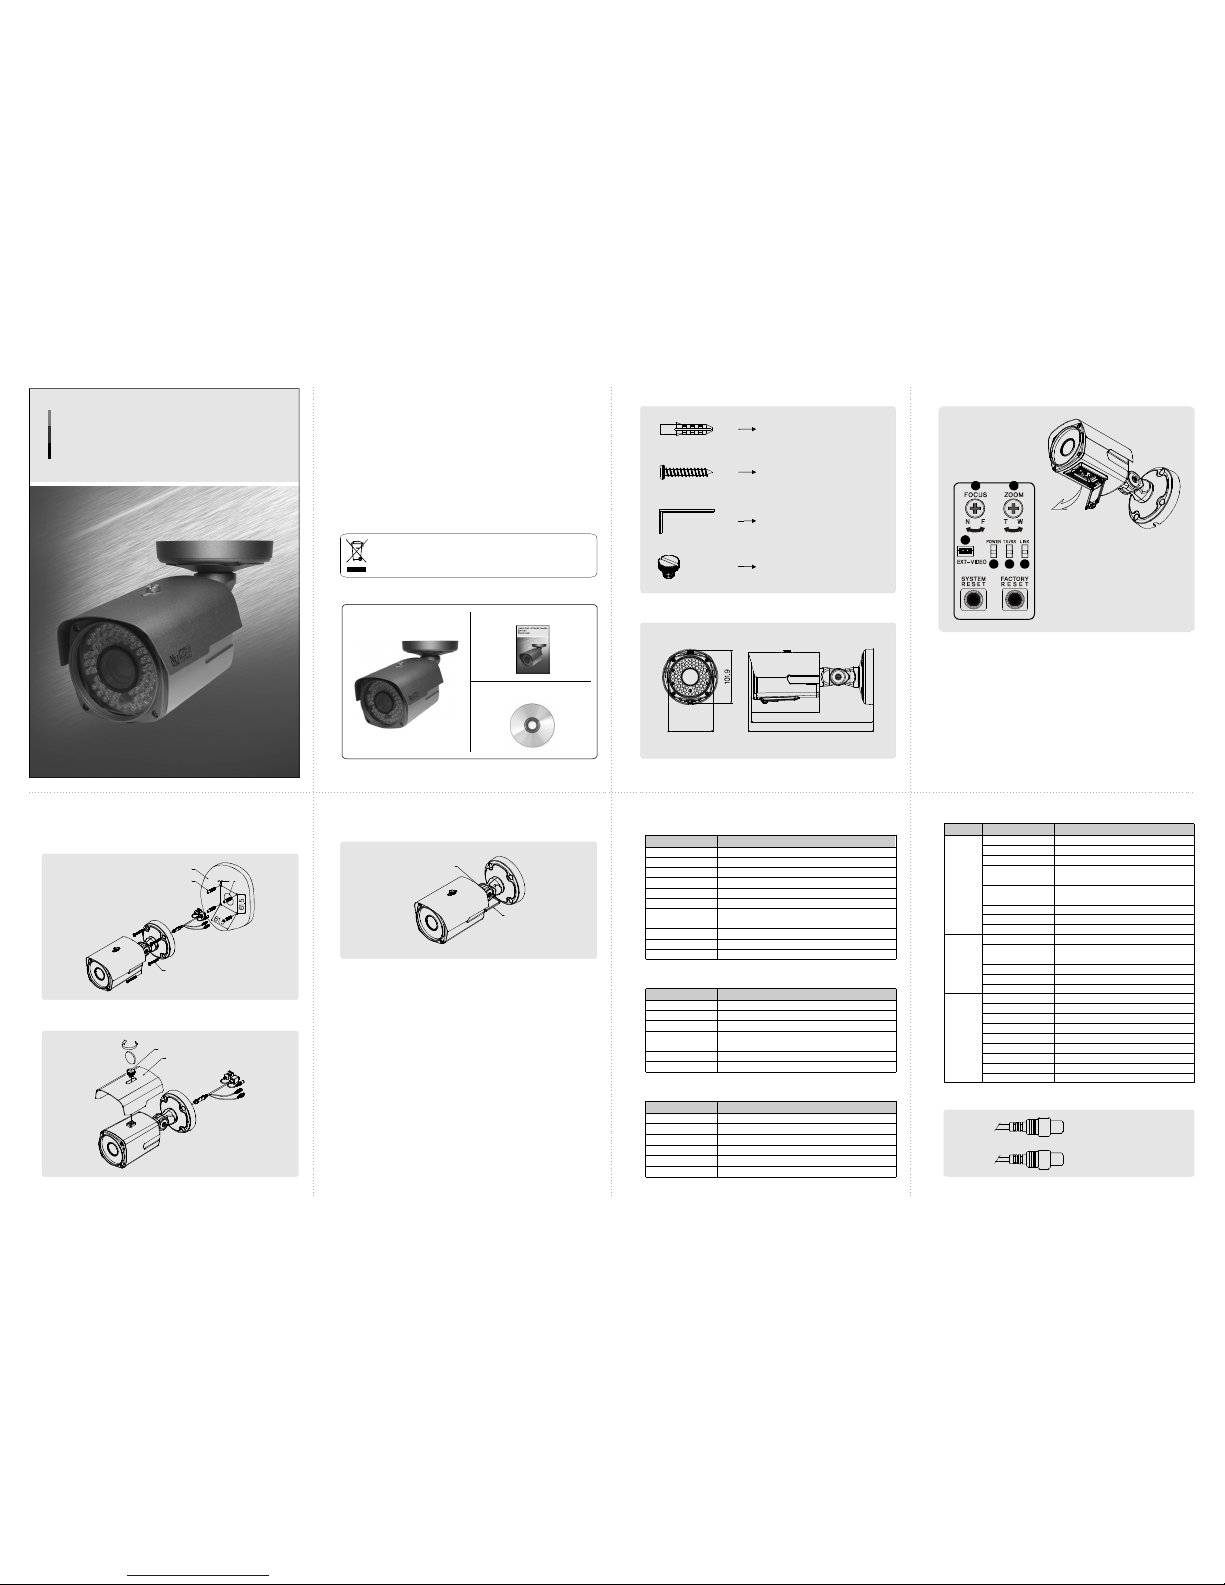
Chapter 1. Install and Specification
1.1 Safety Cautions
1.2 Package
1) Thiscamera maybe damaged by electricaland physicalshock.
Use regulated12V DC, 1Apower supply.Do not throw ordrop it onto floor.
2) Thiscamera canbe used outdoor. Butif it isused outdoor,i tis required touse
the sunvisor andavoid direct light from thesun. Do notuse it under water.
3) In case itis installed at high location, be sure tom ount securely toprevent the
unit from falling below.
4) Incase the unit fails, DONOT try todisassembleth eproduct.
Contact or consult the distributor or an authorized technician for after-sales
service.
Warrantyvoid for the product disassembled withoutan authorization from the
distributor oran authorizedtechnician.
5) Allresponsibilityby using this unitis on theuser.
5. Loosen thebolt by using the3mm wrenchincluded.
6. Face thedirection ofthe camerato monitor.
7. Tighten thebolt to complete adjustment.
1.6 HowTo Install
1. Makea holeof Ø25mm indiameter forpassing cable.
2. Drillfour holeson the wallor ceilingand insertthe anchors.
3. Arrangeth ecables andfix the screws.
4. Attachthe sunvisor andfix thesunvisor fixingbolt.
1.3 Accessories for installation
1.4 Dimension
1.7.4 NetworkSp ecification
1.7.5 Audio Input/Output
2
1.5 Camera setup(Control board)
①FOCUS,②ZOOM :
③EXT. VIDEO :
④POWER:
⑤Rx/Tx :
⑥LINK:
⑦SYSTEMRESET :
⑧FACTORY RESET:
Use a'+' type driver foradjusting focus and zoom.
(In caseof operation Focus/Zoom,don't put stress excessively.)
Extravideo outputterminal forinstallation.
Plug your testmonitor inhear. The cable isoption
Light would turnon when power ison.
Light would turn onwhen theus erconnect bythe network.
Light wouldtu rn onwhen the LANcable is connectedto the unit.
Pressthe buttonto resetwhenthe unitisno tworkingnormally.
Turn on the power and wait 2 minutes. Press the button
for 3 seconds to set the ID and Passwords for administration and IP setting
valuesto the Factory default.
[Reference] Pleaserefer toVideo Check in Chapter 2and Chapter 5. System Setting
regardingdefaultvalue.(Refer tothe manualin the CD.)
3 4
6
1.7 Specification
1.7.1 Camera Specification
1.7.2 Camera Function
1.7.3 ElectricS pecification
85
Software & User Manual CD
Camera Quick Guide
If the product isto be putout of operation definitively,take itto a
localrecycling plantfor adisposal whichis not harmfulto the
environment.
MEGA PIXEL NETWORK CAMERA
SK-N611
Quick Guide
ANCHOR6x30 4EA
SCREW4 x35 TP1 BINDSUS, 4EA
HEXAGONWRENCH 3.0mm
L TYPE, 1EA
BOLT1/4"-20UNC L=6,1EA
3
21
574 6
8
*Focus/Zoom adjustmentdirection
1. Unfastenthe screwof thebottom door
2. Adjustthe Focusand Zoomtrimmers
3. Tightenthe screwof thebottom door
ANCHOR 6x30, 4EA
WALL
SCREWTp1 4x35,4EA
BOLT
SUNVISOR
WRENCH
BOLT
PowerSupply
CurrentConsumption
OperationTemp.
Preservation Temp.
Dimension
Weight
Max.1A(DC 12V) IRLED ON
-10℃~ 50℃
-20℃ ~60℃
86.4(W)x 101.9(H)x 131.3(D)mm
Approx.1kg
PrivacyZone
Day&Night
WDR
SenseUp
WhiteBalance
ON /OFF(6 ProgrammableZones)
Auto/ Night /Day
WDR(1~ 5), (BackLight, Front Light)
Auto(1~ 29)
Auto/ Indoor /Outdoor /Fluorescent /User
ModelNo.
Type
ImageSensor
Effective Pixels
Resolution
ScanningSystem
AlarmInput/Output
IR LED
Lens
SK-N611
Megapixelnetwork Day&Night IRcamera
1/3" SONY PROGRESSIVESCAN CMOS(1.3 MegaPixels)
1329(H)X 1049(V)
1280x1024/ 1280x960/ 1280x720/ 640x480/ 320x240
ProgressiveScan
Input: 1, Output: 1
70PCS
Vari-focalauto iris megapixellens
LEDOFF : 0.01Lux(Sense upAuto X4)
LEDON : 0Lux(60M Range)
Min.Illumination
Specification
Classification
Item
Summary
Image
Function
OS
NetworkInterface
Setting
Security
PC OS
WebBrowser
Compression
Compression Rate
FrameRate
Bit Rate
Simultaneous Access
VideoRecording
MotionDetection
PrivacyZone
OSD
AlarmInput/Output
DynamicIP
IP Router
DDNS
Network Support
SupportedProtocol
Resolution
EmbeddedLinux
RJ4510/100BaseT,Ethernet
By web browser
Userauthentication
WINDOWSXP, WINDOWSVISTA,WINDOWS 7
IE7.0 or higher
H.264,MPEG-4, MJPEG
200: 1(Typical)
Max.30fps(@1280z1024)
64~ 6000kbps
Max.10 users
Support
Support
Support
Support
Support
Support
Support
LeasedLine, CableModem, SupportDynamic
IP and StaticIP, ADSLusable under Router
TCP/IP, UDP/IP, RTP, RTSP,R TCP,NTP,
HTTP,DHCP, FTP, SMTP, DNS,DDNS
1280 1024/ 1280 960/ 1280 720/
640 480/ 320 240
x x x
x x
Recordingin clientPC withCMS orFTP Server
MIC(Red)
LINE OUT(Black)
Item
Function
Specification
Specification
Classification
Specification
Regulated12V DC,PoE(Power over Ethernet)- IEEE802.3af
Auto: 1/15 ~1/9,000(NTSC),1/12.5 ~1/ 8,000(PAL)
SuppressRolling, Manual
Electronic Shutter
86.4
131.3
236
241.1
Ø6
Ø25
Page 2
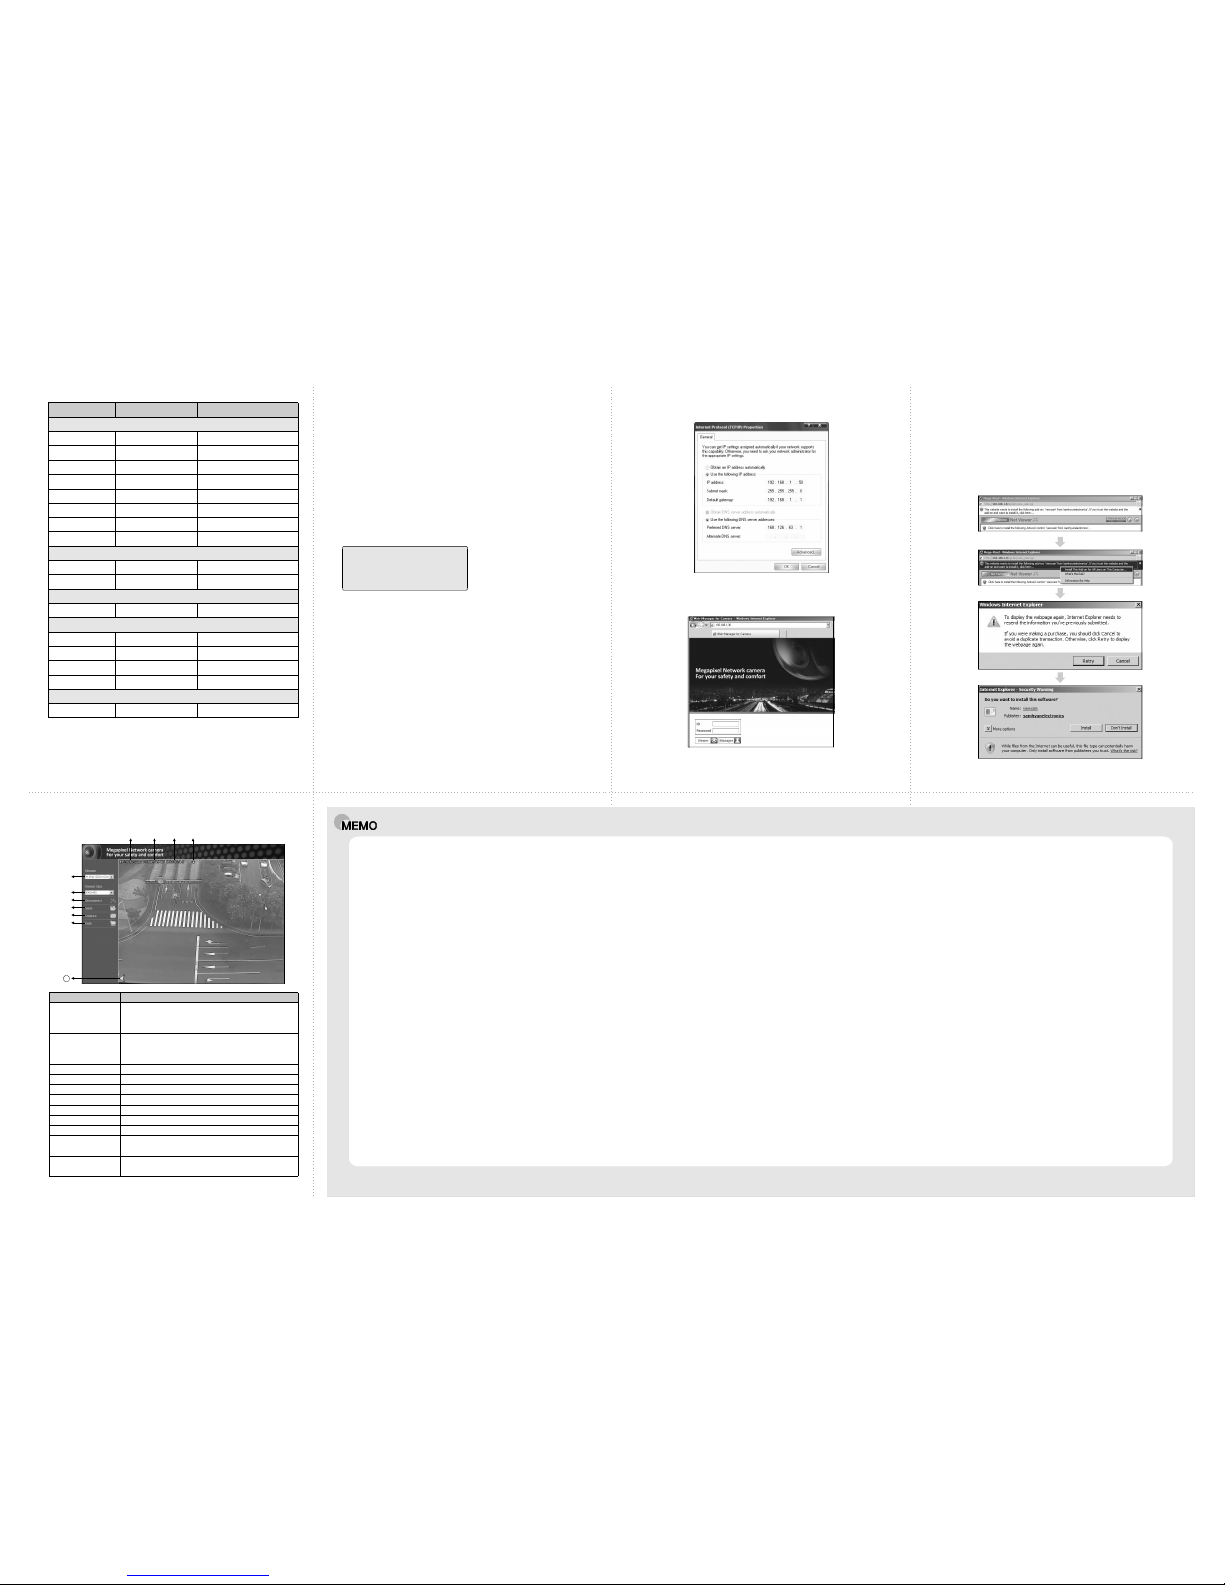
Chapter 2. Installation and VideoCheck
2.1 Installation
2.2 Network Setting and Video Check
On the assumption that User PC and the camera areused under static IP, and
the camera is tobe directlyconnected withUser PC orLocal Network.
The installationprocedureis to be;
1) Connect thecamera andPC with LANCable.
2) Power oncamera.
※Use regulated12V DC, 1A
※Use PoE(Power Over Ethernet) : The cable includes data and power, so it's
easy toinstall thecamera. So,you can savetime to installand cost. Whenyou
connectthe camerawith PoEa ndDC adaptor,Only PoEis used.
3) Wait about 2 minutea fter power oncamera, thesystem willbe booted.
Toconnectthe unitin user'sPC,changethe settingvalueof PCnetworkenvironment.
on yourPC.
Defaultnetwork settingvalue of the unit isto be;.
<Caution> Before changing the setting value, please memorize the previous setting
value
2.2.1 Change thesetting value of PC network environment
2.2.2 Connect thecamera with web browser
Set IP Address, Subnet Mask and Gate-way of user's PC with 192.168.1.50 /
255.255.255.0 /192.168.1.1 asshown onbelow picture.
Run web browser and input the default IP address(192.168.1.30) in URL line
and press "Enter". Then, below picture isto be shown.
※If the pagedoes not open, Please refer to"Chapter 11appendix"i nthe CD.
2.2.3 Input ID/Password
2.2.4 Active-Xauto installation
Shownthe main page,input ID and Password and clickon "Viewer"to see the
videofeed.(Defaultadministrator'sID &Password is'admin'.)
Click"install" onthe security certificateto load theActive-X control.
If youchoose "Don'tinstall", theweb viewerwould notwork.
<Caution>
[Reference]
Please change default value of ID/Password into new ones after the
installation.
Please refer to5.3 Administrator's ID andPassword Change regarding
'ChangeAdministrator'.
1.7.5 Basic Setting Table
[Reference] Incase toreset hardwarea nd network setting, IDand password ofuser
andAdministratorwill beautomaticallyreturnedto theabovedefault value.
*Framerate canbe affectedby the externalvideo outputoption.
So factorydefault isoff.When youinstallthe camera,enablethis option.Thendisable
itaf terthe installation.
10 11 129
3B15963B
13
2.2.5 Complete the installation
Upon installation,Web Viewer appearsand image of camera isto be seen.
11
⑩
①
②
③
④
⑤
⑥
⑧⑦ ⑨
Item Description
⑩StatusIcon
⑪StreamInfo.
Connector disconnectto the stream
Savesthe streamas a moving picturefile in the.avi format
Savesthe snapshotas an image filein the .bmpformat
Specifythe filesaving path
Displaycamera title
Displaythe date
Displaycurrent time
Selectstream codecand resolution menu relatedt o
live-viewwas defined onlyby the admin.
(H.264/MPEG/MJPEG)
Defaultsize is640X480.
Adjustthe screento the optimalsize(Recommendation :
Selectthe same size withstreamresolution)
Displaythe site informationsuch asDay/Night, Motion,
Alarminput/output
Displaythe streaminformationsuch asAu dio and
recordingcon dition
①Streamselection
②Windowsize
④Recording
⑤Capture
⑥Savingpath
⑦Cameraname
⑧Date
⑨Time
③Connection/Disconnection
IP Address : 192.168.1.30
Subnet Mask :255.255.255.0
Gateway : 192.168.1.1
②
③
①
Item Default(Basic setting) Remarks
StaticIP
Enable
192.168.1.30
192.168.1.1
255.255.255.0
80
554
5000 ~5999
admin/admin
root/root, guest/guest
iplinker.net
H.26415fps@ 1280x1024
MJPEG15fps@ 640x480
None
OFF
Asia/Seoul(Korea)
rtsp://<ipaddress>:554/stream1
rtsp://<ipaddress>:554/stream2
rtsp://<ipaddress>:554/stream3
Afterinstallation,deactivate it.
Network
StaticIP/Dynamic IP
IP Server Enable
IP Address
Gateway
SubnetMask
RTSPPort
RTP Port Range
ID andPassword
User ID/Password
Domainof RelatedServer
DDNS Server
Streamsetting
Stream1
Stream2
Stream3
Videoout*
Other Setting
Time Zone
Administrator
ID/Password
WebConnection
Port
※Thespecificationis subjectto changewithoutany prior noticeto improvethe quality.
 Loading...