

Page 1
3-AXIS HD-SDI
IR DOME CAMERA
MANUAL
◐ SPECIFICATION
Ø81.4
Ø111.9 Ø90
45.2
87
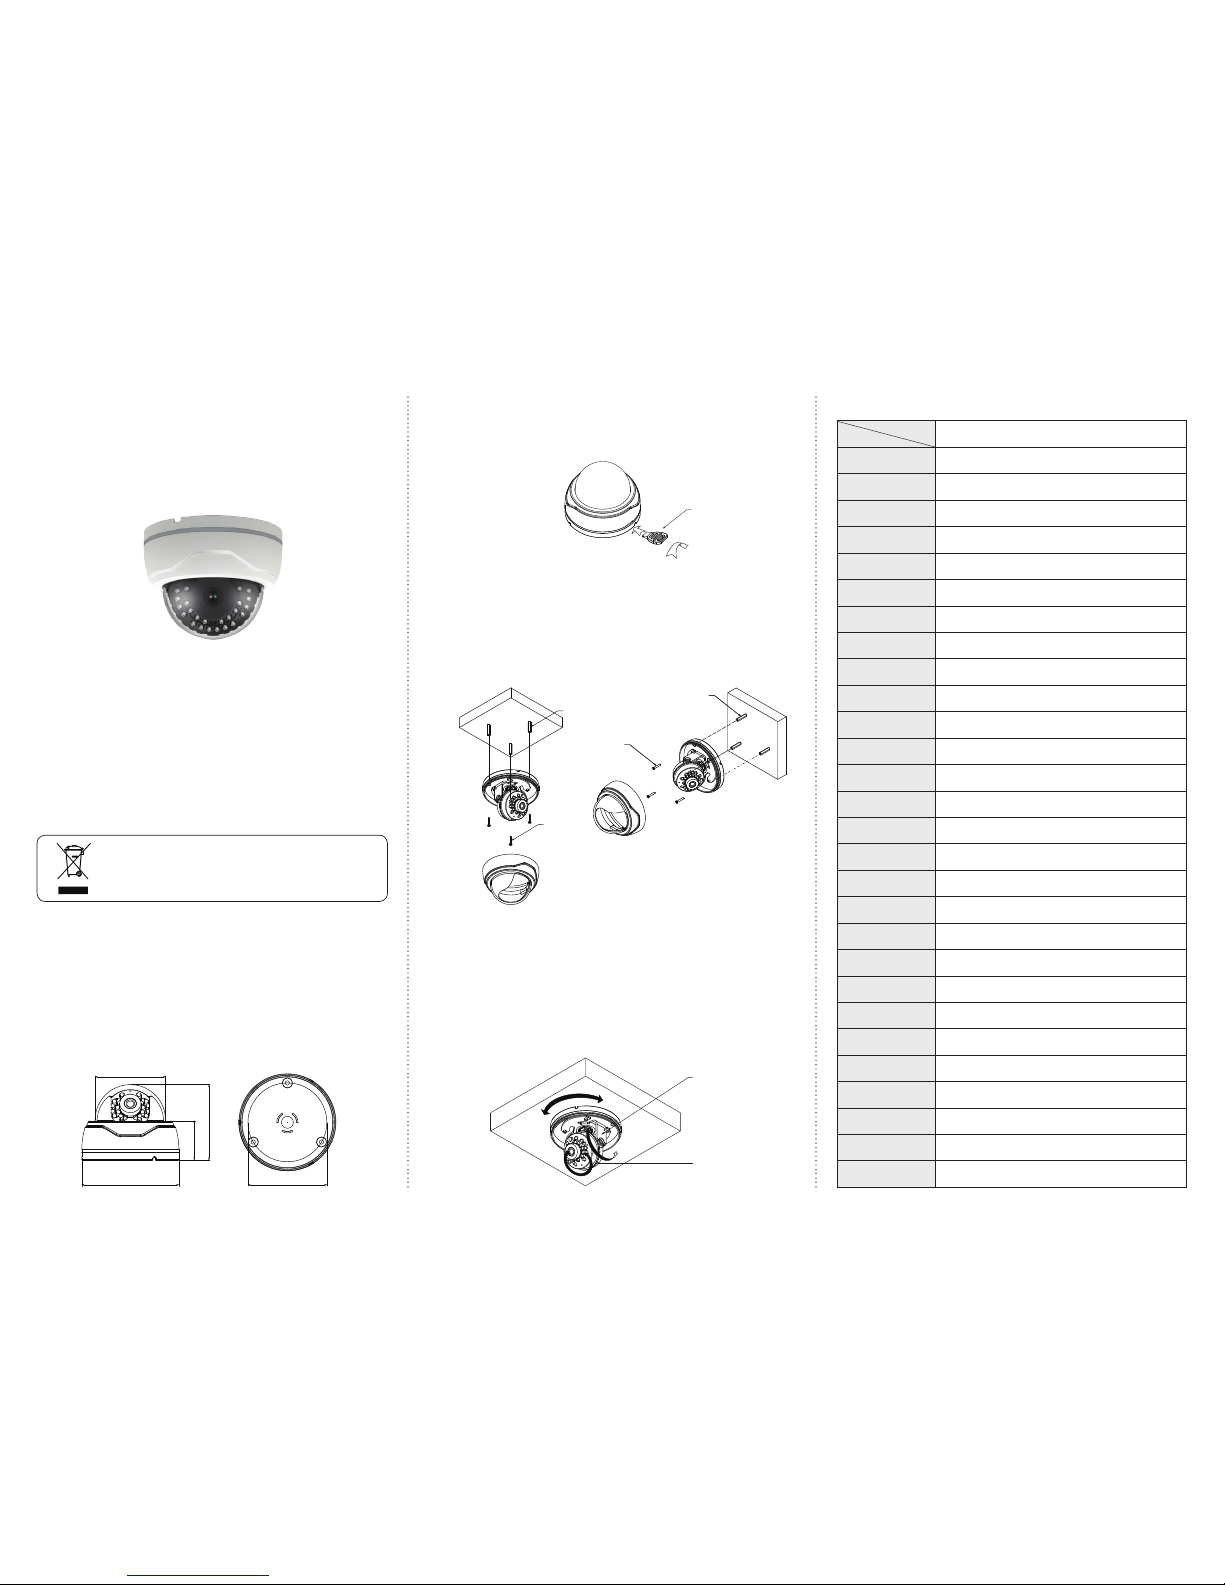
1. Opening the dome cover : Insert the handle to the side hole and
twist it.(Remove the protection sheet after installing.) After that, lift the
dome cover.
◐ HOW TO INSTALL
2. Camera installation :
(1) Fix the camera set with the supplied screws on ceiling or wall
mount. If you don't use supplied screws, the camera may fall off.
(2) Please refer to '3. Camera angle adjustment' regarding adjust
camera angle.
(3) Re-assemble the camera.
◐ DIMENSION
1. Do not install the camera outdoors.
2. Choose an ideal location for the camera, since a camera unit must
be protected against moisture and vibration.
3. Be careful not to scratch the camera unit, especially lens or dome
cover.
4. Use the camera within the temperature(-45℃~50℃).
5. Handle with care. Dropping it can cause serious damage to the
camera.
6. Avoid any direct sun light toward the lens.
7. Use the AC adaptor 12V DC, 500mA regulated.
◐ PRECAUTION
If the product is to be put out of operation definitively,
take it to a local recycling plant for a disposal which
is not harmful to the environment.
3. Camera angle adjustment :
(1) Pan adjustment : Grasp the disk of camera and then adjust direction
to the right or left(-180˚~180˚)
(2) Tilt adjustment : Grasp the camera holder of camera and then
adjust direction to the up or down(6˚~ 90˚)
(3) Roll adjustment : Grasp the camera holder and then rotate (-178˚
~178˚)
<Caution> If you try to adjust the camera out of limited angle, it might
cause troubles and damage to camera.
Handle
(Coins or '-' shaped driver
available)
<Ceiling mount> <Wall mount>
SCREW
SCREW
ANCHOR
ANCHOR
U/D
L
R
DISK
CAMERA
HOLDER
ROTATION
TYPE
Image Device 1/3" SONY 1.3Megapixel CMOS Sensor
Scanning System
Progressive Scan
Effective Pixel 1305(H) x 1049(V) Pixel
S/N Ratio 50dB or More
Video Output Mode 720P(1280 x 720) 60/50fps
Video Output Level HD-SDI / 1.0VP-P(75Ω, Composite), NTSC/PAL(Option)
Min. Illumination 0 Lux(LED ON), 0.5Lux(LED OFF) @ F1.2
Shutter Speed AUTO
White Balance
AUTO
Backlight ON/OFF
HLC
ON/OFF
WDR ON/OFF
DSS
ON/OFF(~ X8)
Mirror OFF/H/V/HV
Defog ON/OFF(Level Adjustable)
Digital zoom ON/OFF(~ x8)
Privacy zone ON/OFF(16 Zone Selectable)
Motion detector ON/OFF(4 Zone Selectable)
AGC AUTO
3DNR AUTO
Day&Night AUTO(ICR)
LED IR LED 24EA
Lens Fixed focal board lens
Power Supply Regulated 12V DC ±10%
Current Consumption Max. 300mA : LED ON
Operation Temp. -45℃~50℃
Dimension Ø111.9(W) x 87(H)mm
Weight Approx. 185g
1. 1280x720 Resolution.
2. This camera is incredibly flexible to install with its 3-axis camera
construction, which makes the camera ceiling, wall or slope
mountable.
3. 20M range visible in total darkness with 24pcs of IR LEDs.(Indoor)
4. It displays seamless and smooth REAL WDR image.
◐ FEATURES
Page 2
2. OSD menu structure
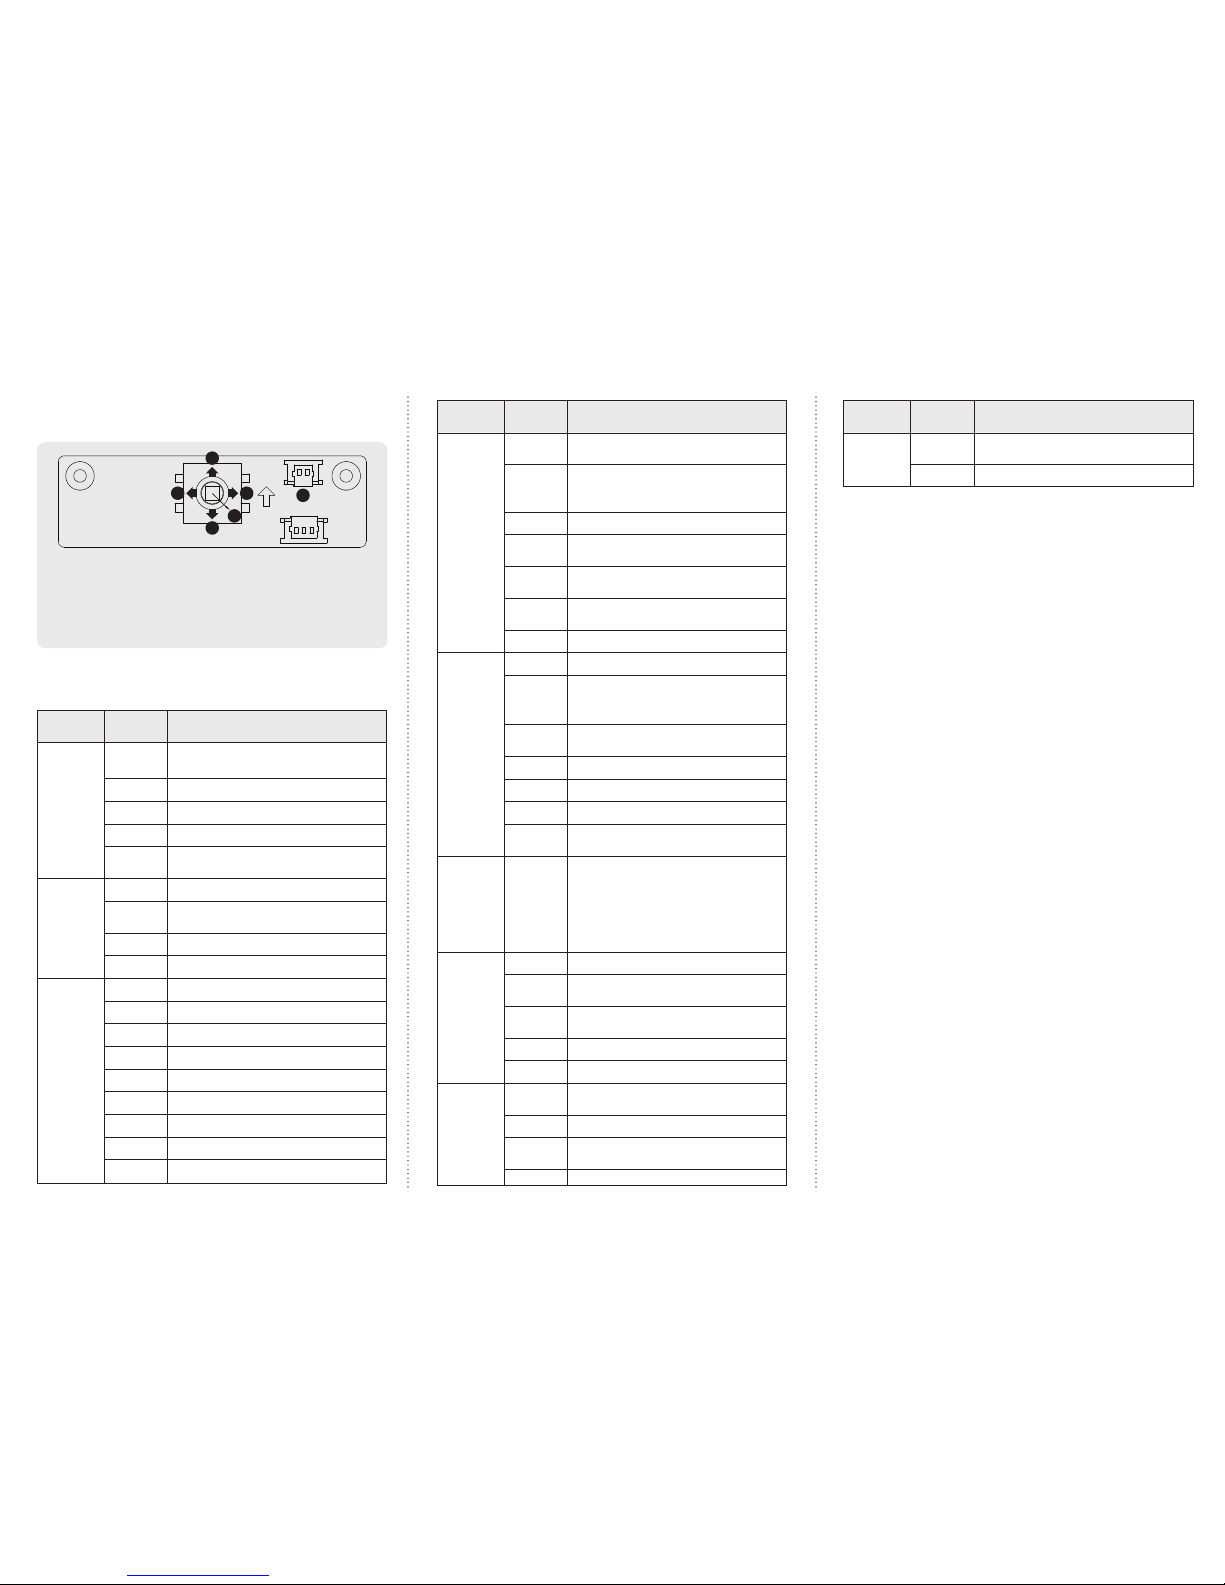
1. How to use the jog lever
※All specification is subject to change without notice to improve the quality. 3B26298A
◐ FUNCTION SETTING
①SET : Used to access the menu and confirm selection.
②UP, ③DOWN : Used to move the cursor to up or down.
④ LEFT, ⑤RIGHT : Used to move the cursor to left or right and
change the value.
⑥EXT-VIDEO : Extra video output terminal for installation.
Plug your test monitor in hear. The cable is option.
Function
setting menu
Sub menu Summary
1.
EXPOSURE
BRIGHTNESS
Adjust brightness level 0(dark) ~ 20(bright)
MODE Select AE MODE
SHUTTER Can be set in AUTO or MANUAL
AGC Select Auto Gain Control
Sens - up
Select maximum DSS(Digital Slow Shutter)
OFF, x2~X8
2.
WHITE BAL.
AWB Select WHITE BALANCE mode
▷AUTO
Automatically adjusts color according to the
lighting
▷AUTO ext Faster extension version of Auto
▷MANUAL Adjust the white balance manually
3.
BACK
LIGHT
BACKLIGHT Select Backlight compenstaion mode
WDR Adjust WDR level - Low / Middle / High
HLC Select High Light Compensation.
BLC
▷AREA Control BLC area according to light condition.
▷POS-H Adjust the window H- Axis position
▷POS-V Adjust the window V- Axis position
▷SIZ-H Adjust the window H- Axis size
▷SIZ-V Adjust the window V- Axis size
Function
setting menu
Sub menu Summary
4.
DAY&
NIGHT
DAY&NIGHT
Select Day&Night mode
AUTO_CDS
Automatic switching between day operation
(colormode) and night operation (black and
white mode)
▷IR-LED LED On/Off Control
▷ANTISAT
Compensate when IR hunting happens.
When you use this function.
▷AGC
THRS
Day&Night change level. Higher level make
the night mode changed in lower illumination.
▷AGC
MARGIN
Day to night and night to day switch margin
▷DELAY 2 ~ 60 second
5.
IMAGE
DNR Select Digital Noise Reduction
SHARPNESS
Adjust sharpness level
COLOR
GAIN
Adjust Color gain value 0~20 Steps.
GAMMA Selecte gamma mode. 0.45~0.65
D-WDR Select Digital WDR(Wide Dynamic Range)
DEFOG Carry out defog function
SHADING
Select Lens shading compensation. (OFF /
ON)
5.
IMAGE
MIRROR
H-Flip : Flip the picture horizontally on the
screen
V-Flip: Flip the picture vertically on the
screen
Rotate : Flip the picture horizontally
& vertically on the screen
6.
SPECIAL
TITLE Camera title edit and display on / off select
PRIVACY
Hide an area you want to hide on the
screen
MOTION
When there is movement of the subject on
the screen,there will be motion detection
D-ZOOM Select digital zoom magnification. Max 8x
LANGUAGE Select Language
7.
SYSTEM
IMAGE
RANGE
Select pedestal level scale
HD Format Select HD output format. 720p
FRAME
RATE
Select HD output frame rate.
720p 60, 50fps
CVBS Select CVBS output mode. NTSC or PAL
Function
setting menu
Sub menu Summary
RESET EXIT
All the settings will be restored to the factory
default
EXIT Escape the menu
6
1
2
4
3
5
 Loading...