

Husqvarna EN EPA, POWER CUTTER User Manual

Oper ator’s manual (EPA)
K750
Please r ead the operator’s manual carefully and make sure you understand the
instructions before using the machine.
EEEEnnnngggglllliiiisssshh
hh
2
K
W
ey to symbols
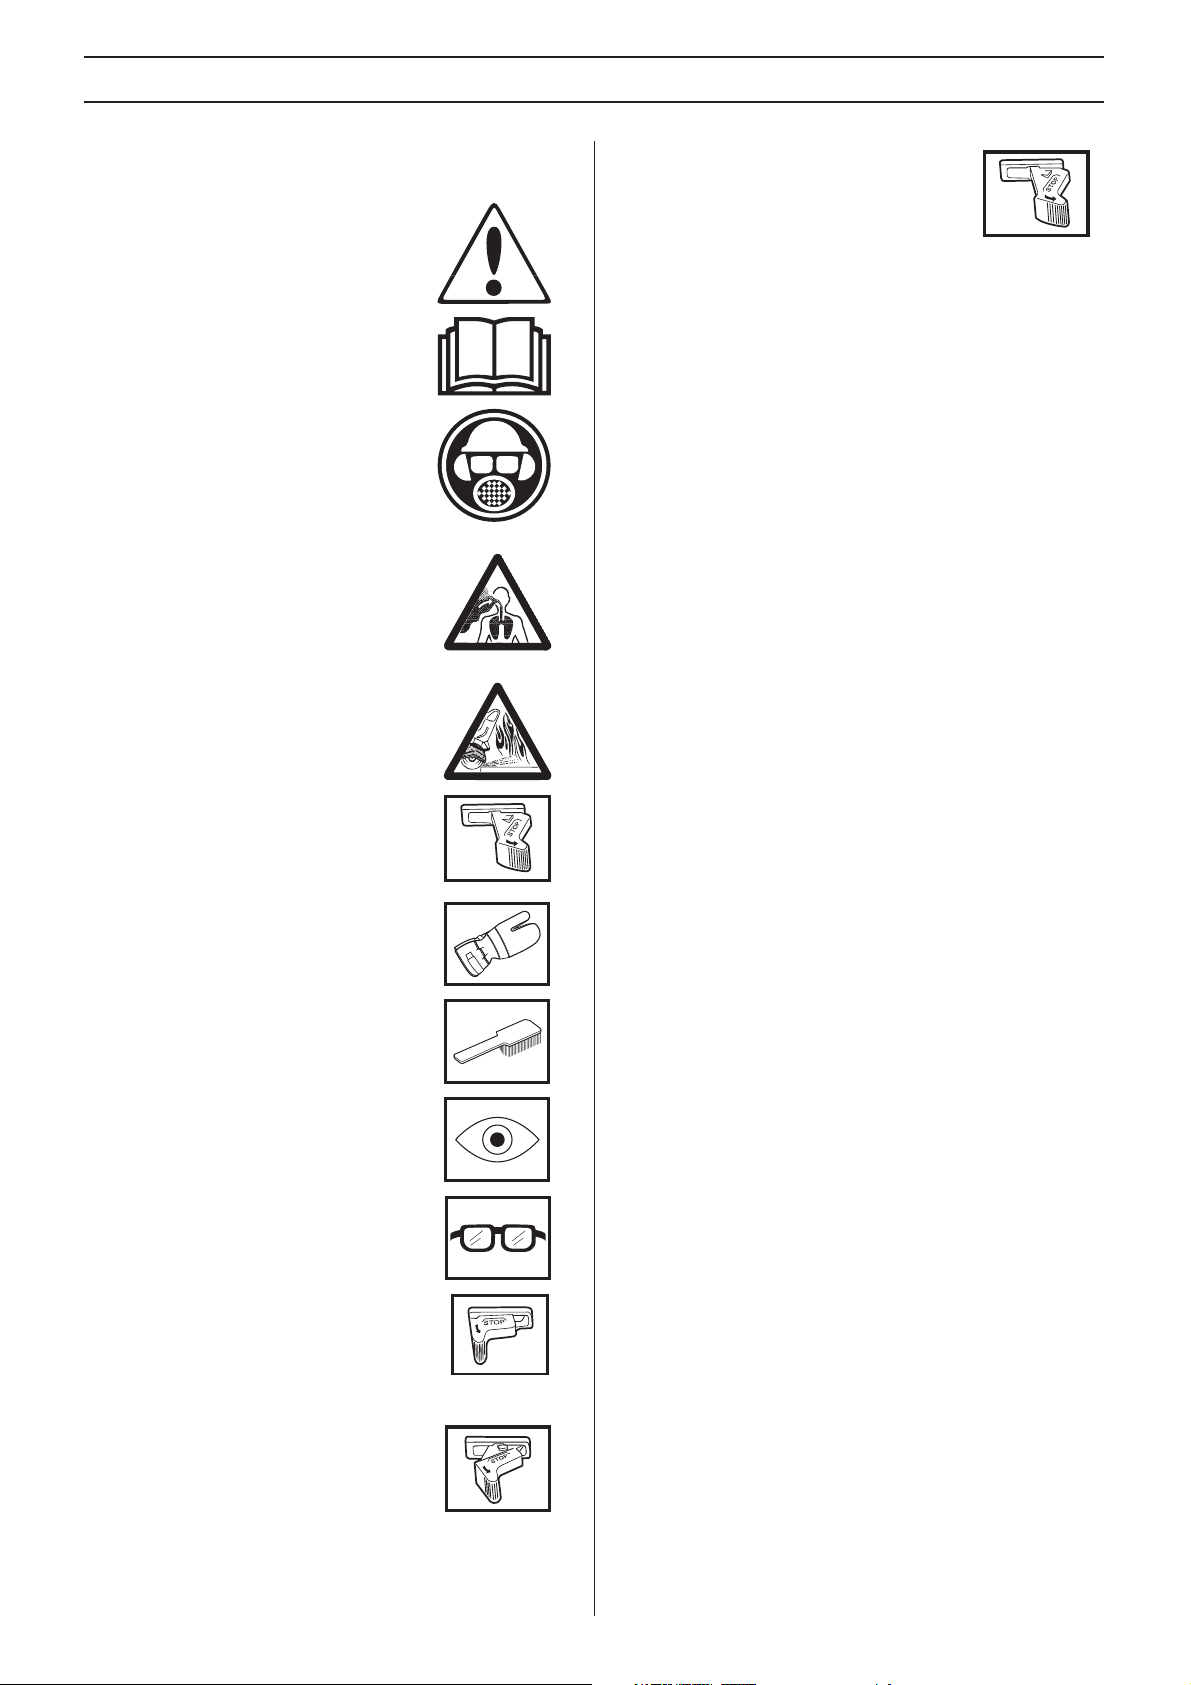
ARNING! The machine can be a
dangerous tool if used incorrectly or
carelessly, which can cause serious or
fatal injury to the operator or others.
Please read the operator’s manual
carefully and make sure you understand
the instructions before using the machine.
Always wear:
• Protective helmet
• Hearing protection
• Protective goggles or a visor
• Breathing mask
WARNING! Dust forms when cutting, this
can cause injuries if inhaled. Use an
approved breathing mask. Avoid inhaling
petrol fumes and exhaust fumes. Always
provide for good ventilation.
KEY T O SYMBOLS
Stop, in the fixed position.
Other symbols/decals on the mac hine
refer to special certification
requirements for certain markets.
WARNING! Sparks from the cutting blade
can cause fire in combustible materials
such as: petrol (gas), wood, dry grass etc.
Switch off the engine b y moving the stop
switch to the STOP position before carrying
out any checks or maintenance.
Alw ays wear protective gloves.
Regular cleaning is required.
Visual chec k.
Protectiv e goggles or a visor must be worn.
Run position.
Stop , with the return spring to the operating
position.
–
English

K
ST
T
T
Y
CONTENTS
Contents
KEY TO SYMBOLS
ey to symbols ............................................................. 2
CONTENTS
Contents ...................................................................... 3
WHA T IS WHAT?
What is what on the po wer cutter? ............................... 4
SAFETY INSTR UCTIONS
Steps bef ore using a new power cutter. ....................... 5
Personal protective equipment ..................................... 5
Machine ′ s safety equipment ........................................ 6
Checking, maintaining and servicing the machine ′ s
safety equipment .......................................................... 7
General safety precautions .......................................... 8
General working instructions ....................................... 9
Cutting blades .............................................................. 11
ASSEMBL Y
Chec king the drive axle and flange washers ............... 13
Fitting the cutting blade ................................................ 13
Guard for the blade ...................................................... 13
FUEL HANDLING
Fuel .............................................................................. 14
K750 ............................................................................ 14
K750 OilGuard ............................................................. 14
Fueling ......................................................................... 15
ARTING AND STOPPING
Star ting and stopping ................................................... 16
MAINTENANCE
ensioning the drive belt .............................................. 17
Replacing the drive belt ............................................... 17
Belt pulley and clutch ................................................... 17
Carburetor .................................................................... 17
Fuel filter ...................................................................... 18
Air filter ......................................................................... 18
Starter .......................................................................... 19
Spark plug .................................................................... 20
Cooling system ............................................................ 20
Muffler .......................................................................... 20
General maintenance instructions ............................... 21
TECHNICAL D ATA
echnical data .............................................................. 22
Cutting equipment ........................................................ 22
FEDERAL EMISSION CONTR OL WARRANTY
STATEMENT
OUR WARRANTY RIGHTS AND OBLIGATIONS ..... 23
English
– 3
4
1
WHA T IS WHA T?
15
16
17
18
14
25
13
1
12
11
2
10
9
3
4
5
6
7
8
19
20
21
22
23
26
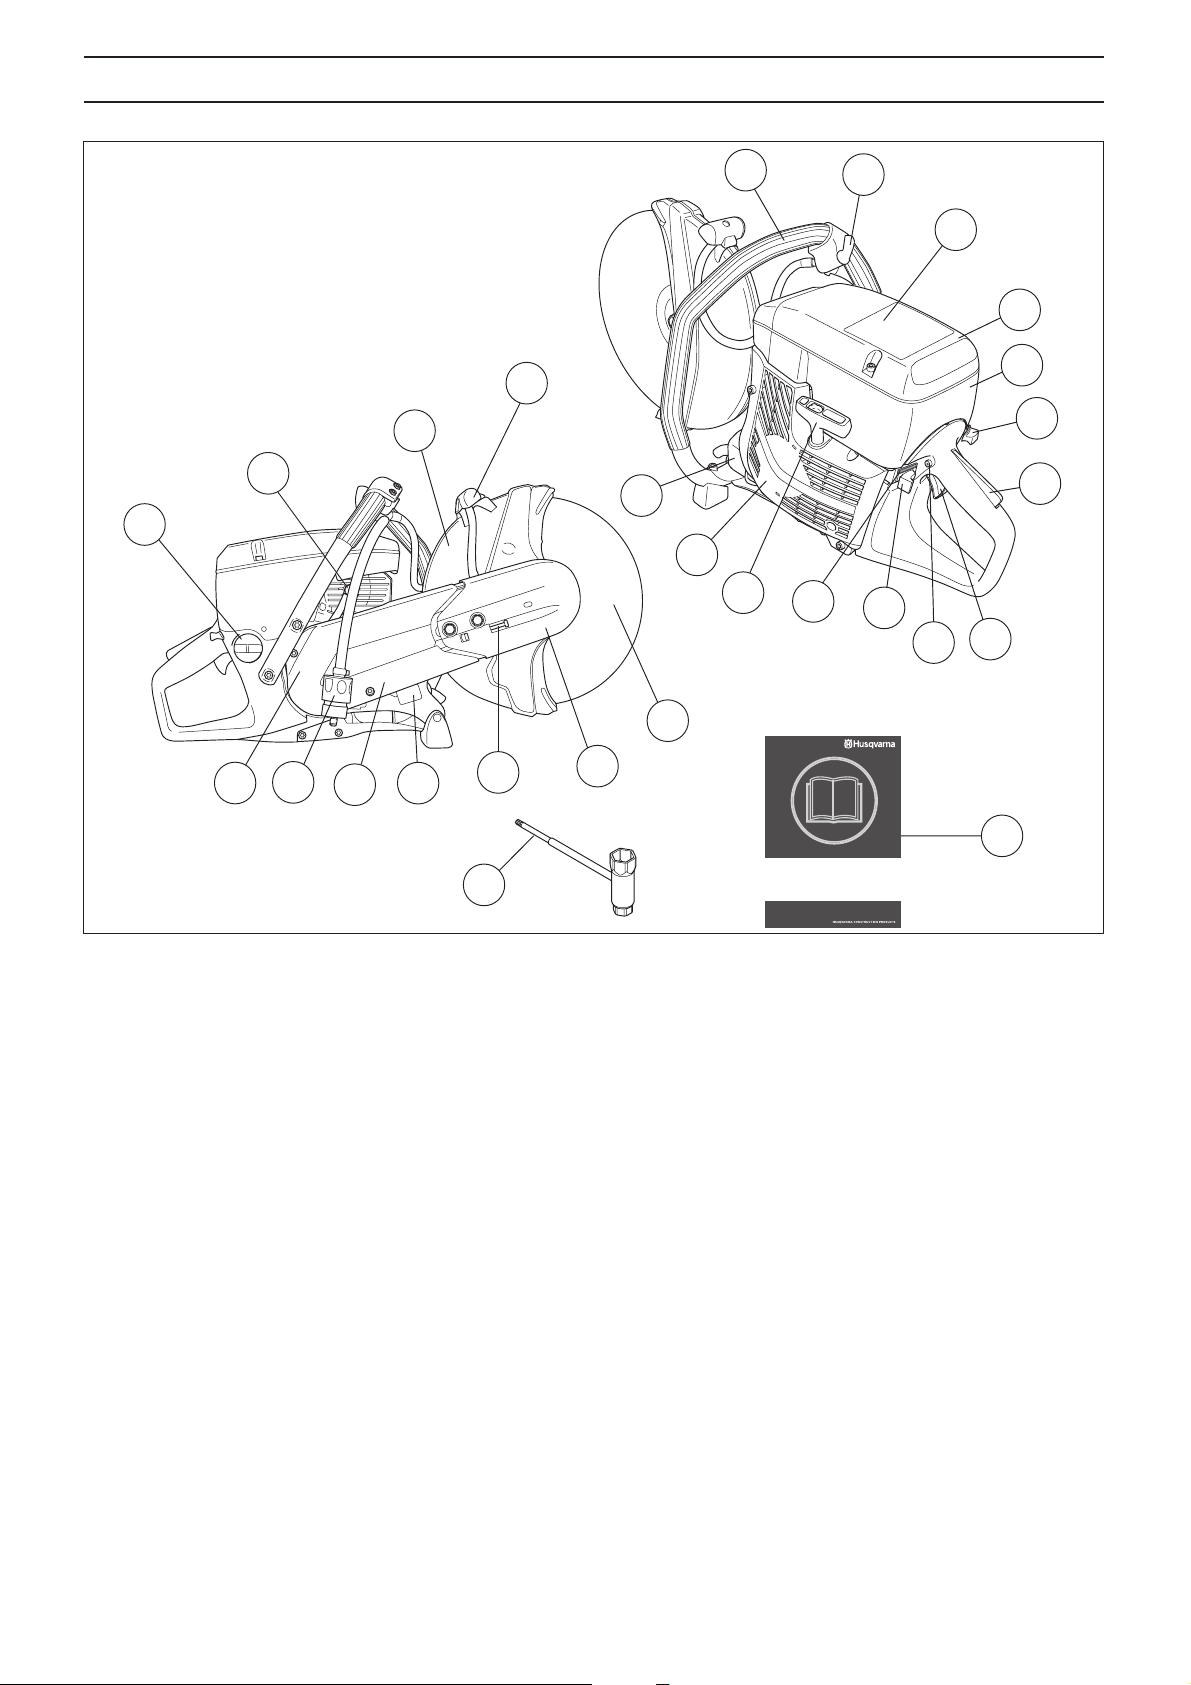
What is what on the po wer cutter?
Front handle
2 Water tap
3 Warning decal
4 Air filter cover
5 Cylinder cover
6 Choke
7 Throttle lockout
8 Throttle control
9 Start throttle lock
10 Stop switch
11 Disconnection function for OilGuard (K750 OilGuard)
12 Starter handle
13 Starter
14 Muffler
24
27
15 Fuel tank
16 Decompression valve
17 Guard for the blade
18 Adjustment handle for guard
19 Belt guard
20 Water connection with filter
21 Cutting arm
22 Type plate
23 Belt tensioner
24 Cutting head
25 Cutting blade
26 Combination spanner
27 Operator’s manual (EPA)
–
English
SAFETY INSTR UCTIONS
Steps bef ore using a new power cutter
Please read the operator’s manual carefully.
• Check the cutting blade’s mounting, see the chapter
”Assembly”.
• Start the engine and check the idling setting, see
instructions under the heading Maintenance. When the
carburettor is set correctly the cutting blade should be still
while idling. Setting of the idle speed is described in the
Operator’s Manual. Set the correct speed according to
these instructions. Do not use the power cutter if the idle
speed is not adjusted correctly!
• Let your Husqvarna dealer regularly check the power
cutter and make essential adjustments and repairs.
ARNING! Under no circumstances may the
design of the machine be modified without
!
the permission of the manufacturer. Always
use genuine accessories. Non-authorized
modifications and/or accessories can result
in serious personal injury or the death of the
operator or others.
•
P
•
W
W
W
W
W
W
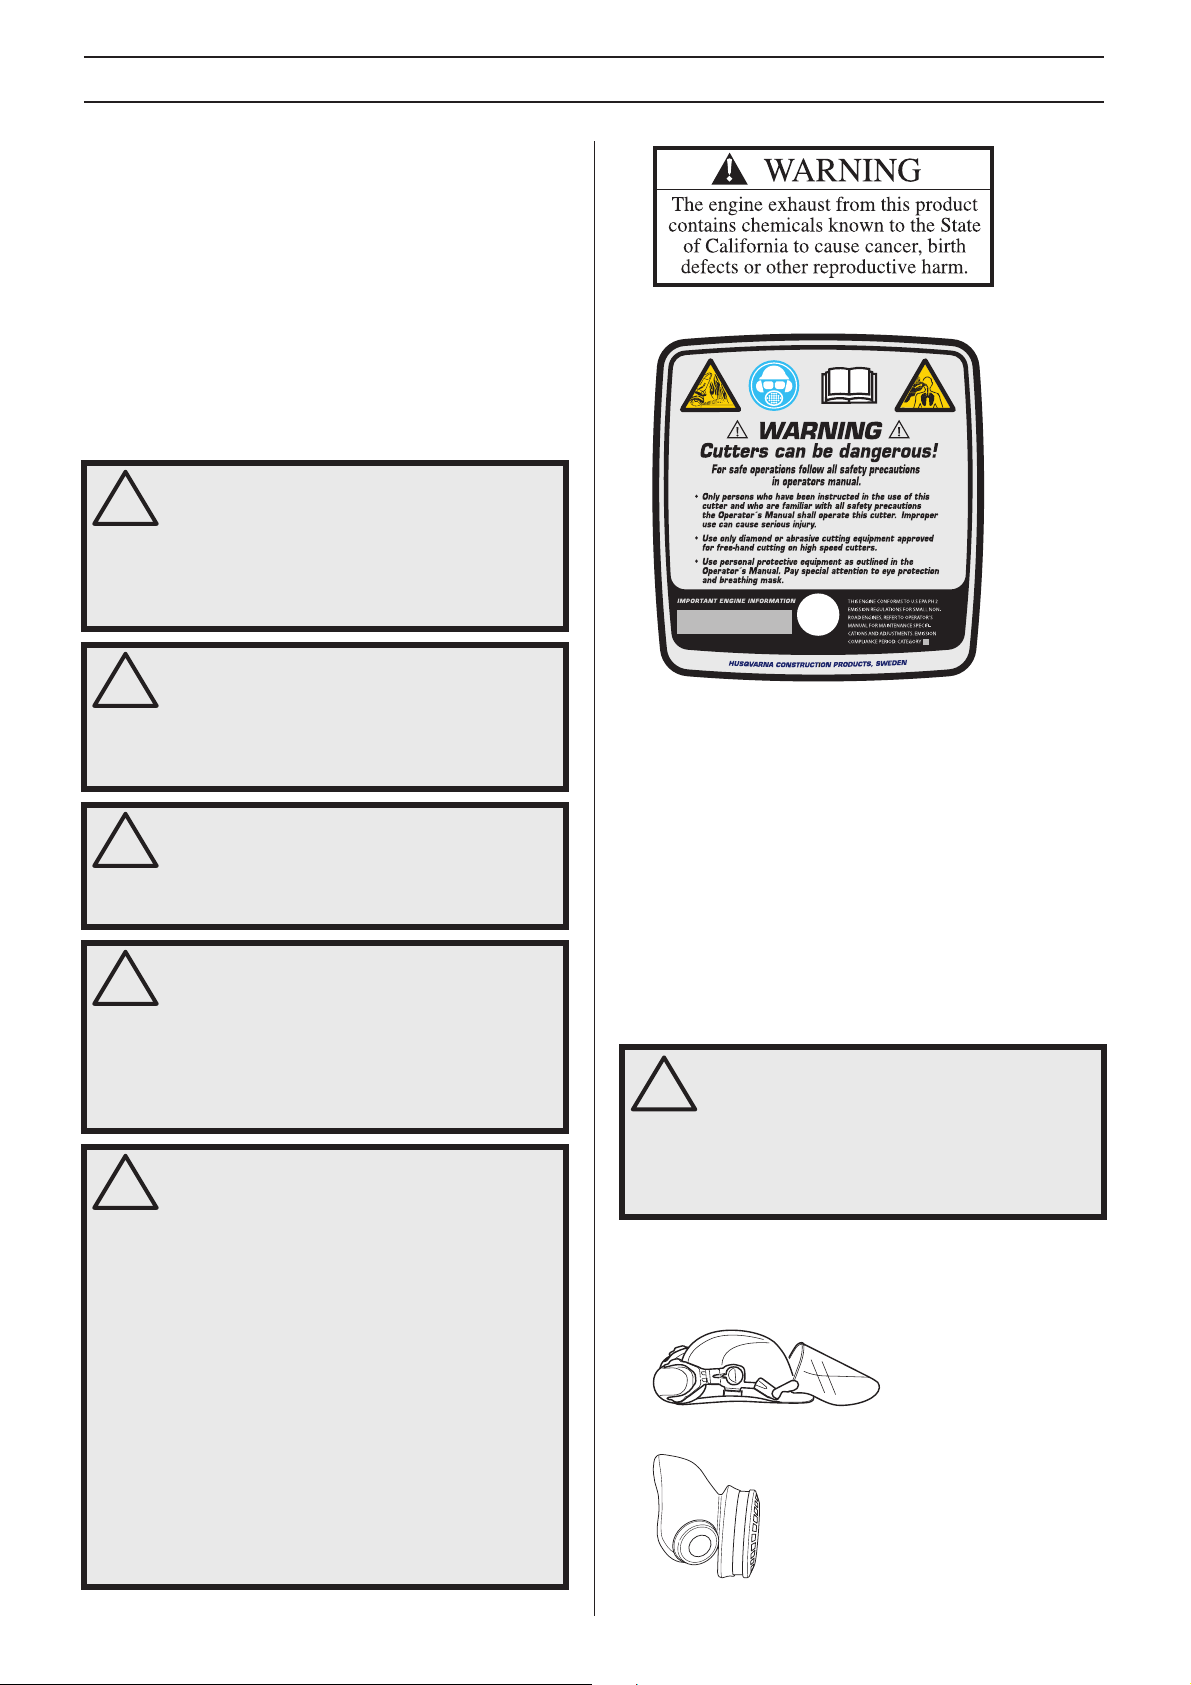
You will find the following labels on your power cutter:
ARNING! Use of products which cut, grind,
drill, sand or shape material can generate
!
dust and vapors which may contain harmful
chemicals. Know the nature of the material
being worked on and wear appropriate dust
mask or respirator protection.
ARNING! A power cutter is a dangerous tool
if used carelessly or incorrectly and can cause
!
serious, even fatal injuries. It is extremely
important that you read and understand the
contents of this Operator’s Manual.
ARNING! The ignition system of this
machine produces an electromagnetic field
!
during operation. This field may under some
circumstances interfere with pacemakers. To
reduce the risk of serious or fatal injury, we
recommend persons with pacemakers to
consult their physician and the pacemaker
manufacturer before operating this machine.
ARNING! Some dust created by power
sanding, sawing, grinding, drilling, and other
!
construction activities contains chemicals
known (to the State of California) to cause
cancer, birth defects or other reproductive
harm. Some examples of these chemicals are:
Lead from lead-based paints.
Crystalline silica from bricks, cement and
other masonry products.
Arsenic and chromium from
chemicallytreated lumber.
Your risk from these exposures varies,
depending on how often you do this type of
work. To reduce your exposure to these
chemicals: work in a well ventilated area,
and work with approved safety equipment,
such as those dust makes that are specially
designed to filter out microscopic material.
The Emissions Compliance Period referred to on the
Emission Compliance label indicates the number of operating
hours for which the engine has been shown to meet Federal
emissions requirements. Category C = 50 hours, B = 125
hours, and A = 300 hours.
Husqvarna Construction Products has a policy of continuous
product development. Husqvarna reserves the right to modify
the design and appearance of products without prior notice
and without further obligation introduce design modifications.
All information and all data in the Operator’s Manual were
applicable at the time the Operator’s Manual was sent to print.
ersonal protective equipment
ARNING! You must use approved personal
protective equipment whenever you use the
!
machine. Personal protective equipment
cannot eliminate the risk of injury but it will
reduce the degree of injury if an accident
does happen. Ask your dealer for help in
choosing the right equipment.
Protective helmet
• Hearing protection
• Protective goggles or a visor
• Breathing mask
English
– 5
6
SAFETY INSTR UCTIONS
•
Y
W
W
W
F
W
Heavy-duty, firm grip gloves.
• Tight-fitting, heavy-duty and comfortable clothing that
permits full freedom of movement.
• Use leg-guards recommended for the material to be cut.
• Boots with steel toe-caps and non-slip sole
Stop s witch
Use the stop s witch to switch off the engine.
Muffl er
ARNING! The muffler gets very hot in use
and remains so for a short time afterwards.
!
Do not touch the muffler if it is hot!
The m uffler is designed to keep noise levels to a minimum
and to direct exhaust fumes away from the user.
• Always have a first aid kit nearby.
Mac hine ′ s safety equipment
This section descr ibes the machine ′ s safety equipment, its
purpose, and how checks and maintenance should be carried
out to ensure that it operates correctly. See the ”What is
what?” section to locate where this equipment is positioned
on your machine.
ARNING! Never use a machine that has
faulty safety equipment! Carry out the
!
inspection, maintenance and service
routines listed in this section.
Vibration damping system
our machine is equipped with a vibration damping system
that is designed to reduce vibration and make operation
easier.
The machine ′ s vibration damping system reduces the transfer
of vibration between the engine unit/cutting equipment and
the machine ′ s handle unit.
The engine body, including the cutting equipment, is insulated
from the handles by vibration damping units.
ARNING! The exhaust fumes from the
engine are hot and may contain sparks
!
which can start a fire. Never start the
machine indoors or near combustible
material!
IMPORTANT INFORMATION
or mufflers it is very important that you follow the
instructions on checking, maintaining and servicing your
machine. See instructions under the heading Checking,
maintaining and servicing the machine’s safety equipment.
ARNING! The inside of the muffler contain
chemicals that may be carcinogenic. Avoid
!
contact with these elements in the event of a
damaged muffler.
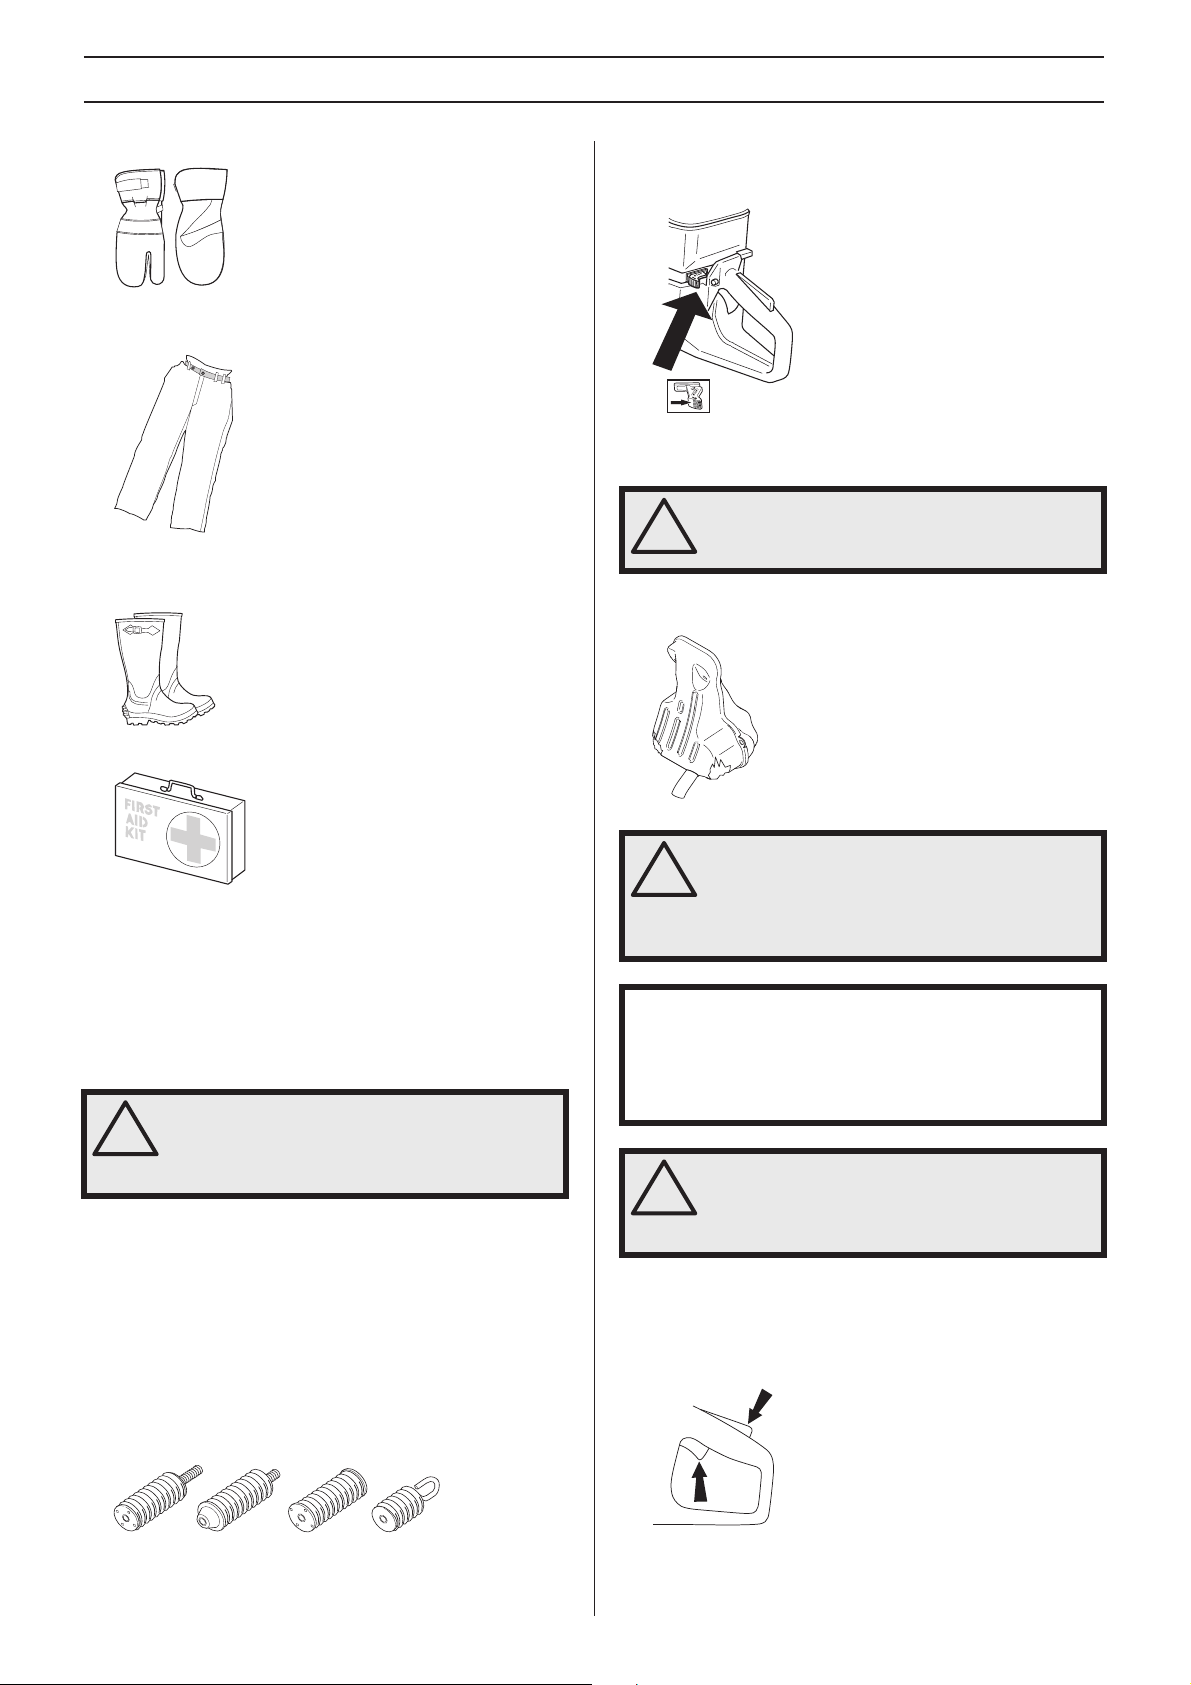
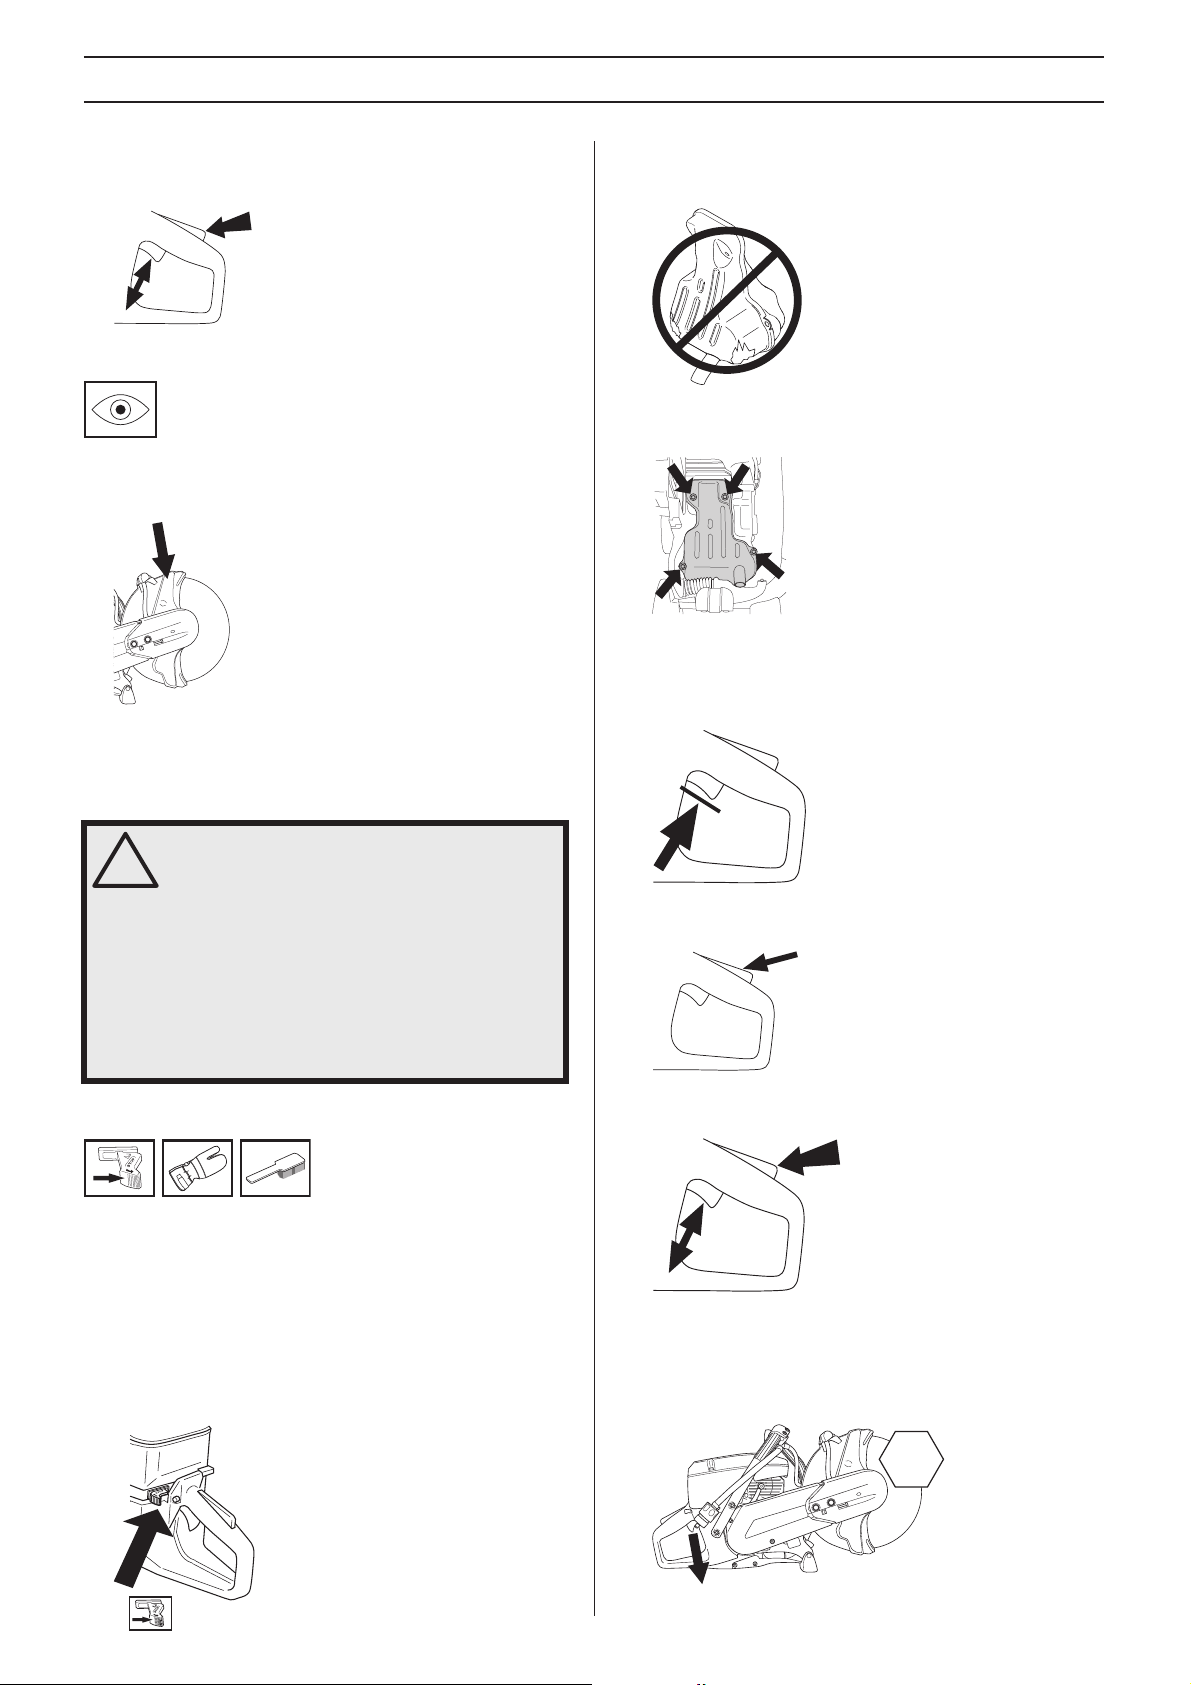
Thr ottle lockout
The throttle tr igger lock is designed to prevent accidental
operation of the throttle. When the lock (A) is pressed in this
releases the throttle (B).
A
–
B
The trigger lock remains pressed in as long as the throttle is
pressed. When the grip on the handle is released the throttle
trigger and the throttle trigger lock both return to their original
English
SAFETY INSTR UCTIONS
′
positions . This is controlled by two independent return spring
systems. This means that the throttle trigger is automatically
locked in the idle position.
Guar d for the blade
This guard is fi tted above the cutting blade and is designed to
prevent parts of the blade or cutting fragments from being
thrown towards the user.
Muffler
Never use a machine that has a faulty muffler.
Regularly check that the muffler is securely attached to the
machine.
Throttle lockout
• Make sure the throttle control is locked at the idle setting
when the throttle lockout is released.
Chec king, maintaining and servicing
the machine
WARNING! All servicing and repair work on
the machine requires special training. This is
!
especially true of the machine
equipment. If your machine fails any of the
checks described below you must contact
your service agent. When you buy any of our
products we guarantee the availability of
professional repairs and service. If the
retailer who sells your machine is not a
servicing dealer, ask him for the address of
your nearest service agent.
Vibration damping system
Regularly check the vibration damping units for cracks or
deformation.
Make sure the vibration damping units are securely attached
to the engine unit and handle unit.
Keep the handles clean and dry.
Stop switch
Start the engine and make sure the engine stops when you
move the stop switch to the stop setting.
s safety equipment
′s safety
• Press the throttle lockout and make sure it returns to its
original position when you release it.
• Check that the throttle control and throttle lockout move
freely and that the return springs work properly.
• Start the power cutter and apply full throttle. Release the
throttle control and check that the cutting blade stops and
remains stationary. If the cutting blade rotates when the
throttle is in the idle position you should check the
carburettor’s idle adjustment.
STOP
• See instructions under the heading Maintenance.
English
– 7
SAFETY INSTRUCTIONS
Checking the blade guard
WARNING! Always check that the guard is
correctly fitted before starting the machine.
!
Check that the cutting blade is fitted
correctly and does not show signs of
damage. A damaged cutting blade can cause
personal injury. See instructions under the
heading Assembly.
Check that the guard is complete and without any cracks or
deformations.
General safety precautions
• A power cutter is designed to cut hard materials, such as
masonry. Observe the increased risk of kickback when
cutting soft materials. See instructions under the heading
How to avoid kickback.
• Do not use the power cutter until you have read the entire
contents of this Operator’s Manual.
All servicing, in addition to the points listed in the section
”Control, maintenance and service of the power cutter’s
safety equipment”, should be carried out by trained
service specialists.
• Never use the machine if you are tired, if you have drunk
alcohol, or if you are taking medication that could affect
your vision, your judgement or your co-ordination.
• Wear personal protective equipment. See instructions
under the heading Personal protective equipment.
• Never use a machine that has been modified in any way
from its original specification.
• Never use a machine that is faulty. Carry out the checks,
maintenance and service instructions described in this
manual. Some maintenance and service measures must
be carried out by trained and qualified specialists. See
instructions under the heading Maintenance.
• Never allow anyone else to use the machine without first
ensuring that they have understood the contents of the
operator’s manual.
• Never use the machine indoors. Be aware of the dangers
of inhaling the engine’s exhaust fumes.
Transport and storage
Do not store or transport the power cutter with the cutting
blade fitted.
Store the power cutter in a lockable area so that it is out of
reach of children and unauthorised persons.
All blades should be removed from the cutter after use and
stored carefully. Store cutting blades in dry, frost free
conditions.
Special care should be taken with abrasive discs. Abrasive
discs must be stored on a flat, level surface. If blades are
supplied with a backing pad then a spacer should be used to
keep them flat. If an abrasive disc is stored in humid
conditions, this can cause imbalance and result in injury.
Inspect new blades for transport or storage damage.
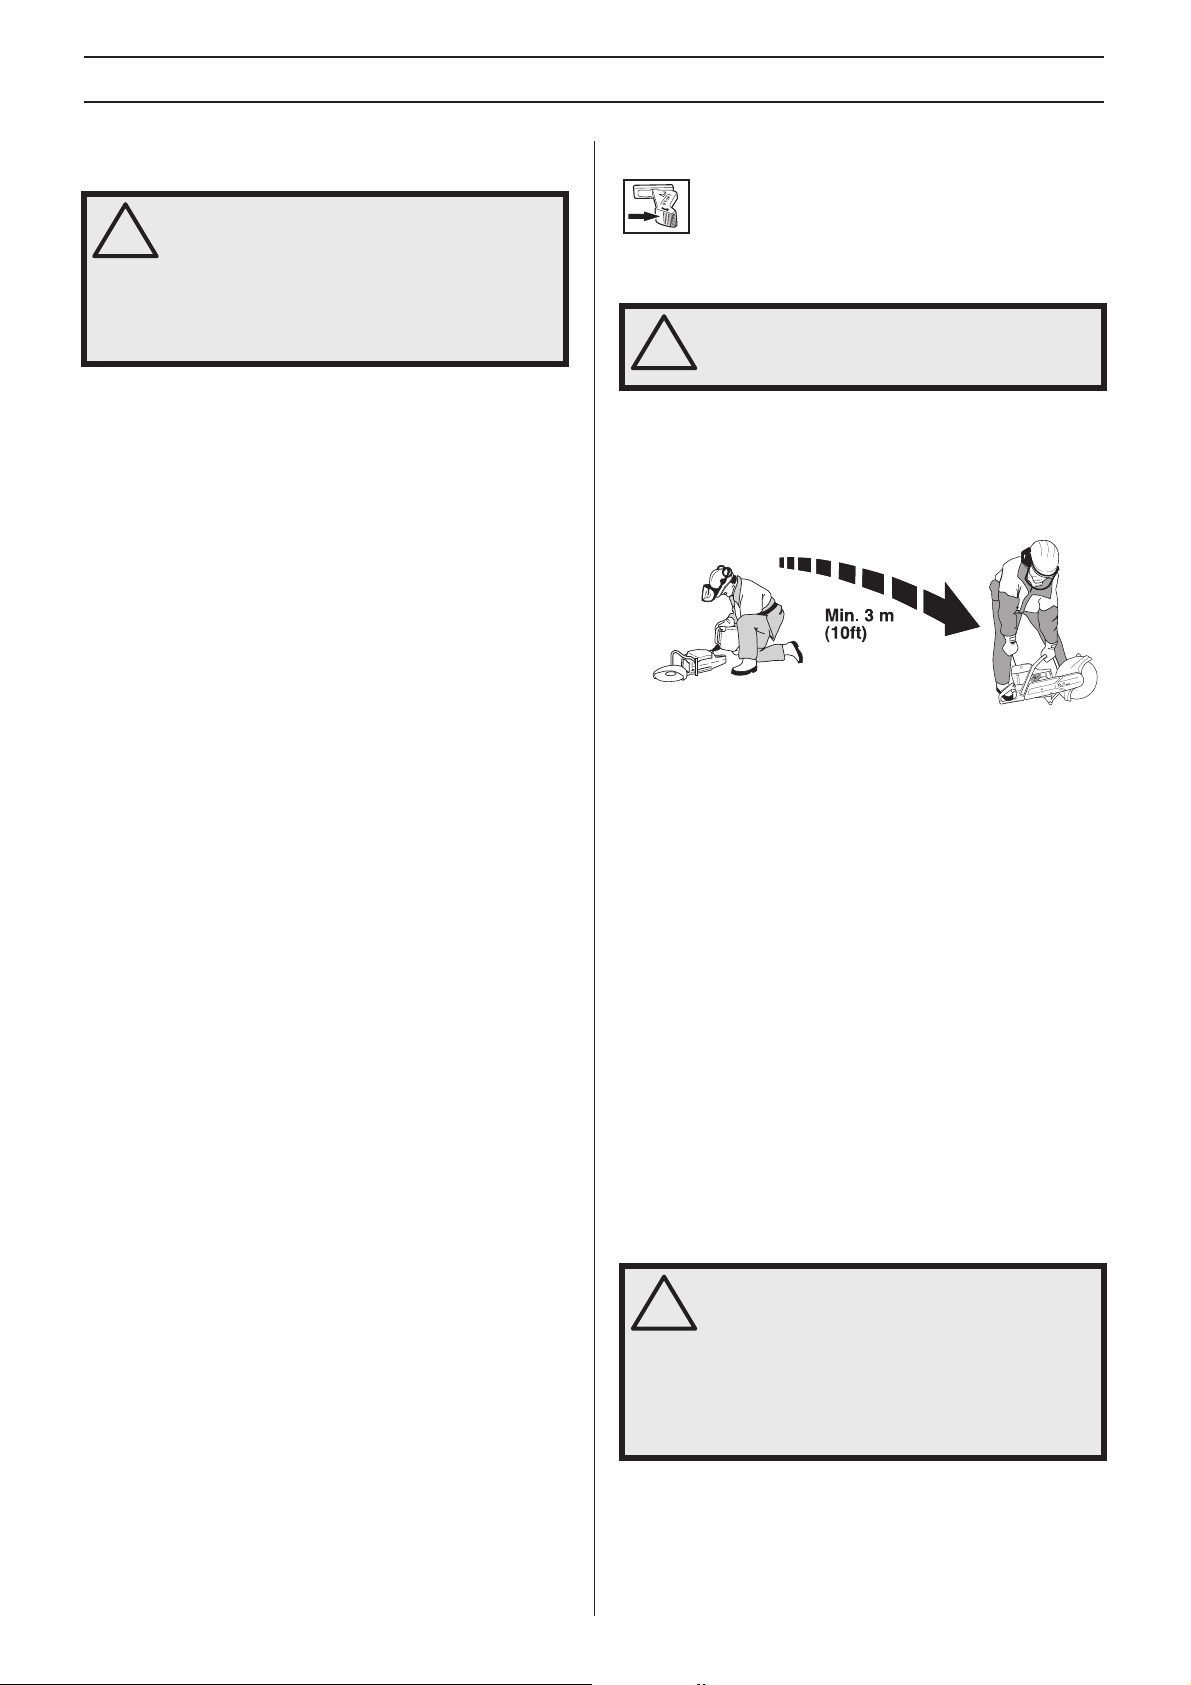
Fuel safety
(Refuelling/Fuel mixture/Storage.)
WARNING! Take care when handling fuel.
Bear in mind the risk of fire, explosion and
!
inhaling fumes.
• Never refuel the machine while the engine is running.
• Make sure there is plenty of ventilation when refuelling or
mixing fuel (gasoline and 2-stroke oil).
• Move the machine at least 10 ft (3 m) from the refuelling
point before starting it.
• Never start the machine:
- If you have spilled fuel on it. Wipe off the spillage and allow
remaining fuel to evaporate.
- If you have spilled fuel on yourself or your clothes, change
your clothes. Wash any part of your body that has come in
contact with fuel. Use soap and water.
- If the machine is leaking fuel. Check regularly for leaks
from the fuel cap and fuel lines.
• Store and transport the machine and fuel so that there is
no risk of any leakage or fumes coming into contact with
sparks or naked flames, for example, from electrical
machinery, electric motors, electrical relays/switches or
boilers.
• Always store fuel in an approved container designed for
that purpose.
• When storing the machine for long periods the fuel tank
must be emptied. Contact your local gas station to find out
where to dispose of excess fuel.
• Always use a Husqvarna fuel container with an anti-spill
valve.
WARNING! Bear in mind the risk of fire,
explosion and inhaling fumes. Stop the
!
engine before fuelling. Do not fill so that the
fuel runs over. Wipe up all spillage on the
ground and machine. If you spill fuel on
yourself or your clothes. Change your
clothes. Move the machine at least 3 metres
away from the refuelling area before starting.
8 – English
 Loading...