

Page 1

EN Operator's manual 2-37
DE Bedienungsanweisung 38-75
ES Manual de usuario 76-113
FR Manuel d'utilisation 114-151
IT Manuale dell'operatore 152-189
NL Gebruiksaanwijzing 190-226
PT Manual do utilizador 227-264
SL Navodila za uporabo 265-300
543 XP®, 543 XP®G
Page 2
Contents
18
19
6
17
7
27
25
1
8
9
10
11
3
4
2
31
30
32
12
15
24
5
5
26
14
16
13
5
21
22
23
28
29
20
5
33
34
35
Introduction..................................................................... 2
Safety..............................................................................4
Assembly........................................................................ 9
Operation...................................................................... 10
Maintenance................................................................. 21
Introduction
Troubleshooting............................................................ 33
Transportation and storage...........................................34
Technical data.............................................................. 34
Accessories.................................................................. 35
EC Declaration of Conformity....................................... 37
Intended use
This product is intended for sawing in wood.
Note: National regulations can set limit to the operation
of the product.
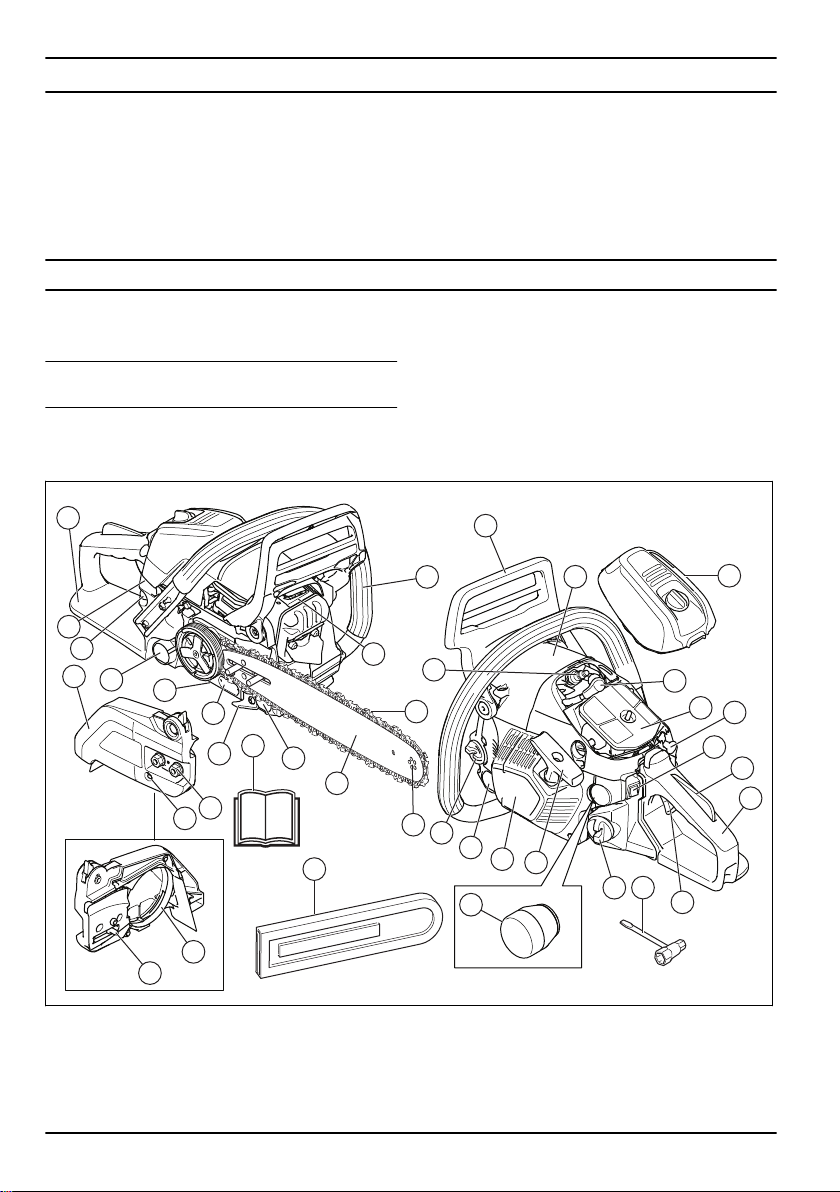
Product overview
1. Air filter cover
2. Spark plug
3. Spark plug cap
4. Air filter
Product description
The Husqvarna 543 XP, 543 XPG are chainsaw models
with a combustion engine.
Work is constantly in progress to increase your safety
and efficiency during operation. Speak to your servicing
dealer for more information.
5. Vibration damping system, 4 units
6. Throttle trigger lockout
7. Rear handle
8. Information and warning decal
2 956 - 003 -
Page 3
9. Throttle trigger
yyyywwxxxxx
10. Start/stop switch
11. Choke control
12. Fuel tank
13. Air purge bulb
14. Starter rope handle
15. Starter housing
16. Chain oil tank
17. Muffler
18. Chain brake and front hand guard
19. Front handle
20. Switch for heated handles (543 XPG)
21. Right hand guard
22. Clutch cover
23. Chain tensioning screw
24. Chain catcher
25. Saw chain
26. Guide bar
27. Bar tip sprocket
28. Chain adjuster pin
29. Brake band
30. Operator's manual
31. Transportation guard
32. Combination wrench
33. Product and serial number plate
34. Oil pump adjustment screw
35. Bar nuts
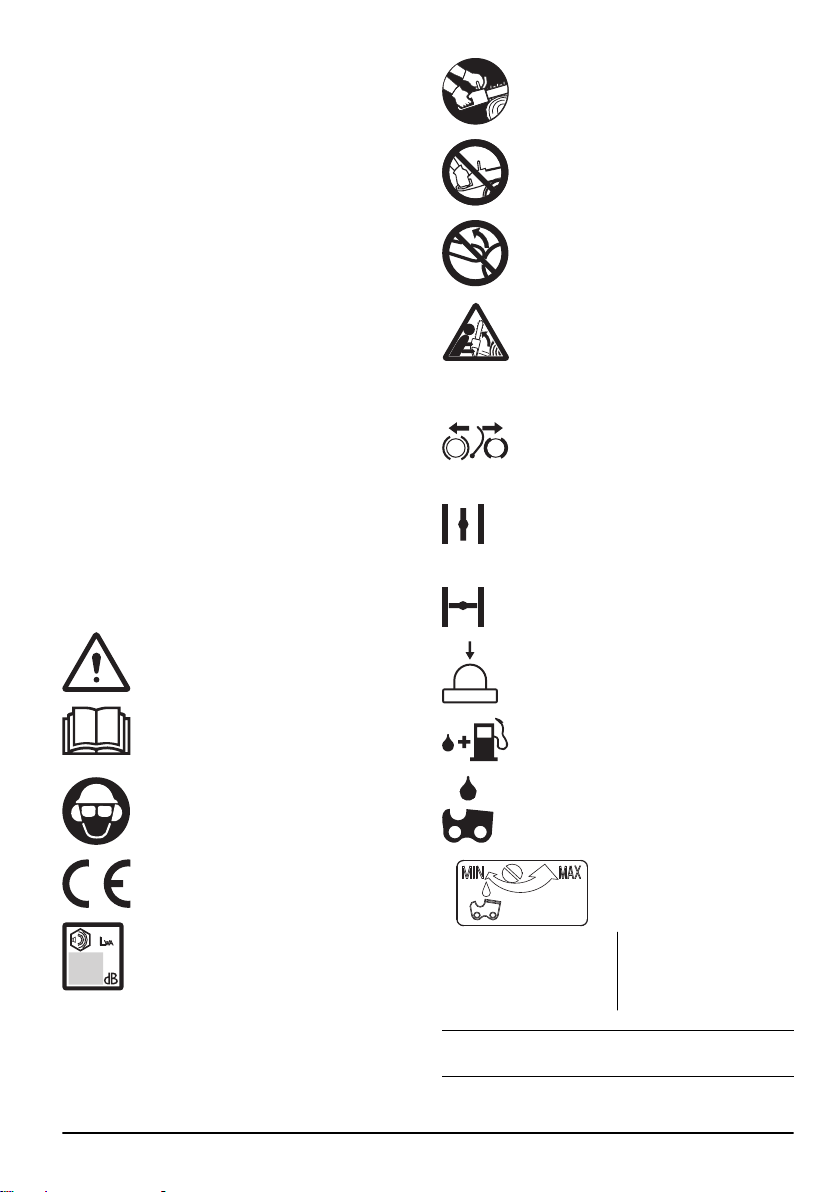
Symbols on the product
Careless or incorrect use of this product can
result in serious or fatal injury to the operator
or others.
Read the operator's manual carefully and
make sure you understand the instructions
before you use this product.
Both of the operator's hands must be used
to operate the chainsaw.
Never operate the chainsaw holding it with
one hand only.
Never let the guide bar tip come in contact
with any object.
Warning! Kickback may occur when the
nose or tip of the guide bar touches an
object, and cause a lightning fast reverse
reaction, kicking the guide bar up and
towards the operator. May cause serious
personal injury.
Chain brake, activated (right). Chain brake,
not activated (left).
Choke lever in "open position".
Choke lever in "closed position".
Air purge.
Refuelling.
956 - 003 - 3
Always wear approved protective helmet,
approved hearing protection and protective
goggles or a visor.
This product is in accordance with
applicable EC Directives.
Noise emissions to the environment
according to European Directive 2000/14/EC
and New South Wales legislation "Protection
of the Environment Operations (Noise
Control) Regulation 2017". Noise emission
data can be found on the machine label and
in the chapter
Technical data on page 34
.
Chain oil fill.
Adjustment of the oil
pump.
The rating plate showing
serial number. yyyy is the
production year, ww is the
production week.
Note: Other symbols/decals on the product refer to
certification requirements for certain markets.
Page 4
Euro V Emissions
WARNING: Tampering with the engine voids
the EU type-approval of this product.
Safety
Safety definitions
Warnings, cautions and notes are used to point out
specially important parts of the manual.
WARNING: Used if there is a risk of injury or
death for the operator or bystanders if the
instructions in the manual are not obeyed.
CAUTION: Used if there is a risk of damage
to the product, other materials or the
adjacent area if the instructions in the
manual are not obeyed.
Note: Used to give more information that is necessary in
a given situation.
General safety instructions
WARNING: Read the warning instructions
that follow before you use the product.
• A chainsaw is a dangerous tool if used carelessly or
incorrectly and can cause serious injury or death. It
is very important that you read and understand the
contents of this operator’s manual.
• Under no circumstances may the design of the
product be modified without the permission of the
manufacturer. Do not use a product that appears to
have been modified by others and only use
accessories recommended for this product. Nonauthorized modifications and/or accessories can
result in serious personal injury or the death of the
operator or others.
• The inside of the muffler contain chemicals that may
be carcinogenic. Avoid contact with these elements
in the event of a damaged muffler.
• Long term inhalation of the engine’s exhaust fumes,
chain oil mist and sawdust can represent a health
risk.
• This product produces an electromagnetic field
during operation. This field may under some
circumstances interfere with active or passive
medical implants. To reduce the risk of serious or
fatal injury, we recommend persons with medical
implants to consult their physician and the medical
implant manufacturer before operating this product.
• The information in this operator's manual is never a
substitute for professional skills and experience. If
you get into a situation where you feel unsafe, stop
and seek expert advice. Contact your servicing
dealer or an experienced chainsaw user. Do not
attempt any task that you feel unsure of!
Safety instructions for operation
WARNING: Read the warning instructions
that follow before you use the product.
• Before using the product you must understand the
effects of kickback and how to avoid them. Refer to
Kickback information on page 11
• Never use a product that is faulty.
• Never use a product with visible damage to the
spark plug cap and ignition cable. A risk of sparking
arises, which can cause a fire.
• Never use the product if you are fatigued, while
under the influence of alcohol or drugs, medication
or anything that could affect your vision, alertness,
coordination or judgement.
• Do not use the product in bad weather such as
dense fog, heavy rain, strong wind, intense cold,
etcetera. Working in bad weather is tiring and often
brings added risks, such as icy ground,
unpredictable felling direction, etcetera.
• Never start a product unless the guide bar, saw
chain and all covers are fitted correctly. Refer to
Assembly on page 9
and saw chain attached to the product the clutch can
come loose and cause serious injury.
• Never start the product indoors. Exhaust fumes can
be dangerous if inhaled.
• The exhaust fumes from the engine are hot and can
contain sparks, which can start a fire. Never start the
product near flammable material!
• Observe your surroundings and make sure that there
is no risk of people or animals coming in contact with
or affect your control of the product.
• Never allow children to use or be in the vicinity of the
product. As the product is equipped with a spring-
for instructions. Without a bar
for instructions.
4
956 - 003 -
Page 5
loaded start/stop switch and can be started by low
speed and force on the starter handle, even small
children under some circumstances can produce the
force necessary to start the product. This can mean
a risk of serious personal injury. Therefore remove
the spark plug cap when the product is not under
close supervision.
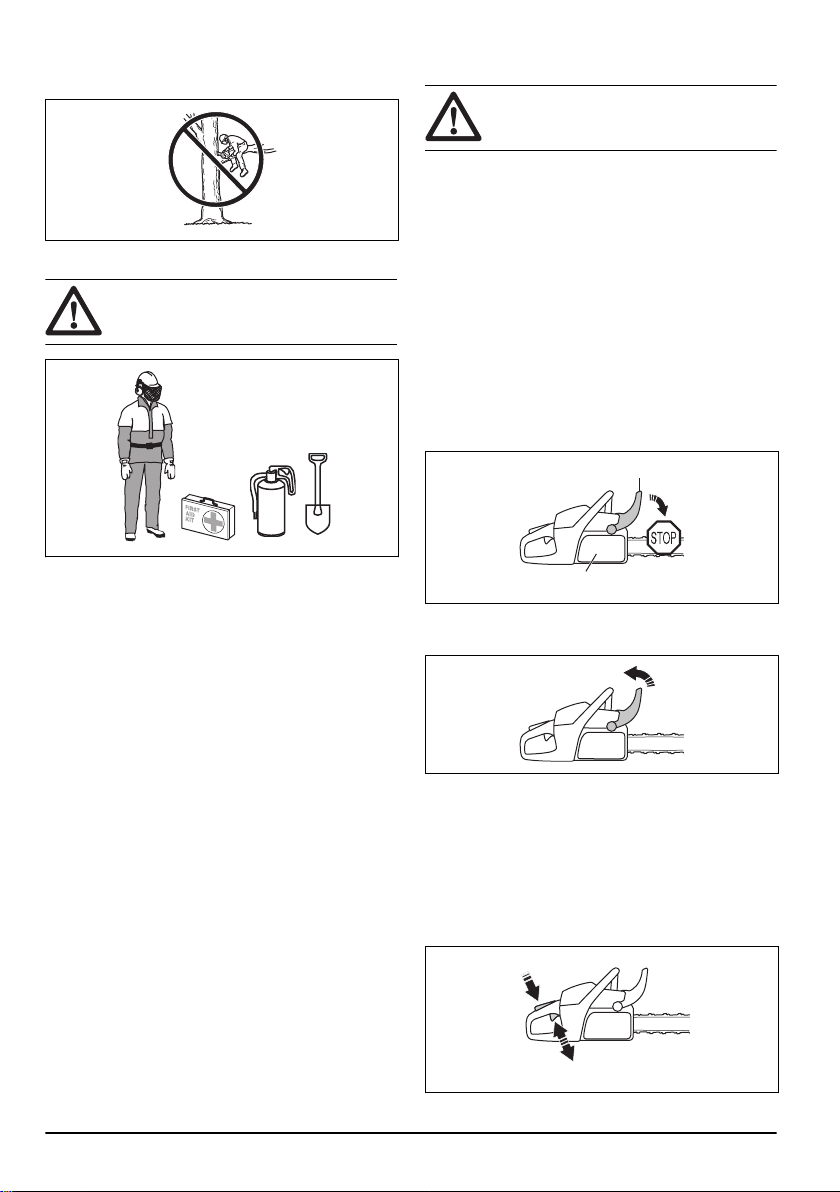
• You must have a steady stance in order to have full
control of the product. Never work standing on a
ladder, in a tree or where you do not have a firm
ground to stand on.
• Lack of concentration can lead to kickback if the
kickback zone of the bar accidentally touches a
branch, nearby tree or some other object.
• Never use the product by holding it with one hand.
This product is not safely controlled with one hand.
• Always hold the product with both hands. The right
hand should be on the rear handle, and the left hand
on the front handle. All people, whether right or left
handed, should use this grip. Use a firm grip with
thumbs and fingers encircling the handles. This grip
minimizes the risk of kickback and lets you keep the
product under control. Do not let go of the handles!
• Never use the product above shoulder height.
• Do not use the product in a situation where you
cannot call for help in case of an accident.
• Before moving your product, switch off the engine
and lock the saw chain using the chain brake. Carry
the product with the guide bar and saw chain
pointing backwards. Fit a transportation guard to the
guide bar before transporting the product or carrying
it for any distance.
• When you put the product on the ground, lock the
saw chain using the chain brake and ensure you
have a constant view of the product. Switch the
engine off before leaving your product for any length
of time.
• Sometimes chips get stuck in the clutch cover
causing the saw chain to jam. Always stop the
engine before cleaning.
• Running an engine in a confined or badly ventilated
area can result in death due to carbon monoxide
poisoning.
• The exhaust fumes from the engine are hot and may
contain sparks which can start a fire. Do not start the
product indoors or near flammable material.
• Use the chain brake as a parking brake when you
start the product and when you move short
distances. Always carry the product in the front
handle. This decreases the risk that you or a person
near you get hit by the saw chain.
• Overexposure to vibration can lead to circulatory
damage or nerve damage in people who have
impaired circulation. Contact your doctor if you
experience symptoms of overexposure to vibration.
Such symptoms include numbness, loss of feeling,
tingling, pricking, pain, loss of strength, changes in
skin colour or condition. These symptoms normally
appear in the fingers, hands or wrists. These
symptoms may be increased in cold temperatures.
• It is not possible to cover every conceivable situation
you can face when using this product. Always
exercise care and use your common sense. Avoid all
situations which you consider to be beyond your
capability. If you still feel uncertain about operating
procedures after reading these instructions, you
should consult an expert before continuing. Do not
hesitate to contact your dealer or Husqvarna if you
have any questions about the use of the product. We
will willingly be of service and provide you with
advice as well as help you to use your product both
efficiently and safely. Attend a training course in
chainsaw usage if possible. Your dealer, forestry
956 - 003 -
5
Page 6
school or your library can provide information about
A
B
A
B
which training materials and courses are available.
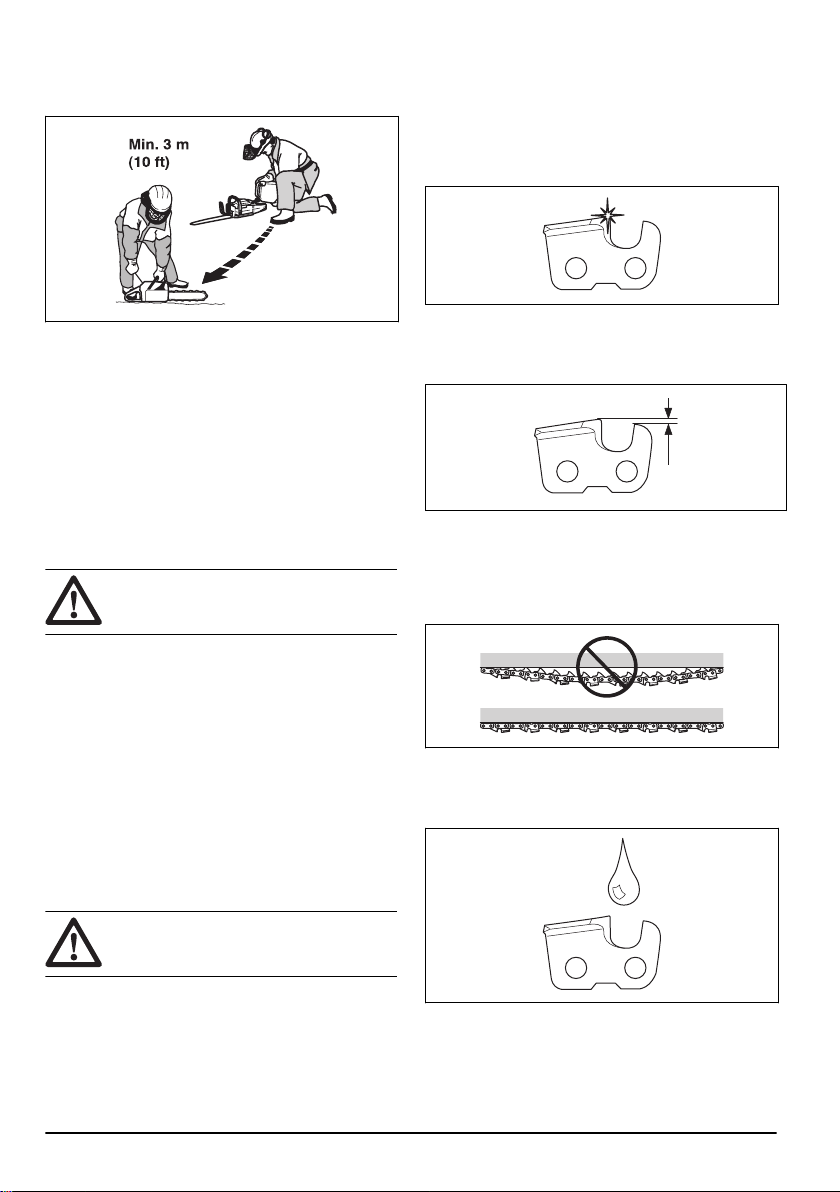
Personal protective equipment
Safety devices on the product
WARNING: Read the warning instructions
that follow before you use the product.
• Do not use a product with defective safety devices.
• Do a check of the safety devices regularly. Refer to
Maintenance and checks of the safety devices on
the product on page 23
• If the safety devices are defective, speak to your
Husqvarna servicing dealer.
.
WARNING: Read the warning instructions
that follow before you use the product.
• Most chainsaw accidents occur when the saw chain
touches the operator. You must use approved
personal protective equipment during operation.
Personal protective equipment does not give you full
protection from injuries but it decreases the degree
of injury if an accident occurs. Speak to your
servicing dealer for recommendations about which
equipment to use.
• Your clothing must be close-fitting but not limit your
movements. Regularly do a check of the condition of
the personal protective equipment.
• Use an approved protective helmet.
• Use approved hearing protection. Long-term
exposure to noise can result in permanent damage
to the hearing.
• Use protective glasses or a face visor to decrease
the risk of injury from thrown objects. The product
can throw objects, such as wood chips, small pieces
of wood and more, at large force. This can result in
serious injury, especially to the eyes.
• Use gloves with saw protection.
• Use pants with saw protection.
• Use boots with saw protection, steel toe-cap and
non-slip sole.
• Always have a first-aid kit with you.
• Risk of sparks. Keep fire extinguishing tools and a
shovel near to prevent forest fires.
Chain brake and front hand guard
Your product has a chain brake that stops the saw chain
if you get a kickback. The chain brake decreases the
risk of accidents, but only you can prevent them.
The chain brake engages (A) manually by your left hand
or automatically by the inertia release mechanism. Push
the front hand guard (B) forward to engage the chain
brake manually.
Pull the front hand guard rearward to disengage the
chain brake.
Throttle trigger lockout
The throttle trigger lockout prevents accidental operation
of the throttle trigger. If you put your hand around the
handle and press the throttle trigger lockout (A), it
releases the throttle trigger (B). If you release the
handle, the throttle trigger and the throttle trigger lockout
move back to their initial positions. This function locks
the throttle trigger at idle speed.
6
956 - 003 -
Page 7

Chain catcher
The chain catcher catches the saw chain if it breaks or
comes loose. Correct saw chain tension and correctly
applied maintenance on the saw chain and guide bar,
decrease the risk of accidents.
Right hand guard
The right hand guard is a protection for your hand on the
rear handle. The right hand guard gives you protection if
the saw chain breaks or derails. The right hand guard
also gives you protection from branches or twigs.
operate the product near flammable
materials and/or fumes.
WARNING: Do not operate a product
without a muffler or with a defective muffler.
A defective muffler can increase the noise
level and the risk of fire. Keep fire
extinguishing tools near. Do not use a
product without, or with a broken, spark
arrestor mesh if you must have a spark
arrestor mesh in your area.
The muffler keeps the noise levels to a minimum and
points the exhaust fumes away from the operator. In
areas with a hot, dry weather there is a high risk of fire.
Obey local regulations and maintenance instructions.
Vibration damping system
The vibration damping system decreases vibration in the
handles. Vibration damping units operate as a
separation between the product body and the handle
unit.
Refer to
Product overview on page 2
about where the vibration damping system is on your
product.
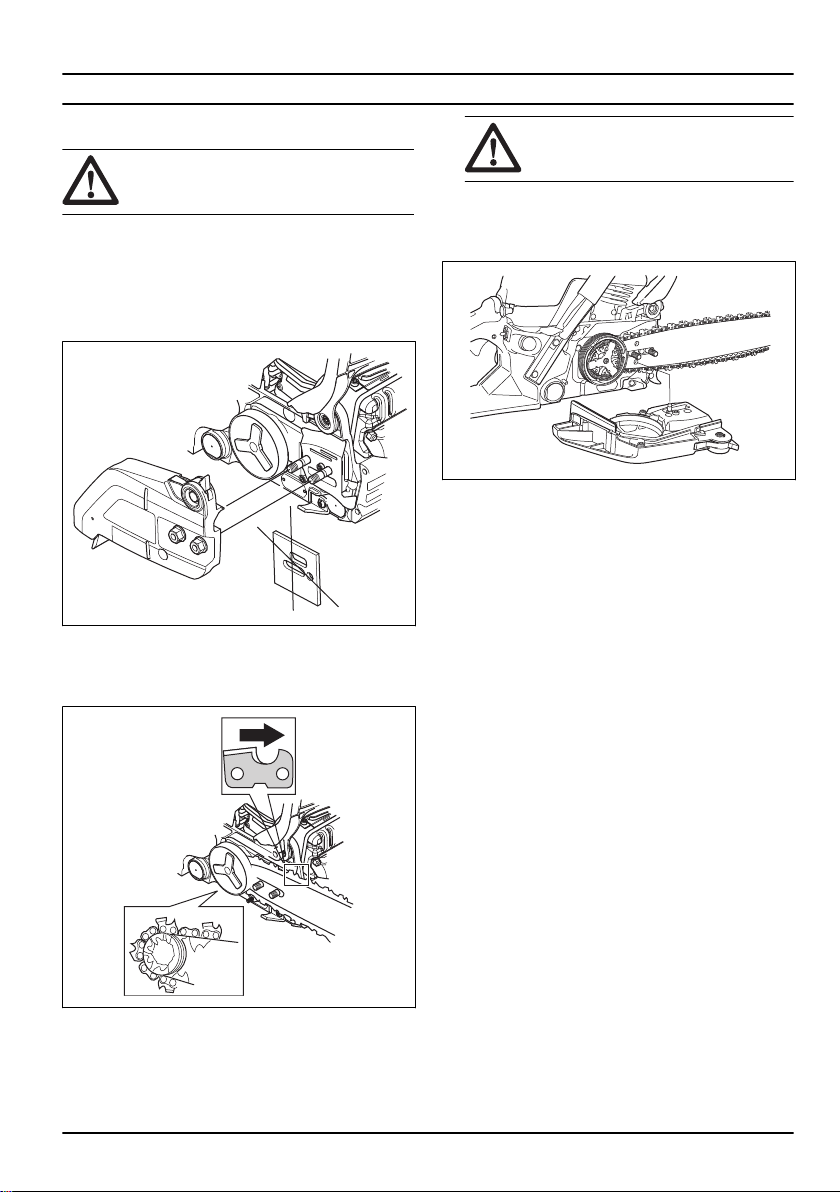
Start/stop switch
Use the start/stop switch to stop the engine.
Muffler
WARNING: The muffler becomes very hot
during/after operation and at idle speed.
There is a risk of fire, especially when you
956 - 003 -
for information
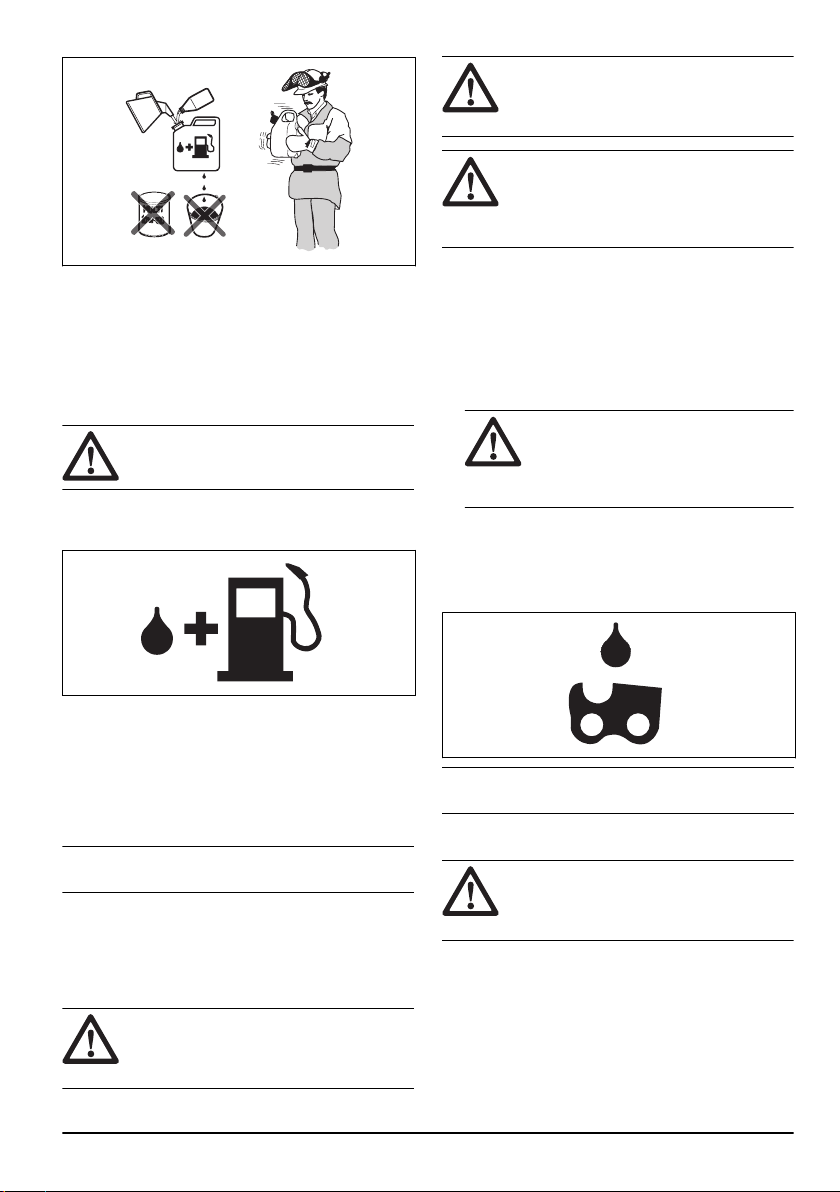
Fuel safety
WARNING:
that follow before you use the product.
• Make sure there is plenty of ventilation when
refuelling or mixing fuel (petrol and two-stroke oil).
• Fuel and fuel vapour are highly flammable and can
cause serious injury when inhaled or allowed to
come in contact with the skin. For this reason
observe caution when handling fuel and make sure
there is adequate ventilation.
• Take care when handling fuel and chain oil. Be
aware of the risks of fire, explosion and those
associated with inhalation.
• Do not smoke and do not place any hot objects in
the vicinity of fuel.
• Always stop the engine and let it cool for a few
minutes before refuelling.
• When refuelling, open the fuel cap slowly so that any
excess pressure is released gently.
• Tighten the fuel cap carefully after refuelling.
• Never refuel the machine while the engine is
running.
Read the warning instructions
7
Page 8
• Always move the product at least 3 m (10 ft) away
from the refuelling area and fuel source before
starting.
After refuelling, there are some situations where you
must never start the product:
• If you have spilled fuel or chain oil on the product.
Wipe off the spillage and allow remaining fuel to
evaporate.
• If you have spilled fuel on yourself or on your
clothes. Change your clothes and wash any part of
your body that has come in contact with fuel. Use
soap and water.
• If the product leaks fuel. Regularly do a check for
leaks from the fuel tank, fuel cap and fuel lines.
Safety instructions for maintenance
WARNING: Read the warning instructions
that follow before you do maintenance on
the product.
• Use protective gloves when you use or do
maintenance on the saw chain. A saw chain that
does not move can also cause injuries.
• Keep the cutting teeth correctly sharpened. Obey the
instructions and use the recommended file gauge. A
saw chain that is damaged or incorrectly sharpened
increases the risk of accidents.
• Keep the correct depth gauge setting. Obey the
instructions and use the recommended depth gauge
setting. Too large depth gauge setting increases the
risk of kickback.
• Make sure that the saw chain has the correct
tension. If the saw chain is not tight against the guide
bar, the saw chain can derail. An incorrect saw chain
tension increases wear on the guide bar, saw chain
and chain drive sprocket. Refer to
tension of the saw chain on page 30
To adjust the
.
• Do only the maintenance and servicing given in this
operator's manual. Let professional servicing
personnel do all other servicing and repairs.
• Regularly do the safety checks, maintenance and
service instructions given in this manual. Regular
maintenance increases the life of the product and
decreases the risk of accidents. Refer to
Maintenance on page 21
• If the safety checks in this operator's manual is not
approved after you do maintenance, speak to your
servicing dealer. We guarantee that there are
professional repairs and servicing available for your
product.
for instructions.
Safety instructions for the cutting equipment
WARNING:
that follow before you use the product.
• Only use the guide bar/saw chain combinations and
filing equipment that we recommend. Refer to
Accessories on page 35
8
Read the warning instructions
for instructions.
• Do maintenance on the cutting equipment regularly
and keep it correctly lubricated. If the saw chain is
not correctly lubricated, the risk of wear on the guide
bar, saw chain and chain drive sprocket increases.
956 - 003 -
Page 9
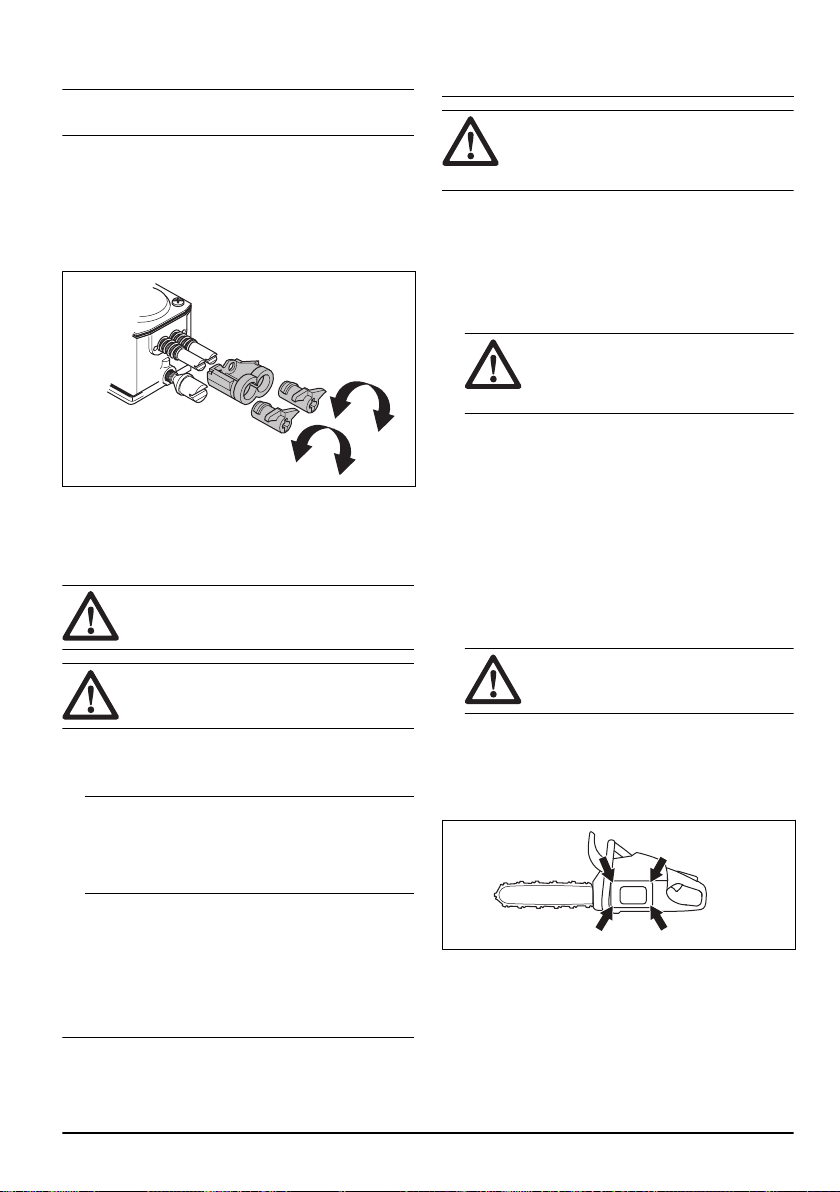
Assembly
A
Introduction
WARNING: Read and understand the safety
chapter before you assemble the product.
To assemble the guide bar and saw chain
1. Disengage the chain brake.
2. Remove the bar nuts and the clutch cover. Remove
the transportation guard (A).
3. Assemble the guide bar onto the bar bolt. Move the
guide bar to its most rear position.
4. Install the saw chain correctly around the drive
sprocket and put it in the groove on the guide bar.
WARNING: Always use protective
gloves when you assemble the saw
chain.
5. Make sure that the edges of the cutters point forward
on the top edge of the guide bar.
6. Align the hole in the guide bar with the chain adjuster
pin and install the clutch cover.
7. Tighten the bar nut finger tight.
8. Tighten the saw chain. Refer to
of the saw chain on page 30
9. Tighten the bar nuts.
To adjust the tension
for instructions.
956 - 003 - 9
Page 10
Operation
7
10
9
1
2
3
6,8
4
Introduction
WARNING: Read and understand the safety
chapter before you use the product.
To do a function check before you use the product
1. Make sure that the chain brake operates correctly
and that it is not damaged.
2. Make sure that the right hand guard is not damaged.
3. Make sure that the throttle lockout operates correctly
and that it is not damaged.
4. Make sure that the start/stop switch operates
correctly and that it is not damaged.
5. Make sure that there is no oil on the handles.
6. Make sure that the vibration damping system
operates correctly and that it is not damaged.
7. Make sure that the muffler is correctly attached and
that it is not damaged.
8. Make sure that all parts of the product are correctly
attached and not damaged or missing.
9. Make sure that the chain catcher is correctly
attached.
10. Do a check of the saw chain tension.
Fuel
This product has a two-stroke engine.
CAUTION: Incorrect type of fuel can result in
engine damage. Use a mixture of gasoline
and two-stroke oil.
To mix fuel
Gasoline
• Use good quality unleaded gasoline with a maximum
of 10% ethanol contents.
CAUTION: Do not use gasoline with an
octane grade less than 90 RON/87 AKI.
Use of a lower octane grade can cause
engine knocking, which causes engine
damages.
• We recommend that you use gasoline of a higher
octane grade for work with continuously high rpm.
Two-stroke oil
• For best results and performance use Husqvarna
two-stroke oil.
• If Husqvarna two-stroke oil is not available, use a
two-stroke oil of good quality for air-cooled engines.
Speak to your servicing dealer to select the correct
oil.
CAUTION: Do not use two-stroke oil for
water-cooled outboard engines, also
referred to as outboard oil. Do not use oil
for four-stroke engines.
To mix gasoline and two-stroke oil
Gasoline, liter Two-stroke oil,
liter
2% (50:1)
5 0.10
10 0.20
15 0.30
20 0.40
CAUTION: Small errors can influence the
ratio of the mixture drastically when you mix
small quantities of fuel. Measure the quantity
of oil carefully and make sure that you get
the correct mixture.
Premixed fuel
• Use Husqvarna premixed alkylate fuel of a good
quality, for best performance and extension of the
engine life. This fuel contains less harmful chemicals
compared to regular fuel, which decreases harmful
exhaust fumes. The quantity of remains after
combustion is lower with this fuel, which keeps the
components of the engine more clean.
10 956 - 003 -
Page 11
WARNING: The saw chain can break if the
lubrication of the cutting equipment is not
sufficient. Risk of serious injury or death to
the operator.
WARNING: This product has a function that
lets the fuel run out before the chain oil. Use
the correct chain oil for this function to
operate correctly. Speak to your servicing
dealer when you select your chain oil.
1. Fill half the quantity of gasoline in a clean container
for fuel.
2. Add the full quantity of oil.
3. Shake the fuel mixture.
4. Add the remaining quantity of gasoline to the
container.
5. Carefully shake the fuel mixture.
CAUTION: Do not mix fuel for more than 1
month at a time.
To fill the fuel tank
1. Clean the area around the fuel tank cap.
2. Shake the container and make sure that the fuel is
fully mixed.
3. Remove the fuel tank cap and fill the fuel tank.
4. Tighten the fuel tank cap carefully.
5. Move the product 3 m/10 ft or more away from the
refueling area and fuel source before you start the
engine.
To see where the fuel tank is on your product,
Note:
refer to
Product overview on page 2
.
To do a run-in
• During the first 10 hours of operation, do not apply
full throttle without load for extended periods.
To use the correct chain oil
WARNING:
cause injury to you and the environment.
Waste oil also causes damage to the oil
pump, the guide bar and the saw chain.
Do not use waste oil, which can
• Use Husqvarna chain oil for maximum saw chain life
and to prevent negative effects on the environment.
If Husqvarna chain oil is not available, we
recommend you to use a standard chain oil.
• Use a chain oil with good adherence to the saw
chain.
• Use a chain oil with correct viscosity range that
agrees with the air temperature.
CAUTION: If the oil is too thin, it runs out
before the fuel. In temperatures below
0°C/32°F some chain oils become too
thick, which can cause damage to the oil
pump components.
• Use the recommended cutting equipment. Refer to
Accessories on page 35
• Remove the cap to the chain oil tank.
• Fill the chain oil tank with chain oil.
• Attach the cap carefully.
To see where the chain oil tank is on you product,
Note:
refer to
Product overview on page 2
.
.
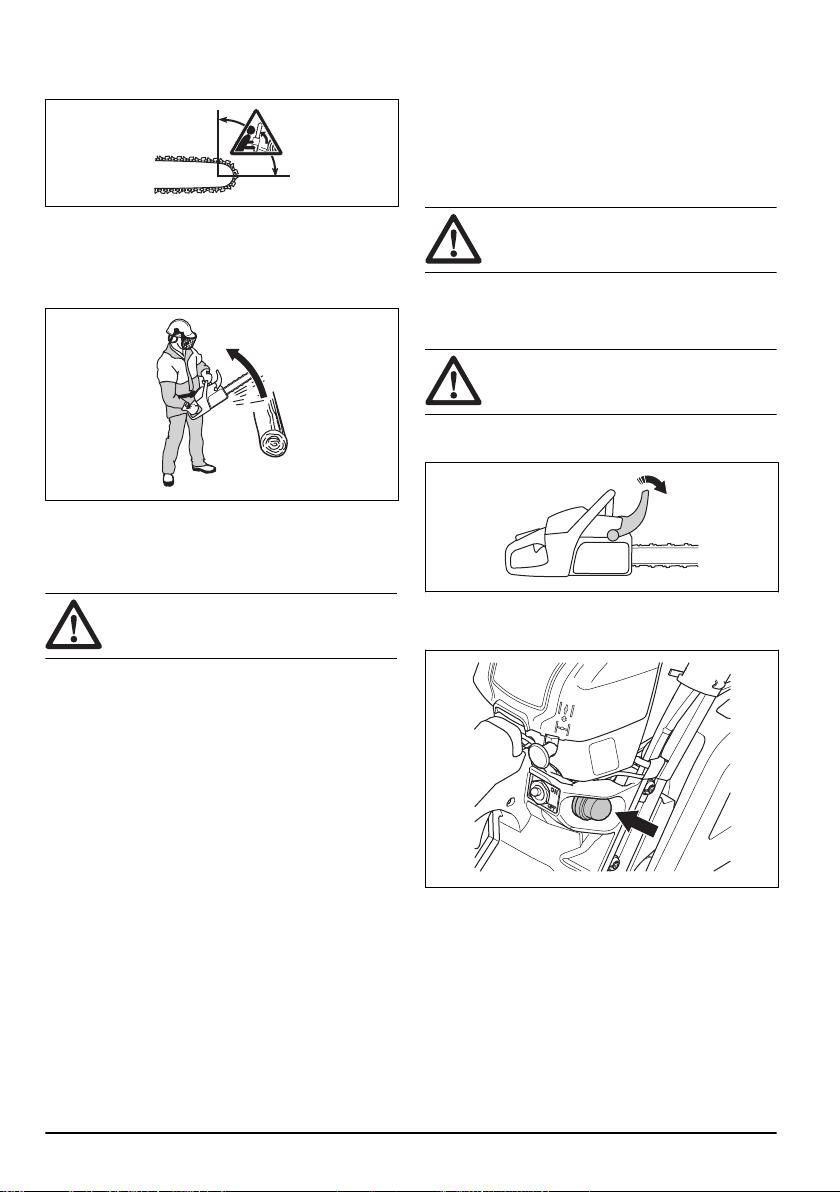
Kickback information
WARNING:
injury or death to the operator or others. To
decrease the risk you must know the causes
of kickback and how to prevent them.
A kickback occurs when the kickback zone of the guide
bar touches an object. A kickback can occur suddenly
A kickback can cause serious
956 - 003 -
11
Page 12
and with large force, which throws the product in the
direction of the operator.
Kickback always occurs in the cutting plane of the guide
bar. Usually, the product is thrown against the operator
but can also move in a different direction. It is how you
use the product when the kickback occurs that causes
the direction of the movement.
A smaller bar tip radius decreases the force of the
kickback.
Use a low kickback saw chain to decrease the effects of
kickback. Do not let the kickback zone touch an object.
WARNING: No saw chain fully prevents
kickback. Always obey the instructions.
Will the chain brake always protect me from injury
•
during a kickback?
No. The chain brake must operate correctly to give
protection. The chain brake must also be engaged
during a kickback to stop the saw chain. If you are
near the guide bar, it is possible that the chain brake
does not have time to stop the saw chain before it
hits you.
WARNING: Only you and the correct
working technique can prevent kickbacks.
To start the product
To prepare to start with a cold engine
WARNING: The chain brake must be
engaged when the product is started to
decrease the risk of injury.
1. Move the front hand guard forward to engage the
chain brake.
2. Push the air purge bulb approximately 6 times or
until fuel starts to fill the bulb. It is not necessary to
fill the air purge bulb fully.
Common questions about kickback
• Will the hand always engage the chain brake during
a kickback?
No. It is necessary to use some force to push the
front hand guard forward. If you do not use the force
necessary, the chain brake will not be engaged. You
must also hold the handles of the product stable with
two hands during work. If a kickback occurs, it is
possible that the chain brake does not stop the saw
chain before it touches you. There are also some
positions in which your hand can not touch the front
hand guard to engage the chain brake. An example
of this is in the felling position.
• Will the inertia release mechanism always engage
the chain brake during kickback?
No. First, the chain brake must operate correctly.
Refer to
To do a check of the chain brake on page
23
for instructions about how to do a check of the
chain brake. We recommend you to do this each
time before you use the product. Second, the force
of the kickback must be large to engage the chain
brake. If the chain brake is too sensitive, it can
engage during rough operation.
12
956 - 003 -
Page 13

3. Set the choke to choke position.
4. Continue to
more instructions.
To start the product on page 13
for
To prepare start with a warm engine
WARNING: The chain brake must be
engaged when the product is started to
decrease the risk of injury.
1. Move the front hand guard forward to engage the
chain brake.
To start the product
WARNING: You must keep your feet in a
stable position when you start the product.
WARNING: If the saw chain rotates at idle
speed, speak to your servicing dealer and
do not use the product.
1. Put the product on the ground.
2. Put your left hand on the front handle.
3. Put your right foot into the footgrip on the rear
handle.
4. Pull the starter rope handle slowly with your right
hand until you feel resistance.
WARNING: Do not twist the starter rope
around your hand.
5. Pull the starter rope handle quickly and with force.
2. Push the air purge bulb approximately 6 times or
until fuel starts to fill the bulb. It is not necessary to
fill the air purge bulb fully.
Do not set the choke to the choke position.
Note:
3. Continue to
more instructions.
956 - 003 -
To start the product on page 13
for
CAUTION: Do not pull the starter rope to
full extension and do not let go of the
starter rope handle. This can cause
damage to the product.
a) If you start your product with a cold engine, pull
the starter rope handle until the engine fires.
You can identify when the engine fires
Note:
through a "puff" sound.
b) Disengage the choke.
6. Pull the starter rope handle until the engine starts.
7. Quickly disengage the throttle trigger lockout to set
the product to idle speed.
13
Page 14
8. Move the front hand guard rearward to disengage
the chain brake.
9. Use the product.
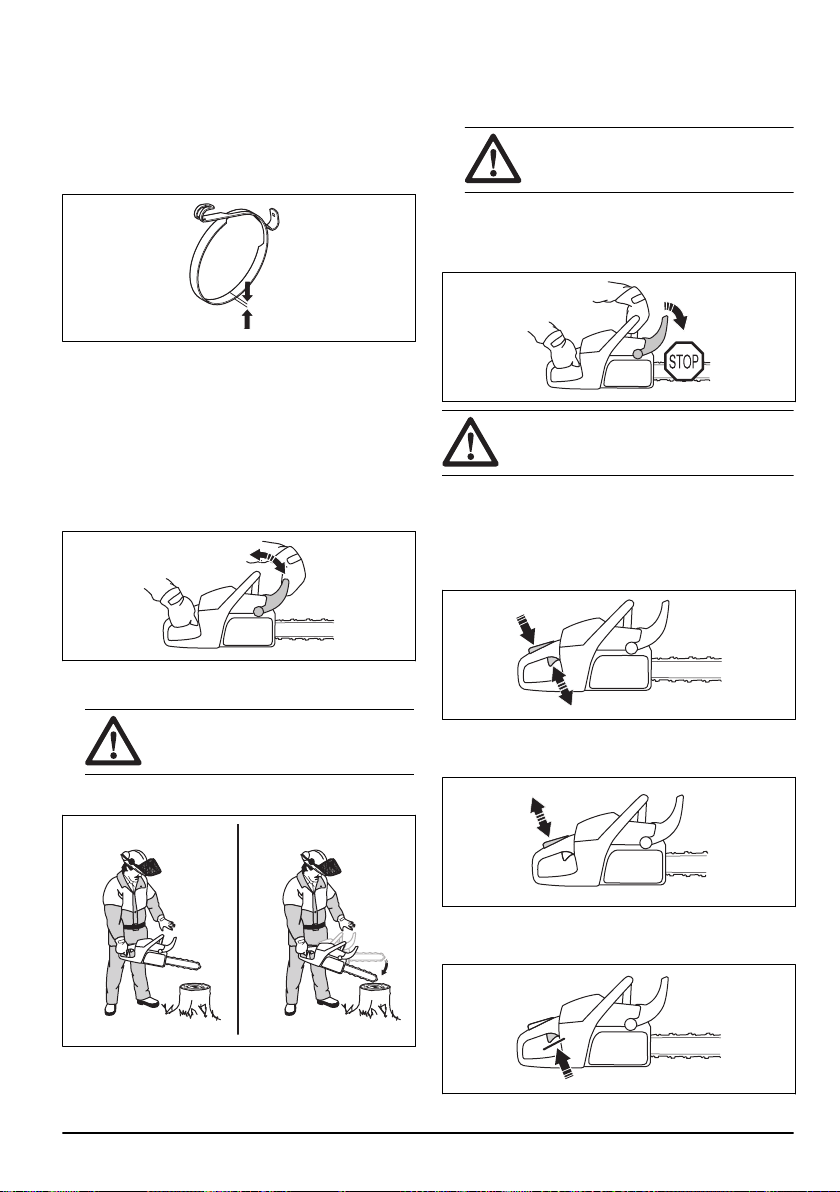
To stop the product
• Push the start/stop switch to position 0 to stop the
engine.
Pull stroke and push stroke
You can cut through wood with the product in 2 different
positions.
• To cut on the pull stroke is when you cut with the
bottom of the guide bar. The saw chain pulls through
the tree when you cut. In this position you have
better control of the product and the position of the
kickback zone.
• To cut on the push stroke is when you cut with the
top of the guide bar. The saw chain pushes the
product in the direction of the operator.
WARNING: If the saw chain is caught in
the trunk, the product can be pushed at
you. Hold the product tightly and make
sure that the kickback zone of the guide
bar does not touch the tree and causes a
kickback.
To use the cutting technique
WARNING: Use full throttle when you cut
and decrease to idle speed after each cut.
CAUTION: Engine damage can occur if the
engine runs for too long at full throttle
without load.
1. Put the trunk on a saw horse or runners.
WARNING: Do not cut trunks in a pile.
That increases the risk of kickback and
can result in serious injury or death.
2. Remove the cut pieces from the cutting area.
14
956 - 003 -
Page 15

WARNING: Cut pieces in the cutting
1.
2.
1.
2.
1.
2.
area increase the risk of kickback and
that you can not keep your balance.
To cut a trunk on the ground
1. Cut through the trunk on the pull stroke. Keep full
throttle but be prepared for sudden accidents.
WARNING: Make sure that the saw
chain does not touch the ground when
you complete the kerf.
2. Cut approximately ⅔ through the trunk and then
stop. Turn the trunk and cut from the opposite side.
To cut a trunk that has support on one end
WARNING:
not break during cutting. Obey the
instructions below.
Make sure that the trunk does
To cut a trunk that has support on two ends
WARNING: Make sure that the saw chain
does not get caught in the trunk during
cutting. Obey the instructions below.
1. Cut on the pull stroke approximately ⅓ through the
trunk.
2. Cut through the remaining part of the trunk on the
push stroke to complete the cut.
WARNING: Stop the engine if the saw chain
gets caught in the trunk. Use a lever to open
up the kerf and remove the product. Do not
try to pull the product out by hand. This can
result in injury when the product suddenly
breaks free.
To use the limbing technique
For thick branches, use the cutting technique.
Note:
Refer to
To use the cutting technique on page 14
.
WARNING: There is a high accident risk
when you use the limbing technique. Refer
to
Kickback information on page 11
instructions how to prevent kickback.
1. Cut on the push stroke approximately ⅓ through the
trunk.
2. Cut through the trunk on the pull stroke until the two
kerfs touch.
956 - 003 - 15
WARNING: Cut limbs one by one. Be careful
when you remove small limbs and do not cut
bushes or many small limbs at the same
time. Small limbs can get caught in the saw
chain and prevent safe operation of the
product.
for
Page 16

Note: Cut the limbs piece by piece if it is necessary.
1
2
3
1. Remove the limbs on the right side of the trunk.
a) Keep the guide bar on the right side of the trunk
and keep the body of the product against the
trunk.
b) Select the applicable cutting technique for the
tension in the branch.
b) Cut on the push stroke.
3. Remove the limbs on the left side of the trunk.
a) Select the applicable cutting technique for the
tension in the branch.
WARNING: If you are not sure about
how to cut the branch, speak to a
professional chainsaw operator
before you continue.
2. Remove the limbs on the top of the trunk.
a) Keep the product on the trunk and let the guide
bar move along the trunk.
Refer to
To cut trees and branches that are in tension on
page 20
for instructions on how to cut branches that
are in tension.
WARNING: If you are not sure about
how to cut the branch, speak to a
professional chainsaw operator
before you continue.
To use the tree felling technique
WARNING:
fell a tree. If possible, engage in a training
course in chainsaw operation. Speak to an
operator with experience for more
knowledge.
16 956 - 003 -
You must have experience to
Page 17

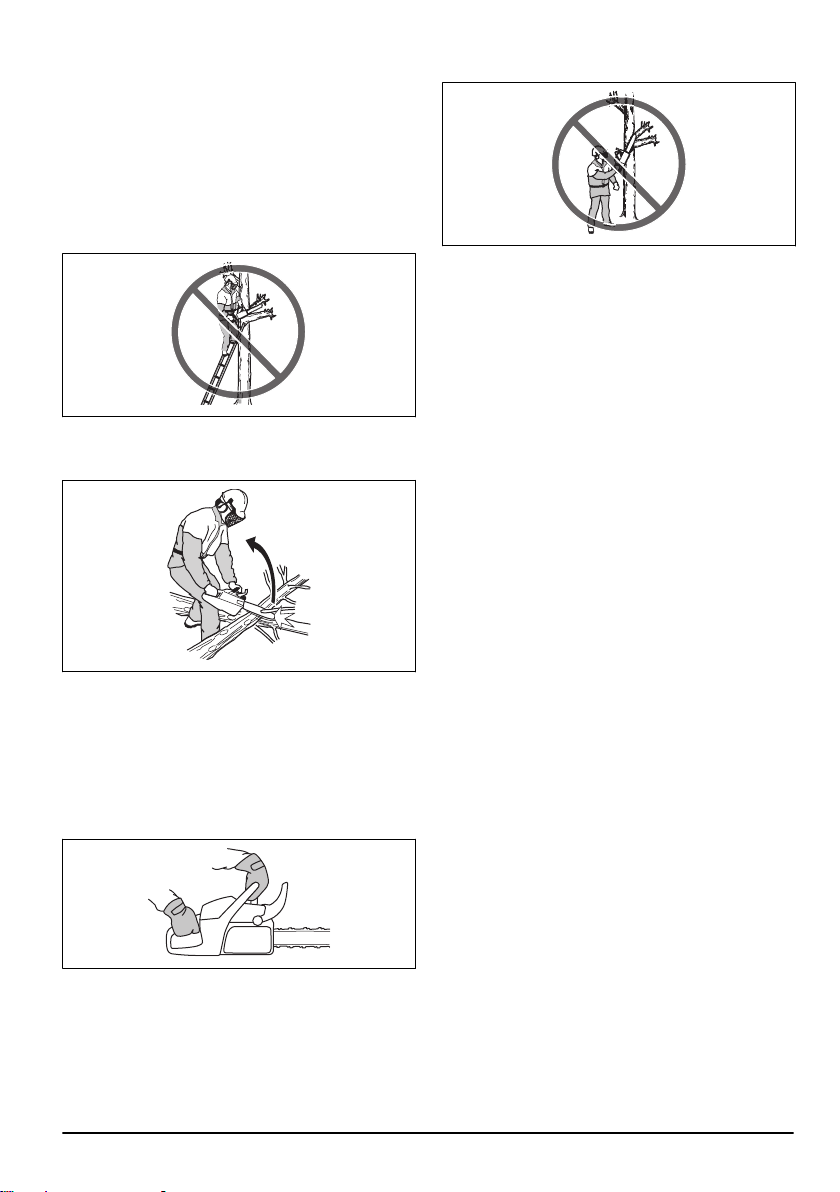
To keep a safe distance
1. Make sure that persons around you keep a safe
distance at a minimum of 2 1/2 tree lengths.
2. Make sure that no person is in the risk zone before
or during felling.
To calculate the felling direction
1. Examine in which direction it is necessary for the
tree to fall. The goal is to fell it in a position where
you can limb and cut the trunk easily. It is also
important that you are stable on your feet and can
move about safely.
WARNING:
possible to fell the tree in its natural
direction, fell the tree in a different
direction.
2. Examine the natural fall direction of the tree. For
example the tilt and bend of the tree, wind direction,
the location of the branches and weight of snow.
3. Examine if there are obstacles, for example other
trees, power lines, roads and/or buildings around.
4. Look for signs of damage and rot in the stem.
WARNING: Rot in the stem can mean a
risk that the tree falls before you
complete the cutting.
5. Make sure the tree has no damaged or dead
branches that can break off and hit you during
felling.
If it is dangerous or not
6. Do not let the tree fall onto a different standing tree.
It is dangerous to remove a caught tree and there is
a high accident risk. Refer to
on page 19
.
WARNING: During critical felling
operations, lift your hearing protection
immediately when the sawing is
complete. It is important that you hear
sounds and warning signals.
To free a trapped tree
To clear the trunk and prepare your path of retreat
Cut off all branches from your shoulder height and
down.
1. Cut on the pull stroke from the top down. Make sure
that the tree is between you and the product.
2. Remove undergrowth from the work area around the
tree. Remove all cut off material from the work area.
3. Do a check of the area for obstacles such as stones,
branches and holes. You must have a clear path of
retreat when the tree starts to fall. Your path of
retreat must be approximately 135 degrees away
from the felling direction.
1. The danger zone
2. The path of retreat
3. The felling direction
956 - 003 -
17
Page 18
1
2
2
1
3
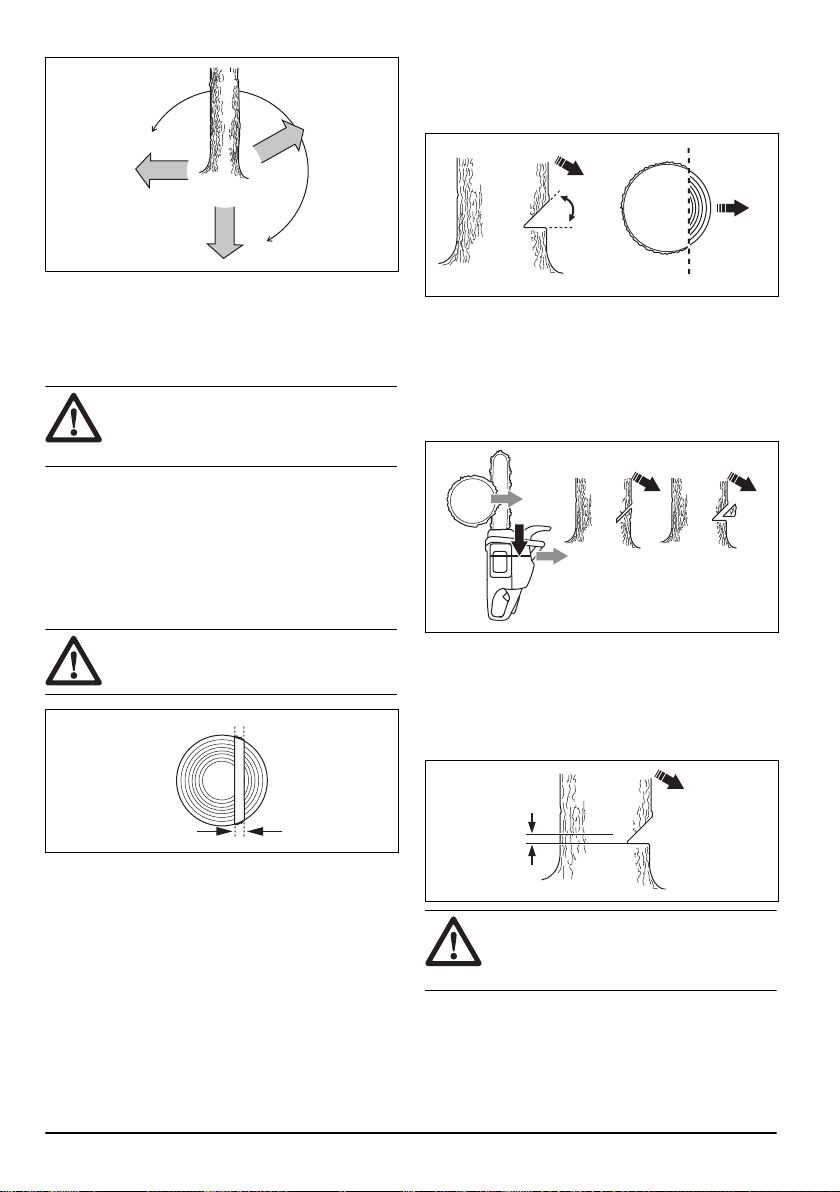
To make the directional cuts
45º-70º
2
1
1. Make the directional cuts ¼ of the diameter of the
tree. Make a 45°-70° angle between the top
directional cut and bottom directional cut.
To fell a tree
Husqvarna recommends you to make the directional
cuts and then use the safe corner method when you fell
a tree. The safe corner method helps you to make a
correct felling hinge and control the felling direction.
WARNING: Do not fell trees with a diameter
that is more than two times larger than the
guide bar length. For this, you must have
special training.
The felling hinge
The most important procedure during tree felling is to
make the correct felling hinge. With a correct felling
hinge, you control the felling direction and make sure
that the felling procedure is safe.
The thickness of the felling hinge must be equal and a
minimum of 10% of the tree diameter.
WARNING: If the felling hinge is incorrect or
too thin, you have no control of the felling
direction.
a) Make the top directional cut. Align the felling
direction mark (1) of the product with the felling
direction of the tree (2). Stay behind the product
and keep the tree on your left side. Cut with a
pull stroke.
b) Make the bottom directional cut. Make sure that
the end of the bottom directional cut is at the
same point as the end of the top directional cut.
2. Make sure that the bottom directional cut is
horizontal and at a 90° angle to the felling direction.
To use the safe corner method
The felling cut must be made slightly above the
directional cut.
WARNING:
guide bar tip. Start to cut with the lower
section of the guide bar tip as you make a
bore cut into the trunk.
Be careful when you cut with the
18 956 - 003 -
Page 19
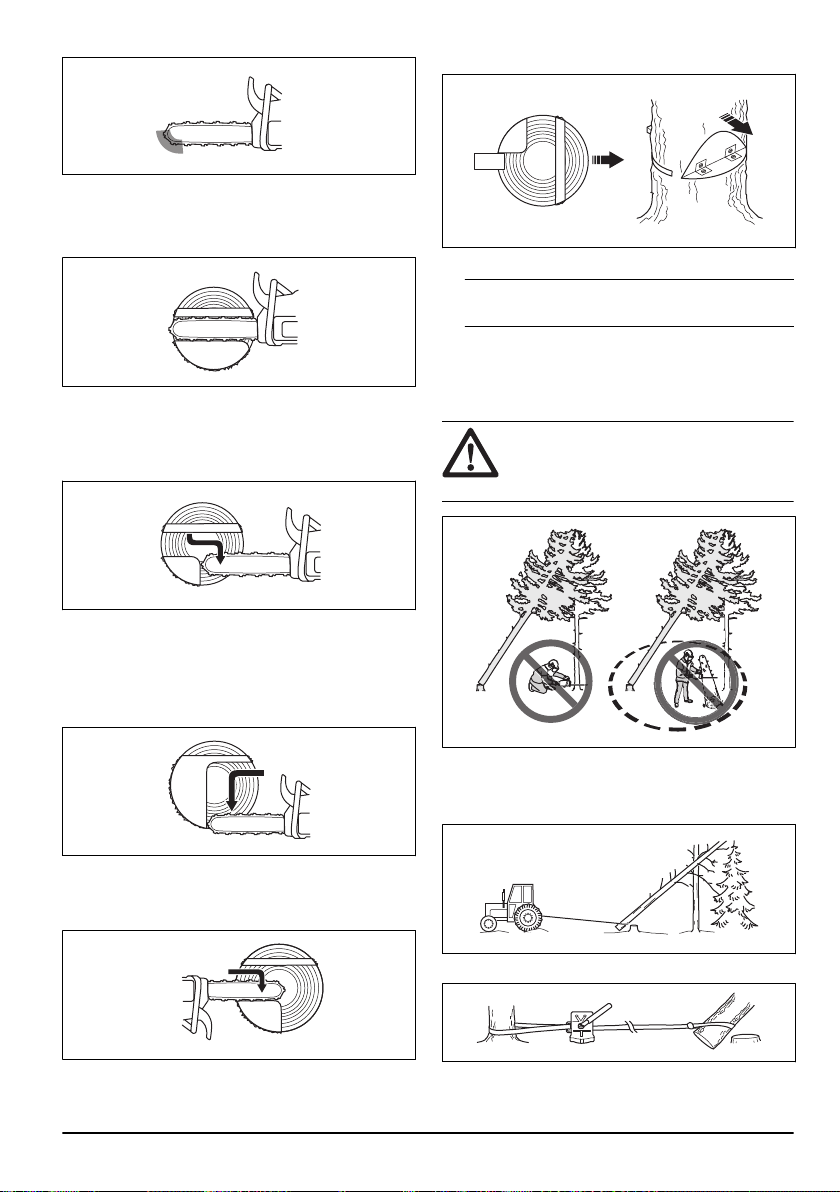
1. If the usable cutting length is longer than the tree
diameter, do these steps (a-d).
a) Make a bore cut straight into the trunk to
complete the felling hinge width.
b) Cut on the pull stroke until ⅓ of the trunk is left.
c) Pull the guide bar 5-10 cm/2-4 in rearward.
d) Cut through the remaining of the trunk to
complete a safe corner that is 5-10 cm/2-4 in
wide.
2. If the usable cutting length is shorter than the tree
diameter, do these steps (a-d).
a) Make a bore cut straight into the trunk. The bore
cut must extend 3/5 of the tree diameter.
b) Cut on the pull stroke through the remaining
trunk.
3. Put a wedge in the kerf straight from behind.
4. Cut off the corner to make the tree fall.
Note: If the tree does not fall, hit the wedge until it
does.
5. When the tree starts to fall, use the path of retreat to
move away from the tree. Move a minimum of 5
m/15 ft away from the tree.
To free a trapped tree
WARNING: It is very dangerous to remove a
trapped tree and there is a high accident
risk. Keep out of the risk zone and do not try
to fell a trapped tree.
c) Cut straight into the trunk from the other side of
the tree to complete the felling hinge.
d) Cut on the push stroke, until ⅓ of the trunk is left,
to complete the safe corner.
956 - 003 -
The safest procedure is to use one of the following
winches:
• Tractor-mounted
• Portable
19
Page 20

To cut trees and branches that are in tension
1
2
1. Figure out which side of the tree or branch that is in
tension.
2. Figure out where the point of maximum tension is.
3. Examine which is the safest procedure to release the
tension.
Note: In some situations the only safe procedure is
to use a winch and not your product.
4. Keep a position where the tree or branch can not hit
you when the tension is released.
5. Make one or more cuts of sufficient depth necessary
to decrease the tension. Cut at or near the point of
maximum tension. Make the tree or branch break at
the point of maximum tension.
7. Continue to cut more into the tree until the tree/
branch bends and the tension is released.
8. Cut the tree/branch from the opposite side of the
bend, after the tension is released.
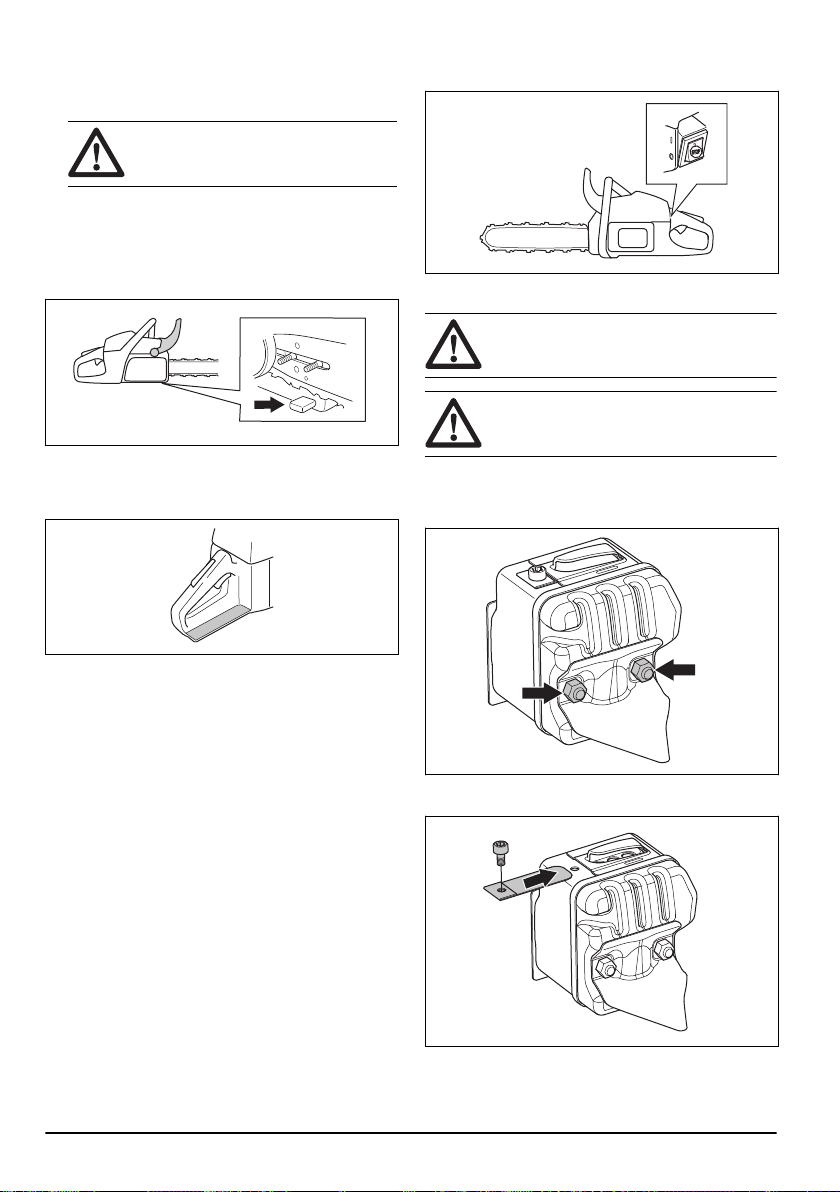
To use the product in cold weather
CAUTION: Snow and cold weather can
cause operation problems. Risk of too low
engine temperature or ice on the air filter
and the carburetor.
1. In temperatures below 0°C/32°F, move the plug from
position 1 to position 2.
WARNING: Do not cut straight through a
tree or branch that is in tension.
WARNING: Be very careful when you
cut a tree that is in tension. There is a
risk that the tree moves quickly before or
after you cut it. Serious injury can occur
if you are in an incorrect position or if
you cut incorrectly.
6. If you must cut across tree/branch, make 2 to 3 cuts,
1 in. apart and with a depth of 2 in.
20 956 - 003 -
Page 21
2. For temperatures below -5°C/23°F or in conditions
with snow, a winter cover is available. Assemble the
winter cover on the starter housing. The winter cover
decreases the flow of cool air and keeps snow away
from the carburetor space.
CAUTION: Remove the winter cover if the
temperature increases above -5°C/23°F. Put
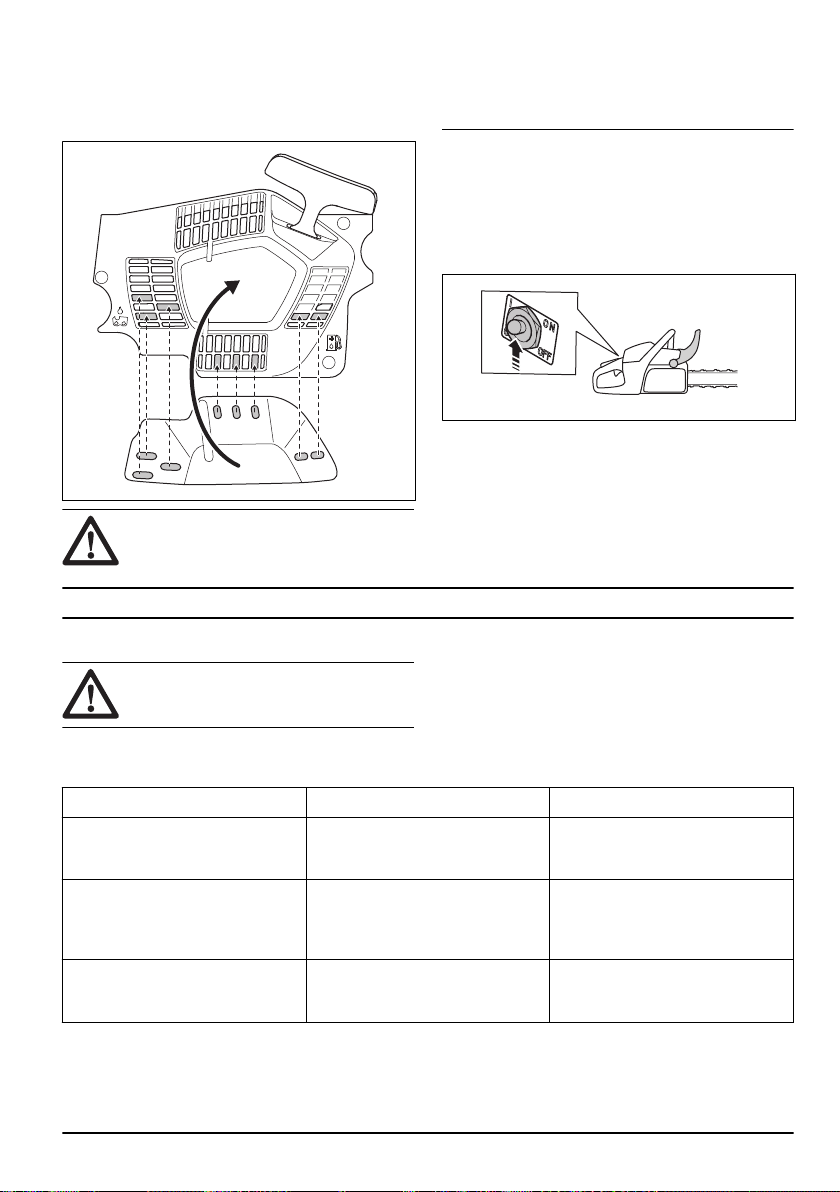
Maintenance
Introduction
the winter plug in in position 1 if the
temperature increases above 0°C/32°F. Risk
of too high engine temperature and damage
to the engine.
Heated handles (543 XPG)
On models with the designation "G", the front and rear
handles have electrical heating coils. A generator
supplies power to the heating coils.
Push the switch to engage the heat in the handles. The
heat is on when you can see the red mark on the switch.
Electrical carburetor heating (543 XPG)
Adjustment of the carburetor heating is done electrically
through a thermostat. This keeps the correct carburetor
temperature and prevents ice in the carburetor.
WARNING: Read and understand the safety
chapter before you do maintenance on the
product.
Maintenance schedule
Daily maintenance Weekly maintenance Monthly maintenance
Clean the external parts of the product and make sure that there is no oil
on the handles.
Do a check of the throttle trigger and
throttle trigger lockout. Refer to
a check of the throttle trigger and
throttle trigger lockout on page 23
Make sure that there is no damage
on the vibration damping units.
956 - 003 - 21
Clean the cooling system. Refer to
To clean the cooling system on page
32
.
Do a check of the starter, starter rope
To do
and return spring.
.
Lubricate the needle bearing. Refer
to
To lubricate the needle bearing on
page 30
.
Do a check of the brake band. Refer
to
To do a check of the brake band
on page 23
Do a check of the clutch centre,
clutch drum and clutch spring.
Clean the spark plug. Refer to
.
To do
a check of the spark plug on page
27
.
Page 22

Daily maintenance Weekly maintenance Monthly maintenance
Clean and do a check of the chain
brake. Refer to
To do a check of the
chain brake on page 23To do a
Remove burrs from the edges of the
guide bar. Refer to
the guide bar on page 31
To do a check of
.
Clean the external parts of the carburettor.
check of the front hand guard and the
chain brake activation on page 23
Do a check of the chain catcher. Refer to
To do a check of the chain
catcher on page 24
Turn the guide bar, do a check of the
lubrication hole and clean the groove
in the guide bar. Refer to
.
check of the guide bar on page 31
Make sure that the guide bar and
saw chain are getting sufficient oil.
Do a check of the saw chain. Refer to
To do a
.
Clean or replace the spark arrestor
mesh on the muffler.
Clean the carburetor area. Do a check of all cables and connec-
.
Clean or replace the air filter. Refer
to
To clean the air filter on page 27
Clean between the cylinder fins. Empty the oil tank.
Do a check of the fuel filter and the
fuel hose. Replace if necessary.
tions.
Empty the fuel tank.
.
To examine the cutting equipment on
page 31
.
Sharpen the saw chain and do a
check of its tension. Refer to
sharpen the saw chain on page 27
Do a check of the chain drive sprocket. Refer to
To do a check of the rim
sprocket on page 30
Clean the air intake on the starter.
Make sure that nuts and screws are
tightened.
Do a check of the stop switch. Refer
to
To do a check of the start/stop
switch on page 24
Make sure that these are no fuel
leaks from the engine, tank or fuel
lines.
Make sure that the saw chain does
not rotate when the engine is at idle
speed.
Make sure that there is no damage
on the right hand guard.
Make sure that the muffler is correctly attached, has no damages and
that no parts of the muffler are missing.
.
To
.
.
22 956 - 003 -
Page 23
Maintenance and checks of the safety devices on the product
To do a check of the brake band
1. Use a brush to remove wood dust, resin and dirt
from the chain brake and clutch drum. Dirt and wear
can decrease the function of the brake.
2. Do a check of the brake band. The brake band must
be at a minimum of 0.6 mm/0.024 in thick at its
thinnest point.
To do a check of the front hand guard and the chain brake activation
1. Make sure that the front hand guard is not damaged
and that there are no defects, such as cracks.
2. Make sure that the front hand guard moves freely
and that it is attached safely to the clutch cover.
To do a check of the chain brake
1. Start the product. Refer to
page 12
for instructions.
WARNING: Make sure that the saw
chain does not touch the ground or other
objects.
2. Hold the product tightly.
3. Apply full throttle and tilt your left wrist against the
front hand guard to engage the chain brake. The
saw chain must stop immediately.
WARNING: Do not let go of the front handle.
To start the product on
To do a check of the throttle trigger and throttle trigger lockout
1. Make sure that the throttle trigger and throttle trigger
lockout move freely and that the return spring works
correctly.
3. Hold the product with 2 hands above a stump or
other stable surface.
WARNING: The engine must be off.
4. Let go of the front handle and let the guide bar tip fall
against the stump.
5. Make sure that the chain brake engages as the
guide bar tip hits the stump.
956 - 003 -
2. Press down the throttle trigger lockout and make
sure that it goes back to its initial position when you
release it.
3. Make sure that the throttle trigger is locked at the
idle position when the throttle trigger lockout is
released.
23
Page 24
4. Start the product and apply full throttle.
5. Release the throttle trigger and make sure that the
saw chain stops and stays stationary.
WARNING: If the saw chain rotates
when the throttle trigger is in the idle
position, speak to your servicing dealer.
To do a check of the chain catcher
1. Make sure that there is no damage on the chain
catcher.
2. Make sure that the chain catcher is stable and
attached to the body of the product.
To do a check of the right hand guard
• Make sure that the right hand guard is not damaged
and that there are no defects, such as cracks.
2. Push the start/stop switch to the STOP position. The
engine must stop.
To do a check of the muffler
WARNING: Do not use a product that has a
defective muffler or a muffler that is in bad
condition.
WARNING: Do not use a product if the spark
arrestor mesh on the muffler is missing or
defective.
1. Examine the muffler for damages and defects.
2. Make sure that the muffler is correctly attached to
the product.
To do a check of the vibration damping system
1. Make sure that there are no cracks or deformation
on the vibration damping units.
2. Make sure that the vibration damping units are
correctly attached to the engine unit and handle unit.
Refer to
Product overview on page 2
about where the vibration damping system is on your
product.
for information
To do a check of the start/stop switch
1. Start the engine.
24
3. If your product has a special spark arrestor mesh,
clean the spark arrestor mesh weekly.
4. Replace a damaged spark arrestor mesh.
956 - 003 -
Page 25
Carburetor with adjustment limitations
1/2
1/2
H
L
Note: If you do not know which carburetor type that you
have on your product, speak to your servicing dealer.
Carburetor adjustment
Because of environmental and emissions laws, your
product has adjustment limitations on the carburetor
adjuster screws. This decreases the harmful exhaust
fumes from your product. You can only turn the
adjustment screws maximum ½ turn.
Basic adjustments and run-in
The basic carburetor adjustments are done at the
factory. For the recommended idle speed, refer to
Technical data on page 34
CAUTION: Do not operate the product at too
high speed during the first 10 hours of
operation.
.
must also be safely below the speed at which the saw
chain starts to rotate.
WARNING: If the saw chain does not stop
when you turn the idle speed screw, speak
to your servicing dealer. Do not use the
product until it is correctly adjusted.
To adjust the high speed needle (H)
The engine is adjusted at the factory to operate at sea
level. At higher altitudes, in different weather or different
temperatures it can be necessary to adjust the high
speed needle.
• Turn the high speed needle to make adjustments.
CAUTION: Do not turn the high speed
needle screw across the adjustment
limitation stop. This can cause damage
to the piston and the cylinder.
To examine if the carburetor is correctly adjusted
• Make sure that the product has the correct
acceleration capacity.
• Make sure that the product 4-cycles a little at full
throttle.
• Make sure that the saw chain does not rotate at idle
speed.
• If the product is not easy to start or has less
acceleration capacity, adjust the low and high speed
needles.
CAUTION: If the saw chain rotates at idle
speed, turn the idle speed screw
counterclockwise until the saw chain stops.
To adjust the low speed needle (L)
• Turn the low speed needle clockwise until stop.
If the product has a bad acceleration capacity
Note:
or if the idle speed is not correct, turn the low speed
needle counterclockwise. Turn the low speed needle
until the acceleration capacity and idle speed is
correct.
To adjust the idle speed screw (T)
1. Start the product.
2. Turn the idle speed screw clockwise until the saw
chain starts to rotate.
3. Turn the idle speed screw counterclockwise until the
saw chain stops.
The idle speed is correctly adjusted when the
Note:
engine runs correctly in all positions. The idle speed
956 - 003 -
CAUTION:
cause damage to the engine.
Incorrect adjustments can
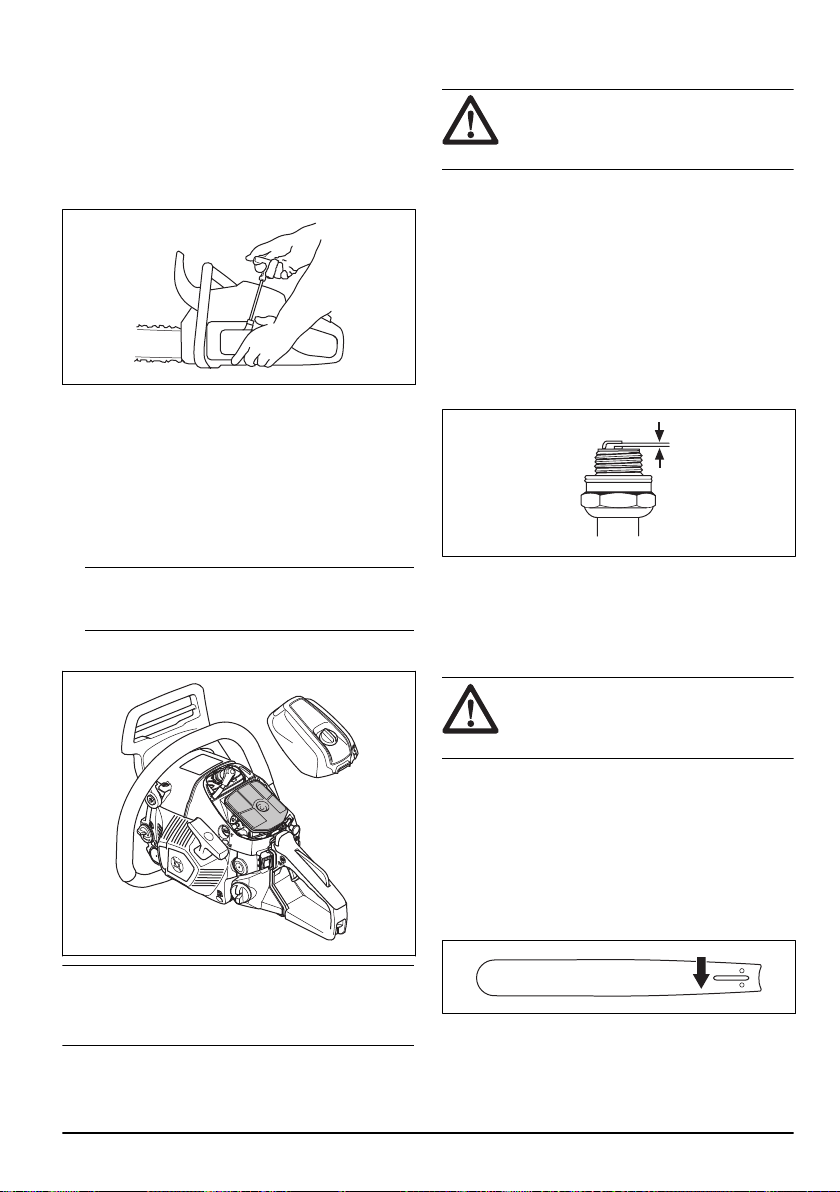
To replace a broken or worn starter rope
1. Loosen the screws to the starter housing.
2. Remove the starter housing.
25
Page 26
3. Pull out the starter rope approximately 30 cm/12 in
and put it in the notch on the pulley.
4. Let the pulley rotate slowly rearward to release the
recoil spring.
5. Remove the center screw and remove the pulley.
WARNING: You must be careful when
you replace the return spring or the
starter rope. The recoil spring is in
tension when it is wound up in the starter
housing. If you are not careful, it can
eject and cause injuries. Use protective
glasses and protective gloves.
6. Remove the used starter rope from the handle and
the pulley.
7. Attach a new starter rope to the pulley. Wind the
starter rope approximately 3 turns around the pulley.
8. Pull the starter rope through the hole in the starter
housing and the starter rope handle.
9. Attach the center screw in the center of the pulley.
10. Make a tight knot at the end of the starter rope.
To tighten the recoil spring
1. Put the starter rope into the notch in the pulley.
2. Turn the starter pulley approximately 2 turns
clockwise.
3. Make sure that you can turn the pulley ½ turn after
the starter rope is fully extended.
26
956 - 003 -
Page 27
To assemble the starter housing on the product
1. Pull out the starter rope and put the starter in
position against the crankcase.
2. Slowly release the starter rope until the pulley
engages with the pawls.
3. Tighten the screws that hold the starter.
To clean the air filter
Clean the air filter regularly from dirt and dust. This
prevents carburetor malfunctions, starting problems,
loss of engine power, wear to engine parts and more
fuel consumption than usual.
1. Remove the cylinder cover and the air filter.
2. Use a brush or shake the air filter clean. Use
detergent and water to clean it fully.
Note: An air filter that is used for a long time can not
be fully cleaned. Replace the air filter regularly and
always replace a defective air filter.
3. Attach the air filter and make sure that the air filter
seals tightly against the filter holder.
To do a check of the spark plug
CAUTION: Use the recommended spark
plug. Refer to
An incorrect spark plug can cause damage
to the product.
1. If the product is not easy to start or to operate or if
the product operates incorrectly at idle speed,
examine the spark plug for unwanted materials. To
decrease the risk of unwanted material on the spark
plug electrodes, do these steps:
a) make sure that the idle speed is correctly
adjusted.
b) make sure that the fuel mixture is correct.
c) make sure that the air filter is clean.
2. Clean the spark plug if it is dirty.
3. Make sure that the electrode gap is correct. Refer to,
Technical data on page 34
4. Replace the spark plug monthly or more frequently if
necessary.
Technical data on page 34
.
.
To sharpen the saw chain
Information about the guide bar and saw chain
WARNING:
use or do maintenance on the saw chain. A
saw chain that does not move can also
cause injuries.
Use protective gloves when you
Because of different work conditions, weather or
Note:
season, your product can be used with different types of
air filter. Speak to your servicing dealer for more
information.
956 - 003 -
Replace a worn or damaged guide bar or saw chain with
the guide bar and saw chain combination recommended
by Husqvarna. This is necessary to keep the safety
functions of the product. Refer to
35
, for a list of replacement bar and chain
combinations that we recommend.
• Guide bar length, in/cm. Information about the guide
bar length can usually be found on the rear end of
the guide bar.
Accessories on page
27
Page 28
• Number of teeth on bar tip sprocket (T).
PITCH =
D
D
2
A
B
• Chain pitch, in. The distance between the drive links
of the saw chain must align with the distance of the
teeth on the bar tip sprocket and drive sprocket.
• Number of drive links. The number of drive links is
decided by the type of guide bar.
• Drive link width, mm/in.
General information about how to sharpen the cutters
Do not use a blunt saw chain. If the saw chain is blunt,
you must apply more pressure to push the guide bar
through the wood. If the saw chain is very blunt, there
will be no wood chips but sawdust.
A sharp saw chain eats through the wood and the wood
chips becomes long and thick.
The cutting tooth (A) and the depth gauge (B) together
makes the cutting part of the saw chain, the cutter. The
difference in height between the two gives the cutting
depth (depth gauge setting).
• Bar groove width, in/mm. The groove width in guide
bar must be the same as the chain drive links width.
• Chain oil hole and hole for chain tensioner. The
guide bar must align with product.
28
When you sharpen the cutter, think about the following:
• Filing angle.
• Cutting angle.
• File position.
956 - 003 -
Page 29
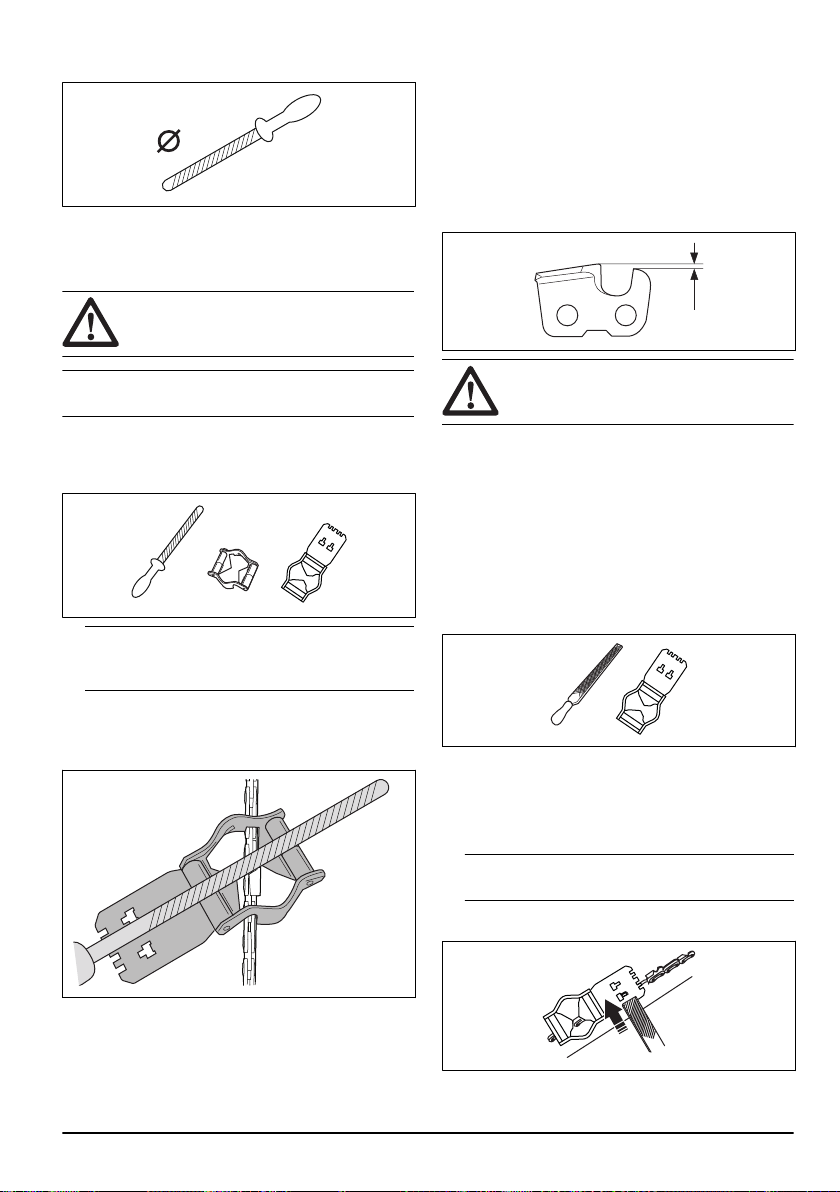
• Round file diameter.
A
B
C
It is not easy to sharpen a saw chain correctly without
the correct equipment. Use Husqvarna file gauge. This
will help you to keep maximum cutting performance and
the kickback risk at a minimum.
WARNING: The force of the kickback
increases a lot if you do not follow the
sharpening instructions.
General information about how to adjust the depth gauge setting
The depth gauge setting (C) decreases when you
sharpen the cutting tooth (A). To keep maximum cutting
performance you must remove filing material from the
depth gauge (B) to receive the recommended depth
gauge setting. See
instructions about how to receive the correct depth
gauge setting for your saw chain.
Accessories on page 35
for
Note: Refer to
information about sharpening of the saw chain.
To sharpen the saw chain on page 27
for
To sharpen the cutters
1. Use a round file and a file gauge to sharpen the
cutting teeth.
Note: Refer to
information about which file and gauge that
Husqvarna recommends for your saw chain.
2. Apply the file gauge correctly on to the cutter. Refer
to the instruction supplied with the file gauge.
3. Move the file from the inner side of the cutting teeth
and out. Decrease the pressure on the pull stroke.
Accessories on page 35
for
WARNING: The risk of kickback increases if
the depth gauge setting is too large!
To adjust the depth gauge setting
Before you adjust the depth gauge setting or sharpen
the cutters, refer to
adjust the depth gauge setting on page 29
instructions. We recommend you to adjust the depth
gauge setting after each third operation that you
sharpen the cutting teeth.
We recommend that you use our depth gauge tool to
receive the correct depth gauge setting and bevel for the
depth gauge.
1. Use a flat file and a depth gauge tool to adjust the
depth gauge setting. Only use Husqvarna depth
gauge tool to get the correct depth gauge setting and
bevel for the depth gauge.
2. Put the depth gauge tool on the saw chain.
See the package of the depth gauge tool for
Note:
more information about how to use the tool.
3. Use the flat file to remove the part of the depth
gauge that extends through the depth gauge tool.
General information about how to
, for
4. Remove material from one side of all the cutting
teeth.
5. Turn the product around and remove material on the
other side.
6. Make sure that all cutting teeth are the same length.
956 - 003 -
29
Page 30
To adjust the tension of the saw chain
WARNING: A saw chain with an incorrect
tension can come loose from the guide bar
and cause serious injury or death.
A saw chain becomes longer when you use it. Adjust the
saw chain regularly.
1. Loosen the bar nuts that hold the clutch cover/chain
brake. Use a wrench.
Note: Some models have only one bar nut.
2. Tighten the bar nuts by hand as tightly as you can.
3. Lift the front of the guide bar and turn the chain
tensioning screw. Use a wrench.
4. Tighten the saw chain until it is tight against the
guide bar but still can move easily.
5. Tighten the bar nuts using the wrench and lift the
front of the guide bar at the same time.
6. Make sure you can pull the saw chain around freely
by hand and that it does not hang from the guide
bar.
2. If the saw chain lubrication is correct, you see a clear
line of oil on the surface after 1 minute.
3. If the saw chain lubrication does not operate
correctly, do a check of the guide bar. Refer to
a check of the guide bar on page 31
instructions. Speak to your servicing dealer if the
maintenance steps does not help.
for
To do
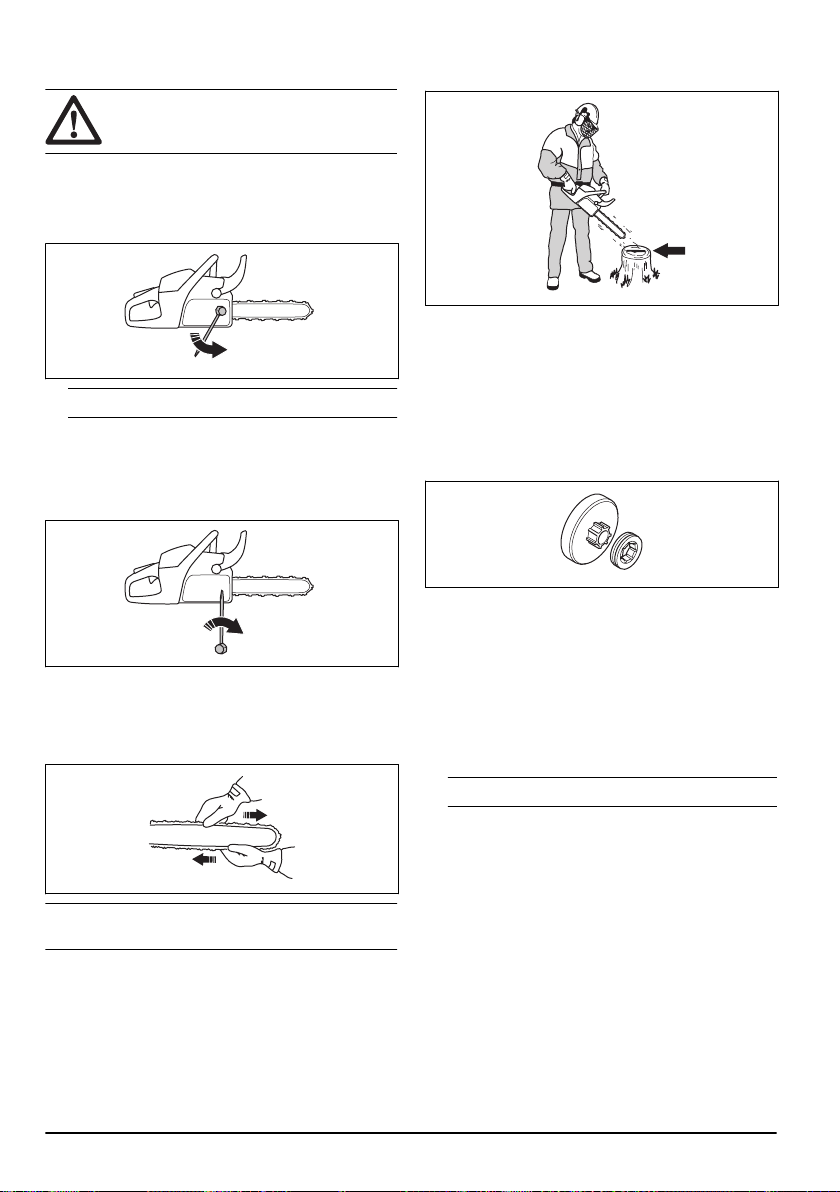
To do a check of the rim sprocket
The clutch drum has a rim sprocket that can be
replaced.
1. Make sure that the rim sprocket is not worn. Replace
if necessary.
2. Replace the rim sprocket each time you replace the
saw chain.
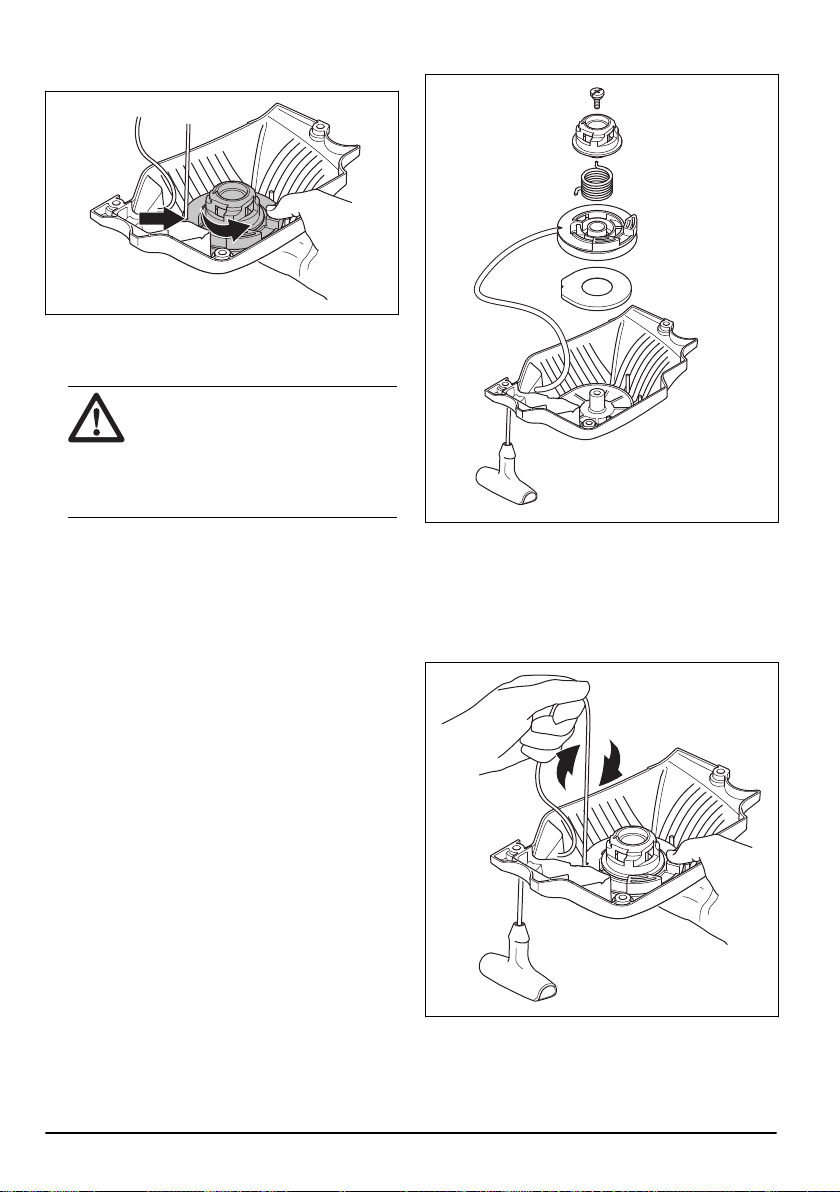
To lubricate the needle bearing
1. Pull the front hand guard rearward to disengage the
chain brake.
2. Loosen the bar nuts and remove the clutch cover.
Some models have only one bar nut.
Note:
3. Put the product on a stable surface with the clutch
drum up.
Refer to
Note:
position of the chain tensioning screw on your product.
Product overview on page 2
for the
To do a check of the saw chain lubrication
1. Start the product and let it operate at ¾ throttle. Hold
the bar approximately 20 cm/8 in above a surface of
light color.
30
956 - 003 -
Page 31

4. Lubricate the needle bearing with a grease gun. Use
engine oil or a bearing grease of high quality.
To examine the cutting equipment
1. Make sure that there are no cracks in rivets and links
and that no rivets are loose. Replace if it is
necessary.
To do a check of the guide bar
1. Make sure that the oil channel is not blocked. Clean
if it is necessary.
2. Examine if there are burrs on the edges of the guide
bar. Remove the burrs using a file.
3. Clean the groove in the guide bar.
4. Examine the groove in the guide bar for wear.
Replace the guide bar if it is necessary.
2. Make sure that the saw chain is easy to bend.
Replace the saw chain if it is rigid.
3. Compare the saw chain with a new saw chain to
examine if the rivets and links are worn.
4. Replace the saw chain when the longest part of the
cutting tooth is less than 4 mm/0.16 in. Also replace
the saw chain if there are cracks on the cutters.
956 - 003 -
5. Examine if the guide bar tip is rough or very worn.
6. Make sure that the bar tip sprocket turns freely and
that the lubricating hole in the bar tip sprocket is not
blocked. Clean and lubricate if it is necessary.
31
Page 32

7. Turn the guide bar daily to extend its life cycle.
To do maintenance on the fuel tank and the chain oil tank
• Drain and clean the fuel tank and the chain oil tank
regularly.
• Replace the fuel filter yearly or more frequently if
necessary.
the air filter. AirInjection
and the engine.
™
extends the life of the air filter
CAUTION: Contamination in the tanks
causes malfunction.
To adjust the chain oil flow
WARNING: Stop the engine before you
make adjustments to the oil pump.
• Turn the adjustment screw of the oil pump. Use a
screwdriver or combination wrench.
a) Turn the adjustment screw clockwise to decrease
the chain oil flow.
b) Turn the adjustment screw counterclockwise to
increase the chain oil flow.
Recommended settings for the oil pump
• Guide bar length 33-38 cm/13-15 in: Minimum flow
• Guide bar length 38-41 cm/15-16 in: Medium flow
• Guide bar length -46 cm/-18 in: Maximum flow
Air cleaning system
AirInjection™ is a centrifugal air cleaning system that
removes dust and dirt before the particles are caught by
To clean the cooling system
The cooling system keeps the engine temperature
down. The cooling system includes the air intake on the
starter and the air guide plate, the pawls on the flywheel,
the cooling fins on the cylinder, the cooling channel and
the cylinder cover.
1. Clean the cooling system with a brush weekly or
more frequently if it is necessary.
2. Make sure that the cooling system is not dirty or
blocked.
CAUTION: A dirty or blocked cooling
system can make the product too hot,
which can cause damage to the product.
32 956 - 003 -
Page 33

Troubleshooting
The engine does not start
Product part to examine Possible cause Action
Starter pawls The starter pawls are blocked. Adjust or replace the starter pawls.
Clean around the pawls.
Speak to an approved service workshop.
Fuel tank Incorrect fuel type. Drain the fuel tank and fill with cor-
The fuel tank is filled with chain oil. If you have tried to start the product,
Ignition, no spark The spark plug is dirty or wet. Make sure that the spark plug is dry
The electrode gap is incorrect. Clean the spark plug. Make sure that
Spark plug and cylinder The spark plug is loose. Tighten the spark plug.
Engine is flooded because of repeated starts with full choke after ignition.
rect fuel.
speak to your servicing dealer. If you
have not tried to start the product,
drain the fuel tank.
and clean.
the electrode gap and spark plug is
correct, and that the correct spark
plug type is the recommended or
equivalent.
Refer to
Technical data on page 34
for the correct electrode gap.
Remove and clean the spark plug.
Put the product on its side with the
spark plug hole away from you. Pull
the starter rope handle 6-8 times. Assemble the spark plug and start the
product. Refer to
on page 12
To start the product
.
The engine starts but stops again
Product part to examine
Fuel tank Incorrect fuel type. Drain the fuel tank and fill with cor-
Carburetor The idle speed is not correct. Speak to your servicing dealer.
Air filter Clogged air filter. Clean or replace the air filter.
Fuel filter Clogged fuel filter. Replace the fuel filter.
956 - 003 - 33
Possible cause Action
rect fuel.
Page 34

Transportation and storage
Transportation and storage
• For storage and transportation of the product and
fuel, make sure that there are no leaks or fumes.
Sparks or open flames, for example from electrical
devices or boilers, can start a fire.
• Always use approved containers for storage and
transportation of fuel.
• Empty the fuel and chain oil tanks before
transportation or before long-term storage. Discard
the fuel and chain oil at an applicable disposal
location.
• Use the transportation guard on the product to
prevent injuries or damage to the product. A saw
chain that does not move can also cause serious
injuries.
• Remove the spark plug cap from the spark plug and
engage the chain brake.
• Attach the product safely during transportation.
To prepare your product for long-term storage
1. Disassemble and clean the saw chain and the
groove in the guide bar.
CAUTION: If the saw chain and guide
bar are not cleaned, they can become
rigid or blocked.
2. Attach the transportation guard.
3. Clean the product. Refer to
for instructions.
4. Do a complete servicing of the product.
Technical data
Technical data
Husqvarna 543 XP Husqvarna 543 XPG
Engine
Cylinder displacement, cm
Idle speed, rpm 2500-2700 2500-2700
Maximum engine power acc. to ISO
8893, kW/hp @ rpm
Ignition system
Spark plug NGK CMR7H NGK CMR7H
Electrode gap, mm 0.65 0.65
Fuel and lubrication system
Fuel tank capacity, liter/cm
Oil tank capacity, liter/cm
Type of oil pump Adjustable Adjustable
Weight
Weight, kg 4.5 4.7
Noise emissions
Sound power level, measured dB(A) 112 112
1
3
3
3
43.1 43.1
2.2/2.9 @ 9600 2.2/2.9 @ 9600
0.42/420 0.42/420
0.27/270 0.27/270
Maintenance on page 21
1
Always use the recommended spark plug type! Use of the wrong spark plug can damage the piston/cylinder.
34 956 - 003 -
Page 35

Sound power level, guaranteed L
dB(A)
Sound levels
Equivalent sound pressure level at
the operator’s ear, dB(A)
Equivalent vibration levels, a
Front handle, m/s
Rear handle, m/s
Saw chain/guide bar
Type of drive sprocket/number of
teeth
Saw chain speed at 133% of maximum engine power speed, m/s.
2
hveq
2
2
Husqvarna 543 XP Husqvarna 543 XPG
WA
113 113
101 101
3
4.5 4.5
4.2 4.2
Rim/7 Rim/7
24.6 24.6
Accessories
Recommended cutting equipment
Chainsaw models Husqvarna 543 XP, 543 XPG have
been evaluated for safety according to EN ISO
11681-1:2011 (Machinery for forestry - Portable
chainsaw safety requirements and testing) and fulfill the
safety requirements when equipped with the below listed
guide bar and saw chain combinations.
Kickback and guide bar nose radius
For sprocket nose bars the nose radius is specified by
the number of teeth, such as 10T. For solid guide bars
the nose radius is specified by the dimension of the
nose radius. For a given guide bar length, you can use a
guide bar with smaller nose radius than given.
Low kickback saw chain
A saw chain that is designated as Low kickback saw
chain, meets the low kickback requirement specified in
ANSI B175.1-2012.
Guide bar Saw chain
Length, in/cm Pitch, in Gauge, in/mm Max. nose ra-
13/33 0.325 0.050/1.3 10T Husqvarna
15/38 64
16/41 66
18/46 72
2
Equivalent sound pressure level, according to ISO 22868, is calculated as the time-weighted energy total for
different sound pressure levels under various working conditions. Typical statistical dispersion for equivalent
sound pressure level is a standard deviation of 1 dB (A).
3
Equivalent vibration level, according to ISO 22867, is calculated as the time-weighted energy total for vibration
levels under various working conditions. Reported data for equivalent vibration level has a typical statistical
dispersion (standard deviation) of 1 m/s2.
dius
Type Length, drive
links (no.)
56 Yes
H30
Low kickback
956 - 003 - 35
Page 36

Guide bar Saw chain
Length, in/cm Pitch, in Gauge, in/mm Max. nose ra-
dius
13/33 0.325 0.050/1.3 10T Husqvarna
15/38 64
16/41 66
18/46 72
13/33 0.325 0.058/1.5 10T Husqvarna
15/38 64
16/41 66
18/46 72
Type Length, drive
SP33G
H25
links (no.)
Low kickback
56
56 Yes
The usable cutting length is usually 1 in less than the
nominal guide bar length.
Pixel
Pixel is a guide bar and saw chain combination that is
more light weight and designated to offer more energy
efficient use by cutting narrow cuts. Both guide bar and
saw chain need to be Pixel to get these benefits. Pixel
cutting equipment is marked with this symbol.
SP33G 4.8 mm / 3/16 in 586 93 84-01
H30 4.8 mm / 3/16 in 505 69 81-08
H25 4.8 mm / 3/16 in 505 69 81-09
Filing equipment and filing angles
Use a Husqvarna file gauge to sharpen the saw chain. A
Husqvarna file gauge makes sure that you get the
correct filing angles. The part numbers are given in the
table below.
If you are not sure how to identify the type of saw chain
on your product, refer to www.husqvarna.com for more
information.
0.025 in / 0.65
mm
0.025 in / 0.65
mm
0.025 in / 0.65
mm
30° 80°
30° 85°
30° 85°
36 956 - 003 -
Page 37

EC Declaration of Conformity
EC Declaration of conformity
Husqvarna AB, SE-561 82 Huskvarna, Sweden, tel:
+46-36-146500, declares under sole responsibility that
the chainsaws for forest service Husqvarna 543 XP, 543
XPG from 2016’s serial numbers and onwards (the year
is clearly stated in plain text on the type plate with
subsequent serial number), are in conformity with the
requirements of the COUNCIL’S DIRECTIVES:
• of May 17, 2006 ”relating to machinery” 2006/42/EC.
• of February 26, 2014 ”relating to electromagnetic
compatibility” 2014/30/EU.
• of May 8, 2000 ”relating to the noise emissions in the
environment” 2000/14/EC.
• of June 8, 2011 ”on the restriction of the use of
certain hazardous substances in electrical and
electronic equipment” 2011/65/EU.
The following standards have been applied: EN ISO
12100:2010, ISO 14982:2009, EN ISO 11681-1:2011,
EN 50581:2012
Notified body: 0404, RISE SMP Svensk Maskinprovning
AB, Box 7035, SE-750 07 Uppsala, Sweden, has carried
out EC type examination in accordance with the
machinery directive’s (2006/42/EC) article 12, point 3b.
The certificates for EC type examination in accordance
with annex VI, has the number: 0404/12/2360 – 543 XP,
543 XPG.
In addition, 0404, RISE SMP Svensk Maskinprovning
AB, Box 7035, SE-750 07 Uppsala, Sweden, has
certified conformity with annex V of the Council’s
Directive of May 8, 2000 ”relating to the noise emissions
in the environment” 2000/14/EC. The certificate has the
number: 01/161/080 - 543 XP, 543 XPG.
For information relating to noise emissions, refer to
Technical data on page 34
The supplied chainsaw conforms to the example that
underwent EC type examination.
Huskvarna, 20160330
.
Per Gustafsson, Development manager (authorized
representative for Husqvarna AB and responsible for
technical documentation.)
956 - 003 -
37
Page 38

Einleitung...................................................................... 38
18
19
6
17
7
27
25
1
8
9
10
11
3
4
2
31
30
32
12
15
24
5
5
26
14
16
13
5
21
22
23
28
29
20
5
33
34
35
Sicherheit......................................................................40
Montage........................................................................45
Betrieb.......................................................................... 46
Wartung........................................................................ 58
Einleitung
Verwendungszweck
Dieses Produkt dient zum Sägen von Holz.
Hinweis: Der Betrieb des Geräts kann durch nationale
Vorschriften eingeschränkt werden.
Produktbeschreibung
Husqvarna 543 XP, 543 XPG sind Motorsägenmodelle
mit Verbrennungsmotor.
Produktübersicht
Inhalt
Fehlerbehebung............................................................70
Transport und Lagerung............................................... 71
Technische Angaben.................................................... 72
Zubehör........................................................................ 73
EG-Konformitätserklärung............................................ 75
Wir arbeiten laufend daran, Ihre Sicherheit und die
Effektivität während des Betriebs zu verbessern. Ihr
Servicehändler steht Ihnen gern für weitere
Informationen zur Verfügung.
1. Luftfilterdeckel 2. Zündkerze
38 956 - 003 -
Page 39

3. Zündkappe
4. Luftfilter
5. Antivibrationssystem, 4 Einheiten
6. Gashebelsperre
7. Hinterer Handgriff
8. Informations- und Warnschild
9. Gashebel
10. Start-/Stoppschalter
11. Choke-Hebel
12. Kraftstofftank
13. Kraftstoffpumpe
14. Startseilhandgriff
15. Startvorrichtungsgehäuse
16. Kettenöltank
17. Schalldämpfer
18. Kettenbremse mit Handschutz
19. Vorderer Handgriff
20. Schalter für Griffheizung (543 XPG)
21. Rechtshandschutz
22. Kupplungsdeckel
23. Kettenspannschraube
24. Kettenfänger
25. Sägekette
26. Führungsschiene
27. Umlenkstern
28. Stift der Ketteneinstellung
29. Bremsband
30. Bedienungsanleitung
31. Transportschutz
32. Gabel-Ringschlüssel
33. Produkt- und Seriennummernschild
34. Stellschraube, Ölpumpe
35. Schienenmuttern
Symbole auf dem Gerät
Durch unsachgemäße oder nachlässige
Handhabung dieses Geräts können schwere
Verletzungen oder sogar tödliche Unfälle
von Bedienern oder anderen Personen
verursacht werden.
Umweltbelastende Geräuschemissionen
gemäß der entsprechenden europäischen
Richtlinie 2000/14/EG und der australischen
„Protection of the Environment Operations
(Noise Control)
Regulation 2017“ („Umweltschutz-/
Lärmschutzbestimmung“) von New South
Wales. Informationen zur Geräuschemission
sind auf dem Geräteschild und im Abschnitt
Technische Daten auf Seite 72
Die Motorsäge muss immer mit beiden
Händen betrieben werden.
Halten Sie die Motorsäge bei der
Anwendung niemals nur mit einer Hand.
Die Führungsschienenspitze darf niemals
Gegenstände berühren.
Warnung! Sollte die
Führungsschienenspitze einen Gegenstand
berühren, kann dies zu einem Rückschlag
führen, sodass die Schiene nach oben und
zurück zum Bediener geschleudert wird.
Schwere Verletzungen können die Folge
sein.
Kettenbremse, aktiviert (rechts).
Kettenbremse, nicht aktiviert (links).
Der Chokehebel befindet sich in der offenen
Stellung.
Der Chokehebel befindet sich in der
geschlossenen Stellung.
angegeben.
Lesen Sie die Bedienungsanleitung
sorgfältig, und machen Sie sich mit den
Anweisungen vertraut, bevor Sie das Gerät
verwenden.
Tragen Sie stets einen zugelassenen
Schutzhelm, Gehörschutz und Schutzbrille
oder Gesichtsschutz.
Dieses Gerät stimmt mit den geltenden EGRichtlinien überein.
956 - 003 - 39
Kraftstoffpumpe.
Tanken.
Befüllung mit Sägekettenöl.
Page 40

Einstellen der Ölpumpe.
yyyywwxxxxx
Das Typenschild mit Seriennummer. JJJJ ist das
Produktionsjahr, ww ist
die Produktionswoche.
Hinweis: Sonstige Symbole/Aufkleber am Gerät
beziehen sich auf Zertifizierungsanforderungen, die in
bestimmten Ländern gelten.
Sicherheit
Sicherheitsdefinitionen
Warnungen, Vorsichtsmaßnahmen und Hinweise
werden verwendet, um auf besonders wichtige Teile der
Bedienungsanleitung hinzuweisen.
WARNUNG: Wird verwendet, wenn bei
Nichtbeachtung der Anweisungen in diesem
Handbuch die Gefahr von Verletzung oder
Tod des Bedieners oder anderer Personen
besteht.
ACHTUNG: Wird verwendet, wenn bei
Nichtbeachtung der Anweisungen in diesem
Handbuch die Gefahr von Schäden am
Gerät, an anderen Materialien oder in der
Umgebung besteht.
Hinweis: Für weitere Informationen, die in bestimmten
Situationen nötig sind.
Allgemeine Sicherheitshinweise
WARNUNG: Lesen Sie die folgenden
Warnhinweise, bevor Sie das Gerät
benutzen.
• Eine unsachgemäß oder nachlässig eingesetzte
Motorsäge kann zu einem gefährlichen Gerät
werden und zu schweren oder gar
lebensgefährlichen Verletzungen führen. Es ist
deshalb von größter Wichtigkeit, dass diese
Bedienungsanweisung aufmerksam durchgelesen
und verstanden wird.
• Unter keinen Umständen darf die ursprüngliche
Konstruktion des Gerätes ohne Genehmigung des
Herstellers geändert werden. Verwenden Sie keine
Geräte, die von anderen modifiziert wurden, und
verwenden Sie nur für dieses Produkt empfohlenes
Originalzubehör. Unzulässige Änderungen und/oder
unzulässiges Zubehör können zu schweren oder
Emissionen nach Euro V
WARNUNG: Bei jeglichen Manipulationen
des Motors erlischt die EU-Typgenehmigung
für dieses Produkt.
sogar tödlichen Verletzungen des Anwenders oder
anderer Personen führen.
• Der Schalldämpfer enthält Chemikalien, die
karzinogen sein können. Falls der Schalldämpfer
beschädigt wird, vermeiden Sie es, mit diesen
Stoffen in Kontakt zu kommen.
• Das Einatmen der Motorabgase, des Kettenölnebels
und von Sägespänen über längere Zeit kann eine
Gefahr für die Gesundheit darstellen.
• Dieses Gerät erzeugt beim Betrieb ein
elektromagnetisches Feld. Dieses Feld kann sich
unter bestimmten Bedingungen auf die
Funktionsweise aktiver oder passiver medizinischer
Implantate auswirken. Um die Gefahr von
Situationen, die zu schweren oder tödlichen
Verletzungen führen können, auszuschließen,
sollten Personen mit einem medizinischen Implantat
vor der Nutzung dieses Gerätes ihren Arzt und den
Hersteller des Implantats konsultieren.
• Die Informationen in dieser Bedienungsanleitung
ersetzen auf keinen Fall professionelle Fähigkeiten
und Erfahrungen. Wenn Sie in eine Situation
geraten, in der Sie unsicher sind, sollten Sie einen
Fachmann um Rat fragen. Wenden Sie sich an Ihren
Servicehändler oder einen erfahrenen Benutzer von
Motorsägen. Vermeiden Sie jede Arbeit, für die Sie
nicht ausreichend qualifiziert sind!
Sicherheitshinweise für den Betrieb
WARNUNG: Lesen Sie die folgenden
Warnhinweise, bevor Sie das Gerät
benutzen.
• Vor der Benutzung dieses Produkts müssen Sie
wissen, was ein Rückschlag ist und wie er
vermieden werden kann. Eine Anleitung finden Sie in
Informationen zu Rückschlägen auf Seite 48
• Arbeiten Sie niemals mit einem defekten Gerät.
• Verwenden Sie niemals ein Gerät mit sichtbaren
Schäden an Zündkappe und Zündkabel. Es besteht
die Gefahr der Funkenbildung, was ein Feuer
verursachen kann.
.
40
956 - 003 -
Page 41

• Verwenden Sie niemals das Gerät, wenn Sie müde
sind, Alkohol getrunken oder Medikamente
eingenommen haben, die Ihre Sehkraft,
Urteilsvermögen oder Körperkontrolle
beeinträchtigen können.
• Vermeiden Sie es, das Gerät bei schlechtem Wetter
zu benutzen. Z. B. bei dichtem Nebel, starkem
Regen oder Wind, großer Kälte usw. Bei schlechtem
Wetter ist das Arbeiten nicht nur ermüdend, es
können außerdem gefährliche Arbeitsbedingungen
entstehen, z. B. glatter Boden, unberechenbare
Fällrichtung des Baumes usw.
• Starten Sie das Produkt nur dann, wenn
Führungsschiene, Sägekette und sämtliche
Abdeckungen montiert sind. Eine Anleitung finden
Sie in
Montage auf Seite 45
Führungsschiene und Sägekette kann sich die
Kupplung lösen und schwere Schäden entstehen.
• Lassen Sie den Motor niemals in Innenräumen
laufen. Seien Sie sich der Gefahr bewusst, die das
Einatmen von Motorabgasen birgt!
• Die Abgase sind heiß und können Funken enthalten,
die einen Brand verursachen können. Starten Sie
das Gerät niemals in der Nähe von brennbarem
Material!
• Achten Sie bei der Arbeit auf die Umgebung achten
und stellen Sie sicher, dass weder Menschen noch
Tiere mit der Schneidausrüstung in Berührung
kommen können oder Ihre Kontrolle über das Gerät
beeinträchtigen.
• Erlauben Sie niemals Kindern, das Gerät zu
benutzen oder sich in seiner Nähe aufzuhalten. Da
das Gerät mit einem rückfedernden Start-/StoppSchalter ausgerüstet ist und mit geringer
Geschwindigkeit und Kraft am Starthandgriff
gestartet werden kann, können u. U. auch kleine
Kinder die Kraft aufbringen, die zum Starten
erforderlich ist. Dies kann zu schweren Verletzungen
führen. Daher ist stets die Zündkappe zu entfernen,
wenn das Gerät ohne Aufsicht ist.
• Um das Gerät voll unter Kontrolle zu haben, müssen
Sie fest und sicher stehen. Arbeiten Sie niemals auf
einer Leiter stehend, oben auf einem Baum oder in
anderen Positionen, in denen Sie keinen festen
. Ohne montierte
Grund unter den Füßen haben, auf dem Sie sicher
stehen.
• Durch Unachtsamkeit kann der Rückschlagbereich
der Führungsschiene einen Ast, einen nahen Baum
oder einen anderen Gegenstand berühren und einen
Rückschlag auslösen.
• Halten Sie das Gerät bei der Anwendung niemals
nur mit einer Hand. Dieses Gerät lässt sich mit nur
einer Hand nicht sicher bedienen.
• Halten Sie die Motorsäge stets mit beiden Händen.
Mit der rechten Hand den hinteren Griff und mit der
linken den vorderen Griff umfassen. Alle Benutzer,
ob Links- oder Rechtshänder, müssen die Handgriffe
so greifen. Achten Sie auf festen Griff und umgreifen
Sie beide Griffe mit Daumen und Fingern. Durch
diesen Griff kann man die Rückschlaggefahr
minimieren und gleichzeitig die Kontrolle über das
Gerät behalten. Die Handgriffe nicht loslassen!
• Verwenden Sie das Gerät niemals über
Schulterhöhe.
956 - 003 -
41
Page 42

• Benutzen Sie das Produkt nie, ohne die Möglichkeit
zu haben, bei einem eventuellen Unfall Hilfe
herbeizurufen.
• Bevor Sie das Gerät transportieren, müssen Sie
dieses ausschalten und die Sägekette mithilfe der
Kettenbremse arretieren. Tragen Sie das Gerät so,
dass die Führungsschiene und die Sägekette nach
hinten zeigen. Bei längeren Wegen und Transporten
muss ein Transportschutz an der Führungsschiene
angebracht werden.
• Sichern Sie beim Abstellen des Geräts auf den
Boden die Sägekette mit der Kettenbremse, und
behalten Sie das Gerät immer im Auge. Bei längeren
Arbeitsunterbrechungen muss der Motor abgestellt
werden.
• Gelegentlich setzt sich Splitt im Kupplungsdeckel
fest, wodurch die Kette blockieren kann. Stellen Sie
zum Reinigen grundsätzlich den Motor ab.
• Einen Motor in einem geschlossenen oder schlecht
belüfteten Raum laufen zu lassen, kann zum Tod
durch Kohlenmonoxidvergiftung führen.
• Die Motorabgase sind heiß und können Funken
enthalten, die einen Brand verursachen können. Das
Gerät sollte nicht im Innenbereich oder in der Nähe
von feuergefährlichen Stoffen gestartet werden.
• Verwenden Sie Kettenbremse als Feststellbremse,
wenn Sie das Gerät starten und sich über kurze
Strecken bewegen. Halten Sie das Gerät immer am
vorderen Handgriff. Das verringert das Risiko, dass
Sie oder eine Person ihrer Nähe von der Sägekette
getroffen werden.
• Personen mit Blutkreislaufstörungen, die zu oft
Vibrationen ausgesetzt werden, laufen Gefahr,
Schäden an den Blutgefäßen oder am
Nervensystem davonzutragen. Gehen Sie zum Arzt,
wenn Sie an Ihrem Körper Symptome feststellen, die
darauf hinweisen, dass Sie übermäßigen Vibrationen
ausgesetzt waren. Beispiele für solche Symptome
sind: Einschlafen von Körperteilen, Gefühlsverlust,
Jucken, Stechen, Schmerzen, Verlust oder
Beeinträchtigung der normalen Körperkraft,
Veränderungen der Hautfarbe oder der Haut. Diese
Symptome treten üblicherweise in Fingern, Händen
und Handgelenken auf. Bei niedrigen Temperaturen
können sich diese Symptome verstärken.
• Es ist nicht möglich, hier alle denkbaren Situationen
zu beschreiben, die beim Gebrauch dieses Geräts
auftreten könnten. Stets vorsichtig vorgehen und mit
gesundem Menschenverstand arbeiten. Vermeiden
Sie Situationen, denen Sie sich nicht gewachsen
fühlen. Wenn Sie sich nach dem Lesen dieser
Anweisungen immer noch unsicher fühlen, wie Sie
vorgehen sollen, bitten Sie einen Fachmann um Rat,
bevor Sie fortfahren. Zögern Sie nicht, Ihren Händler
oder Husqvarna anzusprechen, wenn Sie Fragen
bezüglich des Gebrauchs des Geräts haben. Wir
sind gerne für Sie da und helfen Ihnen beim
optimalen und sicheren Einsatz Ihres Geräts. Auch
ein Kurs zum Thema Anwendung der Motorsäge
kann hilfreich sein. Händler, Forstfachschulen oder
Bibliotheken informieren Sie über verfügbares
Weiterbildungsmaterial und das Kursangebot.
Persönliche Schutzausrüstung
WARNUNG: Lesen Sie die folgenden
Warnhinweise, bevor Sie das Gerät
benutzen.
• Bei Kontakt mit der Sägekette können schwerste
Verletzungen auftreten. Sie müssen während des
Betriebs eine zugelassene persönliche
Schutzausrüstung tragen. Die persönliche
Schutzausrüstung schützt Sie zwar nicht vollständig
vor Verletzungen, vermindert aber den Umfang der
Verletzungen bei einem Unfall. Wenden Sie sich an
Ihren Servicehändler für Empfehlungen, welche
Ausrüstung zu verwenden ist.
• Ihre Kleidung muss eng sitzen, darf aber nicht Ihre
Bewegungen einschränken. Überprüfen Sie
regelmäßig den Zustand der persönlichen
Schutzausrüstung.
• Verwenden Sie einen zugelassenen Schutzhelm.
• Tragen Sie einen zugelassenen Gehörschutz. Eine
längerfristige Beschallung mit Lärm kann zu
bleibenden Gehörschäden führen.
• Tragen Sie eine Schutzbrille oder einen
Gesichtsschutz, um sich vor Verletzungen durch
weggeschleuderte Gegenstände zu schützen. Das
Gerät kann Gegenstände wie Sägespäne,
Holzstückchen und mehr mit großer Kraft
wegschleudern. Schwere Verletzungen, besonders
an den Augen, können die Folge sein.
• Verwenden Sie Handschuhe mit Schnittschutz.
• Verwenden Sie Hosen mit Schnittschutz.
• Verwenden Sie Stiefel mit Schnittschutz, Stahlkappe
und rutschfester Sohle.
• Sie sollten immer ein Erste-Hilfe-Set dabei haben.
42
956 - 003 -
Page 43

• Risiko der Funkenbildung. Halten Sie zur
A
B
A
B
Verhinderung von Waldbränden
Feuerlöschwerkzeuge und eine Schaufel bereit.
Sicherheitsvorrichtungen am Gerät
WARNUNG: Lesen Sie die folgenden
Warnhinweise, bevor Sie das Gerät
benutzen.
• Benutzen Sie kein Gerät mit defekten
Sicherheitsvorrichtungen.
• Führen Sie regelmäßig eine Überprüfung der
Sicherheitsvorrichtungen durch. Siehe
Prüfung der Sicherheitseinrichtungen auf dem Gerät
auf Seite 60
• Wenn die Sicherheitsvorrichtungen defekt sind,
wenden Sie sich an Ihre HusqvarnaServicewerkstatt.
Kettenbremse mit Handschutz
Ihr Gerät ist mit einer Kettenbremse versehen, welche
die Sägekette bei einem Rückschlag stoppt. Die
Kettenbremse verringert die Unfallgefahr nur, wenn Sie
selbst die erforderlichen Vorsichtsmaßnahmen
einhalten.
Die Kettenbremse (A) wird entweder manuell mit der
linken Hand oder automatisch durch die
Trägheitsfunktion aktiviert. Drücken Sie den Handschutz
(B) nach vorne, um die Kettenbremse manuell zu
aktivieren.
.
Wartung und
zurückgestellt. Dadurch wird der Gashebel im Leerlauf
gesperrt.
Kettenfänger
Der Kettenfänger fängt die Kette, wenn sie bricht oder
sich löst. Eine korrekte Spannung der Sägekette und
richtige Anwendung der Wartung der Sägekette und
Führungsschiene verringern die Gefahr von Unfällen.
Rechtshandschutz
Der Rechtshandschutz ist ein Schutz für Ihre Hand am
hinteren Griff. Der Rechtshandschutz bietet Ihnen
Schutz, wenn die Kette reißt oder herausspringt. Der
Rechtshandschutz schützt Sie außerdem vor Ästen oder
Zweigen.
Bewegen Sie den Handschutz nach hinten, um die
Kettenbremse zu lösen.
Gashebelsperre
Die Gashebelsperre verhindert ein versehentliches
Auslösen des Gashebels. Wenn Sie mit Ihrer Hand um
den Griff fassen und die Gashebelsperre (A) betätigen,
wird der Gashebel (B) freigegeben. Wenn Sie den
Handgriff loslassen, werden Gashebel und
Gashebelsperre wieder in ihre Ausgangsstellung
956 - 003 -
Antivibrationssystem
Das Antivibrationssystem verringert Vibrationen in den
Griffen. Antivibrationselemente funktionieren als
Trennung zwischen Gerät und den Griff.
Unter
Produktübersicht auf Seite 38
Informationen darüber, wo das Antivibrationssystem sich
an Ihrem Gerät befindet.
finden Sie
43
Page 44

Start-/Stoppschalter
Drücken Sie den Start-/Stopp-Schalter, um den Motor
abzustellen.
Schalldämpfer
WARNUNG: Der Schalldämpfer wird
während/nach dem Betrieb und im Leerlauf
sehr heiß. Es besteht die Gefahr von Feuer,
besonders, wenn Sie das Gerät in der Nähe
von entflammbaren Materialien und/oder
Dämpfen betreiben.
WARNUNG: Betreiben Sie das Gerät
niemals ohne oder mit defektem
Schalldämpfer. Ein defekter Schalldämpfer
kann den Geräuschpegel und die
Brandgefahr erhöhen. Halten Sie einen
Feuerlöscher griffbereit. Verwenden Sie kein
Gerät ohne oder mit einem kaputten
Funkenfängernetz, wenn in Ihrem Bereich
ein solches vorgeschrieben ist.
• Beim Tanken und Mischen von Kraftstoff (Benzin
und Zweitaktöl) ist für gute Belüftung zu sorgen.
• Kraftstoff und Kraftstoffdämpfe sind sehr
feuergefährlich und können beim Einatmen und auf
der Haut schwere Schäden verursachen. Beim
Umgang mit Kraftstoff ist daher Vorsicht geboten
und für eine gute Belüftung zu sorgen.
• Beim Umgang mit Kraftstoff und Kettenöl ist Vorsicht
geboten. Es besteht Feuer-, Explosions- und
Vergiftungsgefahr.
• Beim Tanken nicht rauchen und jegliche
Wärmequellen vom Kraftstoff fernhalten.
• Den Motor abstellen und vor dem Tanken einige
Minuten abkühlen lassen.
• Öffnen Sie den Tankdeckel stets vorsichtig, sodass
sich ein evtl. vorhandener Überdruck langsam
abbauen kann.
• Den Tankdeckel nach dem Tanken wieder sorgfältig
zudrehen.
• Niemals Kraftstoff nachfüllen, wenn der Motor läuft.
• Bewegen Sie das Gerät vor dem Start immer
mindestens 3 Meter aus dem Auftankbereich und
von der Kraftstoffauftankquelle weg.
Der Schalldämpfer senkt den Geräuschpegel so weit
wie möglich und leitet die Abgase des Motors vom
Anwender weg. In Gebieten mit warmem, trockenem
Wetter besteht erhöhte Brandgefahr. Beachten Sie die
örtlich geltenden Vorschriften und
Wartungsanweisungen.
Sicherer Umgang mit Kraftstoff
WARNUNG: Lesen Sie die folgenden
Warnhinweise, bevor Sie das Gerät
benutzen.
44
Nach dem Tanken gibt es einige Situationen, in denen
das Gerät niemals gestartet werden darf:
• Sie haben Kraftstoff oder Kettenöl über das Gerät
verschüttet. Wischen Sie den verschütteten
Kraftstoff restlos ab und lassen Sie die
Kraftstoffdämpfe verdunsten.
• Sie haben Kraftstoff über sich selbst oder Ihre
Kleidung verschüttet. Wechseln Sie Ihre Kleidung
und waschen Sie alle Körperteile, die mit Kraftstoff in
Kontakt gekommen sind. Verwenden Sie Wasser
und Seife.
• Am Gerät tritt Kraftstoff aus. Überprüfen Sie den
Kraftstofftank, den Tankdeckel und die
Kraftstoffleitungen regelmäßig auf Undichtigkeiten.
Sicherheitshinweise für die Wartung
WARNUNG:
Warnhinweise, bevor Sie das Gerät warten.
• Sie dürfen nur die Wartungs- und Servicearbeiten
ausführen, die in dieser Bedienungsanleitung
Lesen Sie die folgenden
956 - 003 -
Page 45

beschrieben sind. Lassen Sie professionelles
Wartungspersonal alle anderen Wartungsarbeiten
und Reparaturen durchführen.
• Die Kontroll-, Wartungs- und Serviceanweisungen in
dieser Bedienungsanweisung sind regelmäßig
durchzuführen. Durch eine regelmäßige Wartung
verlängert sich die Lebensdauer des Geräts und
verringert sich die Gefahr von Unfällen. Eine
Anleitung finden Sie in
• Wenn die Sicherheitskontrollen in dieser
Bedienungsanleitung nach Wartungsarbeiten nicht
genehmigt werden, wenden Sie sich an Ihren
Kundendienst. Wir garantieren Ihnen, dass für Ihr
Gerät professionelle Service- und Reparaturdienste
verfügbar sind.
Wartung auf Seite 58
.
Sicherheitshinweise für die Schneidausrüstung
WARNUNG: Lesen Sie die folgenden
Warnhinweise, bevor Sie das Gerät
benutzen.
• Verwenden Sie nur die Kombinationen von
Führungsschiene/Sägekette und Einfüllhilfen, die wir
empfehlen. Eine Anleitung finden Sie in
Seite 73
• Tragen Sie Schutzhandschuhe, wenn Sie an der
• Sorgen Sie dafür, dass die Schneidezähne gut
.
Sägekette eine Wartung durchführen oder sie
verwenden. Eine Sägekette, die sich nicht bewegt,
kann auch zu Verletzungen führen.
geschärft sind. Befolgen Sie die Anweisungen und
verwenden Sie die empfohlene Schärflehre. Eine
Sägekette, die beschädigt oder nicht korrekt
geschärft ist, erhöht die Unfallgefahr.
Zubehör auf
Sie die empfohlene Tiefenbegrenzereinstellung. Ein
zu großer Tiefenbegrenzerabstand erhöht die
Rückschlaggefahr.
• Stellen Sie sicher, dass die Sägekette die richtige
Spannung besitzt. Wenn sich die Sägekette nicht
fest in der Führungsschiene befindet, kann die
Sägekette abspringen. Eine falsche
Sägekettenspannung führt zu höherem Verschleiß
an der Führungsschiene, der Sägekette und dem
Kettenantriebsrad. Siehe
Spannung der Sägekette ein auf Seite 67
• Führen Sie die Wartung der Schneidausrüstung
regelmäßig durch und sorgen Sie für eine korrekte
Schmierung. Wenn die Sägekette ist nicht
ordnungsgemäß geschmiert ist, erhöht sich die
Gefahr von Verschleiß an der Führungsschiene, der
Sägekette dem und Kettenantriebsrad.
So stellen Sie die
.
• Behalten Sie den korrekten Tiefenbegrenzerabstand
bei. Befolgen Sie die Anweisungen und verwenden
Montage
Einleitung
WARNUNG: Lesen Sie vor der Montage des
Geräts das Kapitel über Sicherheit, und
machen Sie sich damit vertraut.
So montieren Sie Führungsschiene und Kette
1. Deaktivieren Sie die Kettenbremse.
956 - 003 - 45
Page 46

2. Entfernen Sie die Schienenmuttern und den
A
Kupplungsdeckel. Entfernen Sie den
Transportschutz (A).
3. Montieren Sie die Führungsschiene auf den
Schienenbolzen. Bringen Sie die Führungsschiene in
ihre hinterste Stellung.
4. Montieren Sie die Sägekette ordnungsgemäß um
das Kettenantriebsrad, und passen Sie sie in die Nut
in der Führungsschiene ein.
WARNUNG: Tragen Sie bei der
Montage der Sägekette immer
Schutzhandschuhe.
5. Achten Sie darauf, dass die Schneiden der
Sägezähne auf der Oberkante der Führungsschiene
nach vorn gerichtet sind.
6. Richten Sie das Loch in der Führungsschiene an
dem Stift der Ketteneinstellung aus, und befestigen
Sie den Kupplungsdeckel.
7. Ziehen Sie die Schienenmutter von Hand fest an.
8. Spannen Sie die Sägekette. Eine Anleitung finden
Sie in
So stellen Sie die Spannung der Sägekette ein
auf Seite 67
9. Die Schienenmuttern anziehen.
.
Betrieb
Einleitung
WARNUNG: Lesen Sie vor Gebrauch des
Geräts das Kapitel über Sicherheit, und
machen Sie sich damit vertraut.
So führen Sie eine Funktionsprüfung vor Verwendung des Geräts durch
1. Stellen Sie sicher, dass die Kettenbremse
ordnungsgemäß funktioniert und unbeschädigt ist.
46 956 - 003 -
2. Vergewissern Sie sich, dass der Rechtshandschutz
nicht beschädigt ist.
3. Stellen Sie sicher, dass die Gashebelsperre
ordnungsgemäß funktioniert und unbeschädigt ist.
4. Stellen Sie sicher, dass der Start-/Stoppschalter
richtig funktioniert und nicht beschädigt ist.
5. Achten Sie darauf, dass sich auf den Griffen kein Öl
befindet.
6. Stellen Sie sicher, dass das Antivibrationssystem
ordnungsgemäß funktioniert und unbeschädigt ist.
7. Stellen Sie sicher, dass der Schalldämpfer
ordnungsgemäß funktioniert und unbeschädigt ist.
Page 47

8. Stellen Sie sicher, dass alle Teile des Geräts korrekt
7
10
9
1
2
3
6,8
4
befestigt und nicht beschädigt sind und keine Teile
fehlen.
9. Stellen Sie sicher, dass der Kettenfänger richtig
angebracht ist.
10. Überprüfen Sie die Kettenspannung.
Kraftstoff
Dieses Produkt verfügt über einen Zweitaktmotor.
ACHTUNG: Die Verwendung eines falschen
Kraftstoffs kann zu einer Beschädigung des
Motors führen. Verwenden Sie eine
Mischung aus Benzin und Zweitaktöl.
Vorgemischter Kraftstoff
• Verwenden Sie Husqvarna vorgemischten
Alkylatkraftstoff von hoher Qualität. Dies sorgt für die
beste Leistung und eine Verlängerung der
Lebensdauer des Motors. Im Vergleich zu
herkömmlichem Kraftstoff enthält dieser Kraftstoff
weniger gesundheitsschädliche Substanzen,
wodurch der Ausstoß schädlicher Abgase verringert
wird. Die Menge von Rückständen nach der
Verbrennung ist bei diesem Kraftstoff niedriger.
Dadurch bleiben die Bauteile des Motors sauberer.
So mischen Sie Kraftstoff vor
für luftgekühlte Motoren. Wenden Sie sich an Ihren
Kundendienst zur Auswahl der richtigen Ölsorte.
ACHTUNG: Verwenden Sie kein
Zweitaktöl für wassergekühlte
Außenbordmotoren (auch Outboardoil
genannt). Verwenden Sie kein Öl für
Viertaktmotoren.
So mischen Sie Benzin und Zweitaktöl
Benzin, Liter
5 0,10
10 0,20
15 0,30
20 0,40
ACHTUNG: Beim Mischen kleiner
Kraftstoffmengen wirken sich auch kleine
Abweichungen bei der Ölmenge stark auf
das Mischungsverhältnis aus. Um das
korrekte Mischungsverhältnis
sicherzustellen, muss die beizumischende
Ölmenge genau abgemessen werden.
Zweitaktöl, Liter
2 % (50:1)
Benzin
• Verwenden Sie hochwertiges bleifreies Benzin mit
maximal 10 % Ethanol (E10).
ACHTUNG:
mit einer geringeren Oktanzahl als
90 RON (87 AKI). Bei Einsatz von
Kraftstoff mit niedrigerer Oktanzahl kann
es zu einem Klopfen im Motor kommen,
das Motorschäden verursacht.
• Wir empfehlen Ihnen, Benzin mit einer höheren
Oktanzahl für Arbeiten mit konstant hoher
Motordrehzahl zu verwenden.
Zweitaktöl
• Verwenden Sie für beste Ergebnisse und die beste
Leistung Husqvarna Zweitaktöl.
• Wenn Husqvarna Zweitaktöl nicht verfügbar ist,
verwenden Sie ein qualitativ hochwertiges Zweitaktöl
Verwenden Sie kein Benzin
1. Füllen die Hälfte des Benzins in einen sauberen
Kraftstoffbehälter.
2. Fügen Sie die gesamte Menge Öl hinzu.
3. Schütteln Sie die Kraftstoffmischung.
4. Geben Sie dann den Rest des Benzins in den
Behälter dazu.
5. Schütteln Sie die Kraftstoffmischung sorgfältig.
ACHTUNG: Mischen Sie Kraftstoff
höchstens für einen Monat im Voraus.
956 - 003 - 47
Page 48

So füllen Sie den Kraftstofftank
1. Säubern Sie den Bereich rund um den Tankdeckel.
2. Schütteln Sie den Behälter, und stellen Sie sicher,
dass der Kraftstoff vollständig vermischt ist.
3. Öffnen Sie den Tankdeckel und füllen Sie den
Kraftstofftank.
4. Ziehen Sie den Tankdeckel vorsichtig fest.
5. Bewegen Sie das Gerät vor dem Start mindestens
3 m (10 ft) aus dem Auftankbereich und von der
Kraftstoff-Auftankquelle weg.
Hinweis: Um herauszufinden, wo sich der Kraftstofftank
an Ihrem Gerät befindet, siehe
Seite 38
.
Produktübersicht auf
So fahren Sie den Motor ein
• Geben Sie während der ersten 10 Betriebsstunden
nicht über einen längeren Zeitraum Vollgas ohne
Last.
So verwenden Sie das richtige Kettenöl
WARNUNG:
zu Verletzungen und Umweltschäden führen
kann. Altöl beschädigt auch die Ölpumpe,
Führungsschiene und Sägekette.
WARNUNG: Die Sägekette kann reißen,
wenn die Schmierung der
Schneidausrüstung nicht ausreichend ist.
Gefahr von schweren oder tödlichen
Verletzungen des Bedieners.
Verwenden Sie kein Altöl, das
• Verwenden Sie ein Kettenöl mit dem richtigen
Viskositätsbereich, der zu der Lufttemperatur passt.
ACHTUNG: Wenn das Öl zu dünnflüssig
ist, wird es vor dem Kraftstoff verbraucht.
Bei Temperaturen unter 0 °C werden
manche Kettenöle zu dickflüssig, was zu
Schäden an der Ölpumpe führen kann.
• Verwenden Sie die empfohlene Schneidausrüstung.
Siehe
• Entfernen Sie den Deckel des Kettenöltanks.
Zubehör auf Seite 73
• Füllen Sie den Kettenöltank mit Kettenöl.
• Befestigen Sie den Deckel sorgfältig.
Hinweis: Um herauszufinden, wo sich der Kettenöltank
an Ihrem Produkt befindet, siehe
Seite 38
.
.
Produktübersicht auf
Informationen zu Rückschlägen
WARNUNG: Ein Rückschlag kann schwere
Verletzungen des Bedieners oder anderer
Personen verursachen. Um das Risiko zu
mindern, müssen Sie die Ursachen für
Rückschläge kennen und wissen, wie Sie
sie vermeiden können.
Ein Rückschlag kann eintreffen, wenn der
Rückschlagbereich der Schiene einen Gegenstand
berührt. Ein Rückschlag kann plötzlich und mit großer
Kraft auftreten, die das Gerät gegen den Bediener
schleudert.
WARNUNG: Dieses Produkt verfügt über
eine Funktion, dass der Kraftstoff vor dem
Kettenöl abläuft. Verwenden Sie die
richtigen Kettenöl, damit diese Funktion
korrekt funktionieren kann. Wenden Sie sich
zur Auswahl des Kettenöls an Ihren
Servicehändler.
• Verwenden Sie Husqvarna Kettenöl, um die
maximale Lebensdauer der Sägekette zu
gewährleisten und negative Auswirkungen auf die
Umwelt zu vermeiden. Wenn Husqvarna Kettenöl
nicht verfügbar ist, empfehlen wir, ein
Standardkettenöl zu verwenden.
• Verwenden Sie ein Kettenöl mit guter Haftung an der
Sägekette.
48
Ein Rückschlag ist immer in Richtung der
Führungsschiene gerichtet. Normalerweise wird das
Gerät gegen den Bediener geschleudert, manchmal
aber auch in eine andere Richtung. Sie beeinflussen die
956 - 003 -
Page 49

Richtung der Bewegung durch Ihr Verhalten beim
Auftreten des Rückschlags.
Ein kleinerer Radius der Schienenspitze verringert die
Kraft des Rückschlags.
Verwenden Sie eine Sägekette mit einem niedrigen
Rückschlag, um die Auswirkungen des Rückschlags zu
mindern. Sorgen Sie dafür, dass der Rückschlagbereich
keine Gegenstände berührt.
WARNUNG: Keine Sägekette kann einen
Rückschlag vollständig verhindern.
Beachten Sie stets die Anweisungen.
u. U. nicht genügend Zeit, die Kette anzuhalten,
bevor Sie sie trifft.
WARNUNG: Nur Sie selbst und die richtige
Arbeitstechnik können einen Rückschlag
verhindern.
So starten Sie das Gerät
So bereiten Sie einen kalten Motor auf den Start vor
WARNUNG: Beim Starten der Motorsäge
muss die Kettenbremse eingeschaltet sein,
um das Risiko einer Verletzung zu mindern.
1. Bewegen Sie den Handschutz nach vorne, um die
Kettenbremse zu aktivieren.
Häufig gestellte Fragen über Rückschläge
• Wird die Hand die Kettenbremse beim Rückschlag
stets aktivieren?
Nein. Sie müssen etwas Kraft aufwenden, um den
Handschutz nach vorn zu drücken. Wenn Sie nicht
mit der erforderlichen Kraft drücken, kann die
Kettenbremse nicht aktiviert werden. Außerdem
müssen Sie die Griffe des Geräts während der Arbeit
fest mit beiden Händen halten. Wenn es zu einem
Rückschlag kommt, kann die Kettenbremse nicht die
Sägekette anhalten, bevor sie Sie trifft. Es gibt auch
einige Positionen, in denen Ihre Hand nicht an den
Handschutz reicht, um die Kettenbremse zu
aktivieren. Ein Beispiel dafür ist die Fällposition.
• Aktiviert die Trägheitsfunktion stets die
Kettenbremse bei einem Rückschlag?
Nein. Zunächst muss die Kettenbremse
ordnungsgemäß funktionieren. Unter
die Kettenbremse auf Seite 60
Anweisungen zur Überprüfung der Kettenbremse.
Wir empfehlen Ihnen, sie vor jedem Gebrauch des
Geräts zu überprüfen. Zum anderen muss die Kraft
des Rückschlags hoch genug sein, um die
Kettenbremse zu aktivieren. Wenn die Kettenbremse
zu empfindlich ist, kann sie bei rauhem Motorlauf
aktiviert werden.
• Wird mich die Kettenbremse bei einem Rückschlag
stets vor Verletzungen schützen?
Nein, die Kettenbremse muss richtig funktionieren,
um Schutz zu bieten. Die Kettenbremse muss bei
einem Rückschlag auch aktiviert werden, damit sie
die Kette anhält. Wenn Sie sich in der Nähe der
Führungsschiene aufhalten, hat die Kettenbremse
So prüfen Sie
finden Sie
2. Drücken Sie die Kraftstoffpumpe ca. 6 Mal, bis sich
die Pumpe mit Kraftstoff füllt. Es ist nicht erforderlich,
die Kraftstoffpumpe vollständig zu füllen.
3. Bringen Sie den Choke in Choke-Lage.
4. Unter
So starten Sie das Gerät auf Seite 50
Sie weitere Anweisungen.
finden
956 - 003 -
49
Page 50

So bereiten Sie einen warmen Motor auf den Start vor
WARNUNG: Beim Starten der Motorsäge
muss die Kettenbremse eingeschaltet sein,
um das Risiko einer Verletzung zu mindern.
1. Bewegen Sie den Handschutz nach vorne, um die
Kettenbremse zu aktivieren.
2. Drücken Sie die Kraftstoffpumpe ca. 6 Mal, bis sich
die Pumpe mit Kraftstoff füllt. Es ist nicht erforderlich,
die Kraftstoffpumpe vollständig zu füllen.
Hinweis: Bringen Sie den Choke nicht in die ChokeLage.
3. Unter
So starten Sie das Gerät auf Seite 50
Sie weitere Anweisungen.
finden
So starten Sie das Gerät
WARNUNG:
nicht um Ihre Hand.
5. Ziehen Sie dann schnell und kraftvoll am Startseil.
ACHTUNG: Ziehen Sie das Startseil
nicht vollständig aus, und lassen den
Startseilgriff nicht los. Dies kann das
Gerät beschädigen.
a) Wenn Sie das Gerät mit kaltem Motor starten,
ziehen Sie den Starterseilgriff, bis der Motor
startet.
Hinweis: Sie können erkennen, dass der Motor
zündet, wenn das typische Zündgeräusch des
Motors zu vernehmen ist.
b) Deaktivieren Sie den Choke.
6. Ziehen Sie am Startseilgriff, bis der Motor anspringt.
7. Lösen Sie schnell die Gashebelsperre, um das Gerät
in Leerlauf zu bringen.
Wickeln Sie das Starterseil
WARNUNG:
stabilen Position befinden, wenn Sie das
Produkt starten.
WARNUNG: Wenn sich die Sägekette im
Leerlauf dreht, sprechen Sie mit Ihrem
Kundendienst, und benutzen Sie das Gerät
nicht.
1. Stellen Sie das Produkt auf dem Boden ab.
2. Legen Sie die linke Hand auf den vorderen Griff.
3. Stellen Sie Ihren rechten Fuß in den Fußgriff am
hinteren Griff.
4. Ziehen Sie den Startseilgriff langsam mit der rechten
Hand, bis Sie einen Widerstand spüren.
50
Ihre Füße müssen sich in einer
8. Bewegen Sie den Handschutz nach hinten, um die
Kettenbremse zu lösen.
9. Beginnen Sie mit dem Betrieb.
956 - 003 -
Page 51

So stoppen Sie das Gerät
• Drücken Sie den Start-/Stopp-Schalter in die
Stellung „0“, um den Motor abzustellen.
Ziehende und schiebende Kette
Sie können mit dem Produkt in 2 verschiedenen
Positionen durch das Holz sägen.
• Beim Sägen mit „ziehender“ Kette sägen Sie mit der
Unterseite der Führungsschiene. Die Sägekette zieht
durch den Baum, während Sie sägen. In dieser
Position haben Sie eine bessere Kontrolle über das
Gerät und die Position des Rückschlagbereichs.
• Beim Sägen mit „schiebender“ Kette sägen Sie mit
der Oberseite der Führungsschiene. Die Sägekette
schiebt das Gerät in der Richtung des Bedieners.
So verwenden Sie die Schneidtechnik
WARNUNG: Setzen Sie die volle Leistung
beim Sägen ein und reduzieren Sie die
Geschwindigkeit nach jedem Schnitt in den
Leerlauf.
ACHTUNG: Am Motor können Schäden
auftreten, wenn der Motor zu lange mit voller
Leistung ohne Last läuft.
1. Legen Sie den Stamm auf einen Sägebock o. Ä.
WARNUNG: Sägen Sie Stämme nicht in
einem Stapel. Dies erhöht die Gefahr
von Rückschlägen und kann zu
schweren Verletzungen oder zum Tod
führen.
2. Die gesägten Abschnitte aus dem Arbeitsbereich
entfernen.
WARNUNG:
Sägebereich erhöhen die
Rückschlaggefahr und es besteht die
Gefahr, dass sie das Gleichgewicht
verlieren.
Gesägte Stücke im
956 - 003 -
WARNUNG:
Stamm eingeklemmt wird, kann die
Motorsäge gegen Sie gedrückt werden.
Halten Sie das Gerät fest und stellen Sie
sicher, dass der Rückschlagbereich der
Führungsschiene nicht den Baum
berührt und zu einem Rückschlag führt.
Wenn die Sägekette im
So sägen Sie einen Stamm auf dem Erdboden
1. Durchtrennen Sie den Stamm mit ziehender Kette.
Sägen Sie unter Vollgas, aber seien Sie auf
plötzliche Unfälle gefasst.
51
Page 52

WARNUNG: Stellen Sie sicher, dass die
1.
2.
1.
2.
1.
2.
1
2
3
Sägekette nicht den Boden berührt,
nachdem Sie den Stamm durchgesägt
haben.
2. Stoppen Sie, nachdem Sie rund zwei Drittel durch
den Stamm gesägt haben. Drehen Sie den Stamm,
um von der gegenüberliegenden Seite
hineinzusägen.
So sägen Sie einen Stamm, der an einem Ende gestützt wird.
WARNUNG: Stellen Sie sicher, dass der
Stamm während des Sägens nicht bricht.
Befolgen Sie die folgenden Anweisungen.
1. Sägen Sie mit schiebender Kette ca. ⅓ durch den
Stamm.
2. Durchtrennen Sie den Stamm mit ziehender Kette,
bis die beiden Kerben sich berühren.
1. Sägen Sie mit ziehender Kette ca. ⅓ durch den
Stamm.
2. Durchtrennen Sie den restlichen Teil des Stamms
mit schiebender Kette.
WARNUNG: Schalten Sie den Motor ab,
wenn die Sägekette im Stamm hängen
bleibt. Verwenden Sie einen Hebel, um den
Schnitt zu öffnen und entfernen Sie das
Gerät. Versuchen Sie nicht, das Gerät mit
der Hand herauszuziehen. Wenn das Gerät
plötzlich ausbricht, kann es zu Verletzungen
kommen.
So verwenden Sie die EntastenTechnik
Hinweis: Wenden Sie bei dicken Ästen die Sägetechnik
an. Siehe
Seite 51
So verwenden Sie die Schneidtechnik auf
.
WARNUNG: Bei Anwendung der
Entastungstechnik entsteht ein hohes
Unfallrisiko. Siehe
Rückschlägen auf Seite 48
zur Vermeidung eines Rückschlags.
WARNUNG: Sägen Sie einen Ast nach dem
anderen ab. Seien Sie besonders vorsichtig,
wenn Sie kleine Äste sägen, und sägen Sie
keine Büsche oder viele kleine Äste
gleichzeitig ab. Kleine Äste können sich in
der Sägekette verfangen und damit ist ein
sicherer Betrieb des Geräts nicht mehr
gewährleistet.
Informationen zu
für Anweisungen
So sägen Sie einen Stamm, der an zwei Enden gestützt wird.
WARNUNG:
Sägekette beim Sägen nicht im Stamm
hängen bleibt. Befolgen Sie die folgenden
Anweisungen.
Stellen Sie sicher, dass die
Hinweis: Sägen Sie die Äste Stück für Stück, wenn es
erforderlich ist.
52 956 - 003 -
Page 53

1. Entfernen Sie die Äste auf der rechten Seite des
Stamms.
a) Halten Sie die Führungsschiene auf der rechten
Seite des Stamms und drücken Sie den
Gerätekörper gegen den Stamm.
b) Wählen Sie die gewünschte Sägetechnik, je
nach Spannung im Ast.
WARNUNG: Wenn Sie sich beim
Sägen des Astes nicht sicher sind,
sprechen Sie mit einem erfahrenen
Motorsägenbediener bevor Sie
fortfahren.
2. Entfernen Sie die Äste auf der Oberseite des
Stammes.
a) Lassen Sie das Gerät auf dem Stamm und die
Führungsschiene den Stamm entlang wandern.
b) Sägen Sie mit schiebender Kette.
a) Wählen Sie die gewünschte Sägetechnik, je
nach Spannung im Ast.
WARNUNG: Wenn Sie sich beim
Sägen des Astes nicht sicher sind,
sprechen Sie mit einem erfahrenen
Motorsägenbediener bevor Sie
fortfahren.
Siehe
Sägen in Baumstämmen und Ästen, die unter
Spannung stehen auf Seite 56
Sägen von Ästen, die unter Spannung stehen.
für Anweisungen zum
So verwenden Sie die Baumfälltechnik
WARNUNG: Das Fällen eines Baums setzt
ein gewisses Maß an Erfahrung voraus.
Nehmen Sie nach Möglichkeit an einem
Kurs zum Bedienen von Motorsägen Teil.
Sprechen Sie mit einem erfahrenen
Bediener, um nötiges Wissen zu erwerben.
3. Entfernen Sie die Äste auf der linken Seite des
Stamms.
956 - 003 -
So halten Sie einen ausreichenden Sicherheitsabstand ein
1. Stellen Sie sicher, dass Personen in Ihrem Umfeld
einen ausreichenden Sicherheitsabstand von
mindestens 2 1/2 Baumlängen einhalten.
53
Page 54

2. Stellen Sie sicher, dass keine Person sich vor oder
1
2
2
1
3
während dem Fällen im Gefahrenbereich aufhält.
So berechnen Sie die Fällrichtung
1. Überprüfen Sie, in welche Richtung der Baum fallen
soll. Das Ziel ist, den Baum in eine Position zu fällen,
in der Sie den Stamm leicht entasten und zerkleinern
können. Wichtig ist auch, dass sie stabil auf den
Füßen stehen und sich sicher bewegen können.
WARNUNG: Wenn es gefährlich oder
nicht möglich ist, den Baum in seine
natürliche Richtung zu fällen, dann fällen
Sie ihn in eine andere Richtung.
2. Überprüfen Sie die natürliche Fallrichtung des
Baumes. Zum Beispiel die Neigung und Biegung des
Baumes, die Windrichtung, die Position der Äste und
das Gewicht von Schnee.
3. Prüfen Sie, ob es Hindernisse vorhanden sind, z. B.
andere Bäume, Stromleitungen, Straßen und/oder
Gebäude.
4. Untersuchen Sie den Stamm auf Schäden und
Fäulnis.
WARNUNG: Fäulnis im Stamm kann ein
Risiko bedeuten, dass der Baum fällt,
bevor Sie mit dem Sägen fertig sind.
5. Stellen Sie sicher, dass der Baum keine
beschädigten oder abgestorbenen Äste hat, die
abbrechen und Sie beim Fällen treffen können.
6. Lassen Sie den Baum nicht auf einen anderen
stehenden Baum fallen. Es ist gefährlich, einen
Baum zu entfernen, der sich beim Fällen verfangen
hat. Es besteht sehr große Unfallgefahr. Siehe
befreien Sie einen eingeklemmten Baum auf Seite
56
.
So
WARNUNG:
Fällarbeiten nehmen Sie den
Gehörschutz sofort nach dem Sägen ab.
Es ist wichtig, dass Sie Geräusche und
Warnsignale hören.
Bei gefährlichen
So entfernen Sie Äste im unteren Stammbereich und bereiten Ihren Rückzugsweg vor
Sägen Sie alle Äste auf Schulterhöhe oder unterhalb
davon.
1. Sägen Sie mit ziehender Kette von oben nach unten.
Stellen Sie sicher, dass sich der Baum zwischen
Ihnen und dem Gerät befindet.
2. Entfernen Sie Unterholz aus dem Arbeitsbereich um
den Baum. Entfernen Sie alle gesägten Teile aus
dem Arbeitsbereich.
3. Führen Sie eine Überprüfung des Bereichs auf
Hindernisse wie Steine, Äste und Löcher durch. Sie
müssen einen freien Rückzugsweg haben, wenn der
Baum zu fallen beginnt. Der Rückzugsweg muss
ungefähr 135 Grad schräg hinter der geplanten
Fällrichtung des Baumes liegen.
1. Der Gefahrenbereich
2. Der Rückzugsweg
3. Die Fällrichtung
So fällen Sie einen Baum
Husqvarna empfiehlt Ihnen, die Kerbschnitte zu machen
und zum Fällen des Baumes die „Safe Corner“-Methode
anzuwenden. Mit der „Safe Corner“-Methode können
54
956 - 003 -
Page 55

Sie das korrekte Brechmaß bestimmen und die
45º-70º
2
1
Fallrichtung steuern.
WARNUNG: Fällen Sie keine Bäume mit
einem Durchmesser, der mehr als doppelt
so groß wie die Länge der Führungsschiene
ist. Hierzu müssen Sie über eine
Spezialausbildung verfügen.
Das Brechmaß
Der wichtigste Schritt beim Baumfällen ist das Ermitteln
des korrekten Brechmaßes. Mit dem richtigen Brechmaß
können Sie die Fällrichtung kontrollieren und somit ein
sicheres Fällen gewährleisten.
Die Stärke des Brechmaßes muss mindestens 10 % des
Baumdurchmessers betragen.
WARNUNG: Wenn das Brechmaß falsch
oder zu klein ist, können Sie die Fällrichtung
nicht mehr kontrollieren.
b) Manchen Sie den unteren Kerbschnitt. Stellen
Sie sicher, dass sich das Ende des unteren
Kerbschnitts an der gleichen Stelle wie das Ende
des oberen Kerbschnitts befindet.
2. Stellen Sie sicher, dass der untere Kerbschnitt
horizontal ausgerichtet ist und im Winkel von 90
Grad zur Fällrichtung ist.
Anwendung der „Safe Corner“-Methode
Der Fällschnitt muss etwas oberhalb des Kerbschnitts
gemacht werden.
So machen Sie Kerbschnitte
1. Machen Sie Kerbschnitte, die ¼ des
Baumdurchmessers betragen. Legen Sie einen
45 °-70 °-Winkel zwischen dem oberen und dem
unteren Kerbschnitt an.
a) Manchen Sie den oberen Kerbschnitt. Richten
Sie die Fällrichtungsmarkierung (1) des Geräts
an der Fällrichtung des Baumes (2) aus. Bleiben
Sie hinter dem Gerät und sorgen Sie dafür, dass
sich der Baum stets links von Ihnen befindet.
Sägen Sie mit ziehender Kette.
956 - 003 -
WARNUNG: Seien Sie vorsichtig, wenn Sie
mit der Führungsschienenspitze sägen.
Beginnen Sie mit dem unteren Bereich der
Führungsschienenspitze zu sägen, während
Sie einen Einstichschnitt in den Stamm
machen.
1. Wenn die effektive Schnittlänge größer als der
Baumdurchmesser ist, folgen Sie diesen Schritten
(a-d).
a) Machen Sie einen geraden Einstichschnitt, um
die Brechmaßbreite zu erhalten.
55
Page 56

b) Mit ziehender Kette sägen bis noch ⅓ des
Stammes übrig ist.
c) Ziehen Sie die Führungsschiene 5 bis 10 cm
nach hinten.
d) Durchtrennen Sie den restlichen Stamm, um eine
sichere Ecke mit einer Breite von 5-10 cm zu
erhalten.
2. Wenn die effektive Schnittlänge kürzer als der
Baumdurchmesser ist, gehen Sie wie folgt vor (a-d).
a) Machen Sie einen geraden Einstichschnitt in den
Stamm. Der Einstichschnitt muss größer als 3/5
des Baumdurchmessers sein.
b) Mit ziehender Kette durch den restlichen Stamm
sägen.
c) Sägen Sie von der anderen Seite des Baumes
gerade in den Stamm, um das Brechmaß zu
erhalten.
d) Sägen Sie mit schiebender Kette bis ⅓ des
Stamms übrig ist, um die sichere Ecke zu
erhalten.
5. Wenn der Baum zu fallen beginnt, dann nutzen Sie
den Rückzugsweg, um sich vom Baum zu entfernen.
Entfernen Sie sich mindestens 5 Meter vom Baum.
So befreien Sie einen eingeklemmten Baum
WARNUNG: Es ist sehr gefährlich, einen
Baum zu entfernen, der sich beim Fällen
verfangen hat. Es besteht sehr große
Unfallgefahr. Bleiben Sie außerhalb der
Gefahrenzone und versuchen Sie nicht,
einen eingeklemmten Baum zu fällen.
Die sicherste Methode ist, eine der folgenden Winden zu
verwenden:
• Am Traktor
3. Legen Sie einen Keil gerade von hinten in die Kerbe.
4. Sägen Sie die Ecke des Baumes ab, damit er fällt.
Wenn der Baum nicht fällt, schlagen Sie auf
Hinweis:
den Keil, bis er fällt.
56
• Tragbar
Sägen in Baumstämmen und Ästen, die unter Spannung stehen
1. Finden Sie heraus, welche Seite des Baumstamms
oder Asts unter Spannung steht.
2. Finden Sie heraus, an welchem Punkt die Spannung
am stärksten ist.
956 - 003 -
Page 57

3. Prüfen Sie, welches die sichersten Verfahren sind,
1
2
um die Spannung zu lösen.
Hinweis: In manchen Fällen ist das einzig sichere
Verfahren die Benutzung einer Winde und nicht
Ihres Geräts.
4. Halten Sie sich dort auf, wo der Baumstamm oder
Ast Sie nicht treffen kann, wenn die Spannung gelöst
ist.
5. Machen Sie einen oder mehrere Schnitte so tief wie
erforderlich, um die Spannung zu verringern. Sägen
Sie am oder in der Nähe des Punktes mit der
stärksten Spannung. Lassen Sie den Baumstamm
oder Ast an dem Punkt mit der stärksten Spannung
brechen.
WARNUNG: Sägen Sie einen
Baumstamm, der unter Spannung steht,
nie einfach durch.
7. Sägen Sie weiter in den Stamm, bis der Stamm/Ast
sich biegt und die Spannung gelöst ist.
8. Sägen Sie den Baum/Ast von der anderen Seite der
Biegung, nachdem die Spannung gelöst ist.
So verwenden Sie das Gerät bei kaltem Wetter
ACHTUNG: Schnee und kaltes Wetter
können zu Betriebsproblemen führen. Risiko
zu niedriger Motortemperaturen oder Eis am
Luftfilter und Vergaser.
1. Bewegen Sie den Stopfen bei Temperaturen unter
0 °C von Position 1 in Position 2.
WARNUNG: Sägen Sie sehr vorsichtig
beim Schneiden von Bäumen, die unter
Spannung stehen. Es besteht die
Gefahr, dass sich der Baum vor oder
nach dem Sägen schnell bewegt. Es
kann zu schweren Verletzungen
kommen, wenn Sie sich in der falschen
Position befinden oder wenn Sie falsch
sägen.
6. Wenn Sie durch den Baum/Ast sägen müssen,
bringen Sie 2 bis 3 Sägeschnitte im Abstand von ca.
2,5 cm und mit einer Tiefe von ca. 5 cm an.
956 - 003 - 57
Page 58

2. Für Bedingungen mit Temperaturen unter -5 °C oder
bei Schneefall ist eine Winterabdeckung verfügbar.
Montieren Sie die Winterabdeckung am
Startvorrichtungsgehäuse. Die Winterabdeckung
verringert den Strom kühler Luft und hält große
Mengen Schnee vom Vergaserraum ab.
ACHTUNG: Entfernen Sie die
Winterabdeckung, wenn die Temperaturen
über -5 °C steigen. Bringen Sie den
Wartung
Winterstopfen in Position 1, wenn die
Temperaturen über 0 °C steigen. Es besteht
das Risiko zu hoher Motortemperaturen und
Motorschäden.
Beheizte Handgriffe (543 XPG)
Bei Modellen mit der Bezeichnung „G“ ist sowohl der
vordere als auch der hintere Handgriff mit elektrischen
Heizschleifen versehen. Ein Generator versorgt die
Heizspiralen mit Strom.
Betätigen Sie den Schalter, um die Griffheizung zu
aktivieren. Die Heizung ist eingeschaltet, wenn Sie die
rote Markierung auf dem Schalter sehen.
Elektrische Vergaserheizung (543 XPG)
Die Einstellung der Vergaserheizung erfolgt elektrisch
über einen Thermostat. Dadurch wird die korrekte
Vergasertemperatur beibehalten und Eisbildung im
Vergaser verhindert.
Einleitung
WARNUNG: Lesen Sie vor dem Warten des
Geräts das Kapitel über Sicherheit, und
machen Sie sich damit vertraut.
Wartungsplan
Tägliche Wartung Wöchentliche Wartung Monatliche Wartung
Reinigen Sie die äußeren Bauteile
des Geräts und achten Sie darauf,
dass sich kein Öl an den Griffen befindet.
Kontrollieren Sie den Gashebel und
die Gashebelsperre. Siehe
Kontrollieren Sie den Gashebel und die Gashebelsperre. auf Seite 60
Kontrollieren Sie, ob die Antivibrationseinheiten unbeschädigt sind.
58 956 - 003 -
.
Reinigen Sie das Kühlsystem. Siehe
So reinigen Sie das Kühlsystem auf
Seite 70
.
Kontrollieren Sie den Anlasser, das
Startseil und die Rückzugfeder.
Schmieren Sie das Nadellager. Siehe
So schmieren Sie das Nadellager auf
Seite 68
.
Prüfen Sie das Bremsband. Siehe
kontrollieren Sie das Bremsband auf
Seite 60
.
Kontrollieren Sie das Kupplungszentrum, die Kupplungstrommel und die
Kupplungsfeder.
Reinigen Sie die Zündkerze. Siehe
So prüfen Sie die Zündkerze auf
Seite 64
.
So
Page 59

Tägliche Wartung Wöchentliche Wartung Monatliche Wartung
Reinigen und überprüfen Sie die Kettenbremse. Siehe
So prüfen Sie die
Kettenbremse auf Seite 60Prüfen
Sie den Handschutz und die Aktivierung der Kettenbremse. auf Seite 60
Prüfen Sie den Kettenfänger. Siehe
So prüfen Sie den Kettenfänger auf
Seite 61
.
Drehen Sie die Führungsschiene,
kontrollieren Sie die Schmieröffnung,
und reinigen Sie die Nut der Führungsschiene. Siehe
So prüfen Sie
die Führungsschiene auf Seite 69
Stellen Sie sicher, dass die Führungsschiene und die Sägekette ausreichend geölt werden.
Überprüfen Sie die Sägekette. Siehe
So prüfen Sie die Schneidausrüstung
auf Seite 68
Schärfen Sie die Sägekette und kontrollieren Sie ihre Spannung. Siehe
.
Entfernen Sie alle Grate an den
Kanten der Führungsschiene. Siehe
Reinigen Sie die äußeren Bauteile
des Vergasers.
So prüfen Sie die Führungsschiene
auf Seite 69
.
Reinigen Sie das Funkenfängernetz
des Schalldämpfers oder tauschen
Sie es aus.
Reinigen Sie den Vergaserbereich. Kontrollieren Sie alle Kabel und Ans-
.
Reinigen oder ersetzen Sie den Luftfilter. Siehe
filter auf Seite 64
Reinigen Sie den Bereich zwischen
den Kühlrippen des Zylinders.
.
Kontrollieren Sie den Kraftstofffilter
und -schlauch. Tauschen Sie sie bei
Bedarf aus.
chlüsse.
Leeren Sie den Kraftstofftank.
So reinigen Sie den Luft-
.
Leeren Sie den Öltank.
So schärfen Sie die Sägekette auf
Seite 65
.
Prüfen Sie das Kettenantriebsrad.
Siehe
So prüfen Sie das Rim-An-
triebsrad auf Seite 68
Reinigen Sie den Lufteinlass am Anlasser.
Überprüfen Sie, ob alle Muttern und
Schrauben angezogen sind.
Prüfen Sie den Start-/Stopp-Schalter.
Siehe
So prüfen Sie den Start-/
Stopp-Schalter auf Seite 61
Stellen Sie sicher, dass von Motor,
Tank oder Kraftstoffleitungen kein
Kraftstoff ausläuft.
Stellen Sie sicher, dass die Sägekette bei Leerlaufdrehzahl des Motors
nicht dreht.
Kontrollieren Sie, ob der Rechtshandschutz unbeschädigt ist.
Stellen Sie sicher, dass der Schalldämpfer richtig befestigt ist, keine
Beschädigungen hat und dass keine
Teile des Schalldämpfers fehlen.
.
.
956 - 003 - 59
Page 60

Wartung und Prüfung der Sicherheitseinrichtungen auf dem Gerät
So kontrollieren Sie das Bremsband
1. Reinigen Sie die Kettenbremse und
Kupplungstrommel mit einer Bürste von Spänen,
Harz und Schmutz. Verschmutzung und Abnutzung
beeinträchtigen die Bremsfunktion .
2. Prüfen Sie das Bremsband. Das Bremsband muss
an der dünnsten Stelle mindestens 0,6 mm dick sein.
Prüfen Sie den Handschutz und die Aktivierung der Kettenbremse.
1. Kontrollieren Sie, ob der Handschutz unbeschädigt
ist, er darf keine Defekte wie z.B. Risse aufweisen.
2. Stellen Sie sicher, dass der Handschutz sich frei
bewegen lässt und sicher am Kupplungsdeckel
befestigt ist.
5. Stellen Sie sicher, dass die Kettenbremse aktiviert
wird, sobald die Führungsschienenspitze auf dem
Baumstumpf aufschlägt.
So prüfen Sie die Kettenbremse
1. Starten Sie das Gerät. Eine Anleitung finden Sie in
So starten Sie das Gerät auf Seite 49
WARNUNG: Stellen Sie sicher, dass die
Sägekette nicht den Erdboden oder
andere Gegenstände berührt.
2. Halten Sie das Gerät gut fest.
3. Lassen Sie das Gerät auf voller Leistung laufen und
drücken Sie Ihr linkes Handgelenk gegen den
Handschutz, um die Kettenbremse zu aktivieren. Die
Sägekette muss sofort stoppen.
WARNUNG: Lassen Sie den vorderen
Handgriff nicht los.
.
Kontrollieren Sie den Gashebel und die Gashebelsperre.
1. Prüfen Sie, ob sich der Gashebel und die
Gashebelsperre frei bewegen lassen und ob die
Rückholfeder korrekt funktioniert.
3. Halten Sie das Gerät mit beiden Händen über einen
Baumstumpf oder eine andere stabile Oberfläche.
WARNUNG:
ausgeschaltet sein.
4. Lassen Sie den vorderen Handgriff los und lassen
Sie die Führungsschienenspitze auf den
Baumstumpf fallen.
60
Der Motor muss
2. Prüfen Sie, ob sich der Gashebel und die
Gashebelsperre frei bewegen lassen und ob die
Rückholfeder korrekt funktioniert.
956 - 003 -
Page 61

3. Stellen Sie sicher, dass der Gashebel in der
Leerlaufstellung verriegelt ist, wenn die
Gashebelsperre freigegeben wird.
4. Starten Sie das Gerät und lassen Sie es auf Vollgas
laufen.
5. Lassen Sie den Gashebel los, und prüfen Sie, ob die
Sägekette stoppt und stehen bleibt.
WARNUNG: Dreht sich die Sägekette,
wenn der Gashebel in Leerlaufstellung
steht, wenden Sie sich an Ihren
Kundendienst.
So prüfen Sie den Kettenfänger
1. Kontrollieren Sie, ob der Kettenfänger unbeschädigt
ist.
2. Stellen Sie sicher, dass der Kettenfänger stabil und
am Körper des Geräts angebracht ist.
So prüfen Sie den Start-/Stopp-Schalter
1. Starten Sie den Motor.
2. Schalten Sie den Start-/Stoppschalter in die Position
„STOP“. Der Motor muss sich automatisch abstellen.
So prüfen Sie den Schalldämpfer
WARNUNG: Benutzen Sie kein Gerät mit
defektem Schalldämpfer oder einem
Schalldämpfer, der in schlechtem Zustand
ist.
WARNUNG: Benutzen Sie das Gerät nicht,
wenn das Funkenfängernetz auf dem
Schalldämpfer fehlt oder defekt ist.
1. Überprüfen Sie den Schalldämpfer auf Schäden und
Defekte.
2. Stellen Sie sicher, dass der Schalldämpfer fest am
Produkt montiert ist.
So prüfen Sie den Rechtshandschutz
• Kontrollieren Sie, ob der Rechtshandschutz
unbeschädigt ist, er darf keine Defekte wie z.B.
Risse aufweisen.
So prüfen Sie das Antivibrationssystem
1. Kontrollieren Sie, dass die Antivibrationseinheiten
keine Risse oder Deformationen aufweisen.
2. Kontrollieren Sie, ob die Antivibrationselemente
zwischen Motoreinheit und Handgriffeinheit korrekt
verankert sind.
Unter
Produktübersicht auf Seite 38
Informationen darüber, wo das Antivibrationssystem sich
an Ihrem Gerät befindet.
956 - 003 -
finden Sie
61
Page 62

3. Wenn Ihr Produkt über ein spezielles
1/2
1/2
H
L
Funkenfängernetz verfügt, reinigen Sie dieses
einmal pro Woche.
4. Tauschen Sie ein beschädigtes Funkenfängernetz
aus.
Vergaser mit Einstellbegrenzungen
Hinweis: Wenn Sie nicht wissen, welchen Vergasertyp
Sie an Ihrem Gerät haben, wenden Sie sich an Ihren
Servicehändler.
Vergasereinstellung
Aufgrund der Umwelt- und Emissionsgesetze hat Ihr
Gerät eingeschränkte Einstellmöglichkeiten für die
Einstellschrauben des Vergasers. So wird der Ausstoß
schädlicher Abgase von Ihrem Gerät verringert. Sie
können die Einstellschrauben nur die max.
½ Umdrehung drehen.
ACHTUNG: Wenn sich die Motorsäge im
Leerlauf dreht, drehen Sie die
Leerlaufeinstellschraube gegen den
Uhrzeigersinn, bis die Sägekette stoppt.
So stellen Sie die Nadel für niedrige Drehzahl (L) ein
• Drehen Sie die Nadel für niedrige Drehzahl im
Uhrzeigersinn bis zum Anschlag.
Hinweis: Wenn das Gerät eine schlechte
Beschleunigungskapazität hat oder die
Leerlaufdrehzahl nicht korrekt ist, drehen Sie die
Nadel für niedrige Drehzahl gegen den
Uhrzeigersinn. Drehen Sie die Nadel für niedrige
Drehzahl, bis die Beschleunigungskapazität und der
Leerlauf korrekt eingestellt sind.
So stellen Sie die Leerlaufeinstellschraube (T) ein
1. Starten Sie das Gerät.
2. Drehen Sie die Leerlaufeinstellschraube im
Uhrzeigersinn, bis die Sägekette sich zu drehen
beginnt.
3. Drehen Sie die Leerlaufeinstellschraube gegen den
Uhrzeigersinn, bis die Sägekette stehen bleibt.
Hinweis: Eine korrekt justierte Leerlaufdrehzahl ist
erreicht, wenn der Motor in jeder Lage ordnungsgemäß
läuft. Es sollte außerdem ein sicherer Abstand zu der
Drehzahl bestehen, bei der die Sägekette sich zu
drehen beginnt.
WARNUNG: Wenn Sie die Schraube für
niedrige Drehzahl drehen und die Sägekette
nicht anhält, wenden Sie sich an den
nächsten Servicehändler. Verwenden Sie
das Produkt erst wieder, wenn es richtig
eingestellt wurde.
So stellen Sie die Nadel für hohe Drehzahl (H) ein
Der Motor ist werkseitig für den Betrieb auf
Grundlegende Einstellungen und Einfahren
Die Grundeinstellungen des Vergasers werden im Werk
vorgenommen. Informationen zur empfohlenen
Leerlaufdrehzahl finden Sie unter
auf Seite 72
.
ACHTUNG: Betreiben Sie das Gerät
während der ersten 10 Betriebsstunden
nicht mit zu hoher Geschwindigkeit.
Technische Angaben
Meeresspiegelhöhe eingestellt. In höheren Lagen,
anderen Witterungsbedingungen oder extremen
Temperaturen kann es notwendig sein, die Nadel für
hohe Drehzahl einzustellen.
• Drehen Sie die Nadel für hohe Drehzahl, um
Einstellungen vorzunehmen.
ACHTUNG:
der Nadel für hohe Drehzahl nicht weiter
als zum Begrenzungsanschlag. Dies
kann Schäden an Zylinder und Kolben
zur Folge haben.
Drehen Sie die Schraube
62 956 - 003 -
Page 63

So prüfen Sie, ob der Vergaser richtig eingestellt ist
• Stellen Sie sicher, dass das Gerät die richtige
Beschleunigungskapazität hat.
• Stellen Sie sicher, dass das Gerät mit Vollgas ein
bisschen viertaktet.
• Vergewissern Sie sich, dass die Sägekette im
Leerlauf nicht rotiert.
• Wenn das Gerät nicht einfach zu starten ist oder
eine geringere Beschleunigungskapazität hat, stellen
Sie die Nadeln für niedrige und hohe Drehzahl ein.
ACHTUNG: Falsche Einstellungen
können zu Schäden am Gerät führen.
So tauschen Sie ein gerissenes oder verschlissenes Startseil aus
1. Lösen Sie die Schrauben am
Startvorrichtungsgehäuse.
2. Entfernen Sie das Startvorrichtungsgehäuse.
3. Ziehen Sie das Startseil ca. 30 cm/12 Zoll heraus,
und setzen Sie es in die Aussparung an der
Riemenscheibe ein.
führen. Tragen Sie Schutzbrille und
Schutzhandschuhe.
6. Entfernen Sie das gebrauchte Startseil aus dem Griff
und der Riemenscheibe.
7. Befestigen Sie ein neues Startseil an der
Riemenscheibe. Wickeln Sie das Startseil ca. 3 Mal
um die Riemenscheibe.
8. Ziehen Sie das Startseil durch das Loch im
Startergehäuse und im Startseilgriff.
9. Befestigen Sie die mittlere Schraube in der Mitte der
Riemenscheibe.
10. Sichern Sie dann das Startseil mit einem festen
Knoten.
4. Lassen Sie die Riemenscheibe sich langsam nach
hinten drehen, um die Rückzugfeder zu lösen.
5. Entfernen Sie die mittlere Schraube und die
Riemenscheibe.
WARNUNG:
von Startfeder oder Startseil vorsichtig
vor. Die Rückzugfeder steht unter
Spannung, wenn sie im
Startvorrichtungsgehäuse vorgespannt
ist. Wenn Sie nicht aufpassen, kann sie
herausspringen und zu Verletzungen
956 - 003 -
Gehen Sie beim Austausch
So spannen Sie die Rückzugfeder
1. Setzen Sie das Startseil in die Aussparung an der
Riemenscheibe ein.
2. Drehen Sie die Seilrolle ca. 2 Umdrehungen im
Uhrzeigersinn.
63
Page 64

3. Stellen Sie sicher, dass Sie die Riemenscheibe noch
½ Umdrehung drehen können, nachdem das
Startseil vollständig ausgefahren ist.
So montieren Sie das Startvorrichtungsgehäuse am Gerät
1. Ziehen Sie das Startseil heraus, und legen Sie die
Startvorrichtung gegen das Kurbelgehäuse.
2. Lassen Sie das Startseil langsam frei, damit die
Starterklinken in die Seilrolle eingreifen.
3. Ziehen Sie die Befestigungsschrauben der
Startvorrichtung fest.
Wechseln Sie den Luftfilter regelmäßig aus, und
wechseln Sie stets defekte Luftfilter aus.
3. Befestigen Sie den Luftfilter wieder und achten Sie
darauf, dass der Luftfilter völlig dicht am Filterhalter
anliegt.
Hinweis: Aufgrund der unterschiedlichen
Arbeitsbedingungen, Wetterlagen und Jahreszeiten
kann Ihr Gerät mit verschiedenen Arten von Luftfiltern
verwendet werden. Ihr Servicehändler steht Ihnen gern
für weitere Informationen zur Verfügung.
So prüfen Sie die Zündkerze
ACHTUNG: Verwenden Sie die empfohlene
Zündkerze. Siehe
Seite 72
. Eine falsche Zündkerze kann zu
Schäden am Gerät führen.
Technische Angaben auf
So reinigen Sie den Luftfilter
Reinigen Sie den Luftfilter regelmäßig von Staub und
Schmutz. Dies verhindert Fehlfunktionen des Vergasers,
Probleme beim Anlassen, Leistungsverlust des Motors,
Verschleiß der Motorteile und einen Kraftstoffverbrauch
als gewöhnlich.
1. Entfernen Sie Zylinderdeckel und Luftfilter.
2. Bürsten oder schütteln Sie den Luftfilter sauber.
Reinigen Sie ihn vollständig mit einem
Reinigungsmittel und Wasser.
Ein Luftfilter, der über lange Zeit verwendet
Hinweis:
wurde, kann nicht vollständig gereinigt werden.
64
1. Wenn das Gerät nicht einfach zu starten oder in
Betrieb zu nehmen ist oder wenn das Gerät im
Leerlauf nicht ordnungsgemäß funktioniert,
überprüfen Sie die Zündkerze auf unerwünschte
Materialien. Wenn Sie diese Schritte ausführen,
verringern Sie die Gefahr von unerwünschtem
Material an den Elektroden der Zündkerze:
a) Vergewissern Sie sich, dass die Leerlaufdrehzahl
richtig eingestellt ist.
b) Vergewissern Sie sich, dass das
Kraftstoffgemisch korrekt ist.
c) Vergewissern Sie sich, dass der Luftfilter sauber
ist.
2. Reinigen Sie die Zündkerze, wenn sie schmutzig ist.
956 - 003 -
Page 65

3. Stellen Sie sicher, dass der Elektrodenabstand
PITCH =
D
D
2
korrekt ist. Siehe
72
.
4. Ersetzen Sie die Zündkerze monatlich oder ggf.
häufiger.
Technische Angaben auf Seite
So schärfen Sie die Sägekette
So montieren Sie die Führungsschiene und die Sägekette
WARNUNG: Tragen Sie Schutzhandschuhe,
wenn Sie an der Sägekette eine Wartung
durchführen oder sie verwenden. Eine
Sägekette, die sich nicht bewegt, kann auch
zu Verletzungen führen.
Tauschen Sie abgenutzte oder beschädigte
Führungsschienen und Sägeketten mit den von
Husqvarna empfohlenen Kombinationen von
Führungsschienen und Sägeketten aus. Dies ist
notwendig, damit die Sicherheitsfunktionen des Geräts
ordnungsgemäß arbeiten. Unter
finden Sie eine Liste der von uns empfohlenen
Ersatzschienen-/Kettenkombinationen.
• Länge der Führungsschiene in cm Informationen
über die Länge der Führungsschiene können in der
Regel am hinteren Ende der Führungsschiene
finden.
Zubehör auf Seite 73
zwischen den Zähnen auf dem Umlenkstern und
dem Kettenantriebsrad angepasst sein.
• Anzahl Treibglieder (St.). Die Anzahl der Treibglieder
hängt von der Art der Führungsschiene ab.
• Nutbreite der Schiene, mm. Die Nutbreite der
Schiene muss identisch mit der Breite der
Treibglieder der Kette sein.
• Loch für Kettenöl und Loch für Kettenspannzapfen.
Die Führungsschiene muss am Gerät ausgerichtet
sein.
• Anzahl Zähne des Umlenksterns (T).
• Kettenteilung, Zoll. Der Abstand zwischen den
Treibgliedern der Sägekette muss dem Abstand
956 - 003 -
• Treibgliedbreite (mm)
65
Page 66

Allgemeine Informationen zum Schärfen der
A
B
Zähne
Verwenden Sie keine stumpfe Sägekette. Wenn die
Sägekette stumpf ist, müssen Sie mehr Druck ausüben,
um die Führungsschiene durch das Holz zu drücken.
Wenn die Sägekette sehr stumpf ist, gibt es keine
Holzspäne, sondern Sägemehl.
Eine scharfe Sägekette frisst sich durch das Holz, und
die Holzspäne werden lang und dick.
Der Schneidezahn (A) und die Tiefenlehre (B) bilden
zusammen das sägende Element der Sägekette. Der
Höhenunterschied zwischen den beiden sorgt für die
Schnitttiefe (Tiefenbegrenzerabstand).
Wenn Sie den Zahn schärfen, bedenken Sie Folgendes:
• Schärfwinkel.
Ohne Hilfsmittel ist es nicht leicht, eine Sägekette
korrekt zu schärfen. Verwenden Sie Husqvarna
Schärflehre. Dies hilft Ihnen, die maximale
Schnittleistung zu erhalten und die Rückschlaggefahr
auf ein Minimum zu reduzieren.
WARNUNG: Die Intensität des Rückschlags
erhöht sich erheblich, wenn Sie die
Anweisungen zum Schärfen nicht befolgen.
Hinweis: Unter
65
finden Sie weitere Informationen zum Schärfen der
Sägekette.
So schärfen Sie die Sägekette auf Seite
So schärfen Sie die Schneidezähne
1. Verwenden Sie eine Rundfeile und eine Feilenlehre
zum Schärfen der Schneidezähne.
• Schnittwinkel.
• Schärfposition.
• Durchmesser der Rundfeile.
Hinweis: Unter
Informationen dazu, welche Feile und Lehre
Husqvarna für Ihre Sägekette empfiehlt.
2. Wenden Sie die Feilenlehre richtig auf das
Schneidwerk an. Siehe die Anweisungen im
Lieferumfang der Feilenlehre.
3. Fahren Sie mit der Feile von der Innenseite der
Schneidezähne heraus. Heben Sie die Feile beim
Zurückziehen an.
4. Entfernen Sie Material von der einen Seite aller
Schneidezähne.
5. Drehen Sie das Gerät um und entfernen Sie Material
von den Zähnen auf der anderen Seite.
6. Stellen Sie sicher, dass alle Schneidezähne die
gleiche Länge haben.
Zubehör auf Seite 73
finden Sie
66
956 - 003 -
Page 67

Allgemeine Informationen zum Anpassen des
A
B
C
Tiefenbegrenzerabstands
Der Tiefenbegrenzerabstand (C) nimmt ab, wenn Sie
den Schneidezahn (A) schärfen. Um die maximale
Schneidleistung zu erhalten, müssen Sie Feilmaterial
von der Tiefenbegrenzerlehre (B) entfernen, um den
empfohlenen Tiefenbegrenzerabstand einzuhalten.
Siehe
Zubehör auf Seite 73
zum korrekten Tiefenbegrenzerabstand für Ihre
Sägekette.
WARNUNG: Die Rückschlaggefahr nimmt
zu, wenn der Tiefenbegrenzerabstand zu
groß ist!
für weitere Informationen
So justieren Sie die Tiefenbegrenzereinstellung
Bevor Sie den Tiefenbegrenzerabstand einstellen oder
die Schneidezähne schärfen, lesen Sie die
Anweisungen unter
Anpassen des Tiefenbegrenzerabstands auf Seite 67
Wir empfehlen, den Tiefenbegrenzerabstand nach jeder
dritten Sägekettenschärfung einzustellen.
Wir empfehlen die Verwendung unserer Schärflehre für
den Tiefenbegrenzerabstand, um das korrekte Maß und
den richtigen Winkel für die Tiefenbegrenzernase zu
erhalten.
1. Verwenden Sie eine Flachfeile und eine Schärflehre
zum Einstellen des Tiefenbegrenzerabstands.
Verwenden Sie nur die Husqvarna Schärflehre für
den Tiefenbegrenzerabstand, um das korrekte Maß
und den richtigen Winkel für den Tiefenbegrenzer zu
erhalten.
2. Setzen Sie die Schärflehre auf die Sägekette.
Hinweis:
Sie weitere Informationen zur Verwendung des
Werkzeugs.
Allgemeine Informationen zum
.
Auf der Verpackung der Schärflehre finden
3. Verwenden Sie die Flachfeile, um den Teil des
Tiefenbegrenzers zu entfernen, der durch die
Schärflehre reicht.
So stellen Sie die Spannung der Sägekette ein
WARNUNG: Eine nicht korrekt gespannte
Sägekette kann sich von der
Führungsschiene lösen und schwere
Verletzungen oder Tod verursachen.
Eine Sägekette wird bei Verwendung länger. Stellen Sie
die Sägekette regelmäßig ein.
1. Lösen Sie die Führungsschienenmuttern, die
Kupplungsdeckel und Kettenbremse halten.
Verwenden Sie hierzu einen Schraubenschlüssel.
Hinweis: Einige Modelle haben nur eine
Schienenmutter.
2. Ziehen Sie die Schienenmuttern dann so fest wie
möglich von Hand an.
3. Heben Sie die Spitze der Führungsschiene an und
drehen Sie die Spannschraube. Verwenden Sie
hierzu einen Schraubenschlüssel.
4. Ziehen Sie die Sägekette fest, bis sie fest an der
Führungsschiene sitzt, sich aber noch immer einfach
bewegen kann.
5. Ziehen Sie die Muttern der Führungsschiene mit
dem Zoll-Schraubenschlüssel an, und heben Sie
gleichzeitig die Vorderseite der Führungsschiene an.
956 - 003 -
67
Page 68

6. Stellen Sie sicher, dass sich die Sägekette leicht von
Hand drehen lässt und nicht an der
Führungsschiene herabhängt.
Hinweis: Unter
die Position der Kettenspannschraube an Ihrem Gerät.
Produktübersicht auf Seite 38
finden Sie
So prüfen Sie die Schmierung der Sägekette
1. Starten Sie das Gerät, und lassen Sie es mit ¾Geschwindigkeit laufen. Halten Sie die Schiene ca.
20 cm über eine helle Oberfläche.
2. Wenn die Schmierung der Sägekette korrekt ist,
sehen Sie nach 1 Minute eine durchsichtige Ölspur
an der Oberfläche.
So schmieren Sie das Nadellager
1. Bewegen Sie den Handschutz nach hinten, um die
Kettenbremse zu lösen.
2. Lösen Sie die Schienenmuttern und entfernen Sie
den Kupplungsdeckel.
Hinweis: Einige Modelle haben nur eine
Schienenmutter.
3. Setzen Sie das Gerät auf einem stabilen Untergrund
mit der Kupplungstrommel nach oben ab.
4. Schmieren Sie das Nadellager mit einer
Schmierfettpistole. Verwenden Sie Motoröl oder
Lagerfett von hoher Qualität.
3. Wenn die Sägekettenschmierung nicht
ordnungsgemäß funktioniert, führen Sie eine
Prüfung der Führungsschiene durch. Eine Anleitung
finden Sie in
Seite 69
wenn Sie mit den Wartungsschritte das Problem
nicht beheben können.
So prüfen Sie die Führungsschiene auf
. Wenden Sie sich an den Kundendienst,
So prüfen Sie das Rim-Antriebsrad
Die Kupplungstrommel ist mit einem Rim-Antriebsrad
ausgestattet, das ausgetauscht werden kann.
1. Stellen Sie sicher, dass kein Verschleiß am RimAntriebsrad vorliegt. Tauschen Sie es bei Bedarf
aus.
2. Ersetzen Sie das Rim-Antriebsrad bei jedem
Wechsel der Sägekette.
68
So prüfen Sie die Schneidausrüstung
1. Stellen Sie sicher, dass es keine Risse an den
Nieten und Gliedern gibt und dass keine Nieten
locker sind. Tauschen Sie sie bei Bedarf aus.
2. Sorgen Sie dafür, dass die Sägekette einfach zu
biegen ist. Tauschen Sie die Sägekette aus, wenn
sie zu starr ist.
3. Vergleichen Sie die Sägekette mit einer neuen Kette,
um herauszufinden, ob Nieten und Glieder abgenutzt
sind.
956 - 003 -
Page 69

4. Tauschen Sie die Sägekette aus, wenn der längste
Teil des Schneidezahns weniger als 4 mm lang ist.
Tauschen Sie die Sägekette auch bei Rissen am
Schneidewerkzeug aus.
5. Prüfen Sie, ob die Führungsschienenspitze rau oder
stark abgenutzt ist.
So prüfen Sie die Führungsschiene
1. Stellen Sie sicher, dass die Ölleitung nicht verstopft
ist. Reinigen Sie sie, falls dies notwendig ist.
2. Prüfen Sie, ob sich an den Kanten der
Führungsschiene Grate gebildet haben. Entfernen
Sie Grate mit einer Feile.
3. Reinigen Sie die Nut in der Führungsschiene.
4. Überprüfen Sie die Nut in der Führungsschiene auf
Verschleiß. Tauschen Sie die Führungsschiene aus
wenn nötig.
6. Kontrollieren Sie, ob der Umlenkstern der
Führungsschiene sich leicht bewegen lässt und sein
Schmierloch offen ist. Reinigen und schmieren Sie
ihn bei Bedarf.
7. Drehen Sie die Führungsschiene täglich zur
Verlängerung der Lebensdauer.
So warten Sie den Kraftstofftank und Kettenöltank
• Lassen Sie den Kraftstofftank und den Kettenöltank
regelmäßig ab und reinigen Sie sie.
• Ersetzen Sie den Kraftstofffilter jährlich oder ggf.
häufiger.
ACHTUNG: Verunreinigungen im Tank
führen zu Betriebsstörungen.
956 - 003 -
So stellen Sie den Kettenölfluss ein
WARNUNG:
Sie Einstellungen an der Ölpumpe
vornehmen.
• Drehen Sie die Justierschraube der Ölpumpe.
Verwenden Sie dazu einen Schraubendreher oder
Gabel-Ringschlüssel.
a) Drehen Sie die Stellschraube im Uhrzeigersinn,
um den Kettenölfluss zu verringern.
Stoppen Sie den Motor, bevor
69
Page 70

b) Drehen Sie die Stellschraube gegen den
Uhrzeigersinn, um den Kettenölfluss zu erhöhen.
Empfohlene Einstellungen für die Ölpumpe
• Führungsschienenlänge 33 - 38 cm: Minimaler Fluss
• Führungsschienenlänge 38 - 41 cm: Mittlerer Fluss
• Führungsschienenlänge 46 cm: Maximaler Fluss
Luftfiltersystem
AirInjection™ ist ein Zentrifugalluftreinigungssystem, das
Staub und Schmutz entfernt, bevor die Partikel in den
Luftfilter gelangen. AirInjection™ erhöht die
Lebensdauer des Luftfilters und des Motors.
So reinigen Sie das Kühlsystem
Das Kühlsystem hält die Motortemperatur niedrig. Das
Kühlsystem umfasst den Lufteinlass am Anlasser und
das Luftleitblech, die Starterklinken auf dem
Schwungrad, die Kühlrippen des Zylinders, den
Kühlkanal und den Zylinderdeckel.
1. Reinigen Sie das Kühlsystem wöchentlich oder bei
Bedarf häufiger mit einer Bürste.
2. Stellen Sie sicher, dass das Kühlsystem nicht
verschmutzt oder verstopft ist.
ACHTUNG:
Verstopfung des Kühlsystems führt zur
Überhitzung des Gerätes, was das Gerät
beschädigen kann.
Eine Verschmutzung oder
Fehlerbehebung
Der Motor springt nicht an
Zu überprüfendes Bauteil des Produkts
Starterklinken Die Starterklinken sind blockiert. Stellen Sie die Starterklinken ein
70 956 - 003 -
Mögliche Ursache Maßnahme
oder tauschen Sie sie aus.
Reinigen Sie den Bereich um die
Starterklinken.
Wenden Sie sich an eine autorisierte
Servicewerkstatt.
Page 71

Zu überprüfendes Bauteil des Produkts
Kraftstofftank Falsche Kraftstoffsorte. Wechseln Sie den Kraftstoff aus.
Zündung, kein Zündfunke Die Zündkerze ist verschmutzt oder
Zündkerze und Zylinder Die Zündkerze sitzt lose. Zündkerze festziehen.
Mögliche Ursache Maßnahme
Der Kraftstofftank wird mit Kettenöl
gefüllt.
nass.
Der Elektrodenabstand ist falsch. Reinigen Sie die Zündkerze. Stellen
Die Maschine ist „abgesoffen“ aufgrund von wiederholten Starts mit
vollständigem Choke nach der Zündung.
Wenn Sie versucht haben, das Gerät
zu starten, wenden Sie sich an den
Kundendienst. Wenn Sie noch nicht
versucht haben, das Gerät zu starten, leeren Sie den Kraftstofftank.
Stellen Sie sicher, dass die Zündkerze sauber und trocken ist.
Sie sicher, dass der Elektrodenabstand und die Zündkerze korrekt sind
und dass der verwendete Zündkerzentyp der empfohlene oder ein
gleichwertiger ist.
Unter
Technische Angaben auf Seite
72
finden Sie den richtigen Elektro-
denabstand.
Entfernen und reinigen Sie die Zündkerze. Legen Sie das Produkt auf die
Seite, sodass die Zündkerzenöffnung
von Ihnen weg zeigt. Ziehen Sie 6bis 8-mal den Startseilgriff. Montieren
Sie die Zündkerze, und starten Sie
das Produkt. Siehe
das Gerät auf Seite 49
So starten Sie
.
Der Motor startet, geht aber wieder aus.
Zu überprüfendes Bauteil des Produkts
Kraftstofftank Falsche Kraftstoffsorte. Wechseln Sie den Kraftstoff aus.
Vergaser Die Leerlaufdrehzahl ist falsch. Wenden Sie sich an Ihren Service-
Luftfilter Verstopfter Luftfilter. Reinigen oder ersetzen Sie den Luft-
Kraftstofffilter Verstopfter Kraftstofffilter. Tauschen Sie den Kraftstofffilter aus.
Mögliche Ursache Maßnahme
händler.
filter.
Transport und Lagerung
Transport und Lagerung
• Für die Lagerung und den Transport des Produkts
und des Kraftstoffs ist darauf zu achten, dass keine
Lecks oder Dämpfe vorhanden sind. Funken oder
956 - 003 - 71
offene Flammen, zum Beispiel von elektrischen
Geräten oder einem Boiler, können ein Feuer
auslösen.
Page 72

• Verwenden Sie für die Lagerung und den Transport
von Kraftstoff immer zugelassene Behälter.
• Leeren Sie den Kraftstoff- und Kettenöltank vor
einem Transport oder einer langen Lagerung des
Geräts. Entsorgen Sie den Kraftstoff und das
Kettenöl in einer geeigneten Abfallentsorgungsstelle.
• Verwenden Sie für das Gerät einen Transportschutz,
um Verletzungen oder Schäden am Gerät zu
vermeiden. Eine Sägekette, die sich nicht bewegt,
kann auch zu schweren Verletzungen führen.
• Entfernen Sie die Zündkappe von der Zündkerze,
und aktivieren Sie die Kettenbremse.
• Befestigen Sie das Gerät während des Transports
sicher.
2. Befestigen Sie den Transportschutz.
3. Reinigen Sie das Produkt. Eine Anleitung finden Sie
in
4. Führen Sie eine vollständige Wartung des Geräts
aus.
ACHTUNG: Wenn die Sägekette und die
Führungsschiene nicht gereinigt werden,
können sie starr oder blockiert werden.
Wartung auf Seite 58
So bereiten Sie das Gerät zur Langzeitlagerung vor
1. Zerlegen und reinigen Sie die Sägekette und die Nut
der Führungsschiene.
Technische Angaben
Technische Daten
Husqvarna 543 XP Husqvarna 543 XPG
Motor
Hubraum, cm
Leerlaufdrehzahl, U/min 2500-2700 2500-2700
Motorhöchstleistung nach ISO 8893,
kW/PS bei U/min
Zündanlage
Zündkerze NGK CMR7H NGK CMR7H
Elektrodenabstand, mm 0,65 0,65
Kraftstoff- und Schmiersystem
Füllmenge Kraftstofftank, l/cm
Füllmenge Kraftstofftank, l/cm
Ölpumpentyp Einstellbar Einstellbar
Gewicht
Gewicht, kg 4,5 4,7
Geräuschemissionen
Schallleistungspegel, gemessen in
dB(A)
3
4
43,1 43,1
2,2/2,9 bei 9600 2,2/2,9 bei 9600
3
0,42/420 0,42/420
3
0,27/270 0,27/270
112 112
.
4
Verwenden Sie stets den vom Hersteller empfohlenen Zündkerzentyp! Eine ungeeignete Zündkerze kann Kolben und Zylinder beschädigen.
72 956 - 003 -
Page 73

Husqvarna 543 XP Husqvarna 543 XPG
Schallleistungspegel, garantiert L
dB(A)
Lautstärke
Äquivalenter Schalldruckpegel am
Ohr des Bedieners, dB(A)
Äquivalente Vibrationspegel, a
Vorderer Griff, m/s
Hinterer Griff, m/s
Sägekette/Führungsschiene
Kettenantriebsradtyp/Anzahl Zähne Rim/7 Rim/7
Kettengeschwindigkeit bei 133 % der
maximalen Motorleistung, m/s.
5
2
2
WA
113 113
101 101
6
hveq
4,5 4,5
4,2 4,2
24,6 24,6
Zubehör
Empfohlene Schneidausrüstung
Die Kettensägenmodelle Husqvarna 543 XP, 543 XPG
wurden gemäß EN ISO 11681-1:2011 auf Sicherheit
geprüft (Maschinen für die Forstwirtschaft –
Sicherheitsanforderungen und -prüfungen für tragbare
Kettensägen) und erfüllt die Sicherheitsanforderungen
bei Ausstattung mit den unten aufgeführten
Führungsschienen- und Sägekettenkombinationen.
Sägekette mit geringem Rückschlag
Eine Kette mit niedrigem Rückschlag erfüllt die Kriterien
für Sägeketten mit niedrigem Rückschlag gemäß ANSI
B175.1-2012.
Führungsschiene Sägekette
Länge, cm Neigung, Zoll Anzeige, mm Max. Anzahl
13/33 0,325 0,050/1,3 10T Husqvarna
15/38 64
16/41 66
18/46 72
5
Der äquivalente Schalldruckpegel ergibt sich gemäß ISO-Norm ISO 22868 durch die energetische Addition
zeitgewichteter Schalldruckpegel bei verschiedenen Betriebsarten. Die typische Ausbreitungsklasse für einen
äquivalenten Schalldruckpegel ist eine standardmäßige Ausbreitung von 1 dB(A).
6
Der äquivalente Schalldruckpegel ergibt sich gemäß ISO-Norm ISO 22867 durch die energetische Addition
zeitgewichteter Vibrationspegel bei verschiedenen Betriebsarten. Berichten zufolge liegt der äquivalente Vibrationspegel normalerweise bei einer Ausbreitungsklasse (Standardabweichung) von 1 m/s2.
Zähne des
Umlenksterns
Rückschlag und Radius der Führungsschienenspitze
Für Schienen mit Umlenkstern richtet sich der Radius
nach der Anzahl der Zähne (z. B. 10T). Für
Vollmaterialschienen richtet sich der Radius der Spitze
nach den Abmessungen der Spitze. Für eine gegebene
Führungsschienenlänge sollten Sie eine
Führungsschiene mit einem kleineren Spitzenradius
verwenden als aufgeführt.
Typ Länge, Treibg-
lied (Anz.)
56 Ja
H30
Geringer
Rückschlag
956 - 003 - 73
Page 74

Führungsschiene Sägekette
Länge, cm Neigung, Zoll Anzeige, mm Max. Anzahl
Zähne des
Umlenksterns
13/33 0,325 0,050/1,3 10T Husqvarna
15/38 64
16/41 66
18/46 72
13/33 0,325 0,058/1,5 10T Husqvarna
15/38 64
16/41 66
18/46 72
Typ Länge, Treibg-
SP33G
H25
lied (Anz.)
56
56 Ja
Geringer
Rückschlag
Die effektive Schnittlänge ist in der Regel 1 Zoll weniger
als die nominale Länge der Führungsschiene.
Pixel
Pixel ist eine Führungsschienen-SägekettenKombination mit geringem Gewicht, mit der schmalere
Schnitte bei einer höheren Energieeffizienz möglich
sind. Sowohl Führungsschiene als auch Sägekette
müssen der Kategorie Pixel angehören, damit Sie von
diesen Vorteilen profitieren können. PixelSchneidausrüstung ist mit diesem Symbol versehen.
SP33G 4,8 mm 586 93 84-01. 0,65 mm 30° 80°
H30 4,8 mm 505 69 81-08. 0,65 mm 30° 85°
H25 4,8 mm 505 69 81-09. 0,65 mm 30° 85°
Feilausrüstung und Feilwinkel
Verwenden Sie eine Husqvarna Schärflehre zum
Schärfen der Sägekette. Eine Husqvarna Schärflehre
stellt sicher, dass Sie die richtigen Feilwinkel erhalten.
Die Teilenummern können Sie der unten stehenden
Tabelle entnehmen.
Wenn Sie nicht genau wissen, wie Sie den Typ der
Sägekette an Ihrem Gerät identifizieren, finden Sie unter
www.husqvarna.com weitere Informationen dazu.
74 956 - 003 -
Page 75

EG-Konformitätserklärung
EG-Konformitätserklärung
Husqvarna AB, S-561 82 Huskvarna, Schweden, Tel.
+46-36-146500, erklären hiermit unsere alleinige
Haftung dafür, dass die Motorsägen für die Baumpflege
Husqvarna 543 XP, 543 XPG, auf die sich diese
Erklärung bezieht, von den Seriennummern des
Baujahrs 2016 an (die Jahreszahl wird im Klartext auf
dem Typenschild angegeben, mitsamt einer
nachfolgenden Seriennummer) den Vorschriften
folgender RICHTLINIEN DES RATES entspricht:
• „Maschinen-Richtlinie“ 2006/42/EG vom 17. Mai
2006
• Richtlinie „über elektromagnetische Verträglichkeit“,
2014/30/EU vom 26. Februar 2014
• Richtlinie „über umweltbelastende
Geräuschemissionen von zur Verwendung im Freien
vorgesehenen Geräten und Maschinen“ 2000/14/EG
vom 8. Mai 2000
• Richtlinie „zur Beschränkung der Verwendung
bestimmter gefährlicher Stoffe in Elektro- und
Elektronikgeräten" 2011/65/EU vom 8. Juni 2011.
Die folgenden Normen werden erfüllt: EN ISO
12100:2010, ISO 14982:2009, EN ISO 11681-1:2011,
EN 50581:2012
Die angemeldete Prüfstelle 0404, RISE SMP Svensk
Maskinprovning AB, Postfach 7035, SE-750 07 Uppsala,
Schweden, hat die EG-Typenprüfung gemäß Artikel 12,
Punkt 3b der Maschinen-Richtlinie (2006/42/EG)
ausgeführt. Die Zertifikate über die EG-Typenprüfung
gemäß Anhang VI weisen folgende Nummern auf:
0404/12/2360 – 543 XP, 543 XPG.
Darüber hinaus hat 0404, RISE SMP Svensk
Maskinprovning AB, Box 7035, SE-750 07 Uppsala,
Schweden, hat die Übereinstimmung mit der Anlage V
zur Richtlinie des Rates vom 8. Mai 2000 „über
umweltbelastende Geräuschemissionen von zur
Verwendung im Freien vorgesehenen Geräten und
Maschinen“ 2000/14/EG bestätigt. Das Zertifikat hat die
Nummer: 01/161/080 - 543 XP, 543 XPG.
Informationen zu Geräuschemissionen finden Sie unter
Technische Angaben auf Seite 72
Die gelieferte Motorsäge entspricht dem
Geräteexemplar, das die EG-Typenprüfung durchlaufen
hat.
Huskvarna, 20160330
.
Per Gustafsson, Entwicklungsleiter (bevollmächtigter
Vertreter für Husqvarna AB, verantwortlich für die
technische Dokumentation)
956 - 003 - 75
Page 76

Contenido
18
19
6
17
7
27
25
1
8
9
10
11
3
4
2
31
30
32
12
15
24
5
5
26
14
16
13
5
21
22
23
28
29
20
5
33
34
35
Introducción.................................................................. 76
Seguridad..................................................................... 78
Montaje......................................................................... 83
Funcionamiento............................................................ 84
Mantenimiento.............................................................. 96
Introducción
Uso previsto
Este producto está diseñado para serrar madera.
Nota: El uso de este producto podría estar regulado por
la legislación nacional.
Descripción del producto
Las Husqvarna 543 XP, 543 XPG son modelos de
motosierra con motor de combustión.
Descripción del producto
Resolución de problemas........................................... 108
Transporte y almacenamiento.................................... 109
Datos técnicos............................................................ 110
Accesorios.................................................................. 111
Declaración de conformidad CE................................. 113
Trabajamos constantemente para mejorar la seguridad
y la eficiencia durante el uso del producto. Póngase en
contacto con su distribuidor para obtener más
información.
1. Tapa del filtro de aire 2. Bujía
76 956 - 003 -
Page 77

3. Cubierta de la bujía
4. Filtro de aire
5. Sistema amortiguador de vibraciones, 4 unidades
6. Bloqueo del acelerador
7. Mango trasero
8. Etiqueta adhesiva de información y advertencia
9. Acelerador
10. Interruptor de arranque/parada
11. Control del estrangulador
12. Depósito de combustible
13. Perilla de la bomba de combustible
14. Empuñadura de la cuerda de arranque
15. Cuerpo del mecanismo de arranque
16. Depósito de aceite de la cadena
17. Silenciador
18. Freno de cadena con protección contra reculadas
19. Mango delantero
20. Interruptor para calefacción de los mangos (543
XPG)
21. Protección de la mano derecha
22. Cubierta del embrague
23. Tornillo de tornillo de tensado de cadena
24. Captor de cadena
25. Cadena de sierra
26. Espada
27. Cabezal de rueda
28. Pasador de ajuste de la cadena
29. Cinta de freno
30. Manual de usuario
31. Protección de transporte
32. Llave combinada
33. Placa de identificación
34. Tornillo de ajuste, bomba de aceite
35. Tuercas de la espada
Símbolos que aparecen en el producto
Emisiones sonoras al medio ambiente
conformes con la directiva europea
2000/14/CE y con la regulación de 2017
sobre de protección del medio ambiente
(control de ruidos) (Protection of the
Environment Operations - Noise Control) de
la legislación de Nueva Gales del Sur. Los
datos sobre las emisiones sonoras se
pueden encontrar en la etiqueta de la
máquina y en el capítulo
la página 110
El operario debe usar las dos manos para
utilizar la motosierra.
Nunca utilice la motosierra sosteniéndola
solo con una sola mano.
No permita nunca que la punta de la espada
entre en contacto con ningún objeto.
Advertencia: Si la punta de la espada toca
en un objeto se puede producir reculada
que lanza la espada hacia arriba y atrás
contra el usuario. Ello puede causar daños
personales graves.
Freno de cadena, activado (parte derecha)
Freno de cadena, no activado (parte
izquierda).
Estrangulador en posición abierta.
.
Datos técnicos en
El uso descuidado o incorrecto de este
producto puede provocar heridas graves o
mortales al operador o a otras personas.
Lea atentamente el manual de usuario y
asegúrese de que entiende las instrucciones
antes de utilizar este producto.
Use siempre casco protector, protectores
auriculares y gafas protectoras o visor
homologados.
Este producto cumple con las directivas CE
vigentes.
956 - 003 - 77
Estrangulador en posición cerrada.
Bomba de combustible.
Carga de combustible.
Rellenado de aceite para cadena.
Page 78

Ajuste de la bomba de
yyyywwxxxxx
aceite.
Nota: Los demás símbolos/etiquetas que aparecen en el
producto corresponden a requisitos de homologación en
determinados mercados.
Placa de características
que muestra el número de
serie. aaaa es el año de
fabricación, ss es la semana de producción.
Seguridad
Definiciones de seguridad
Las advertencias, precauciones y notas se utilizan para
destacar información especialmente importante del
manual.
ADVERTENCIA: Indica un riesgo de
lesiones o incluso de muerte del usuario o
de las personas cercanas si no se respetan
las instrucciones del manual.
PRECAUCIÓN: Indica un riesgo de daños
en el producto, otros materiales o el área
adyacente si no se respetan las
instrucciones del manual.
Nota: Se usa para proporcionar más información
necesaria en una situación determinada.
Instrucciones generales de seguridad
ADVERTENCIA: Lea las siguientes
instrucciones de advertencia antes de
utilizar el producto.
• Una motosierra es una herramienta peligrosa que
puede causar daños graves e incluso mortales si se
usa de forma incorrecta o descuidada. Es muy
importante que lea y comprenda el contenido de
este manual de instrucciones.
• Bajo ninguna circunstancia debe modificarse la
configuración original del producto sin autorización
del fabricante. No utilice un producto que parezca
haber sido modificado por otras personas y emplee
solo accesorios recomendados. Las modificaciones
y/o la utilización de accesorios no autorizadas
pueden ocasionar accidentes graves o incluso la
muerte del operario o de terceros.
• En el interior del silenciador hay sustancias químicas
que pueden ser cancerígenas. Evitar el contacto con
estas sustancias si se daña el silenciador.
• La inhalación prolongada de los gases de escape
del motor, los vapores de aceite de cadena y el
serrín puede poner en riesgo la salud.
Emisiones Euro V
ADVERTENCIA: La manipulación del motor
anula la homologación de la UE de este
producto.
• Este producto genera un campo electromagnético
durante el funcionamiento. Este campo magnético
puede, en determinadas circunstancias, interferir
con implantes médicos activos o pasivos. Para
reducir el riesgo de que se den condiciones que
provocarían lesiones graves o letales, las personas
que utilizan implantes médicos deben consultar con
su médico y con el fabricante del implante antes de
poner en marcha este producto.
• La información de este manual de usuario nunca es
un sustituto de competencia y experiencia
profesional. Por consiguiente, cuando no esté
seguro de cómo utilizar la máquina, consulte a un
experto. Póngase en contacto con su distribuidor o
con un usuario experimentado de motosierras. ¡Evite
los trabajos para los que no se sienta
suficientemente cualificado!
Instrucciones de seguridad para el funcionamiento
ADVERTENCIA: Lea las siguientes
instrucciones de advertencia antes de
utilizar el producto.
• No utilice el producto hasta que haya comprendido
el efecto de las reculadas y la forma de evitarlas.
Consulte
Información sobre reculada en la página
86
para ver las instrucciones.
• No utilice nunca un producto defectuoso.
• No utilice nunca un producto con daños visibles en
el sombrerete de bujía y el cable de encendido. Hay
riesgo de generación de chispas, que pueden
causar incendios.
• Nunca utilice el producto si está cansado, si ha
ingerido alcohol o si toma medicamentos que
puedan afectarle la vista, su capacidad de
discernimiento o el control del cuerpo.
• No use el producto en condiciones atmosféricas
desfavorables como niebla, lluvia intensa,
tempestad, frío intenso, etc. El trabajo con mal
tiempo es fatigoso y puede crear circunstancias
peligrosas, como terreno resbaladizo, cambio
imprevisto de la dirección de derribo de los árboles,
etc.
78
956 - 003 -
Page 79

• No ponga en marcha el producto sin haber montado
antes correctamente la espada, la cadena de sierra
y todas las cubiertas. Consulte
83
para ver las instrucciones. Sin la espada y la
cadena de sierra montadas en el producto, el
embrague se puede soltar y causar daños graves.
Montaje en la página
involuntariamente una rama, un árbol u otro objeto y
producir una reculada.
• No ponga nunca en marcha el producto en
interiores. Tenga en cuenta el riesgo de inhalación
de los gases de escape del motor.
• Los gases de escape del motor están calientes y
pueden contener chispas que pueden provocar un
incendio. Nunca arranque el producto cerca de
material inflamable.
• Observe el entorno y asegúrese de que no haya
personas o animales en riesgo de entrar en contacto
con el equipo de corte o capaces de afectar a su
control del producto.
• No permita nunca que los niños utilicen el producto
ni que permanezcan cerca de este. Dado que el
interruptor de arranque/parada de la máquina tiene
retorno por muelle y se puede arrancar con poca
velocidad y fuerza en la empuñadura de arranque,
incluso niños pequeños pueden, en determinadas
circunstancias, lograr la fuerza necesaria para
arrancar el producto. Ello puede comportar riesgo de
daños personales graves. Por consiguiente, quite el
sombrerete de bujía cuando vaya a dejar la máquina
sin vigilar.
• Para tener el máximo control del producto, es
necesario adoptar una posición estable. No trabaje
nunca subido a una escalera, encaramado a un
árbol o en una posición que carezca de una base
firme.
• Si se trabaja con negligencia, el sector de riesgo de
reculada de la espada puede tocar
• Nunca utilice el producto sosteniéndolo con una
mano. Este producto no se controla con seguridad
con una mano.
• Sujete siempre el producto con ambas manos.
Agarre la empuñadura trasera con la mano derecha
y la empuñadura delantera con la mano izquierda.
Todos los usuarios, diestros o zurdos, deben usar
este agarre. Agarre con firmeza, con todos los
dedos alrededor de los mangos. Este agarre es la
mejor forma de reducir el riesgo de reculada y, al
mismo tiempo, mantener el control del producto. ¡No
suelte los mangos!
• No utilice nunca el producto por encima de los
hombros.
• No utilice el producto sin que haya alguien a quien
recurrir en caso de accidente.
• Para desplazar el producto, pare el motor y bloquee
la cadena de sierra con el freno de cadena.
Transporte el producto con la espada y la cadena de
sierra mirando hacia atrás. Para los
desplazamientos largos y los transportes, utilice
siempre la protección de transporte de la espada.
• Cuando ponga el producto en el suelo, bloquee la
cadena de sierra con el freno de cadena y no lo
pierda de vista. Para un estacionamiento prolongado
del producto, se debe parar el motor.
• A veces las astillas quedan atrapadas en la cubierta
del embrague, lo que hace que la cadena de sierra
956 - 003 -
79
Page 80

se atasque. Antes de retirarlas, pare siempre el
motor.
• Si se hace funcionar el motor en un local cerrado o
mal ventilado, se corre riesgo de muerte por
intoxicación con monóxido de carbono.
• Los gases de escape del motor están calientes y
pueden contener chispas que pueden provocar
incendio. Nunca arranque el producto en interiores
ni cerca de material inflamable.
• Utilice el freno de cadena como freno de
estacionamiento cuando arranque el producto y
cuando se mueva en distancias cortas. Cuando
transporte el producto, hágalo siempre por el mango
delantero. Esto reduce el riesgo de que usted o
cualquier otra persona que se encuentre cerca
puedan sufrir daños por la cadena de sierra.
• La sobreexposición a las vibraciones puede
provocar problemas circulatorios y dolencias de
carácter nervioso, especialmente en personas con
patologías circulatorias. Acuda a un médico si nota
síntomas corporales que puedan relacionarse con la
sobreexposición a las vibraciones. Son ejemplos de
tales síntomas la pérdida de sensibilidad, el
'cosquilleo', las 'punzadas', el dolor, la pérdida o
reducción de la fuerza normal o los cambios en el
color y la superficie de la piel. Estos síntomas se
presentan normalmente en dedos, manos y
muñecas. Los síntomas pueden aumentar en
temperaturas frías.
• Es imposible abarcar todas las situaciones
imaginables que se pueden producir al utilizar este
producto. Utilice siempre el equipo con cuidado y
sentido común. Evite todas aquellas situaciones que
considere que sobrepasan sus capacidades. Si,
después de leer estas instrucciones, no está seguro
del procedimiento que debe seguir, consulte a un
experto antes de utilizar el equipo. No dude en
ponerse en contacto con el distribuidor o con
Husqvarna si tiene alguna duda en cuanto al empleo
del producto. Estaremos encantados de poder
aconsejarle y ayudarle a utilizar el producto de
manera eficaz y segura. Le recomendamos hacer un
cursillo sobre empleo de motosierras. El distribuidor
local, una escuela de silvicultura o una biblioteca
pueden informarle acerca del material de formación
y los cursos disponibles.
• La mayoría de los accidentes con motosierra se
producen cuando la cadena de sierra toca al
operador. Utilice un equipo de protección personal
homologado durante el uso del producto. El equipo
de protección personal no elimina completamente el
riesgo de lesiones, pero reduce la gravedad de las
lesiones en caso de accidente. Consulte a su taller
de servicio para que le informe sobre el equipo que
puede utilizar.
• La ropa debe ser ceñida pero debe permitirle total
libertad de movimiento. Compruebe periódicamente
el estado del equipo de protección personal.
• Utilice un casco protector homologado.
• Utilice protección auditiva homologada. La
exposición prolongada al ruido puede causar daños
crónicos en el oído.
• Utilice siempre gafas protectoras o visera para
reducir el riesgo de lesiones causadas por objetos
que salgan despedidos. El producto puede lanzar
con gran fuerza objetos como virutas, trozos de
madera pequeños, etc. Ello comporta riesgo de
daños personales graves, especialmente en los
ojos.
• Utilice guantes con protección anticorte.
• Utilice pantalones con protección anticorte.
• Utilice botas con protección anticorte, puntera de
acero y suela antideslizante.
• Tenga siempre a mano el equipo de primeros
auxilios.
• Riesgo de chispas. Tenga a mano herramientas
para extinguir incendios y una pala para evitar
incendios forestales.
Dispositivos de seguridad en el producto
Equipo de protección personal
ADVERTENCIA: Lea las siguientes
instrucciones de advertencia antes de
utilizar el producto.
80
ADVERTENCIA: Lea las siguientes
instrucciones de advertencia antes de
utilizar el producto.
• No utilice un producto que tenga dispositivos de
seguridad defectuosos.
• Realice una comprobación de los dispositivos de
seguridad con frecuencia. Consulte la sección
Mantenimiento y comprobaciones de los dispositivos
de seguridad del producto en la página 98
• Si los dispositivos de seguridad están defectuosos,
hable con su taller de servicio Husqvarna.
.
956 - 003 -
Page 81

Freno de cadena con protección contra reculadas
A
B
A
B
El producto cuenta con un freno de cadena que detiene
la cadena en caso de reculada. El freno de cadena
reduce el riesgo de accidentes, pero solo es usted, el
usuario, quien puede impedirlos.
El freno de cadena (A) se activa manualmente con la
mano izquierda o automáticamente por efecto de la
inercia. Mueva la protección contra reculadas (B) hacia
delante para acoplar el freno de cadena manualmente.
Mueva la protección contra reculadas hacia atrás para
desacoplar el freno de cadena.
Bloqueo del acelerador
El bloqueo del acelerador evita el uso accidental del
acelerador. Si coloca la mano en el mango y presiona el
bloqueo del acelerador (A), se desbloqueará el
acelerador (B). Al soltar el mango, el acelerador y el
bloqueo del acelerador vuelven a sus posiciones
iniciales. Esta función bloquea el acelerador cuando el
producto se encuentra a ralentí.
el mantenimiento adecuado tanto de la cadena como de
la espada ayudan a reducir el riesgo de accidentes.
Protección de la mano derecha
La protección de la mano derecha protege su mano al
ponerla sobre el mango trasero. Ofrece protección en
caso de que la cadena de sierra se rompa o se suelte.
Además, la protección de la mano derecha también
protege frente a las ramas.
Sistema amortiguador de vibraciones
El sistema amortiguador de vibraciones disminuye la
vibración en los mangos. Los amortiguadores de
vibraciones actúan como separadores entre el cuerpo
del producto y el mango.
Consulte
obtener más información sobre la ubicación del sistema
amortiguador de vibraciones en el producto.
Interruptor de arranque/parada
Utilice el interruptor de arranque/parada para parar el
motor.
Descripción del producto en la página 76
para
Captor de cadena
El captor de cadena sujeta la cadena de sierra si se
rompe o se suelta. Una cadena de sierra bien tensada y
Silenciador
ADVERTENCIA:
mucho durante y después del
956 - 003 - 81
funcionamiento, y con el producto a ralentí.
Hay riesgo de incendio, especialmente si el
El silenciador se calienta
Page 82

producto se utiliza cerca de materiales o
vapores inflamables.
ADVERTENCIA: No utilice nunca un
producto que no tenga silenciador o que lo
tenga defectuoso. Un silenciador defectuoso
puede aumentar el nivel de ruido y el riesgo
de incendio. Tenga a mano herramientas
para extinguir incendios. No utilice un
producto sin red apagachispas o con ella
rota si esta es obligatoria en su zona.
El silenciador mantiene al mínimo los niveles de ruido y
aparta los gases de escape del operador. En regiones
de clima cálido y seco, puede haber un riesgo de
incendio considerable. Cumpla la legislación local y
aplique las instrucciones de mantenimiento.
Seguridad en el uso del combustible
ADVERTENCIA: Lea las siguientes
instrucciones de advertencia antes de
utilizar el producto.
• Procure que haya buena ventilación durante el
repostaje y la mezcla de combustible (gasolina y
aceite para motores de dos tiempos).
• El combustible y los vapores de combustible son
muy inflamables y pueden causar daños graves por
inhalación y contacto con la piel. Por consiguiente, al
manipular combustible proceda con cuidado y
procure que haya buena ventilación.
• Proceda con cuidado en la manipulación del
combustible y el aceite de cadena. Tenga en cuenta
el riesgo de incendio, explosión e inhalación.
• No fume ni ponga objetos calientes cerca del
combustible.
• Apague el motor y deje que se enfríe unos minutos
antes de repostar.
• Para repostar, abra despacio la tapa del depósito de
combustible para evacuar lentamente la eventual
sobrepresión.
• Después de repostar, apriete bien la tapa del
depósito de combustible.
• No reposte nunca la máquina con el motor en
marcha.
• Antes de arrancar, aparte siempre el producto unos
3 metros (10 ft) del lugar y de la fuente de repostaje.
Después de repostar, hay algunas situaciones en las
que nunca debe arrancar el producto:
• Si ha derramado sobre el producto combustible o
aceite para cadena. Seque cualquier residuo y
espere a que se evaporen los restos de combustible.
• Si ha derramado combustible sobre sí mismo o su
ropa. Cámbiese de ropa y lávese las partes del
cuerpo que han entrado en contacto con el
combustible. Use agua y jabón.
• Si el producto presenta fugas de combustible.
Compruebe regularmente si hay fugas en el
depósito de combustible, en el tapón del depósito de
combustible y en los conductos de combustible.
Instrucciones de seguridad para el mantenimiento
ADVERTENCIA: Lea las instrucciones de
advertencia siguientes antes de realizar el
mantenimiento del producto.
• Lleve a cabo solamente las labores de servicio y
mantenimiento indicadas en el presente manual de
usuario. El resto de trabajos de reparación y
mantenimiento deben encomendarse a un
profesional.
• Lleve a cabo las comprobaciones de seguridad y
siga las instrucciones de mantenimiento y servicio
de este manual. El mantenimiento periódico
aumenta la vida útil del producto y disminuye el
riesgo de accidentes. Consulte
página 96
• Si las comprobaciones de seguridad descritas en
este manual de usuario no arrojan un resultado
satisfactorio tras llevar a cabo los trabajos de
mantenimiento, contacte con el taller de servicio. Le
garantizamos que realizarán reparaciones y
mantenimiento profesionales en su producto.
para ver las instrucciones.
Mantenimiento en la
Instrucciones de seguridad para el equipo de corte
ADVERTENCIA: Lea las siguientes
instrucciones de advertencia antes de
utilizar el producto.
82 956 - 003 -
Page 83

• Utilice solo las combinaciones de espada y cadena
A
de sierra, así como el equipo de afilado
recomendados. Consulte
111
para ver las instrucciones.
• Use guantes protectores cuando manipule la cadena
de sierra o realice tareas de mantenimiento en ella.
La cadena de sierra puede causar lesiones, aunque
no se mueva.
• Mantenga los dientes de corte bien afilados. Siga las
instrucciones y utilice el calibrador de afilado
recomendado. Una cadena de sierra dañada o mal
afilada aumenta el riesgo de accidentes.
• Mantenga el calibre de profundidad adecuado. Siga
las instrucciones y utilice el calibre de profundidad
recomendado. Un calibre de profundidad demasiado
grande aumenta el riesgo de reculada.
Accesorios en la página
Montaje
Introducción
ADVERTENCIA: Asegúrese de leer y
comprender el capítulo sobre seguridad
antes de montar el producto.
• Asegúrese de que la cadena de sierra tiene la
tensión correcta. Si la cadena de sierra no está bien
tensada en la espada, puede soltarse. Si la tensión
de la cadena de sierra es incorrecta, el desgaste de
la espada, la cadena de sierra y el piñón de arrastre
de la cadena es mayor. Consulte la sección
Ajuste
de la tensión de la cadena de sierra en la página
105
.
• Realice periódicamente el mantenimiento del equipo
de corte y manténgalo bien lubricado. Si la cadena
de sierra no está bien lubricada, el riesgo de
desgaste de la espada, la cadena de sierra y el
piñón de arrastre de la cadena es mayor.
2. Retire las tuercas de la espada y la cubierta del
embrague. Retire la protección de transporte (A).
Montaje de la espada y la cadena
1. Desactive el freno de cadena.
3. Monte la espada sobre el tornillo de la espada.
Desplace la espada al máximo hacia atrás.
956 - 003 - 83
Page 84

4. Instale la cadena de sierra correctamente alrededor
7
10
9
1
2
3
6,8
4
del piñón de arrastre y colóquela en la ranura de la
espada.
ADVERTENCIA: Use siempre guantes
protectores cuando monte la cadena de
sierra.
Funcionamiento
Introducción
ADVERTENCIA: Asegúrese de leer y
comprender el capítulo sobre seguridad
antes de usar el producto.
5. Asegúrese de que los bordes de los eslabones de
corte están orientados hacia delante en la parte
superior de la espada.
6. Alinee el orificio de la espada con el pasador de
ajuste de la cadena e instale la cubierta del
embrague.
7. Apriete a mano la tuerca de la espada.
8. Apriete la cadena de sierra. Consulte
tensión de la cadena de sierra en la página 105
ver las instrucciones.
9. Apriete las tuercas de la espada.
10. Compruebe la tensión de la cadena de sierra.
Ajuste de la
para
Prueba de funcionamiento antes de utilizar el producto
1. Asegúrese de que el freno de cadena funcione
correctamente y no esté dañado.
2. Asegúrese de que la protección de la mano derecha
no esté dañada.
3. Asegúrese de que el fiador del acelerador funcione
correctamente y no esté dañado.
4. Asegúrese de que el interruptor de arranque/parada
funcione correctamente y no esté dañado.
5. Asegúrese de que no haya aceite en los mangos.
6. Asegúrese de que el sistema amortiguador de
vibraciones funcione correctamente y no esté
dañado.
7. Asegúrese de que el silenciador funcione
correctamente y no esté dañado.
8. Asegúrese de que todas las piezas del producto
estén bien montadas y en perfectas condiciones, y
de que no falte ninguna.
9. Asegúrese de que el captor de cadena esté bien
84
montado.
Carburante
Este producto tiene un motor de dos tiempos.
PRECAUCIÓN: Un tipo de combustible
incorrecto puede producir daños en el
motor. Utilice una mezcla de gasolina y
aceite para motores de dos tiempos.
Combustible premezclado
• Utilice gasolina de alquilato premezclada Husqvarna
de buena calidad para mejorar el rendimiento y
prolongar la vida útil del motor. Este combustible
contiene menos productos químicos peligrosos que
la gasolina tradicional, lo que reduce los gases de
escape tóxicos. Con este combustible, se reduce la
cantidad de residuos de la combustión, lo que ayuda
a mejorar el nivel de limpieza de los componentes
del motor.
956 - 003 -
Page 85

Mezcla de combustible
Gasolina
• Utilice gasolina sin plomo de buena calidad con un
máximo de un 10 % de etanol.
PRECAUCIÓN: No utilice gasolina con
un octanaje inferior a 90 octanos RON
(87 AKI). El uso de gasolina de un
octanaje inferior puede causar golpeteo
del motor, lo cual puede provocar daños
en el motor.
• Le recomendamos que utilice gasolina con un
octanaje superior si va a trabajar constantemente
con un régimen elevado.
Aceite para motores de dos tiempos
• Para obtener los mejores resultados y un
rendimiento óptimo, utilice aceite para motores de
dos tiempos Husqvarna.
• Si no se dispone de aceite para motores de dos
tiempos Husqvarna, puede utilizarse un aceite para
motores de dos tiempos de buena calidad para
motores refrigerados por aire. Póngase en contacto
con su taller de servicio para seleccionar el aceite
correcto.
PRECAUCIÓN: No utilice nunca aceite
para motores de dos tiempos motores
fueraborda refrigerados por agua. No
utilice aceite para motores de cuatro
tiempos.
1. Agregue la mitad de la cantidad de gasolina a un
recipiente limpio homologado para combustible.
2. Añada la cantidad total de aceite.
3. Agite la mezcla de combustible.
4. Añada el resto de gasolina al recipiente.
5. Agite bien la mezcla de combustible.
PRECAUCIÓN: No mezcle combustible para
más de 1 mes como máximo.
Llenado del depósito de combustible
1. Limpie minuciosamente alrededor de la tapa del
depósito de combustible.
Mezcla de gasolina y aceite para motores de dos tiempos
Gasolina, litros Aceite para
motores de
dos tiempos, litros
2 % (50:1)
5 0,10
10 0,20
15 0,30
20 0,40
PRECAUCIÓN: Los errores, por pequeños
que sean, pueden influir en la proporción de
la mezcla considerablemente si mezcla
pequeñas cantidades de combustible. Mida
cuidadosamente la cantidad de aceite para
asegurarse de obtener la mezcla adecuada.
956 - 003 -
2. Agite el recipiente y asegúrese de que el
combustible esté totalmente mezclado.
3. Quite el tapón al depósito de combustible y vacíelo.
4. Apriete con cuidado el tapón del depósito de
combustible.
5. Aparte el producto 3 m (10 pies) o más del lugar y la
fuente de repostaje antes de arrancar el motor.
Para conocer la ubicación del depósito de
Nota:
combustible en el producto, consulte
producto en la página 76
.
Descripción del
Rodaje
• Durante las primeras 10 horas de funcionamiento,
no acelere al máximo sin carga durante periodos
prolongados.
85
Page 86

Uso de aceite para cadena correcto
ADVERTENCIA: No utilice aceite residual,
ya que puede causar tanto lesiones
personales como daños al medio ambiente.
El aceite residual también causa daños a la
bomba de aceite, la espada y la cadena de
sierra.
ADVERTENCIA: La cadena de sierra puede
romperse si la lubricación del equipo de
corte es insuficiente. Riesgo de lesiones
graves o mortales para el operador.
ADVERTENCIA: Este producto cuenta con
una función que permite que el combustible
se agote antes que el aceite para cadena.
Para que esta función funcione
correctamente, utilice un aceite para cadena
adecuado. Consulte a su taller de
mantenimiento al seleccionar el aceite para
cadena.
Para conocer la ubicación del depósito de aceite
Nota:
para cadena en el producto, consulte
producto en la página 76
.
Descripción del
Información sobre reculada
ADVERTENCIA: La reculada puede
ocasionar lesiones graves o mortales tanto
al operador como a cualquier otra persona.
Para reducir el riesgo, debe conocer las
causas de la reculada y cómo evitarlas.
La reculada se produce cuando la zona de riesgo de
reculada de la espada toca un objeto. Una reculada
puede producirse de forma repentina y violenta; esta
situación lanza el producto contra el operador.
• Utilice aceite para cadena Husqvarna para prolongar
al máximo la vida útil de la cadena de sierra y evitar
efectos adversos en el medio ambiente. Si el aceite
para cadena Husqvarna no está disponible, le
recomendamos que utilice un aceite para cadena
estándar.
• Utilice un aceite para cadena con buena adherencia
a la cadena de sierra.
• Utilice un aceite para cadena con la viscosidad
correcta según la temperatura ambiente.
PRECAUCIÓN:
densidad, se agotará antes que el
combustible. A temperaturas por debajo
de 0 °C (32 °F), algunos aceites para
cadena se vuelven demasiado densos,
lo que puede provocar daños en los
componentes de la bomba de aceite.
• Utilice el equipo de corte recomendado. Consulte la
sección
• Quite el tapón del depósito de aceite para cadena.
• Llene el depósito de aceite para cadena con aceite
• Coloque con cuidado el tapón.
Accesorios en la página 111
para cadena.
Si el aceite tiene poca
.
La reculada sigue siempre el sentido del plano de la
espada. Por lo general, el producto sale despedido
contra el operador, pero también puede moverse en
cualquier otra dirección. La dirección dependerá de la
manera en la que esté usando el producto cuando se
produzca la reculada.
Cuanto menor es el radio de la punta de la espada,
menor es la violencia de la reculada.
Para reducir los efectos de la reculada, utilice una
cadena de sierra de reculada reducida. No permita que
el sector de riesgo de reculada entre en contacto con
ningún objeto.
ADVERTENCIA: No existe ninguna cadena
de sierra que evite por completo la reculada.
Cumpla siempre las instrucciones.
Preguntas frecuentes acerca de las reculadas
• ¿Podré activar siempre con la mano el freno de
cadena en caso de reculada?
No. Es necesario ejercer algo de fuerza para mover
la protección contra reculadas hacia delante. Si no
ejerce la fuerza necesaria, el freno de cadena no se
86
956 - 003 -
Page 87

activará. Además, debe sujetar firmemente los
mangos del producto con ambas manos mientras
trabaja. En caso de reculada, es posible que el freno
de cadena no detenga la cadena de sierra antes de
entrar en contacto con usted. Además, hay algunas
posiciones en las que no puede tocar la protección
contra reculadas con la mano para activar el freno
de cadena. Por ejemplo, en la posición de tala.
• ¿Se activará siempre el freno de cadena por inercia
en caso de reculada?
No. En primer lugar, el freno de cadena debe
funcionar correctamente. Consulte
del freno de cadena en la página 98
instrucciones sobre cómo comprobar el freno de
cadena. Le recomendamos que lleve esto a cabo
cada vez que vaya a utilizar el producto. En segundo
lugar, la reculada debe tener la fuerza suficiente
para activar el freno de cadena. Si el freno de
cadena fuera demasiado sensible, podría activarse
al trabajar en condiciones difíciles.
• ¿Me protegerá siempre el freno de cadena contra
daños si se produce una reculada?
No. El freno de cadena debe funcionar
correctamente para ofrecer protección. El freno de
cadena debe activarse también al producirse una
reculada para detener la cadena de sierra. Si se
encuentra cerca de la espada, es posible que el
freno de cadena no tenga tiempo suficiente para
detener la cadena de sierra antes de entrar en
contacto con usted.
ADVERTENCIA: Solo usted y una técnica
de trabajo correcta podrán evitar las
reculadas.
Comprobación
para obtener
Arranque del producto.
Preparación para arrancar con el motor en frío
ADVERTENCIA:
estar activado cuando se arranca el
producto para reducir el riesgo de lesiones.
1. Mueva la protección contra reculadas hacia delante
para acoplar el freno de cadena.
El freno de cadena debe
2. Presione la perilla de la bomba de combustible 6
veces aproximadamente o hasta que la perilla se
empiece a llenar de combustible. No es necesario
llenar completamente la perilla de la bomba de
combustible.
3. Sitúe el estrangulador en la posición de
estrangulamiento.
4. Consulte
Arranque del producto. en la página 88
para obtener más información al respecto.
Preparación del arranque con el motor en caliente
ADVERTENCIA:
estar activado cuando se arranca el
producto para reducir el riesgo de lesiones.
1. Mueva la protección contra reculadas hacia delante
para acoplar el freno de cadena.
El freno de cadena debe
956 - 003 -
87
Page 88

2. Presione la perilla de la bomba de combustible 6
veces aproximadamente o hasta que la perilla se
empiece a llenar de combustible. No es necesario
llenar completamente la perilla de la bomba de
combustible.
Nota: No ponga el estrangulador en la posición de
estrangulamiento.
3. Consulte
Arranque del producto. en la página 88
para obtener más información al respecto.
Arranque del producto.
ADVERTENCIA: Al arrancar el producto, los
pies deben encontrarse en una posición
estable.
ADVERTENCIA: Si la cadena de sierra gira
a ralentí, póngase en contacto con su taller
de servicio y no utilice el producto.
5. Tire de la empuñadura de la cuerda de arranque con
fuerza y rapidez.
PRECAUCIÓN: No tire de la cuerda de
arranque al máximo y no suelte la
empuñadura de arranque. Esto puede
provocar daños en el producto.
a) Si arranca el producto con el motor frío, tire de la
empuñadura de arranque hasta que el motor
intente arrancar.
Nota: Podrá identificar que el motor está
intentando arrancar cuando escuche una
especie de soplido.
b) Desacople el estrangulador.
6. Tire de la empuñadura de la cuerda de arranque
hasta que el motor arranque.
7. Suelte rápidamente el bloqueo del acelerador para
que el producto funcione a ralentí.
1. Coloque el producto en el suelo.
2. Coloque la mano izquierda en el mango delantero.
3. Lleve el pie derecho al reposapiés del mango
trasero.
4. Tira lentamente de la empuñadura de arranque con
la mano derecha hasta que note resistencia.
ADVERTENCIA:
de arranque alrededor de la mano.
88
No se enrolle la cuerda
8. Mueva la protección contra reculadas hacia atrás
para desacoplar el freno de cadena.
9. Use el producto.
956 - 003 -
Page 89

Para detener el producto
• Desplace el interruptor de arranque/parada a la
posición 0 para detener el motor.
Cadena tirante y cadena impelente
El producto permite cortar madera en 2 posiciones
diferentes.
• Cuando se corta con cadena tirante, el corte se
efectúa con la parte inferior de la espada. La cadena
de sierra tira a través del árbol para cortar. Esta
posición permite un control óptimo del producto y del
sector de riesgo de reculada.
• Cuando se corta con cadena impelente, el corte se
efectúa con la parte superior de la espada. La
cadena de sierra empujará el producto en la
dirección del operador.
Uso de la técnica de corte
ADVERTENCIA: Al cortar, acelere al
máximo; una vez que finalice el corte,
reduzca el régimen hasta llegar a ralentí.
PRECAUCIÓN: El motor puede resultar
dañado si funciona mucho tiempo a máxima
velocidad sin carga.
1. Ponga el tronco en un soporte o guía para serrar.
ADVERTENCIA: No corte troncos
amontonados. Esto aumenta el riesgo
de reculada y puede provocar lesiones
graves o mortales.
2. Aparte los trozos cortados de la zona de trabajo.
ADVERTENCIA:
cortados en la zona de trabajo aumenta
el riesgo de reculada y puede dificultar el
equilibrio.
Mantener los trozos
Corte de un tronco en el suelo
1. Corte el tronco con la cadena tirante. Mantenga la
aceleración máxima pero prepárese para cualquier
evento repentino.
ADVERTENCIA:
se atasca en el tronco, la motosierra
puede salir despedida hacia usted.
Sujete bien el producto y asegúrese de
que la zona de riesgo de reculada de la
espada no toque el árbol para evitar la
reculada.
956 - 003 - 89
Si la cadena de sierra
ADVERTENCIA: Compruebe que la
cadena de sierra no entra en contacto
con el suelo al completar el corte.
Page 90

2. Corte aproximadamente ⅔ del tronco y deténgase.
1.
2.
1.
2.
1.
2.
1
2
3
Gire el tronco para cortar desde el otro lado.
2. Utilice la técnica de cadena impelente para cortar el
resto del tronco hasta completar el corte.
Corte de un tronco apoyado en uno de los extremos
ADVERTENCIA: Compruebe que el tronco
no se rompa durante el corte. Respete las
siguientes instrucciones.
1. Corte con la cadena impelente aproximadamente ⅓
del tronco.
2. Utilice la técnica de cadena tirante para cortar el
tronco hasta que los dos cortes entren en contacto.
Corte de un tronco apoyado en ambos extremos
ADVERTENCIA:
cadena de sierra no se quede atrapada en
el tronco durante el corte. Respete las
siguientes instrucciones.
Asegúrese de que la
ADVERTENCIA: Detenga el motor si la
cadena de sierra se atasca en el tronco.
Para soltar el producto, utilice una palanca.
No intente sacar el producto con la mano.
La caída repentina del producto puede
provocar lesiones.
Uso de la técnica de desramado
Nota: Para cortar ramas gruesas, use esta técnica de
corte. Consulte la sección
la página 89
.
ADVERTENCIA: Hay un gran riesgo de
accidentes al usar la técnica de desramado.
Consulte
página 86
cómo evitar la reculada.
ADVERTENCIA: Corte las ramas una a una.
Tenga cuidado al retirar las ramas
pequeñas y no corte arbustos ni varias
ramas pequeñas a la vez. Las ramas
pequeñas pueden quedarse atrapadas en la
cadena de sierra e impedir el
funcionamiento seguro del producto.
Nota: Corte las ramas una a una si es necesario.
Uso de la técnica de corte en
Información sobre reculada en la
para obtener instrucciones sobre
1. Corte con la cadena tirante aproximadamente ⅓ del
tronco.
90
1. Retire las ramas del lado derecho del tronco.
a) Mantenga la espada a la derecha del tronco y el
cuerpo del producto contra el tronco.
956 - 003 -
Page 91

b) Seleccione la técnica de corte adecuada según
la tensión de la rama.
a) Seleccione la técnica de corte adecuada según
la tensión de la rama.
ADVERTENCIA: Si tiene dudas
sobre cómo cortar la rama, hable con
un operario profesional de
motosierras antes de continuar.
2. Retire las ramas de la parte superior del tronco.
a) Mantenga el producto en el tronco y deje que la
espada se mueva a lo largo del mismo.
b) Corte con la cadena impelente.
3. Retire las ramas del lado izquierdo del tronco.
ADVERTENCIA: Si tiene dudas
sobre cómo cortar la rama, hable con
un operario profesional de
motosierras antes de continuar.
Consulte
94
sometidas a tensión.
Corte de árboles y ramas tensos en la página
para ver las instrucciones sobre cómo cortar ramas
Uso de la técnica de tala
ADVERTENCIA: Debe tener experiencia
para talar un árbol. Si es posible, haga un
curso de formación sobre el funcionamiento
de la motosierra. Hablar con un operario
experimentado para adquirir más
conocimientos.
Mantenimiento de una distancia de seguridad
1. Asegúrese de que las personas que se encuentren
cerca guarden una distancia mínima equivalente a 2
veces y media la longitud el árbol.
956 - 003 -
91
Page 92

2. Asegúrese de que no haya nadie en esta zona de
1
2
2
1
3
riesgo antes de la tala o durante la misma.
Cálculo de la dirección de derribo
1. Determine hacia qué dirección debe caer el árbol. El
objetivo es que caiga en un lugar donde pueda
desramarlo y cortar el tronco con facilidad. También
es importante que cuente con un buen equilibrio y
pueda moverse de forma segura.
ADVERTENCIA: Si es peligroso o
imposible talar un árbol en su dirección
natural, hágalo en una dirección
diferente.
2. Examine la dirección de caída natural del árbol.
Observe aspectos tales como la inclinación y la
curvatura del árbol, la dirección del viento, la
ubicación de las ramas y el peso de la nieve.
3. Examine si hay obstáculos, por ejemplo, otros
árboles, tendidos eléctricos, carreteras y/o edificios
alrededor.
4. Examine el tronco para verificar si está dañado o
podrido.
ADVERTENCIA: Si el tronco está
podrido, el árbol podría caer antes de
finalizar el corte.
5. Asegúrese de que el árbol no esté dañado ni tenga
ramas muertas que puedan romperse y golpearle al
derribarlo.
6. Evite que el árbol caiga sobre la copa de otro árbol.
Es peligroso retirar un árbol atascado y hay un
elevado riesgo de accidente. Consulte la sección
Liberación de un árbol atascado en la página 94
.
ADVERTENCIA:
de la tala, levántese los protectores
auriculares nada más terminar el corte.
Debe estar atento a cualquier sonido o
señal de advertencia.
En momentos críticos
Limpieza del tronco y preparación del camino de retirada
Corte todas las ramas desde la altura de sus hombros
hacia abajo.
1. Corte con la cadena tirante de arriba abajo.
Compruebe que el árbol se encuentre entre usted y
el producto.
2. Elimine la vegetación de la zona de trabajo
alrededor del árbol. Retire todos los materiales
cortados de la zona de trabajo.
3. Revise la zona para comprobar si hay obstáculos
como piedras, ramas y agujeros. Debe disponer de
un camino de retirada despejado para abandonar la
zona cuando el árbol empiece a caer. El camino de
retirada debe estar a unos 135 grados de la
dirección de derribo.
1. Zona de peligro
2. Camino de retirada
3. Dirección de derribo
Para talar un árbol
Husqvarna recomienda hacer cortes de dirección y
seguir el método de esquina segura al talar un árbol. El
método de esquina segura le ayuda a conseguir una
92
956 - 003 -
Page 93

faja de desgaje correcta y a controlar la dirección de
45º-70º
2
1
derribo.
ADVERTENCIA: No tale árboles con un
diámetro más de dos veces superior a la
longitud de la espada. Para ello, debe
contar con una formación especial.
La faja de desgaje
El procedimiento más importante al talar un árbol es
conseguir la faja de desgaje correcta. Con una faja de
desgaje correcta, puede controlar la dirección de derribo
y garantizar la seguridad del procedimiento.
El grosor de la faja de desgaje debe ser igual y como
mínimo el 10 % del diámetro del árbol.
ADVERTENCIA: Si la faja de desgaje es
incorrecta o demasiado delgada, no podrá
controlar la dirección de derribo.
Realización de cortes de indicación
1. Realice los cortes de indicación con una longitud
igual a ¼ del diámetro del árbol. Debe existir un
ángulo de 45°-70° entre los cortes de indicación
superior e inferior.
b) Realice el corte de indicación inferior. Asegúrese
de que el extremo del corte de indicación inferior
se encuentre en el mismo punto que el extremo
del corte de indicación superior.
2. Asegúrese de que el corte de indicación inferior sea
completamente horizontal y esté en un ángulo de
90° con respecto a la dirección de derribo.
Uso del método de esquina segura
El corte de derribo se debe hacer ligeramente por
encima del corte de indicación.
ADVERTENCIA: Tenga cuidado al cortar
con la punta de la espada. Empiece a cortar
con la parte inferior de la punta de la espada
conforme hace un corte de cala en el tronco.
a) Haga el corte de indicación superior. Alinee la
marca de dirección de derribo (1) del producto
con la dirección de derribo del árbol (2). Sitúese
detrás del producto y mantenga el árbol a su
izquierda. Efectúe un corte con cadena tirante.
956 - 003 -
1. Si la longitud efectiva de corte supera el diámetro
del árbol, siga estos pasos (a-d).
a) Haga un corte de cala directamente en el tronco
para completar la anchura de la faja de desgaje.
b) Corte con la cadena tirante aproximadamente
hasta que quede ⅓ del tronco.
93
Page 94

c) Tire de la espada 5-10 cm (2-4 pulg.) hacia
atrás.
d) Corte el resto del tronco hasta completar una
esquina segura con una anchura de 5-10 cm
(2-4 pulg.).
2. Si la longitud efectiva de corte es menor que el
diámetro del árbol, siga estos pasos (a-d).
a) Haga un corte de cala directamente en el tronco.
El corte de cala debe abarcar 3/5 del diámetro
del árbol.
b) Corte con la cadena tirante el resto del tronco.
c) Corte directamente el tronco desde el otro lado
del árbol para completar la faja de desgaje.
d) Corte con la cadena impelente hasta que quede
⅓ del tronco para completar la esquina segura.
Liberación de un árbol atascado
ADVERTENCIA: Es muy peligroso retirar un
árbol atascado y hay un elevado riesgo de
accidente. Aléjese de la zona de riesgo y no
intente derribar un árbol atascado.
Lo más seguro es usar uno de los cabrestantes
siguientes:
• Montado en un tractor
• Portátil
3. Ponga una cuña en el corte en posición recta desde
atrás.
4. Corte la esquina para que el árbol caiga.
Si el árbol no se cae, golpee la cuña hasta que
Nota:
lo haga.
5. Cuando el árbol empiece a caer, use el camino de
retirada para alejarse del árbol. Aléjese un mínimo
de 5 m (15 pies) del árbol.
94 956 - 003 -
Corte de árboles y ramas tensos
1. Determine el punto del árbol o la rama que se
encuentra tenso.
2. Determine el punto donde la tensión es más
elevada.
3. Determine cuál es el procedimiento más seguro para
aliviar la tensión.
En algunas situaciones, lo más seguro es usar
Nota:
un cabrestante en lugar del producto.
Page 95

4. Sitúese en un lugar donde el árbol o la rama no
1
2
puedan golpearle cuando la tensión disminuya.
5. Haga uno o varios cortes con una profundidad
suficiente para aliviar la tensión. Efectúe un corte en
el punto de tensión máxima o cerca del mismo.
Asegúrese de que el árbol o la rama se rompan en
el punto de tensión máxima.
ADVERTENCIA: No corte del todo un
árbol o rama en tensión.
ADVERTENCIA: Tenga mucho cuidado
al cortar un árbol en tensión. El árbol
podría moverse bruscamente antes o
después de cortarlo. Si no se encuentra
en un lugar adecuado o si realiza el
corte de manera incorrecta, puede sufrir
lesiones graves.
6. Si necesita cortar a través del árbol o rama, efectúe
de 2 a 3 cortes de 2,5 cm (1 pulg) de separación y
una profundidad de 5 cm (2 pulg).
motor demasiado baja o de hielo en el filtro
de aire y en el carburador.
1. A temperaturas inferiores a 0 °C/32 °F, mueva el
tapón de la posición 1 a la posición 2.
2. Hay disponible una cubierta de invierno para trabajar
a temperaturas inferiores a –5 °C (23 °F) o con
nieve. Monte la cubierta de invierno en el cuerpo del
mecanismo de arranque. La cubierta de invierno
disminuye el flujo de aire frío y evita la entrada de
una gran cantidad de nieve en la zona del
carburador.
7. Siga cortando el árbol hasta que la rama o el árbol
se doblen y la tensión disminuya.
8. Corte el árbol o la rama en el lado opuesto de la
curvatura una vez que se haya reducido la tensión.
Uso del producto en climas fríos
PRECAUCIÓN:
pueden causar problemas de
funcionamiento. Riesgo de temperatura del
956 - 003 - 95
La nieve y un clima frío
PRECAUCIÓN:
invierno si la temperatura aumenta por
encima de -5 °C/23 °F. Coloque el tapón
invernal en la posición 1 si la temperatura
aumenta por encima de 0 °C/32 °F. Riesgo
Retire la cubierta de
Page 96

de temperatura excesiva del motor y de
daños en el motor.
Mangos calefactados (543 XPG)
En los modelos con la designación "G", tanto el asa
delantero como el trasero llevan serpentines
calefactores. Un generador suministra energía a los
serpentines calefactores.
Presione el interruptor para activar el calor en los
mangos. El calor está activado cuando se activa la
marca roja en el interruptor.
Mantenimiento
Introducción
ADVERTENCIA: Asegúrese de leer y
comprender el capítulo sobre seguridad
Programa de mantenimiento
Calefacción eléctrica del carburador (543 XPG)
El ajuste de la calefacción del carburador se realiza
eléctricamente mediante un termostato. Esto mantiene
la temperatura correcta del carburador y evita la
formación de hielo en él.
antes de realizar tareas de mantenimiento
en el producto.
Mantenimiento diario Mantenimiento semanal Mantenimiento mensual
Limpie el exterior del producto y asegúrese de que no haya aceite en los
mangos.
Realice una comprobación del acelerador y del bloqueo del acelerador.
Consulte la sección
Comprobación
Limpie el sistema de refrigeración.
Consulte la sección
Para limpiar el
sistema de refrigeración en la página
108
.
Revise el mecanismo de arranque, la
cuerda de arranque y el muelle de
retorno.
Realice una comprobación de la cinta de freno. Consulte la sección
Comprobación de la cinta de freno
en la página 98
Revise el centro, el tambor y el
muelle del embrague.
.
del acelerador y del bloqueo del acelerador en la página 98
Asegúrese de que no haya daños en
los amortiguadores de vibraciones.
Limpie e inspeccione el freno de cadena. Consulte la sección
bación del freno de cadena en la
página 98Comprobar la protección
.
Compro-
Lubrique el cojinete de agujas. Consulte la sección
nete de agujas en la página 106
Lime las rebabas de los bordes de la
espada. Consulte la sección
Lubricación del coji-
.
Comprobación de la espada en la página
106
.
Limpie la bujía. Consulte la sección
Mantenimiento de la bujía en la página 102
.
Limpie el exterior del carburador.
contra reculadas y la activación del
freno de cadena en la página 98
Revise el captor de cadena. Consulte
la sección
Comprobación del captor
de cadena en la página 99
96 956 - 003 -
.
Limpie o cambie el apagachispas del
silenciador.
.
Revise el filtro y la manguera de
combustible. Sustitúyala si es necesario.
Page 97

Mantenimiento diario Mantenimiento semanal Mantenimiento mensual
Gire la espada, revise el orificio de
lubricación y limpie la ranura de la
espada. Consulte la sección
Com-
Limpie la zona del carburador. Revise todos los cables y conex-
iones.
probación de la espada en la página
106
.
Asegúrese de que la espada y la cadena de sierra reciben suficiente
aceite.
Realice una comprobación de la cadena de sierra. Consulte la sección
Limpie o sustituya el filtro de aire.
Consulte la sección
filtro de aire en la página 102
Limpie el espacio entre las aletas del
cilindro.
Para limpiar el
.
Vacíe el depósito de combustible.
Vacíe el depósito de aceite.
Para inspeccionar el equipo de corte
en la página 106
Afile la cadena de sierra y compruebe su tensión. Consulte la sección
Para afilar la cadena de sierra
en la página 102
Revise el piñón de arrastre de la cadena. Consulte la sección
.
.
Comprobación del piñón rim en la página
106
.
Limpie la toma de aire del arranque.
Asegúrese de que las tuercas y los
tornillos están bien apretados.
Compruebe el interruptor de parada.
Consulte la sección
Comprobación
del interruptor de arranque/parada en
la página 99
Asegúrese de que no haya fugas de
combustible en el motor, el depósito
o los conductos de combustible.
Asegúrese de que la cadena de sierra no gira cuando el motor está al ralentí.
Asegúrese de que no haya daños en
la protección de la mano derecha.
Asegúrese de que el silenciador está
bien montado, no tenga daños y no
le falte ninguna pieza.
.
956 - 003 - 97
Page 98

Mantenimiento y comprobaciones de los dispositivos de seguridad del producto
Comprobación de la cinta de freno
1. Limpie el freno de cadena y el tambor de embrague
de serrín, resina y suciedad con un cepillo. La
suciedad y el desgaste perjudican la función de
frenado.
2. Realice una comprobación de la cinta de freno. La
cinta de freno debe tener un mínimo de 0,6 mm
(0,024 pulg) de espesor en el punto más
desgastado.
Comprobar la protección contra reculadas y la activación del freno de cadena
1. Compruebe que la protección contra reculadas esté
intacta y sin defectos visibles como, por ejemplo,
grietas.
2. Asegúrese de que la protección contra reculadas se
mueve con facilidad y que está fijada de forma
segura a la cubierta del embrague.
4. Suelte el mango delantero y deje que la punta de la
espada caiga contra el tocón.
5. Asegúrese de que el freno de cadena se acopla
cuando la punta de la espada golpea el tocón.
Comprobación del freno de cadena
1. Arranque el producto. Consulte
producto. en la página 87
ADVERTENCIA: Asegúrese de que la
cadena de sierra no entre en contacto
con el suelo u otros objetos.
2. Sujete firmemente el producto.
3. Acelere al máximo e incline la muñeca izquierda
hacia la protección contra reculadas para activar el
freno de cadena. La cadena de sierra debe
detenerse inmediatamente.
Arranque del
para ver las instrucciones.
3. Sujete el producto con las dos manos sobre un
tocón u otra superficie estable.
ADVERTENCIA:
parado.
98
El motor debe estar
ADVERTENCIA: No suelte el mango
delantero.
Comprobación del acelerador y del bloqueo del acelerador
1. Compruebe que el acelerador y el bloqueo del
acelerador se muevan con facilidad y que el muelle
de retorno funcione correctamente.
956 - 003 -
Page 99

2. Presione el bloqueo del acelerador y asegúrese de
que vuelve a su posición inicial al soltarlo.
3. Asegúrese de que el acelerador está bloqueado en
la posición de ralentí cuando el bloqueo se suelta.
4. Ponga en marcha el producto y acelere al máximo.
5. Suelte el acelerador y compruebe que la cadena de
sierra se para y permanece inmóvil.
ADVERTENCIA: Si la cadena gira
cuando el acelerador está en posición
de ralentí, póngase en contacto con su
taller de servicio.
Comprobación del sistema amortiguador de vibraciones
1. Asegúrese de que no los amortiguadores de
vibraciones no presenten fisuras ni deformación.
2. Compruebe que los amortiguadores de vibraciones
estén bien montados entre la parte del motor y la
parte de los mangos.
Consulte
obtener más información sobre la ubicación del sistema
amortiguador de vibraciones en el producto.
Descripción del producto en la página 76
para
Comprobación del interruptor de arranque/ parada
1. Arranque el motor.
2. Ponga el interruptor de arranque/parada en la
posición de parada. El motor se debe detener.
Comprobación del captor de cadena
1. Asegúrese de que no haya daños en el captor de
cadena.
2. Asegúrese de que el captor de cadena se encuentre
estable y montado en el cuerpo del producto.
Comprobación de la protección de la mano derecha
• Compruebe que la protección de la mano derecha
esté intacta y sin defectos tales como grietas.
Comprobación del silenciador
ADVERTENCIA: No utilice un producto que
tenga un silenciador defectuoso o en mal
estado.
ADVERTENCIA: No utilice un producto sin
la red apagachispas del silenciador o con
una que esté defectuosa.
1. Examine el silenciador en busca de daños y
deterioro.
2. Compruebe que el silenciador esté firmemente
montado en el producto.
956 - 003 -
99
Page 100

3. Si el producto tiene una red apagachispas especial,
1/2
1/2
H
L
limpie el apagachispas una vez por semana.
4. S el apagachispas está dañado, cámbielo.
Carburador con limitaciones de ajuste
Nota: Si desconoce el tipo de carburador que tiene en el
producto, pregunte a su taller de servicio.
Ajuste del carburador
En cumplimiento de las leyes sobre emisiones y medio
ambiente, su producto cuenta con limitaciones en los
tornillos de ajuste del carburador. Esto reduce las
sustancias nocivas en los gases de escape de su
producto. Podrá girar los tornillos de ajuste media vuelta
como máximo.
Ajuste de la aguja de régimen bajo (L)
• Gire la aguja de régimen bajo hacia la derecha hasta
que la cadena se pare.
Nota: Si el producto no acelera correctamente o el
ralentí no es adecuado, gire la aguja de régimen
bajo hacia la izquierda. Gire la aguja de régimen
bajo hasta que la capacidad de aceleración y el
régimen de ralentí sean los correctos.
Ajuste del tornillo de ralentí (T)
1. Arranque el producto.
2. Gire el tornillo de ralentí hacia la derecha hasta que
la cadena de sierra comience a girar.
3. Gire el tornillo de ralentí hacia la izquierda hasta que
la cadena de sierra se detenga.
Nota: El régimen de ralentí es correcto cuando el motor
funciona correctamente en todas las posiciones.
También debe existir un buen margen hasta el régimen
en que empieza a girar la cadena de sierra.
ADVERTENCIA: Si la cadena de sierra no
se detiene cuando gira la aguja de régimen
bajo, acuda a su distribuidor. No utilice el
producto hasta que no esté regulado
correctamente.
Ajuste de la aguja de régimen alto (H)
El motor se ajusta en la fábrica para funcionar a nivel
del mar. A una altitud superior, o en climas o a
temperaturas diferentes, puede que sea necesario
ajustar la aguja de régimen alto.
• Gire la aguja de régimen alto para realizar ajustes.
PRECAUCIÓN:
régimen alto más allá del límite de
ajuste. Esto puede provocar daños en el
pistón y en el cilindro.
No gire la aguja de
Ajustes básicos y rodaje
El carburador se ajusta en la fábrica. Para obtener
información sobre el régimen recomendado de ralentí,
consulte
Datos técnicos en la página 110
PRECAUCIÓN: No utilice el producto a un
régimen demasiado alto durante las
primeras 10 horas de funcionamiento.
PRECAUCIÓN: Si la cadena de sierra gira a
ralentí, gire el tornillo de ralentí hacia la
izquierda hasta que la cadena de sierra se
detenga.
.
100 956 - 003 -
carburador está bien ajustado
• Asegúrese de que la aceleración del producto sea
correcta.
• Asegúrese de que el producto funciona a cuatro
ciclos un poco al acelerar al máximo.
• Asegúrese de que la cadena de sierra no gire a
ralentí.
• Si es difícil poner en marcha el producto o la
aceleración es incorrecta, ajuste las agujas de
régimen bajo y alto.
PRECAUCIÓN:
pueden provocar daños en el motor.
Unos ajustes incorrectos
Inspección para comprobar si el
 Loading...