

Page 1
PART NO. 5725
92-00 GM DUALLY REAR MUD GUARD
INSTALLATION INSTRUCTIONS
Please read instructions thoroughly before installation.
Tools Required
• Short Phillips screwdriver
• Center punch
• Drill / 1/8” drill bit
• 13 mm wrench
NOTE: It may be necessary to remove the rear wheels depending on the tools being used for installation.
1. Clean and degrease the mud guard location area on the fender before installation.
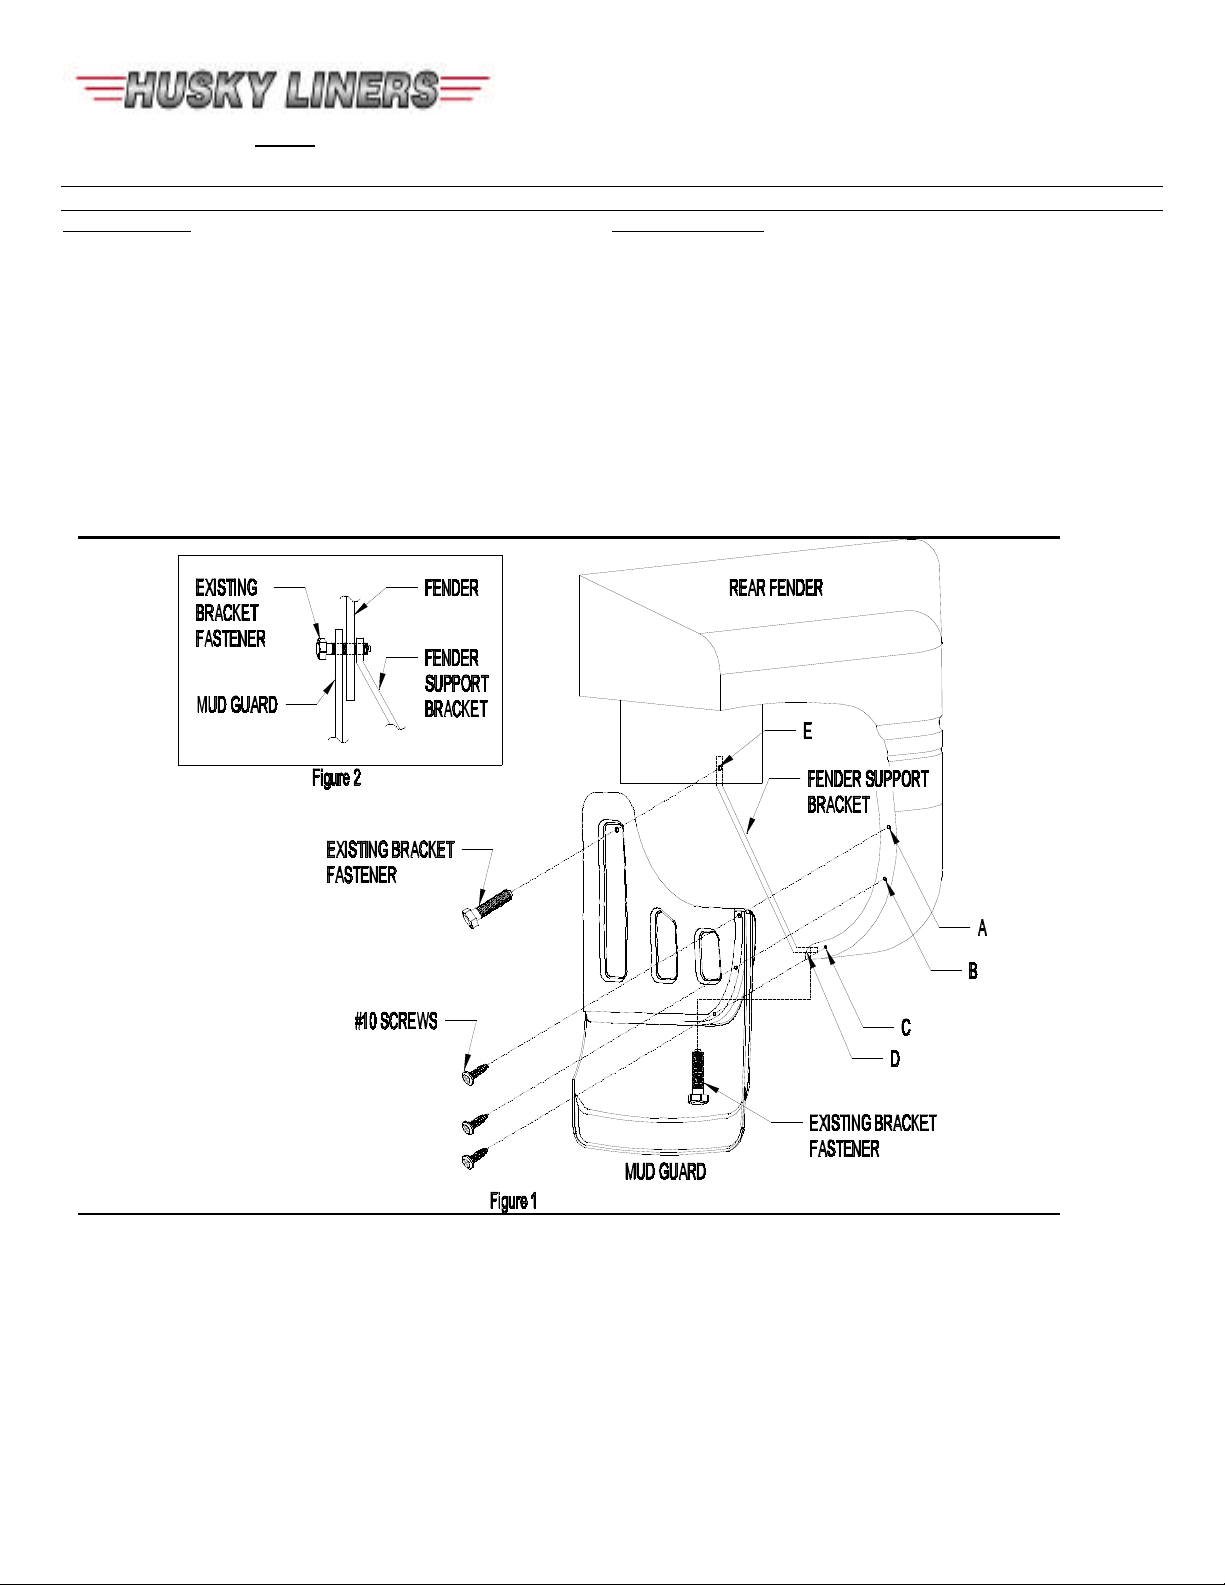
2. Remove existing bracket fasteners from locations D, and E using a 13 mm wrench or socket (Figure 1).
3. Attach mud guard by installing an existing bracket fastener at location D - through mud guard, fender, and into fender
bracket (Figures 1 and 2).
4. Using mud guard as a template, center punch and drill 1/8” holes at locations A, B, and, C (Figure 1).
5. Install #10 screws at locations A, B, and C.
6. Install existing bracket fastener at location E - through mud guard, fender, and into fender bracket (Figures 1 and 2).
Package Contents
• Driver & passenger side rear mud guard
• #10 screw (qty. 6)
• Instruction sheet
PAINTING INSTRUCTIONS
1. Clean mud guard with a soap and water solution to remove dirt and other contaminates.
2. Sand painting surface with 320 grit sand paper.
3. Apply a coating of flexible primer-adhesion promoter.
4. Apply a flexible paint as directed by the paint manufacturer.
5725RE~1.DOC
Rev: 1
 Loading...