

Page 1
PART NO. 5421
5421 Denali XL / Escalade ESV instr
Rev: 0
GMC YUKON DENALI XL / CADILLAC ESCALADE ESV
LOGO READY REAR MUD GUARD INSTALLATION INSTRUCTIONS
Please read instructions thoroughly before installation.
Tools Required
• 1/8” drill bit / Drill
• Center punch / Hammer
• Short Phillips screwdriver or drill attachment
Package Contents
• Driver & passenger side rear mud guard
• #10 screw (8)
• Washers (8)
• U-clip (8)
• Instruction sheet
NOTE: It may be necessary to remove the wheels depending on the tools being used for installation.
1. Clean the mud guard location area on the fender before installation.
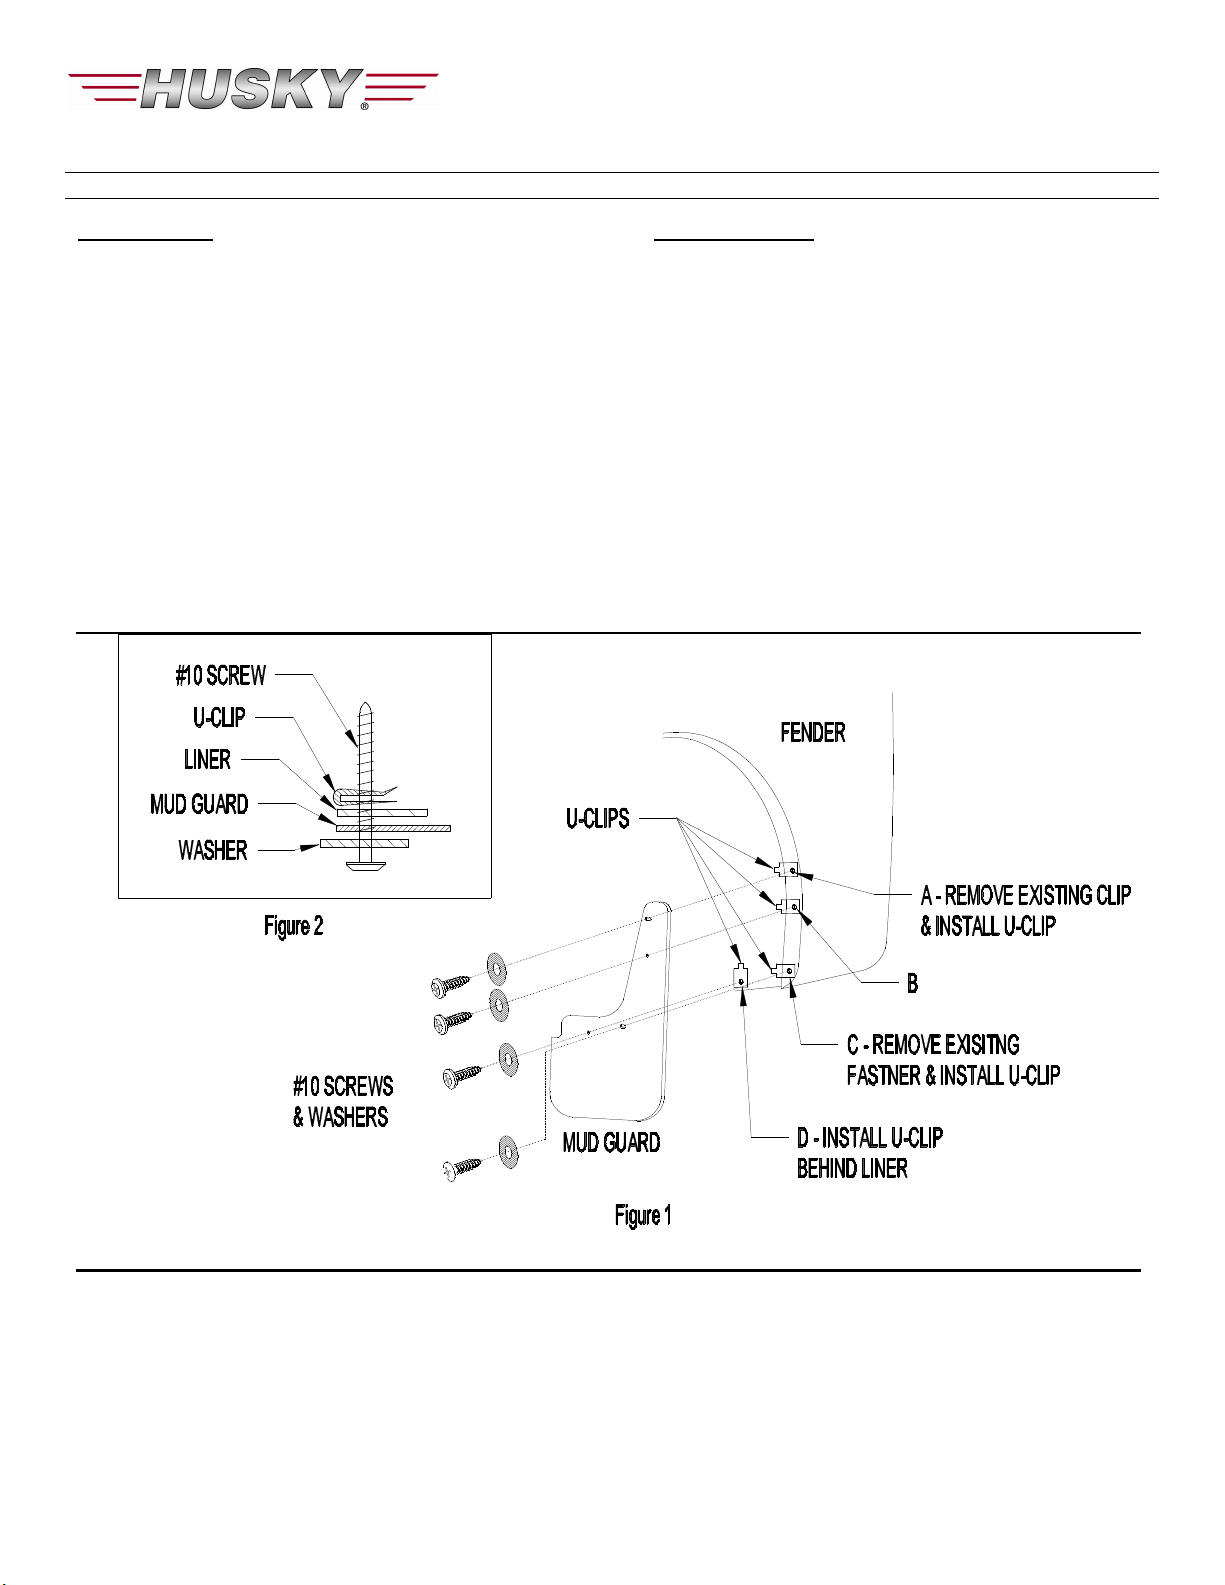
2. Remove existing fastener and clip from location A and plastic fastener from location C (Figure 1).
3. Install u-clips at locations A and C.
4. Install mud guard to rear fender with #10 screw and washer at locations A and C (Figure 1). Check fit and parallel and adjust
accordingly before tightening.
5. Using mud guard as a template, mark and drill 1/8” holes at locations B and D.
6. Install #10 screw and washer at location D, thru mud guard, fender liner and into a U-clip placed on the backside of fender liner
(Figure 2).
7. Install #10 screw and washer at location B, through mud guard, fender and into a U-clip placed on the backside of fender.
NEED A LOGO FOR YOUR NEW MUD GUARD? TRY AN INTERNET SEARCH FOR
“EMBLEM” ON E-BAY, AMAZON OR YOUR FAVORITE AUTOMOTIVE SITE.
 Loading...