

HuRob HSB-S100, HSB-R100, HSB-F100 Operating Manual

@printed by korea
HuRob Co., Ltd.
BIC 203 Korea Industry Technology University. 2121 Jungwang-dong, Siheung city, Gyunggi-do, Korea
Business department 501, 12-3 Sanghyun-dong, Suji-gu, Yongin city, Gyunggi-do, Korea
Operating Manual
HuRob Co., Ltd.
www.hurob.com
HSB-Series
OUTDOOR BLUETOOTH

2
2
Contents
1
Before use
Safety precautions 4
Product composition 5
Names of each part 6
Installation figure for helmet type 7
Installing main body in helmet 8
Precautions in use 10
2
Basic use
Safety precautions before use 11
Turing On/Off 12
Registering 13
Making a call 14
Receiving a call 14
Ending the call 14
Adjusting volume 15
Initializing (S/W reset) 15
Initializing (H/W reset) 15
3
Listening music
Play / Stop 16
Controlling volume 16
Receiving a call during listening music
16
Making a call during listening music
16
Speaking through Intercom during listening music
17
Listening music with Bluetooth peripherals
17
4
Using Intercom
Connecting 18
Speaking / Ending 18
Controlling volume 19
Voice supporting (Supporting for R100 model only)
19
Receiving a call during speaking through Intercom
19
5
Others
Utilizing navigation 20
Utilizing App of smart phone 20
Using wireless phone Dongle(F100)
21
6
Appendixes
Pairing 23
Multi-paring (3 channels) 24
Storing 25
Button operation time and indication lamp condition
25
Consumer’s damage compensation regulation
26
Q&A 27
Spec. and characteristics 29
Product warranty 30
Contents
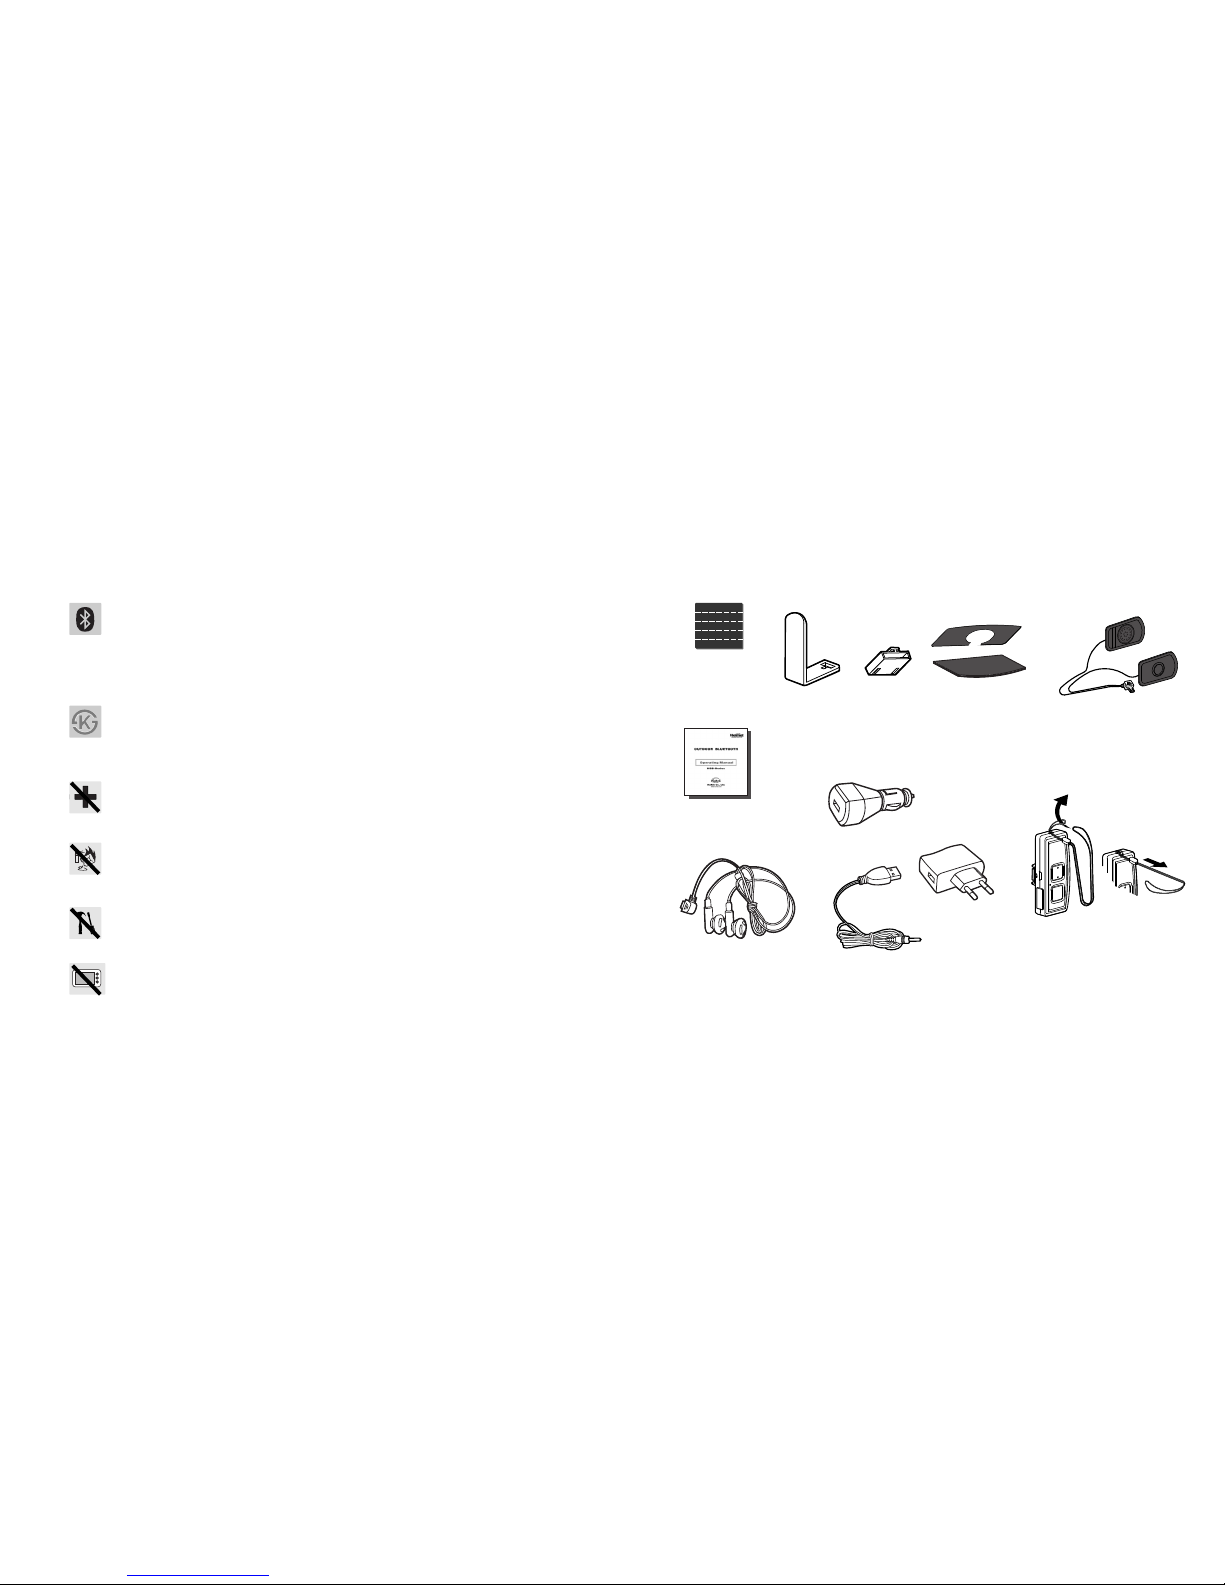
Speaker for attaching to
inside of helmet.
Necklace type
(Sold separately)
Charger for cigar jack (Option)
User manual
Pictures of components may be different from actual thing,
and some items may be changed according to product series.
AC charger
Cloth tape for
arranging speaker
cable
Velcro for attachment
to main body
(Detachable on top and bottom)
“L”type holder
Tunnel type
holder
■■
Product configurations
Take care in using outdoor Bluetooth.
Strong impact to it or dropping it may cause trouble and explosion.
-Its exposure to high temperature or heating it may cause trouble and
explosion.
-Take care for children or pets not to bite or suck the headset.
-Take care of it not to be put in the water or to get wet. It may cause
electric shock or trouble due to damage of parts or circuit.
Always use original parts
-You must use approved product supplied or sold separately by manufacturer,
unauthorized battery or charger, etc. may cause short of life, degrade of
performance and safety in use of the product can not be guaranteed.
Do not use it at the places prohibited to use it such as in hospitals, etc.
-Turn off your headset at the places prohibited to use headset where it may cause
radio wave problem or danger.
Turn off your headset prior to entering any places with a potentially
explosive atmosphere.
-Obey all regulations, instructions, signals in the area with a potentially explosive
atmosphere.
Do not modify, disassemble, repair at your own.
-Repair must always be done at the designated service center.
-Unauthorized modification, disassemble, repair can cause you not to get free of
charge repair.
Do not use it near microwave range or wireless LAN.
-It uses the same frequency therefore it may cause malfunction or noise.
Use it under the speed of less than 35km/h for safety purpose.
-Obey applicable laws related to using mobile phones during driving.
1 Before use
■Safety precautions
4
35
㎞㎞
USB type charger (Combined) connector
Earphone (Sold separately)
for bicycle/Inline
6
■■
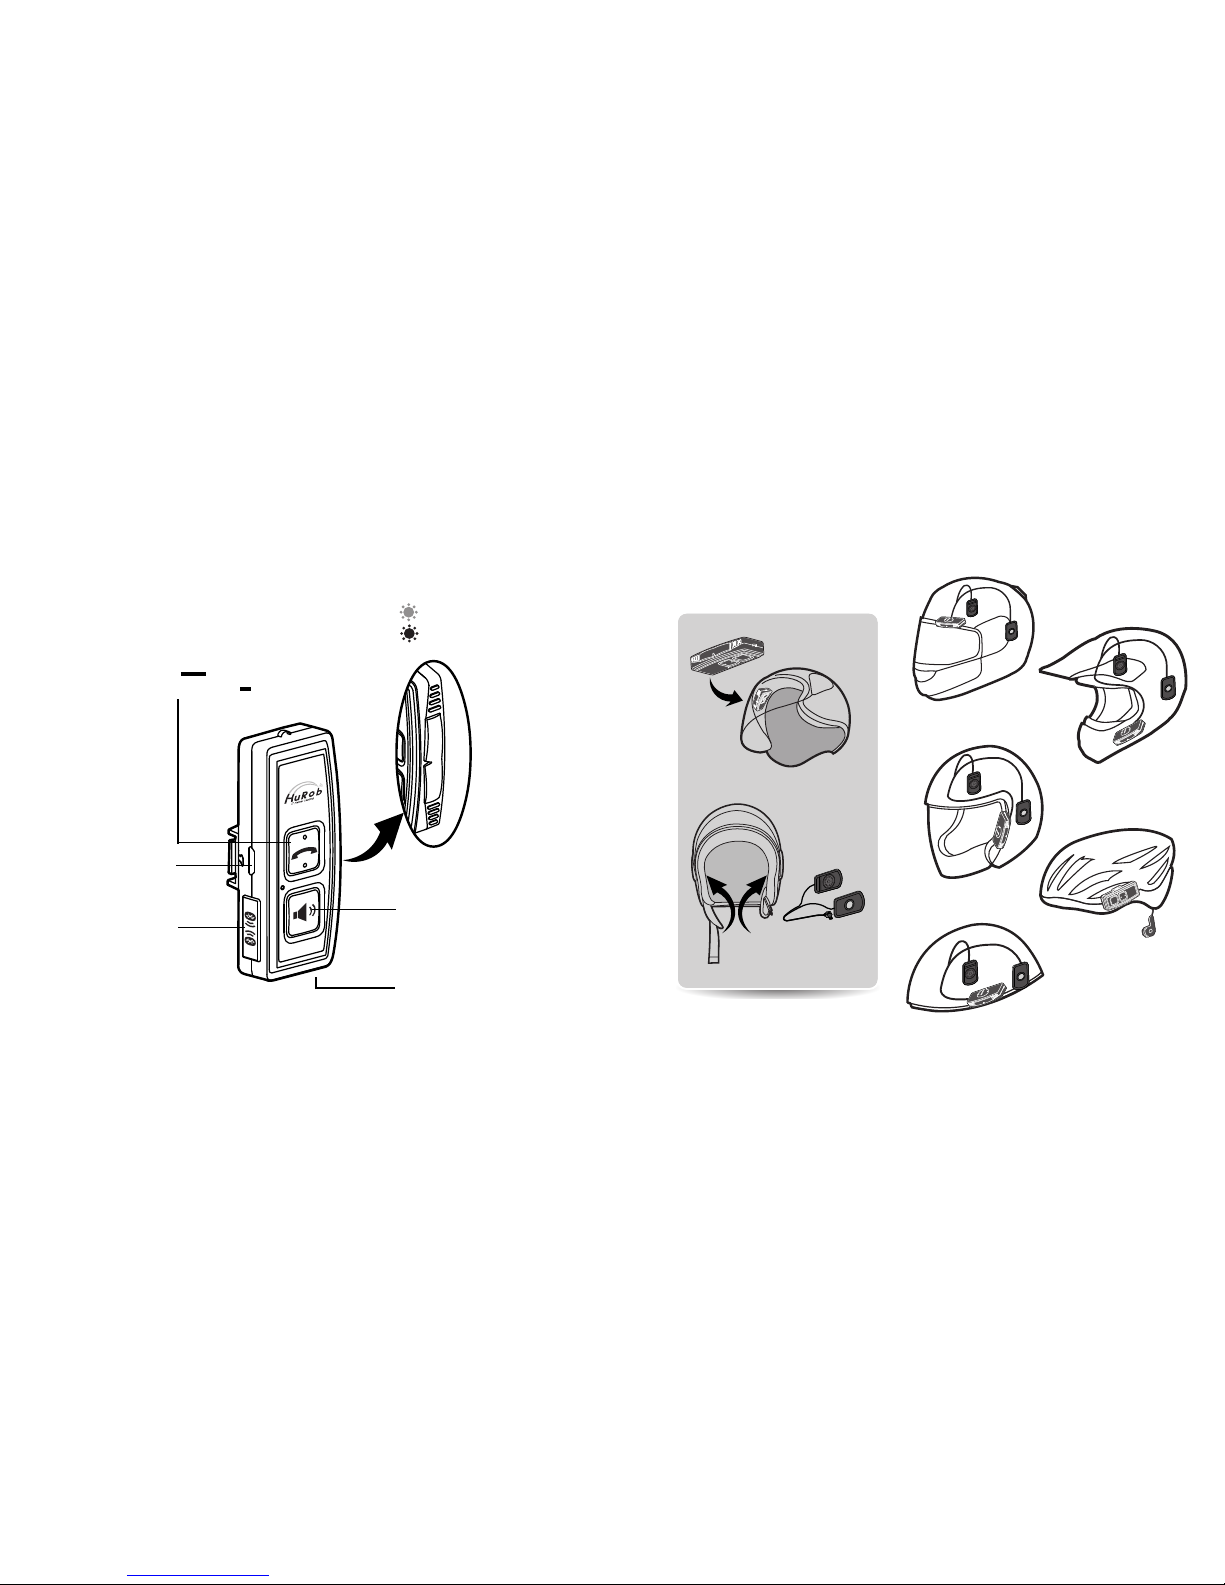
Installed figure for each helmet type
Installing main body (Inside)
Installing speaker (Inside)
Full face type
Off road type
Jet type
Figure of installing
bicycle/Inline type helmet
(Outside) and connecting
earphone.
■■
Names of each part
Charging terminals
Intercom button
Speaker
connection jack
Volume button
(UP/DOWN) type volume control
Press long time
(For 2 seconds)
- Power (On/Off) :
- Call conversation (On/Off) :
Press short time
LED window
Red indication lamp
Blue indication lamp
Open type
8
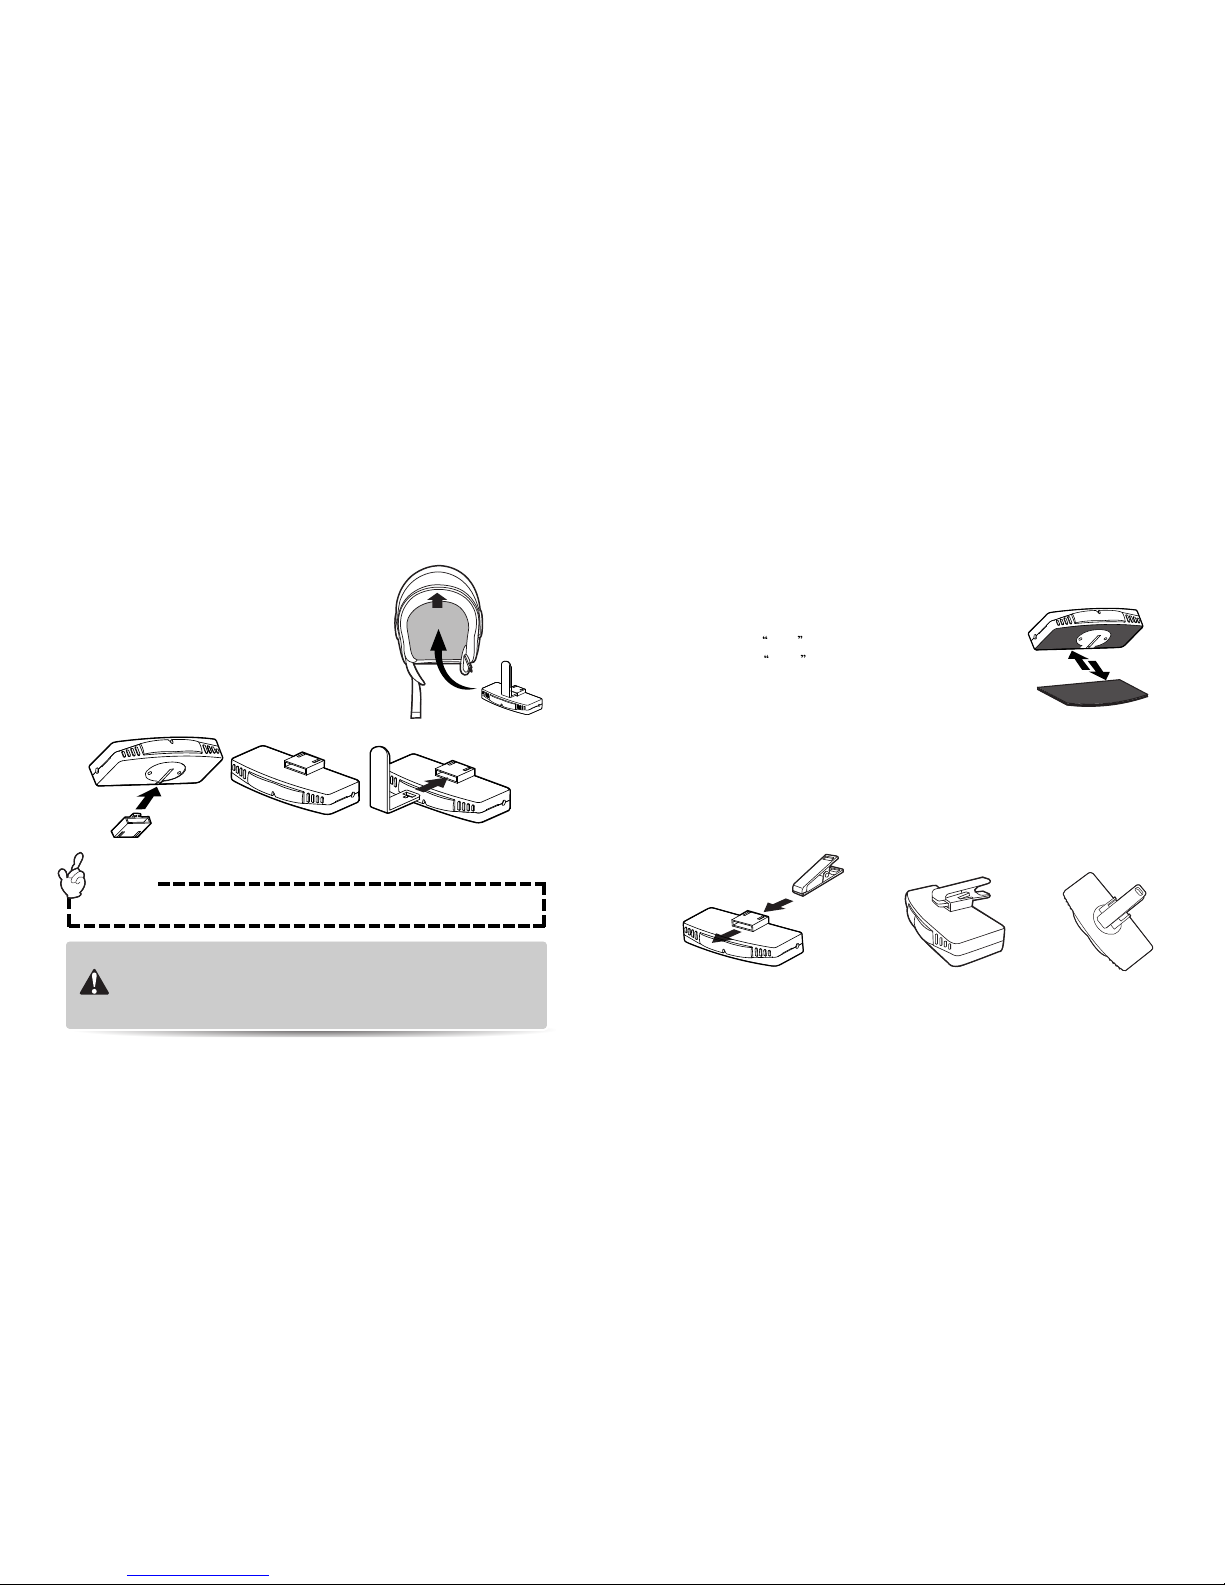
2. B-type installation of main body
① Wipe out contact point of helmet before
installing Bluetooth
② Attach
lower Velcro onto inside of helmet.
③ Attach
upper Velcro on the attaching side of
this equipment.
④ Install this equipment onto helmet.
3. C-type installation of main body (For earphone)
Velcro for attaching
main body
Velcro for attaching onto
inside of helmet
(Easily detachable to main body)
Figure of completed
installation of clip
Using clip for reports activity
■■
Installing main body into helmet
■■
Installing main body into helmet
[Information] If fixing in helmet is not stable then fix it using both sides sticking tape.
If the product is installed on the both side sticking tape
which is not sufficiently fixed then the product may drop
resulting in damage of it during driving. Sticking power of
the both side sticking tape is getting stronger after more
than 25 hours.
Cautions :
Insert clip into tunnel type holder
Back side figure of completed
installation of clip
Insert tunnel type holder to main body
Insert “L”type holder.
1. A-type installation of main body
① Wipe out contact part of helmet before
installing Bluetooth.
② Install tunnel type holder to the equipment.
③ Insert “L”type holder into tunnel type holder.
④ Fix the holder at helmet insertion position.
⑤ Connect speaker into speaker connection jack.
Note
 Loading...