

Hunter Stoves HERALD 5 SLIMLINE CE VII Installation And Operating Instructions Manual
H E R A L D 5
H E R A L D 5H E R A L D 5
H E R A L D 5
S L I M L I N E
S L I M L I N ES L I M L I N E
S L I M L I N E
C E
C EC E
C E
VVVV
I I
I II I
I I
C L E A N B U R N
C L E A N B U R NC L E A N B U R N
C L E A N B U R N
S T O V E
S T O V ES T O V E
S T O V E
Installation and Operating Instructions
A Hetas certified engineer must carry out the installation of this appliance;
alternatively, your local Building Control Officer can approve the completed
installation, should a non-certified engineer undertake the installation. It is an
offence, under UK law, not to comply with this advice. Please hand these
instructions to the stove user when the installation is complete. Leave the
system ready for operation and instruct the user in the correct use of the
appliance and operation of controls.

Herald 5 Slimline CE
Technical Specification
Stove Mass 88 kg
Wood
Total Efficiency 72.5 %
Nominal Heat Output 4.5 KW
Mean CO Emission (at 13% O2) 0.27 %
Mean Flue Gas Temperature 270 °C
Flue Gas Mass Flow 5.7 g/s
This appliance is not suitable for use in a shared flue
This appliance is suitable for intermittent burning

Assembly Instructions
PLEASE READ THESE INSTRUCTIONS CAREFULLY
It is important that your stove is correctly installed, as Hunter Stoves Limited cannot
accept responsibility for any fault arising through incorrect use or installation.
Flue Collar
Place the Flue Gasket on the top, or rear outlet as required. Place the Flue Collar on top of the
Gasket. Secure to the four locating tabs, inside the flue outlet, using the M6 nuts & bolts
supplied. Fit the 2 - M8 carriage bolts, washers & nuts into the Damper Holes, located on each
side of the Flue Collar.
Blanking Plate
Fit the Flue Gasket and Blanking Plate on the remaining free outlet and
secure it, using 2 - M6 countersunk screws & nuts.
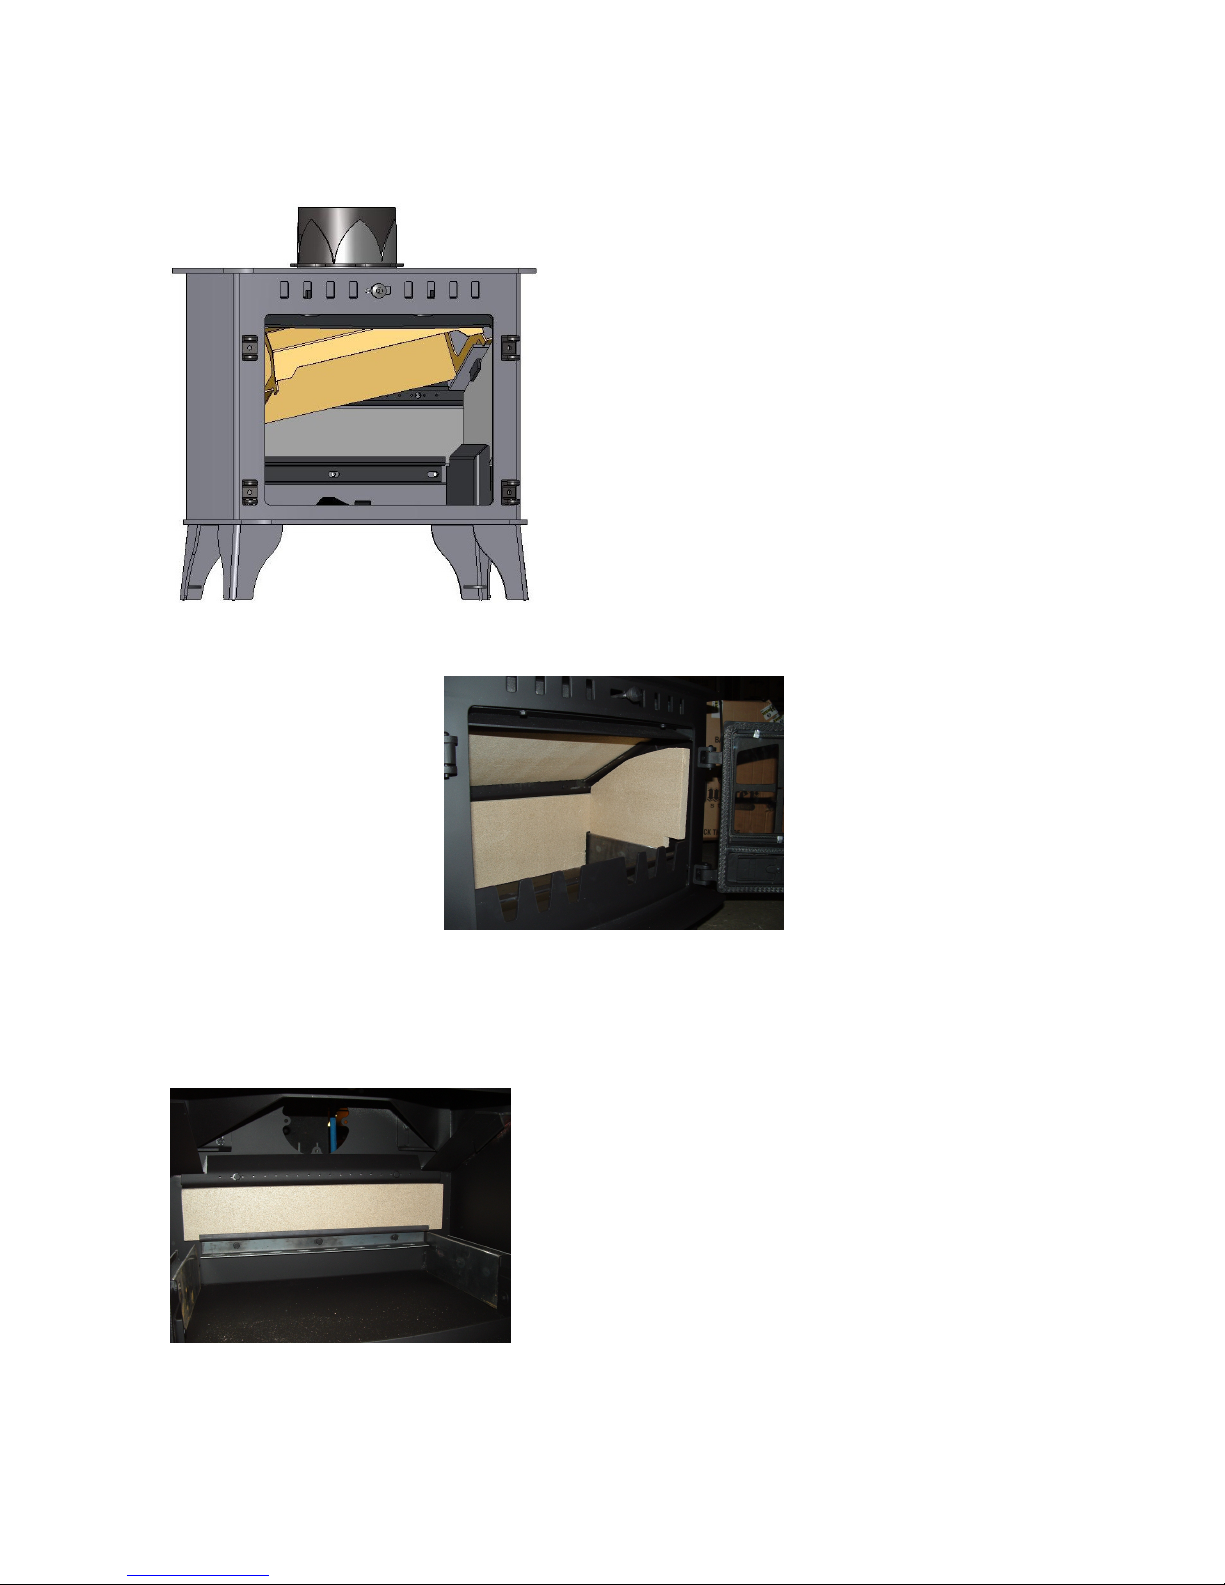
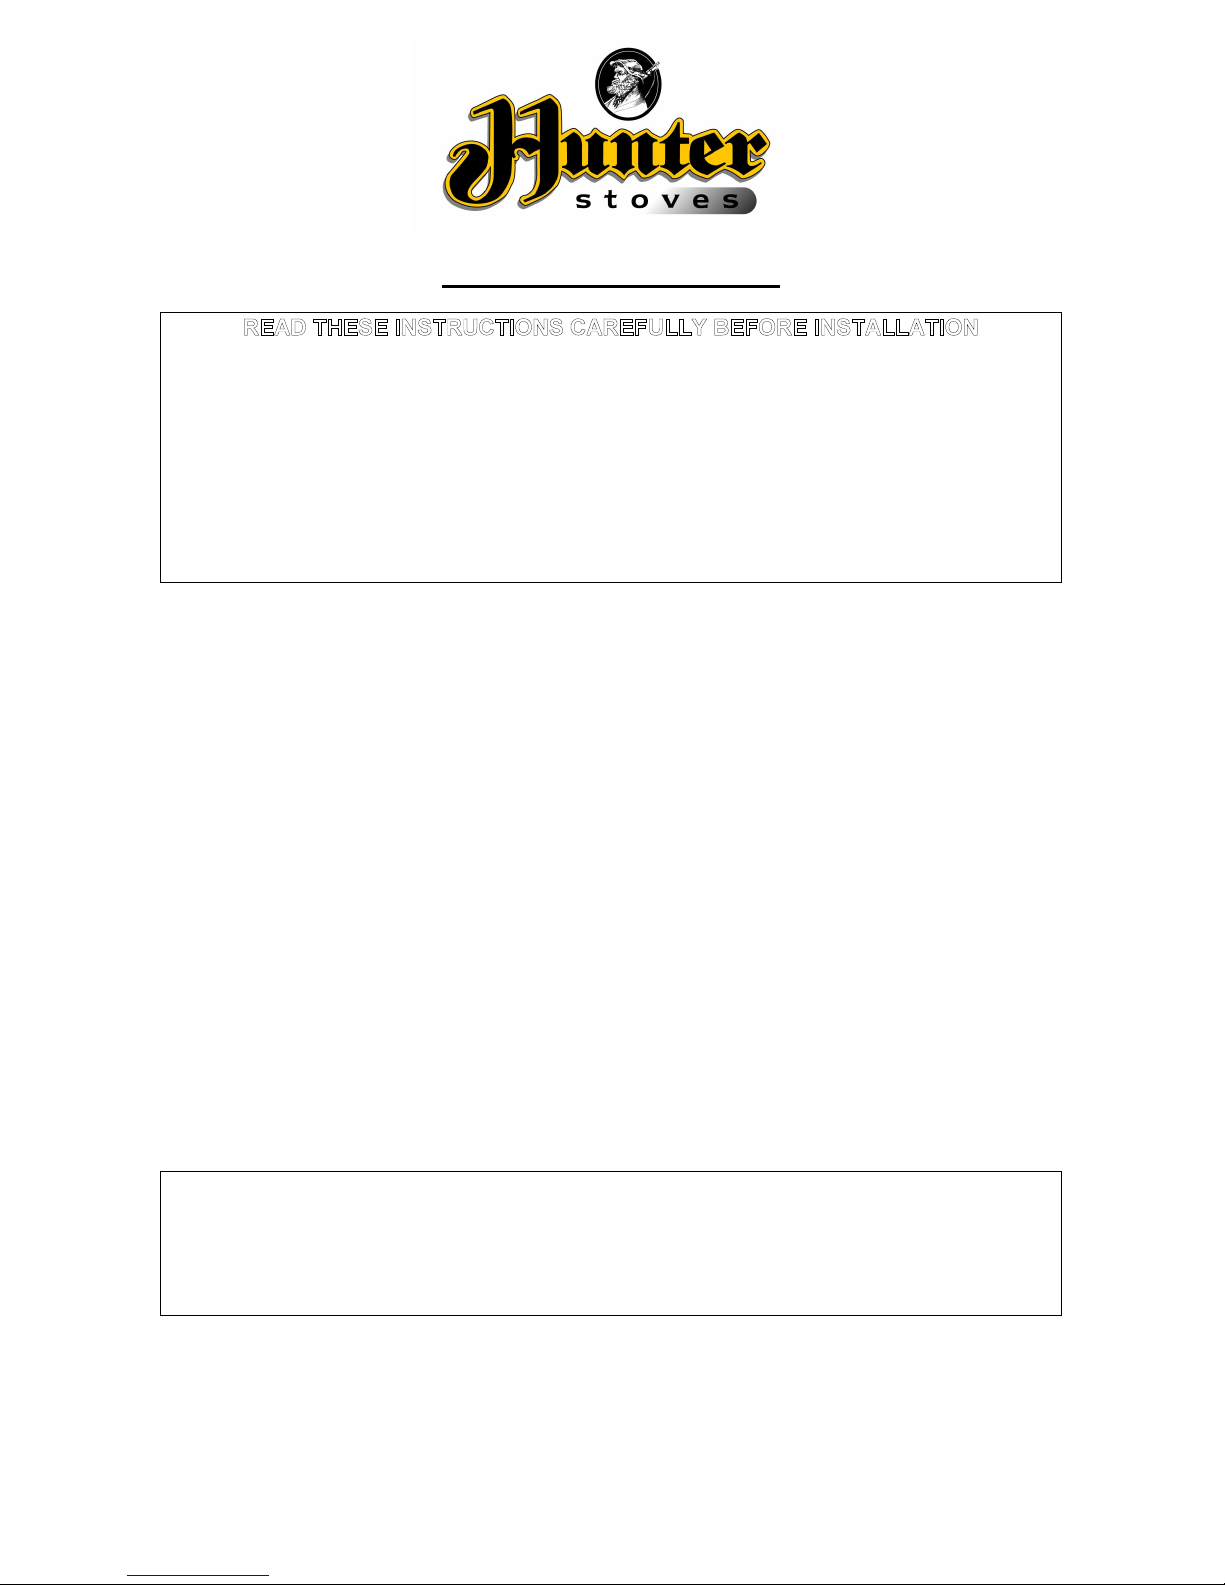
Fire Bricks
The Fire Bricks, in this appliance, are factory fitted. The following set of photos show the
removal sequence that you will need to employ when servicing your Hunter stove.
Baffle
Side Bricks
Remove all of the Riddling bars. Remove the side bricks by sliding the bottom towards the
centre of the stove.
Rear Brick
To assemble these Fire Bricks, simply reverse the above procedure.
Pull the top edge of the Rear Brick towards you, lift
and remove.
Remove the Riddling Bars, Cam
Bar and Catch Bar. Remove the ash
pan. Lift the Baffle and slide to the
right.
When the left side of the Baffle
clears the Baffle Support, lower the
Baffle into the Firebox and remove.
Installation Instructions
These instructions cover the basic principles to ensure satisfactory installation of the stove,
although detail may need slight modification to suit particular local site conditions. In all
cases the installation must comply with current Building Regulations, Local Authority
Byelaws, European and national standards and other specifications or regulations as they
affect the installation of the stove. It should be noted that the Building Regulations
requirements may be met by adopting the relevant recommendations given in British
Standards BS 8303, BS 6461 and BS 7566 as an alternative means to achieve an equivalent
level of performance to that obtained following the guidance given in Approved Document
J.
Health And Safety Precautions
Handling
Adequate facilities must be available for loading, unloading and site handling.
Fire Cement
Some types of fire cement are caustic and should not be allowed to come into contact with the
skin. In case of contact, wash immediately with plenty of water.
Asbestos
This stove contains no asbestos. If there is a possibility of disturbing any asbestos in the course
of installation then please seek specialist guidance and use appropriate protective equipment.
Metal Parts
When installing or servicing this stove, care should be taken to avoid the possibility of personal
injury.
Important Warning
This stove must not be installed into a chimney that serves any other heating appliance.
There must not be an extractor fan fitted in the same room as the stove as this can cause the stove
to emit fumes into the room.
 Loading...