

Page 1

Model 45051 Hunter Home Light Control System
43012-01 r101107
Installation and Operation Manual
ENGLISH
See page 2
Vea la página 37
ESPAÑOL
Page 2

TABLE OF CONTENTS
Introduction..............................2
Features...................................3
Limitations/ Warnings..............4
Transmitter Controls...............5
Receiver Controls....................7
Setup.........................................8
Home Program........................15
The Hunter Home Light Control System is an automated, easy-to-use home timer system. It
features two programmable modes that control lighting when you're at home, or when you're
away on vacation. It also has a manual mode that allows you to use the Transmitter as a remote
control. A convenient keychain remote lets you turn lights on and off from outside your home.
The Transmitter controls four light groups. Once the Transmitter is programmed, you can use as
many Receivers as you want in each lighting group. Simply assign the additional Receivers to a
light group, plug the lamp into the Receiver, and plug the Receiver into a standard home electrical
outlet. The System allows an unlimited number of Receivers and Remotes.
Vacation Program.....................25
Manual Operation.....................30
Keychain Remote Operation....31
Daily Operation.........................32
Transmitter Wall Mount.............34
Maintenance..............................35
Technical Support.....................36
INTRODUCTION
2
43012-01
Page 3

Features
• A Home Program with three modes:
~ 7-Day Same mode - allows you to quickly and easily program the same On/Off
times for every day of the week either for all Light Groups or for individual Light
Groups.
~ Week / Weekend mode - allows you to program the same On/Off times for the
weekdays, and different On/Off times for the weekend either for all Light
Groups or for individual Light Groups.
~ Custom mode - allows you to program individual On/Off times for each day of
the week, either for all Light Groups or for individual Light Groups.
• A Vacation Program with two modes:
~ Home Variable Mode - uses your Home Program settings to randomly turn on
light groups for each hour and turn them off after thirty minutes.
~ Smart Deterrence Mode - between the hours of 5:30PM and 11:30PM Smart
Deterrence always keeps at least one Light Group on. Each Light
Groups remains on between one hour and one hour forty-ve
minutes, depending on how many Light Groups are selected for this mode. The
cycle continues through all selected Light Groups. In this way Smart Deterrence
simulates someone inside your home moving from one area to another.
• A Manual mode that allows you to use the Transmitter as a Remote Control for your
lighting.
• Convenient Transmitter wall-mounting.
• For indoor use only.
43012-01
3
Page 4

Limitations & Warnings
• For use with switched wall outlets.
• Maximum load for receptacles is 500 watts.
• Receivers conform to UL 60730-2-7, Timers and Time Switches.
This device complies with Part 15 of the FCC Rules. Operation is subject to the following two
conditions: (1) this device may not cause harmful interference, and (2) this device must accept
any interference received, including interference that may cause undesired operation.
This equipment has been tested and found to comply with the limits for a Class B digital
device, pursuant to Part 15 of the FCC Rules. These limits are designed to provide reasonable protection against harmful interference in a residential installation. This equipment
generates, uses and can radiate radio frequency energy and, if not installed and used in
accordance with the instructions, may cause harmful interference to radio communications.
However, there is no guarantee that interference will not occur in a particular installation. If
this equipment does cause harmful interference to radio or television reception, which can
be determined by turning the equipment off and on, the user is encouraged to try to correct
the interference by one or more of the following measures:
• Increase the separation between the equipment and receiver.
• Connect the equipment into an outlet on a circuit different from that to which the receiver
is connected.
• Consult the dealer or an experienced radio/TV technician for help.
Any change or modication to this equipment not expressly approved by Hunter Fan Co.
will void the user’s authority to operate the equipment.
4
43012-01
Page 5
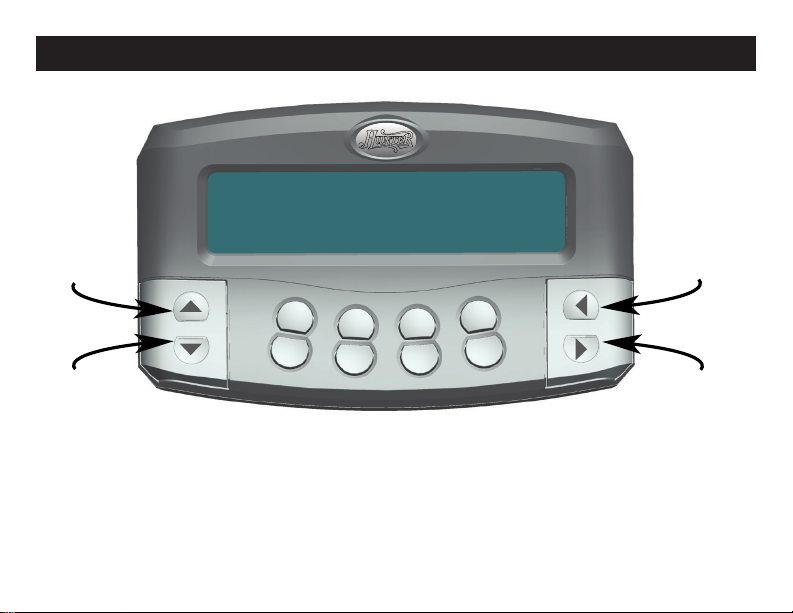
Transmitter Controls
WIRELESS LAMP TIMER SYSTEM
All Off /
Scroll Up/
Setup
Button
All On /
Scroll Down
Button
SETUP
ALL
ON
A D
Transmitter Controls
OFF
B C
ON
All Off / Scroll
Left Button
ALL
OFF
ALL
ON
All On / Scroll
Right / Enter
Button
43012-01
5
Page 6
Transmitter Controls (cont.)
Channel Switch
•HOME
Program Select Switch
1
2
3
•VACATION
•MANUAL
6
43012-01
Page 7
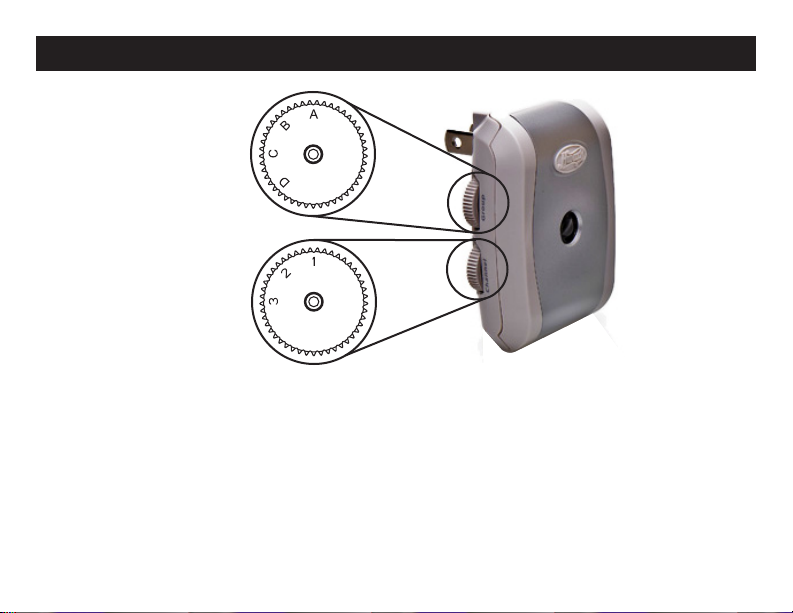
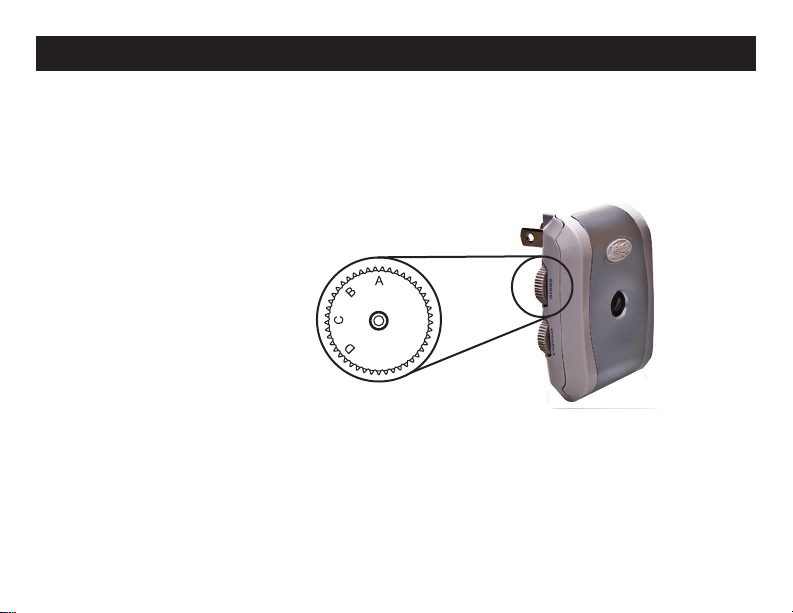
Receiver Controls
Light Group
Select Dial
Channel
Select Dial
Receiver Controls
43012-01
7
Page 8
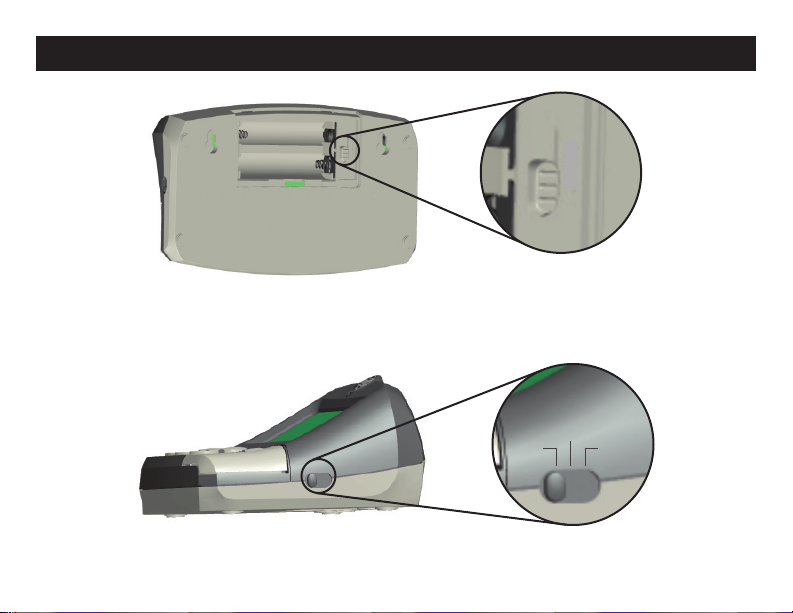
Setup
1) Remove the Battery Cover from the back of the Transmitter.
2) Slide the Channel Select Switch to any of the three numbers next to it.
1
2
3
8
43012-01
Page 9

Setup (cont.)
3) On each Receiver rotate the Channel Select Dial to the channel to which you set the Transmitter
Channel Select Switch.
Channel Select Dial
(shown with channel
3 selected)
4) The Hunter Home Light Control System divides the rooms and areas of your home into four Light
Groups labeled A, B, C, and D on the Transmitter keyboard. Assign your rooms and areas to Light
Groups, and make a note of the assignments. We suggest that the entry area of your home be assigned to Light Group A. This is because the Keychain Remote for your Hunter Light Control System
operates only Light Group A, and you will want to be able to turn on your entry lighting before you
enter. A sample Light Group assignment scheme might be:
Light Group A - Entry Area
Light Group B - Living Area
Light Group C - Dining Area
Light Group D - Master Bedroom
43012-01
9
Page 10
Setup (cont.)
NOTE - OBTAINING ADDITIONAL RECEIVERS
Each Light Group can support an unlimited number of Receivers. To purchase additional
Receivers, visit our website at www.hunterfan.com.
5) On each Receiver rotate the Light Group Select Dial to the Light Group for which it is intended.
Light Group Select
Dial (shown with Light
Group C selected)
10
43012-01
Page 11
Setup (cont.)
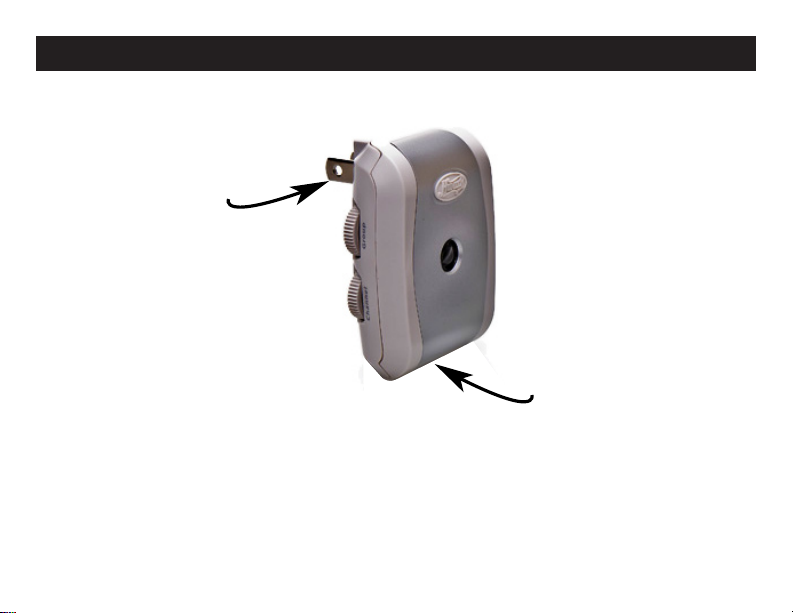
6) Plug your lamps into the Receivers (observing correct plug polarities), then plug the Receivers into
standard wall electrical outlets.
Receiver plugs into
wall outlet.
Lamp plugs in under
Receiver
7) Switch the lamps that will be controlled by the Home Light Control System to the On position.
43012-01
11
Page 12
Setup (cont.)
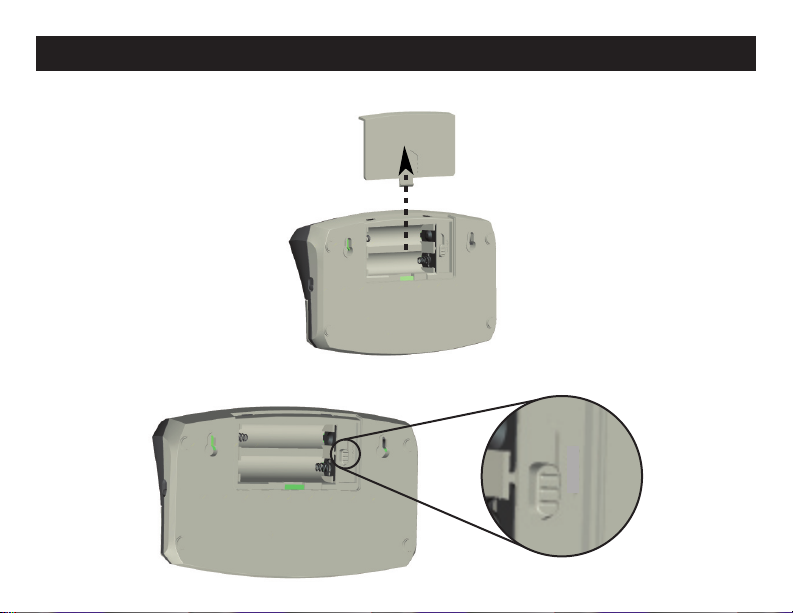
8) Install two fresh AA batteries into the Battery Compartment. Ensure the battery polarities are
correctly oriented.
9) Reinstall the Battery Cover.
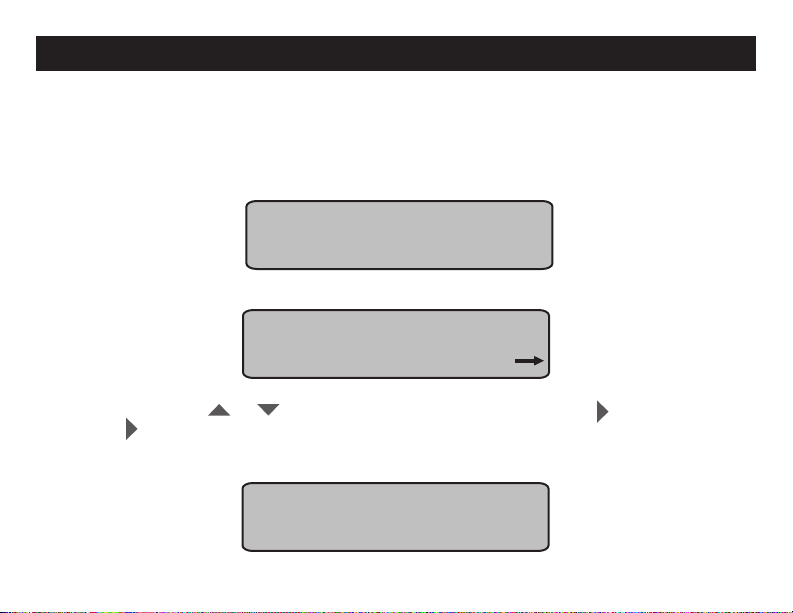
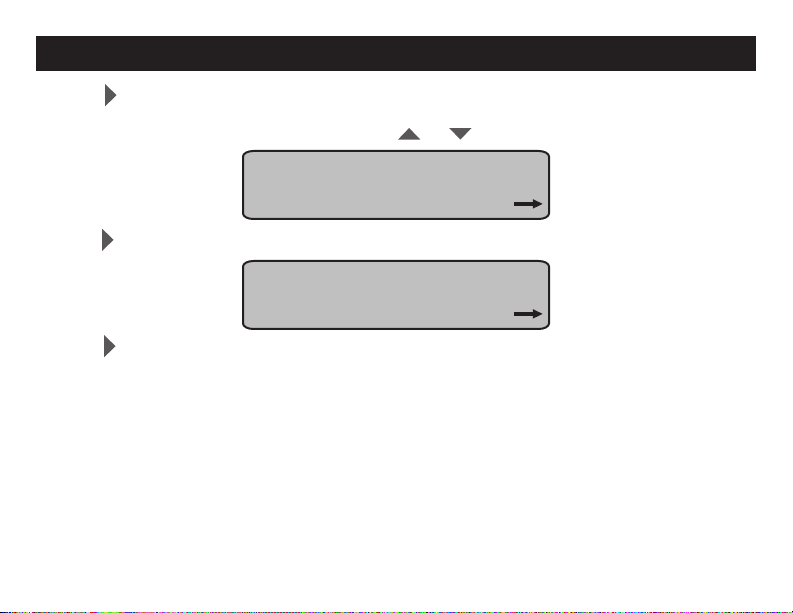
10) The Welcome screen will appear:
PRESS ANY KEY TO BEGIN
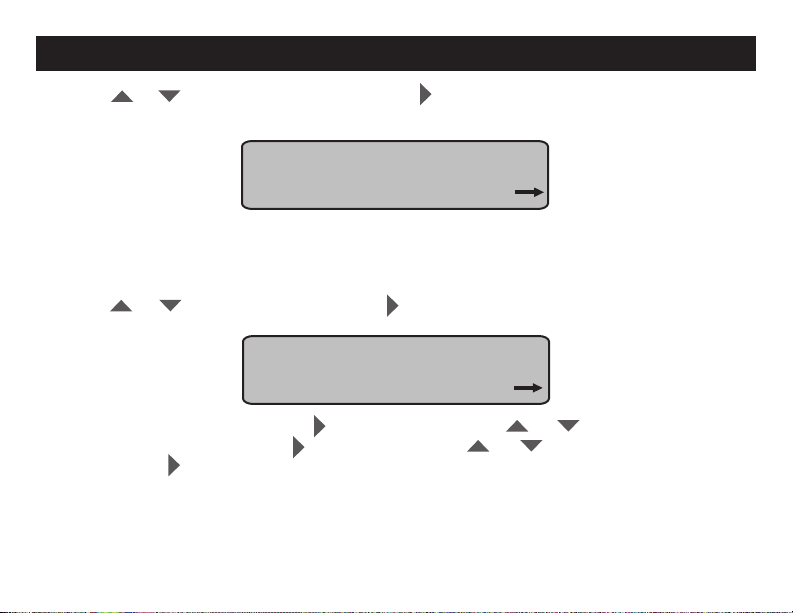
11) Press any key. The Setup screen will appear:
SETUP
DATE / TIME
ENTER
12) To exit Setup press or so the Setup screen shows Exit, then press . To proceed with
Setup press .
If you decide to exit the Setup, then the Setup Complete screen will appear:
SETUP COMPLETE
WELCOME
SETUP
12
43012-01
Page 13
Setup (cont.)
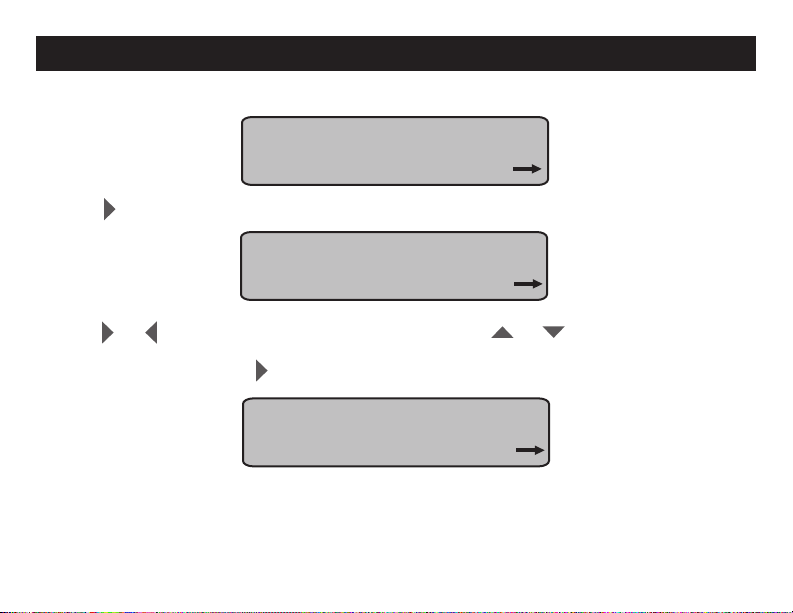
After approximately ve seconds the screen will show the mode on which the Program Select Switch
is set.
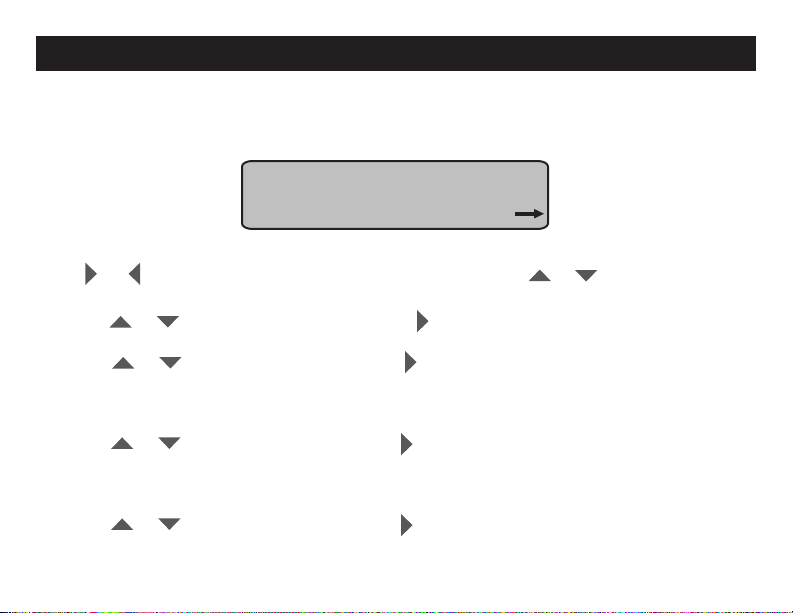
If you decide to proceed with Setup, then the Calendar / Clock screen will appear:
JAN 01 2007 12:00A
MONDAY
ENTER
NOTE - BUTTON OPERATION
Press or to select the Calendar and Clock positions; press or to change settings.
To fast scroll, press and hold the buttons; for slow scroll, press the buttons repeatedly.
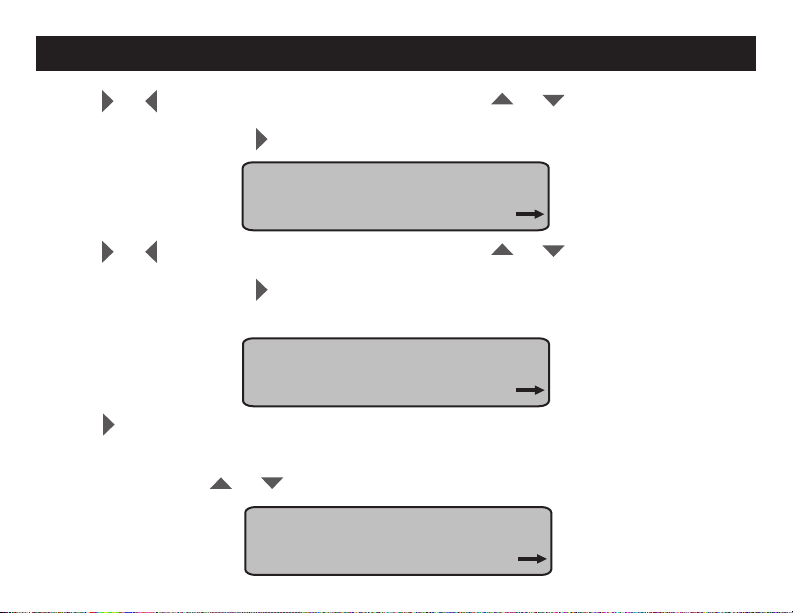
13) Press or to nd the current month. Press to set the month.
14) Press or to nd the current date. Press to set the date.
NOTE - WEEK DAY SETTING
The correct week day will automatically update while entering the year, month, or day.
15) Press or to nd the current year. Press to set the year.
NOTE - AM / PM SETTING
To set AM or PM, scroll through the hours until the correct setting appears.
16) Press or to nd the current hour. Press to set the hour.
43012-01
13
Page 14
Setup (cont.)
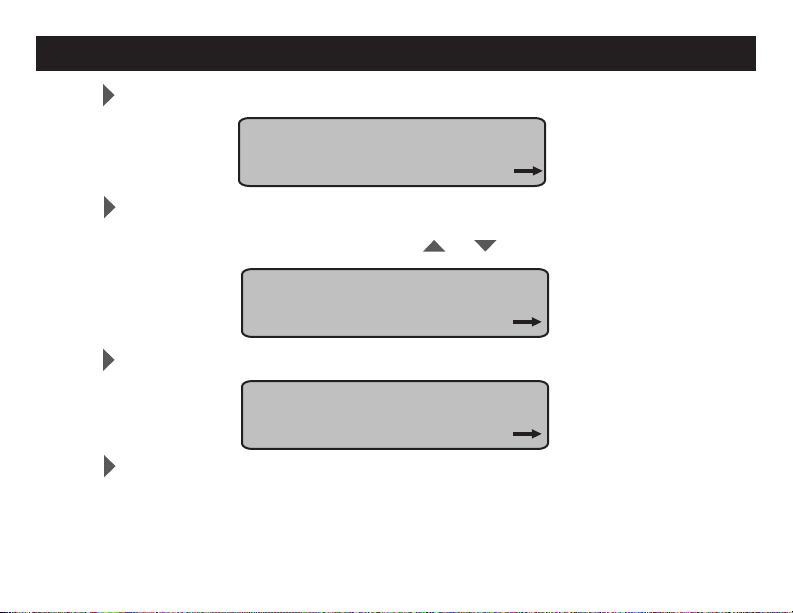
17) Press or to nd the current minute. Press to set the minute. The Automatic Daylight
Savings Time screen will appear.
AUTO DST UPDATE? YES
ENTER
NOTE - AUTOMATIC DAYLIGHT SAVINGS TIME SETTING
If you select Yes, then the Home Light Control will update automatically for Daylight Savings
Time.
18) Press or to choose Yes or No. Press to set your choice. The Final Setup screen will
appear:
SETUP
PROGRAM
ENTER
19) To proceed to the Programs, press . To revisit Setup, press or to nd the
Calendar / Clock screen, and press . To exit Setup, press or to nd the Exit
screen, and press .
14
43012-01
Page 15
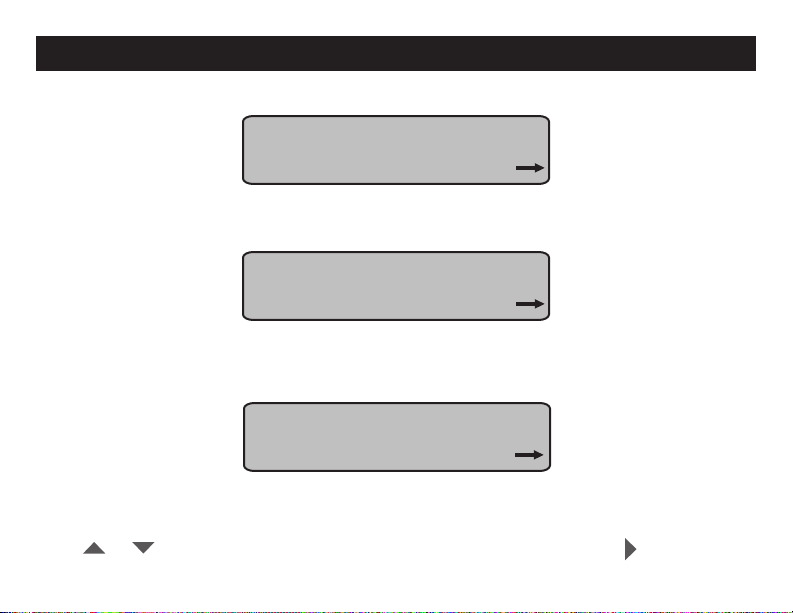
Home Program
The Home Program has three modes:
PROGRAM: HOME
7 DAY SAME
ENTER
~ 7-Day Same mode - allows you to quickly and easily program the same On/Off times
for every day of the week either for all Light Groups or for individual Light Groups.
PROGRAM: HOME
WEEK / WEEKEND
ENTER
~ Week / Weekend mode - allows you to program the same On/Off times for the
weekdays, and different On/Off times for the weekend either for all Light Groups or for
individual Light Groups.
PROGRAM: HOME
CUSTOM
ENTER
~ Custom mode - allows you to program individual On/Off times for each day of the week,
either for all Light Groups or for individual Light Groups.
Press or to scroll through the three Home Program modes, and and press to select
the mode you wish to program.
43012-01
15
Page 16
Home Program (cont.)
To program the 7-Day Same mode:
PROGRAM: HOME
7 DAY SAME
ENTER
1) Press to select the 7 Day Same mode. The Time/Group screen will appear:
ON 06:00A 05:00P
OFF 08:00A 11:00P
GROUP A ENTER
NOTE - PROGRAMMING TIMES
You can program two different On/Off times for each Light Group.
NOTE - GROUPS
The word GROUP on the screen means Light Group.
2) Press or to select the Time and Group positions. Press or to change the settings.
To fast scroll, press and hold the buttons; for slow scroll, press the buttons repeatedly. When your
desired setting appears, press .
16
43012-01
Page 17
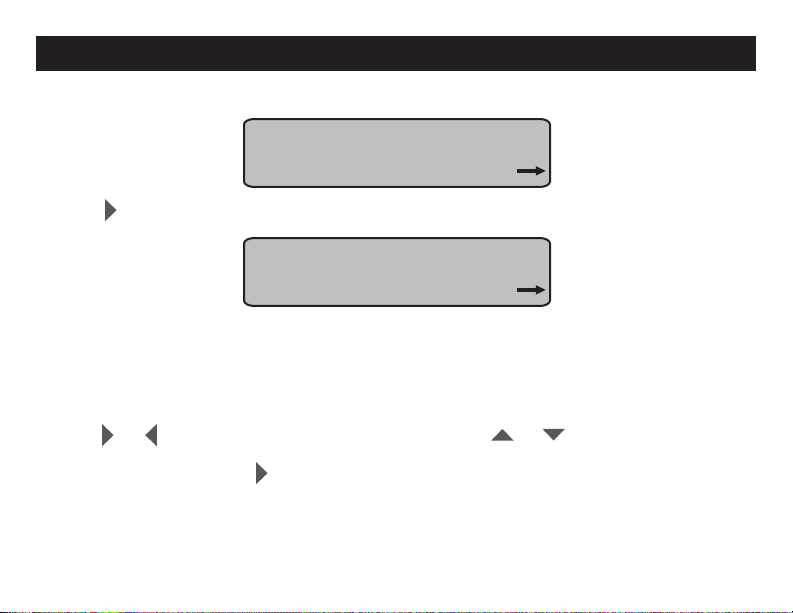
Home Program (cont.)
3) Once your desired times are programmed the screen will show:
SAME PROGRAM FOR ALL
GROUPS? YES
ENTER
4) Press to program the other Light Groups with the same times for every day of the week. The
screen will show the Vacation Program screen (explained later). If you want to program the other
Light Groups with different times for everyday of the week, or if you want to program no other Light
Groups, then press or so the screen shows “NO”:
SAME PROGRAM FOR ALL
GROUPS? NO
ENTER
5) Press . The screen will show:
PROGRAM ADDITIONAL
GROUPS? YES
ENTER
43012-01
17
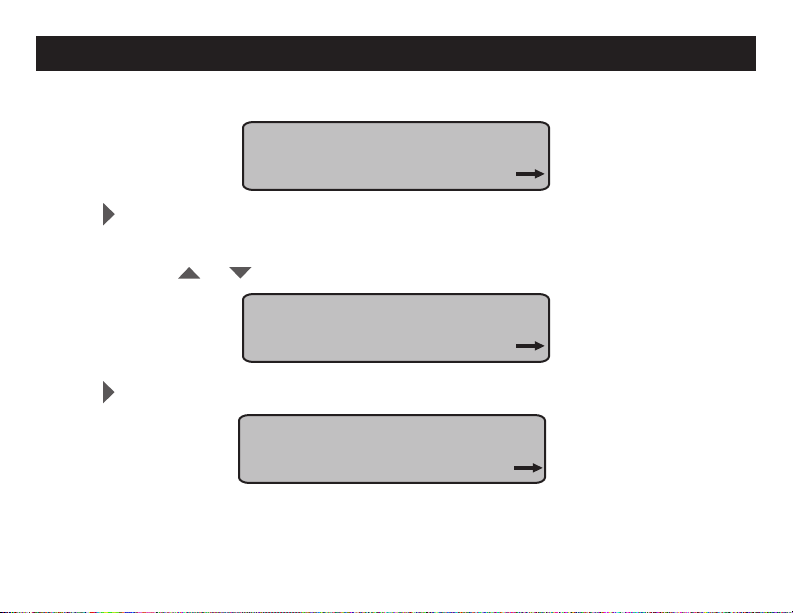
Page 18
Home Program (cont.)
6) Press to program the other individual Light Groups with different times for every day of the
week. You will be taken back to Step 2 of the 7-Day Same option. If you do not want to program the
other Light Groups with different times, then press or so the screen shows “NO”:
PROGRAM ADDITIONAL
GROUPS? NO
ENTER
7) Press . The screen will show the Vacation Program option screen (explained on page 26):
PROGRAM VACATION NOW?
YES
ENTER
8) Press to proceed to the Vacation Program.
18
43012-01
Page 19
Home Program (cont.)
To program the Week / Weekend mode:
PROGRAM: HOME
WEEK / WEEKEND
ENTER
1) Press to select the Week / Weekend option option. The Week Time/Group screen will appear:
ON 06:00A 05:00P WEEK
OFF 08:00A 11:00P
GROUP A ENTER
2) Press or to select the Time and Group positions. Press or to change the settings.
To fast scroll, press and hold the buttons; for slow scroll, press the buttons repeatedly. When your
desired setting appears, press . The Weekend Time/Group for Saturday screen will appear:
ON 06:00A 05:00P SAT
OFF 08:00A 11:00P
GROUP A ENTER
43012-01
19
Page 20
Home Program (cont.)
3) Press or to select the Time and Group positions. Press or to change the settings.
To fast scroll, press and hold the buttons; for slow scroll, press the buttons repeatedly. When your
desired setting appears, press . The Weekend Time/Group for Sunday screen will appear:
ON 06:00A 05:00P SUN
OFF 08:00A 11:00P
GROUP A ENTER
5) Press or to select the Time and Group positions. Press or to change the settings.
To fast scroll, press and hold the buttons; for slow scroll, press the buttons repeatedly. When your
desired setting appears, press .
4) Once your desired times are programmed the screen will show:
SAME PROGRAM FOR ALL
GROUPS? YES
ENTER
6) Press to program the other Light Groups with the same times for the week and weekend. The
screen will show the Program Vacation Mode screen (explained later). If you want to program the
other Light Groups with different times for the week and weekend, or if you want to program no other
light groups, then press or so the screen shows “NO”:
SAME PROGRAM FOR ALL
GROUPS? NO
ENTER
20
43012-01
Page 21
Home Program (cont.)
7) Press . The screen will show:
PROGRAM ADDITIONAL
GROUPS? YES
ENTER
8) Press to program the other individual Light Groups with different times for the week and week-
end. You will be taken back to Step 2 of the Week / Weekend option. If you do not want to program
the other Light Groups with different times, then press or so the screen shows “NO”:
PROGRAM ADDITIONAL
GROUPS? NO
ENTER
9) Press . The screen will show the Vacation Program option screen (explained on page 26):
PROGRAM VACATION NOW?
YES
ENTER
10) Press to proceed to the Vacation Program.
43012-01
21
Page 22
Home Program (cont.)
To program the Custom mode:
PROGRAM: HOME
CUSTOM
ENTER
1) Press to select the Custom mode. The Custom Time/Group screen will appear:
ON 06:00A 05:00P MON
OFF 08:00A 11:00P
GROUP A ENTER
NOTE - DAYS OF THE WEEK
On the rst line of the screen, the days of the week are abbreviated MON, TUE, WED, THU,
FRI, SAT, SUN. When you enter your desired settings, the screen will automatically show the
next day of the week.
2) Press or to select the Time and Group positions. Press or to change the settings.
To fast scroll, press and hold the buttons; for slow scroll, press the buttons repeatedly. When your
desired setting appears, press . The screen for the next day of the week will appear. Repeat this
procedure for the remaining days of the week.
22
43012-01
Page 23

Home Program (cont.)
3) Once your desired times are programmed the screen will show:
SAME PROGRAM FOR ALL
GROUPS? YES
ENTER
4) Press to program the other Light Groups with the same times for every day of the week. The
screen will show the Program Vacation option screen (explained later). If you want to program the
other Light Groups with different times for every day of the week, or if you want to program no other
Light Groups, then press or so the screen shows “NO”:
SAME PROGRAM FOR ALL
GROUPS? NO
ENTER
5) Press . The screen will show:
PROGRAM ADDITIONAL
GROUPS? YES
ENTER
43012-01
23
Page 24

Home Program (cont.)
6) Press to program the other individual Light Groups with different times for every day of the
week. You will be taken back to Step 2 of the Custom option. If you do not want to program the other
Light Groups with different times, then press or so the screen shows “NO”:
PROGRAM ADDITIONAL
GROUPS? NO
ENTER
7) Press . The screen will show the Vacation Program option screen (explained on page 26):
PROGRAM VACATION NOW?
YES
ENTER
8) Press to proceed to the Vacation Program.
24
43012-01
Page 25

Vacation Program
The Vacation Program has two modes:
PROGRAM: VACATION
HOME VARIABLE
ENTER
~ Home Variable Mode - uses your Home Program settings to randomly turn on light
groups for each hour and then turn them off after thirty minutes.
PROGRAM: VACATION
SMART DETERRENCE
ENTER
~ Smart Deterrence Mode - between the hours of 5:30PM and 11:30PM Smart Deter-
rence always keeps at least one Light Group on. The time each Light Groups remains on is between
one hour and one hour forty-ve minutes, depending on how many Light Groups are selected for this
mode. In this way Smart Deterrence simulates someone inside your home moving from one area to
another.
Press or to scroll through the Vacation Program Modes, and and press to select the
Mode you wish to activate.
43012-01
25
Page 26

Vacation Program (cont.)
To activate the Home Variable Mode:
PROGRAM: VACATION
HOME VARIABLE
ENTER
1) Press to select the Home Variable Mode. The Setup Complete screen will appear:
SETUP COMPLETE
After approximately ve seconds the screen will show the mode on which the Program Select Switch
is set.
To activate the Smart Deterrence Mode:
PROGRAM: VACATION
SMART DETERRENCE
ENTER
1) Press to select the Smart Deterrence Mode. The Group Select screen will appear:
SELECT GROUPS FOR
SETUP:
ENTER
26
43012-01
Page 27

Vacation Program (cont.)
NOTE - SMART DETERRENCE MODE LIGHT GROUPS
You must select at least two Light Groups in the Smart Deterrence Mode.
2) To include a Light Group in Smart Deterrence press that Light Group’s On button. That Light
Group will appear on the screen.
Light Groups
On Buttons
A D
C
B
OFF
ON
Off Buttons
SELECT GROUPS FOR
SETUP: A B C D
ENTER
To remove a Light Group from Smart Deterrence press that Light Group’s Off button. That Light Group
will disappear from the screen.
43012-01
27
Page 28

Vacation Program (cont.)
3) Press . The Setup Complete screen will appear:
SETUP COMPLETE
If you did not include at least two Light Groups in Smart Deterrence Mode, then the Setup Incomplete
screen will appear:
SETUP INCOMPLETE
RETURN TO SETUP?
NO ENTER
4) Press if you wish to exit the Vacation Program, or press or so the screen shows
Yes if you wish to return to the Vacation Program screen and include other Light Groups in Smart
Deterrence.
If you decide to Exit the Vacation Program, then the Setup Complete screen will appear:
SETUP COMPLETE
After approximately ve seconds the screen will show the mode on which the Program Select Switch
is set.
28
43012-01
Page 29

Vacation Program (cont.)
If you decide to include other Light Groups in Smart Deterrence, then the Vacation Program Smart
Deterrence screen will appear:
PROGRAM: VACATION
SMART DETERRENCE
ENTER
5) Press to proceed with including other Light Groups in Smart Deterrence. Once you’ve included
all your desired Light Groups, the Setup Complete screen will appear:
SETUP COMPLETE
43012-01
29
Page 30

Manual Operation
Manual Operation allows you disable the Home and Vacation programs and use the Transmitter as a
remote switch for your Light Groups.
To enter Manual Operation:
NOTE - MANUAL OPERATION SCREEN
Only the Light Groups that are selected will appear on the screen.
1) Set the Mode Switch to Manual. The Manual Operation screen will appear:
12:00P
MANUAL
A B C D ENTER
2) Use the Light Groups On / Off buttons to remotely operate Light Groups. Use the All On buttons
and the All Off buttons to operate all Light Groups.
Light Groups
On / Off Buttons
All Off Button
All Off Button
All On Button
All Off Button
ALL
ON
A
OFF
B C
ON
30
ALL
OFF
D
ALL
ON
All On Button
43012-01
Page 31

Keychain Remote Operation
The Keychain Remote allows you to turn on Light Group A before you enter you home. Simply press
the On and Off buttons
OFF
ON
LAMP REMOTE
NOTE - OBTAINING ADDITIONAL KEYYCHAIN REMOTES
Your Hunter Home Light Control System can support an unlimited number of Keychain Remotes. To purchase additional Keychain Remotes, visit our website at www.hunterfan.com.
43012-01
31
Page 32

Daily Operation
Once your desired times are programmed into Home Light Control System, it will operate automatically depending upon the postion of the Program Select Switch.
•VACATION
•HOME
Program Select Switch
With the Program Select Switch in the Home position, the Home Light Control System will operate
according to your Home Program settings, and the Home Mode screen will appear:
NOTE - TIME DISPLAY
The time displayed on the screen will be the actual time.
NOTE - LIGHT GROUPS ON THE SCREEN
Only the Light Groups that are selected will appear on the screen.
12:00P
HOME
A B C D
•MANUAL
32
43012-01
Page 33

Daily Operation (cont.)
With the Program Select Switch in the Vacation position, the Home Light Control System will operate
according to your Vacation Program settings, and the Vacation Mode screen will appear:
12:00P
VACATION
A B C D
With the Program Select Switch in the Manual position, the Home Light Control System becomes a
remote control for you Light Groups, and the Vacation Mode screen will appear:
12:00P
MANUAL
A B C D
At some point you will want to change the Home Light Control System’s program settings, so you will
need to enter Setup.
To enter Setup:
1) Press and hold for three seconds. The Setup Screen will appear:
SETUP
DATE / TIME
ENTER
43012-01
33
Page 34

Transmitter Wall-Mount
The Home Light Control System can be conveniently mounted on a wall by using the included Wall
Anchors, Screws, and Wall Mount Template.
To wall-mount the Transmitter:
1) Select your desired location.
2) Afx the Wall-Mount Template the wall at your desired height.
3) Follow the instructions on the Wall-Mount Template
34
43012-01
Page 35

Maintenance
Your Hunter Home Light Control System requires very little maintenance. Except for occasional cleaning and battery replacement, the system is otherwise trouble-free.
Cleaning
NOTE - DO NOT IMMERSE THE TRANSMITTER, RECEIVERS, OR KEYCHAIN REMOTE IN WATER.
Use a soft damp cloth to gently wipe off the Transmitter, Receivers, and Keychain Remotes
Batteries
When the System’s batteries are becoming depleted, the screen will show the Low Battery Indicator:
12:00P
MANUAL
A B C D
Low Battery Indicator
When the Low Battery Indicator appears it is best to change the batteries at your earliest convenience. Install two fresh AA Batteries.
The Keychain Remote battery should last for about a year depending on use. If your Keychain Remote begins operate only intermittently, install a fresh CR2032 3-volt battery.
43012-01
35
Page 36

Technical Support
If you have any additional questions or problems with your Hunter Home Light
Control System, please call 1-888-830-1326 from 7:00AM to 7:00PM Central Time
Monday thru Friday and 8:00AM to 5PM Central Time on Saturday, or contact us
over the Internet at www.hunterfan.com.
HUNTER FAN COMPANY
2500 FRISCO AVENUE
MEMPHIS, TN 38114, USA
36
43012-01
Page 37

Sistema de control de iluminación para el hogar
43012-02 r101107
ESPAÑOL
Hunter Modelo 45051
Manual de instalación y operación
Page 38

TABLA DE CONTENIDO
Introducción................................................37
Características...........................................38
Limitaciones/Advertencias........................39
Controles del transmisor..........................40
Controles del receptor................................42
Configuración.............................................43
Programa Vacation.....................................50
INTRODUCCIÓN
El sistema de control de iluminación para el hogar de Hunter es un sistema de temporización automático y de fácil uso para el hogar. Presenta dos modos programables que controlan la iluminación
si se encuentra en su hogar o si no lo está durante las vacaciones. También cuenta con un modo
manual que le permite usar el Transmisor como un control remoto. Un práctico control remoto
portátil le permite encender y apagar las luces desde fuera de su hogar.
El Transmisor controla cuatro grupos de luces. Al programar el transmisor, usted puede usar los
Receptores que desee en cada grupo de iluminación. Sólo designe los receptores adicionales para
cada grupo de luz, conecte la lámpara en el receptor y conecte el receptor en una toma de corriente
doméstica estándar. El sistema permite un número ilimitado de receptores y controles remotos.
Programa Vacation...................................60
Operación manual....................................65
Operación con control remoto portátil....66
Operación diaria........................................67
Montaje en pared del transmisor..............69
Mantenimiento...........................................70
Soporte técnico.........................................71
43012-02
37
Page 39

Características
• Un programa Home (en casa) con tres modos:
~ Modo de programación semanal - le permite programar rápida y fácilmente la misma
programación de encendido/apagado para cada día de la semana tanto para todos los
grupos de iluminación como para los grupos individuales.
~Modosemana/ndesemana - le permite programar el mismo horario de encendido/
apagado para los días de la semana y diferentes horarios para el n de semana tanto
para todos los grupos de iluminación como para los grupos individuales.
~ Modo diario - le permite programar horarios individuales de encendido/apagado para
cada día de la semana, para todos los grupos de iluminación o para grupos individuales.
• Un programa Vacation (Vacaciones) con dos modos:
~ Modo Home variable - usa los ajustes del programa Home para encender
aleatoriamente los grupos de iluminación a cada hora y apagarlos luego de treinta
minutos.
~ Modo Smart Deterrence - entre las 5:30pm y las 11:30pm el modo Smart Deterrence
(Disuasión inteligente) siempre mantiene encendido por lo menos un grupo de
iluminación. Cada grupo de iluminación permanece encendido entre una hora y una
hora cuarentaicinco minutos, dependiendo de cuantos grupos de iluminación se han
seleccionado para este modo. El ciclo continúa para todos los grupos de iluminación
seleccionados. De esta forma Smart Deterrence simula que hay alguien dentro de su
casa desplazándose de un área a otra.
• Un modo manual que le permite usar el Transmisor como un control remoto para la iluminación.
• Práctico montaje en pared del transmisor.
38
43012-02
Page 40

Limitaciones y advertencias
• Sólo para uso en interiores.
• Para uso con tomas de corriente de pared con interruptor.
• La carga máxima para los receptáculos es de 500 vatios.
• Los receptores cumplen con las normas UL 60730 -2-7 para temporizadores
e interruptores.
Este dispositivo cumple con la Parte 15 de las reglas FCC. Esta operación está sujeta a las siguientes
condiciones: (1) Este dispositivo no puede causar interferencia perjudicial, y (2) este dispositivo debe
aceptar cualquier interferencia recibida, incluyendo interferencias que puedan causar una operación
no deseada.
Este equipo ha sido probado y cumple con los límites para un dispositivo digital clase B, de acuerdo con la Parte 15 de las reglas FCC. Estos límites están diseñados para proporcionar protección
razonable contra interferencias perjudiciales en una instalación residencial. Este equipo genera, usa
y puede radiar energía de radio frecuencia, y si no se instala y usa de acuerdo con las instrucciones,
puede causar interferencia perjudicial a la comunicación por radio. Sin embargo, no existe garantía de
que no pueda producirse interferencia en una instalación en particular. Si este equipo causa alguna
interferencia perjudicial a la recepción de radio o televisión, lo que puede determinarse apagando y
encendiendo el equipo, el usuario debe tratar de corregir la interferencia aplicando una o más de las
siguientes medidas:
• Aumente la separación entre el equipo y el receptor.
• Conecte el equipo en una salida de un circuito diferente del circuito al que está conectado
el receptor.
• Consulte a su representante de ventas o solicite ayuda a un técnico experto en radio/TV.
To do cambio o modicación no aprobada expresamente por Hunter Fan Co. anulará la autorización
del usuario para operar este equipo.
43012-02
39
Page 41

Controles del transmisor
WIRELESS LAMP TIMER SYSTEM
Botón Todo
apagado /
avanzar /
conguración
Botón Todo
encendido /
retroceder
ALL LIGHTS ALL LIGHTS
SETUP
ALL
ON
A D
OFF
B C
ON
Controles del transmisor
40
ALL
OFF
ALL
ON
Botón Todo
apagado /
desplazar a
la izquierda
Botón Todo
encendido /
desplazar a
la derecha /
ingresar
43012-02
Page 42

Controles del transmisor (cont.)
1
2
3
Selector de canal
•VACATION
•HOME
Interruptor selector de programa
•MANUAL
43012-02
41
Page 43

Controles del receptor
Dial de selección
del grupo de
iluminación
Dial de selección
del canal
Controles del receptor
42
43012-02
Page 44

Configuración
1) Retire la cubierta de la batería de la parte posterior del transmisor.
2) Deslice el dial de selección de canal a cualquiera de los tres números.
1
2
3
43012-02
43
Page 45

Configuración (cont.)
3) En cada receptor gire el dial de selección de canal al canal al que le asigna el selector de canal
de transmisión.
Dial de selección
del canal (se muestra con
el canal 3 seleccionado)
4) El Sistema de control de iluminación para el hogar Hunter divide las habitaciones y áreas de su
hogar en cuatro grupos de iluminación, etiquetados como A, B, C y D en el teclado del transmisor.
Asigne sus habitaciones y áreas a los grupos de iluminación y tome nota de las asignaciones. Le
sugerimos que el área de ingreso a su hogar esté asignada al Grupo de Iluminación A. Esto se debe
a que el control remoto portátil de su sistema de control de iluminación de Hunter opera solo con el
Grupo de iluminación A y usted podrá encender la iluminación de la entrada antes de ingresar.
Un ejemplo del esquema de asignación del grupo de iluminación podría ser:
Grupo de iluminación A - Área de ingreso
Grupo de iluminación B - Área de la sala
Grupo de iluminación C - Área del comedor
Grupo de iluminación D - Dormitorio principal
44
43012-02
Page 46

Configuración (cont.)
NOTA - PARA OBTENER RECEPTORES ADICIONALES
Cada grupo de iluminación puede soportar un número ilimitado de receptores. Para comprar
receptores adicionales, visite nuestro sitio Web en www.hunterfan.com.
5) En cada receptor gire el dial de selección del grupo de iluminación al grupo de iluminación que
le corresponde.
Dial de selección del grupo
de iluminación (muestra
el grupo de iluminación C
seleccionado)
43012-02
45
Page 47

Configuración (cont.)
6) Conecte sus lámparas en los receptores (observando que las polaridades de los conectores sean
correctas), luego conecte los receptores en tomas de corriente estándar de pared.
El receptor se conecta
en la toma de corriente
de pared.
La lámpara se
conecta debajo
del receptor
7) Cambie las lámparas que serán controladas por el sistema de control de iluminación para el hogar
a la posición On.
46
43012-02
Page 48

Configuración (cont.)
8) Instale dos baterias alcalinas AA nuevas en el compartimiento de las baterías. Asegúrese de que
las polaridades de las baterías tengan la orientación correcta.
9) Coloque nuevamente la cubierta de la batería.
10) Aparecerá la pantalla de Bienvenida:
PRESS ANY KEY TO BEGIN
11) Presione cualquier tecla. Aparecerá la pantalla de Conguración:
SETUP
DATE / TIME
ENTER
12) Para salir de la conguración presione o hasta que la pantalla indique Exit, luego
presione . Para continuar con la programación presione .
Si decide salir de la conguración, aparecerá la pantalla de conguración completa:
SETUP COMPLETE
WELCOME
SETUP
43012-02
47
Page 49

Configuración (cont.)
Luego de aproximadamente cinco segundos la pantalla mostrará el modo de ajuste del Interruptor
selector de programa.
Si desea continuar la conguración, en la pantalla aparecerá Calendar/clock (Calendario/reloj):
JAN 01 2007 12:00A
MONDAY
ENTER
NOTA - OPERACIÓN CON BOTONES
Presione o para seleccionar las posiciones del Calendario y reloj; presione o
para cambiar los ajustes. Para un desplazamiento rápido, presione y mantenga presionados
los botones, para desplazamiento lento, presione los botones repetidamente.
13) Presione o para seleccionar el mes actual. Presione para establecer el mes.
14) Presione o para seleccionar la fecha actual. Presione para establecer la fecha.
NOTA - AJUSTE DEL DÍA DE LA SEMANA
El día correcto de la semana se actualizará automáticamente al ingresar el año, mes o día.
15) Presione o para seleccionar el año actual. Presione para establecer el año.
NOTA - AJUSTE DE AM / PM
Para el ajuste de AM o PM, desplácese entre las opciones de hora hasta que aparezca el
ajuste correcto.
16) Presione o para seleccionar la hora actual. Presione para jar la hora.
48
43012-02
Page 50

Configuración (cont.)
17) Presione o para seleccionar los minutos actuales. Presione para establecer los minutos.
Aparecerá la pantalla de modo Hora de verano automático.
AUTO DST UPDATE? YES
ENTER
NOTA - AJUSTE DE MODO AUTOMÁTICO DE HORA DE VERANO
Al seleccionar Yes (si), el Control de iluminación para el hogar se actualizará automáticamente para el modo Hora de verano.
18) Presione o para seleccionar Si o No. Presione para jar su selección. Aparecerá
la pantalla de Conguración nal:
SETUP
PROGRAM
ENTER
19) Para continuar con los Programas, presione . Para volver a la conguración,
presione o para seleccionar la pantalla de Calendario/reloj, luego presione . Para
salir de la Conguración, presione o hasta que la pantalla indique Exit, luego
presione .
43012-02
49
Page 51

Programa Home
El programa Home tiene tres modos:
PROGRAM: HOME
7 DAY SAME
ENTER
~ Modo de programación semanal - le permite programar rápida y fácilmente la misma
programación de encendido/apagado para cada día de la semana tanto para todos los
grupos de iluminación como para los grupos individuales.
PROGRAM: HOME
WEEK / WEEKEND
ENTER
~Modosemana/ndesemana - le permite programar el mismo horario de encendido/
apagado para los días de la semana y diferentes horarios para el n de semana tanto para
todos los grupos de iluminación como para los grupos individuales.
PROGRAM: HOME
CUSTOM
ENTER
~ Modo diario - le permite programar horarios individuales de encendido/apagado para
cada día de la semana, para todos los grupos de iluminación o para grupos individuales.
Presione o para desplazarse a través de los tres modos del programa Home y presione
para seleccionar el modo que desee programar.
50
43012-02
Page 52

Programa Home (cont.)
Para programar el modo de programación semanal:
PROGRAM: HOME
7 DAY SAME
ENTER
1) Presione para seleccionar el modo de programación semanal. Aparecerá la pantalla
de Horarios/Grupo.
ON 06:00A 05:00P
OFF 08:00A 11:00P
GROUP A ENTER
NOTA- PROGRAMACIÓN DE HORARIOS
Usted puede programar dos horarios diferentes de encendido/apagado para cada grupo
de iluminación.
NOTA - GRUPOS
La palabra GROUP en pantalla se reere a los grupos de iluminación.
2) Presione o para seleccionar las posiciones de Horario y Grupo. Presione o para
cambiar los ajustes. Para un desplazamiento rápido, presione y mantenga presionados los botones,
para desplazamiento lento, presione los botones repetidamente. Cuando aparezca el ajuste
deseado, presione .
43012-02
51
Page 53

Programa Home (cont.)
3) Cuando haya programado el horario deseado la pantalla mostrará:
SAME PROGRAM FOR ALL
GROUPS? YES
ENTER
4) Presione para programar los otros grupos de iluminación con los mismos horarios para cada
día de la semana. La pantalla mostrará el programa Vacation (vea la explicación más adelante).
Si quiere programar los otros grupos de iluminación con diferentes horarios para cada día de la
semana, o si no quiere programar los otros grupos de iluminación, presione o para que la
pantalla muestre “NO”.
SAME PROGRAM FOR ALL
GROUPS? NO
ENTER
5) Presione . La pantalla mostrará:
PROGRAM ADDITIONAL
GROUPS? YES
ENTER
52
43012-02
Page 54

Programa Home (cont.)
6) Presione para programar individualmente a los otros grupos de iluminación con diferentes
horarios para cada día de la semana. La pantalla lo llevará al Paso 2 de la opción de programación
semanal. Si no quiere programar los otros grupos de iluminación con diferentes horarios, presione
o hasta que la pantalla indique “NO”.
PROGRAM ADDITIONAL
GROUPS? NO
ENTER
7) Presione . La pantalla mostrará la opción del programa Vacation (vea la explicación en la pág. 26):
PROGRAM VACATION NOW?
YES
ENTER
8) Presione para pasar al programa Vacation.
43012-02
53
Page 55

Programa Home (cont.)
ParaprogramarelmodoSemana/ndesemana:
PROGRAM: HOME
WEEK / WEEKEND
ENTER
1) Presione para seleccionar la opción semana/n de semana. Aparecerá la pantalla horario/grupo
para el n de semana:
ON 06:00A 05:00P WEEK
OFF 08:00A 11:00P
GROUP A ENTER
2) Presione o para seleccionar las posiciones de Horario y Grupo. Presione o para
cambiar los ajustes. Para un desplazamiento rápido, presione y mantenga presionados los botones;
para desplazamiento lento, presione los botones repetidamente. Cuando aparezca el ajuste deseado,
presione . Aparecerá la pantalla horario/grupo para el día sábado:
ON 06:00A 05:00P SAT
OFF 08:00A 11:00P
GROUP A ENTER
54
43012-02
Page 56

Programa Home (cont.)
3) Presione o para seleccionar las posiciones de Horario y Grupo. Presione o para
cambiar los ajustes. Para un desplazamiento rápido, presione y mantenga presionados los botones;
para desplazamiento lento, presione los botones repetidamente. Cuando aparezca el ajuste deseado,
presione . Aparecerá la pantalla horario/grupo para el día domingo:
ON 06:00A 05:00P SUN
OFF 08:00A 11:00P
GROUP A ENTER
5) Presione o para seleccionar las posiciones de Horario y Grupo. Presione o para cambiar
los ajustes. Para un desplazamiento rápido, presione y mantenga presionados los botones; para desplazamiento lento, presione los botones repetidamente. Cuando aparezca el ajuste deseado, presione .
4) Cuando haya programado el horario deseado la pantalla mostrará:
SAME PROGRAM FOR ALL
GROUPS? YES
ENTER
6) Presione para programar los otros grupos de iluminación con los mismos horarios para la semana
y el n de semana. La pantalla mostrará el programa del modo Vacation (vea la explicación más adelante). Si quiere programar los otros grupos de iluminación con diferentes horarios para la semana y el
n de semana, o si no quiere programar otros grupos de iluminación, presione o para que la
pantalla muestre “NO”.
43012-02
SAME PROGRAM FOR ALL
GROUPS? NO
ENTER
55
Page 57

Programa Home (cont.)
7) Presione . La pantalla mostrará:
PROGRAM ADDITIONAL
GROUPS? YES
ENTER
8) Presione para programar individualmente a los otros grupos de iluminación con diferentes horarios
para la semana y el n de semana. La pantalla lo llevará al Paso 2 de la opción Semana/n de semana.
Si no quiere programar los otros grupos de iluminación con diferentes horarios, presione o hasta
que la pantalla indique “NO”.
PROGRAM ADDITIONAL
GROUPS? NO
ENTER
9) Presione . La pantalla mostrará la opción del programa Vacation (vea la explicación en la pág. 26):
PROGRAM VACATION NOW?
YES
ENTER
10) Presione para pasar al programa Vacation.
56
43012-02
Page 58

Programa Home (cont.)
Para programar el modo diario:
PROGRAM: HOME
CUSTOM
ENTER
1) Presione para seleccionar el modo diario. Aparecerá la pantalla Horario/grupo diario:
ON 06:00A 05:00P MON
OFF 08:00A 11:00P
GROUP A ENTER
NOTA - DÍAS DE LA SEMANA
En la primera línea de la pantalla, los días de la semana están abreviados como MON,
TUE, WED, THU, FRI, SAT, SUN. Al ingresar el ajuste deseado, la pantalla automáticamente
mostrará el siguiente día de la semana.
2) Presione o para seleccionar las posiciones de Horario y Grupo. Presione o para
cambiar los ajustes. Para un desplazamiento rápido, presione y mantenga presionados los botones;
para desplazamiento lento, presione los botones repetidamente. Cuando aparezca el ajuste deseado,
presione . Aparecerá la pantalla para el siguiente día de la semana. Repita este procedimiento para
los días siguientes.
43012-02
57
Page 59

Programa Home (cont.)
3) Cuando haya programado el horario deseado la pantalla mostrará:
SAME PROGRAM FOR ALL
GROUPS? YES
ENTER
4) Presione para programar los otros grupos de iluminación con los mismos horarios para cada
día de la semana. La pantalla mostrará la opción del programa Vacation (vea la explicación más
adelante). Si quiere programar los otros grupos de iluminación con diferentes horarios para cada día
de la semana, o si no quiere programar los otros grupos de iluminación, presione o para que
la pantalla muestre “NO”:
SAME PROGRAM FOR ALL
GROUPS? NO
ENTER
5) Presione . La pantalla mostrará:
PROGRAM ADDITIONAL
GROUPS? YES
ENTER
58
43012-02
Page 60

Programa Home (cont.)
6) Presione para programar individualmente a los otros grupos de iluminación con diferentes
horarios para cada día de la semana. La pantalla lo llevará al Paso 2 de la opción diaria. Si no quiere
programar los otros grupos de iluminación con diferentes horarios, presione o hasta que la
pantalla indique “NO”.
PROGRAM ADDITIONAL
GROUPS? NO
ENTER
7) Presione . La pantalla mostrará la opción del programa Vacation (vea la explicación en la pág. 26):
PROGRAM VACATION NOW?
YES
ENTER
8) Presione para pasar al programa Vacation.
43012-02
59
Page 61

Programa Vacation
El programa Vacation tiene dos modos:
PROGRAM: VACATION
HOME VARIABLE
ENTER
~ Modo Home variable - usa los ajustes del programa Home para encender aleatoriamente los grupos de iluminación a cada hora y apagarlos luego de treinta minutos.
PROGRAM: VACATION
SMART DETERRENCE
ENTER
~ Modo Smart Deterrence - entre las 5:30pm y las 11:30pm el modo Smart Deterrence
(Disuasión inteligente) siempre mantiene encendido por lo menos un grupo de iluminación. El tiempo
que cada grupo de iluminación permanece encendido es de una hora y una hora cuarentaicinco mi-
nutos, dependiendo de cuantos grupos de iluminación se han seleccionado para este modo. De esta
forma, Smart Deterrence simula que hay alguien dentro de su casa desplazándose de un área a otra.
Presione o para desplazarse a través de los tres modos del programa Home y presione
para seleccionar el modo que desee programar.
60
43012-02
Page 62

Programa Vacation (cont.)
Para activar el modo Home variable:
PROGRAM: VACATION
HOME VARIABLE
ENTER
1) Presione para seleccionar el modo Home variable. Aparecerá la pantalla de conguración completa:
SETUP COMPLETE
Luego de aproximadamente cinco segundos la pantalla mostrará el modo de ajuste del Interruptor
selector de programa.
Para activar el modo Smart Deterrence:
PROGRAM: VACATION
SMART DETERRENCE
ENTER
1) Presione para seleccionar el modo Smart Deterrence. Aparecerá la pantalla de selección de grupo:
SELECT GROUPS FOR
SETUP:
ENTER
43012-02
61
Page 63

Programa Vacation (cont.)
NOTA - GRUPOS DE ILUMINACIÓN EN EL MODO SMART DETERRENCE
Debe seleccionar por lo menos dos grupos de iluminación en el modo Smart Deterrence.
2) Para incluir un grupo de iluminación en Smart Deterrence, presione el botón de encendido de
ese grupo. Ese grupo de iluminación aparecerá en pantalla.
Grupos de
iluminación
Botones
de encendido
A D
C
B
OFF
ON
Botones de apagado
SELECT GROUPS FOR
SETUP: A B C D
ENTER
Para eliminar un grupo de iluminación de Smart Deterrence presione el botón de apagado de dicho
grupo. El grupo de iluminación desaparecerá de la pantalla.
62
43012-02
Page 64

Programa Vacation (cont.)
3) Presione . Aparecerá la pantalla de conguración completa:
SETUP COMPLETE
Si no incluyó por lo menos dos grupos de iluminación en el modo Smart Deterrence, aparecerá la
pantalla Conguración incompleta:
SETUP INCOMPLETE
RETURN TO SETUP?
NO ENTER
4) Presione si desea salir del programa Vacation, o presione o para que la pantalla
muestre Yes (si) si desea regresar a la pantalla del programa Vacation e incluir otro grupo de
iluminación en Smart Deterrence.
Si decide salir del programa Vacation, aparecerá la pantalla de conguración completa:
SETUP COMPLETE
Luego de aproximadamente cinco segundos la pantalla mostrará el modo de ajuste del Interruptor
selector de programa.
43012-02
63
Page 65

Programa Vacation (cont.)
Si decide incluir otros grupos de iluminación en Smart Deterrence, aparecerá la pantalla Smart
Deterrence del programa Vacation:
PROGRAM: VACATION
SMART DETERRENCE
ENTER
5) Presione para continuar incluyendo otros grupos de iluminación en Smart Deterrence. Una
vez que ha incluido todos los grupos de iluminación deseados, aparecerá la pantalla de conguración
completa:
SETUP COMPLETE
64
43012-02
Page 66

Operación manual
La operación manual le permite deshabilitar los programas Home y Vacation y utilizar el transmisor
como interruptor remoto para sus grupos de iluminación.
Para ingresar a la operación manual:
NOTA - PANTALLA DE OPERACIÓN MANUAL
Sólo aparecerán en pantalla los grupos de iluminación seleccionados.
1) Coloque el interruptor de modo en Manual. Aparecerá la pantalla de operación manual:
12:00P
MANUAL
A B C D ENTER
2) Use los botones de encendido/apagado de los grupos de iluminación para operarlos remotamente.
Use los botones All On (todo encendido) y All Off (Todo apagado) para operar los grupos de iluminación.
Botones de encendido/apagado
de los grupos de iluminación
Botón Todo apagado
Botón Todo apagado
Botón Todo encendido
43012-02
ALL
ON
A
OFF
B C
ON
ALL
OFF
D
ALL
ON
Botón Todo encendido
65
Page 67

Operación con control remoto portátil
El control remoto portátil le permite encender el grupo de iluminación A antes de ingresar a su hogar.
Simplemente presione los botones On y Off.
OFF
ON
LAMP REMOTE
NOTA - PARA OBTENER CONTROLES REMOTOS ADICIONALES
Su sistema de control de iluminación para el hogar Hunter puede soportar un número ilimitado
de controles remotos. Para comprar controles remotos adicionales, visite nuestro sitio Web en
www.hunterfan.com.
66
43012-02
Page 68

Operación diaria
Una vez que ha programado los horarios deseados en el sistema de control de iluminación del hogar,
éste operará automáticamente dependiendo de la posición del interruptor selector de programa.
•VACATION
•HOME
Interruptor selector de programa
Con el interruptor selector de programa en la posición Home, el sistema de control de iluminación del
hogar operará de acuerdo con los ajustes del programa Home y aparecerá la pantalla del modo Home:
NOTA - PANTALLA DE HORA
La hora que aparece en la pantalla es la hora actual.
NOTA - GRUPOS DE ILUMINACIÓN EN LA PANTALLA
Sólo aparecerán en pantalla los grupos de iluminación seleccionados.
12:00P
HOME
A B C D
•MANUAL
43012-02
67
Page 69

Operación diaria (cont.)
Con el interruptor selector de programa en la posición Vacation, el sistema de control de iluminación
del hogar operará de acuerdo con los ajustes del programa Vacation y aparecerá la pantalla del
modo Vacation:
Con el interruptor selector de programa en la posición Manual, el sistema de control de iluminación
del hogar se convierte en un control remoto para sus grupos de iluminación y aparecerá la pantalla
del modo Vacation.
En algún momento usted querrá cambiar los ajustes de programa del sistema de control del iluminación
del hogar y tendrá que ingresar a la Conguración.
ParaingresaralSetup(conguración):
1) Presione y manténgalo presionado por tres segundos. Aparecerá la pantalla de Conguración:
12:00P
VACATION
A B C D
12:00P
MANUAL
A B C D
SETUP
DATE / TIME
ENTER
68
43012-02
Page 70

Montaje en pared del transmisor
El sistema de control de iluminación para el hogar puede ser montado convenientemente en una
pared usando las anclas de pared, los tornillos y la plantilla para montaje en la pared suministrados.
Para montar el transmisor en la pared:
1) Elija la ubicación deseada.
2) Coloque la plantilla para montaje en la pared a la altura deseada.
3) Siga las instrucciones de la plantilla para montaje en la pared.
43012-02
69
Page 71

Mantenimiento
Su sistema de control de iluminación para el hogar Hunter requiere muy poco mantenimiento. Con
excepción de una limpieza ocasional y el reemplazo de baterías, el sistema opera sin problemas.
Limpieza
NOTA - NO SUMERJA EL TRANSMISOR, RECEPTORES, O CONTROLES REMOTOS EN EL AGUA.
Use un paño suave y húmedo para limpiar el transmisor, los receptores y controles remotos.
Baterías
Cuando las baterías del sistema estén agotadas, la pantalla mostrará el indicador de batería baja:
12:00P
MANUAL
A B C D
Indicador de batería baja
Cuando aparezca el indicador de batería baja, cambie las baterías tan pronto como pueda. Instale
dos baterías AA nuevas.
La batería del control remoto debe durar por lo menos un año dependiendo del uso. Si su control
remoto empieza a operar solo de forma intermitente, instale una nueva batería CR2032 de 3 voltios.
70
43012-02
Page 72

Soporte técnico
Si tiene alguna otra pregunta o inquietud sobre su Sistema de control de ilumi-
nación para el hogar Hunter, llame al 1-888-830-1326 de 7:00 a.m. a 7:00 p.m.,
hora del centro, de lunes a viernes y de 8:00 a.m. a 5:00 p.m., hora del centro, los
sábados; o contáctenos a través de Internet en www.hunterfan.com.
HUNTER FAN COMPANY
2500 FRISCO AVENUE
MEMPHIS, TN 38114, USA
43012-02
71
Page 73

72
43012-02
 Loading...