

Page 1

43022-01 r101607
See page 2
Vea la página 37
LightMinder™ Home Light Control System
Models 45050, 45055, 45060
Installation and Operation Manual
ENGLISH
ESPAÑOL
Page 2

TABLE OF CONTENTS
Introduction..............................2
Features...................................3
Limitations/ Warnings..............4
Transmitter Controls...............5
Receiver Controls....................7
Setup.........................................8
Home Program........................15
The LightMinder™ Home Light Control System is an automated, easy-to-use home timer system.
It features two programmable modes that control lighting when you're at home, or when you're
away on vacation. It also has a manual mode that allows you to use the Transmitter as a remote
control. A convenient keychain remote lets you turn lights on and off from outside your home.
The Transmitter controls four light groups. Once the Transmitter is programmed, you can use as
many Receivers as you want in each lighting group. Simply assign the additional Receivers to a
light group, plug the lamp into the Receiver, and plug the Receiver into a standard home electrical
outlet. The System allows an unlimited number of Receivers and Remotes.
Vacation Program.....................25
Manual Operation.....................30
Keychain Remote Operation....31
Daily Operation.........................32
Transmitter Wall Mount.............34
Maintenance..............................35
Technical Support.....................36
INTRODUCTION
2
43022-01
Page 3

Features
• A Home Program with three modes:
~ 7-Day Same mode - allows you to quickly and easily program the same On/Off
times for every day of the week either for all Light Groups or for individual Light
Groups.
~ Week / Weekend mode - allows you to program the same On/Off times for the
weekdays, and different On/Off times for the weekend either for all Light
Groups or for individual Light Groups.
~ Custom mode - allows you to program individual On/Off times for each day of
the week, either for all Light Groups or for individual Light Groups.
• A Vacation Program with two modes:
~ Home Variable Mode - uses your Home Program settings to randomly turn on
light groups for each hour and turn them off after thirty minutes.
~ Smart Deterrence Mode - between the hours of 5:30PM and 11:30PM Smart
Deterrence always keeps at least one Light Group on. Each Light
Groups remains on between one hour and one hour forty-ve
minutes, depending on how many Light Groups are selected for this mode. The
cycle continues through all selected Light Groups. In this way Smart Deterrence
simulates someone inside your home moving from one area to another.
• A Manual mode that allows you to use the Transmitter as a Remote Control for your
lighting.
• Convenient Transmitter wall-mounting.
• For indoor use only.
43022-01
3
Page 4

Limitations & Warnings
• For use with switched wall outlets.
• Maximum load for receptacles is 500 watts.
• Receivers conform to UL 60730-2-7, Timers and Time Switches.
This device complies with Part 15 of the FCC Rules. Operation is subject to the following two
conditions: (1) this device may not cause harmful interference, and (2) this device must accept
any interference received, including interference that may cause undesired operation.
This equipment has been tested and found to comply with the limits for a Class B digital
device, pursuant to Part 15 of the FCC Rules. These limits are designed to provide reasonable protection against harmful interference in a residential installation. This equipment
generates, uses and can radiate radio frequency energy and, if not installed and used in
accordance with the instructions, may cause harmful interference to radio communications.
However, there is no guarantee that interference will not occur in a particular installation. If
this equipment does cause harmful interference to radio or television reception, which can
be determined by turning the equipment off and on, the user is encouraged to try to correct
the interference by one or more of the following measures:
• Increase the separation between the equipment and receiver.
• Connect the equipment into an outlet on a circuit different from that to which the receiver
is connected.
• Consult the dealer or an experienced radio/TV technician for help.
Any change or modication to this equipment not expressly approved by Hunter Fan Co.
will void the user’s authority to operate the equipment.
4
43022-01
Page 5
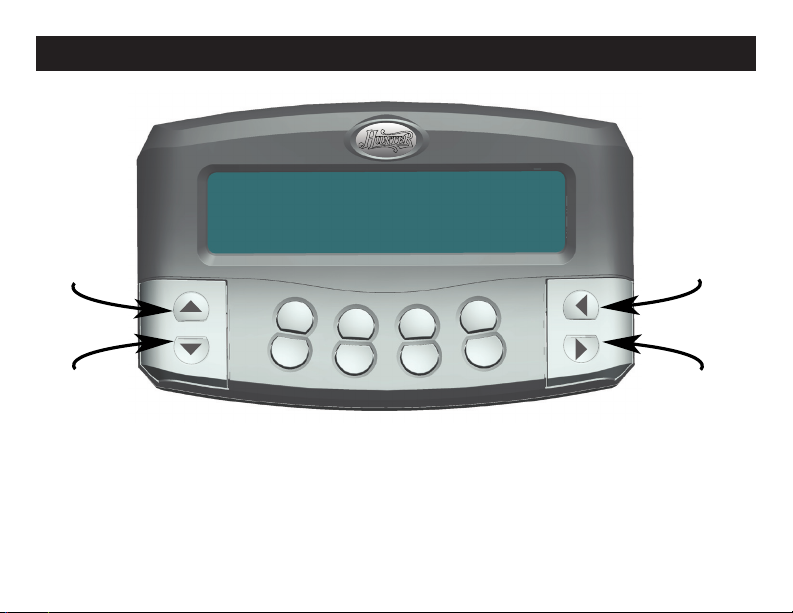
Transmitter Controls
WIRELESS LAMP TIMER SYSTEM
All Off /
Scroll Up/
Setup
Button
All On /
Scroll Down
Button
43022-01
SETUP
ALL
ON
OFF
A D
B C
ON
Transmitter Controls
5
All Off / Scroll
Left/Back
Button
ALL
OFF
ALL
ON
All On / Scroll
Right / Enter
Button
Page 6
Transmitter Controls (cont.)
Channel Switch
•HOME
Program Select Switch
1
2
3
•VACATION
•MANUAL
6
43022-01
Page 7
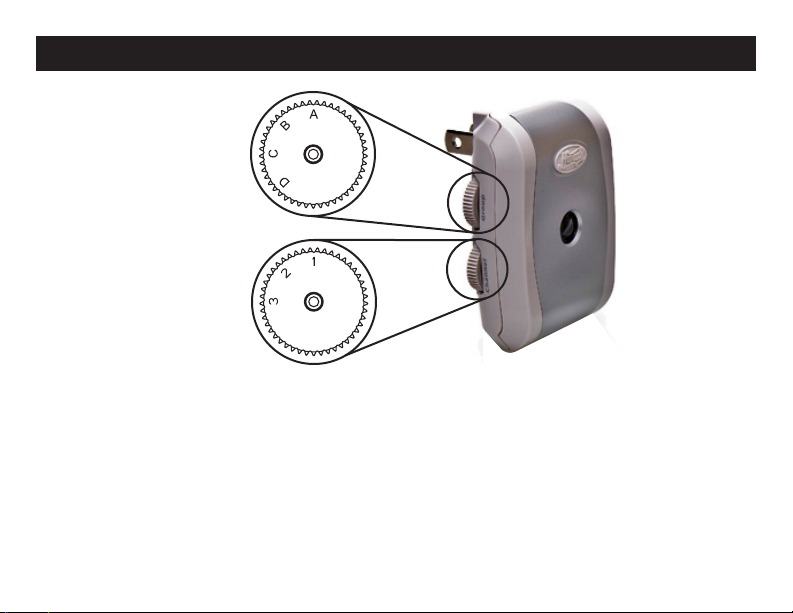
Receiver Controls
Light Group
Select Dial
Channel
Select Dial
Receiver Controls
43022-01
7
Page 8
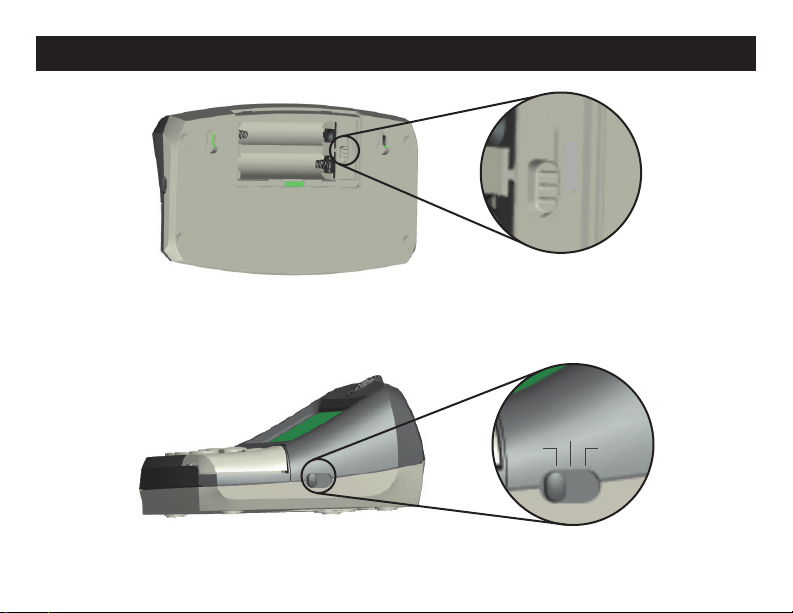
Setup
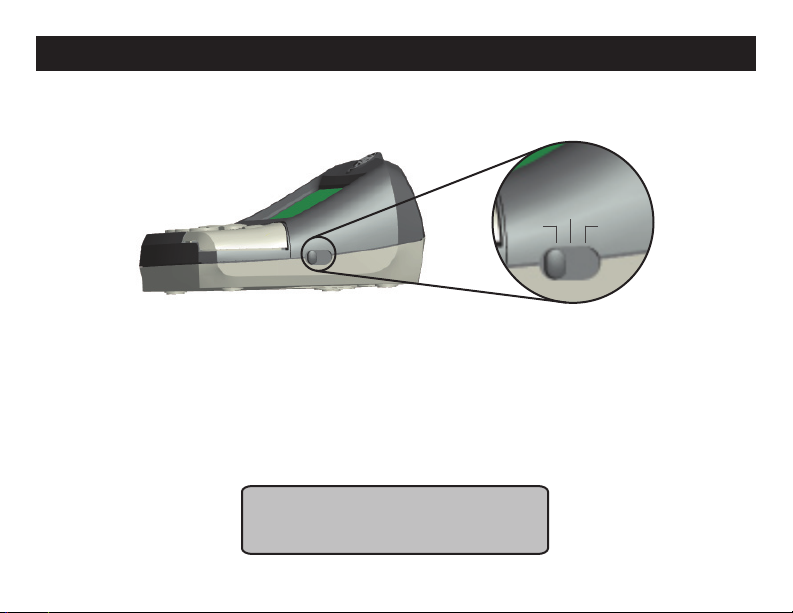
1) Remove the Battery Cover from the back of the Transmitter.
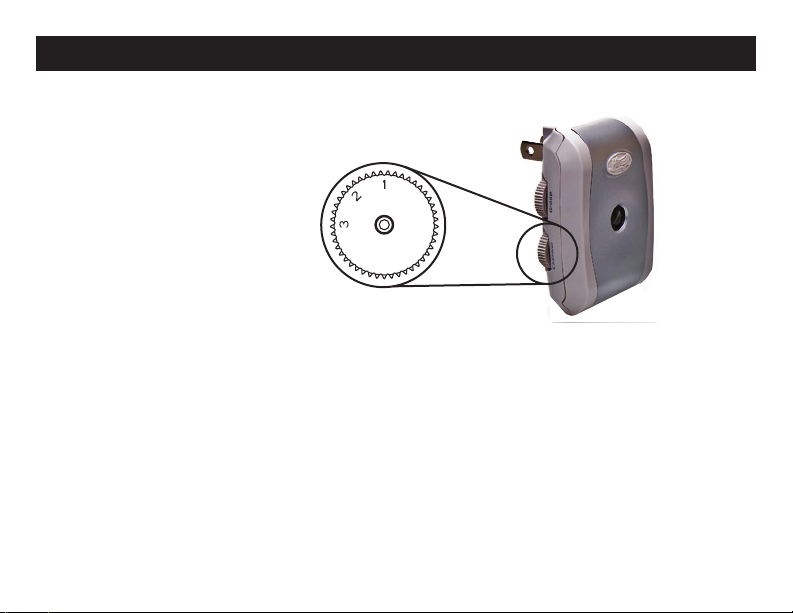
2) Slide the Channel Select Switch to any of the three numbers next to it.
1
2
3
8
43022-01
Page 9
Setup (cont.)
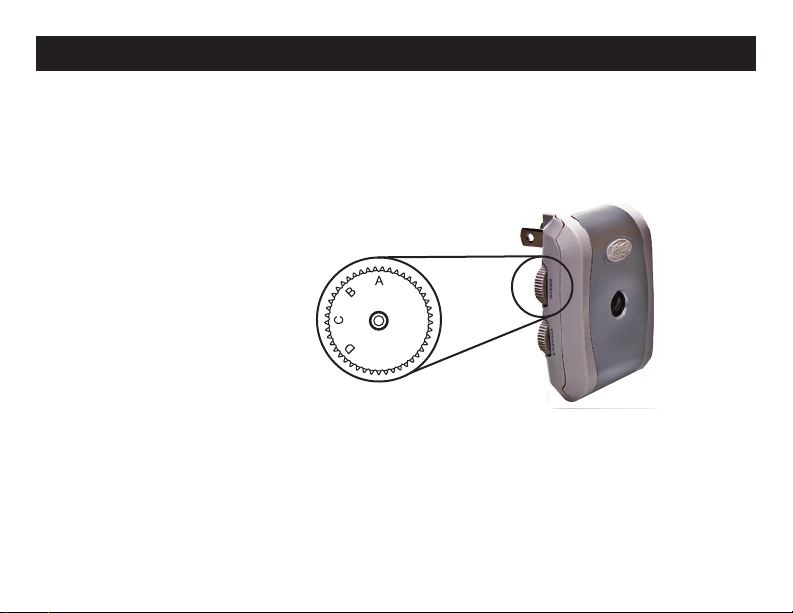
3) On each Receiver rotate the Channel Select Dial to the channel to which you set the Transmitter
Channel Select Switch.
Channel Select Dial
(shown with channel
3 selected)
4) The LightMinder™ Home Light Control System divides the rooms and areas of your home into
four Light Groups labeled A, B, C, and D on the Transmitter keyboard. Assign your rooms and areas
to Light Groups, and make a note of the assignments. We suggest that the entry area of your home
be assigned to Light Group A. This is because the Keychain Remote for your Hunter Light Control
System operates only Light Group A, and you will want to be able to turn on your entry lighting before
you enter. A sample Light Group assignment scheme might be:
Light Group A - Entry Area
Light Group B - Living Area
Light Group C - Dining Area
Light Group D - Master Bedroom
43022-01
9
Page 10
Setup (cont.)
NOTE - OBTAINING ADDITIONAL RECEIVERS
Each Light Group can support an unlimited number of Receivers. To purchase additional
Receivers, visit our website at www.hunterfan.com.
5) On each Receiver rotate the Light Group Select Dial to the Light Group for which it is intended.
Light Group Select
Dial (shown with Light
Group C selected)
10
43022-01
Page 11
Setup (cont.)
6) Plug your lamps into the Receivers (observing correct plug polarities), then plug the Receivers into
standard wall electrical outlets.
Receiver plugs into
wall outlet.
Lamp plugs in under
Receiver
7) Switch the lamps that will be controlled by the Home Light Control System to the On position.
43022-01
11
Page 12

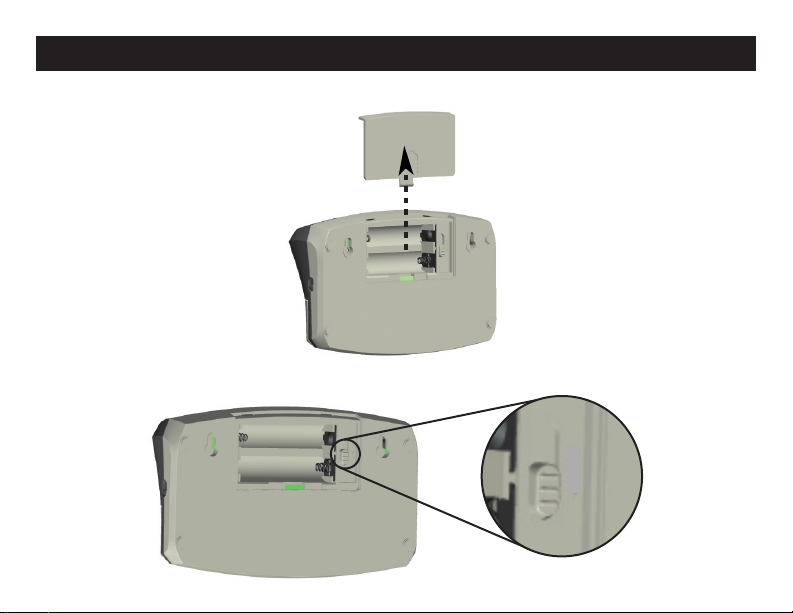
Setup (cont.)
8) Install two fresh AA batteries into the Battery Compartment. Ensure the battery polarities are
correctly oriented.
9) Reinstall the Battery Cover.
10) The Welcome screen will appear:
PRESS ANY KEY TO BEGIN
11) Press any key. The Setup screen will appear:
SETUP
DATE / TIME
ENTER
12) To exit Setup press or so the Setup screen shows Exit, then press . To proceed with
Setup press .
If you decide to exit the Setup, then the Setup Complete screen will appear:
SETUP COMPLETE
WELCOME
SETUP
12
43022-01
Page 13
Setup (cont.)
After approximately ve seconds the screen will show the mode on which the Program Select Switch
is set.
If you decide to proceed with Setup, then the Calendar / Clock screen will appear:
JAN 01 2007 12:00A
MONDAY
ENTER
NOTE - BUTTON OPERATION
Press or to select the Calendar and Clock positions; press or to change settings.
To fast scroll, press and hold the buttons; for slow scroll, press the buttons repeatedly.
13) Press or to nd the current month. Press to set the month.
14) Press or to nd the current date. Press to set the date.
NOTE - WEEK DAY SETTING
The correct week day will automatically update while entering the year, month, or day.
15) Press or to nd the current year. Press to set the year.
NOTE - AM / PM SETTING
To set AM or PM, scroll through the hours until the correct setting appears.
16) Press or to nd the current hour. Press to set the hour.
43022-01
13
Page 14

Setup (cont.)
17) Press or to nd the current minute. Press to set the minute. The Automatic Daylight
Savings Time screen will appear.
AUTO DST UPDATE? YES
ENTER
NOTE - AUTOMATIC DAYLIGHT SAVINGS TIME SETTING
If you select Yes, then the Home Light Control will update automatically for Daylight Savings
Time.
18) Press or to choose Yes or No. Press to set your choice. The Final Setup screen will
appear:
SETUP
PROGRAM
ENTER
19) To proceed to the Programs, press . To revisit Setup, press or to nd the
Calendar / Clock screen, and press . To exit Setup, press or to nd the Exit
screen, and press .
14
43022-01
Page 15

Home Program
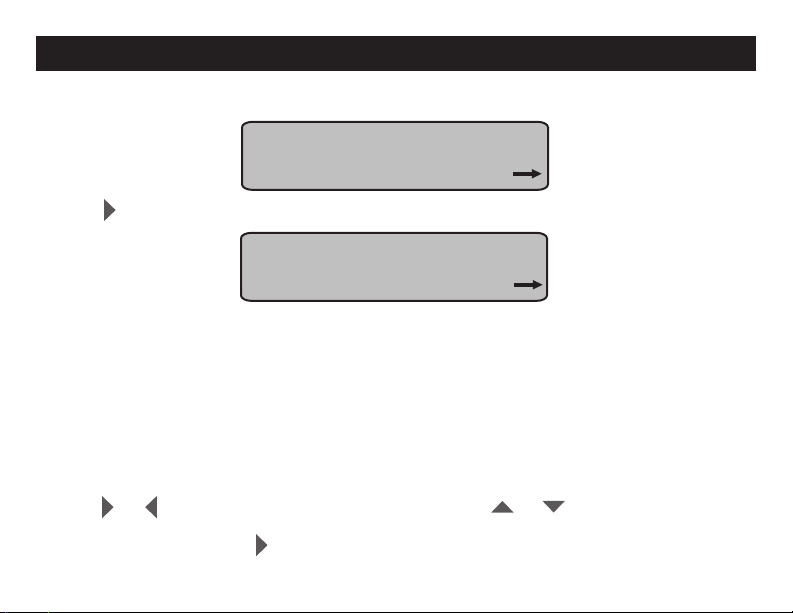
The Home Program has three modes:
PROGRAM: HOME
7 DAY SAME
ENTER
~ 7-Day Same mode - allows you to quickly and easily program the same On/Off times
for every day of the week either for all Light Groups or for individual Light Groups.
PROGRAM: HOME
WEEK / WEEKEND
ENTER
~ Week / Weekend mode - allows you to program the same On/Off times for the
weekdays, and different On/Off times for the weekend either for all Light Groups or for
individual Light Groups.
PROGRAM: HOME
CUSTOM
ENTER
~ Custom mode - allows you to program individual On/Off times for each day of the week,
either for all Light Groups or for individual Light Groups.
Press or to scroll through the three Home Program modes, and and press to select
the mode you wish to program.
43022-01
15
Page 16

Home Program (cont.)
To program the 7-Day Same mode:
PROGRAM: HOME
7 DAY SAME
ENTER
1) Press to select the 7 Day Same mode. The Time/Group screen will appear:
ON 06:00A 05:00P
OFF 08:00A 11:00P
GROUP A ENTER
NOTE - PROGRAMMING TIMES
You can program two different On/Off times for each Light Group. If you want your lights to
come on only once during the day, then program the same On/Off times into both time positions.
NOTE - GROUPS
The word GROUP on the screen means Light Group.
NOTE - REPROGRAMMING LIGHT GROUPS
You can reprogram Light Groups in any Program at any time by 1) placing the Program Select
Switch to the desired Program, and 2) pressing and holding for three seconds either the On or
Off button for the Light Group you wish to reprogram.
16
43022-01
Page 17

Home Program (cont.)
2) Press or to select the Time and Group positions. Press or to change the settings.
To fast scroll, press and hold the buttons; for slow scroll, press the buttons repeatedly. When your
desired setting appears, press .
3) Once your desired times are programmed the screen will show:
SAME PROGRAM FOR ALL
GROUPS? YES
ENTER
4) Press to program the other Light Groups with the same times for every day of the week. The
screen will show the Vacation Program screen (explained later). If you want to program the other
Light Groups with different times for everyday of the week, or if you want to program no other Light
Groups, then press or so the screen shows “NO”:
SAME PROGRAM FOR ALL
GROUPS? NO
ENTER
5) Press . The screen will show:
PROGRAM ADDITIONAL
GROUPS? YES
ENTER
43022-01
17
Page 18

Home Program (cont.)
6) Press to program the other individual Light Groups with different times for every day of the
week. You will be taken back to Step 2 of the 7-Day Same option. If you do not want to program the
other Light Groups with different times, then press or so the screen shows “NO”:
PROGRAM ADDITIONAL
GROUPS? NO
ENTER
7) Press . The screen will show the Vacation Program option screen (explained on page 26):
PROGRAM VACATION NOW?
YES
ENTER
8) Press to proceed to the Vacation Program.
18
43022-01
Page 19

Home Program (cont.)
To program the Week / Weekend mode:
PROGRAM: HOME
WEEK / WEEKEND
ENTER
1) Press to select the Week / Weekend option option. The Week Time/Group screen will appear:
ON 06:00A 05:00P WEEK
OFF 08:00A 11:00P
GROUP A ENTER
2) Press or to select the Time and Group positions. Press or to change the settings.
To fast scroll, press and hold the buttons; for slow scroll, press the buttons repeatedly. When your
desired setting appears, press . The Weekend Time/Group for Saturday screen will appear:
ON 06:00A 05:00P SAT
OFF 08:00A 11:00P
GROUP A ENTER
NOTE - REPROGRAMMING LIGHT GROUPS
You can reprogram Light Groups in any Program at any time by 1) placing the Program Select
Switch to the desired Program, and 2) pressing and holding for three seconds either the On or
Off button for the Light Group you wish to reprogram.
43022-01
19
Page 20

Home Program (cont.)
3) Press or to select the Time and Group positions. Press or to change the settings.
To fast scroll, press and hold the buttons; for slow scroll, press the buttons repeatedly. When your
desired setting appears, press . The Weekend Time/Group for Sunday screen will appear:
ON 06:00A 05:00P SUN
OFF 08:00A 11:00P
GROUP A ENTER
4) Press or to select the Time and Group positions. Press or to change the settings.
To fast scroll, press and hold the buttons; for slow scroll, press the buttons repeatedly. When your
desired setting appears, press .
5) Once your desired times are programmed the screen will show:
SAME PROGRAM FOR ALL
GROUPS? YES
ENTER
6) Press to program the other Light Groups with the same times for the week and weekend. The
screen will show the Program Vacation Mode screen (explained later). If you want to program the
other Light Groups with different times for the week and weekend, or if you want to program no other
light groups, then press or so the screen shows “NO”:
SAME PROGRAM FOR ALL
GROUPS? NO
ENTER
20
43022-01
Page 21

Home Program (cont.)
7) Press . The screen will show:
PROGRAM ADDITIONAL
GROUPS? YES
ENTER
8) Press to program the other individual Light Groups with different times for the week and week-
end. You will be taken back to Step 2 of the Week / Weekend option. If you do not want to program
the other Light Groups with different times, then press or so the screen shows “NO”:
PROGRAM ADDITIONAL
GROUPS? NO
ENTER
9) Press . The screen will show the Vacation Program option screen (explained on page 26):
PROGRAM VACATION NOW?
YES
ENTER
10) Press to proceed to the Vacation Program.
43022-01
21
Page 22
Home Program (cont.)
To program the Custom mode:
PROGRAM: HOME
CUSTOM
ENTER
1) Press to select the Custom mode. The Custom Time/Group screen will appear:
ON 06:00A 05:00P MON
OFF 08:00A 11:00P
GROUP A ENTER
NOTE - DAYS OF THE WEEK
On the rst line of the screen, the days of the week are abbreviated MON, TUE, WED, THU,
FRI, SAT, SUN. When you enter your desired settings, the screen will automatically show the
next day of the week.
NOTE - REPROGRAMMING LIGHT GROUPS
You can reprogram Light Groups in any Program at any time by 1) placing the Program Select
Switch to the desired Program, and 2) pressing and holding for three seconds either the On or
Off button for the Light Group you wish to reprogram.
2) Press or to select the Time and Group positions. Press or to change the settings.
To fast scroll, press and hold the buttons; for slow scroll, press the buttons repeatedly. When your
desired setting appears, press . The screen for the next day of the week will appear. Repeat this
procedure for the remaining days of the week.
22
43022-01
Page 23

Home Program (cont.)
3) Once your desired times are programmed the screen will show:
SAME PROGRAM FOR ALL
GROUPS? YES
ENTER
4) Press to program the other Light Groups with the same times for every day of the week. The
screen will show the Program Vacation option screen (explained later). If you want to program the
other Light Groups with different times for every day of the week, or if you want to program no other
Light Groups, then press or so the screen shows “NO”:
SAME PROGRAM FOR ALL
GROUPS? NO
ENTER
5) Press . The screen will show:
PROGRAM ADDITIONAL
GROUPS? YES
ENTER
43022-01
23
Page 24

Home Program (cont.)
6) Press to program the other individual Light Groups with different times for every day of the
week. You will be taken back to Step 2 of the Custom option. If you do not want to program the other
Light Groups with different times, then press or so the screen shows “NO”:
PROGRAM ADDITIONAL
GROUPS? NO
ENTER
7) Press . The screen will show the Vacation Program option screen (explained on page 26):
PROGRAM VACATION NOW?
YES
ENTER
8) Press to proceed to the Vacation Program.
24
43022-01
Page 25
Vacation Program
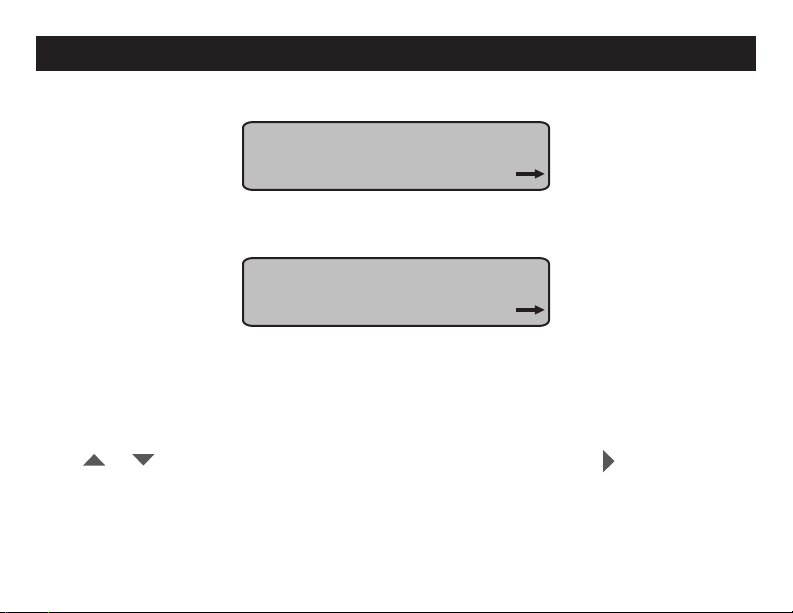
The Vacation Program has two modes:
PROGRAM: VACATION
HOME VARIABLE
ENTER
~ Home Variable Mode - uses your Home Program settings to randomly turn on light
groups for each hour and then turn them off after thirty minutes.
PROGRAM: VACATION
SMART DETERRENCE
ENTER
~ Smart Deterrence Mode - between the hours of 5:30PM and 11:30PM Smart Deter-
rence always keeps at least one Light Group on. The time each Light Groups remains on is between
one hour and one hour forty-ve minutes, depending on how many Light Groups are selected for this
mode. In this way Smart Deterrence simulates someone inside your home moving from one area to
another.
Press or to scroll through the Vacation Program Modes, and and press to select the
Mode you wish to activate.
43022-01
25
Page 26

Vacation Program (cont.)
To activate the Home Variable Mode:
PROGRAM: VACATION
HOME VARIABLE
ENTER
1) Press to select the Home Variable Mode. The Setup Complete screen will appear:
SETUP COMPLETE
After approximately ve seconds the screen will show the mode on which the Program Select Switch
is set.
To activate the Smart Deterrence Mode:
PROGRAM: VACATION
SMART DETERRENCE
ENTER
1) Press to select the Smart Deterrence Mode. The Group Select screen will appear:
SELECT GROUPS FOR
SETUP:
ENTER
26
43022-01
Page 27

Vacation Program (cont.)
NOTE - SMART DETERRENCE MODE LIGHT GROUPS
You must select at least two Light Groups in the Smart Deterrence Mode.
2) To include a Light Group in Smart Deterrence press that Light Group’s On button. That Light
Group will appear on the screen.
Light Groups
On Buttons
A D
C
B
OFF
ON
Off Buttons
SELECT GROUPS FOR
SETUP: A B C D
ENTER
To remove a Light Group from Smart Deterrence press that Light Group’s Off button. That Light Group
will disappear from the screen.
43022-01
27
Page 28

Vacation Program (cont.)
3) Press . The Setup Complete screen will appear:
SETUP COMPLETE
If you did not include at least two Light Groups in Smart Deterrence Mode, then the Setup Incomplete
screen will appear:
SETUP INCOMPLETE
RETURN TO SETUP?
NO ENTER
4) Press if you wish to exit the Vacation Program, or press or so the screen shows
Yes if you wish to return to the Vacation Program screen and include other Light Groups in Smart
Deterrence.
If you decide to Exit the Vacation Program, then the Setup Complete screen will appear:
SETUP COMPLETE
After approximately ve seconds the screen will show the mode on which the Program Select Switch
is set.
28
43022-01
Page 29

Vacation Program (cont.)
If you decide to include other Light Groups in Smart Deterrence, then the Vacation Program Smart
Deterrence screen will appear:
PROGRAM: VACATION
SMART DETERRENCE
ENTER
5) Press to proceed with including other Light Groups in Smart Deterrence. Once you’ve included
all your desired Light Groups, the Setup Complete screen will appear:
SETUP COMPLETE
43022-01
29
Page 30

Manual Operation
Manual Operation allows you disable the Home and Vacation programs and use the Transmitter as a
remote switch for your Light Groups.
To enter Manual Operation:
NOTE - MANUAL OPERATION SCREEN
Only the Light Groups that are selected will appear on the screen.
1) Set the Mode Switch to Manual. The Manual Operation screen will appear:
12:00P
MANUAL
A B C D ENTER
2) Use the Light Groups On / Off buttons to remotely operate Light Groups. Use the All On buttons
and the All Off buttons to operate all Light Groups.
Light Groups
On / Off Buttons
All Off Button
All Off Button
All On Button
All Off Button
ALL
ON
A
OFF
B C
ON
30
ALL
OFF
D
ALL
ON
All On Button
43022-01
Page 31

Keychain Remote Operation
The Keychain Remote allows you to turn on Light Group A before you enter you home.
Remove the slide-cover from the back of the Keychain Remote, install a 3-volt, type CR2032 battery,
and reinstall the slide-cover.
To operate the Keychain Remote, simply press the On and Off buttons.
OFF
ON
LAMP REMOTE
NOTE - OBTAINING ADDITIONAL KEYYCHAIN REMOTES
Your LightMinder™ Home Light Control System can support an unlimited number of Keychain
Remotes. To purchase additional Keychain Remotes, visit our website at www.hunterfan.com.
43022-01
31
Page 32
Daily Operation
Once your desired times are programmed into Home Light Control System, it will operate automatically depending upon the postion of the Program Select Switch.
•VACATION
•HOME
Program Select Switch
With the Program Select Switch in the Home position, the Home Light Control System will operate
according to your Home Program settings, and the Home Mode screen will appear:
NOTE - TIME DISPLAY
The time displayed on the screen will be the actual time.
NOTE - LIGHT GROUPS ON THE SCREEN
Only the Light Groups that are selected will appear on the screen.
12:00P
HOME
A B C D
•MANUAL
32
43022-01
Page 33

Daily Operation (cont.)
With the Program Select Switch in the Vacation position, the Home Light Control System will operate
according to your Vacation Program settings, and the Vacation Mode screen will appear:
12:00P
VACATION
A B C D
With the Program Select Switch in the Manual position, the Home Light Control System becomes a
remote control for you Light Groups, and the Vacation Mode screen will appear:
12:00P
MANUAL
A B C D
At some point you will want to change the Home Light Control System’s program settings, so you will
need to enter Setup.
To enter Setup:
1) Press and hold for three seconds. The Setup Screen will appear:
SETUP
DATE / TIME
ENTER
43022-01
33
Page 34

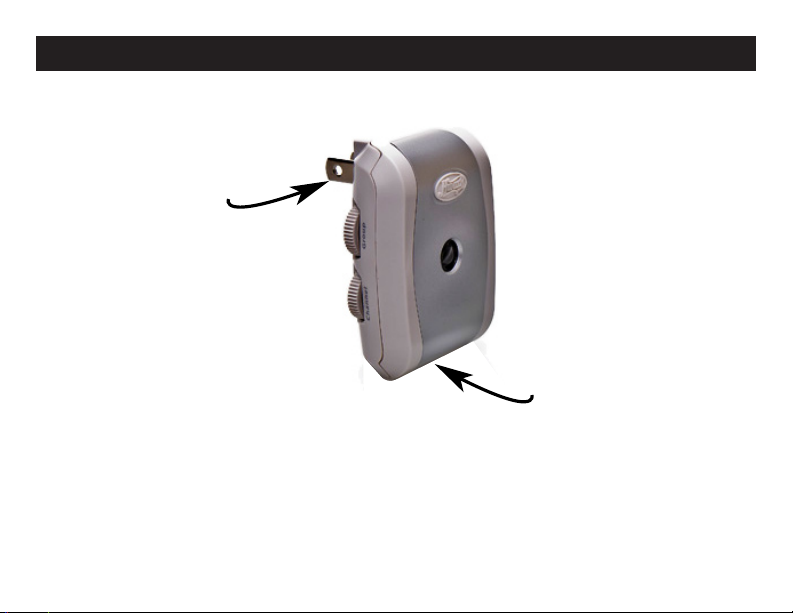
Transmitter Wall-Mount
The Home Light Control System can be conveniently mounted on a wall by using the included Wall
Anchors, Screws, and Wall Mount Template.
To wall-mount the Transmitter:
1) Select your desired location.
2) Afx the Wall-Mount Template the wall at your desired height.
3) Follow the instructions on the Wall-Mount Template
34
43022-01
Page 35
Maintenance
Your LightMinder™ Home Light Control System requires very little maintenance. Except for occasional cleaning and battery replacement, the system is otherwise trouble-free.
Cleaning
NOTE - DO NOT IMMERSE THE TRANSMITTER, RECEIVERS, OR KEYCHAIN REMOTE IN WATER.
Use a soft damp cloth to gently wipe off the Transmitter, Receivers, and Keychain Remotes
Batteries
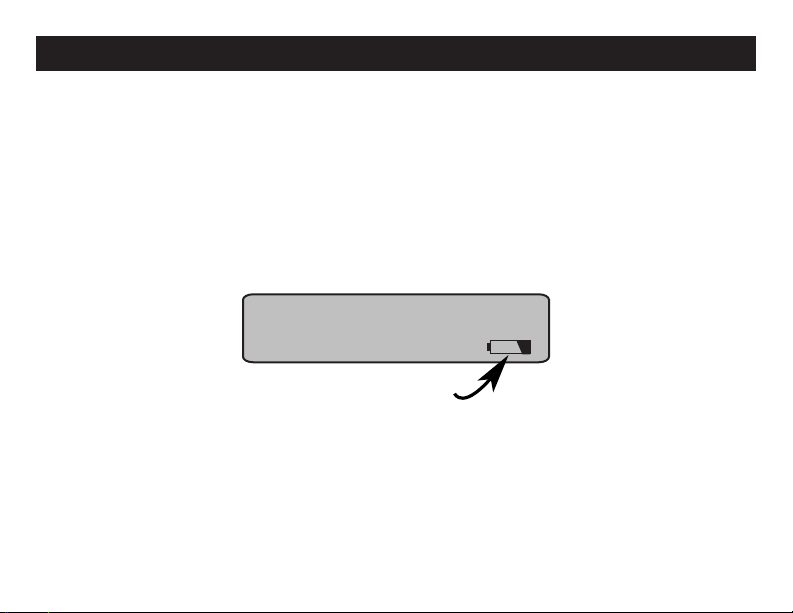
When the System’s batteries are becoming depleted, the screen will show the Low Battery Indicator:
12:00P
MANUAL
A B C D
Low Battery Indicator
When the Low Battery Indicator appears it is best to change the batteries at your earliest convenience. Install two fresh AA Batteries.
The Keychain Remote battery should last for about a year depending on use. If your Keychain Remote begins operate only intermittently, install a fresh CR2032 3-volt battery.
43022-01
35
Page 36

Technical Support
If you have any additional questions or problems with your LightMinder™ Home
Light Control System, please call 1-888-830-1326 from 7:00AM to 7:00PM Central
Time Monday thru Friday and 8:00AM to 5PM Central Time on Saturday, or contact
us over the Internet at www.hunterfan.com.
HUNTER FAN COMPANY
2500 FRISCO AVENUE
MEMPHIS, TN 38114, USA
36
43022-01
 Loading...