

Page 1
1
44008-01
Programmable Thermostat
Models 44668 & 44660
20080916
Page 2

2
(continued)
Table of Contents
PROGRAMMING
INTRODUCTION
INSTALLATION
Read This Before Installing Thermostat 5
What You Need 8
Remove Old Thermostat 8
Wire Labeling 9
Mount Wallplate and Thermostat 10
Connect Wires and Mount Thermostat to Wallplate 11
Option Menu 13
Remote Sensor Channel Set-Up (does not apply to thermostat model 44660) 15
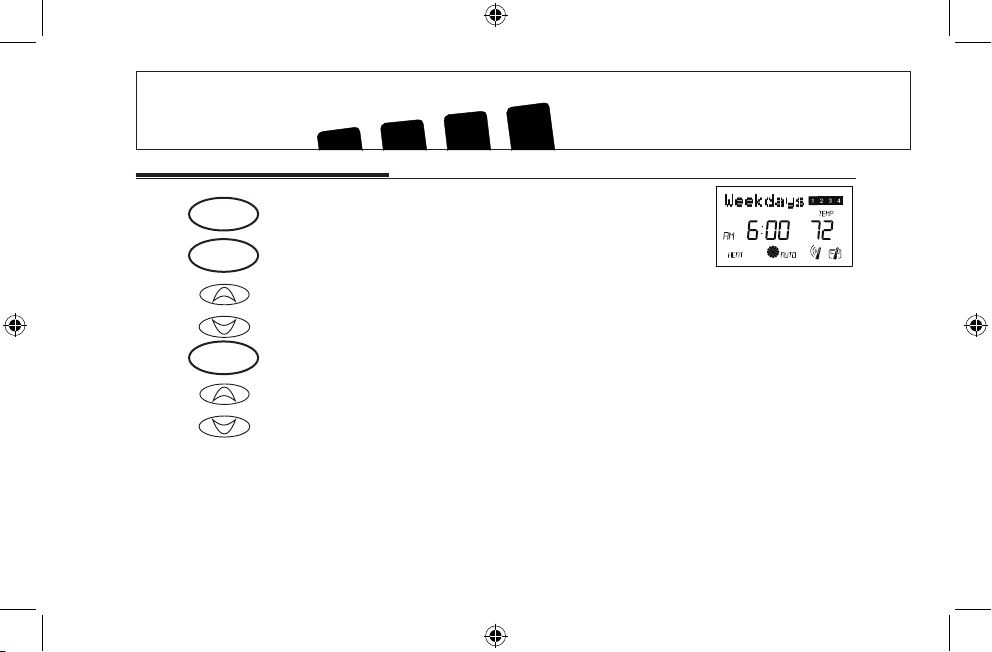
Setting Time and Day 17
12 Hr. / 24 Hr. Time Format 18
Programming Introduction 19
Personal Program Schedule 20
Programming 22
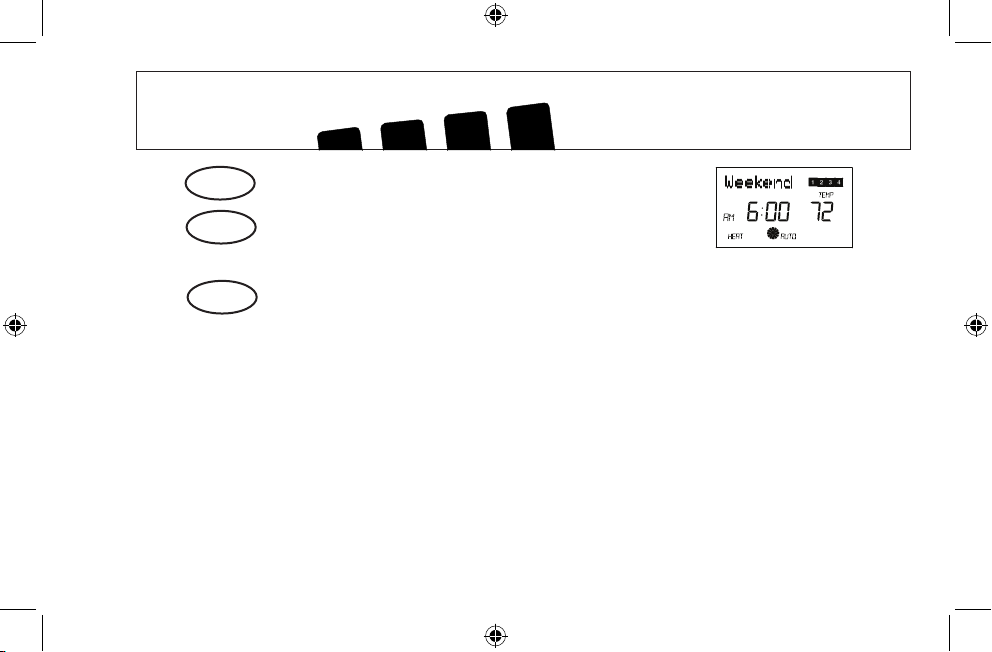
Weekday/Weekend Programming 23
7-Day Programming 26
Everyday Programming 28
Program Options 30
Page 3

3
Table of Contents (continued)
PROGRAMMING (continued)
OPERATIONS
Programmable Fan 30
System Selection Key 32
Fan Key 32
Reviewing the Current Temperature Setting 33
Temporary Manual Override 34
Permanent Manual Override 35
Vacation (Programmable) Hold 36
Auto Season Changeover 37
Home Today 38
Energy Monitor 40
Filter Monitor 41
SPAN Settings 42
Auto Recovery 43
Keyboard Lock 44
Backlighting (INDIGLO® Night-Light) 45
Low Battery Warning 46
Error Mode 46
Problems & Solution 46
Page 4

4
TROUBLESHOOTING
OPERATIONS (continued)
Technical Support 48
Technical Support 49
WIRING DIAGRAMS
Page 5

5
Read This Before Installing Thermostat
IMPORTANT
1
Read the entire installation section of this Owner’s
Manual thoroughly before you begin to install or
operate your Hunter Thermostat.
INSTALLATION
2
All installation is normally performed at your
thermostat.
ARMCHAIR PROGRAMMING
3
You can program your thermostat before installation
by inserting the batteries and following the instructions starting on page 12. This can be done while you
relax in your favorite chair and is a very good way to
familiarize yourself with all the functions of your Hunter
Thermostat.
SYSTEM COMPATIBILITY
4
Your Thermostat is designed to operate with most
gas, oil, electric, or 2-wire hot water heating and air
conditioning systems. It will also operate single-stage
heat pumps that do not have auxiliary or emergency
heat. These have 24 volt or millivolt control systems
and represent most central heating, air conditioning, or
space heating units in the United States.
This thermostat will not control 120/240 Volt systems or
millivolt systems.
COMPRESSOR PROTECTION
5
The thermostat provides a 3.5 minute delay after
shutting off the heating or cooling system before it
can be restarted. This feature will prevent damage to
your compressor caused by rapid cycling.
Page 6

6
TEMPERATURE RANGE
6
Your thermostat can be programmed between 45°F
and 95°F (7°C and 35°C). However, it will display
room temperatures from 15°F to 99°F (-9°C and 37°C).
“HI” will be displayed if the temperature is higher than
99°F (37°C), and “LO” will be displayed if the temperature is lower than 15°F (-9°C).
AUTO RECOVERY
7
Your thermostat is set from the factory to gradually
recover the room temperature from an energy saving program to your comfort program. Therefore, the
thermostat may turn your system on several minutes
prior to your programmed time. This operation is normal, but can be turned off. Refer to the Options Menu
information on pages 15.
BATTERY WARNING
8
Two fresh AA alkaline batteries should provide well
over one year of service. However, when the batter-
ies become drained, the Low Battery Indicator will ash
on the display. when this message occurs, install new
alkaline batteries. You have appoximately one minute
to change the batteries and keep the thermostat’s clock
and program settings. Once the batteries have become
too low to ensure proper operation, your system will
be turned off. The display will be cleared except for the
ashing Low Battery Indicator on the LCD display, and
all programming will be lost.
CAUTION: When only the battery Icon ashes on
the display, the thermostat is shut down and your
system will no longer operate. In this condition, there is
no temperature control of your dwelling. NOTE: If you
plan to be away from the premises over 30 days, we
recommend that you replace the old batteries with new
alkaline batteries prior to leaving.
Page 7

7
REMOTE SENSORS (does not apply to thermostat
model 44660)
1
Your thermostat can support 3 remote sensors that
will measure the temperature from three different lo-
cations - two indoor and one outdoor. To congure your
thermostat to work with the remote sensors, follow the
instructions for Sensor Channel selection on page 13 of
this manual. To congure the remote sensors, consult
the Remote Sensor Instruction Manual.
NOTE (does not apply to thermostat model 44660):
This device complies with Part 15 of the FCC Rules. Op-
eration is subject to the following two conditions: (1) this
device may not cause harmful interference, and (2) this
device must accept any interference received, including
interference that may cause undesired operation.
This equipment has been tested and found to comply with
the limits for a Class B digital device, pursuant to Part 15
of the FCC Rules. These limits are designed to provide
reasonable protection against harmful interference in a
residential installation. This equipment generates, uses
and can radiate radio frequency energy and, if not installed
and used in accordance with the instructions, may cause
harmful interference to radio communications. However,
there is no guarantee that interference will not occur in a
particular installation. If this equipment does cause harmful interference to radio or television reception, which can
be determined by turning the equipment off and on, the
user is encouraged to try to correct the interference by
one or more of the following measures:
• Increase the separation between the equipment and
receiver.
• Connect the equipment into an outlet on a circuit dif-
ferent from that to which the receiver is connected.
• Consult the dealer or an experienced radio/TV techni-
cian for help.
Page 8
8
INSTALLATION
Wall Mounting Plate Thermostat Cover
Wall Mounting Plate Thermostat Cover
What You Need
This thermostat includes two #8 slotted screws and two wall an-
chors for mounting. To install your thermostat, you should have
the following tools and materials.
CAUTION: Do not remove any wiring from existing
thermostat before reading the instructions carefully.
WIRES MUST BE LABELED PRIOR TO REMOVAL.
■
IMPORTANT! Turn off the power to the furnace at
the main power panel or at the furnace.
■
Remove existing thermostat cover. See Figure 1.
Some thermostats will have screws or other lock-
ing devices that must rst be removed. Once wall
mounting plate is exposed, look for wires.
If wires are not visible, they may be connected to the
back of the wallplate. Again, look for screws, tabs, etc.
Some models have doors that open to expose wires
and mounting screws. (See Figure 1).
Remove Old Thermostat
TYPICAL HOME THERMOSTATS
Figure 1
■
Slotted Screwdriver(s) ■ Electric drill and 3/16" bit
■
Phillips Screwdriver ■
Two 1.5 V (AA) size alkaline bat-
teries
■
Hammer
Page 9

9
(continued)
Wire Labeling
■
Each wire coming from the wall to the existing
thermostat is connected to a terminal point on that
thermostat. Each of these terminal points is usually
marked with a code letter as shown in Table A on
page 11.
■
IMPORTANT! BEFORE DISCONNECTING ANY
WIRES, APPLY THE SELF-ADHESIVE LABELS
PROVIDED TO THE WIRE AS SHOWN IN TABLE A
ON PAGE 11. (For example, attach the label marked
W to the wire that goes to the W or H terminal on
your existing thermostat.) IGNORE THE COLOR OF
THE WIRES since these do not always comply with
the standard.
IMPORTANT!
If wires marked Y & C are both present, C may be a
Common wire and should not be used. If you have
a wire marked C, do not connect it to any terminal.
This wire is used only for non-battery powered
thermostats.
■
After labeling wires, disconnect them from the
existing thermostat terminals.
■
Remove existing wallplate. To make sure wires do
not fall back into wall opening, you may want to tape
them to the wall.
■
If hole in wall is larger than necessary for wires, seal
this hole so that no hot or cold air can enter the back
of the thermostat from the wall. This air could cause
a false thermostat reading.
Page 10
10
INSTALLATION
Mount Wallplate and Thermostat
■
Remove the wallplate from your thermostat by
pressing the release tab on the bottom of the
thermostat. (See Figure 2.)
■
Position wallplate on wall and pull existing wires
through large opening. Then level for appearance.
Mark holes for plastic anchors provided if your
existing holes do not line up with those on the Hunter
wallplate.
■
Drill holes with 3/16" bit and gently tap anchors into
the opening. Insert mounting screws provided into
wall anchor and tighten. (See Figure 3.) holes until
ush with wall.
■
Reposition wallplate to wall, pulling wires through
large opening. Insert provided mounting screws into
wall anchors and tighten.
G
W/B
Y1
Y/O
RC
RC1
RH
Y1
Figure 3
Figure 2
Page 11
11
if your existing
thermostat is marked...
label the wire
with this sticker:
G / F
G
G
W / H / B
W/B
W/B
Y / C* / M / O
Y/0
Y/0
RC / VC
RC
RC
RH / R / VR / 4
RH
RH
24 Volt
24 Volt cool
air conditioning
compressor
heating
fan
Y1
Y1
Y1
heat pump
compressor
Connect Wires and Mount Thermostat to
Wallplate
■
Straighten bare end of each wire and cut or strip it
to 1/4” maximum. Insert each labeled wire into its
matching terminal.
NOTE: If a wire marked “C” is present, DO NOT connect
it to the thermosat.
■
Hold the wires in each terminal and tighten the
terminal screws securely, otherwise a loose wire
could cause operational problems with your system
or thermostat.
■
Push excess wire back into hole to prevent
interference with mounting of the thermostat.
■
Make sure the Thermostats System Switch is set to
OFF.
■
Insert two AA size alkaline batteries, observing the
polarity marked on the unit.
Page 12

12
■
On the back of the thermostat, nd Switch SW1 at the lower
right-hand corner.
1) If your system is a gas furnace, then position the
switch to HG.
2) If your system is an electric furnace, then position the
switch to HE.
3) If your system is a single stage heat pump, then
position the switch to SSHP.
■
Insert the upper tabs on the thermostat body into the slot
at the top of the wallplate. Press bottom of the thermostat
body to snap it into the wallplate. (NOTE: Do not force the
thermostat onto the wallplate, as the terminal pins may be
damaged. If it does not snap properly, the thermostat may not
work.)
■
Switch on the main power at the panel or furnace.
If you have not already programmed your thermostat, refer to
page 13 to start setting up your programs.
Page 34 will show you how to bypass the thermostats
programming and activate temporary or permanent holds.
See page 37 for other available options the thermostat has to
offer.
Page 13
13
PROGRAMMING
Option Menu
Your thermostat has many settings that can be adjusted to t your system and preferences.
■
Press to enter the Option Menu and to change to the next option selection.
■
Press at any time to return to normal mode.
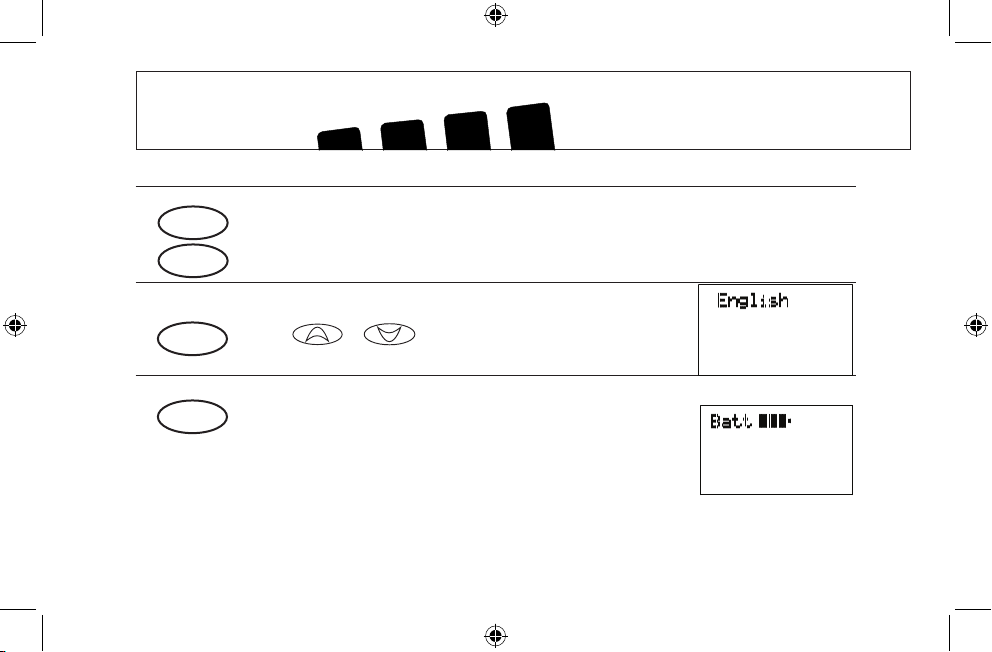
Language Selection
■ or to select English, Spanish, or French.
Battery Status
■ to see how much power remains in the
thermostat’s battery.
option
ret/clear
option
1
option
2
Page 14
14
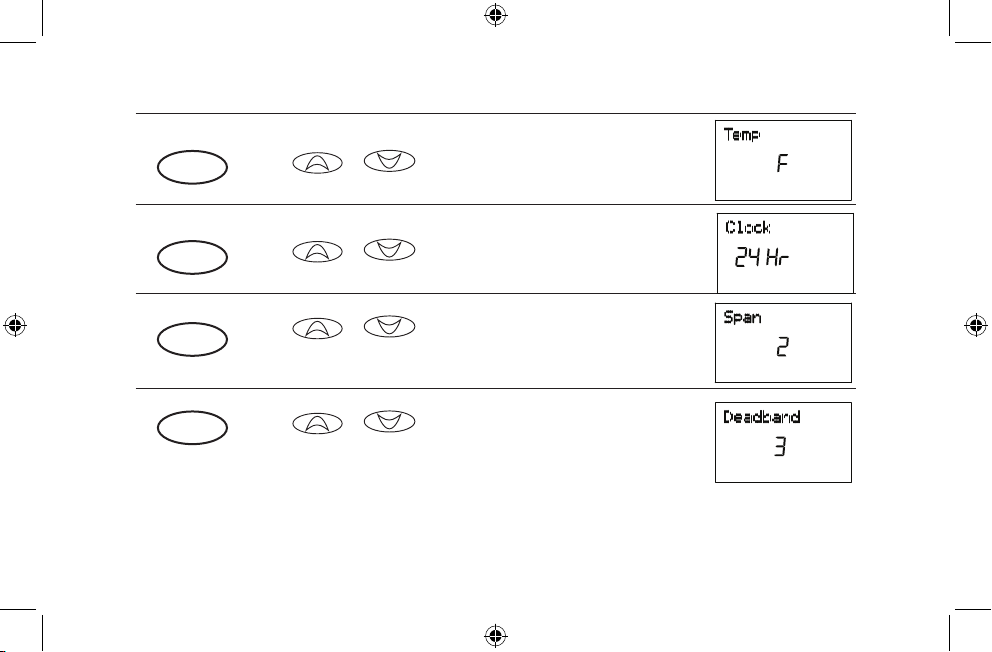
Fahrenheit or Celsius (F°/C°) selection
■ or to change the thermostat display be-
tween Fahrenheit and Celsius.
12 Hour or 24 Hour Clock selection
■ or to change the time format display be-
tween 12 hour (AM / PM) and 24 hour (Military).
SPAN selection
■ or to change the SPAN setting to 1, 2, or
3. The factory setting is 2. Setting 1 will cause shorter cycle
times. Setting 3 will cause longer cycle times.
option
3
option
4
option
5
Auto Season Changeover Deadband
■ or to set the deadband between Heating
and Cooling when the System Selection is set to Auto. See
page 37 for more information on the Auto Season Changeover feature.
option
6
Page 15
15
PROGRAMMING
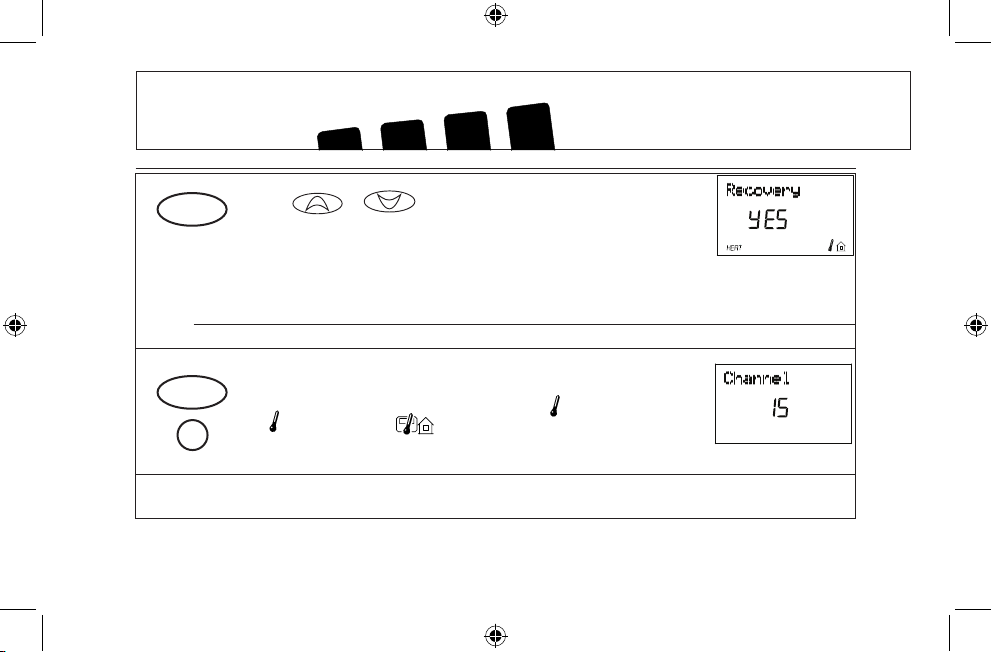
Auto Recovery selection
■ or to enable “YES” or disable “NO” the
Auto Recovery Mode. The factory setting is “YES.”
■ To change between Heat or Cool recovery modes.
NOTE: Auto Recovery is one of the ENERGY STAR® features of this thermostat. Refer to the Auto Recovery
section on pages 43-44 for more information.
Remote Sensor Channel (does not apply to thermostat model 44660)
■ to reach the Sensor Channel Set screen.
■ to select sensor for RF channel setting ( for Indoor 1,
for Indoor 2, or for Outdoor)
option
7
option
sensor
8
1
2
Page 16
16
PROGRAMMING
9
option
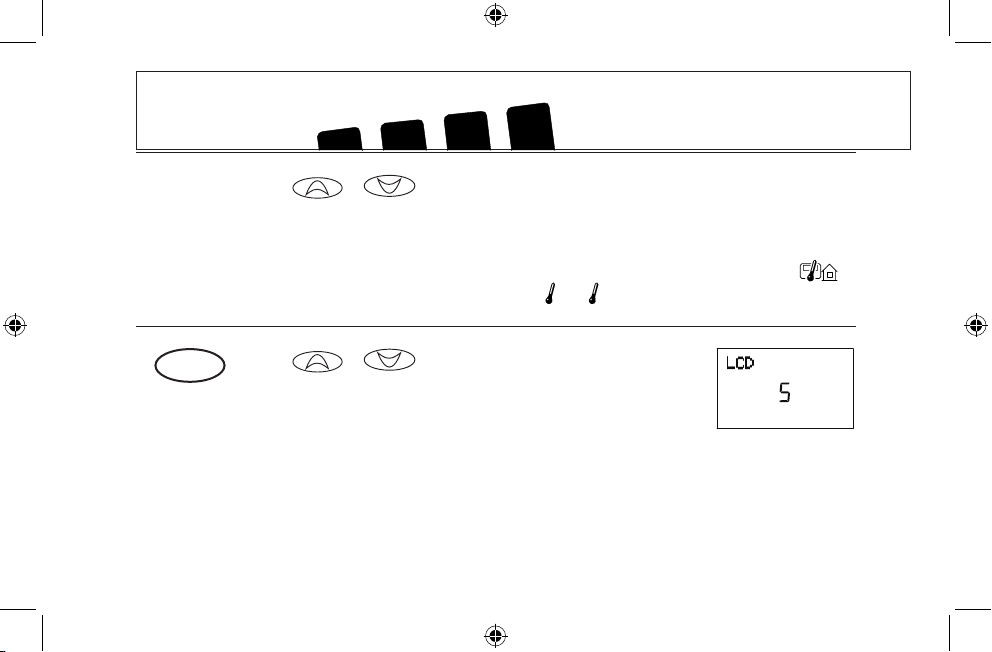
■ or to set RF communication channel (1-15)
for the selected remote sensor.
■ If you do not have, or are not using the a second or outdoor
remote sensor, set the channel to - -.
NOTE: The thermostat will not control your HVAC sysytem from the remote sensor set up as Outdoor .
However, it is crucial that you DO NOT place remote sensor or outdoors.
1
2
LCD Contrast adjustment
■ or to change the LCD contrast between 0
and 9. Lower numbers lighten the display. Higher numbers
darken the display. The factory setting is 5.
Page 17
17
PROGRAMMING
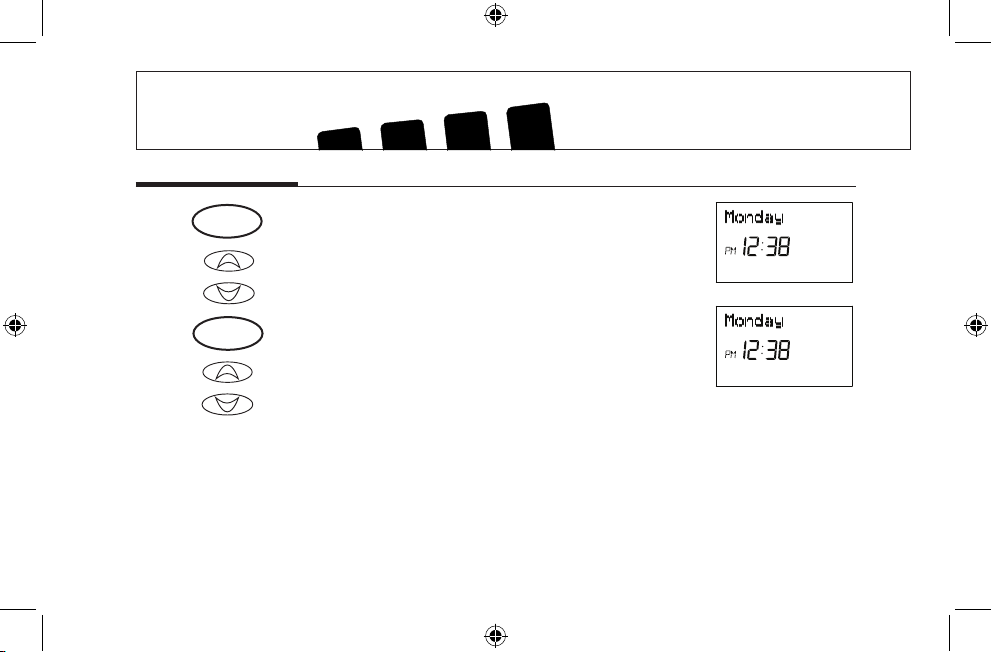
Setting Time and Day
Step 1 ■ Press to enter time and day setting mode. The current hour
and the AM / PM indicator will be ashing.
■ Press to change the Hour up or down to the current hour.
Note the AM / PM indicator, as the display will change at 12
AM and 12 PM.
Step 2 ■ Press again to change from hour setting to minute setting.
The current minute will be ashing.
■ Press to change the Minute up or down to the current minute.
or
or
day/time
day/time
Page 18
18
12 Hr. / 24 Hr. Time Format
Your thermostat is set from the factory in normal 12 (AM / PM) format. To change to 24 hour (military)
time, press at any time while the Hour, Minute, or Day is ashing to toggle between the 12
hour and 24 hour formats. The AM / PM indicator will not be displayed in the 24 hour mode. Both the current time and all programs will change automatically to the selected format. The time format may also be
changed in the Option Menu.
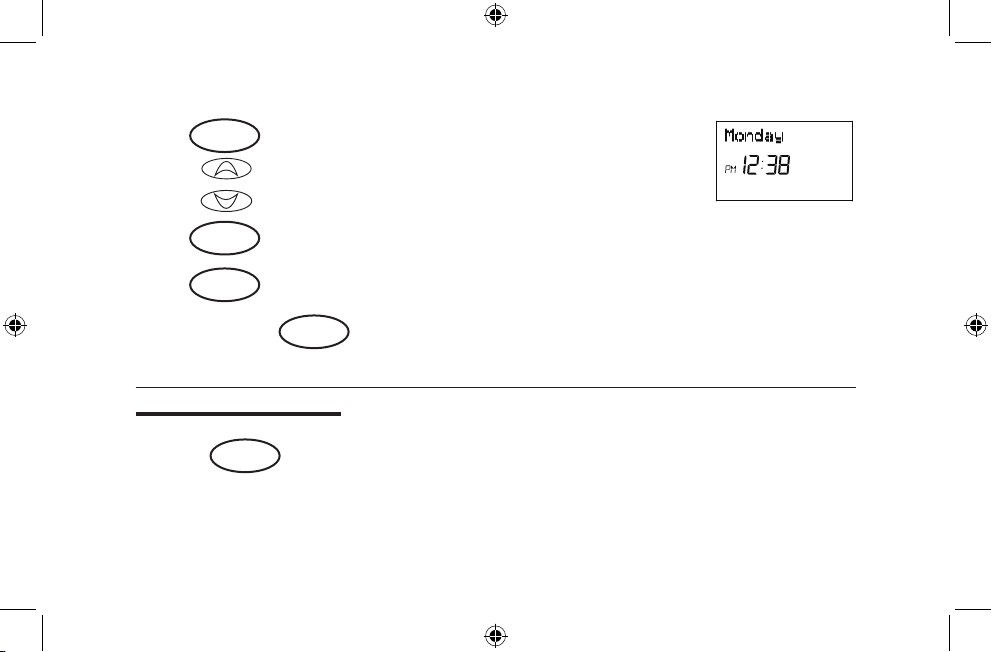
Step 3 ■ Press again to change from minute setting to day setting. The
current day will be ashing.
■ Press to change the Day up or down to the current day.
Step 4 ■ Press again to change back to the normal display.
NOTE: You may press at any time during Day and Time setting to return to the normal display.
or
day/time
ret/clear
day/time
or
ret/clear
option
Page 19
19
PROGRAMMING
Programming Introduction
Studies conducted by the Department of Energy estimate that setting your thermostat back 10°F (6°C) for
two 8-hour periods during winter can reduce your fuel
bill by as much as 33%. By setting your thermostat up
5°F (3°C) for two 8-hour periods during summer you
can reduce your fuel bill up to 25%.
Your thermostat is capable of holding up to 4 separate
programs for each day of the week.
You can program weekdays as a group, weekends as a
group, all 7 days individually or everyday as a group.
The system fan may also be set to run continuously
during a program time period.
Your Hunter thermostat is pre-programmed to meet the
ENERGY STAR® guidelines for energy efciency.
■ At power-up or after a reset, all 7 days of the week have these default programs:
Temperature in F° (C°)
Program Number Time Heat Cool
1 6:00am 68°F (20°C) 78°F (26°C)
2 8:00am 60°F (16°C) 85°F (29°C)
3 4:00pm 68°F (20°C) 78°F (26°C)
4 10:00pm 60°F (16°C) 82°F (28°C)
■ The following sections describe how to change these programs.
Page 20
20
Personal Program Schedule
Before changing programs, use this Personal Program
Schedule to determine which times and temperature
settings will best satisfy both your comfort and energy
saving requirements.
Use a pencil so you can revise your records each time
you change your temperature settings.
Heating
Day Prog. 1 Prog. 2 Prog. 3 Prog. 4
Mon. Time Temp Time Temp Time Temp Time Temp
Tues. Time Temp Time Temp Time Temp Time Temp
Wed. Time Temp Time Temp Time Temp Time Temp
Thurs. Time Temp Time Temp Time Temp Time Temp
Fri. Time Temp Time Temp Time Temp Time Temp
Sat. Time Temp Time Temp Time Temp Time Temp
Sun. Time Temp Time Temp Time Temp Time Temp
(continued)
Page 21
21
PROGRAMMING
Personal Program Schedule (continued)
Cooling
Day Prog. 1 Prog. 2 Prog. 3 Prog. 4
Mon. Time Temp Time Temp Time Temp Time Temp
Tues. Time Temp Time Temp Time Temp Time Temp
Wed. Time Temp Time Temp Time Temp Time Temp
Thurs. Time Temp Time Temp Time Temp Time Temp
Fri. Time Temp Time Temp Time Temp Time Temp
Sat. Time Temp Time Temp Time Temp Time Temp
Sun. Time Temp Time Temp Time Temp Time Temp
Page 22

22
Programming
■ Your thermostat can be programmed for weekdays
and weekends, have unique programs for all 7 days,
or the same program for everyday. Use Weekday/
Weekend Programming on page 23, 7-day Programming on page 26, or Everyday Programming on
page 28 to enter or revise programs to match your
Personal Program Schedule.
■ Familiarize yourself with Manual Programming, so
that you can easily modify your programs as your
comfort needs change. Follow the steps below to
change the program times and temperatures.
NOTE: 1) The program time can be set in 10 minute in-
crements, and remains the same for both Heat
and Cool programs.
2) The program temperature can be set in incre-
ments of 1°F (1°C).
3) The Heat setpoint can not be set higher than
the Cool setpoint, and the Cool setpoint can
not be set lower than the Heat setpoint.
4) If the system selector is in AUTO mode, the
current operating mode will be used for programming.
5) After 15 seconds without a key press, the thermostat will return to normal display mode.
6) When setting the program time, note the AM /
PM indicator.
7) With the Auto Recovery feature enabled, you
do not need to set your comfort program times
early. Auto Recovery will determine how early
to turn your system on, so that the room is
comfortable at the program time.
Page 23
23
PROGRAMMING
Weekday/Weekend Programming
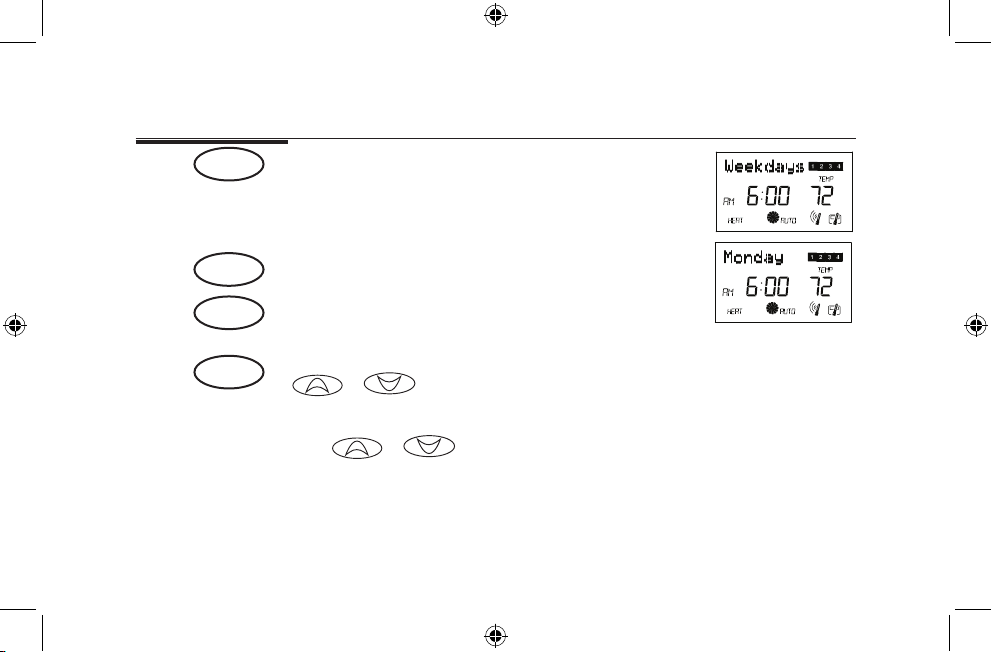
Step 1 ■ Press to enter program mode. Weekdays are displayed and
program 1 is ashing.
■ Press to change heat of cool mode programming while in pro-
gramming mode
Step 2 ■ The Program hour and AM or PM indicator are ashing. Press
to change the hour.
Step 3 ■ Press again to change to the minute position. The current
minute will be ashing.
■ Press to change the minute.
or
program
or
program
system
2
1
Page 24
24
Step 4 ■ Press again to change to the program temperature. The cur-
rent temperature will be ashing.
■ Press to change the temperature.
Step 5 ■ Press to select Auto or On for each program. “Auto” will auto-
matically cycle your system to maintain your set temperature.
“On” will run your system continuously. “Auto” is the default
setting.
Step 6 ■ (Does not apply to thermostat model 44660) Press to select
the sensor that will control each thermostat program, either
for sensor 1, for sensor 2, or for the thermostat.
The thermostat can also be congured to take an average of
any combination of the three.
Step 7 ■ Press again to move to the next program number.
■ Repeat Steps 3 through 5 to change the remaining Weekday
programs.
or
program
program
fan
sensor
1
2
Page 25
25
PROGRAMMING
Step 8 ■ Press to change to Weekend programs.
■ Repeat steps 3 through 5 to complete the weekend programs.
■ Press at any time to exit the Program Mode.
■ After 15 seconds, the thermostat will return to normal mode
automatically.
Step 9 ■ Change to program the other system mode, and repeat steps
2 through 7.
prog/day
ret/clear
system
Page 26
26
7-Day Programming
Step 1 ■ Press to enter program mode, display shows weekday pro-
grams.
■ Press 2 times to reach the Monday program.
Step 2 ■ Press to select HEAT or COOL to program the corresponding
system.
Step 3 ■ The Program hour and AM or PM indicator are ashing. Press
or to change the hour.
Step 4 ■ Press again to change to the minute position. The current
minute will be ashing.
■ Press or to change the minute.
prog/day
program
system
program
2
1
2
1
Page 27
27
Step 5 ■ Press again to change to the program temperature. The cur-
rent
temperature will be ashing.
■ Press or to change the temperature.
Step 6 ■ Press to move to programs 2, 3 and 4.
■ Repeat Steps 3 through 5 to complete the programs for Mon-
day.
Step 7 ■ Press to change to the next day’s programs.
■ Repeat Steps 3 through 6 to complete the selected day’s programs.
■ Continue repeating Steps 3 through 7 to program all 7 days of the week.
Step 8 ■ When nished, press to return to normal mode.
■ After 15 seconds, the thermostat will return to normal mode automatically.
prog/day
ret/clear
system
program
program
Page 28
28
PROGRAMMING
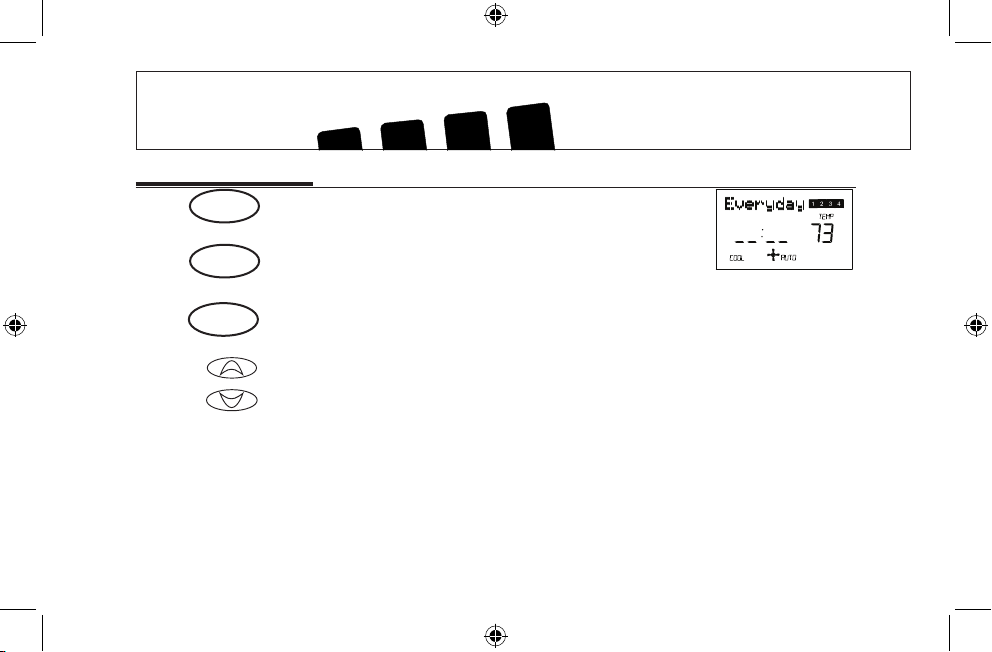
Everyday Programming
Step 2 ■ Press to enter program mode, display shows weekday pro-
grams.
■ Press 9 times to reach the Everyday program.
■ Press to select HEAT or COOL to program the corresponding
system.
Step 3 ■ The Program hour and AM or PM indicator are ashing. Press
to change the hour.
or
prog/day
system
program
Page 29
29
Step 4 ■ Press again to change the minute position. The current min-
ute will be ashing.
■ Press to change the minute.
Step 5 ■ Press again to change to the program temperature. The cur-
rent temperature will be ashing.
■ Press to change the temperature.
Step 6 ■ Press again to move the next program number.
■ Repeat Steps 3 through 5 to change the remaining programs.
■ Press at any time to exit the Program Mode.
■ After 15 seconds, the thermostat will return to Normal
mode automatically.
Step 7 ■ Change to program the other system mode and repeat steps
2 through 6.
system
program
or
ret/clear
program
or
program
Page 30
30
PROGRAMMING
Reviewing Programs
You may want to review the programs to conrm that the settings are compatible with your lifestyle.
■ Press to display M - F programs.
■ Press repeatedly to cycle through the 4 programs.
Program Options
Programmable Fan
■ Any time during programming, this will change the fan display
between “AUTO” and “ON” for the selected system and Program number. (Heat and Cool can be set separately.)
“AUTO” = Fan control runs when the system is ON
“ON” = Fan control runs continuously
NOTE: Fan must be set to “PROG” for the Programmable Fan to be activated.
Weekday
Programs
fan
program
Page 31

31
■ Press to display the Sa - Su programs.
■ Press repeatedly to cycle through the 4 programs.
■ Press to display M - F programs.
NOTE: Time or Temperature display will be blank when at
least one weekday program is different. (All programs will de
displayed if programmed in Everyday mode.)
■ Press to change to Sa - Su. Again, if part of the display is
blank, one of the weekend programs is different.
■ Press again to change to Monday’s program.
■ Continue pressing to cycle through each day, or to reach the
Everyday programs.
■ Press repeatedly to cycle through the 4 programs.
■ Press to return to normal mode.
■ After 15 seconds, the thermostat will return to normal mode automatically.
NOTE: Programs take affect as soon as the thermostat returns to normal mode.
Daily and
Everyday
Programs
Weekend
Programs
prog/day
ret/clear
program
program
prog/day
program
Page 32

32
OPERATION
System Selection Key
■ Press to select the desired system.
■ When Auto is selected, the system will change between Heat
and Cool automatically. Refer to the Auto Season Changeover section on page 37.
system
Fan Key
■ Press to set the fan operation.
■ AUTO: the fan will turn on with the system.
ON: the fan will run continuously.
PROG Auto or ON: (Programmable Fan) The fan will select
AUTO or ON, depending on the setting in the programs. Refer
to the Program Option section on page 30.
NOTE: The fan must be set to “PROG” for the fan’s program
settings to take effect.
fan
Page 33
33
Reviewing the Current Temperature Setting
■ Current time and temperature.
■ Thermostat is set to AUTO and the heating system is se-
lected.
■ Press for 1 second or less.
■ Set Temperature is shown beside current room temperature.
■ If held for over 1 second, Temporary Manual Override mode
is entered. Refer to the next section.
or
Page 34

34
OPERATION
Temporary Manual Override
To temporarily change the current set temperature without affecting your program:
■ Press or and hold for about 1 second to
enter Manual Override mode. Display will ash.
■ Press or to change to your desired new
temperature.
■ Press to return to normal mode, or wait 5 seconds for it to
return automatically.
■ The current program number will ash to signify the Temporary Override.
■ At the next program change, the Temporary Override is
canceled, and the next program temperature becomes the
setpoint temperature.
To end the Temporary Manual Override:
■ Press to return the set temperature to the current program set temperature.
NOTE: The Auto Season Changeover feature will not operate while the thermostat is in Temporary Manual
Override. Refer to the Auto Season Changeover feature on page 39 for more information
.
NOTE: If Vacation Hold is set, then the number of days remaining will also be displayed. Refer to the Vacation (Programmable) Hold section on page 36 for more information.
ret/clear
ret/clear
Page 35

35
Permanent Manual Override
To hold your manual override for an extended period of time:
■ Press to make the current room temperature the HOLD temperature. HOLD will alternate on the display with the day and
any other messages.
■ Follow the Temporary Override instructions above to change
the
Permanent Override temperature.
■ You can conrm the held set temperature by pressing for less
than 1 second.
To end the Permanent Manual Override:
■ Press to return to the current program. The HOLD display will be canceled.
NOTE: The Auto Season Changeover feature will not operate while the thermostat is in Permanent Manual
Override. Refer to the Auto Season Changeover feature on page 36 for more information.
ret/clear
or
hold
Page 36

36
OPERATION
Vacation (Programmable) Hold
This thermostat can hold a xed temperature for a selected number of days (up to 30). After the selected number of
days, the thermostat will return to normal program operation. This feature allows you to return home to your normal
comfort setpoint temperatures.
■ Press and hold for 2 seconds to enter Vacation Hold mode.
The set temperature will be the current room temperature and
the Vacation counter will be set to 1 day.
■ Use to set the Vacation Hold temperature.
■ Press to set the Vacation Hold counter to the number of days
you will be away from home.
■ “Vacation” will alternate on the display with the day and any
other messages.
To end Vacation Hold:
■ Press to return to the current program. The ashing Vacation display will be canceled.
NOTE: The Auto Season Changeover feature will not operate while the thermostat is in Vacation (Programmable)
HOLD. Refer to the Auto Season changeover feature on page 37 for more information.
hold
or
day/time
ret/clear
Page 37

37
Auto Season Changeover
When the System Selection is in AUTO position, the
thermostat will automatically change between Heating
and Cooling systems, depending on your program. We
recommend keeping your programmed heating and
cooling temperatures at least 5°F (3°C) apart to allow
the Auto Season Changeover to occur when the appropriate temperature span has been reached. However,
if your heating and cooling programs set temperatures
are close, there is a built-in program to prevent the
thermostat from changing unnecessarily.
Auto Season Changeover is disabled when the thermostat is in Temporary or Permanent Override, or Vacation
Hold, as these overrides are energy saving settings.
While in any of these modes, “AUTO” will be temporarily removed form the LCD display. “AUTO” will return
when these holds are cleared. Auto Season Changeover will still function in Home Today mode, as this is a
comfort setting.
For example, you may have the following temperatures
programmed at a given time:
Heat Set Temp = 68°F
Cool Set Temp = 78°F
If the room temperature rises above 78°F, then the thermostat will automatically change to cool mode and turn
on the air conditioner.
Likewise, the thermostat will automatically change to
heat mode and turn on heat when the room temperature falls below 68°F.
Even when in the “Auto” position, Cool Mode and Heat
Mode still have to be programmed separately to allow
for the “Set Back” periods.
Page 38

38
OPERATION
(continued)
Home Today
This Hunter patented feature allows you to quickly and temporarily override your energy saving program setting on
days when you are normally away from home with one key press.
■ Press to enter the Home Today override. The highest program
temperature for today will be selected from your programs in
Heat mode and become the set temperature. (In Cool mode,
Home Today will select the lowest program temperature for
today to be the set temperature.)
■ “HOME” will alternate on the display with the day and any
other messages.
■ When pressed during the rst or second program of the day,
Home Today will automatically return to program control at
the start of the fourth program of the day. If Home Today is
pressed after the start of the third program time of the day,
the thermostat will remain in Home Today mode until the rst
program of the next day.
■ If Home Today is already active, you may similarly extend it
to the rst program of the next day by pressing the key again
after the start time of the third program.
Page 39

39
■ If the system is changed between Heat and Cool modes
(either manually or by Auto Season Changeover) during the
“Home Today” override period, the setpoint temperature will
be automatically updated. It will automatically change from
the highest heat program setpoint to the lowest cool program
setpoint, or from the lowest cool program setpoint to the highest heat program setpoint.
■ Press to exit Home Today mode before the schedule ending
time. “HOME” is no longer displayed on the LCD screen, and
the thermostat returns to the current program.
■ You can manually change the setpoint temperature while in
Home Today mode. Refer to the Temporary Manual Override instructions on page 34. Manually changing the set
temperature while in Home Today mode will not affect the
Home Today ending time. However, the set temperature will
not change automatically with a manual or Automatic change
between heating and cooling.
■ You may also press the Home Today key while in Temporary
Manual Override. The operation is the same as the previous
point above.
Home Today (cont.)
Page 40

40
OPERATION
Energy Monitor
The Energy monitor feature measures and stores the
amount of time the heating and air conditioning system
operates. Usage can be displayed for Today (since
12AM), Yesterday, This Month (up to 30 days),
Last Month (last 30 days), and Total (up to 999 Hrs. 59
Min.). By monitoring your energy usage, you see how
much the setback periods are saving and you can test
program adjustment to save even more. Use tables on
pages 20-21.
ret/clear
■ To review energy usage, press to cycle through Today, Yesterday, [number] Days, Last 30 days, and Total. Press again to
return to normal mode, or wait 15 seconds for the display to
return to normal mode. You can also return to normal mode at
any time by pressing RET CLEAR.
■ Press and hold for 3 seconds to reset the Energy Monitor’s
counters while in Energy Monitor mode. The display will blink,
and all counters will be cleared to zero.
Page 41

41
Filter Monitor
Your thermostat also keeps a record of the number of hours your lter has been in use. To maximize your system’s
performance and energy efciency, change or clean your lter regularly.
■ When the total system run time for heat and cool reaches 500
hours, “FILTER” will alternate on the display with the day to
remind you to clean or change your system’s lter. “FILTER”
will continue to display until the counter is set back to zero.
■ Press to review total lter usage. After 15 seconds, the display will return to normal mode, or you can hit RET CLEAR
to exit immediately. The Filter Monitor will display up to 999
hours and 59 minutes of usage.
■ To reset the Filter Monitor counter, hold for 3 seconds.
The display will blink, and the counter will be reset to zero.
ret/clear
filter
Page 42

42
OPERATION
SPAN Settings
STAGE 1
Your thermostat is set at the factory to cycle at 1°F
(0.5°C) above and below the set temperature in Stage
1. (Span = 2.) This setting has been designed to pro-
vide a comfortable room temperature under most all
conditions. However, if you nd your system cycling
too fast or too slow, then the Span can be adjusted to
modify the cycle time. Refer to the Option Menu Stage
1 Span selection on page 17.
Span = 1. This decreases the cycle time by caus-
ing your system to run shorter.
Span = 3. This increases the cycle time by causing
your system to run longer.
The Span settings remain the same for both HEAT and
COOL.
The Span can be changed at any time and is independent of program times or temperatures.
When the thermostat is powered on or the Reset key is
pressed, the Span is reset back to setting 2.
Page 43

43
Hunter’s Auto Recovery feature meets the ENERGY
STAR® guidelines for energy efciency by allowing the
heating or cooling system to recover gradually from an
energy-saving setpoint temperature to a comfort setpoint temperature.
Auto Recovery calculates how early to turn your system back On, so that the room temperature is already
comfortable by the start of the comfort temperature
program period. Auto Recovery works in both Heat and
Cool modes.
For example, in Heat mode, you could have the following programs:
Program #4 (Overnight) Program #1 (Morning)
Set Temp = 60°F Set Temp = 68°F
Time = 10PM Time = 6AM
The room temperature fell to 60°F overnight. Rather
than having the thermostat turning on at 6AM, Auto Recovery would note the temperature difference between
60°F and 68°F and turn the Heat on approximately 30
minutes early. Therefore, the room temperature at 6AM
would be about 68°F instead of 60°F.
■ When the thermostat is in Auto Recovery mode, the
display will alternate “RECOVERY” with the day, and
the program indicator will ash.
Auto Recovery
Details of Auto Recovery Operation:
■ Auto Recovery can be disabled by selecting “NO” in
the Option Menu. Refer to page 17.
■ Auto Recovery will not operate if Permanent hold,
Vacation hold Temporary hold or Home Today is in
operation.
■ Auto Recovery can be canceled manually if RET
CLEAR is pressed during the recovery process. If
a recovery process is canceled manually then the
recovery process will not start again until the next
program period starts (an exception is that if time or
program is changed then the thermostat will check
Auto Recovery conditions immediately).
■ Auto Recovery will be canceled if HOME TODAY or
HOLD is pressed during the recovery process. The
thermostat will enter Home Today, Permanent Hold,
or Vacation Hold.
Page 44

44
OPERATION
Home Today, Permanent hold or Vacation hold.
■ Auto Recovery will be canceled and change to
Temporary Manual Override mode if the setpoint is
adjusted during the recovery process.
■ If the system changes between heat and cool (auto-
matically or manually) then the thermostat will recal-
Auto Recovery (continued)
culate Auto Recovery again. Setpoint temperature
will be changed to the opposite system’s comfort
temperature if the recovery entry criteria are still met.
Otherwise, the recovery process will be canceled
and return to program control mode.
Keyboard Lock
The Keyboard can be locked to prevent unauthorized changes to the thermostat.
■ To lock or unlock the keyboard, press and hold BOTH keys
for 3 seconds. The keyboard is locked when KEY LOCK appears on the display.
■ All keys are locked, but any time a key is pressed, KEY LOCK
will appear on the display for 1 second and the backlight will
operate.
or
Page 45

45
Backlighting (INDIGLO® Night-Light)
Your thermostat has an electroluminescent lamp that
backlights the display for easy viewing in the dark.
When any key is pressed the display is illuminated.
The display will remain illuminated for 15 seconds after
the last key is pressed. This allows the light to stay on
if you need to operate several keys. The backlight will
decrease in brightness before shutting off.
NOTE: The backlight is powered by the 24V AC supply.
It will not operate when there is an AC power interruption or if the thermostat is removed from the wallplate.
Page 46

46
SAFETY FEATURES
Low Battery Warning
Your thermostat has a low battery warning system. When the batteries are detected to be weak, the low battery
warning is indicated by “Low Batt” alternating on the LCD display with the day. You then need to replace the batteries with 2 new AA alkaline batteries. You have 30 seconds to change the batteries before the settings are lost.
Error Mode
If the thermostat is unable to control your system due to
an unexpected problem, the thermostat will enter Error
Mode. In this condition, the thermostat ashes “Error”
and a code number on the LCD display, and shuts off
your system.
To correct this problem, replace the batteries with 2
new AA alkaline batteries, even if you have recently
replaced them. Next, use a paper clip to press the RESET button next to the keypad. You will need to repro-
gram your thermostat and conrm normal operation.
If Error Mode returns, please call 888-830-1326 for
Technical Assistance from 7 AM to 7 PM Central Time
Monday thru Friday and 8 AM to 5 PM Central Time on
Saturday.
Page 47

47
TROUBLESHOOTING
SCRAMBLED OR DOUBLE DISPLAY
(numbers over numbers)
NO DISPLAY
ENTIRE DISPLAY DIMS
PROGRAM DOES NOT CHANGE
AT YOUR DESIRED SETTING
AUTO / FAN DOES NOT TURN ON
FAN RUNS CONTINUOUSLY
1. Remove clear Mylar sticker
1. Check terminal connection.
2. Check battery connections and batteries.
3. Press RESET button with a small pin and hold in for two seconds.
1. Replace Batteries
2. Adjust LCD contrast in the Option Menu.
1. Check that the time is set properly to “AM” or “PM”.
2. Check that the thermostat is not in “HOLD” or “Home Today” modes.
3. Check for the correct day setting.
4. Check any remote sensor readings or weights.
1. Move HG/HE selector to opposite position
1. Check fan setting. It may be “ON” or in Programmable Fan mode
“PGMON”.
SolutionProblem
Page 48

48
1. Check that the system selector key is in the correct position (“HEAT,”
“COOL” or “AUTO”).
2. The thermostat may be in the AUTO mode. Look for “AUTO” on the
LCD display. If the Heat and Cool program temperatures are close,
then the thermostat requires a larger room temperature change before changing from Heat or Cool.
3. There may be as much as a 4 minute delay before the Heat or Cool
system turns On - wait and check. (Compressor protection delay.)
4. Check your circuit breakers and switches to ensure there is power to
the system.
5. Replace batteries.
6. Make sure your furnace blower door is closed properly.
7. Check the position of the Heat Pump switch.
1. Press the RESET button once with a small pin and hold for two seconds. The thermostat will need to be re-programmed.
1. Replace unit.
1. Replace unit.
Solution (cont.)
Problem (cont.)
HEATING OR COOLING DOES
NOT GO ON OR OFF
If you experience any other problems, call 888-830-1326 for Technical Assistance from 7 AM to 7 PM Central
Time Monday thru Friday and 8 AM to 5 PM Central Time on Saturday.
ERRATIC DISPLAY
IF UNIT CONTINUES TO OPERATE
IN THE OFF POSITION
THERMOSTAT PERMANENTLY READS
“HI,” “LO,” OR “Error” AFTER PRESSING RESET BUTTON
Page 49

49
WIRING DIAGRAMS
Y/O
W/B
Y1
G
Fan
Relay
Rc1
Rc
Heat/Cool
24V Supply
Rh
Cool
Contactor
Heat Relay
or Valve
Wallplate
Terminals
Jumper
System
Selector
HG/HE - SSHP
Y/O W/B
Y1
G
Fan
Relay
Rc1
Rc
Heat 24V
Supply
Rh
Heat Relay
or Valve
Cool
Contactor
Wallplate
Terminals
Cool 24V
Supply
System
Selector
HG/HE - SSHP
Y/O W/B
Y1
G
Fan
Relay
Rc1
Rc
Heat Pump
24V Supply
Rh
Cool
Mode
Reversing
Valve
Wallplate
Terminals
Jumper
Heat
Mode
OR
Compressor
Contactor
Connect to proper Reversing
Valve Terminal. See Table A
System
Selector
HG/HE - SSHP
Y/O W/B
Y1
G
Heat Relay
or Valve
Rc1
Rc
Heat 24V or
Millivolt Supply
Rh
Wallplate
Terminals
Jumper
System
Selector
HG/HE - SSHP
Y/O W/B
Y1
G
Fan
Relay
Rc1
Rc
Heat 24V
Supply
Rh
Heat Relay
or Valve
Wallplate
Terminals
Jumper
System
Selector
HG/HE - SSHP
Y/O W/B
Y1
G
Fan
Relay
Rc1
Rc
Cool 24V
Supply
Rh
Heat Relay
or Valve
Wallplate
Terminals
Jumper
System
Selector
HG/HE - SSHP
4-Wire Heat/
Cool System
5-Wire Heat/
Cool System
Single-Stage
Heat Pump
System
2-Wire Heat
Only System
3-Wire Heat
Only System
3-Wire Cool
Only System
Page 50

Hunter Fan Co.
2500 Frisco Avenue
Memphis, TN 38114
44008-01 08/09/2007
www.hunterfan.com
© 2007 Hunter Fan Co.
Page 51

1
44008-02
20080916
Termostato Programable
Modelos 44668 y 44660
Page 52

2
(continuación)
Tabla de contenido
PROGRAMACIÓN
INTRODUCCIÓN
INSTALACIÓN
Lea esto antes de instalar el termostato 5
Características 8
Lo que usted necesita 8
Retire el termostato antiguo 9
Etiquetado de alambres 10
Monte la placa de pared y el termostato 11
Conecte los alambres y monte el termostato a la placa de pared 12
Menú de opciones 14
Conguración del canal del sensor remoto
64
Ajuste de hora y día 16
12 horas. /24 horas. Formato de hora 17
Introducción a la programación 18
Programa personal 19
Programación 21
Programación de día de semana / n de semana 22
Programación de 7 días 25
Programación diaria 27
Page 53

3
Tabla de contenido (continuación)
PROGRAMACIÓN (continuación)
OPERACIONES
Opciones de programa 29
Ventilador programable 29
Tecla de selección de sistema 31
Tecla Fan (ventilador) 31
Revisión del ajuste de temperatura actual 32
Anulación manual temporal 33
Anulación manual permanente 34
Suspensión por vacaciones (programable) 35
Cambio automático por estación 36
Home Today (Hoy día en casa) 37
Monitor de energía 39
Monitor de ltro 40
Ajustes SPAN 41
Auto Recuperación 42
Bloqueo de teclado 43
Luz de fondo (Luz nocturna INDIGLO®) 44
Advertencia de batería baja 45
Modo Error 45
Page 54

4
Problemas y soluciones 46
Soporte técnico 47
Technical Support 48
LOCALIZACIÓN DE FALLAS
OPERACIONES (continuación)
DIAGRAMAS DE CABLEADO
Page 55

5
Lea esto antes de instalar el termostato
IMPORTANTE
1
Lea detenidamente toda la sección de Instalación
de este Manual del propietario antes de comenzar a
instalar u operar su termostato Hunter.
Retire la etiqueta de Mylar de la ventana de
visualización LCD.
INSTALACIÓN
2
Toda la instalación se realiza normalmente en su
termostato.
PROGRAMACIÓN DE SILLÓN
3
Usted puede programar su termostato antes de la
instalación introduciendo las baterías y siguiendo
las instrucciones que comienzan en la página 16. Esto
puede hacerse mientras descansa en su sillón favorito
y es una manera muy buena para familiarizarse todas
las funciones de su termostato Hunter.
COMPATIBILIDAD DEL SISTEMA
4
Su termostato está diseñado para operar con la
mayoría de sistemas de calentamiento de agua a
gas, aceite, eléctricos o de 2 alambres y con sistemas
de aire acondicionado. También operará bombas de
calor de una etapa que no tengan calor auxiliar o de
emergencia. Estas tienen sistemas de control de 24 voltios o milivoltios y representan la mayor parte de las
unidades centrales de calefacción, aire acondicionado o
calentamiento de ambientes en los Estados Unidos.
Este termostato no controlará sistemas de 120/240
voltios o sistemas de milivoltios.
PROTECCIÓN DEL COMPRESOR
5
El termostato proporciona un retardo de 3.5 minutos
luego de apagar el sistema de calefacción o
enfriamiento antes de que pueda ser reiniciado. Esta
característica evitará daños a su compresor causados
por un ciclo rápido.
Page 56

6
RANGO DE TEMPERATURA
6
Su termostato se puede programar entre 45°F y
95°F (7°C y 35°C). (7°C y 35°C). Sin embargo,
mostrará las temperaturas ambiente entre 15°F y
99°F (-9°C y 37°C) Si la temperatura es mayor que
99°F (37°C) se visualizará “HI” y visualizará “LO” si la
temperatura es menor que 15°F (9°C).
AUTO RECUPERACIÓN
7
Su termostato está jado en fábrica para
recuperar gradualmente la temperatura ambiente
desde un programa de ahorro de energía a su
programa de confort. Por lo tanto, el termostato puede
encender su sistema varios minutos antes de su hora
programada. Esta operación es normal, pero puede
desactivarse. Consulte la información del menú de
opciones en la página 15.
OPERACIÓN
NOTA: La luz nocturna INDIGLO® no funcionará
cuando la batería esté baja.
ADVERTENCIA DE BATERÍA
8
Dos baterías AA alcalinas nuevas deben
proporcionar más de un año de servicio. Sin
embargo, cuando las baterías se agotan, el indicador
de batería baja destellará en la pantalla. Cuando vea
este mensaje, instale baterías alcalinas nuevas. Usted
tiene aproximadamente un minuto para cambiar
las baterías y mantener el reloj del termostato y los
ajustes del programa. Cuando las baterías están muy
bajas para asegurar la correcta operación, su sistema
se apagará y la pantalla se borrará con excepción del
Indicador de batería baja que destellará en la pantalla
LCD.
PRECAUCIÓN: Cuando sólo destelle el icono
de batería en la pantalla, el termostato se apaga
y su sistema ya no operará. En esta condición no
hay control de temperatura de su hogar. NOTA: Si
planea estar lejos del local por más de 30 días, le
recomendamos que reemplace las baterías viejas con
baterías alcalinas nuevas antes de marcharse.
Page 57

7
SENSORES REMOTOS (no se aplica al termostato
modelo 44660)
1
Su termostato cuenta con 3 sensores remotos
que medirán la temperatura desde tres lugares
diferentes - dos para interiores y uno para exteriores.
Para congurar su termostato de manera que trabaje
con los sensores remotos, siga las instrucciones para
la selección de Canal de Sensor en la página 14 de
este manual. Para congurar los sensores remotos,
consulte el Manual de instrucciones de sensor remoto.
NOTA (no se aplica al termostato modelo 44660)
Este dispositivo cumple con la parte 15 de las reglas
FCC. La operación está sujeta a las dos siguientes
condiciones: (1) Este dispositivo no pude causar interferencia perjudicial, y (2) este dispositivo debe aceptar
cualquier interferencia recibida, incluyendo interferencias
que puedan causar una operación no deseada.
Este equipo se ha probado y cumple con los límites para
un dispositivo digital clase B, de acuerdo con la parte 15
de las reglas FCC. Estos límites están diseñados para
proporcionar protección razonable contra interferencias
perjudiciales en una instalación residencial. Este equipo
genera, usa y puede radiar energía de radio frecuencia, y
si no se instala y se usa de acuerdo con las instrucciones,
puede causar interferencia perjudicial a la comunicación
por radio. Sin embargo, no hay garantía de que no pueda
producirse interferencia en una instalación en particular.
Si este equipo causa alguna interferencia perjudicial a la
recepción de radio o televisión, lo que puede determinarse
apagando y encendiendo el equipo, el usuario debe tratar
de corregir la interferencia aplicando una o más de las
medidas siguientes:
• Aumente la separación entre el equipo y el receptor.
• Conecte el equipo en una salida de un circuito diferente
del circuito en que está conectado el receptor.
• Consulte con su representante de ventas o con un
técnico experimentado de radio/TV.
Page 58

8
INSTALACIÓN
Placa de montaje de pared Termostato Cubierta
Placa de montaje de pared Termostato Cubierta
Lo que usted necesita
Este termostato incluye dos tornillos ranurados #8 y
dos pernos de pared para el montaje. Para instalar
su termostato, debe tener las herramientas y los
materiales siguientes.
■
Destornillador(es) ranurado(s) ■ Taladro eléctrico y broca de
3/16”
■
Destornillador Phillips ■
Dos baterías alcalinas de 1.5 V
(AA)
■
Martillo
PRECAUCIÓN: No retire ningún cableado del termostato
existente antes de leer las instrucciones detenidamente.
LOS ALAMBRES DEBEN MARCARSE ANTES DE RETIRARLOS.
■
¡IMPORTANTE! Apague la alimentación al horno en
el tablero principal o en el horno.
■
Retire la cubierta del termostato existente.Vea la
Figura 1. Algunos termostatos tendrán tornillos u
otros elementos de cierre que deben retirarse primero.Una vez que la placa de montaje de pared esté
visible, busque los alambres.
Si los alambres no son visibles, pueden estar
conectados a la parte posterior de la placa de pared.
Nuevamente, busque los tornillos, las etiquetas, etc.
Algunos modelos tienen puertas que se abren para
mostrar los alambres y tornillos de montaje. (Vea la
Figura 1).
Retiro del termostato antiguo
TERMOSTATOS DOMÉSTICOS TÍPICOS
Figura 1
Page 59

9
(continuación)
Etiquetado de alambres
■
Cada alambre que va de la pared al termostato
existente está conectado a un punto terminal en ese
termostato. Cada uno de estos puntos terminales se
marcan generalmente con una letra de código como
se muestra en la Tabla A de la página siguiente.
■
¡IMPORTANTE! ANTES DE DESCONECTAR
CUALQUIER ALAMBRE, APLIQUE
LAS ETIQUETAS AUTO ADHESIVAS
PROPORCIONADAS AL ALAMBRE COMO SE
MUESTRA EN LAS TABLA A DE LAS PÁGINAS
11. (Por ejemplo, pegue la etiqueta marcada W al
alambre que va al terminal W
o H en su termostato existente.) IGNORE EL
COLOR DE LOS ALAMBRES ya que estos no
siempre cumplen con la norma.
■
Después de etiquetar los alambres, desconéctelos
de los terminales del termostato existente.
■
Retire la placa de pared existente. Para asegurarse
que los alambres no caigan en la abertura de la
pared, puede pegarlos con cinta a la pared.
■
Si el agujero en la pared es más grande que el
necesario para los alambres, séllelo para que
no pueda ingresar aire frío ni caliente a la parte
posterior del termostato desde la pared. El aire
podría causar una falsa lectura del termostato
Page 60

10
INSTALACIÓN
Montaje de la placa de pared y el termostato
■
Retire la placa de pared de su termostato
presionando la pestaña de liberación en la parte
inferior del termostato. (Vea la Figura 2)
■
Coloque la placa de pared y pase los alambres
existentes a través de la abertura grande. Luego
nivele para obtener una mejor apariencia. Marque
agujeros para los anclajes plásticos proporcionados,
si es que los agujeros existentes no se alinean con
los de la placa de pared de Hunter.
■
Taladre agujeros con una broca de 3/16” y
suavemente coloque los anclajes en la abertura.
Introduzca los tornillos de montaje proporcionados
en el anclaje de la pared y ajústelos (Vea la Figura
3) en los agujeros hasta que estén a nivel con la
pared.
■
Reinstale la placa de pared, tirando de los alambres a
través de la abertura grande. Inserte los tornillos de
montaje proporcionados en el anclaje de la pared y
apriete.
G
W/B
Y1
Y/O
RC
RC1
RH
Y1
Figure 3
Figure 2
Page 61

11
if your existing
thermostat is marked...
label the wire
with this sticker:
G / F
G
G
W / H / B
W/B
W/B
Y / C* / M / O
Y/0
Y/0
RC / VC
RC
RC
RH / R / VR / 4
RH
RH
24 Volt
24 Volt cool
air conditioning
compressor
heating
fan
Y1
Y1
Y1
heat pump
compressor
Conecte los alambres y monte el
termostato a la placa de pared
■
Enderece los extremos desnudos de cada alambre
y pélelos 1/4” como máximo. Introduzca cada
alambre etiquetado en la parte inferior del terminal
correspondiente. Consulte las guras 4 y 5.
■
Sostenga los alambres en cada terminal y apriete los
tornillos de los terminales rmemente; un alambre
ojo podría causar problemas de operación con su
sistema o termostato.
■
Empuje el exceso de conductor dentro del agujero
para evitar que interera con el montaje del
termostato.
■
Asegúrese de que el interruptor del sistema esté en
OFF (apagado).
■
Introduzca dos baterías alcalinas AA observando la
polaridad marcada en la unidad.
■
En la parte posterior del termostato, encuentre el
interruptor SW1 en la esquina inferior izquierda.
1) Si su sistema es un horno a gas, coloque el
interruptor en la posición HE.
2) Si su sistema es un horno eléctrico, coloque
Page 62

12
■
Introduzca las pestañas superiores del cuerpo
del termostato en la ranura de la parte superior
de la placa de pared. Presione la parte inferior del
cuerpo del termostato contra la placa de pared hasta
escuchar un clic. (NOTA: No fuerce el termostato
en la placa ya que los pines de los terminales se
pueden dañar. Si no escucha el clic, es posible que
el termostato no funcione.)
3) Si su sistema es una bomba de calor de
simple etapa, coloque el interruptor en la
posición SSHP.
Page 63

13
PROGRAMACIÓN
el interruptor en la posición HG.
Menú de opciones
Su termostato tiene muchos ajustes que pueden modicarse para adaptarse a su sistema y sus preferencias.
■
Presione para entrar al menú de opciones y cambiar a la siguiente opción.
■
Presione en cualquier momento para regresar a modo normal.
Selección de idioma
■ o para seleccionar Inglés, Español, o
Francés.
Estado de la batería
■ para ver cuánta carga queda en la
option
ret/clear
option
1
option
2
Page 64

14
batería del termostato.
Selección Fahrenheit o Celsius (F°/C°)
■ o para cambiar la visualización del
termostato entre Fahrenheit y Cel
Selección de reloj de 12 horas / 24 horas
■ o para cambiar el formato de hora entre 12
horas (AM / PM) y 24 horas.
Selección de SPAN
■ o para cambiar el ajuste SPAN a 1, 2 o 3. El
ajuste de fábrica es 2. El ajuste 1 causará ciclos más cortos.
option
3
option
4
option
Banda muerta del Cambio automático por estación
■ o para jar la banda muerta entre Heating
(Calentamiento) y Cooling (Enfriamiento) cuando el sistema de
selección esté en la posición Auto. Vea la página 37 para más
información sobre la función Cambio automático por estación.
5
option
6
Page 65

15
PROGRAMACIÓN
Selección de Auto Recuperación
■ o para activar “YES” o desactivar “NO” el
modo Auto Recuperación. El ajuste de fábrica es “YES.”
■ Para cambiar entre los modos de recuperación Heat (calor) o
Cool (frío).
NOTA: Auto Recuperación es una de las características ENERGY STAR® de este termostato. Consulte la
sección Auto Recuperación de las páginas 43-44p ara mayor información.
Canal de sensor (no se aplica al termostato modelo 44660)
■ para llegar a la pantalla de conguración de canal del sensor
remoto
■ para seleccionar el sensor para el ajuste de canal RF ( para
interiores 1, para interiores 2, o para exteriores).
option
7
option
sensor
8
1
2
Page 66

16
PROGRAMACIÓN
■ o para congurar el canal de comunicación RF (1-15) para el
sensor remoto seleccionado.
■ Si no tiene un segundo sensor remoto o un sensor remoto exterior, o si no lo está
usando, je el canal a- -.
NOTA: El termostato no controlará su sistema de calefacción y aire acondicionado desde la conguración
de sensor remoto como Exterior . Sin embargo, es muy importante que NO coloque sensor remoto
o para exteriores.
Ajuste de contraste LCD
■ o para cambiar el contraste de la pantalla
LCD entre 0 y 9. Los números menores aclaran la pantalla.
Los números mayores la oscurecen. El ajuste de fábrica es
5.
9
option
1
2
Page 67

17
PROGRAMACIÓN
Ajuste de hora y día
Paso 1 ■ Presione para ingresar al modo de ajuste de hora y día. Des-
tellarán la hora actual y el indicador AM/PM.
■ Presione para aumentar o disminuir la hora actual.
Observe el indicador AM/PM ya que la pantalla cambiará a
las 12 AM
y 12 PM.
Paso 2 ■ Presione otra vez para cambiar de ajuste de horas a ajuste
de minutos. Destellará el minuto actual.
■ Presione para aumentar o disminuir los minutos actuales.
o
o
day/time
day/time
Page 68

18
Paso 3 ■ Presione otra vez para cambiar a ajuste del día. Destellará el
día actual.
■ Presione para avanzar o retroceder del día actual.
Paso 4 ■ Presione otra vez para cambiar a la pantalla normal.
NOTA: Puede presionar en cualquier momento durante el ajuste de día y hora para regresar a la pan-en cualquier momento durante el ajuste de día y hora para regresar a la pan-
talla normal.
o
day/time
ret/clear
day/time
o
ret/clear
Formato de 12/24 horas
Su termostato es jado en fárica en formato de hora normal 12 (AM/PM). Para cambiar a formato de 24 horas,
presione en cualquier momento mientras destallan la hora, el minuto, o el dia para alternar entre los formatos de
12 y 24 horas. El indicador AM/PM no se mostrará en modo de 24 horas. Tanto la hora actual y todos los programas
cambiarán automáticamente al formato escogido. El formato de hora también puede cambiarse en el menúde opciones.
option
Page 69

19
PROGRAMACIÓN
Introducción a la programación
Estudios realizados por el Departamento de Energía
estiman que reduciendo el punto de ajuste de su
termostato en 10°F (6°C) por dos períodos de 8
horas durante el invierno puede reducir su factura de
combustible hasta en 33%. Aumentando el punto de
ajuste de su termostato en 5°F (3°C) por dos períodos
de 8 horas durante el verano puede reducir su factura
de combustible hasta en 25%.
Y Su termostato puede contener hasta 4 programas
separados para cada día de la semana.
Usted puede programar los días de semana, los nes
de semana, los 7 días individualmente o todos los días
como un grupo.
El ventilador del sistema también puede jarse para
operar continuamente durante un período de tiempo
programado.
Temperatura en ºF (ºC)
Número de programa Hora Calor Frío
1 6:00am 68°F (20°C) 78°F (26°C)
2 8:00am 60°F (16°C) 85°F (29°C)
3 4:00pm 68°F (20°C) 78°F (26°C)
4 10:00pm 60°F (16°C) 82°F (28°C)
Su termostato Hunter está preprogramado para cumplir las pautas de ENERGY
STAR® sobre eciencia de energía.
■ Al iniciar o después de restablecer, los 7 días de la semana tienen estos programas predeterminados:
■ Las siguientes secciones describen la forma de cambiar estos programas.
Page 70

20
Programa personal
Antes de modicar los programas, use este Programa
personal para determinar los ajustes de hora y temperatura que mejor satisfagan sus requisitos de confort
y ahorro de energía.
Use un lápiz de modo que pueda revisar sus registros
cada vez que cambia sus ajustes de temperatura.
Calefacción
Día Prog. 1 Prog. 2 Prog. 3 Prog. 4
Lun. Hora Temp. Hora Temp. Hora Temp. Hora Temp.
Mar. Hora Temp. Hora Temp. Hora Temp. Hora Temp.
Mié. Hora Temp. Hora Temp. Hora Temp. Hora Temp.
Jue. Hora Temp. Hora Temp. Hora Temp. Hora Temp.
Vie. Hora Temp. Hora Temp. Hora Temp. Hora Temp.
Sáb. Hora Temp. Hora Temp. Hora Temp. Hora Temp.
Dom. Hora Temp. Hora Temp. Hora Temp. Hora Temp.
(continuación)
Page 71

21
PROGRAMACIÓN
Programa personal (continuación)
Enfriamiento
Día Prog. 1 Prog. 2 Prog. 3 Prog. 4
Lun. Hora Temp. Hora Temp. Hora Temp. Hora Temp.
Mar. Hora Temp. Hora Temp. Hora Temp. Hora Temp.
Mié. Hora Temp. Hora Temp. Hora Temp. Hora Temp.
Jue. Hora Temp. Hora Temp. Hora Temp. Hora Temp.
Vie. Hora Temp. Hora Temp. Hora Temp. Hora Temp.
Sáb. Hora Temp. Hora Temp. Hora Temp. Hora Temp.
Dom. Hora Temp. Hora Temp. Hora Temp. Hora Temp.
Page 72

22
Programación
■ Su termostato puede programarse para días de
semana y nes de semana, tener programas únicos
para los 7 días, o el mismo programa para cada
día. Use Programación de día de semana / n de
semana en la página 23, Programación de 7 días en
la página 26, o Programación para todos los días
en la página 28 para entrar o revisar programas a n
de que coincidan con su Programa personal.
■ Familiarícese con la Programación manual de modo
que pueda modicar fácilmente sus programas
según cambien sus necesidades de confort. Siga
los pasos de abajo para cambiar las horas y temperaturas del programa.
NOTA: 1) La hora del programa puede ajustarse en in-
crementos de 10 minutos, y permanece igual
para los programas Heat (Calor) y
Cool (Frío).
2)Latemperaturadelprogramasepuedejaren
incrementos de 1°F (1°C).
3) El punto de ajuste de calor no puede ser
mayor que el de frío, y el punto de ajuste de
frío, no puede ser menor que el de calor.
4) Si el selector de sistema está en modo AUTO,
se usará el modo actual de operación para la
programación.
5) Después de 15 segundos sin que se presione
alguna tecla, el termostato volverá al modo
normal de pantalla.
6) Al ajustar la hora del programa, note el
indicador AM/PM.
7) Con la función Auto Recuperación activada, no
necesitajarlashorasdelprogramadeconfort más temprano. Auto Recuperación determinará cuán temprano encender su sistema,
de modo que la habitación esté confortable a
la hora del programa.
Page 73

23
PROGRAMACIÓN
Programación de día de semana / n de semana
Paso 1 ■ Presione para ingresar al modo de programación. Se
visualiza “Weekdays” y destella el programa 1.
■ Presione para cambiar el modo de calor o frío mientras está
en modo de programación.
Paso 2 ■ La hora de programa y AM o PM destellan en pantalla. Pre-
sione para cambiar la hora.
Paso 3 ■ Presione otra vez para cambiar a la posición de minuto. Des-
tellará el minuto actual.
■ Presione para cambiar los minutos.
o
program
o
program
system
2
1
Page 74

24
Paso 4 ■ Presione otra vez para cambiar a la temperatura del programa. Des-
tellará la temperatura actual.
■ Presione para cambiar la temperatura.
Paso 5 ■ Presione para seleccionar Auto o On para cada programa. “Auto” al-
ternará automáticamente su sistema para mantener su temperatura
jada. “On” hará funcionar su sistema continuamente. “Auto” es el
ajuste predeterminado.
Paso 6 ■ (No se aplica al termostato modelo 44660) Presione para seleccio-
nar el sensor que controlará cada programa del termostato, ya sea
para el sensor 1, para el sensor 2, o para el termostato.
El termostato también puede ser co ngurado para tomar un promedio de cualquier combinación de los tres.
Paso 7 ■ Presione otra vez para moverse al próximo número de programa.
■ Repita los pasos 3 hasta 5 para cambiar los programas de días de semana res-
o
program
program
fan
sensor
1
2
Page 75

25
PROGRAMACIÓN
Paso 8 ■ Presione esta tecla para cambiar los programas de n de se-
mana.
■ Repita los pasos 3 a 5 para completar los programas de n
de semana.
■ Presione en cualquier momento para salir del modo de programa.
■ Después de 15 segundos, el termostato regresará a modo
normal automáticamente.
Paso 9 ■ Cambie para programar otro modo de sistema y repita los
pasos 2 hasta 7.
prog/day
ret/clear
system
Page 76

26
Programación de 7 días
Paso 1 ■ Presione para ingresar al modo de programación; la pantalla
muestra los programas de los días de semana.
■ Presione 2 veces para llegar al programa del Lunes.
Paso 2 ■ Presione para seleccionar HEAT (calor) o COOL (frío) para
programar el sistema correspondiente.
Paso 3 ■ La hora de programa y AM o PM destellan en pantalla. Pre-
sione o para cambiar la hora.
Paso 4 ■ Presione otra vez para cambiar a la posición de minuto. Des-
tellará el minuto actual
■ Presione o para cambiar los minutos.
prog/day
program
system
program
2
1
2
1
Page 77

27
Paso 5 ■ Presione otra vez para cambiar a la temperatura del pro-
grama.
Destellará la temperatura actual.
■ Presione o para cambiar la temperatura.
Paso 6 ■ Presione para moverse a los programas 2, 3 y 4.
■ Repita los pasos 3 a 5 para completar los programas para el
lunes.
Paso 7 ■ Presione para cambiar a los programas del día siguiente.
■ Repita los pasos 3 hasta 6 para completar los programas del día
seleccionado.
■ Continúe repitiendo los pasos 3 hasta 7 para programar los 7 días de la semana.
Paso 8 ■ Cuando haya terminado, presione para regresar al modo nor-
mal.
■ Después de 15 segundos, el termostato regresará a modo normal automáticamente.
Paso 9 ■ Cambie al otro sistema y repita los pasos 2 hasta 8.
prog/day
ret/clear
system
program
program
Page 78

28
PROGRAMACIÓN
Programación diaria
Paso 2 ■ Presione para ingresar al modo de programación; la pantalla
muestra los programas de los días de semana.
■ Presione 9 veces para alcanzar el programa de todos los
días.
■ Presione para seleccionar HEAT (calor) o COOL (frío) para
programar el sistema correspondiente.
Paso 3 ■ La hora de programa y AM o PM destellan en pantalla. Pre-
sione para cambiar la hora.
or
prog/day
system
program
Page 79

29
Paso 4 ■ Presione otra vez para cambiar a la posición de minutos.
Destellará el minuto actual.
■ Presione para cambiar los minutos.
Paso 5 ■ Presione otra vez para cambiar a la temperatura del pro-
grama.
Destellará la temperatura actual.
■ Presione para cambiar la temperatura.
Paso 6 ■ Presione otra vez para mover al siguiente número de pro-
grama.
■ Repita los pasos 3 hasta 5 para cambiar los programas restantes.
■ Presione en cualquier momento para salir del modo de programa.
■ Después de 15 segundos, el termostato regresará a modo
normal
system
program
o
ret/clear
program
o
program
Page 80

30
PROGRAMACIÓN
Revisión de los programas
Puede revisar los programas para conrmar que los ajustes sean compatibles con su estilo de vida.
■ Presione para mostrar los programas de Lunes a Viernes (M
- F).
■ Presione repetidamente para alternar entre los 4 programas.
Opciones de programa
Ventilador programable
■ En cualquier momento durante la programación cambiará
la pantalla Fan entre “AUTO” y “ON” para el sistema selec-
cionado y el número de programa (Heat (calor) y Cool (frío)
pueden jarse por separado).
“AUTO” = El control del ventilador opera cuando el sistema
está en ON
“ON” = El control del ventilador opera continuamente
NOTA: Elventiladordebeestarjadoen“PROG”paraactivar
el ventilador programable.
Programas
de n de
semana
fan
program
Page 81

31
■ Presione para mostrar los programas de sábado y domingo
(Sa – Su).
■ Presione repetidamente para alternar entre los 4 programas.
■ Presione para mostrar los programas de Lunes a Viernes (M
- F).
NOTA: La visualización de hora o temperatura estará en
blanco cuando al menos un programa de día de semana sea
diferente.(Todos los programas se mostrarán si se
programan en modo diario).
■ Presione para cambiar a sábado - domingo (Sa – Su). Nuevamente, si parte de la pantalla está en blanco uno de los
programas de n de semana es diferente.
■ Presione otra vez para cambiar al programa del lunes.
■ Continúe presionando para alternar entre cada día, o para
alcanzar los programas de todos los días.
■ Presione repetidamente para alternar entre los 4 programas.
■ Presione para regresar a modo normal.
■ Después de 15 segundos, el termostato regresará a modo normal automáticamente.
NOTA: Los programas entran en efecto en cuanto el termostato vuelve a modo normal.
Programas
diarios
y de todos
los días
Progra-
mas de n
de semana
prog/day
ret/clear
program
program
prog/day
program
Page 82

32
OPERACIÓN
Tecla de selección de sistema
■ Presione para seleccionar el sistema deseado.
■ Cuando Auto esté seleccionado, el sistema cambiará entre
Heat (calor) y Cool (frío) automáticamente. Consulte la sec-
ción Cambio automático por estación en la página 37.
system
Tecla Fan (ventilador)
■ Presione para jar la operación del ventilador.
■ AUTO: el ventilador se encenderá con el sistema.
ON: el ventilador operará continuamente.
PGM Auto u ON: (ventilador programable) El ventilador selec-
cionará AUTO u ON, dependiendo del ajuste en los progra-
mas. Consulte la sección Opciones de programa de la página
30.
NOTA: Elventiladordebejarsea“PGM”paraquelosajust-
es del programa entren en efecto.
fan
Page 83

33
Revisión del ajuste de temperatura actual
■ Hora y temperatura actuales.
■ El termostato está jado en AUTO y el sistema de calefacción
está
seleccionado.
■ Presione por 1 segundo o menos.
■ La temperatura jada se muestra al lado de la actual temperatura
ambiente.
■ Si se mantiene presionada por más de 1 segundo, se ingresa
al modo Anulación manual temporal.
o
Page 84

34
OPERACIÓN
Anulación manual temporal
Para cambiar temporalmente la temperatura jada actual sin afectar su programa:
■ Presione o y mantenga presionado cerca de 1 segun-
do para ingresar al modo de anulación manual. La pantalla destellará.
■ Presione o para cambiar a su nueva temperatura
deseada.
■ Presione para volver al modo normal, o espere 5 segundos para volver automáticamente.
■ El número actual del programa destellará para indicar la anulación temporal.
■ En el próximo cambio del programa, la anulación temporal se cancela
y la siguiente temperatura del programa se convierte en la temperatura
de punto de ajuste.
Para nalizar la Anulación manual temporal:
■ Presione para regresar la temperatura jada a la actual temperatura jada del programa.
NOTA: La función Cambio automático por estación no operará mientras el termostato esté en
Anación manual temporal.Consulte la función Cambio automático por estación en la página
39 para mayor información.
NOTA: SiestájadaSuspensiónporvacaciones,tambiénsemostraráelnúmero6edíasrestantes.
Consulte la sección Suspensión por vacaciones (programable) en la página 38 para mayor
información.
ret/clear
ret/clear
Page 85

35
Anulación manual permanente
Para mantener la anulación manual durante un período prolongado de tiempo:
■ Presione para hacer la temperatura ambiente actual la temperatura HOLD. HOLD alternará en pantalla con el día y
cualquier otro mensaje.
■ Siga las instrucciones de suspensión temporal indicadas
anteriormente para cambiar la temperatura de suspensión
permanente.
■ Usted puede conrmar la temperatura jada mantenida presionando por menos de 1 segundo.
Para nalizar la Anulación manual permanente:
■ Presione para regresar al programa actual. Cancelará la visualización de HOLD.
NOTA: La función Cambio automático por estación no operará mientras el termostato esté en
Anulación manual temporal. Consulte la función Cambio automático por estación en la
página 36 para mayor información.
ret/clear
o
hold
Page 86

36
OPERACIÓN
Suspensión por vacaciones (programable)
Este termostato puede conservar una temperatura ja para un número seleccionado de días (hasta 30). Después
del número seleccionado de días, el termostato regresará a la operación de programa normal. Esta función le
permite que su hogar tenga sus temperaturas de confort jadas.
■ Presione y mantenga presionada por 2 segundos para entrar
al modo Suspensión por vacaciones. La temperatura jada
será la actual temperatura ambiente y el contador de vaca-
ciones se jará en 1 día.
■ Úselo para jar la temperatura de Suspensión por vacaciones.
■ Presione para jar el contador de Suspensión por vacaciones al número de días que estará fuera de casa.
■ “Vacation” alternará en pantalla con el día y otros mensajes.
Para terminar la Suspensión por vacaciones:
■ Presione para regresar al programa actual. Se cancelará la visualización de “Vacation” en
pantalla.
NOTA: La función Cambio automático por estación no operará mientras el termostato esté en Suspensión por
vacaciones (programable). Consulte la función Cambio automático por estación en la página 37 para mayor información.
hold
o
day/time
ret/clear
Page 87

37
Cambio automático por estación
Cuando el sistema de selección esté en la posición
AUTO, el termostato cambiará automáticamente entre los sistemas de calefacción y enfriamiento, dependiendo de su programa. Le recomendamos mantener
sus temperaturas de calefacción y enfriamiento al
menos 5°F (3°C) separadas para permitir que ocurra el
Cambio automático por estación cuando se alcance la
diferencia de temperatura apropiada. Sin embargo, si
las temperaturas jadas de los programas de calefacción y enfriamiento están cercanas, hay un programa
integrado para evitar que el termostato cambie innecesariamente.
El Cambio automático por estación está desactivado
cuando el termostato está en Anulación temporal o permanente o Suspensión por vacaciones, ya que estas
suspensiones son ajustes de ahorro de energía. En
estos modos, “AUTO” será retirada temporalmente de
la pantalla LCD. “AUTO” aparecerá otra vez cuando se
eliminen estas suspensiones. El Cambio automático
por estación aún funcionará en el modo Home Today
(Hoy día en casa), ya que este es un ajuste de comodidad.
Por ejemplo, usted puede tener las siguientes
temperaturas programadas en un momento dado:
Temperatura jada de calor = 68°F
Temperatura jada de frío = 78°F
Si la temperatura ambiente aumenta por encima de
78°F, el termostato cambiará automáticamente a
modo Cool (frío) y encenderá el aire acondicionado.
Asimismo, el termostato cambiará automáticamente
al modo Heat (calor) y encenderá el calor si la temperatura ambiente cae por debajo de 68°F.
Aún en la posición “Auto”, los modos Cool y Heat
deben ser programados de manera separada para dar
lugar a los períodos de “Set Back” (reducción/aumento
automático del ajuste del termostato).
Page 88

38
OPERACIÓN
(continuación)
Home Today (Hoy día en casa)
Esta función patentada de Hunter le permite anular rápida y temporalmente su ajuste de ahorro de energía en días
en que normalmente está lejos de casa pulsando una sola tecla.
■ La mayor temperatura del programa para hoy será seleccio-La mayor temperatura del programa para hoy será seleccionada desde sus programas en el modo Heat (calor) y se con-
vertirá en la temperatura jada. (En modo Cool (frío), Home
Today seleccionará la menor temperatura del programa para
hoy como la temperatura jada.)
■ “HOME” alternará en pantalla con el día y cualquier otro mensaje.
■ Cuando se presiona durante el primer o segundo programa
del día, Home Today regresará automáticamente al control
del programa en el inicio del cuarto programa del día. Si
Home Today se presiona después del inicio de la hora del
tercer programa del día, el termostato permanecerá en modo
Home Today hasta el primer programa del día siguiente.
■ Si Home Today ya está activo, puede extenderlo en forma
similar al primer programa del día siguiente presionando la
tecla otra vez después de la hora de inicio del tercer programa.
Page 89

39
Home Today (Hoy día en casa) (cont.)
■ Si el sistema cambia entre los modos Heat (calor) y Cool
(frío) (ya sea manualmente o por el Cambio automático
por estación) durante el período de suspensión “Home
Today” (Hoy día en casa), la temperatura del punto de
ajuste será actualizada en forma automática. Cambiará
automáticamente desde el punto más alto del programa de
calor al punto más bajo del programa de frío, o desde el
punto más bajo del programa de frío al punto más alto del
programa de calor.
■ Presione para salir del modo Home Today antes de la hora
de término programada. “HOME” ya no se mostrará en la
pantalla LCD y el termostato regresará al programa actual.
■ Mientras está en modo Home Today puede cambiar
manualmente la temperatura del punto de ajuste. Consulte
las instrucciones de Anulación manual temporal en la página
34. Si cambia manualmente la temperatura jada durante el
modo Home Today, no se afectará la hora de nalización de
dicho modo. Sin embargo, la temperatura jada no cambiará
automáticamente con un cambio manual o automático entre
calefacción y enfriamiento.
■ También puede presionar la tecla Home Today mientras está
en Anulación manual temporal.La operación es igual que la del
punto anterior.
Page 90

40
OPERACIÓN
Monitor de energía
La función de Monitor de energía mide y almacena la
cantidad de tiempo que opera el sistema de calefacción
y aire acondicionado. Puede visualizarse la utilización
para hoy (desde las 12 A.M.), ayer, este mes (hasta
30 días), el mes pasado (últimos 30 días), y total (hasta
999 horas y 59 minutos.). Controlando su utilización
de la energía usted ve cuanto ahorran los períodos de
reducción automática de temperatura y puede probar
ajustes del programa para ahorrar aún más. Usa las
tablas de las páginas 20-21.
ret/clear
■ Para revisar la utilización de energía, presione esta tecla para
alternar entre hoy, ayer, días [número], últimos 30 días y Total.
Presione otra vez para regresar al modo normal o espere
15 segundos para que la pantalla retorne a modo normal.
También puede retornar a modo normal en cualquier momento
presionando RET CLEAR.
■ Presione y mantenga presionada esta tecla 3 segundos para
restablecer los contadores del Monitor de energía mientras se
encuentre en dicho modo. La pantalla destellará y todos los contadores serán repuestos
a cero.
Page 91

41
Monitor de ltro
Su termostato también mantiene un registro del número horas que su ltro ha estado en uso. Para maximizar el
rendimiento de su sistema y la eciencia de energía, cambie o limpie su ltro regularmente.
■ Cuando el tiempo de operación total del sistema para calor
y frío alcanza 500 horas, destellará la palabra FILTER en
la pantalla LCD alternando con el día para recordarle limpiar
o cambiar el ltro de su sistema. FILTER seguirá destellando
hasta que el contador sea repuesto
a cero.
■ Presione para revisar la utilización total del ltro. Después
de 15 segundos, la pantalla regresará a modo normal, o
puede presionar la tecla RET CLEAR para salir de inmediato.
El monitor del ltro visualizará hasta 999 horas y 59 minutos
de utilización.
■ Para restablecer el contador del monitor del ltro, mantenga
presionada esta tecla por 3 segundos.
La pantalla parpadeará y el contador será repuesto a cero.
ret/clear
filter
Page 92

42
OPERACIÓN
Ajustes SPAN
ETAPA 1
Su termostato se ja en fábrica para alternar en 1°F
(0.5°C) por encima y por debajo de la temperatura
jada en la Etapa 1. (Span = 2.) Este ajuste se ha diseñado para proporcionar una temperatura ambiente
cómoda bajo la mayoría de condiciones. Sin embargo,
si encuentra que el ciclo del sistema es demasiado
rápido o demasiado lento, el Span puede ajustarse
para modicarlo. Consulte la Selección de SPAN etapa
1 del menú de opciones en la página 17.
Span = 1. Esto disminuye el tiempo del ciclo
causando que su sistema opere menos
tiempo.
Span = 3. Esto aumenta el tiempo del ciclo causando
que su sistema funcione más tiempo.
Los ajustes del Span permanecen iguales para HEAT
(calor) y COOL (frío).
El Span se puede cambiar en cualquier momento y es
independiente de horas o temperaturas de programa.
Cuando el termostato se enciende o cuando presiona
la tecla Reset, el Span retorna a su ajuste de 2.
Page 93

43
La función Auto Recuperación de Hunter cumple
las pautas de ENERGY STAR® sobre eciencia de
energía permitiendo que el sistema de calefacción
o enfriamiento se recupere gradualmente desde una
temperatura de ajuste ahorradora de energía a una
temperatura de ajuste confortable.
Auto Recuperación calcula cuán pronto encender su
sistema de modo que la temperatura ambiente ya sea
confortable para el inicio del período del programa de
temperatura de confort. Auto Recuperación funciona en
los modos Heat y Cool.
Por ejemplo, en modo Heat (calor) puede tener los
siguientes programas:
Programa #4 (Por la noche) Programa #1 (Mañana)
Temp. jada = 60°F Temp. jada = 68°F
Hora = 10 P.M. Hora = 6 A.M.
La temperatura ambiente cayó a 60 ºF durante la
noche. En lugar de que el termostato encienda a
las 6 A.M., Auto Recuperación notaría la diferencia
de temperatura entre 60 ºF y 68 ºF y encendería el
Auto Recuperación
calor aproximadamente 30 minutos más temprano. Por
lo tanto, la temperatura ambiente a las 6 A.M. sería
alrededor de 68 ºF en lugar de 60 ºF.
■ Cuando el termostato está en modo Auto Recuper-
ación, la pantalla alternará “RECOVERY” con el día
y el indicador del programa destellará.
Detalles de la operación de Auto Recuperación:
■ Auto Recuperación puede desactivarse al seleccionar “NO” en el Menú Opción. Consulte la página 17.
■ Auto Recuperación no funcionará en una suspensión
permanente, suspensión por vacaciones, suspensión
temporal ni en modo Home Today.
■ Auto Recuperación puede cancelarse
manualmente si se presiona RET / CLEAR durante
el proceso de recuperación. Si se cancela un
proceso de recuperación manualmente, el proceso
no comenzará otra vez hasta que se inicie el
próximo período del programa (una excepción
es si la hora o el programa se cambia, ya que
el termostato vericará las condiciones de Auto
Recuperación de inmediato)
■ Auto Recuperación será cancelada si se presiona
HOME TODAY o HOLD durante el proceso de
recuperación.
Page 94

44
OPERACIÓN
Home Today, suspensión permanente o suspensión
vacaciónes.
■ Auto Recuperación será cancelado y cambiará al
modo de Anulación manual temporal si se modica
el punto de ajuste durante el proceso de recuper-
Auto Recuperación (continuación)
ación.
■ Si se cambia el sistema entre calor y frío
(automática o manualmente), el termostato
recalculará Auto Recuperación nuevamente. La
temperatura del punto de ajuste será cambiada a la
temperatura de confort opuesta del sistema si los
criterios de entrada de recuperación aún se cumplen.
De otro modo, el proceso de recuperación será cancelado y se regresará al modo de control del programa.
Bloqueo de teclado
El teclado puede bloquearse para evitar cambios no autorizados al termostato.
■ Para bloquear o desbloquear el teclado, presione y mantenga
presionadas AMBAS teclas durante 3 segundos. Cuando el
teclado está bloqueado, en la pantalla aparece KEY LOCK.
■ Todas las teclas están bloqueadas, pero cada vez que se
presiona una, aparecerá KEY LOCK en la pantalla con luz de
fondo durante 1 segundo.
o
Page 95

45
Luz de fondo (Luz nocturna INDIGLO®)
Su termostato tiene una lámpara electroluminiscente
que ilumina desde la parte posterior la pantalla para
facilitar la visualización en la oscuridad.
Cuando se presiona cualquier tecla la pantalla se
ilumina.
La pantalla permanecerá iluminada por 15 segundos
después de presionar la última tecla. Esto permite
que la luz siga encendida si necesita operar varias
teclas. El brillo de la luz de fondo disminuirá antes de
apagarse.
NOTA: La luz de fondo es alimentada por un
suministro de 24 VCA. No funcionará cuando haya una
interrupción de la alimentación de CA o si se retira el
termostato de la placa de pared.
Page 96

46
FUNCIONES DE SEGURIDAD
Advertencia de batería baja
Cuando se detecta que las baterías están bajas, la advertencia de batería baja se indica en la pantalla LCD con
“Low Batt” alternando con el día. Debe reemplazar las baterías con 2 baterías alcalinas AAA nuevas lo más pronto
posible.Tiene 30 segundos para cambiar las baterías antes de perder los ajustes.
Modo Error
Si el termostato no puede controlar su sistema debido
a un problema inesperado, entrará al modo Error.
En esta condición, el termostato destella “Error” y un
número de código en la pantalla y apaga su sistema.
Para corregir este problema, reemplace las baterías
con 2 baterías alcalinas AAA nuevas, aunque las
haya reemplazada recientemente. Luego, use un
sujetapapeles para presionar el botón RESET junto
al teclado numérico. Necesitará reprogramar su
termostato y conrmar la operación normal.
Si experimenta cualquier otro problema, llame al 1-888-
830-1326 de lunes a viernes de 7:00 a.m. a 7:00 p.m.
Hora del centro, y sábados de 8:00 a.m. a 5:00 p.m.
Hora del centro para asistencia técnica.
Page 97

47
LOCALIZACIÓN DE FALLAS
VISUALIZACIÓN CONFUSA O DUPLICADA)
(números sobre números)
NO HAY VISUALIZACIÓN
LA PANTALLA SE OSCURECE
EL PROGRAMA NO CAMBIA
AL AJUSTE DESEADO
AUTO / FAN NO SE ENCIENDE CORRECTAMENTE
EL VENTILADOR OPERA EN FORMA
CONTINUA
1. Retire la calcomanía transparente de Mylar.
1. Verique la conexión de los terminales. Se requiere un alambre
común (C) para la operación.
2. Verique las baterías y sus conexiones.
3. Presione el botón RESET con un aller pequeño y manténgalo pre-
sionado por dos segundos.
1. Reemplace las baterías
2. Ajuste el contraste de la pantalla LCD en el menú de opciones.
1. Verique que la hora esté ajustada correctamente a “AM” o “PM”.
2. Verique que el termostato no esté en los modos “HOLD” o “Home
Today”.
3. Verique el correcto ajuste de día.
4. Verique cualquier lectura o ponderación de un sensor remoto.
1. Mueva el selector HG/HE a la posición opuesta.
1. Verique el ajuste del ventilador. Puede estar en “ON” o en modo de
ventilador programable “PGMON”.
SoluciónProblema
Page 98

48
1. Verique que la tecla selectora del sistema esté en la posición correcta (“HEAT,” “COOL” o “AUTO”).
2. Busque “AUTO” en la pantalla. Si las temp. del programa Heat y Cool
son cercanas, el termostato requiere más cambio en temp. ambiente
antes de cambiar.
3. Puede haber un retardo de hasta 4 minutos antes de que el sistema
de calor o frío se encienda - espere y verique. (Retardo de protección de compresor)
4. Verique sus interruptores automáticos e interruptores para asegu-
rar que hay energía en el sistema.
5. Reemplace las baterías.
6. Asegúrese que la puerta del soplador de su horno esté cerrada correctamente.
7. Verique la posición del interruptor de la bomba de calor.
1. Presione el botón RESET una vez con un aller pequeño y
manténgalo presionado por dos segundos.
1. Reemplace la unidad.
1. Reemplace la unidad.
Solución (cont.)Problema (cont.)
LA CALEFACCIÓN O EL ENFRIAMIENTO NO ENCIENDE O NO
APAGA
VISUALIZACIÓN ERRÁTICA
SI LA UNIDAD SIGUE EN LA
POSICIÓN OFF
EL TERMOST. LEE PERMAN. “HI,”
“LO,” O “Error” LUEGO DE PRESIONAR RESET
Si experimenta cualquier otro problema, llame al 1-888-830-1326 de lunes a viernes de 7:00 a.m. a 7:00 p.m. Hora
del centro, y sábados de 8:00 a.m. a 5:00 p.m. Hora del centro para asistencia técnica.
Page 99

49
DIAGRAMAS DE CABLEADO
Y/O
W/B
Y1
G
Relé de
ventilador
Rc1
Rc
Alimentación
24 V Calor/Frío
Rh
Contactor
de frío
Relé o válvula
de calor
Terminales
de la placa
de pared
Puente
Selector
de sistema
HG/HE - SSHP
Y/O W/B
Y1
G
Relé de
ventilador
Rc1
Rc
Alimentación
24 V Calor
Rh
Relé o válvula
de calor
Contactor
de frío
Terminales
de la placa
de pared
Alimentación
24 V Frío
Selector
de sistema
HG/HE - SSHP
Y/O W/B
Y1
G
Relé de
ventilador
Rc1
Rc
Alimentación
24 V de bomba
de calor
Rh
Modo
Cool
(frío)
Válvula de
inversión
Terminales
de la placa
de pared
Puente
Modo
calor
O
Contactor de
compresor
Conectar a terminal correcto de
válvula de inversión. Vea la Tabla A
Selector
de sistema
HG/HE - SSHP
Y/O W/B
Y1
G
Relé o válvula
de calor
Rc1
Rc
24V o Alimentación
en milivoltios Calor
Rh
Terminales
de la placa
de pared
Puente
Selector
de sistema
HG/HE - SSHP
Y/O W/B
Y1
G
Relé de
ventilador
Rc1
Rc
Alimentación
24 V Calor
Rh
Relé o válvula
de calor
Terminales
de la placa
de pared
Puente
Selector
de sistema
HG/HE - SSHP
Y/O W/B
Y1
G
Relé de
ventilador
Rc1
Rc
Alimentación
24 V Frío
Rh
Relé o válvula
de calor
Terminales
de la placa
de pared
Puente
Selector
de sistema
HG/HE - SSHP
Sistema de
calor/frío de 4
alambres
Sistema de
calor/frío de 5
alambres
Sistema de
bomba de calor
de simple etapa
Sistema sólo
calor de 2
alambres
Sistema sólo
calor de 3
alambres
Sistema sólo
frío de 3 alam-
bres
Page 100

44008-02 09/04/2008
www.hunterfan.com
© 2007 Hunter Fan Co.
Hunter Fan Co.
2500 Frisco Avenue
Memphis, TN 38114
 Loading...