

Hunter Fan 30035, 30038, 30039, 30036 User Manual
©2008 Hunter Fan Co. 43051-01 06/06/2008
Form# 43051-01
20080814
©2008 Hunter Fan Co.
English
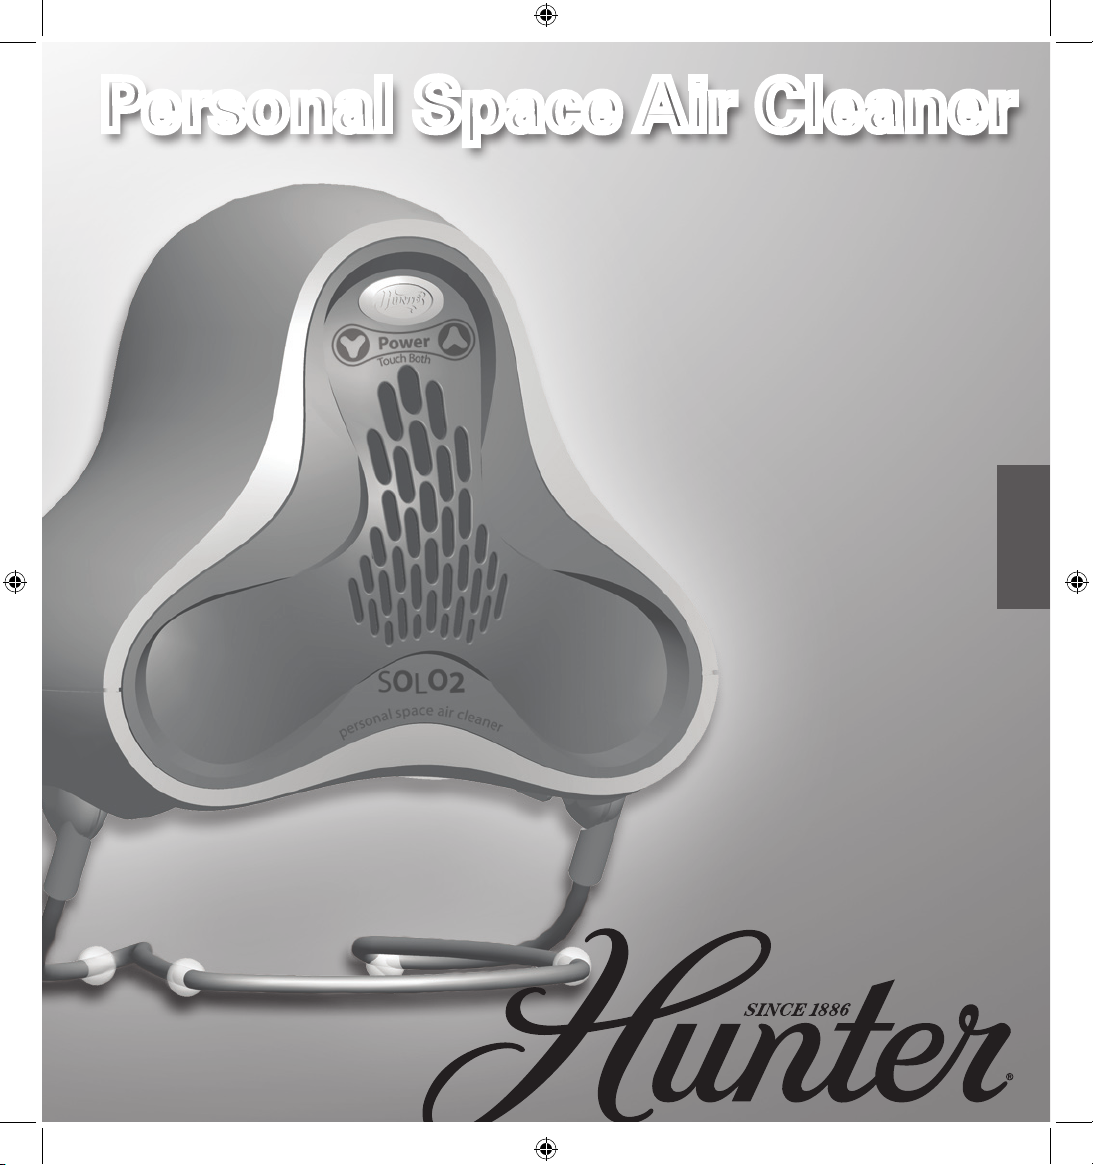
Personal Space Air CleanerPersonal Space Air CleanerPersonal Space Air Cleaner
Owner’s Guide
SO
L
O
2
MODELS
30035, 30036,
30038, 30039
©2008 Hunter Fan Co. 43051-01 20080814
2
TABLE OF CONTENTS
SAFETY INSTRUCTIONS
1. This Air Cleaner is designed for use on a flat level surface
and may not work properly otherwise. ALWAYS place the
SOLO2 on a firm level surface. ALWAYS ensure the
SOLO2 is at least six (6) inches away from walls or
computers, and 3 ft. from heat sources such as stoves,
radiators, or heaters.
IMPORTANT!
READ ALL INSTRUCTIONS
BEFORE USING THIS AIR CLEANER!
Thank you for purchasing the SOLO2 Personal Space Air
Cleaner from Hunter Fan Company. You have purchased our
latest development in portable air cleaning which has been
designed to improve the quality of the air that you breathe.
The following innovative features are included in your Hunter
Air Cleaner.
• Touch Sensitive Controls: Your SOLO2 Air Cleaner
utilizes a touch control interface for operation. The touch
sensitive pads on the front of the unit only need to be
touched with your finger tips to activate. Finger nails,
pens, or pencils will not activate the fields for the touch
control.
• GUI Interface: Convenience and control for your SOLO2
unit. The user interface on your computer allows you to
not only control your SOLO2, but has several programming
options for additional control and convenience.
• Switchable Power Supply: Your SOLO2 power
adapter meets with all State and Local guidelines for
power consumption. With your power adapter being
“Switchable”, your SOLO2 can be taken anywhere, even
overseas.
• High Particulate Efficiency: The HEPAtech® filter will
remove microscopic particles from the air that passes
through the filter. The back side of the HEPAtech® filter
includes a carbon filter which will also help illiminate
odors.
INTRODUCTION
2. Before using the SOLO2, extend the cord and inspect for
any signs of damage. DO NOT use the product if the cord
has been damaged.
3. ALWAYS UNPLUG the SOLO2 from your computer and
power source while it is being cleaned.
4. DO NOT immerse the SOLO2 in water at any time
because permanent damage will occur. To properly clean
your SOLO2, follow the instructions in the Maintenance
section of this manual (page 6).
6. This equipment should be inspected frequently and
collected dirt removed from it regularly to prevent
excessive accumulation that could result in flashover or
risk of fire.
Safety Instructions .................................................................2
Introduction ............................................................................2
Software Installation ..............................................................3
Windows Installation
Macintosh Installation
Air Filtration System ..............................................................3
How the HEPAtech® System Works
Solo2 Components .................................................................4
Computer Operation ..............................................................4
Launching the Control Console
Features and Settings
Adjusting the Solo
2 ................................................................................................................ 5
Manual Operation ..................................................................6
Touch Sensitive
Areas
On / Off Air Flow Control
Air Cleaner Maintenance .......................................................6
Cleaning
Changing the Filter
Troubleshooting .....................................................................7
Replacement Filters...............................................................8
Technical Support ..................................................................8
Warranty ................................................................................8
Other Home Comfort Products From Hunter .........................9
©2008 Hunter Fan Co. 43051-01 20080814
3
SOFTWARE INSTALLATION
Place the SOLO2 CD into your CD or DVD ROM drive. If
your computer is autoplay enabled, an installation window
will automatically pop up on your Windows desktop. Click the
ok button on the welcome screen and follow the on-screen
instructions to install your SOLO2 software.
Windows System Requirements
System: Windows 2000 / XP / Vista
Processor: Pentium 4 or better
Memory: 256MB RAM
Install Size: 10 MB
Windows Installation
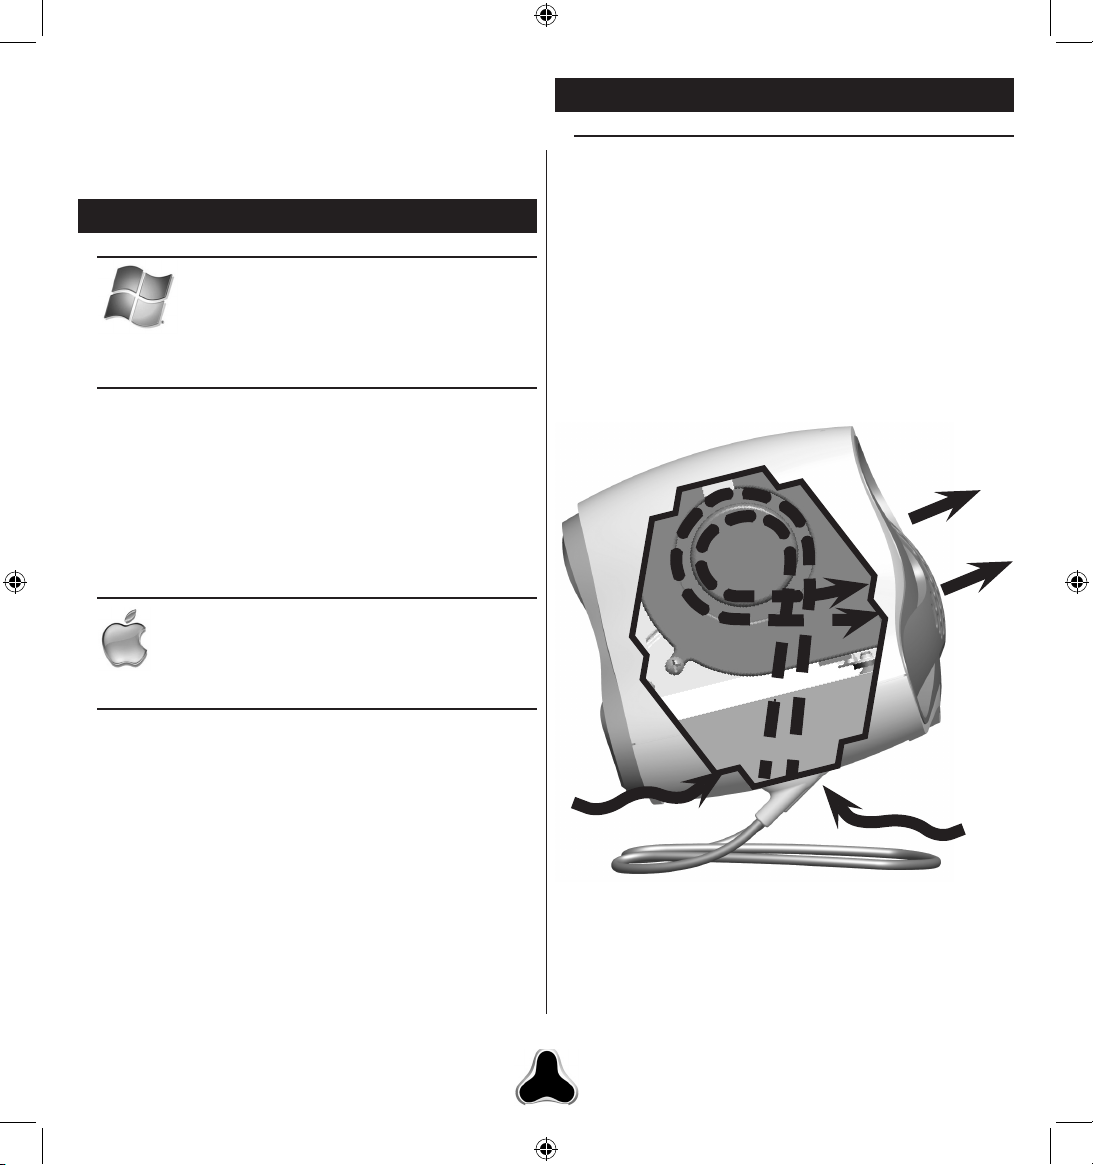
Air is pulled in through the bottom of the unit where particles
such as dust, dander, and pollen collect on the HEPAtech
®
filter, leaving the air emitted from the front of the SOLO2
clean and fresh for your personal space. Figure 1. The
carbon pre-filter on the front of the filter also helps to
eliminate odors from the air. The fan within the unit ensures
that air is pulled into the unit and forced through the filter to
provide fresh air wherever SOLO2 is setup. Refer to Figure
2. for parts breakdown.
AIR FILTRATION SYSTEM
How the HEPAtech® System Works
System: MAC OS10+
Memory: 256MB RAM
Install Size: 10 MB
Macintosh Installation: Load the SOLO2 CD into your Apple
computer and the CD will auto launch the software. Follow
the on screen prompts to load your SOLO2 file extensions to
your computer.
Apple System Requirements
Macintosh Installation
Figure 1.
• Filter Counters: Filter maintenance is critical to the
performance of the SOLO2. To help you determine when
to change the HEPAtech® filter, the software has a built in
life counter to keep track of the life remaining on the filter.
©2008 Hunter Fan Co. 43051-01 20080814
4
COMPUTER OPERATION
Launching the Control Console
To launch the Control Console for Windows, click your Start
button then choose All Programs, SOLO2 folder, SOLO2. On
an Apple Computer click the SOLO2 icon on your file dock or
browse to Hard Drive, Applications, SOLO2.
Features and Settings
Your SOLO2 Personal Air Cleaner has many useful features
you can take control of in the product software. Below is
a list of the features available through your software and
how to interact with them. Refer to Figure 3. for interface
description.
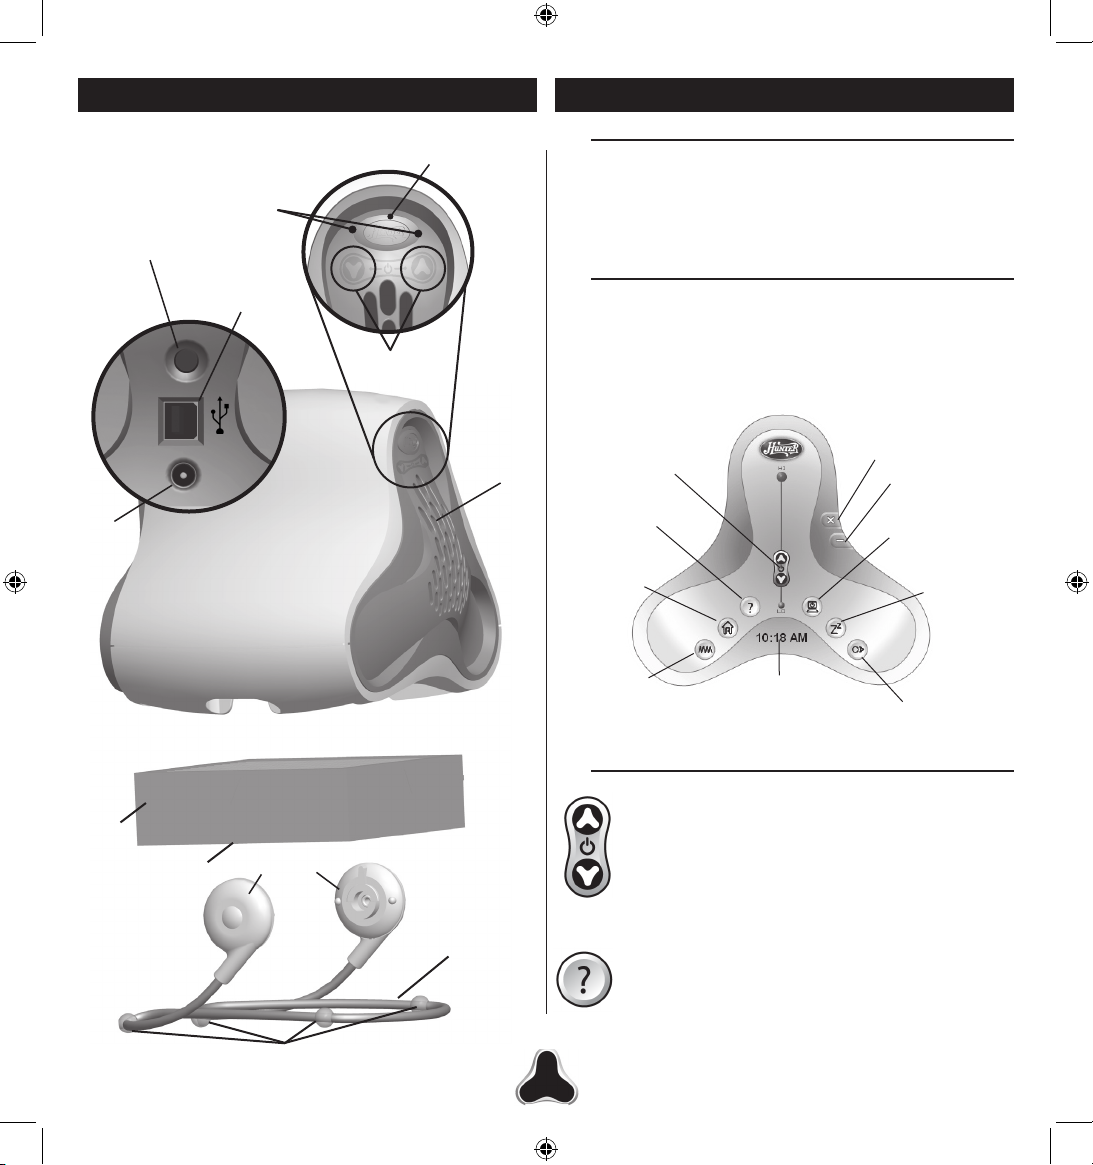
ON/OFF SPEED
CONTROL
HELP / FAQ
MENU
CLOSE
MINIMIZE
FILTER LIFE
INFO
HUNTER FAN
WEBSITE
COMPUTER
POWER SYNC
SLEEP MODE
ON/OFF
MY AIR TIME
COUNTER
TIME
Figure 3.
ON/OFF Speed Control: Gives you the ability to
turn the unit on and off as well as control the speed
of the fan in the unit. Double click the slider to turn
the unit on or off. Click and hold the slider to move it
up and down for speed control. Once your speed is
set, your SOLO2 unit will remember your last setting
when it is turned back on.
Help Menu: Offers a drop down menu with relevant
operational and troubleshooting questions.
(internet connection required)
FI LT ER
SOLO2 COMPONENTS
WIRE BASE
Figure 2.
HINGES
CARBON PRE-FILTER
USB
12VDC
500mA
FILTER RESET
USB PLUG
AC
ADAPTER
PLUG
FILTER CHECK
(AMBER LED)
TOUCH
CONTROLS
TOUCH INDICATOR
(BLUE LED)
EXHAUST
VENT
WIRE FRAME
WIRE STABILIZERS
FI LT ER
©2008 Hunter Fan Co. 43051-01 20080814
5
Hunter Fan Web Site: Provides a convenient link to
www.hunterfan.com for technical support, ordering
information, and owner’s manual information.
(internet connection required)
Filter Life Counter: Filter life is critical to the proper
operation of your Personal Air Cleaner. The
SOLO2 software is equipped with life counters to let
you know when your filter needs to be checked.
Every 2800 hours of running time your SOLO2
software will flash amber on the Hunter Logo and
Check Filter button. The Hunter Logo on the front
of the SOLO
2
unit will also flash amber. Figure 2.
Hold the Filter Reset button on the back of the unit
in for 3 seconds to reset the filter counter and turn
off the amber LED or press the Filter Reset button
under Filter. Although filter life is dependant on your
environment, this will give you a good indication
of when you should check your filter. (See page 8
for filter ordering or click the “filter” button on your
software interface to order over the web.)
Computer Power Sync: Allows you to set your
SOLO2 to turn on/off with your computer. When
selected, whenever your computer is started, the
SOLO2 will start as well. Selecting again will require
you to start the unit either through the interface or
the touch controls on the product.
Sleep Mode ON/OFF: selecting this mode, the unit
will shut down when your windows system goes into
sleep mode and start back up when sleep mode is
cancelled. When selected again, the SOLO2 will
continue to run even when windows is in sleep
mode.
My Air Time: Your Solo2 Personal Air Cleaner
software gives you the ability to record “programs”
you can run at any given time. Click the My Air
Time button and choose Record from the drop
down panel. You may record a maximum of 24
hours running time. During this time frame, you may
move the fan slider freely to adjust output during
your recording session. When you have finished
your recording session, Select Record to end. Then
select the days of the week you wish the program to
run.
NOTE: While recording your programs, your My
Air Time button will be red and “Recording” will
show at the bottom of the interface. When your
unit is not recording a program but does have a
program active, that programs time frame will be
displayed at the bottom of the SOLO2 interface
and your My Air Time button will be blue.
Example: You start recording your program at
5PM, change your speed to high at 7PM then
move the speed control down to low at 10PM.
At 11PM you end your program and select all
weekdays as your program cycle. Your SOLO2
will come on during the week at 5PM and run till
11PM, adjust the fan speed to high at 7PM and
low at 10PM.
Time: Displays the current computer time.
NOTES: When any feature on the SOLO2 is
active, that button on your computer’s interface
will be blue.
To close any features drop down panel, click the
triangle at the bottom of the drop down panel.
Features and Settings (Cont.)
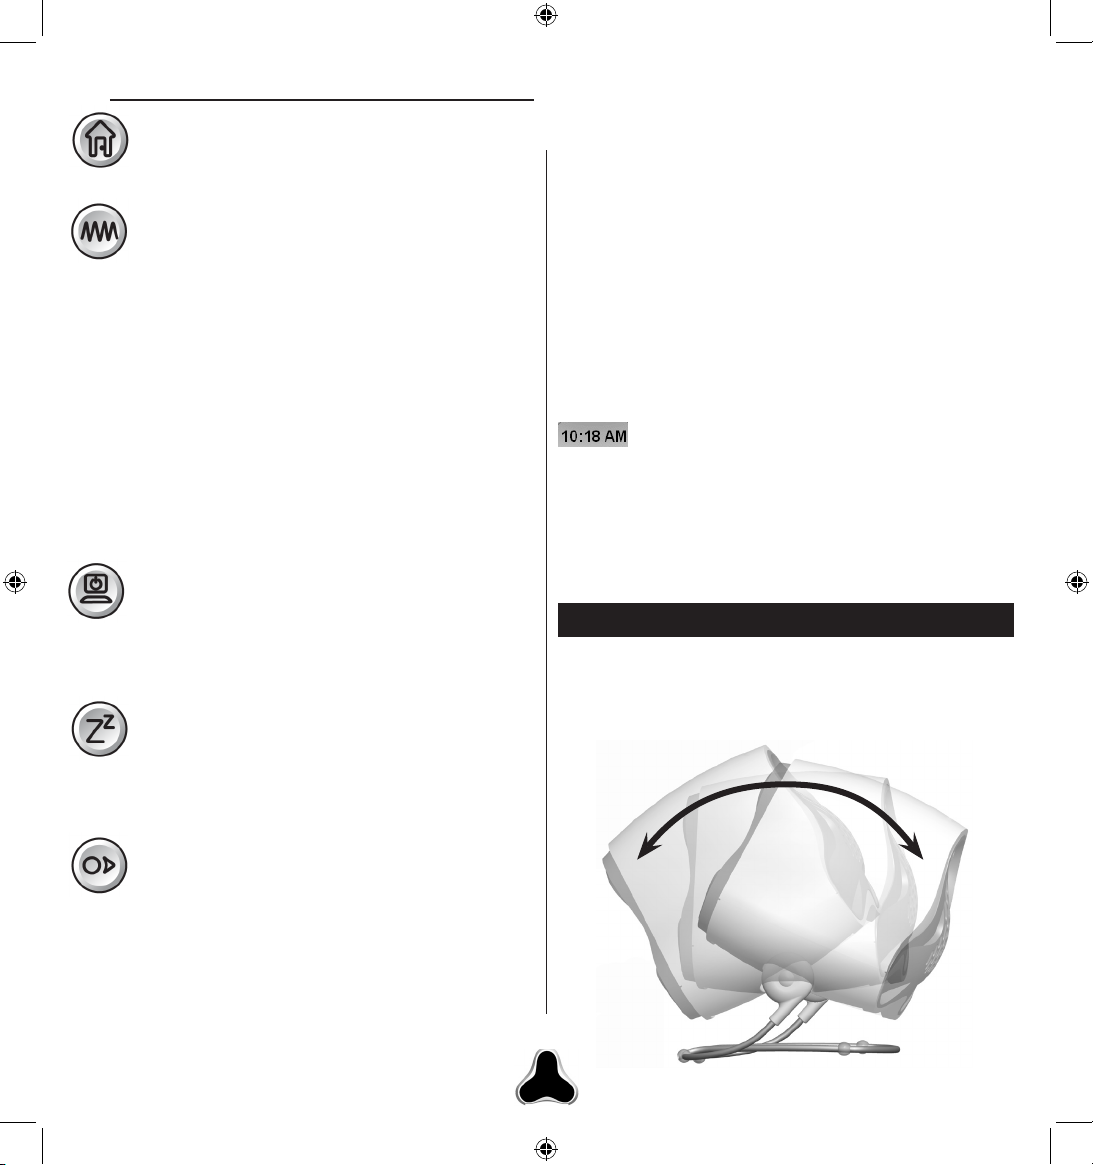
ADJUSTING THE SOLO
2
Now that the SOLO2 is functional, you will need to adjust
it to direct the air flow towards you. Holding the top of the
SOLO2, tilt the unit back or forth until you find the angle that
will provide the best comfort level. Figure 4.
Figure 4.
©2008 Hunter Fan Co. 43051-01 20080814
6
AIR CLEANER MAINTENANCE
Proper maintenance of your Hunter Air Cleaner will help
ensure years of trouble free service. Follow these steps to
properly maintain your air purifier:
1. Approximately every 90 days, the outside of the unit
should be cleaned with a soft, damp cloth.
2. Follow the instructions for Changing the Filter on this
page to determine when and how to replace the filter.
NOTES:
• The air cleaner must be unplugged from your computer
and the power outlet during the cleaning process.
• Be sure the unit is completely dry before plugging it in and
using.
• Never immerse the SOLO2 in water or use harsh chemicals
to clean.
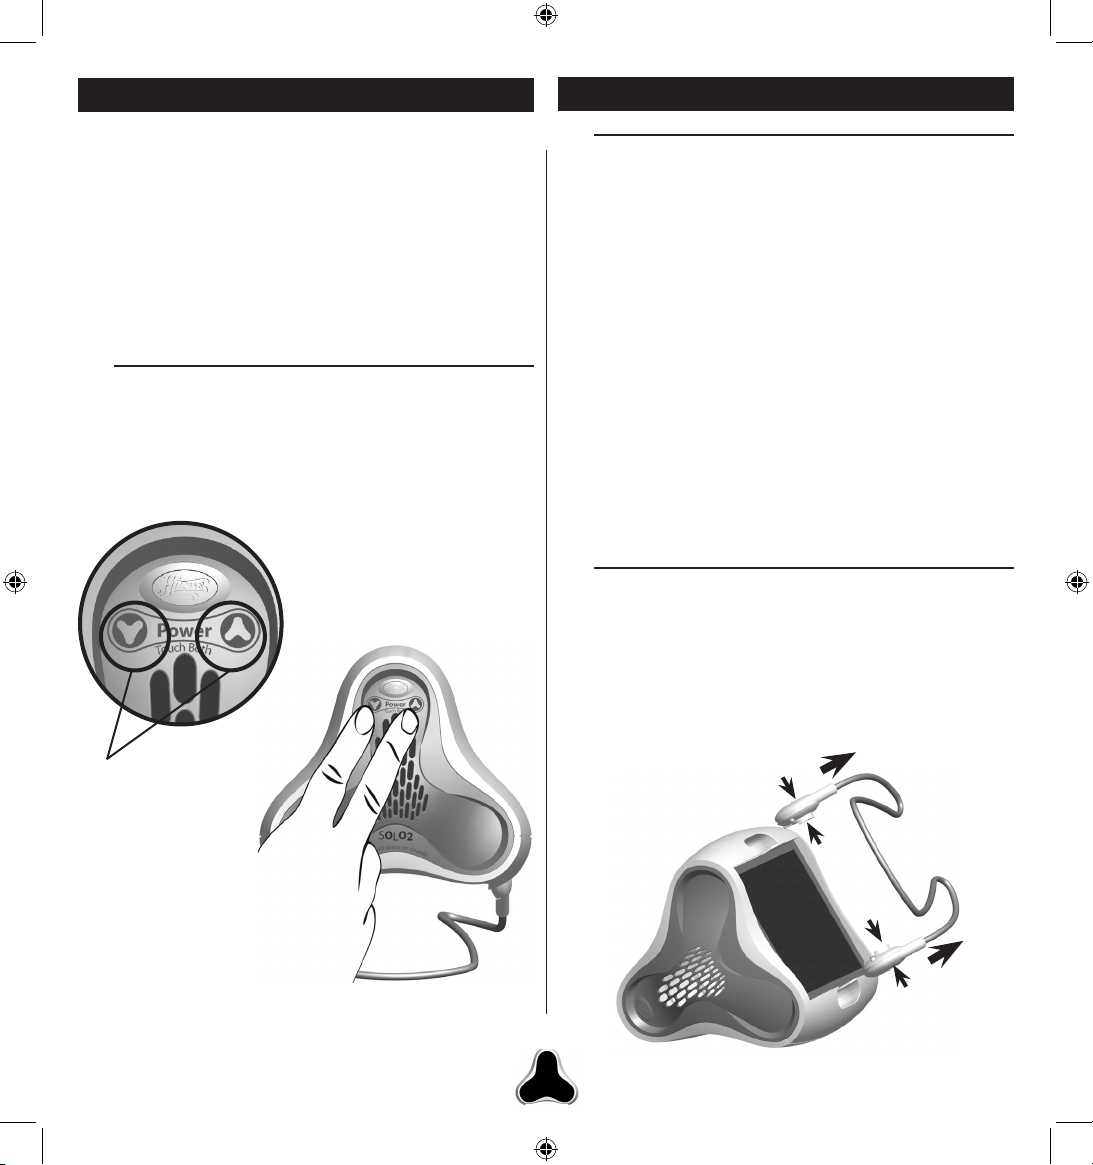
Cleaning
Changing the Filter
1. To change the filter in your SOLO2, turn the unit off,
unplug the power cord, and USB cable.
2. Turn the SOLO2 on it’s side and remove the wire base
from the bottom of the unit by compressing the hinges on
either side of the wire base (a) and gently pulling each
out of the bottom of the SOLO2 unit (b). Figure 6.
Figure 5.
Touch
Sensitive
Areas
Figure 6.
a. Pinch
b. Pull to remove
MANUAL OPERATION
Your SOLO2 Air Cleaner has the ability to work separately
from your computer. Turn the SOLO2 off, unplug your USB
cable from SOLO2, and unplug the Power Adapter from the
wall. You may now move the SOLO2 to anywhere in your
home or office.
NOTE: When using the touch panel on the front of the
SOLO2, you must use your fingertips to operate the controls.
Finger nails, pens, pencils, etc will not work to activate or
control the unit.
On / Off Air Flow Control
To turn your SOLO2 unit on, press the up and down touch
pads on the unit simultaneously. Figure 5. Once on, press
the up or down arrow pads to adjust the fan speed. To turn
your SOLO2 unit back off, press the up and down touch pads
simultaneously again.
 Loading...