

Page 1
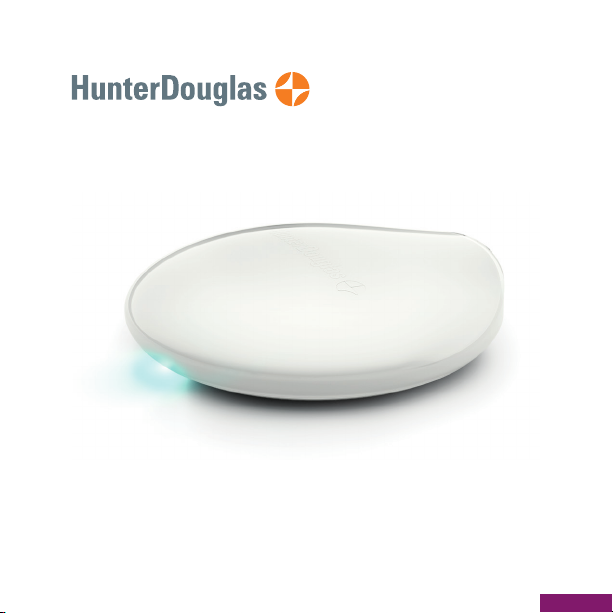
PowerView® Hub
QUICK START GUIDE
Page 2

When pro mpted, scan or type the
Accessory Setup C ode below.
© 2018 Hunter Douglas. All rights reserved. All trademarks used herein
are the property of HunterDouglas or their respective owners. 5/18
Table of Contents
Kit Contents . . . . . . . . . . . . . . . . . 3
Connections . . . . . . . . . . . . . . . . . 5
Home Automation Integration . . . . . . .13
Troubleshooting . . . . . . . . . . . . . . . 15
Page 3
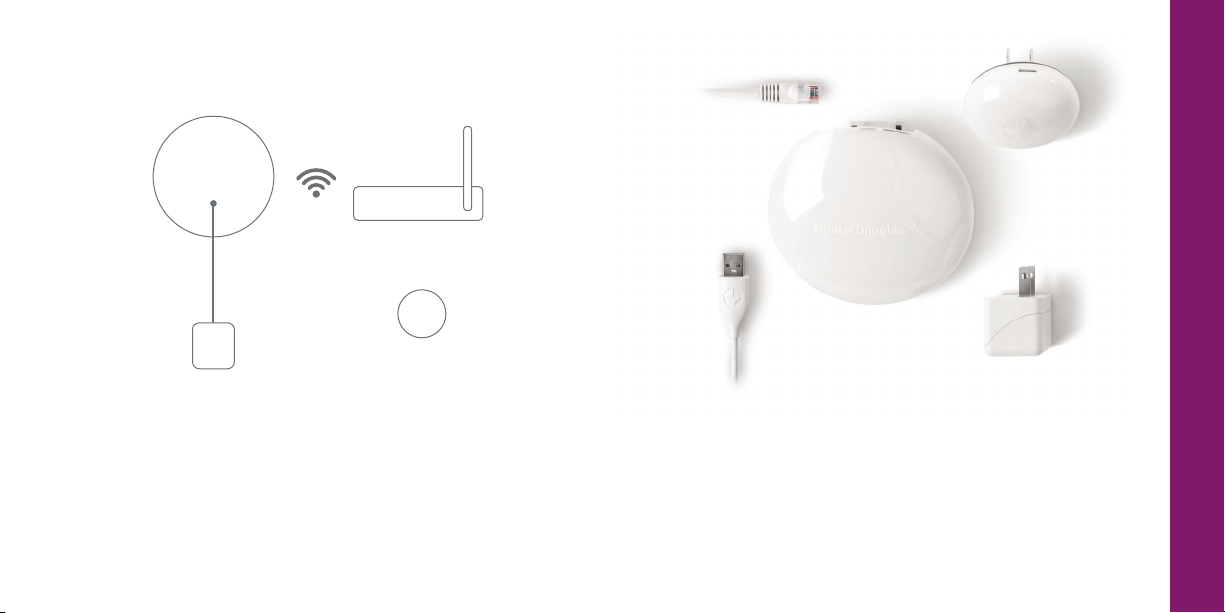
PowerView Hub
KIT CONTENTS
Wireless Router
Repeater
Power Supply
The PowerView® Hub interfaces with the PowerView® App to allow
control of Hunter Douglas motorized window coverings from mobile
devices. The Hub can also integrate with home automation systems
via IP or cloud-to-cloud integration.
Note: Do not exp ose the PowerV iew Hub to direc t sunlight.
E.
A.
D.
A. PowerView
B. PowerView
C. USB Power Supply
Note: Download the PowerView® App. T he App is available for Appl e® iOS and
Android™ mobile devices.
Apple i s a trademark of A pple Inc., re gistered in the U. S. and other co untries.
Androi d is a trademark of Google Inc .
®
Hub USB
®
Repeater
B.
C.
D. USB Power Supply Cable
E. Ethernet Cable (Optional)
3
Page 4
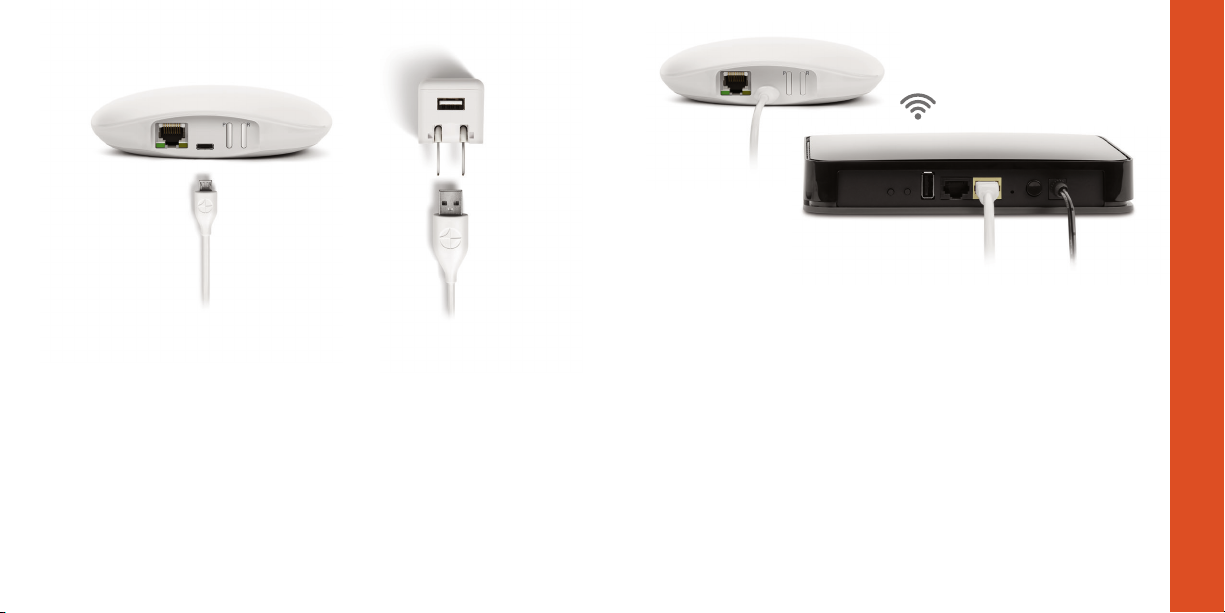
Connect power to Hub.
1. Connect one end of the USB power cable to the USB power
supply.
2. Plug the USB power supply into an AC outlet or power strip.
3. Plug the other end of the USB power cable into the power port
on the back of the Hub.
Note: Durin g the boot-u p process, the H ub’s LED will display diffe rent behavior to
visuall y communicate its status. Please refer to the Powe rView
on page 14 of this guide for referen ce on different L ED behavior. Do n ot interrupt the
Hub boot -up proces s until the Hub is re ady to connec t to a home network or join a
PowerV iew Shade Net work.
®
LED Fee dback char t
Connect Hub to Internet connec ted wireless router.
Connect using an active WiFi network:
Wait for the Hub LED to turn solid MAGENTA. This indicates
the Hub is ready to connect to a WiFi network. Open the
PowerView® App on your mobile device and follow the on-screen
instructions to properly connect to an active WiFi network. Once
connected to a WiFi network, the Hub will install a firmware
update and reboot. The Hub will blink AMBER when it is ready
to join a PowerView Shade Network.
Connect using an Ether net cab le (optional)
Connec t the Ethernet c able from the Hu b to an open LA N port on you r router.
The Hub w ill install a fir mware update an d reboot. The H ub will blink AMBER
when it is re ady to join a Power View Shade N etwork.
Note: If connecting the Hub to the home network via Ethernet, connect the
Hub to the rou ter, before connec ting the Hub to pow er.
CONNECTIONS
5
Page 5
CONNECTIONS
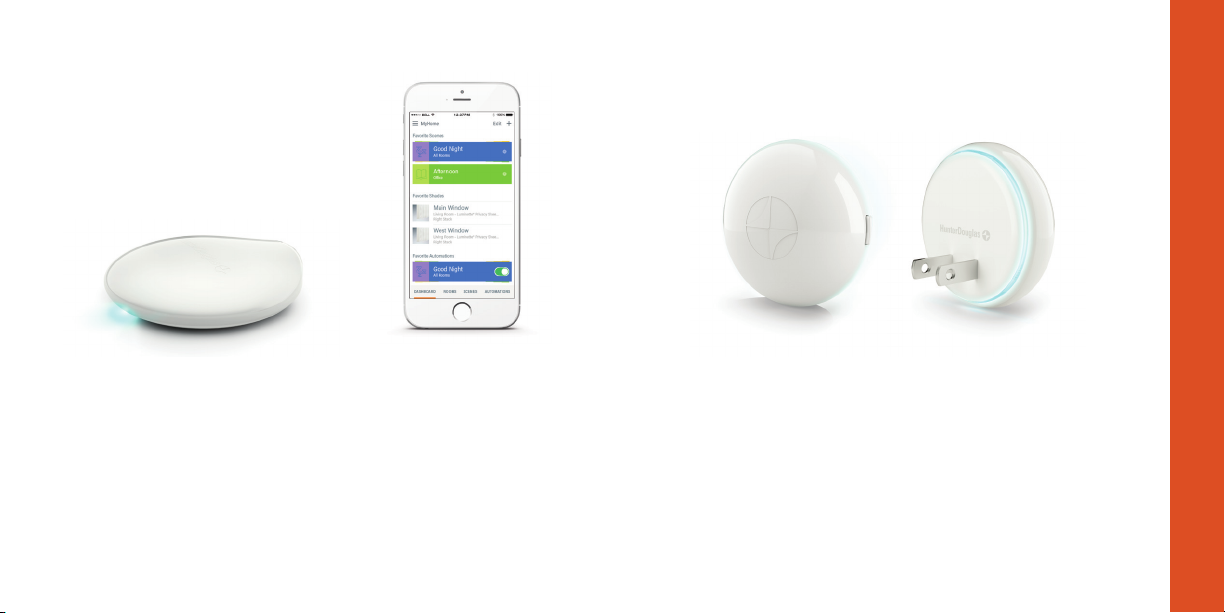
Pairing your Hub with an existing
PowerView® Shade Network.
If you have already established a PowerView® Shade Net work
between a PowerView® Remote and PowerView shades, you should
pair the Hub to the same network. To pair the Hub to the same
network, open the PowerView® App and follow the prompts. The
Hub LED will turn to solid BLUE, once the Hub has been paired to
the PowerView Shade Network.
Distribute Repeater(s) as needed.
Note: D o not expose the P owerView® Repeate r to direct sunlig ht.
7
Page 6
CONNECTIONS
Transfer your hub data (if needed).
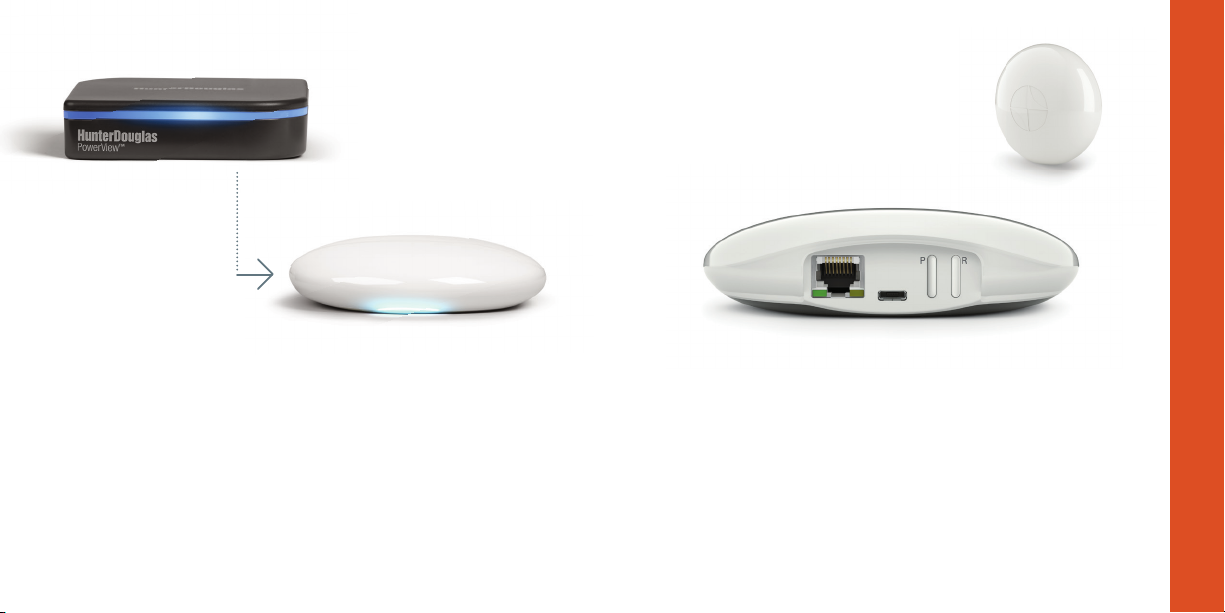
If you have a Gen 1 Hub (above left) on your PowerView® Shade
Network, follow in-app instructions to transfer Hub data to the
new PowerView® Hub.
Test signal to Repeater(s).
Press and hold the P button on the back of the PowerView® Hub.
The light on each Repeater should blink BLUE. If the Repeater
does not blink BLUE, move the Repeater closer to the Hub or
pair the Repeater to the correct PowerView® Shade Net work.
Other controls on the back of the Hub include the R button
which power cycles the Hub and erases all Hub data when
pressed and held for 6 seconds.
9
Page 7
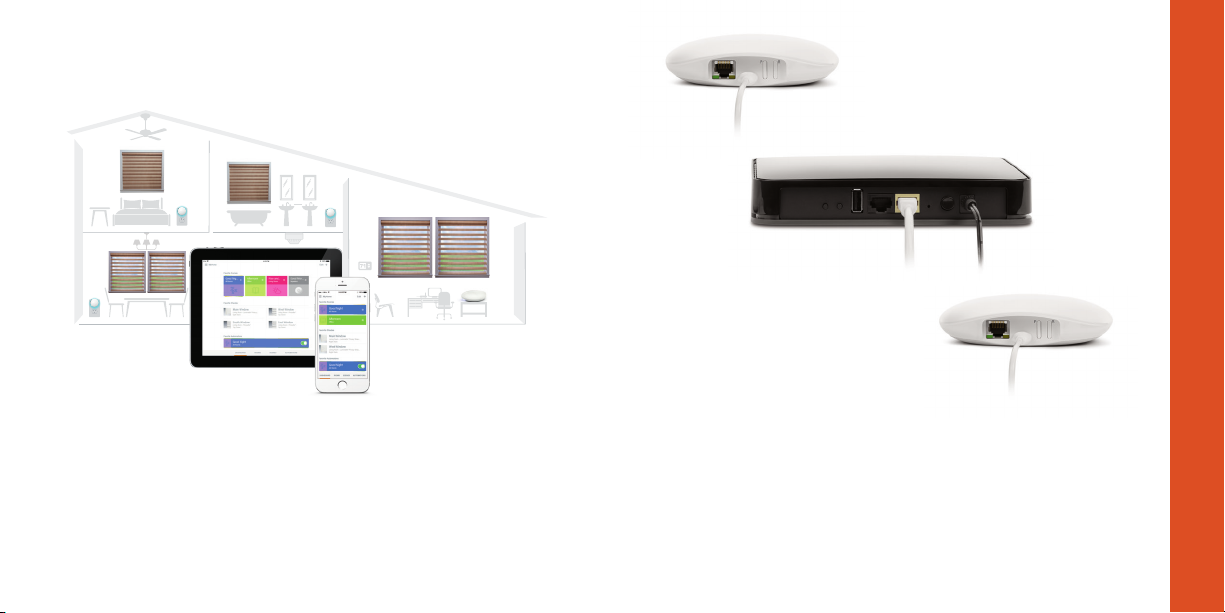
You’re ready to use the PowerView® App.
For more information about the setup and use of the
PowerView® App, please visit:
hunterdouglas.com/operating-systems/motorized/
powerview -motorization
Configuring multiple Hubs on one
PowerView® Network (Optional).
After a primary Hub has been paired to the PowerView®
Network, each subsequent Hub paired to the same network
will automatically be configured as a secondar y Hub (network
access point). Please follow in -app instructions to install
secondary Hubs.
Note: T he LED of seco ndary Hubs will display solid GREEN, o nce paired
to the Power View Netwo rk.
CONNECTIONS
11
Page 8

PowerView® Motorization integrates with a variety
of leading third-par ty control systems and devices.
HOME AUTOMATION INTEGRATION
To learn more about integration, please contact
your local Hunter Douglas dealer or visit:
hunterdouglas.com/operating-systems/motorized/
powerview-motorization/works-with
13
Page 9
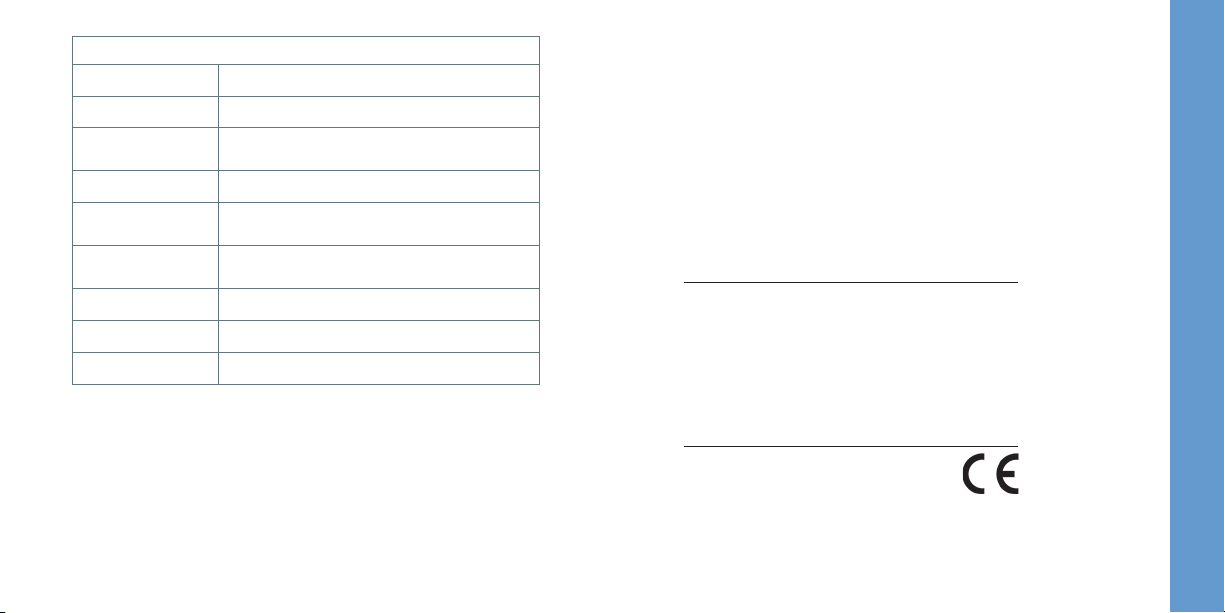
PowerView® LED Feedback
Blinking AQUA Hub is booting up.
Solid AMBER Hub is updating firmware from the Internet.
Blinking AMBER
Hub is ready to join a PowerView
Shade Network.
®
Solid BLUE Connected, normal operation.
Solid MAGENTA
Flashing BLUE
Hub is ready to be connected to a WiFi
Network.
Hub is Transmitting command(s) to the
PowerView Shade Network.
Blank Hub is not connected to power.
Solid GREEN Hub is configured as a secondar y Hub.
Solid RED Hub does not have an IP address.
Problem: Cannot connec t to the Hub with the PowerView® App.
• Check for blinking AMBER, solid BLUE or solid M AGENTA on the
front of the Hub. (See LED Feedback chart above.)
• Check the connection between the Hub and wireless router and
that the router is operating properly.
• Check that the mobile device is on the same network as
wireless router.
U.S. Radio Frequency FCC Compliance
This device complies with Part 15 of the FCC Rules. Operation is subject to the following two conditions:
(1) This device may not cause harmful interference, and
(2) This device must accept any interference received, including interference that may cause
undesired operation.
This equipment has been tested and found to comply with the limits for a Class B digital device,
pursuant to Part 15 of the FCC Rules. These limits are designed to provide reasonable protection
against harmful interference in a residential installation. This equipment generates, uses and can
radiate radio frequency energy and, if not installed and used in accordance with the instructions, may
cause harmful interference to radio communications. However, there is no guarantee that interference
will not occur in a particular installation. If this equipment does cause harmful interference to radio
or television reception, which can be determined by turning the equipment off and on, the user is
encouraged to try to correct the interference by one or more of the following measures:
• Reorient or relocate the receiving antenna.
• Increase the separation between the equipment and receiver.
• Connect the equipment into an outlet on a circuit different from that to which the receiver is connected.
• Consult the dealer or an experienced radio/TV technician for help.
Any changes or modifications not expressly approved by the party responsible for compliance could void
the user’s authority to operate the equipment.
This equipment complies with FCC radiation exposure limits set forth for an uncontrolled environment
and meets the FCC radio frequency (RF) Exposure Guidelines. This equipment should be installed
and operated keeping the radiator at least 20cm or more away from person’s body. RF Exposure
requirements are met when installed in mobile equipment. This module cannot be installed in portable
equipment without further testing and a change to FCC’s grant of authorization.
Industry Canada
Under Industry Canada regulations, this radio transmitter may only operate using an antenna of a type
and maximum (or lesser) gain approved for the transmitter by Industry Canada. To reduce potential
radio interference to other users, the antenna type and its gain should be so chosen that the equivalent
isotropically radiated power (e.i.r.p.) is not more than that necessary for successful communication.
This device complies with Industry Canada licence-exempt RSS standard(s). Operation is subject to the
following two conditions: (1) this device may not cause interference, and (2) this device must accept any
interference, including interference that may cause undesired operation of the device.
Class B Digital Device Notice
This Class B digital apparatus complies with Canadian ICES-003, RSS-Gen and RSS-210.
CAN ICES-3 (B)/NMB-3(B)
This equipment complies with IC radiation exposure limits set forth for an uncontrolled environment
and meets RSS-102 of the IC radio frequency (RF) Exposure rules. This equipment should be installed
and operated keeping the radiator at least 20cm or more away from person’s body.
European Conformity
We, the undersigned,
Hunter Douglas Window Fashions
One Duette Way, Broomfield, CO 80020, USA
Hunter Douglas Europe B.V.
Piekstraat 2, 3071 EL Rotterdam, The Netherlands
certify and declare under our sole responsibility that the PowerView
requirements of the EMC directive 2004/108/EC and R&TTE directive 1999/5/EC.
A copy of the original declaration of conformity may be found at
www.hunterdouglas.com/RFcertifications.
®
Hub conforms with the essential
TROUBLESHOOTING
15
 Loading...