

HunterDouglas Designer Roller, Designer Screen Shades Installation Operation Care
Installation • Operation • Care
Designer Roller and
Designer Screen Shades
Standard and Cassette Cordless Lifting System

CONTENTS
Getting Started:
Product Views ................................................................................................... 1
Tools and Fasteners Needed .............................................................................. 3
Installation Overview ......................................................................................... 3
Installation:
Mounting Types and Window Terminology ........................................................... 4
Mount the Installation Brackets — Inside or Ceiling Mount for Standard Shades ... 4
Mount the Installation Brackets — Outside Mount for Standard Shades ............... 5
Mount the Installation Brackets — Inside or Ceiling Mount for Cordless Cassette .. 6
Mount the Installation Brackets — Outside Mount for Cordless Cassette .............. 7
Install the Shade ............................................................................................... 8
Install the Shade Pull ......................................................................................... 9
Attach the Standard Hold-Down Brackets (Optional) ............................................ 9
Attach the Magnetic Hold-Down Brackets (Optional) ......................................... 10
Operation:
Operate the Shade .......................................................................................... 11
Shade Adjustment ........................................................................................... 11
Troubleshooting .............................................................................................. 13
Care:
Removing the Shade (If Necessary) .................................................................. 14
Cleaning Procedures ....................................................................................... 14
Questions?
Call the Hunter Douglas Customer Information Center at
1-888-501-8364.
© 2012 Hunter Douglas. All trademarks used herein are the property of Hunter Douglas.
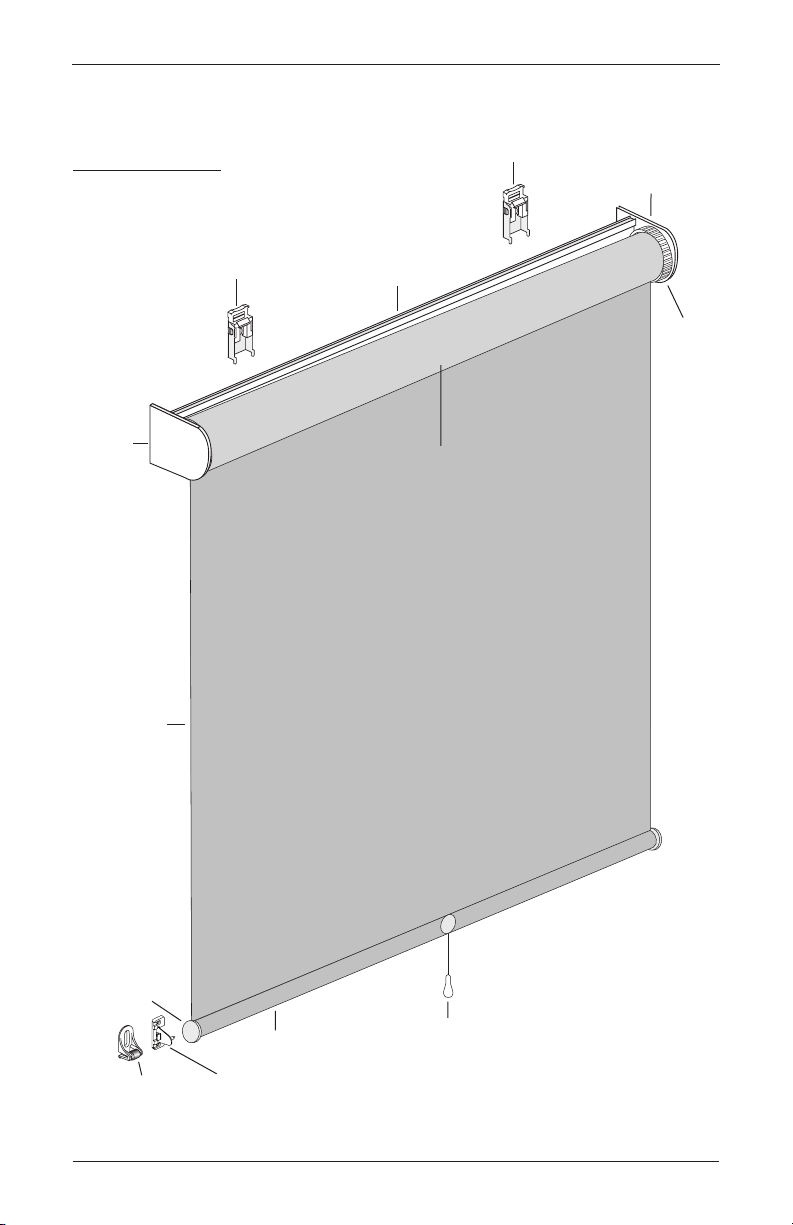
Product Views
Bracket
Bracket
Mounting Profile
Left Side
Holder
Standard Cordless
Fabric
Bottom Bar
End Cap
Bottom Bar
Right Side
Holder
Stop
Controller
Shade Pull
(Not Attached
when Delivered)
Roller Tube
Magnetic
Hold-Down
Bracket
(Optional)
Standard
Hold-Down
Bracket
(Optional)
GETTING STARTED
Standard Cordless
1
GETTING STARTED
Product Views
Cassette Cordless
Cassette
Fabric
Bracket
Bracket
Stop
Controller
Bottom Bar
End Cap
Magnetic
Hold-Down
Bracket
(Optional)
2
Standard
Hold-Down
Bracket
(Optional)
Bottom Bar
Shade Pull
(Not Attached
when Delivered)
GETTING STARTED
Cassette Cordless Shades
Thank you for purchasing Hunter Douglas Designer Roller and Designer Sceen Shades. With
proper installation, operation, and care, your new shades will provide years of beauty and
performance. Please thoroughly review this instruction booklet before beginning the installation.
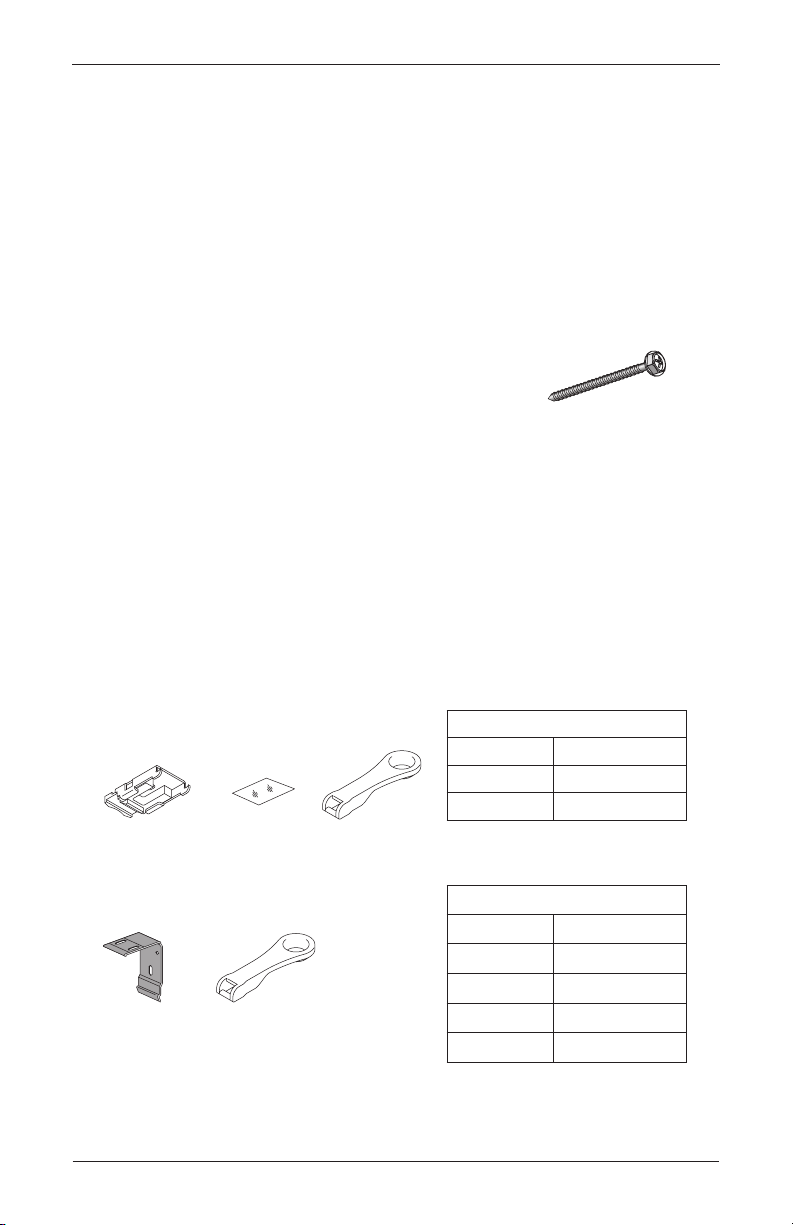
Tools and Fasteners Needed
■ Flat blade and Phillips screwdriver ■ Level (laser level is recommended)
■ Measuring tape and pencil ■ Power drill, 3∕32" drill bit and a
1
∕4" hex driver
In addition, you will need fasteners designed to work with your specific mounting surface(s).
■ #6 Hex Head Screws (Provided). Two 11∕2" screws are
provided per installation bracket.
■ Drywall Anchor (Not Provided). Use drywall anchors when
mounting into drywall.
#6 x 1½"
Hex Head Screw
(Provided)
Installation Overview
■ Your order will include installation brackets specific to your shade.
➤ The number of installation brackets required varies with shade width, as shown in
the tables below.
CAUTION: Keep the “Do not remove until installation” paper wrap in place, until the
shade is completely installed. These instructions will remind you when to remove
the wrap.
Standard Cordless Shades
Standard
Installation Bracket
Installation Bracket
Temporary
Positioning Tape
WinderCassette
Winder
Standard Cordless Shades
Shade Width Brackets Required
12" – 55" 2
1
/8" – 79" 3
55
Cassette Cordless Shades
Shade Width Brackets Required
Up to 36" 2
1
/8" – 72" 3
36
1
/8" – 90" 4
72
1
/8" – 120" 5
90
3
INSTALLATION
Molding
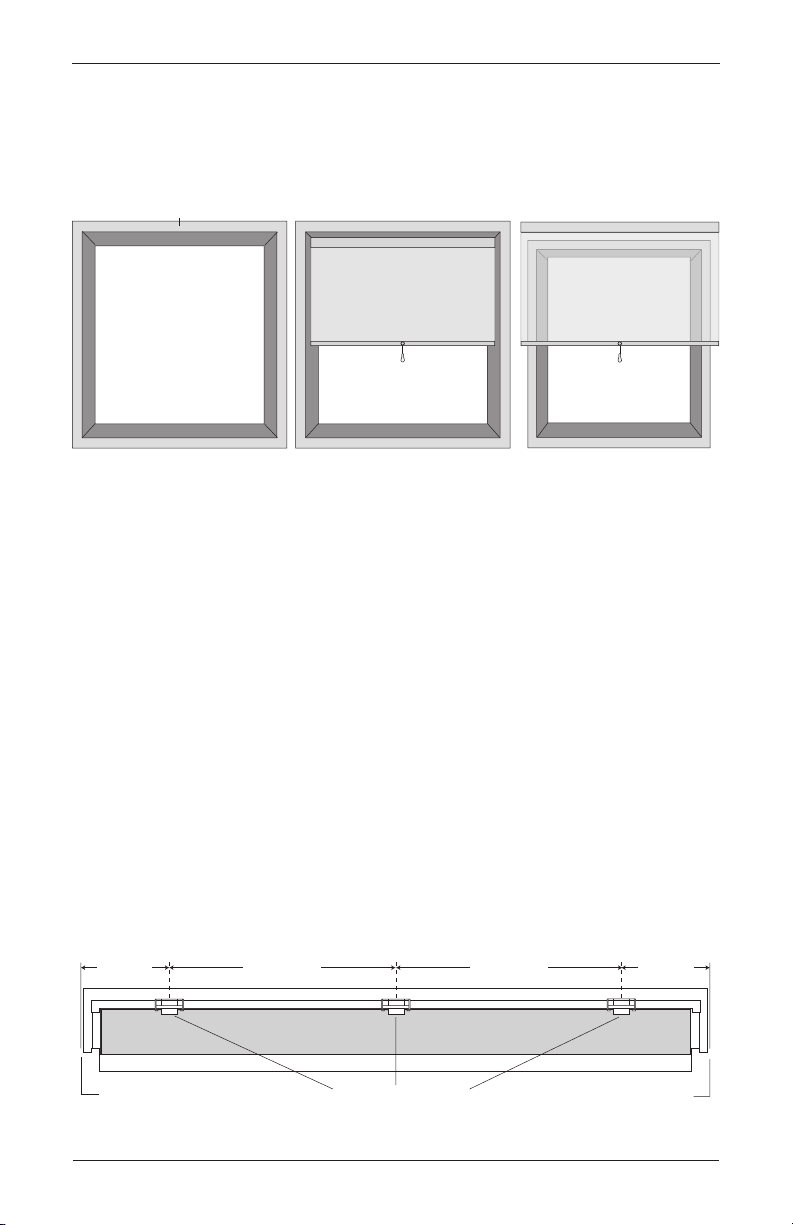
Mounting Types and Window Terminology
If the installation brackets are mounted correctly, the rest of the installation process will follow
easily. To prepare for this important first step, review the mounting types and basic window
terminology illustrated below.
Head Jamb
Jamb Jamb
Collectively, the sill and
jambs are called the
“window casement.”
Sill
Inside Mount
Shade fits within
window opening.
■ Refer to the appropriate page below based on your order:
➤ Inside or Ceiling Mount for Standard Shades, see below.
➤ Outside Mount for Standard Shades, see page 5.
➤ Inside or Ceiling Mount for Cassette Shades, see page 6.
➤ Outside Mount for Cassette Shades, see page 7.
Outside Mount
Shade mounts outside
window opening.
Mount the Installation Brackets — Inside or Ceiling Mount for
Standard Shades
IMPORTANT: To ensure the bracket is mounted properly, the white tab should be toward
the room.
■ Mark 11/2" – 3" from each jamb for bracket location.
➤ If more than two installation brackets came with your order, space additional bracket(s)
evenly between the two end brackets and mark their location. Mount into wood
whenever possible.
11/2" – 3"
4
Jamb
Space Evenly Space Evenly
Installation Brackets
11/2" – 3"
Jamb
 Loading...