

Page 1
XC Hybrid
ACTIVE
SENSOR BYPASS
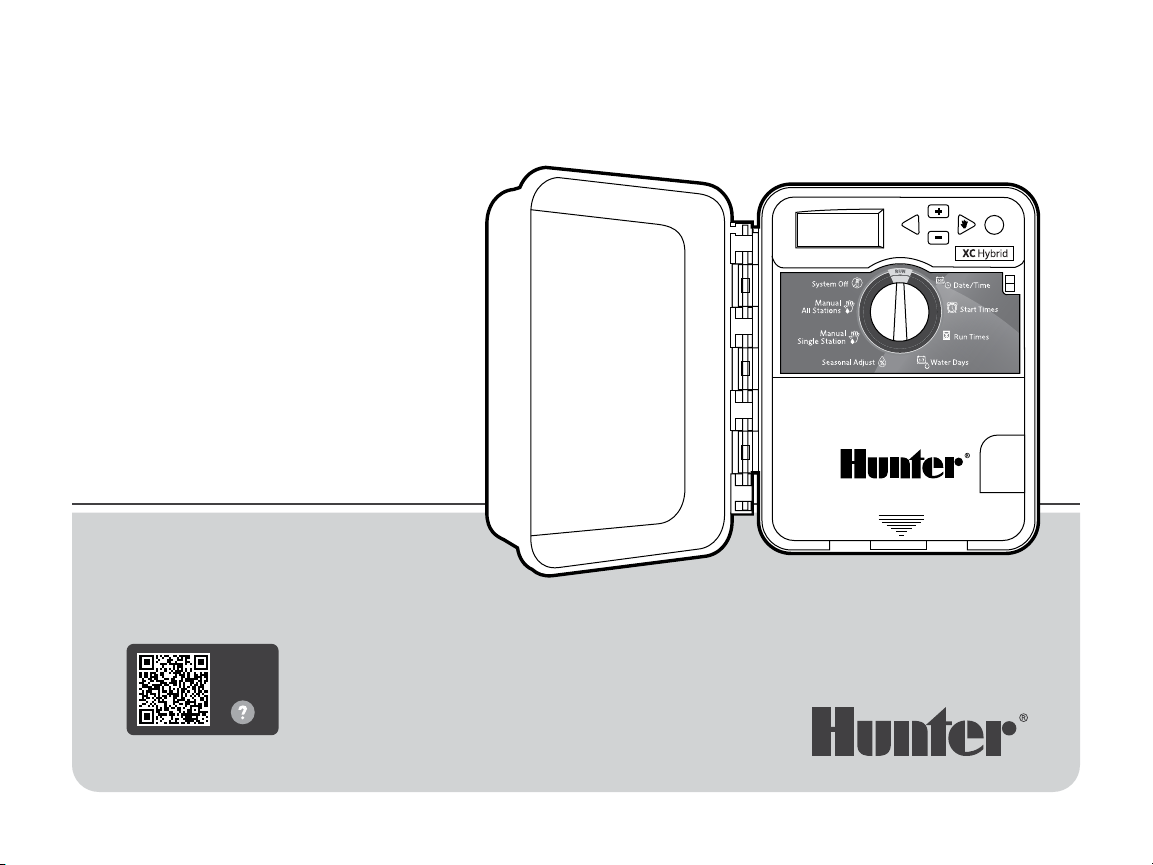
QUICK START GUIDE
XC Hybrid
Irrigation Controller Programming Guide
SCAN
for help
PRG
https://hunter.help/XCHybrid
Page 2
ACTIVE
SENSOR BYPASS
XC Hybrid Components ....................................................................3
Battery Installation and Solenoid Wiring ........................................ 4
Battery Power ................................................................................. 4
Setting the Current Date and Time ..................................................5
Setting a Program Start Time ..........................................................5
Eliminating a Program Start Time ....................................................5
Setting a Station Run Time ..............................................................5
Setting Water Days ......................................................................... 6
Selecting Odd or Even Days to Water.............................................. 6
Selecting Interval Watering ............................................................ 6
Seasonal Adjust ............................................................................... 6
Manual Single Station ..................................................................... 6
Manual Program ............................................................................. 6
One-Touch Manual Start and Advance............................................ 6
Test Program ....................................................................................7
System O ........................................................................................7
Programmable Rain O ...................................................................7
Sensor Bypass .................................................................................7
Full Reset .........................................................................................7
Troubleshooting .............................................................................. 8
Hidden Features and Optional Power ............................................. 9
Installing the Transformer (optional) ............................................. 9
Compliance Information ................................................................. 10
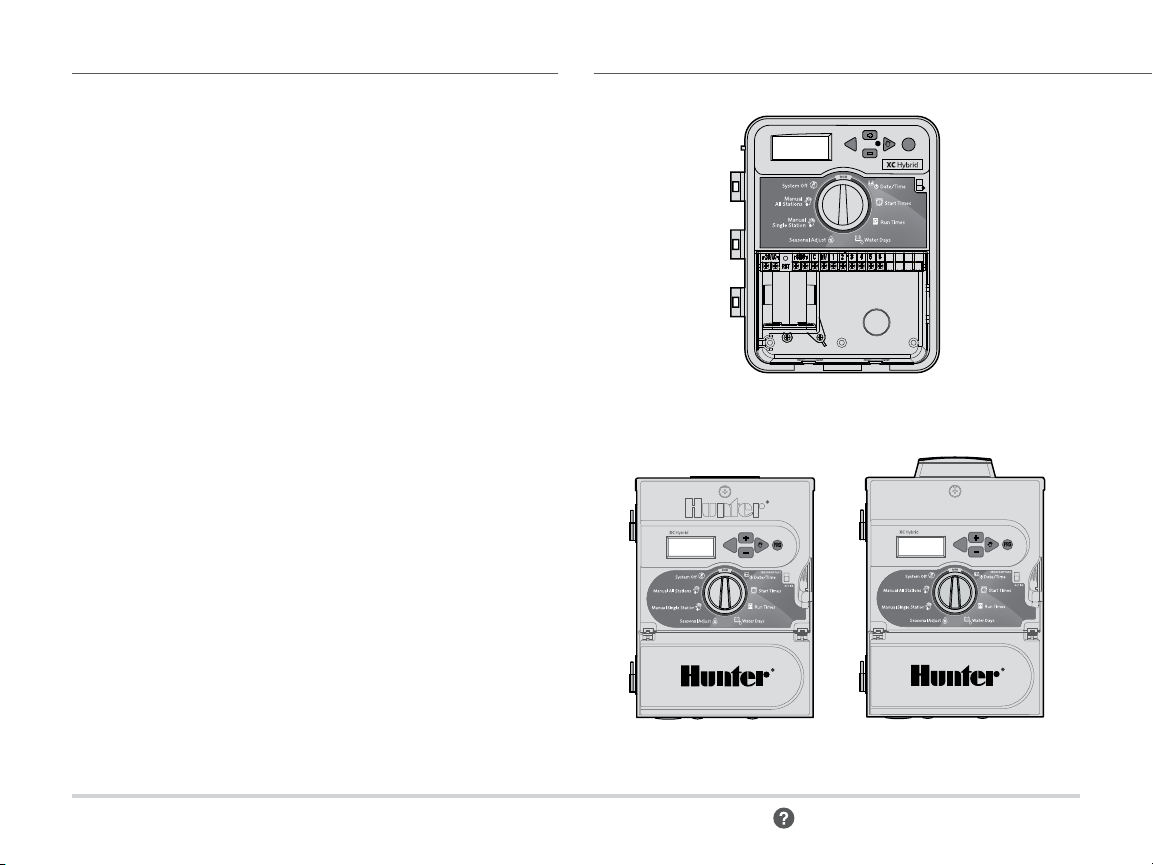
PRG
Plastic model
Stainless steel model
Stainless steel
solar model
2 https://hunter.help/XCHybrid
Page 3
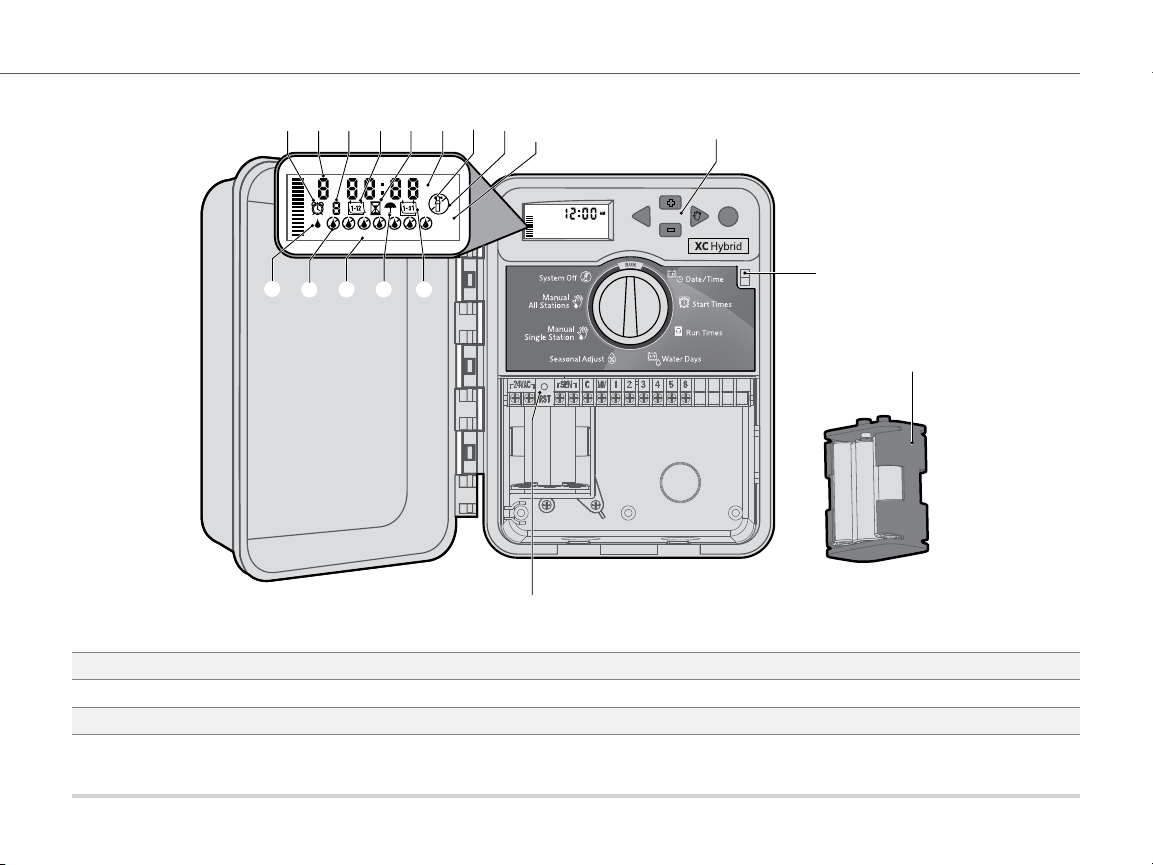
XC Hybrid Components
ACTIVE
SENSOR BYPASS
① ② ③ ⑤ ⑥ ➐⑨➑④
MO TU WE TH FR SA SUODD
AM PM
%24HR
EVEN
2,4...30
1,3...29
Control buttons
PRG
Sensor bypass switch
⑪⑪ ⑫⑫ ⑬⑬⑩⑩ ⑭⑭
Battery holder
Reset button
① Start Time Symbol ⑤ Run Time Symbol ⑨ Odd/Even/Interval Days ⑫ Day of Week
② Station Number ⑥ Seasonal Adjust (%) ⑩ Active Water Day ⑬ Rain Sensor Active/Bypass
③ Program Indicator ⑦ Station Running ⑪ Non-Active Water Day ⑭ Day Symbol
④ Month Symbol ⑧ Sprinkler O Days
Built on Innovation® 3
Page 4

Battery Installation and Solenoid Wiring
PRG
ACTIVE
SENSOR BYPASS
BATTERY POWER
The XC Hybrid plastic model operates with six AA alkaline batteries,
and the XC Hybrid stainless steel model uses six alkaline C
batteries. A battery carrier is supplied with the controller. Insert the
batteries as indicated on the battery carrier.
• To install the battery on the XC Hybrid plastic model, connect
the battery connector inside the access compartment to the
battery carrier. Then insert the carrier into the lower le side of
the controller as shown.
• To access the battery carrier on the XC Hybrid stainless steel
model, remove the screw in the top center of the controller and
tilt the facepack down as shown.
• The XC Hybrid stainless steel solar model comes out of the box
ready to install and program. Place the controller in full sunlight.
Turn the dial to the RUN position to activate solar charging.
XC HYBRID WIRE SIZING CHART
Wire Size Distance from Valve to Controller
2
18 AWG (0.8 mm
16 AWG (1.3 mm
14 AWG (2.1 mm
12 AWG (3.3 mm
) 550' (168 m)
2
) 870' (265 m)
2
) 1,380' (421 m)
2
) 2,200' (671 m)
Plastic model
Stainless steel
model
Stainless steel solar
model
4 https://hunter.help/XCHybrid
Page 5

Setup
SETTING THE CURRENT DATE AND TIME
1. Turn the dial to the DATE /TIME position.
2. The current year will be ashing. Use the + and – buttons to
change the year. Push the ► button to proceed to setting
the month.
3. The month will be ashing. Use the + and – buttons to change
the month. Press the ► button to proceed to the day setting.
4. The day will be ashing. Use the + and – buttons to change
the day of the month. Press the ► button to proceed to the
time setting.
5. The time will be displayed. Use the + and – buttons to select AM,
PM, or 24 HR to display all times in 24–hour mode.
6. Press the ► button to move to hours. Use the + and – buttons to
change the hour shown on the display.
7. Press the ► button to move on to minutes. Use the + and –
buttons to change the minutes shown in the display.
8. Turn the dial to the RUN position. Date and time are now set.
IMPORTANT: The controller dial must be in the RUN position to
enable automatic irrigation.
SETTING A PROGRAM START TIME
1. Turn the dial to the START TIMES position.
2. Use the PRG button to select program (A, B, or C).
3. Use the + and – buttons to change the Star t Time. The Start
Time advances in 15-minute increments.
4. Press the ► button to add another Start Time, or PRG button
to set a Start Time for the next program.
5. Turn the dial to the RUN position.
ELIMINATING A PROGRAM START TIME
1. Turn the dial to the START TIMES position.
2. Press the right arrow to locate the desired STAR T TI ME.
3. Press the + or – buttons to reach OFF located between 11:45 PM
and 12:00 AM.
4. Press the PRG button to view/edit additional programs.
Repeat steps 1–3 if necessary.
SETTING A STATION RUN TIME
1. Turn the dial to the RUN TIMES position.
2. Use the PRG button to select program (A, B, or C).
3. Use the + and – buttons to change the station run time on the
display. You can set station run times from 1 minute to 4 hours.
4. Press the ► button to advance to the next station.
5. Repeat for each station.
Built on Innovation® 5
Page 6

Setup
SETTING WATER DAYS
1. Turn the dial to the WATER DAYS position.
2. The display will show the last program selected (A, B, or C).
Switch to another program by pressing the PRG button.
3. The pointer at the bottom of the screen shows the currently
selected day of the week. Press + or – to select days for
watering or no water .
SELECTING ODD OR EVEN DAYS TO WATER
1. Press ► past all days of week to ODD or EVEN.
2. Press + to select or – to cancel ODD or EVEN.
SELECTING INTERVAL WATERING
1. Press ► past ODD and EVEN to INT.
2. Press + or – to set interval days.
3. Press + or – to set number of days to next watering.
NOTE: To exit interval mode, press the ► or ◄ repeatedly until
specic days of the week appear.
SEASONAL ADJUST
Changes all run times by a percentage for local conditions.
1. Turn the dial to Seasonal Adjustment.
2. Press + or – to change from 10% to 150% of original run times.
MANUAL SINGLE STATION
1. Turn dial to Manual Single Station position.
2. Press ► to select station. Use + or – to set manual run time.
3. Turn dial to RUN position to begin immediately.
MANUAL PROGRAM
1. Turn dial to RUN position.
2. Press and hold ► button for three seconds.
3. Press PRG to select program.
4. Release button for two seconds. Program will begin.
5. Press ► to advance to another station within the Program.
ONETOUCH MANUAL START AND ADVANCE
1. Hold down the right button for two seconds.
2. Press the PRG button to select program.
3. Press the le or right button to select a station.
4. Press the + or – button to change the run time.
5. Aer a two-second pause, the program will begin. At any time
during manual cycle, use the le or right buttons to navigate
from station to station manually.
6 https://hunter.help/XCHybrid
Page 7

Setup
TEST PROGRAM
Runs all stations for a test run time.
1. Press and hold PRG for three seconds.
2. Station 1 appears. Press + or – to enter run time.
3. Wait two seconds; each station will run for test run time.
SYSTEM OFF
Turn dial to system OFF position. No watering will occur in
this dial position.
PROGRAMMABLE RAIN OFF
1. Turn dial to system OFF position and wait for OFF to
stop blinking.
2. Press + or – to set the number of days to remain o.
3. Turn dial back to RUN position. Display will show days o
remaining, and watering will resume when O days reach
0. To cancel Rain O, turn dial to OFF, wait until OFF stops
blinking, then turn dial back to RUN.
SENSOR BYPASS
Overrides sensor shutdown to allow watering.
1. Move sensor BYPASS switch to BYPASS position.
2. Return switch to ACTIVE to allow sensor shutdown.
SCHEDULING TIPS
• A program is a watering schedule that includes Start
Time(s), Run Time(s), and Water Day(s).
• A Start Time is the time of day the Stations in the
Program start watering.
• A Run Time is the watering length per Station (zone).
• One Start Time is needed to run the entire program.
FULL RESET
1. Press and hold down the –, ►, and PRG buttons simultaneously.
2. Press and release the RESET button on the right side of
the controller.
3. When DONE appears on the LCD, release the –, ► and
PRG buttons. The display should now show 12:00 AM.
The memory has now been cleared and the controller may
be reprogrammed.
NOTE: The reset button is located inside the wiring compartment.
Built on Innovation® 7
Page 8

Troubleshooting
Display Possible Cause Solutions
DISPLAY SHOWS “ERR”
WITH NUMBER
DISPLAY SHOWS P “ERR” Short in P/MV wiring or solenoid. Check wiring and solenoid at Master Valve. Check specications for
DISPLAY SHOWS
WATERING BUT
NO WATERING IS
OCCURRING
Short in eld wiring or bad solenoid. Check eld wiring and valve solenoid. Press any button to clear
ERR message.
Pump Start Relay.
Problem in eld wiring. Problem
with solenoids. No water pressure
to system.
Check eld wiring (voltmeter). Check valve solenoid(s). Verify water
source to open.
FROZEN OR GARBLED
DI SPLAY
RAIN SENSOR DOES NOT
STOP IRRIGATION
CONTROLLER SEEMS TO
WATER CONTINUOUSLY
DISPLAY SHOWS “BATT” Batteries are low. Replace batteries.
Power surge occurred. Reset controller.
Jumper wire is not removed. Sensor
switch in BY PASS position.
Too many START TIMES. One Start Time operates all stations in a program. Remove
Remove jumper wire on SEN terminals. Set sensor switch to
Active position.
unnecessary Start Times.
8 https://hunter.help/XCHybrid
Page 9

Hidden Features and Optional Power
Feature Where Found Description
PROGRAMMABLE
SENSOR OVERRIDE
DELAY BETWEEN
STAT IONS
CLIK-DELAY Hold + and turn to OFF. Set number of days for watering to remain o, aer sensor has been
TOTAL RUN TIME Turn to RUN TIMES. Press ◄
EASY RETRIEVE Hold + and PRG to Save. Hold –
TOTAL RESE T Hold PRG and press RESET
QUICKCHECK™ +, –, ◄, ► together, then +. Checks all stations for wiring problems.
Hold – and turn to START TIMES. Sets individual stations to ignore sensor shutdowns. Select stations with
◄ or ►, use +/– to change to OFF to ignore sensor.
Hold – and turn to RUN TIMES. Inserts a delay (seconds or minutes) between stations in a run time for
slow valves or recharging tanks.
activated and restored.
Calculates and displays total of all run times in a program Start Time.
when station 1 is shown, PRG to
select other programs.
Saves all program information to restore at a later time.
and PRG to Restore.
Returns to factory defaults and erases watering schedule and settings.
button.
INSTALLING THE TRANSFORMER OPTIONAL
The XC Hybrid is designed to operate on batteries or a permanent
plug-in transformer, if AC power is available. A 24 VAC output plugin transformer can be attached to the two 24 VAC terminals inside
the lower access area.
NOTE: This does not change the DC voltage output from the station
terminals. Existing DC solenoids should remain installed.
TRANSFORMER MODELS
VOLTAG E IN/OUT VERSION PART NUMBER
120/24 VAC U.S. 526500
23 0/24 VAC European 545700
240/24 VAC Australian 545500
Built on Innovation® 9
Page 10

Compliance Information
This equ ipment has be en tested and fo und to comply wit h the limits for a C lass B
digita l device pursu ant to Part 15 of th e FCC Rules. Thes e limits are desi gned to provide
reason able protect ion against ha rmful inter ference in a resi dential insta llation. This
equipm ent generate s, uses, and can r adiate radio f requency en ergy and, if n ot installed
and use d in accordance wi th the instruc tions, may cau se harmful in terference to r adio
commun ications. How ever, there is no guar antee that inte rference wil l not occur in a
part icular instal lation. If this eq uipment doe s cause harmfu l interferen ce to radio or
televis ion reception, w hich can be dete rmined by turn ing the equipm ent o and on, you
are enco uraged to try to c orrect the in terference b y taking one or mo re of the followi ng
measures:
• Reo rient or reloc ate the receivin g antenna.
• Inc rease the sepa ration betw een the equipm ent and receive r.
• Con nect the equ ipment into an ou tlet on a circuit d ierent from t hat of which the
receiver is connecte d.
• Con sult the dealer o r an experien ced radio/T V technician fo r help.
This dev ice complies wit h part 15 of FCC ru les. Operati on is subject to t he following t wo
conditions:
1. This dev ice may not cause h armful inter ference.
2. This dev ice must accept an y interferen ce received, in cluding inter ference that
may caus e undesired op eration.
Change s or modicat ions not expres sly approved by H unter Industr ies could void th e
user’s au thority to op erate this devi ce. If necessar y, con sult a represen tative of Hunte r
Industries. or an experienced radio/television technician for additional suggestions.
The fol lowing statem ent is applica ble when irrig ation control ler is used with a ccessory
Wi-Fi de vice: To satisfy FCC RF E xposure req uirements fo r mobile and bas e station
transm ission devices , a separation d istance of 7.9" (20 cm) or mor e should be main tained
betwe en the antenna o f this device and p ersons durin g operation.
To ensure comp liance, opera tion at closer th an this distan ce is not recommen ded. The
antenn a(s) use d for this transmi tter must not b e co-located o r operating in co njunction
with any o ther antenna or t ransmitte r.
Certicate of Conformity to European Directives
Hunter I ndustries de clares that the i rrigation con troller compl ies with the
standards of the European Directives of “electromagnetic compatibility”
(2014/ 30/EU), “low volt age” (2014/35 /EU), and “radi o equipment ”
(2014/53/EU).
Innovation, Science and Economic Development Canada (ISED) Compliance Notice
This dev ice contains lic ense-exempt tr ansmitter (s)/receiv er(s) tha t comply with
Innova tion, Science a nd Economic Dev elopment Ca nada’s license-e xempt RSS(s).
Opera tion is subjec t to the followin g two conditio ns:
1. This dev ice may not cause i nterferen ce, and
2. This dev ice must accept an y interferen ce, including i nterferenc e that may cause
undesi red operatio n of the device.
Le prése nt appareil es t conforme aux C NR d’Innovat ion, Sciences e t Développem ent
économique Canada applicables aux appareils radio exempts de licence. L’exploitation
est autorisée aux deux conditions suivantes:
1. L’ap pareil ne doit pa s produire de br ouillage, et
2. L’utilisateur de l ’app areil doit acce pter tout broui llage radioél ectrique su bi, même
si le brou illage est susc eptible d’en comp romettre le fo nctionnem ent.
HUNTER INDUSTRIES | Built on Innovation
®
1940 Diamond Street, San Marcos, CA 92078 USA
Learn more. Visit hunterindustries.com
© 2020 Hunte r Industries™. Hun ter, the Hu nter logo, and all ot her
tradema rks are proper ty of Hunter Indus tries, registe red in the U.S.
and other co untries.
Please recycle.
RC-174 US 11/20
 Loading...