How it Works
Log In / Sign Up
Buy Points
How it Works
FAQ
Contact Us
Questions and Suggestions
Users
Hunter
Loading...
#
22875
22876
22877
23252
4
23262
3
23263
23264
23277
2
23289
3
23298
3
23307
23347
3
23348
23412
23413
23417
23419
23483
23488
4
23562
2
23566
2
23568
4
23683
4
23685
3
23688
3
23697
2
23702
23710
5
23714
23721
23722
2
23723
3
23763
23781
4
23798
23802
23803
23827
23849
2
23856
23857
3
23860
4
23866
4
23867
23868
23869
3
23871
4
23898
3
23902
2
23903
3
23908
3
23909
23915
3
23921
2
23923
23930
23933
23934
23935
23947
2
23948
2
23949
3
23951
23952
2
23957
2
23958
3
23963
23964
23965
5
23970
3
23971
23972
2
23979
2
23980
2
23989
23990
23991
23992
23993
23994
23995
24852
3
25109
3
25120
2
25268
25271
2
25481
25511
3
25517
3
25518
4
25521
25522
4
25578
2
25579
2
25582
2
25583
2
25587
2
23252 44
23855 52
2
23949 48
Loading...
Loading...
Nothing found
23902
Owner's Manual
17 pgs
2.76 Mb
0
Owner's Manual [es]
17 pgs
2.84 Mb
0
Table of contents
Loading...
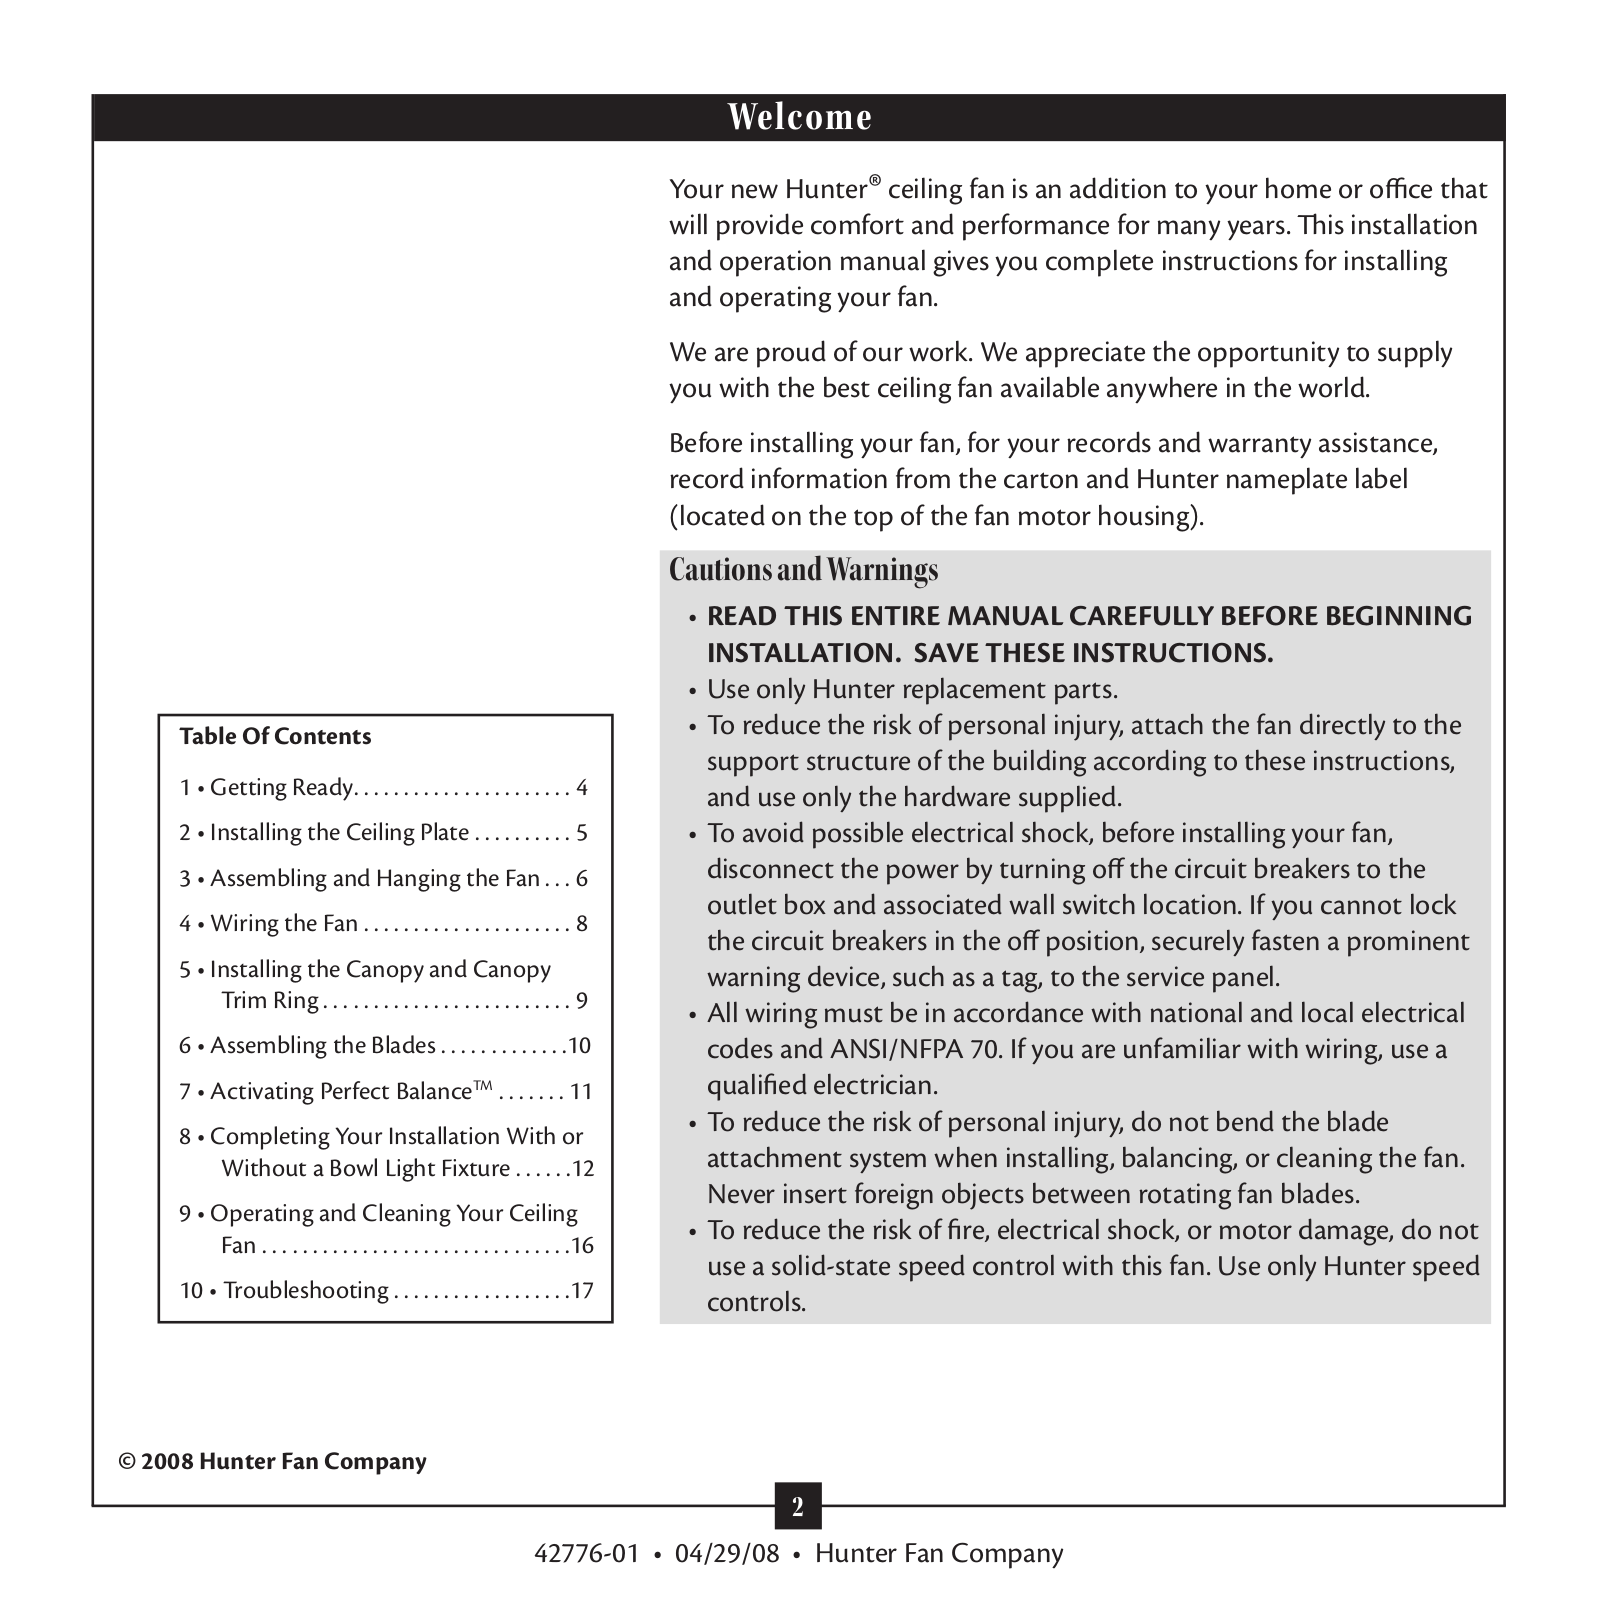
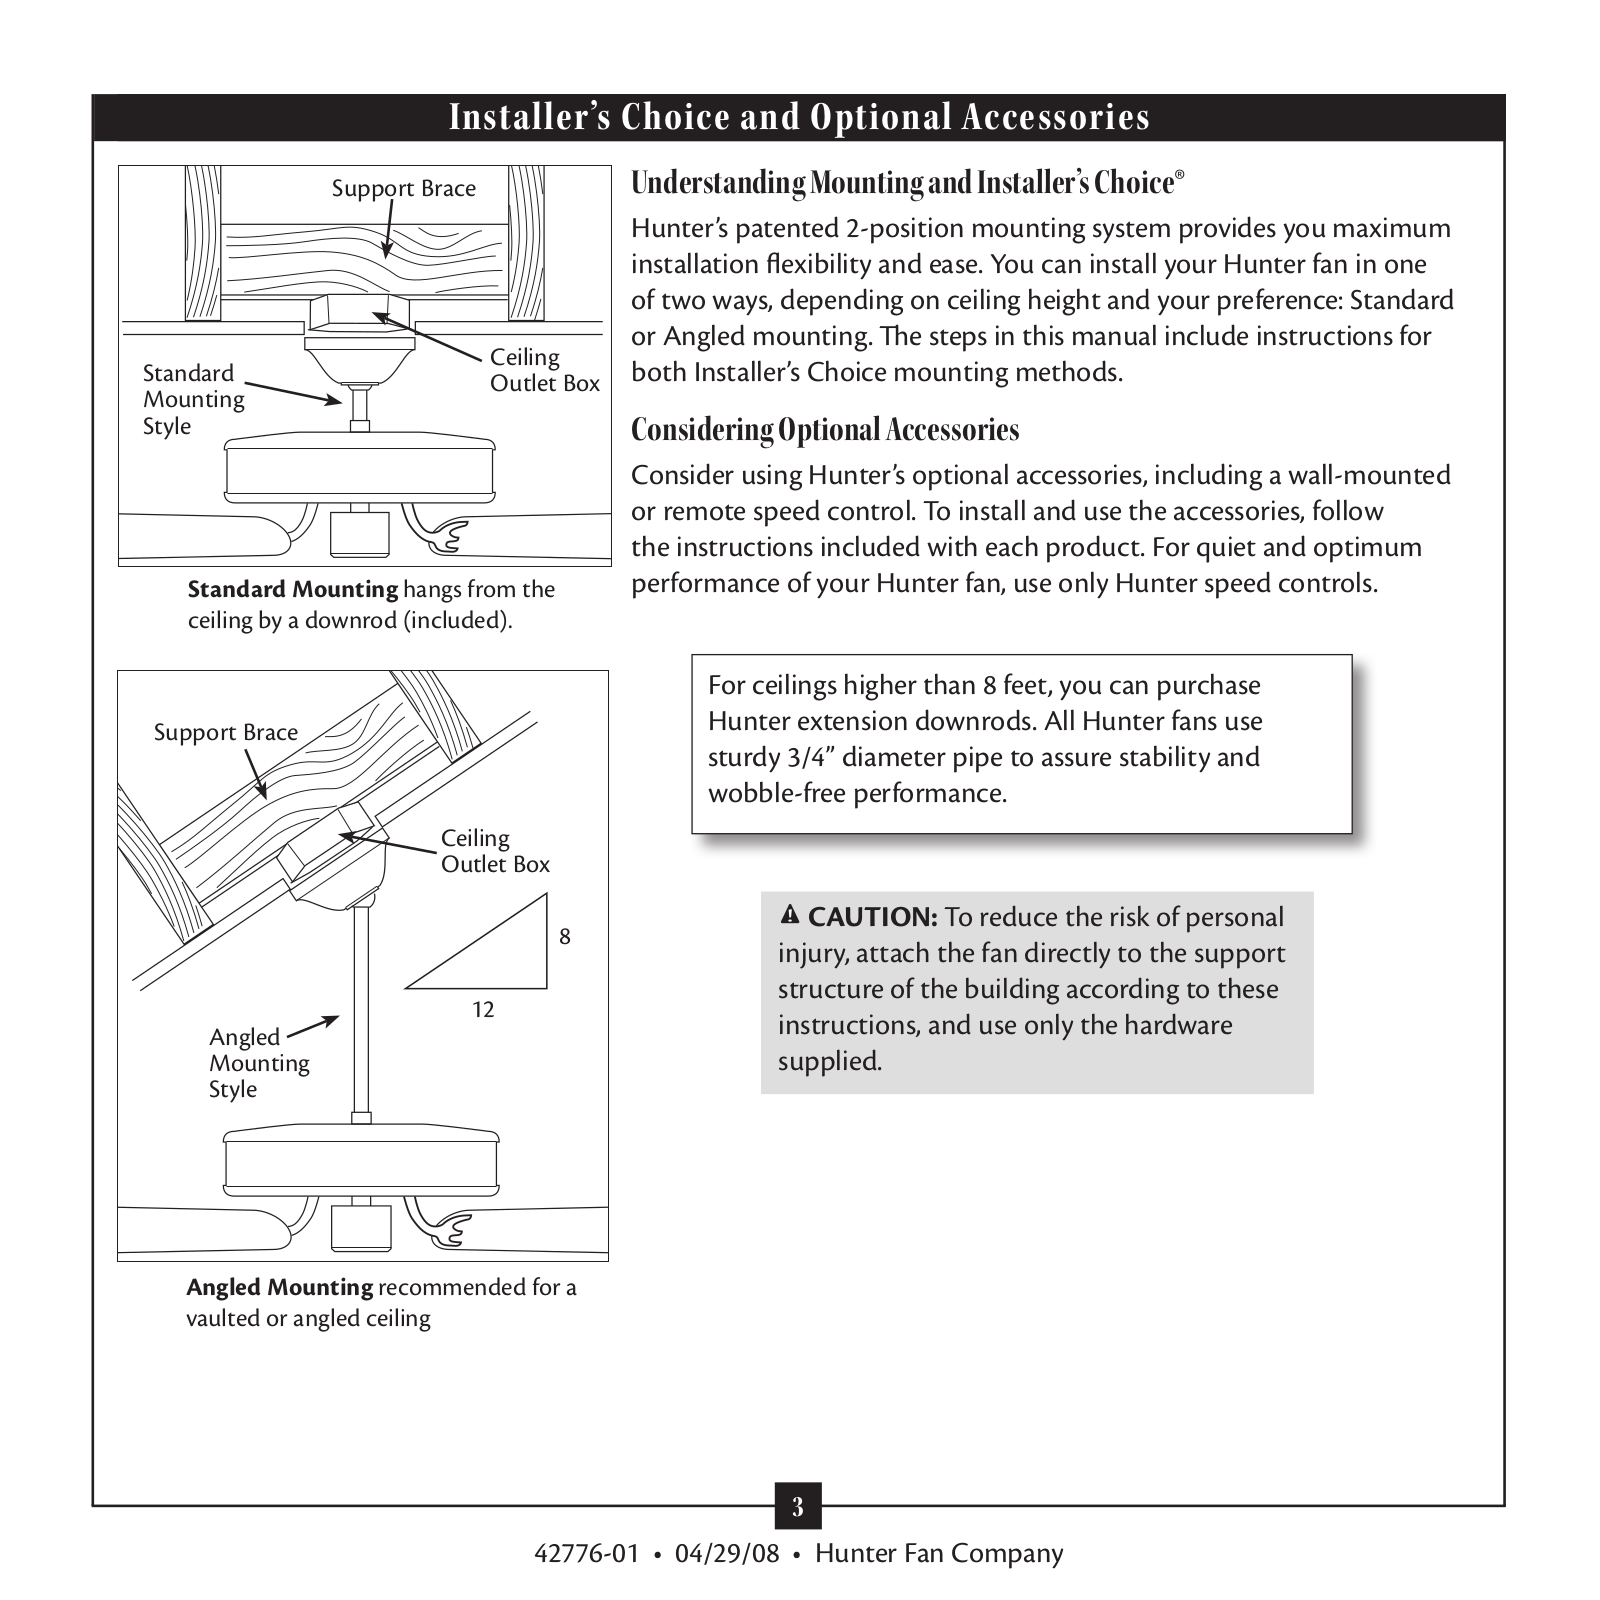
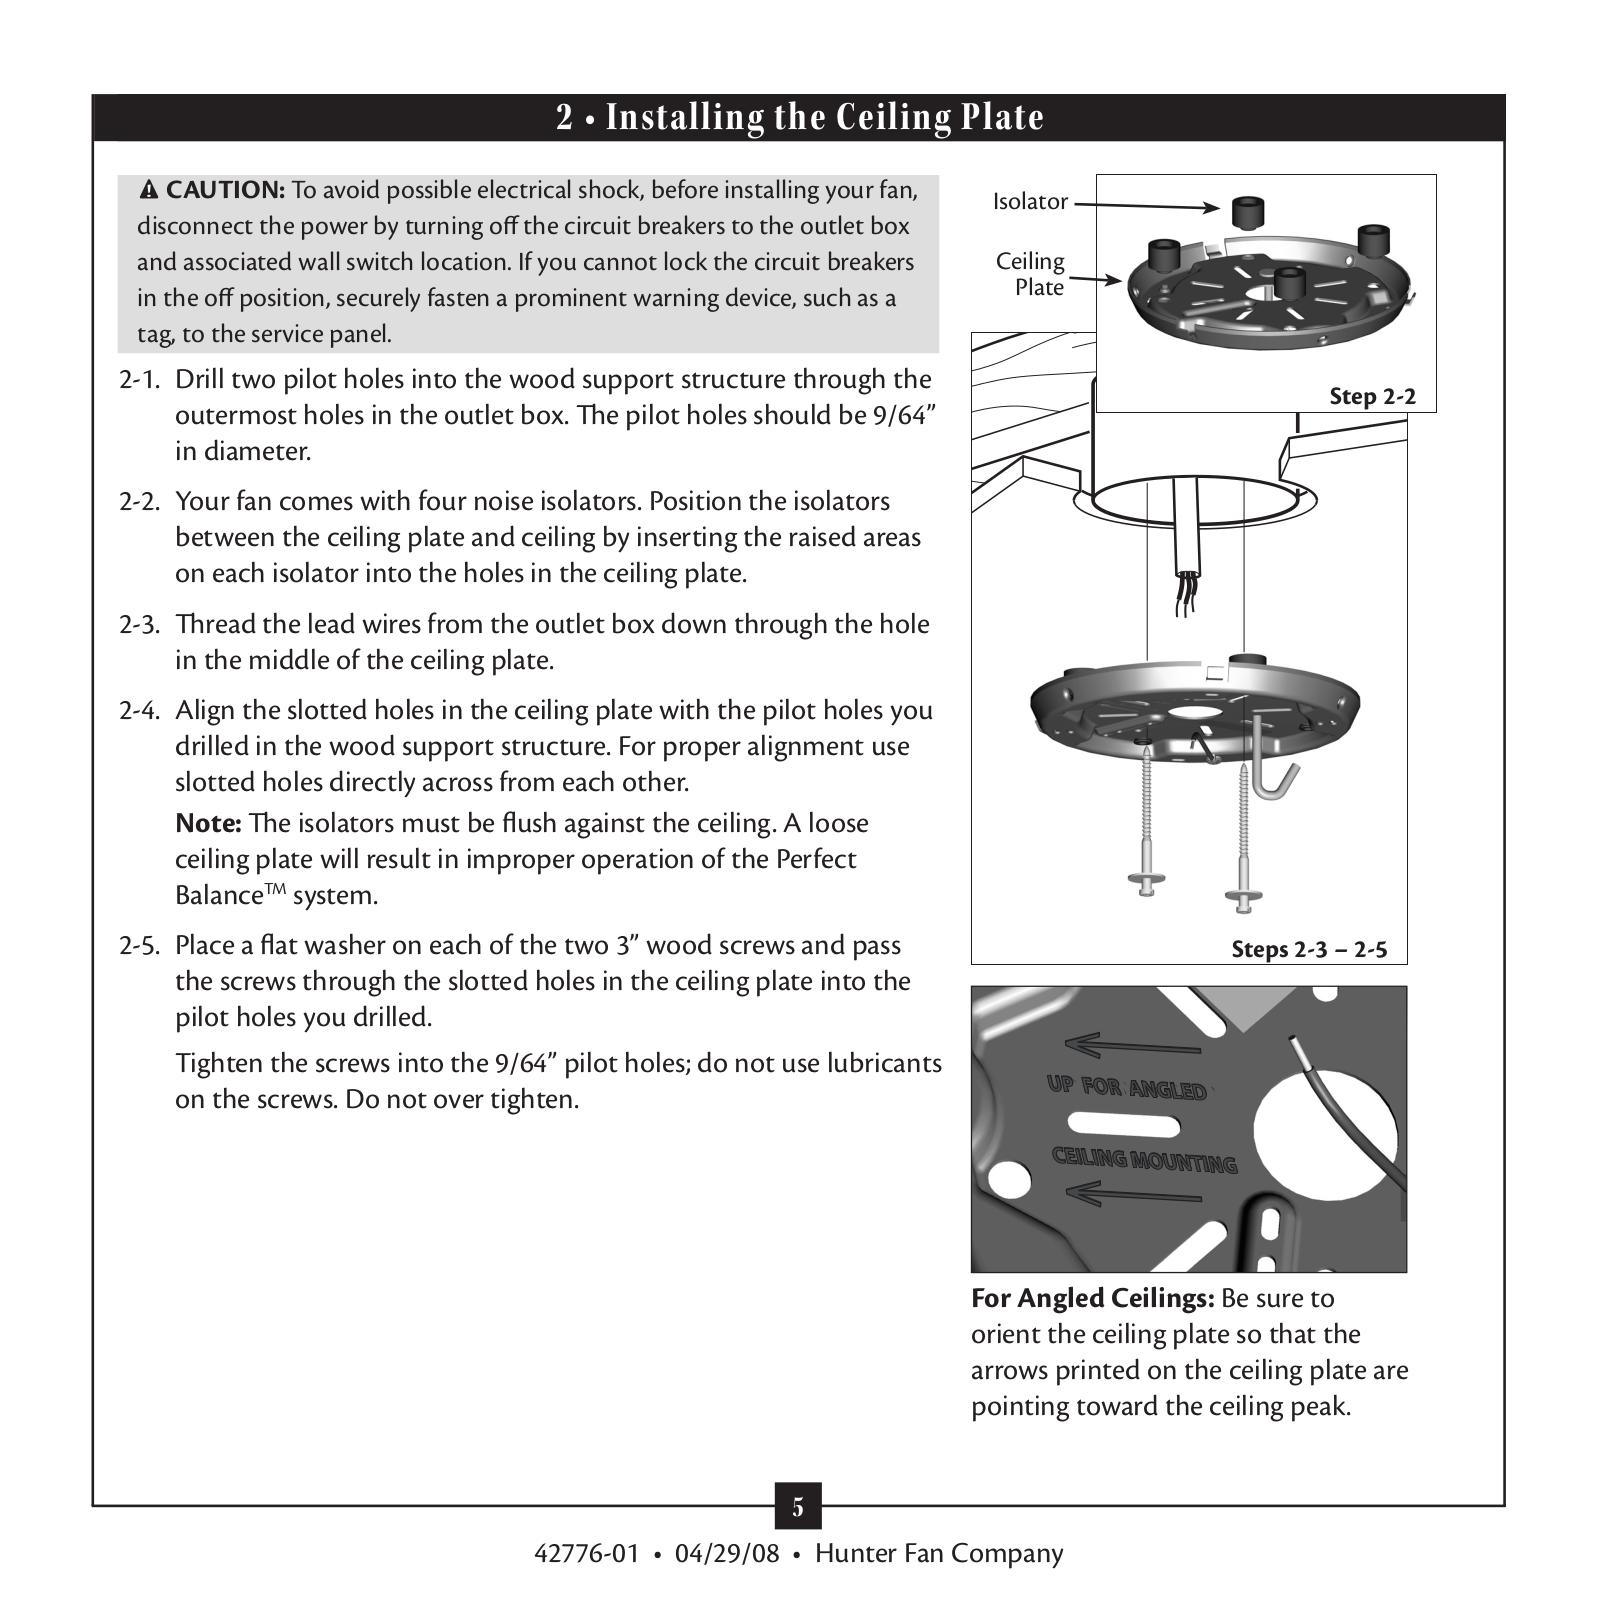
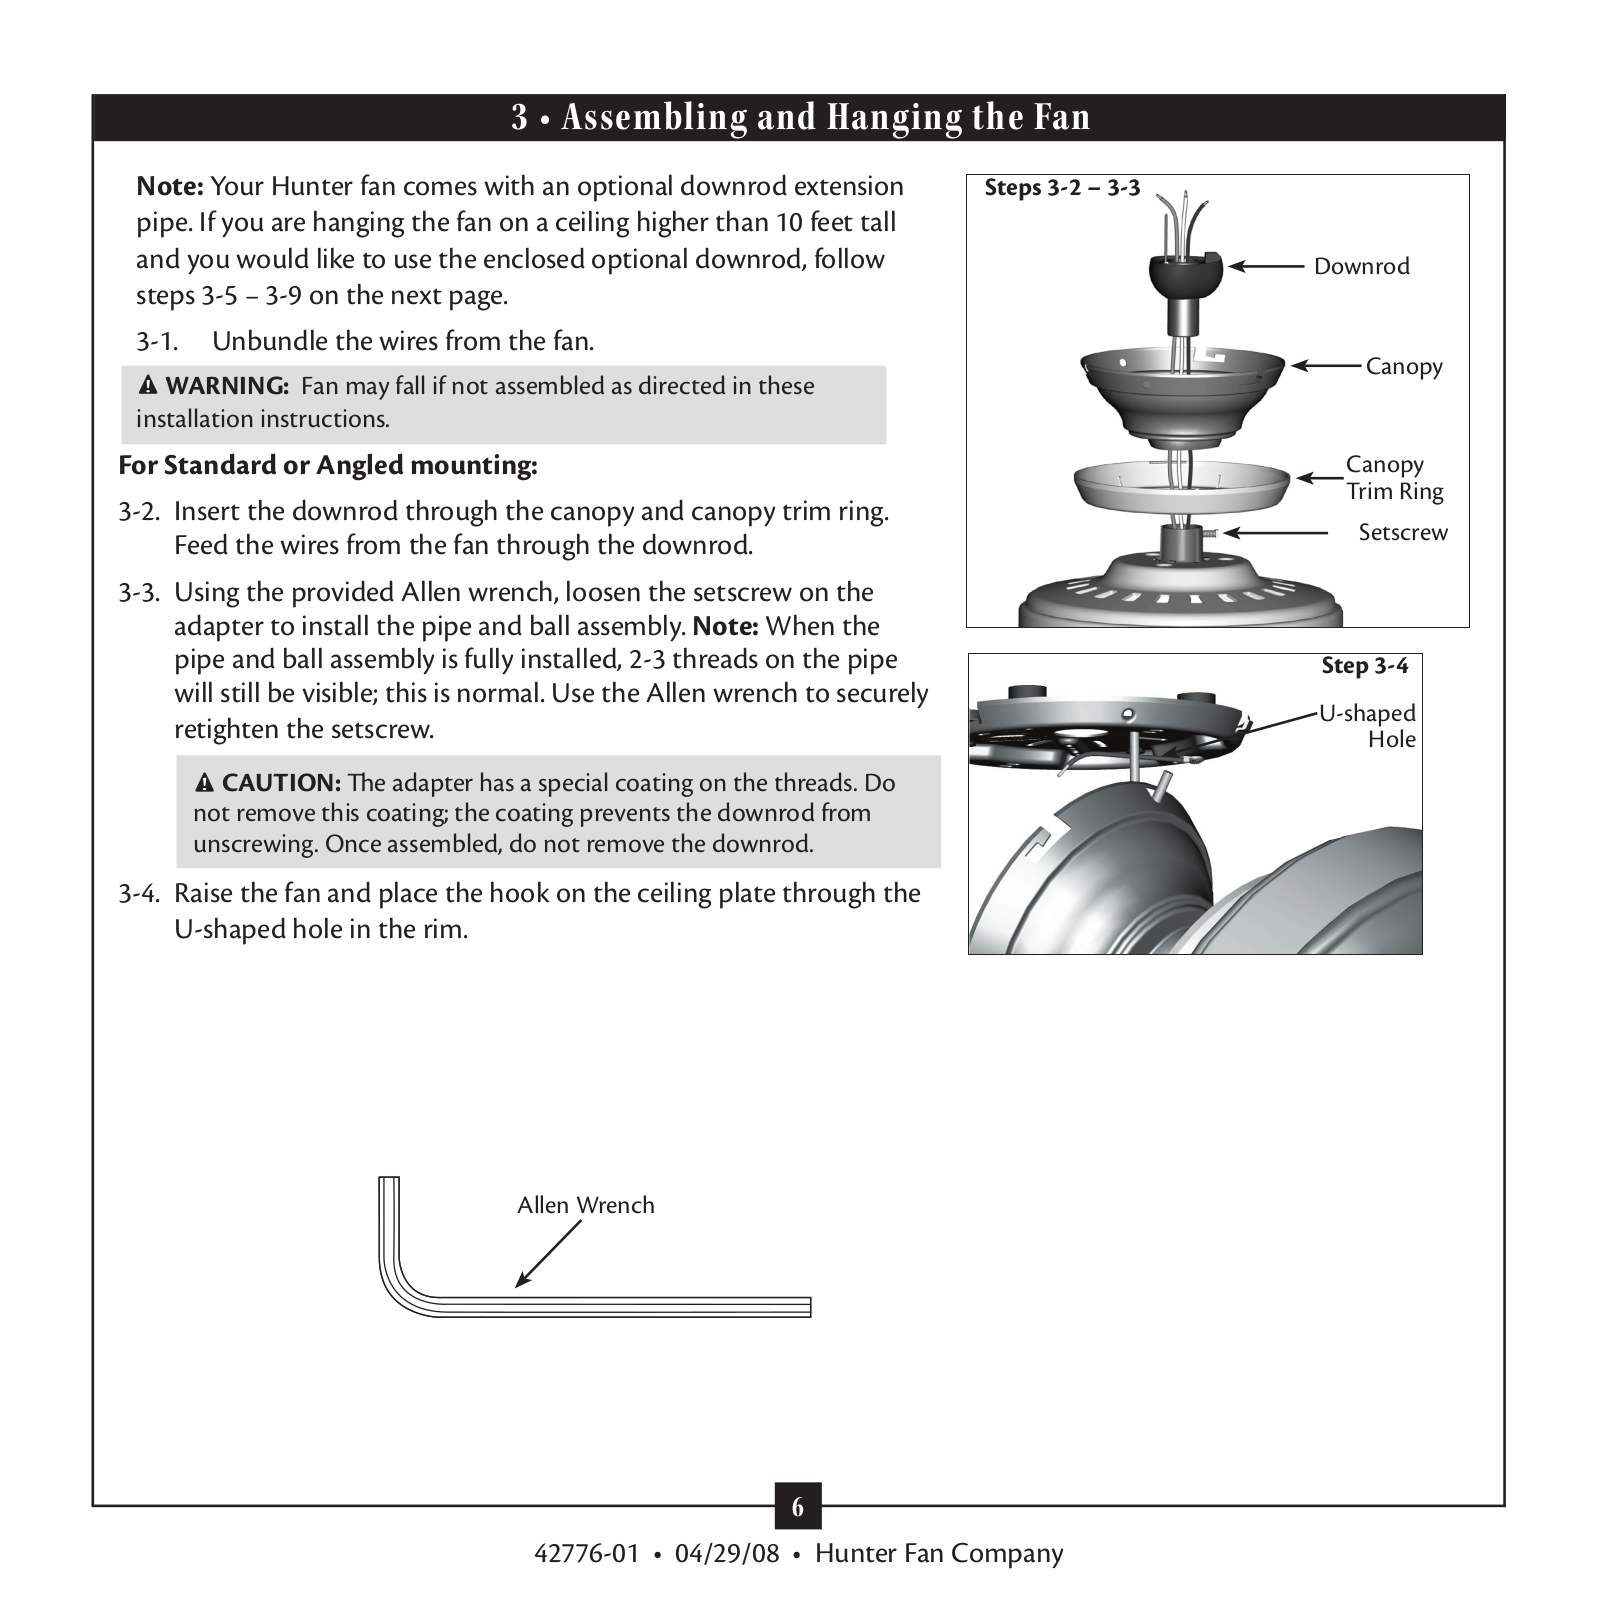
Hunter 23902 Owner's Manual
...
Hunter Owner's Manual
Download
Specifications and Main Features
Frequently Asked Questions
User Manual
Download
Loading...
+
11
hidden pages
Unhide
You need points to download manuals.
1 point = 1 manual.
You can buy points or you can get point for every manual you upload.
Buy points
Upload your manuals
 Loading...