

Page 1

42607-01 • 02/16/06
_____________________
________________
___________________
_________________
Page 2

3
Welcome
2
Page 3
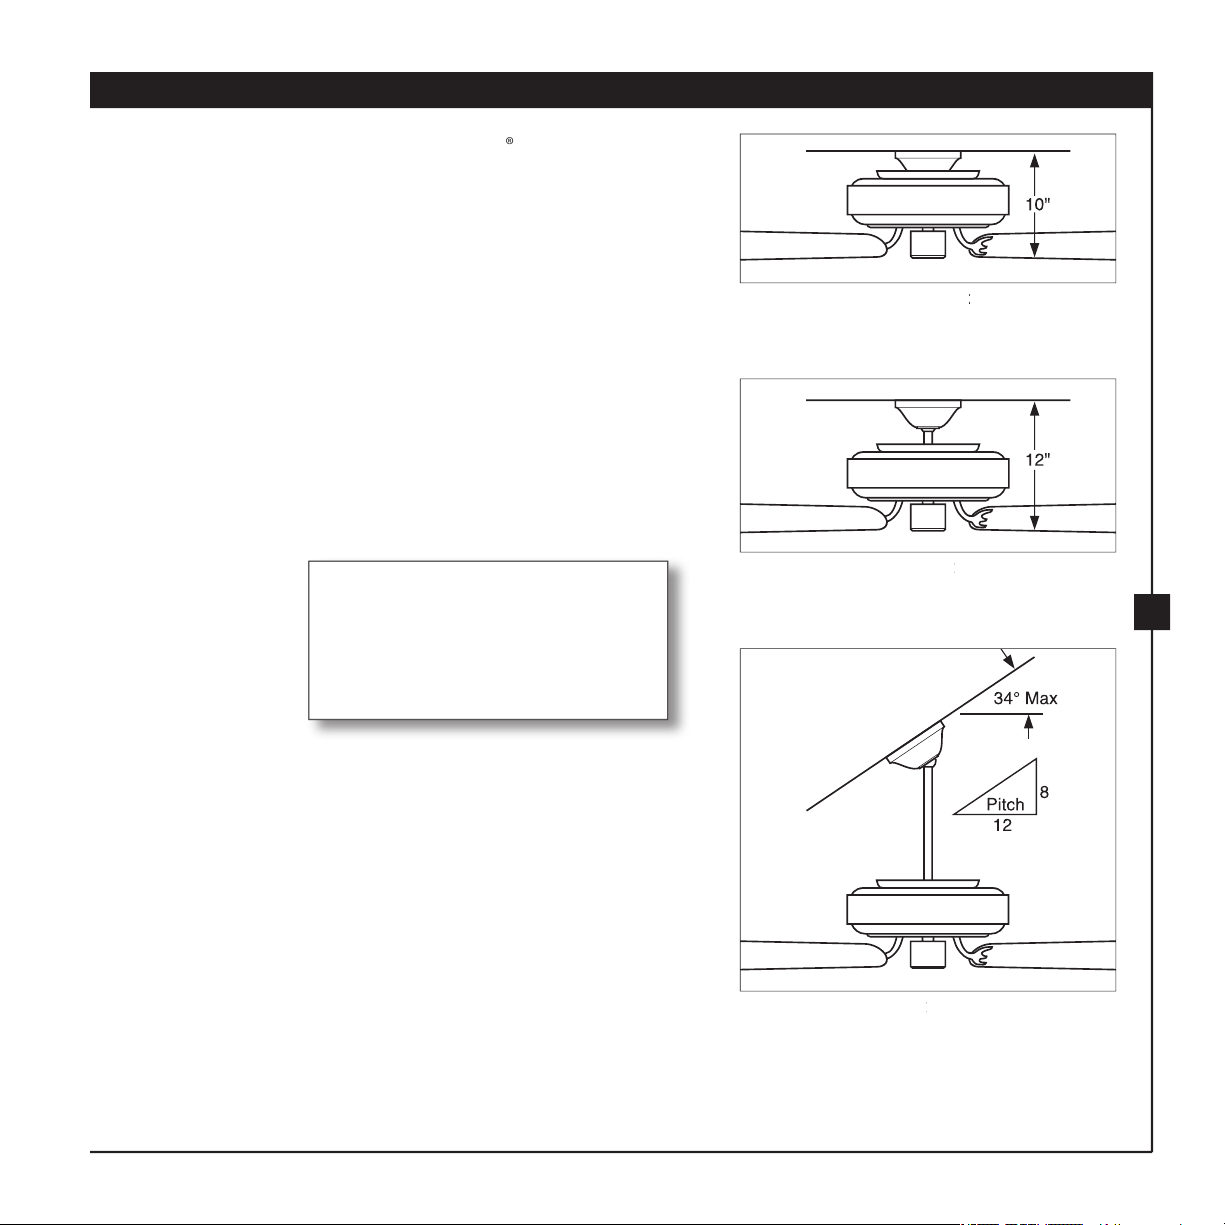
Installer’s Choice and Optional Accessories
ts close to the
hangs from
recommended for a
3
Page 4
5
1 • Getting Ready
4
Page 5
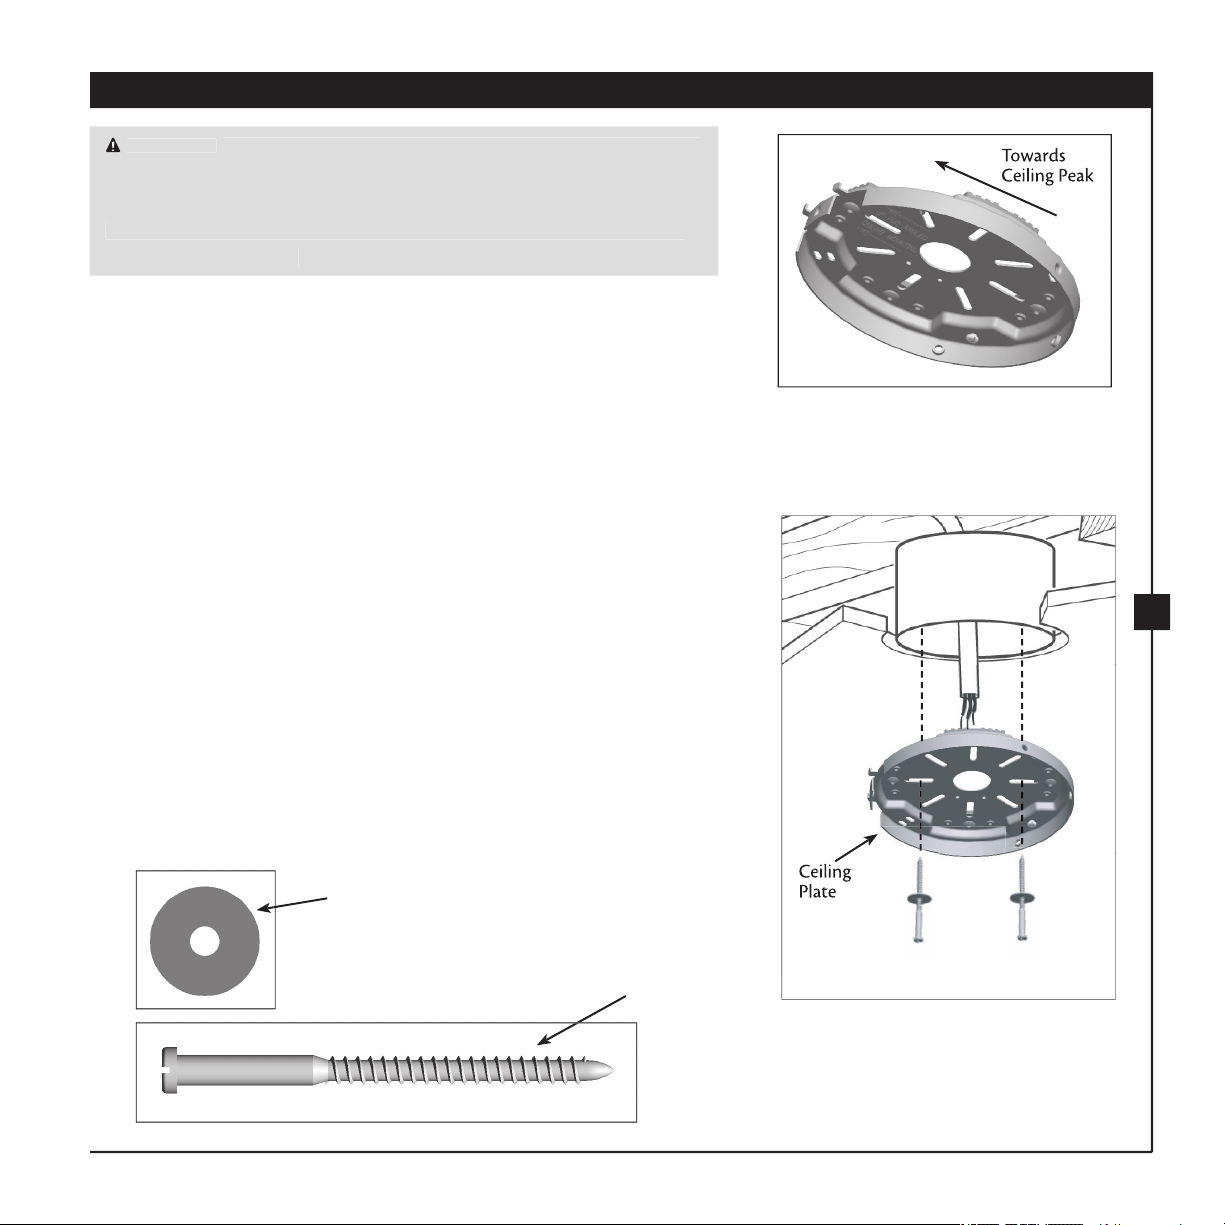
2 • Installing the Ceiling Plate
Be sure to orient the ceiling plate so that the
e isolators should be ush against the ceiling.
5
Page 6

7
3 • Assembling the Fan
Fan may fall if not assembled as directed in these
When the pipe and ball assembly
e adapter has a special coating on the threads. Do
6
Page 7

4 • Hanging and Wiring the Fan
Be sure no bare wire or wire strands are visible after
7
Page 8

9
5 • Installing the Canopy and Canopy Trim Ring
Failure to complete the following steps could cause the fan
It is recommended you use a magnetic tip screwdriver for the
Your fan may have multiple tabs and
e slots in the canopy must remain engaged while
Should you need to remove the trim ring, press rmly on
8
Page 9

6 • Assembling the Blades
Screws
9
Page 10

11
7 • Completing Your Installation With or Without a Light Fixture
Use only the light xture supplied with this fan model.
Make sure the upper switch housing is securely
, proceed with step 7-6 on
, you need to
10
Page 11

11
When removing the wires, pull the thin plug
Page 12

13
Both plug connectors are polarized and will only t together
7 • Completing Your Installation With or Without a Light Fixture (Continued)
12
Page 13

131415
Page 14

8 • Operating and Cleaning Your Ceiling Fan
, use
, use upward
Page 15

15
Page 16

9 • Troubleshooting
16
 Loading...