

Hunt Electronic HTC-9AH36D User Manual
Model No. HTC-9AH36D
IMAGE SENSOR 1/ 3” 960H Color CCD Sensor
EFFECTIVE PIXELS NTSC : 976(H) X 494(V)
SCANNING SYSTEM 2 : 1 INTERLACED 525 LINES / 60 FIELDS / 30 FRAMES
SYNCHRONIZATION INTERNAL
VIDEO OUTPUT 1.0V (P-P) NTSC COMPOSITE, 75Ω
RESOLUTION 700 TV LINES
MIN. ILLUMINATION 0.00LUX (IR LED : On)
S/N RATIO MORE THAN 52dB
GAMMA 0.45
OSD BUILT-IN
SHUTTER SPEED OFF / FLK / 1/50/60~1/100,000 / AUTO SELECTABLE
DAY / NIGHT COLOR / BW / EXT / AUTO SELECTABLE
BLC OFF / BLC / HLC SELECTABLE
DWDR ON / OFF SELECTABLE
AGC OFF/ MIDDLE / LOW / HIGH SELECTABLE
2DNR ON / OFF SELECTABLE
WHITE BALANCE ATW1 / ATW2 / AWC-SET / ANTI.CRL / MANUAL
MOTION DETECTION ON / OFF (4 AREAS PROGRAMMABLE)
PRIVACY MASKING ON / OFF (8AREAS PROGRAMMABLE)
EFFECTS
MIRROR/D-EFFECT/FONT
COLOR/CONTRAST/SHARPNESS/DPC
POWER SUPPLY 12VDC
POWER CONSUMPTION 450mA @24VAC
LENS 3.6mm Fixed Lens
OPERATIONAL TEMP. -10Deg. C ~ +50 Deg. C RH95% MAX.
STORAGE TEMP. -20Deg. C ~ +50 Deg. C RH95% MAX.
WEIGHT 500g
SPECIFICATION
1. SUPER HIGH RESOLUTION
The innovated new DSP Technology will enable to achieve Super High
Resolution 650TVL with High S/N Ratio.
2. 2DNR
The high performance DSP Technology reduces the gain noise in digital
image processing, producing clear sharp images in low light condition.
3. D-WDR (Digital Wide Dynamic Range)
With the newly innovated DSP Technology, the camera enable to
obtain clear and high quality pictures even in strong backlight.
4. DPC (Defect Pixel Correction)
It performs the detection and correction of defective pixels in
a camera Image sensor array.
5. DAY / NIGHT
Built-in Photocell conductive sensor defines Day or Night according to
luminance and switch to appropriate mode (Color or B/W) automatically.
6. Miscellaneous
The camera conveys various features including Motion detection, Privacy
Masking, Mirror, D-Effect, Sharpness, Contrast, BLC, HLC.
GENERAL FEATURES
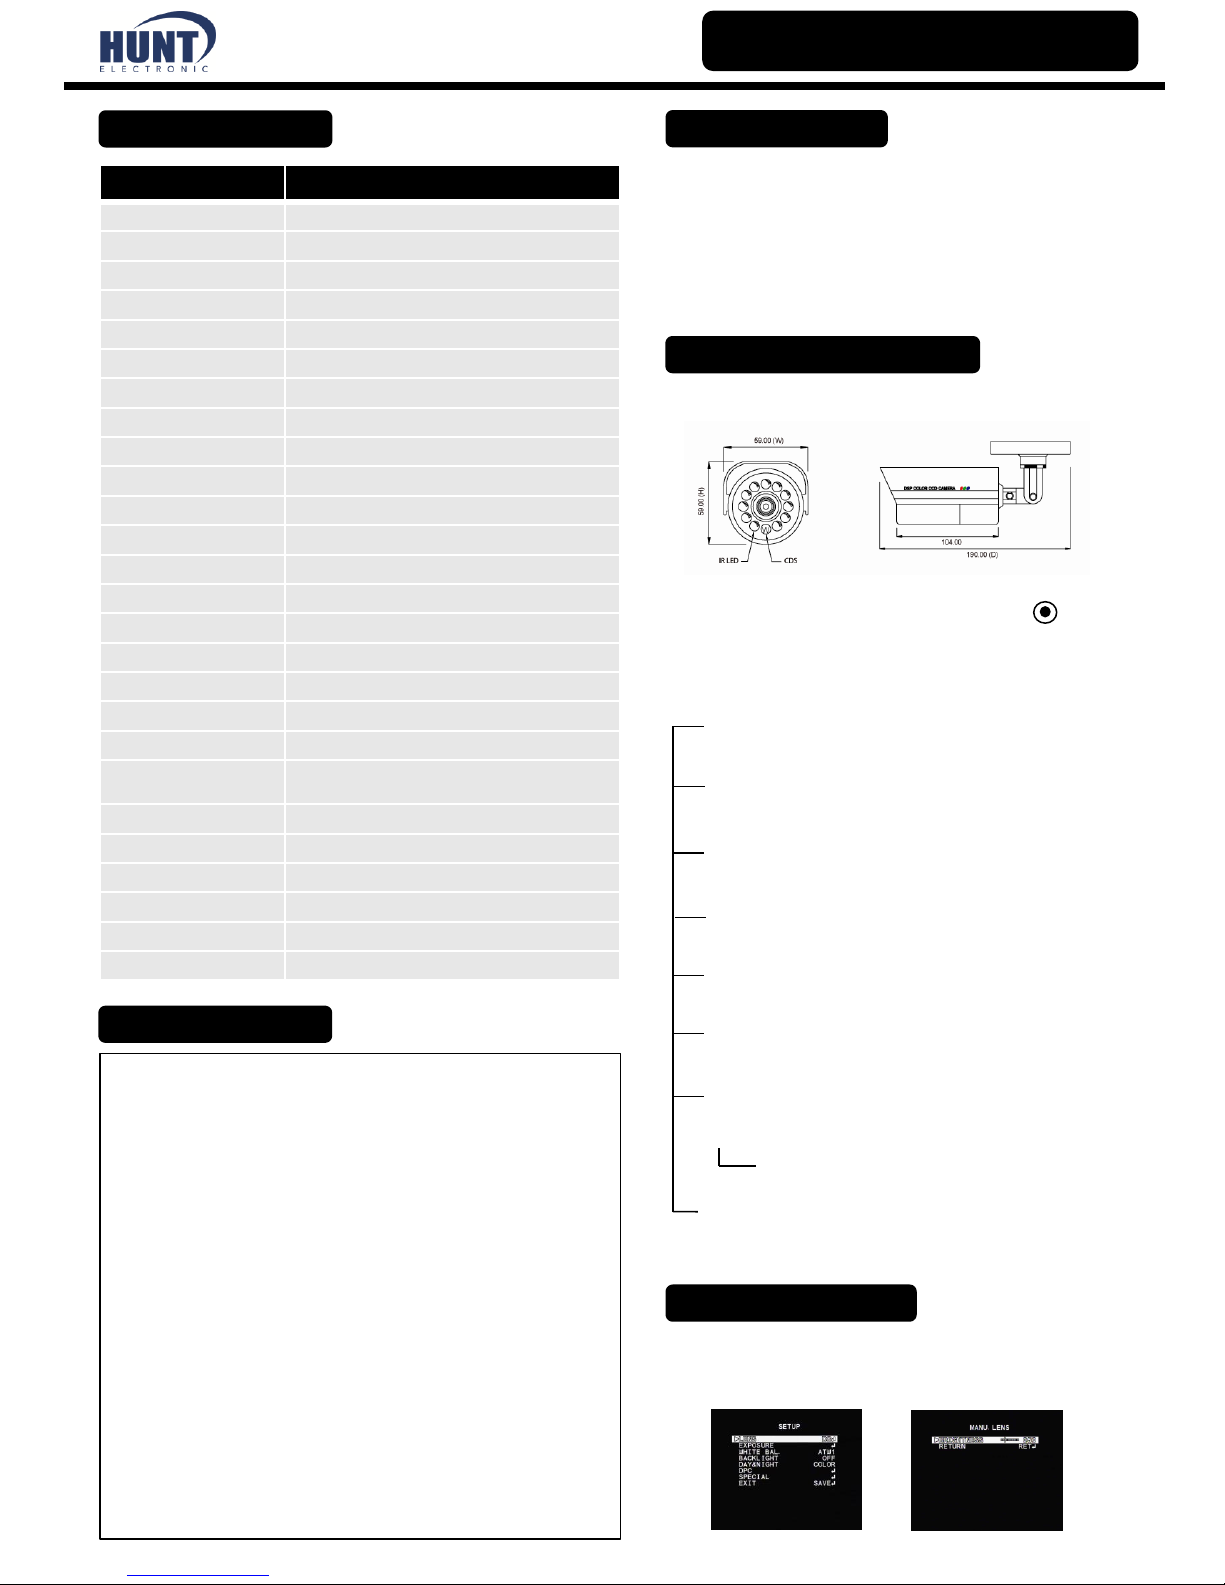
OSD Control & Dimension
OSD CONTROL & MENU TREE
OSD Menu Tree
USER’S MANUAL
HIGH RESOLUTION IR BULLET CAMERA
Please make sure the following items are included in
the package
1. 1 pc of Camera
2. 3 pcs of Mounting Screws
3. 1 Pc of Manual
4. 1 pc of Sunshield
PACKAGE CONTENTS
LENS
● DC ● MANUAL
EXPOSURE
● SHUTTER ● AGC ● DWDR ● RETURN
WHITE BAL.
● ATW1 ● ATW2 ● AWC->SET ● ANTI. CRL ● MANUAL
BACKLIGHT
● OFF ● BLC ● HLC
DPC
● ON ● OFF
DAY & NIGHT
● COLOR ● B/W ● EXT ● AUTO
SPECIAL
● CAM TITLE ● MOTION ● PRIVACY
● IMAGE ADJ. ● COMM ADJ. ● LANGUAGE ● VERSION ● RETURN
- LENS SHAD. - 2DNR - MIRROR - FONT COLOR
- CONTRAST - SHARPNESS - DISPLAY - NEG. IMAGE -RETURN
EXIT
● SAVE ● NOT SAVE ● RESET
1) LENS <DC / MANUAL> - Lens type must be set as Manual
Brightness : Control brightness from 0-255 steps
SETUP Menu Functions
UP
RIGHT LEFT
DOWN
• Open the body cap of the camera housing
and push the joystick S/W to pop up OSD
Menu and set up your desired value.
2) EXPOSURE
<SHUTTER / AGC / D-WDR / RETURN>
Shutter : Adjust shutter settings
< Auto / 1/50 / FLK / 1/250~1/100000>
- Flickerless mode(FLK) reduces on-screen flickering.
- Electronic Shutter Control(AUTO) adjusts brightness
level on screen.
AGC (Auto Gain Control) : High / Middle / Low / Off
- Control Gain Noise to get proper image quality.
- Set AGC Mode as High to get brighter image but more
noises of the picture.
D-WDR (Digital Wide Dynamic Range) : On / Off
- To distinguish an object in both bright and dare areas
- Set the desired level from 0-63 steps
Return
3) WHITE BAL.
<ATW1 / ATW2/ AWC-SET / ANTI.CRL / MANUAL>
ATW1 : Auto Tracking White Balance.
- Use this mode when the color temp. is between
2,500~9,000K
ATW2 : Auto Tracking White Balance
- Use this mode when the color temp. is between
2,300~11,000K
AWC->SET :
- To find the optimal setting for current luminance
environment in this mode. Set the point the camera
towards a sheet of white paper and press the Joystick
S/W. If the environment changes, readjust it.
ANTI. CRL : Anti-Color Rolling.
MANUAL
- To fine-tune White Balance manually. Set White balance
first by using ATW1 or ATW2 before Manual mode. After
that , if there is still a white balance issue, switch to
manual mode and have a fine-tune. Select proper
application as
- Color Temp. (Indoor / Outdoor / Manual)
- Blue / Red
- Return
Manual mode allows you to increase or decrease the
red or blue factor on screen.
This manual is based on the date as shown in the right and specifications are subject to change without notice for quality improvement.
USER’S MANUAL
HIGH RESOLUTION IR BULLET CAMERA
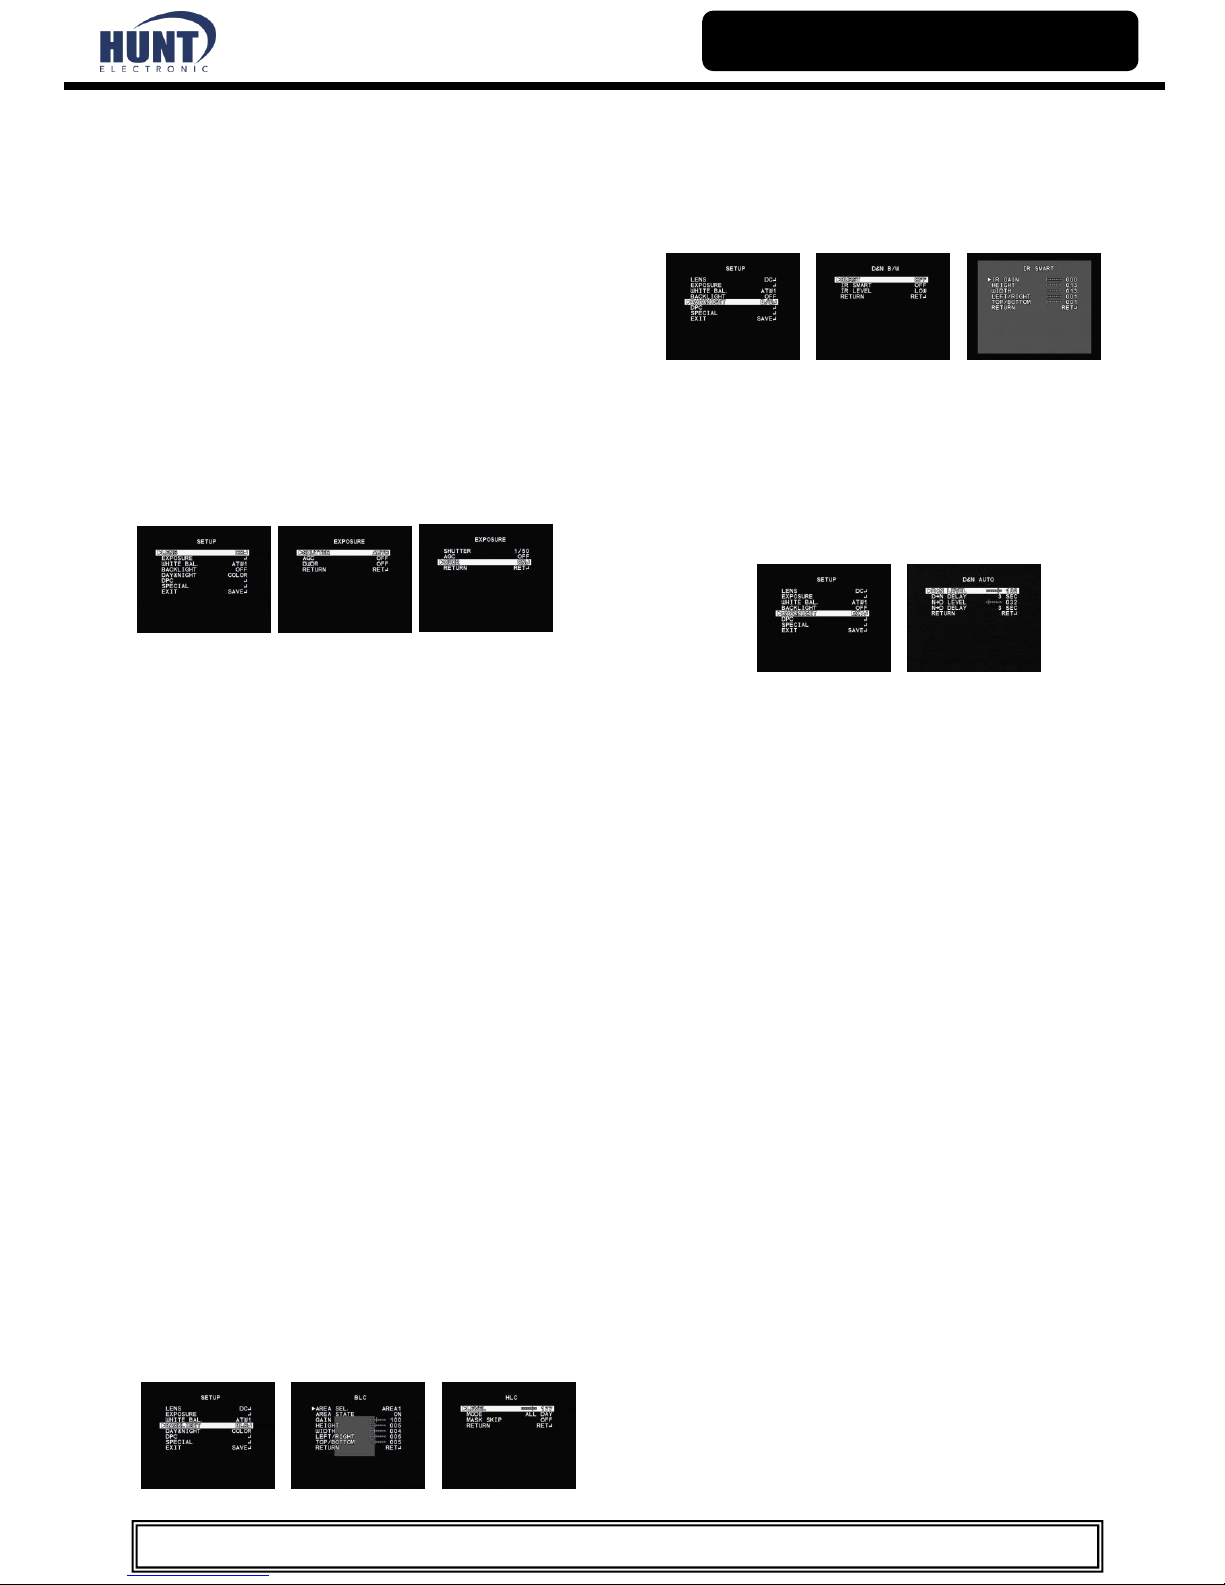
5) DAY / NIGHT <COLOR / BW / EXT / AUTO>
COLOR : Display always color picture
B/W : Display always B/W picture
- IR Smart : To reduce IR Saturation in the designated area.
Set the area and control IR level for IR saturation.
EXT : Automatic D/N switching by using external signals.
Mechanical True D/N version only. (Factory Default)
AUTO :
Automatic D/N switching according to ambient illumination.
- D-N Level : Set desired level to switch B/W from color mode.
- D-N Delay : Set Delay time to switch color to B/W
- N-D Level : Set desired level to switch color from B/W
- N-D Delay : Set delay time to switch B/W to Color
6) DPC : Detecting Dead Pixel on CCD array and correct them.
7) SPECIAL
7-1) CAM TITLE : To display a title on the monitor.
7-2) MOTION :
To transmit an alert signal when it detects motion of an
object on the screen. 4 areas can be selectable.
7-3) PRIVACY :
To mask area which you want to mask. 8 areas selectable.
8) IMAGE ADJ.
8-1) LENS SHAD : To adjust lens shading
8-2) 2DNR : To reduce noise on the screen (On / Off)
8-3) MIRROR : Reverse the picture horizontally.
8-4) FONT COLOR : Select the desired font color. (15 colors)
8-5) CONTRAST : To adjust contrast level.
8-6) SHARPNESS : To adjust sharpness of the video.
8-7) DISPLAY : Select the device for Display CRT / LCD / USER.
8-8) NEG. IMAGE : Change colors off like film (On / Off)
8-9) Return
9 COMM. ADJ. (OPTION)
9-1) CAM ID : Select Characters by moving Joystick S/W.
9-2) BAUD RATE :
Select proper BAUD RATE to communicate with other devices.
9-3) PROTOCOL : Set the proper protocol (Pelco D/P, Nextchip)
9-4) DISPLAY ID : Display CAM ID
9-5) ID POS : Set the location of CAM ID on the screen
10) LANGUAGE : 8 Languages are supported.
11) VERSION : Showing F/W version.
12) EXIT :
SAVE : Save OSD setting value.
NOT SAVE : Do not save OSD setting value
RESET : Go back to “Factory Default”.
4) BACKLIGHT <OFF / BLC / HLC>
- BLC : 2 areas can be designated. Set the size and postion.
Provides light level control to overcome severe conditions.
- HLC : High Light Compensation
It enables Users to mask a strong light in a designated
area by selecting defined colors in OSD.
 Loading...