

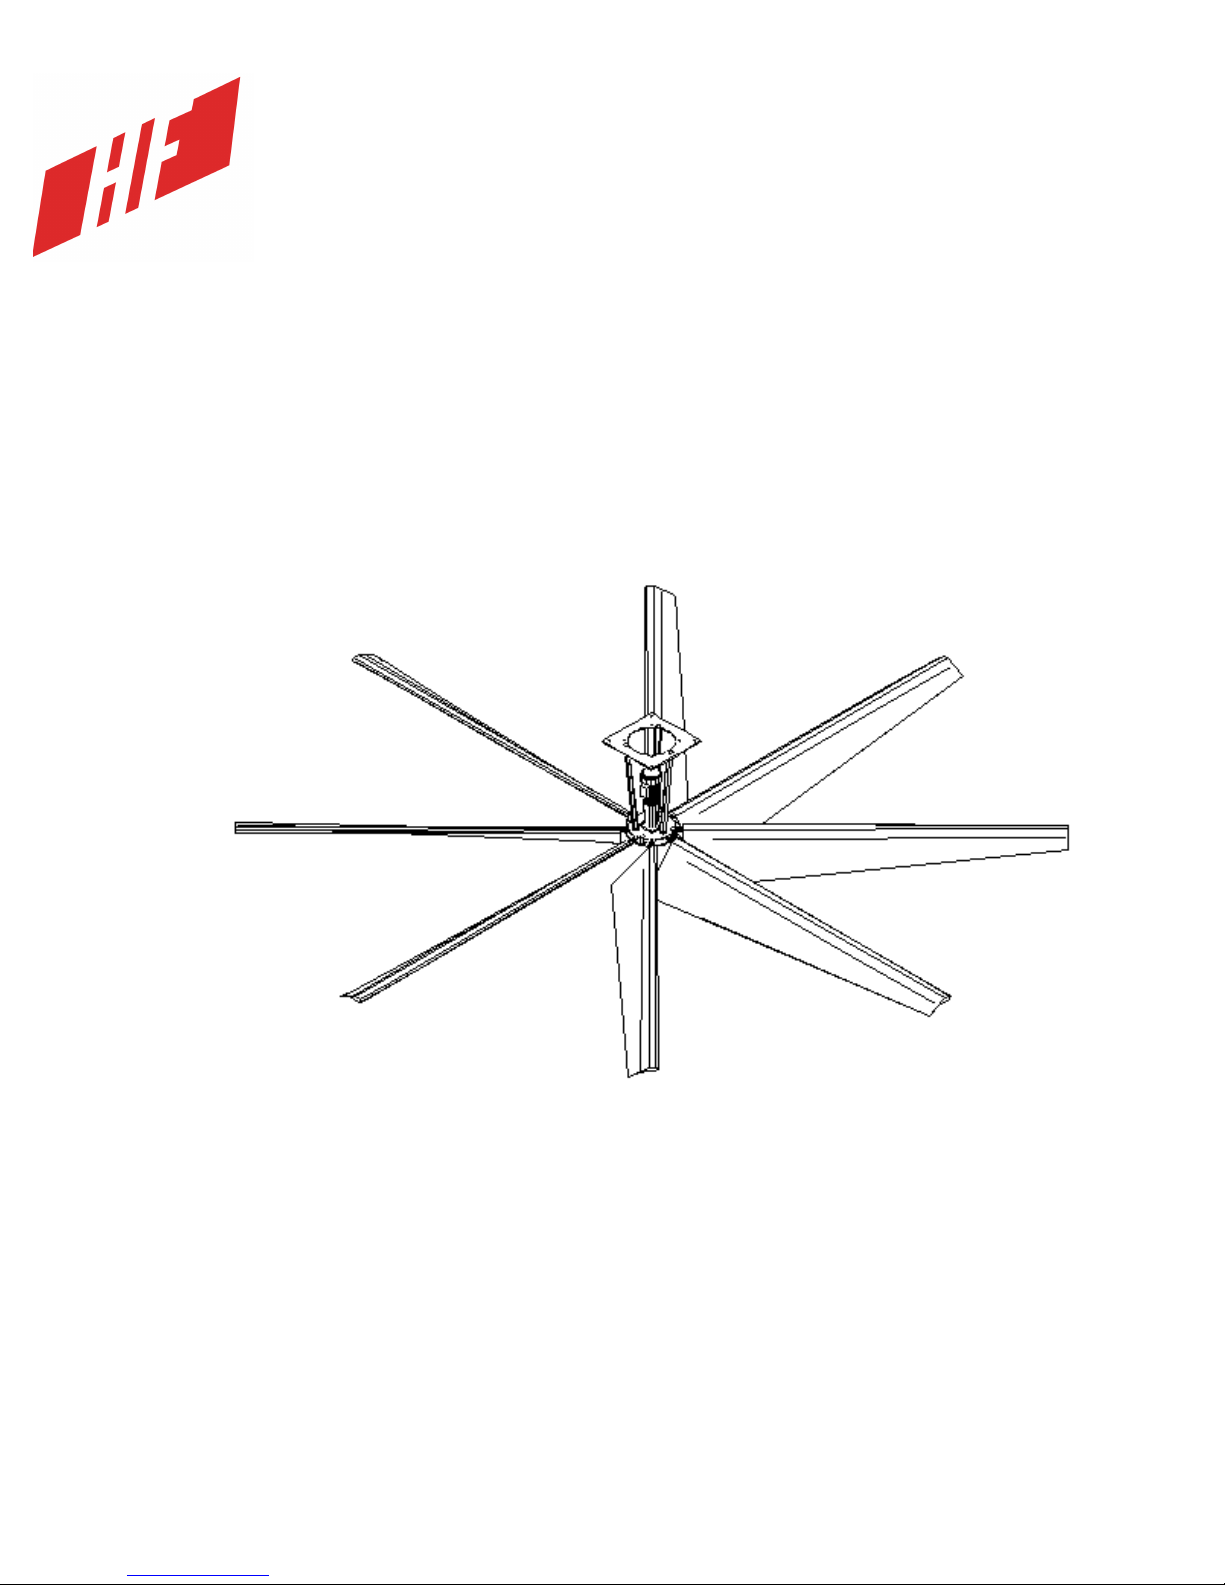
Humongous Fan 51512 Installation Manual
23103 Miles Road (216) 663-8830
Cleveland, OH 44128 www.humongousfan.com
1
Humongous Fan
Installation Guide
Do not discard these instructions, save for further use
51512, Oct. 2014

23103 Miles Road (216) 663-8830
Cleveland, OH 44128 www.humongousfan.com
2
Table of Contents
1. Safety Precautions 3
2. Parts List 4
3. Mounting Scenarios 5
4. Electrical Installation 8
5. Blade Installation 10
6. Operating Instructions 11
7. Periodic Maintenance 12
8. Troubleshooting 12
9. Warranty 13

23103 Miles Road (216) 663-8830
Cleveland, OH 44128 www.humongousfan.com
3
SAFETY PRECAUTIONS
READ, FOLLOW AND SAVE THESE INSTRUCTIONS!
1. Only use this fan in a manner intended by the manufacturer
namely as a vertical, ceiling mounted, air moving device. Any
attempt to use this fan for any other purpose without expressed,
written permission from The Humongous Fan Company will
invalidate the warranty.
2. Before servicing or cleaning the fan, all sources of electrical
power must be disconnected. The user should take means to
ensure that the device is not accidentally energized while being
serviced, such as attaching a lockout tag (not included) to the
power supply.
3. If a safety device is removed prior to servicing the fan, it must
be properly reinstalled before re-energizing the fan.
4. Do not replace any parts to this fan with anything other than
authentic Humongous Fan parts. This includes both
mechanical and electrical components.
5. All electrical wiring must conform to the National Electric Code
and all local codes. Code compliance is ultimately the
responsibility of the installer.
6. The fan must be installed in a manner such that there is no
chance for the fan blades to strike a person or object while in
operation.
7. The fan and any supplemental devices must be installed by
qualified personnel. The Humongous Fan Company will not be
responsible for personal injuries or damage to property or
equipment caused by improper installation.

23103 Miles Road (216) 663-8830
Cleveland, OH 44128 www.humongousfan.com
4
8. The supplemental mounting kit must be installed in a manner
as laid out in this manual. All safety devices and bracing cables
must be used.
9. Integrity of the structure to which the fan is mounted is the sole
responsibility of the installer. Consult a structural engineer if
there is any question relating to the integrity of the structure.
PARTS LIST
BEFORE ATTEMPTING TO INSTALL YOUR HUMONGOUS FAN,
PLEASE VERIFY THAT YOU HAVE THE FOLLOWING:
1. Motor/Hub Assembly
2. Blade Mounting Hardware Kit, containing:
a. 16 ea., 1/4-20 X 1” UNC Grade 5 Bolts
b. 16 ea., 1/4”Split Lock Washers.
3. Safety Cable Kit, containing:
a. 1 ea., 10 Ft. (3.1m) of 1/8” Galvanized Steel Cable
b. 4 ea., 1/8” Cable Clamps
4. 1 ea., Fan Controller
5. 8 ea., Fan Blades
If you are lacking any of the above items, please call us at 216-663-8830.
23103 Miles Road (216) 663-8830
Cleveland, OH 44128 www.humongousfan.com
5
MOUNTING SCENARIOS
The Humongous Fan is designed to be mounted to either a series of
braces spanning two joists or, directly to an I-beam. The mounting
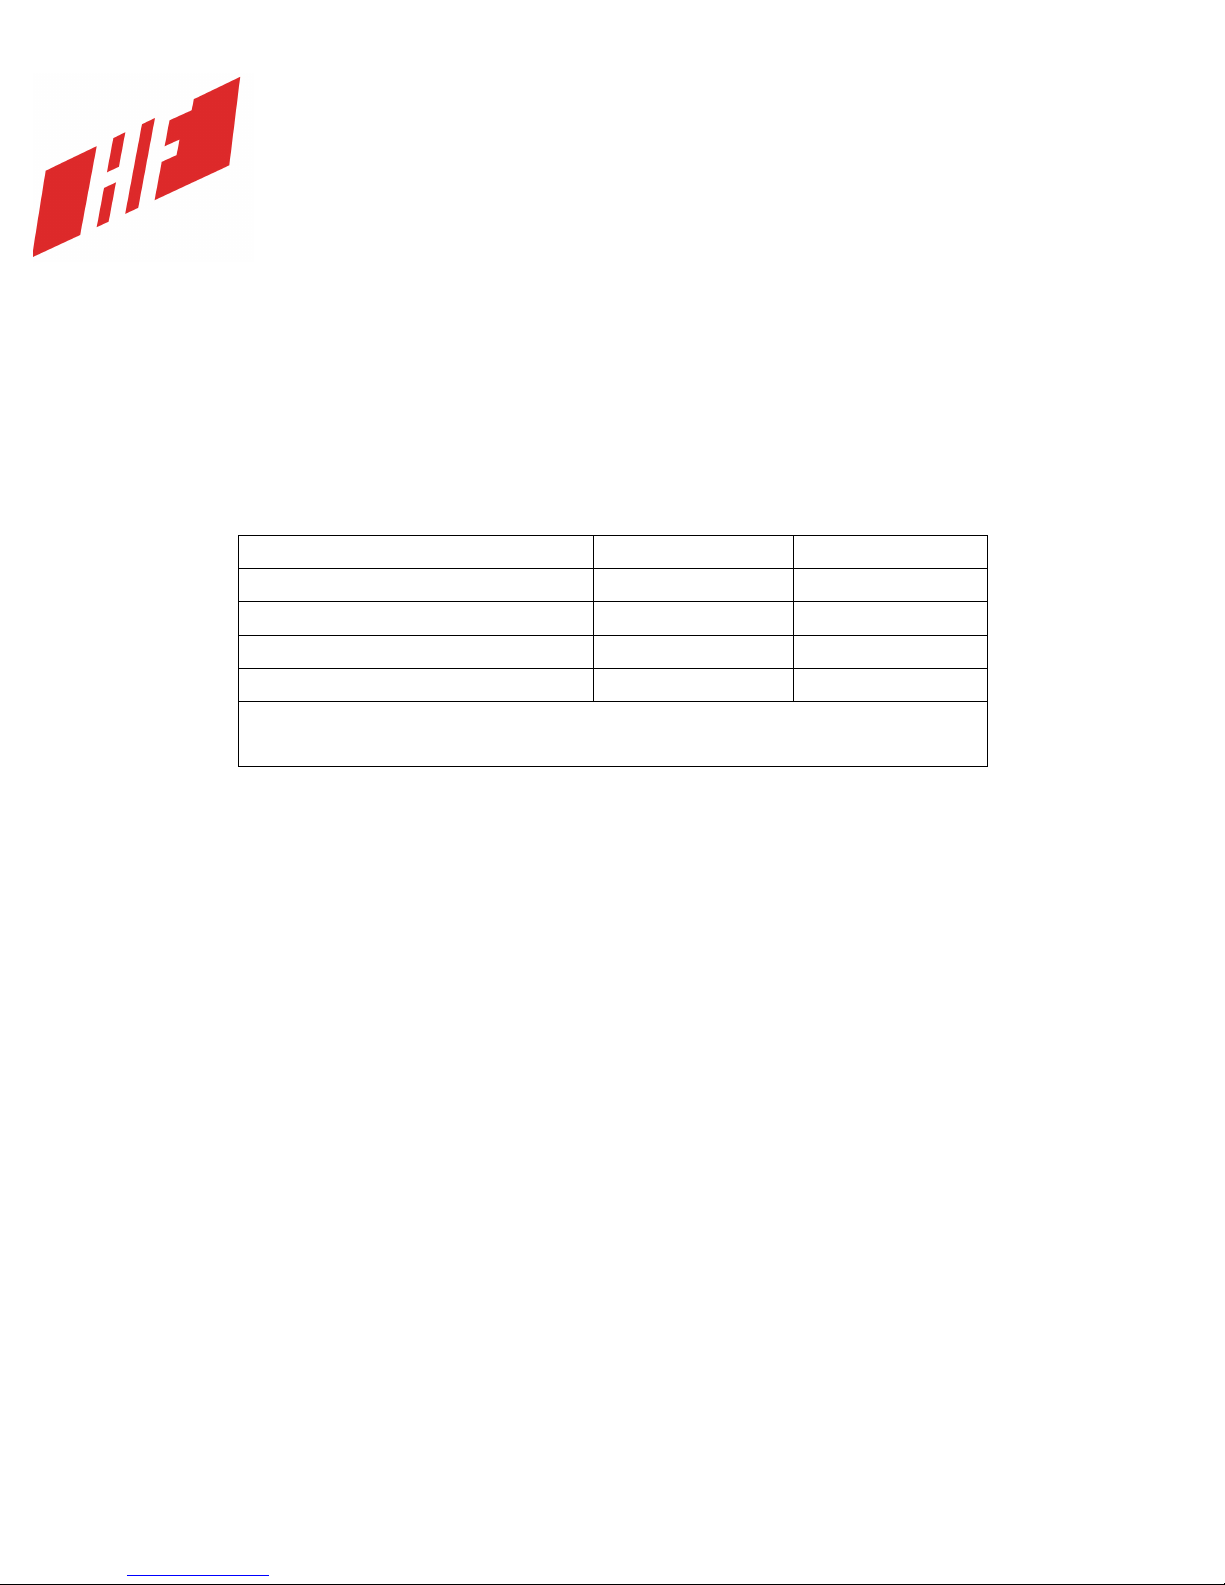
must be sufficiently secure to absorb up to 250 ft-lbs (340 N-M) of
torque, plus an appropriate safety factor. All bolts must be torqued
to the following values:
Table 1
Joist Mounting Scenario
In general, mounting a Humongous Fan between joists is easier than
clamping to a beam, especially if the joists are close together.
Additionally, this type of mounting offers additional flexibility for fitting
the fan between lights and avoiding the flickering caused by fan
blades passing below a lighting fixture.
Since the motor/hub assembly is the heaviest part of the fan
(weighing as much as 75 lbs/33KG), it will take two people to mount.
Product
Torque [Ft.Lb]
Torque [N.m]
1/8” Wire Rope Clamps
4.5
6
1/4-20 UNC Grade 5 Bolts
8.5
12
3/8-16 UNC Grade 8 Bolts
44
60
1/2-13 UNC Grade 8 Bolts
106
143
The above values are based upon using clean, zinc
plated, and non-lubricated fasteners.
 Loading...