

humimeter.com humimeter FS3 User Manual
User manual
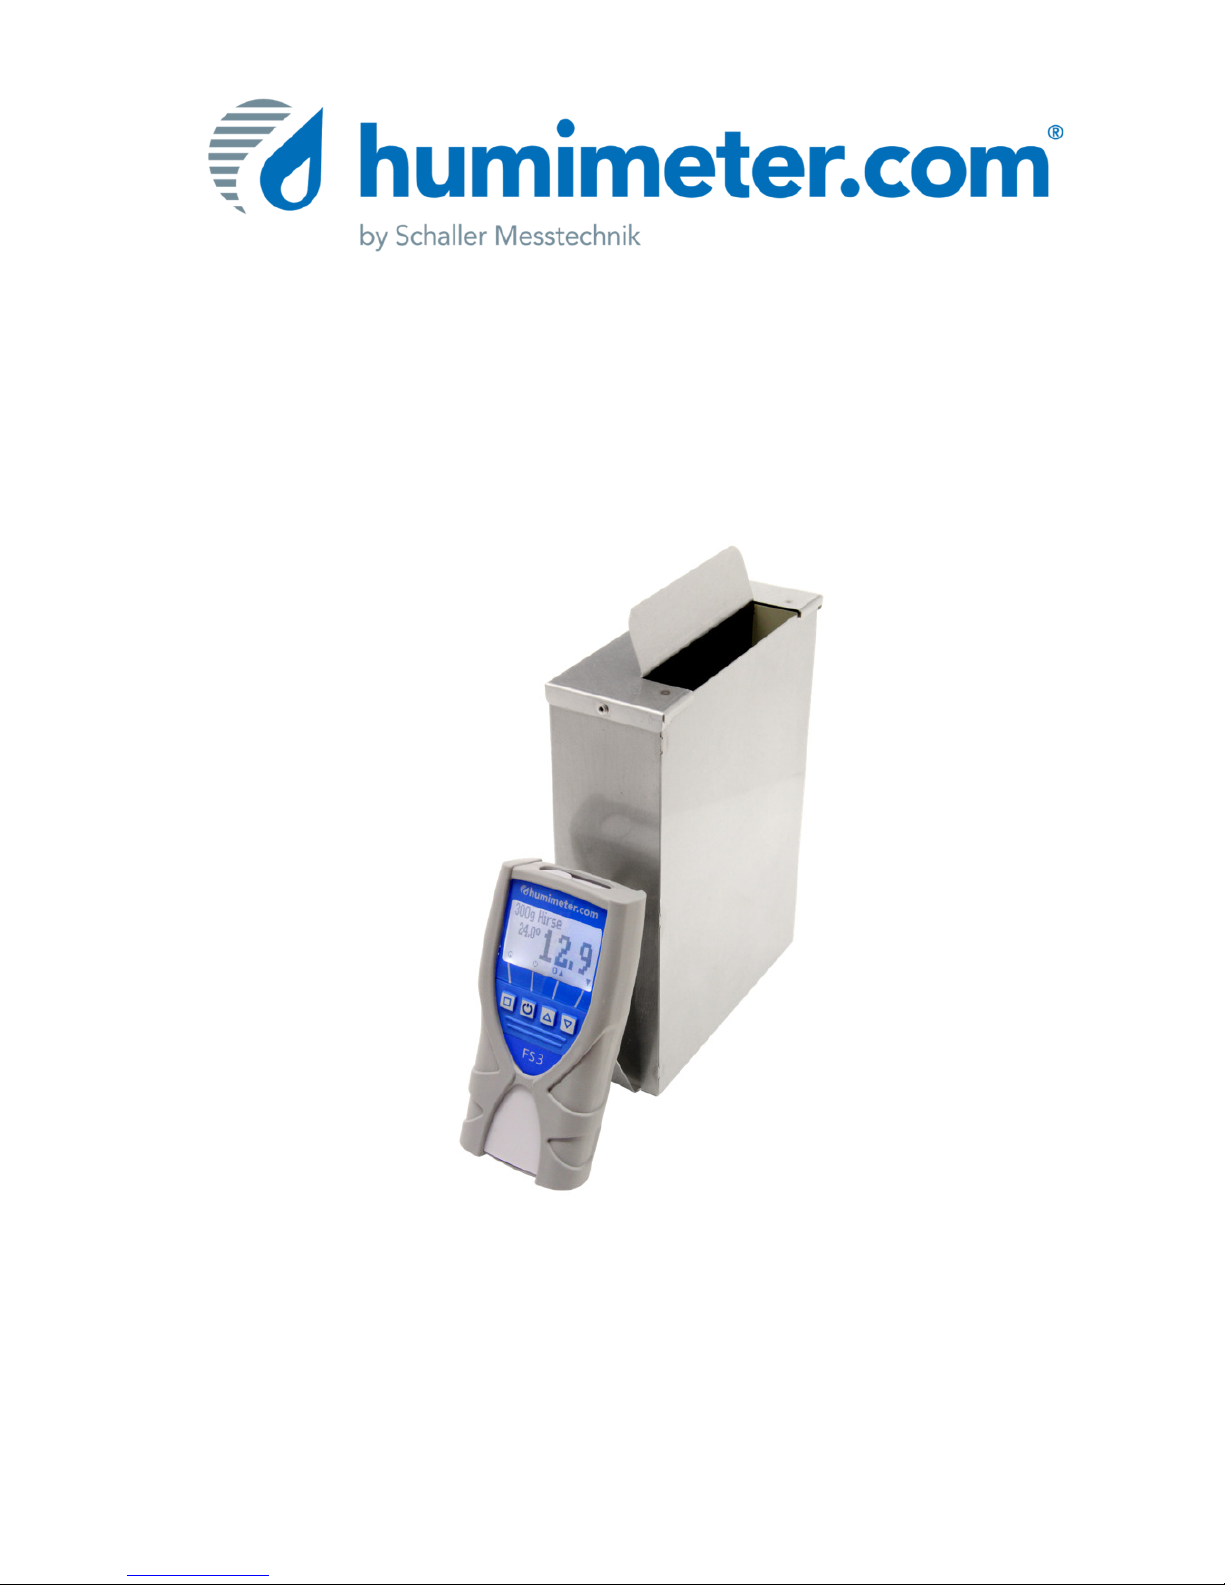
food and luxury food moisture meter
humimeter FS3
Version 2.8_en
© Schaller GmbH
2016
page 2 version 2.8_en
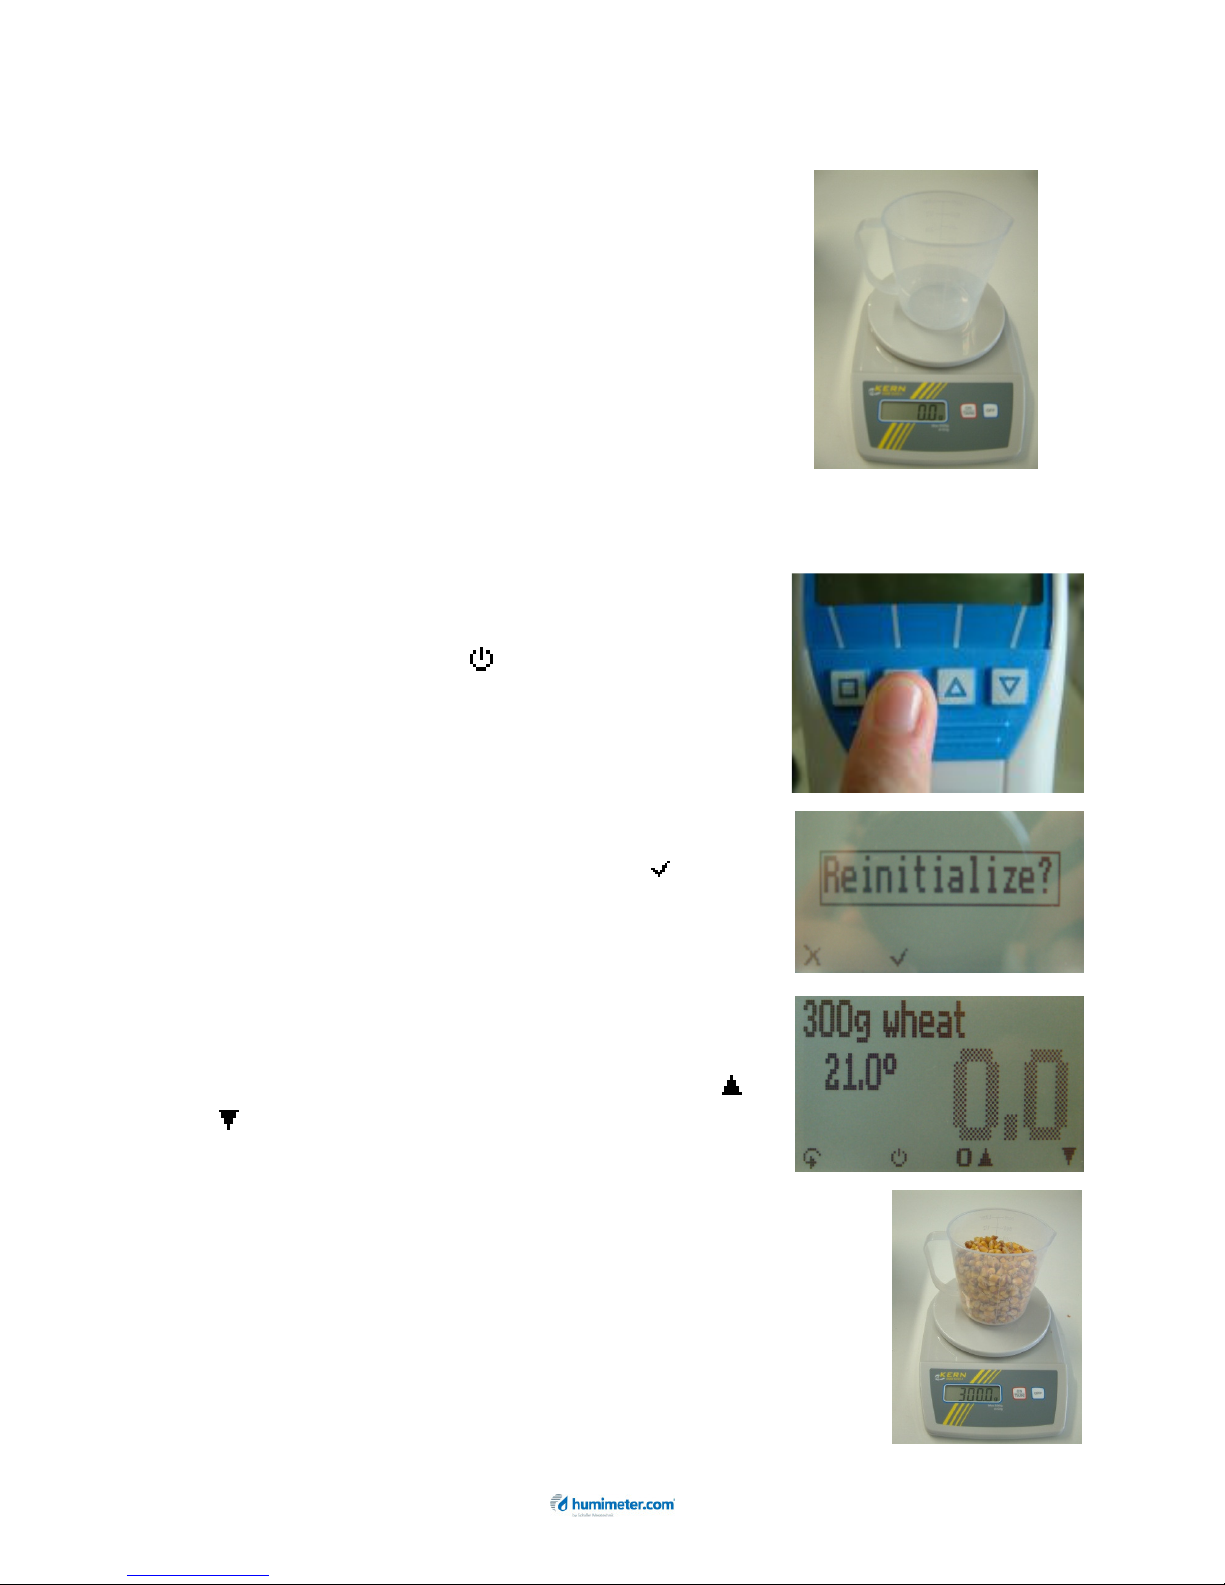
1. Place the empty provided cup (0.5 litre)
on the scale and turn the scale on. It
shows 0.0 gram.
2. Make sure that the measuring chamber is
completely empty. It is important that no
material is left in the measuring chamber
when you turn on the device.
3. Switch on the humimeter FS3 by pressing
the power button ( ) for 3 sec.
4. The next step is a self calibration. The
word “reinitialize” will show up on your
display. Accept by pressing the button.
5. Select the right calibration curve for your
material under test using the buttons or
.
6. Fill up the cup with the sample material
(+/- 1.0g). The filling quantity needed is
shown on the upper left corner of the
display of the device.
version 2.8_en page 3
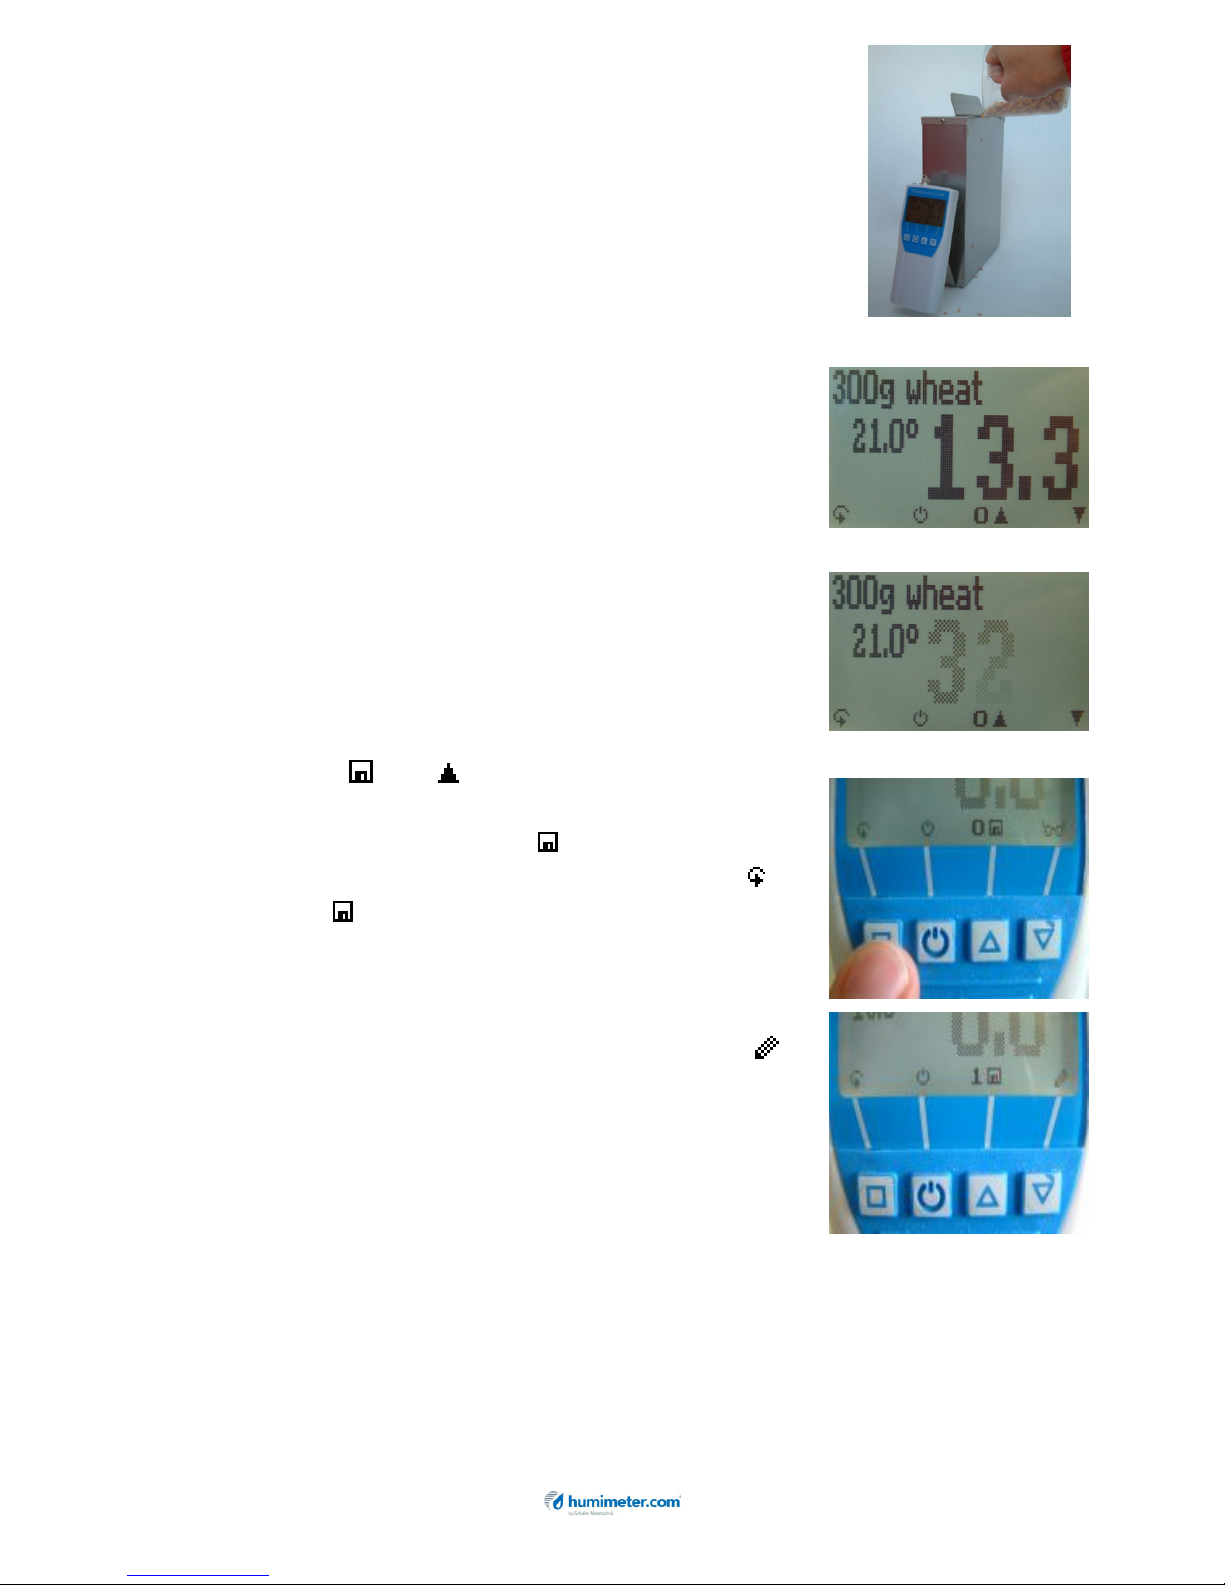
7. Fill up the measuring device with the
sample material. The filling needs to be
done slowly and constantly to ensure
reproducible results.
8. The display shows the measuring result.
9. If the measuring value is blinking, the
valid measuring range has been
exceeded (limits see list on page 5). In
this case the accuracy is decreasing.
10. To save the results in the store menu
press ( button). Storage
was successful when the number in
front of the symbol increases. To
reach the store menu please press ( )
until the appears.
11. To name the saved results press the
button.
12. Empty the humimeter and ensure that no
grain rests are accumulated in the
measuring chamber.
page 4 version 2.8_en
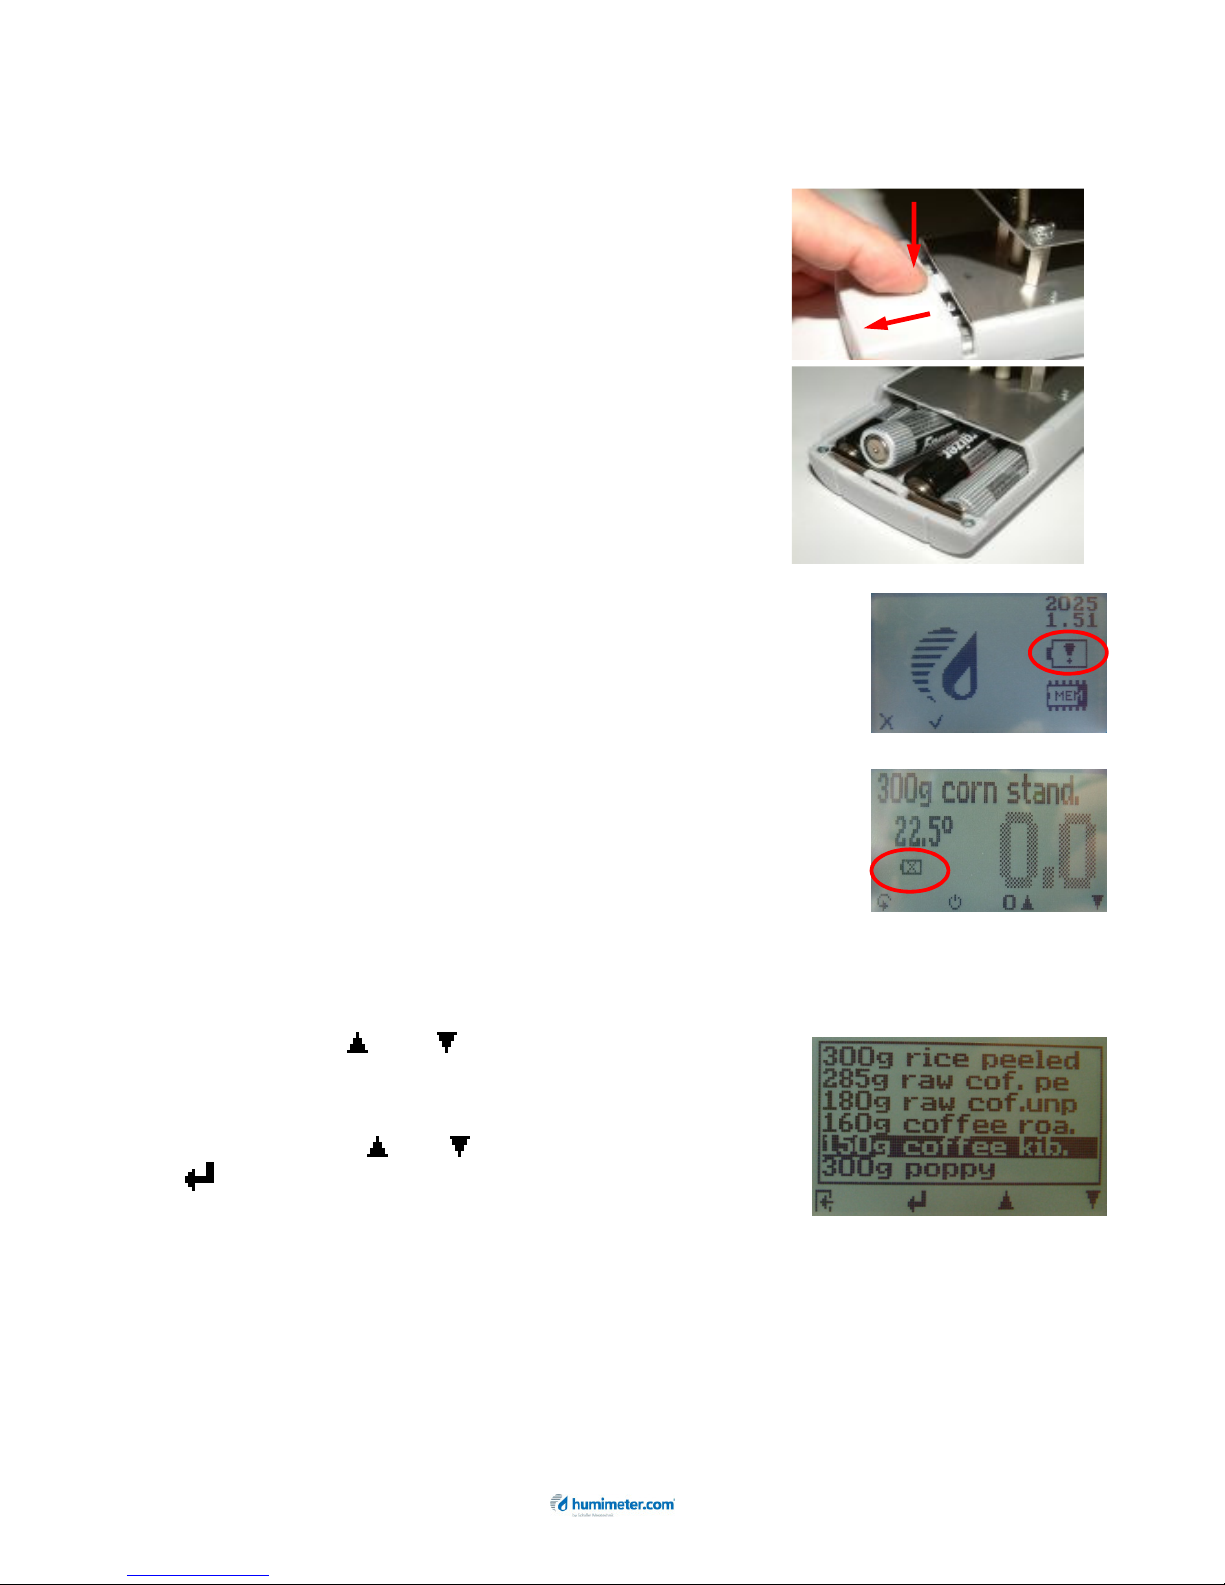
Changing batteries
Your new device is provided with batteries.
If the batteries are empty, please proceed as follows:
1.) Press with your finger onto the arrow of
the battery cap und pull it back.
2.) Remove the empty batteries.
3.) Put four new batteries in the device.
Check the right position of the battery
poles.
4.) Press down the batteries and close the
cap.
If the battery symbol appears in the measuring
window resp. if a critical charge of battery is
shown in the status, the batteries have to be
changed IMMEDIATELY.
If you do not use your humimeter device for a
longer period, remove the batteries. For eventual
resulting damages we cannot provide any
warranty.
List of calibration curves
Press the or key in the measuring
window for at least 3 seconds and a list with
all available sorts will appear. Select your sort
by pressing or and confirm with the
key. The measurement will continue
automatically.
 Loading...