

Page 1
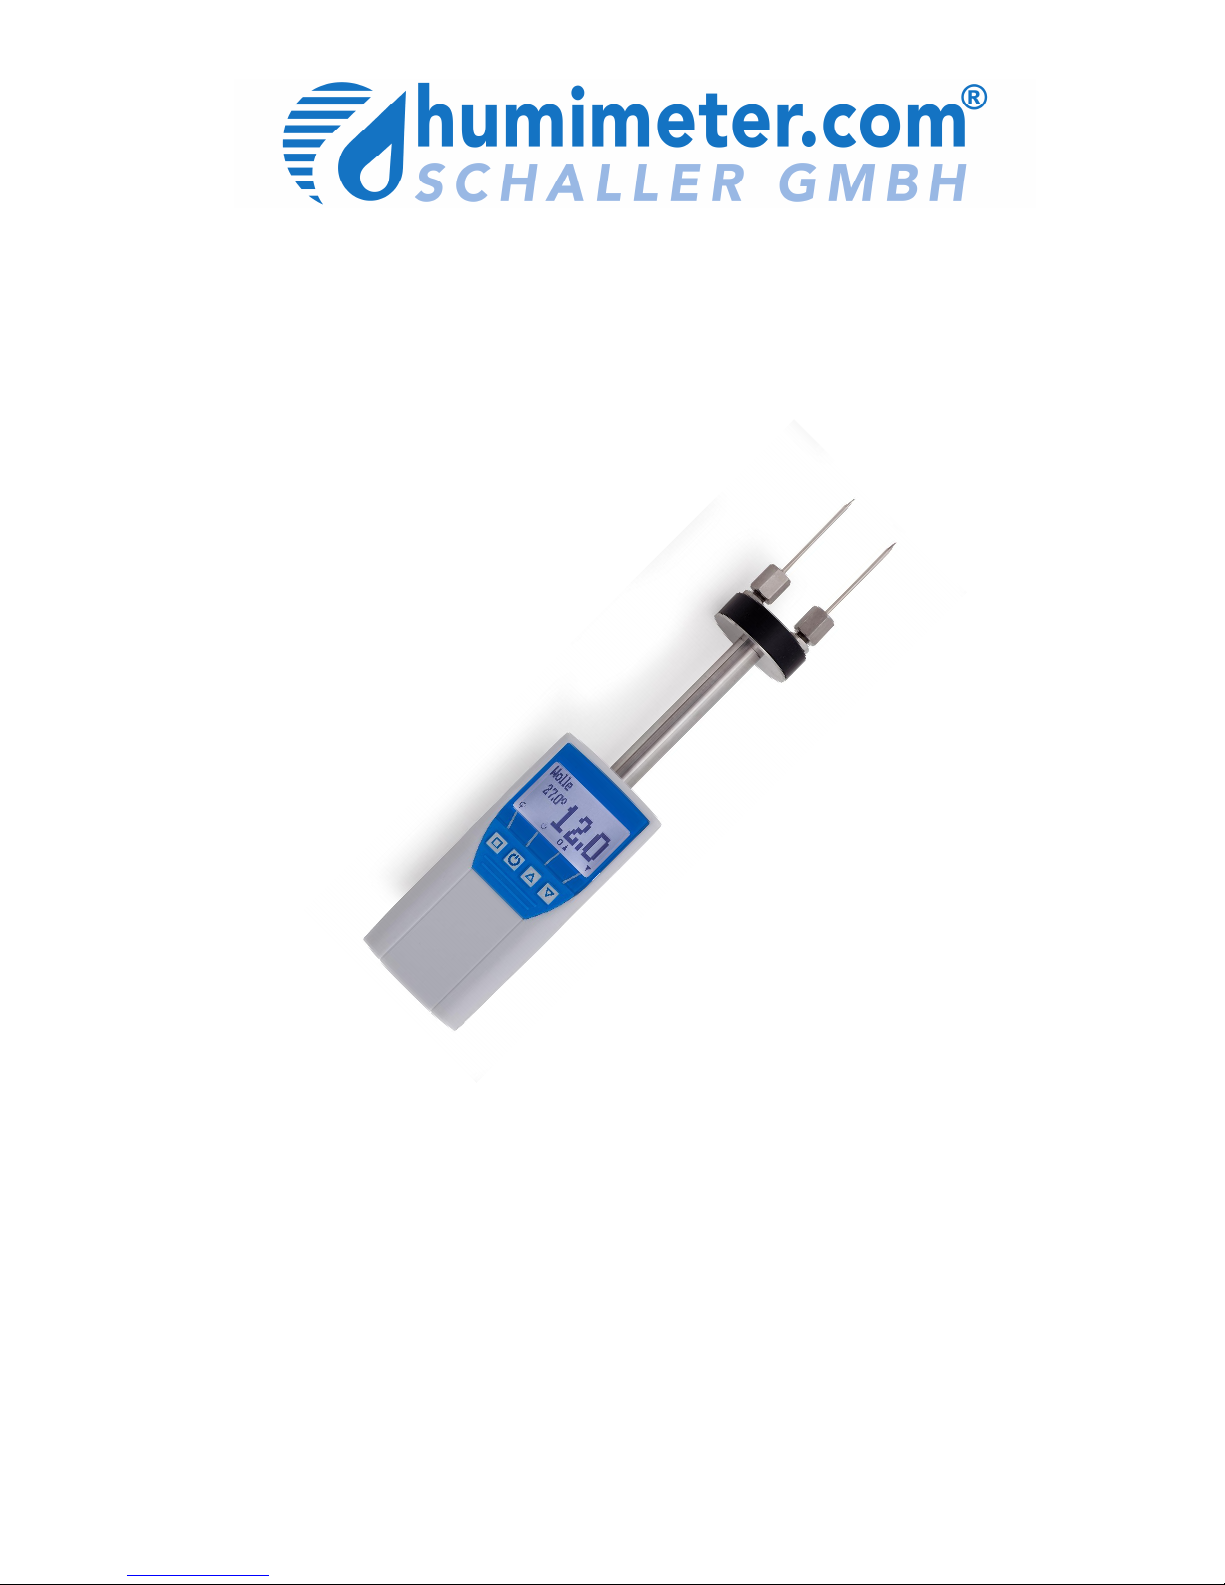
User Manual
humimeter SLW
moisture meter for textile and yarn
Version 1.0
© Schaller GmbH
2010
Page 2
page 2 Version 1.0
Measuring procedure
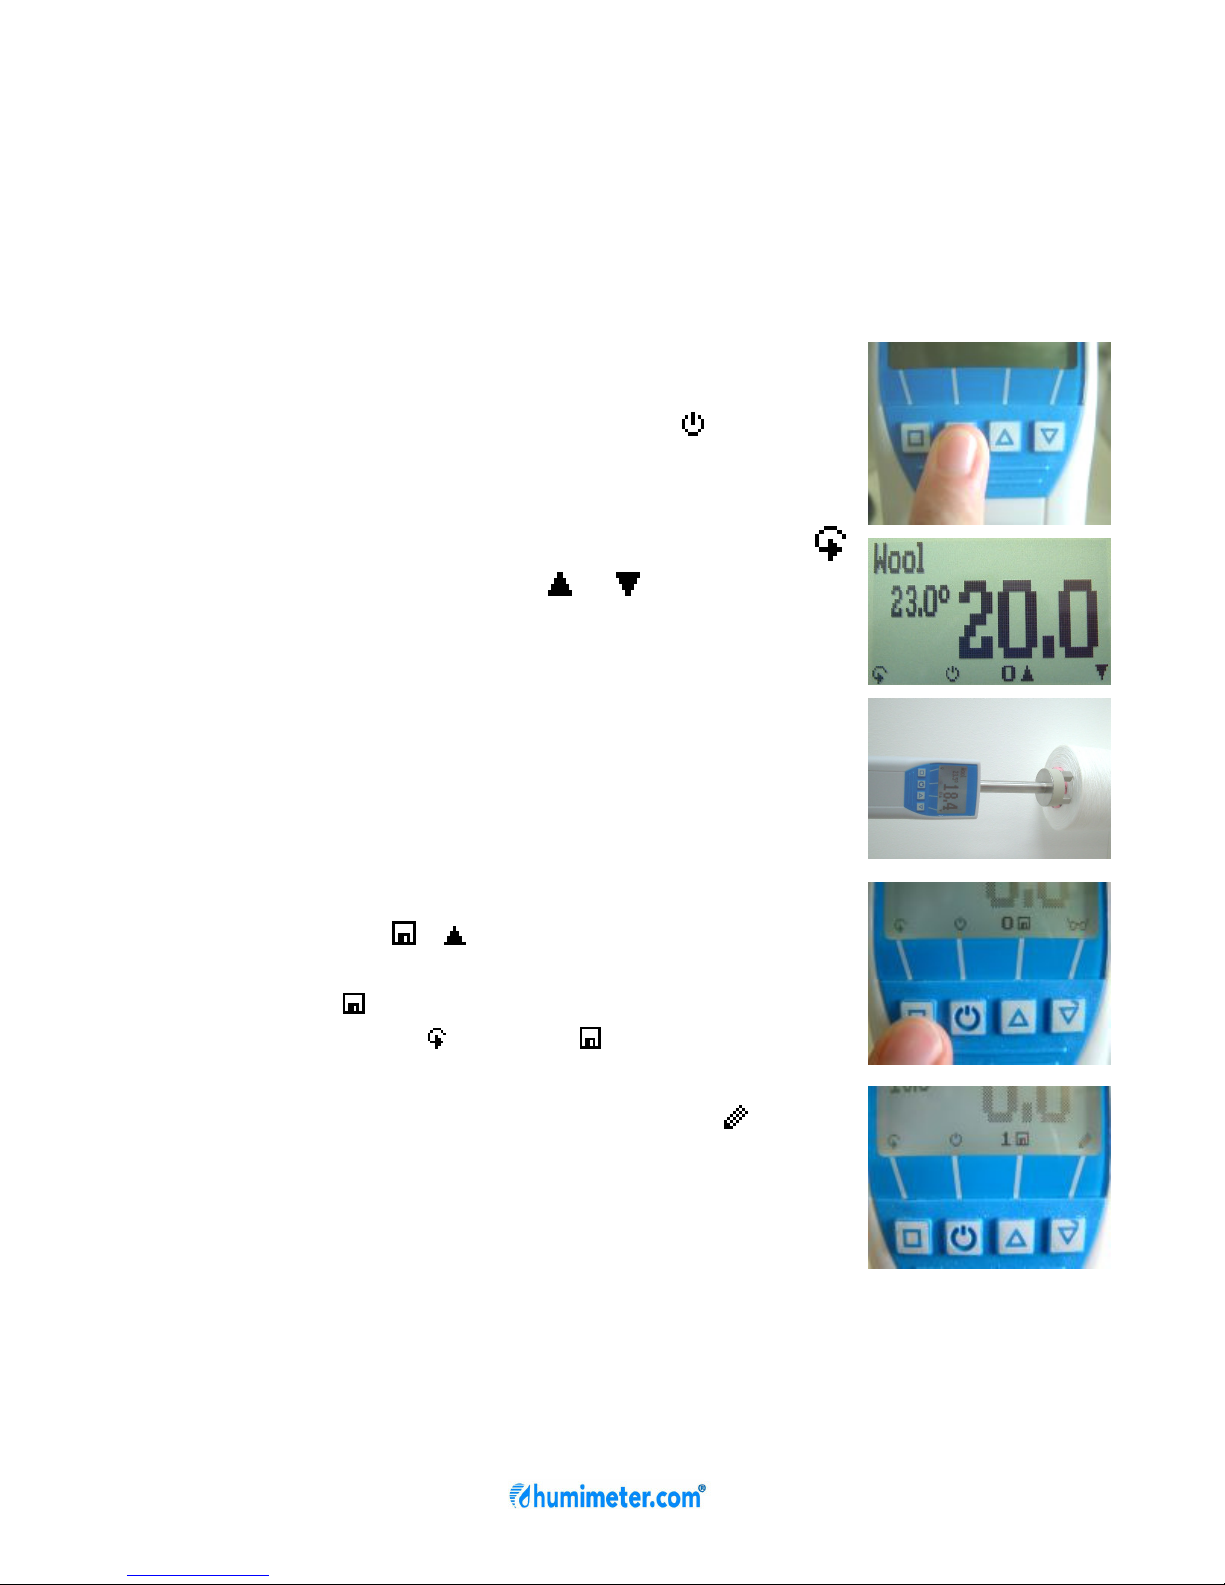
1.) For a correct measurement please ensure that the device has
the same temperature than the material under test (+/-3°C). For
that reason, let your humimeter SLW adjust to the surrounding
temperature of the material for at least half an hour before
measuring.
2.) Switch on the device: Press the key for 3
seconds.
3.) Changing the calibration curve: Press the
key once and then the or key. The name
of the calibration curve can be seen at the
head of the display.
4.) Push the electrodes into the yarn or textile.
Within a second the water content is shown
on the display.
6.) To save the results in the save menu
press the ( button). The storage was
successful when the number in front of the
symbol increases. To reach the store menu
please press ( ) until the appears.
7) To name the saved results press the button.
Attention!! Risk of injury
Page 3
page 3 Version 1.0
List of calibration curves
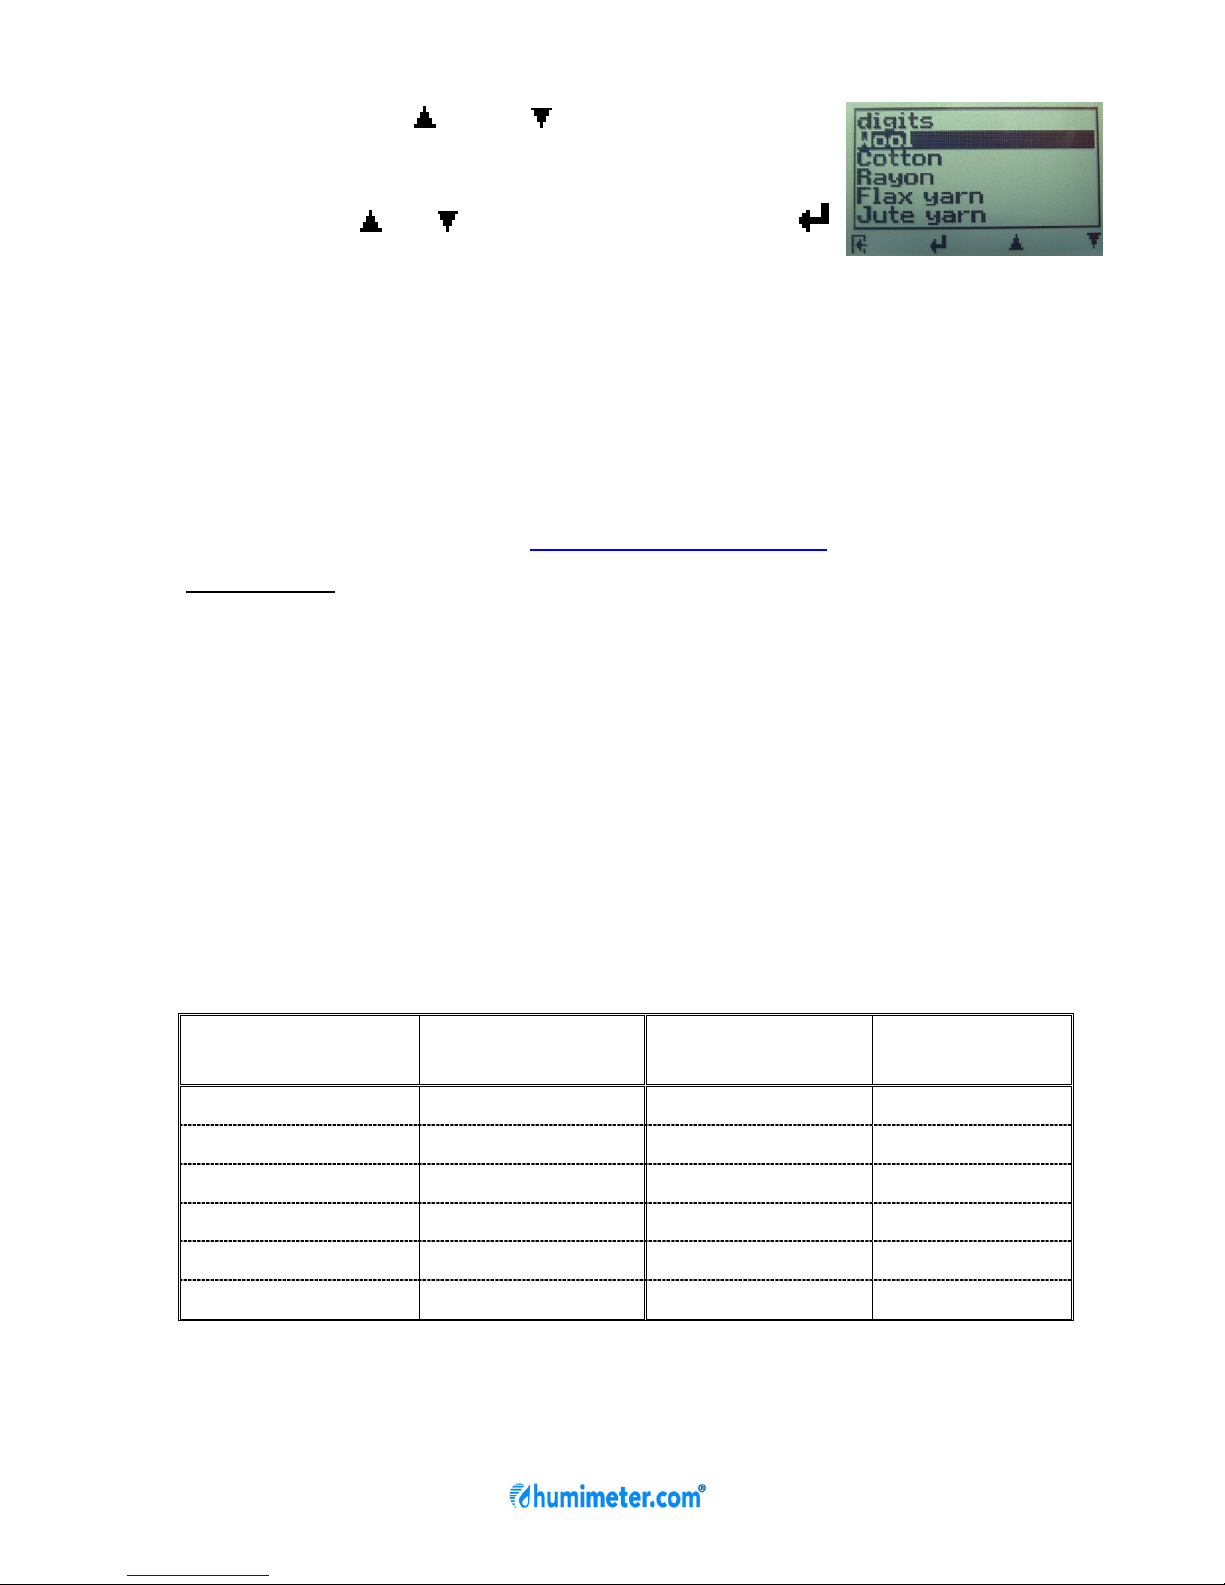
Pressing the or key during the
measurement for at least 3 seconds a list with
all available sorts will appear. Select your sort
by pressing or and confirm it with the
key. The measurement will continue
automatically.
Measuring value
The measuring value shown on your humimeter SLW represents
the “water content” of the testing material (textile). This means that
no conversion from “textile moisture” into “water content” is
necessary. If you prefer to change the shown value into “textile
moisture”, please contact
Definitions:
Water content
The water content is the amount of water in a textile referred to its
total weight. For example: 1kg of a textile with 40% water content
consists of 0.4 kg water and 0,6 kg textile.
Textile Moisture
The textile moisture is the amount of water in a textile referred to its
dry weight. The same example: 0.6 kg textile with 0.4 kg water; the
0.6 kg of the textile represents 100%, so the 0.4 kg of water are
66.7% textile moisture.
Type of material
sort measuring range
sort
measuring
range
Wool 13% – 26% Acetat 3,5% – 13%
Cotton 1,5% – 13% Nylon 1,5% – 6,5%
Rayon 4% – 26% Polyacrylics 0,2% – 3%
Flax Yarn 5,5% – 15% Polyester 0,5% – 4%
Jute Yarn 8% – 24% Digit 0 – 100
Hemp Yarn 5% – 17%
Page 4
page 4 Version 1.0
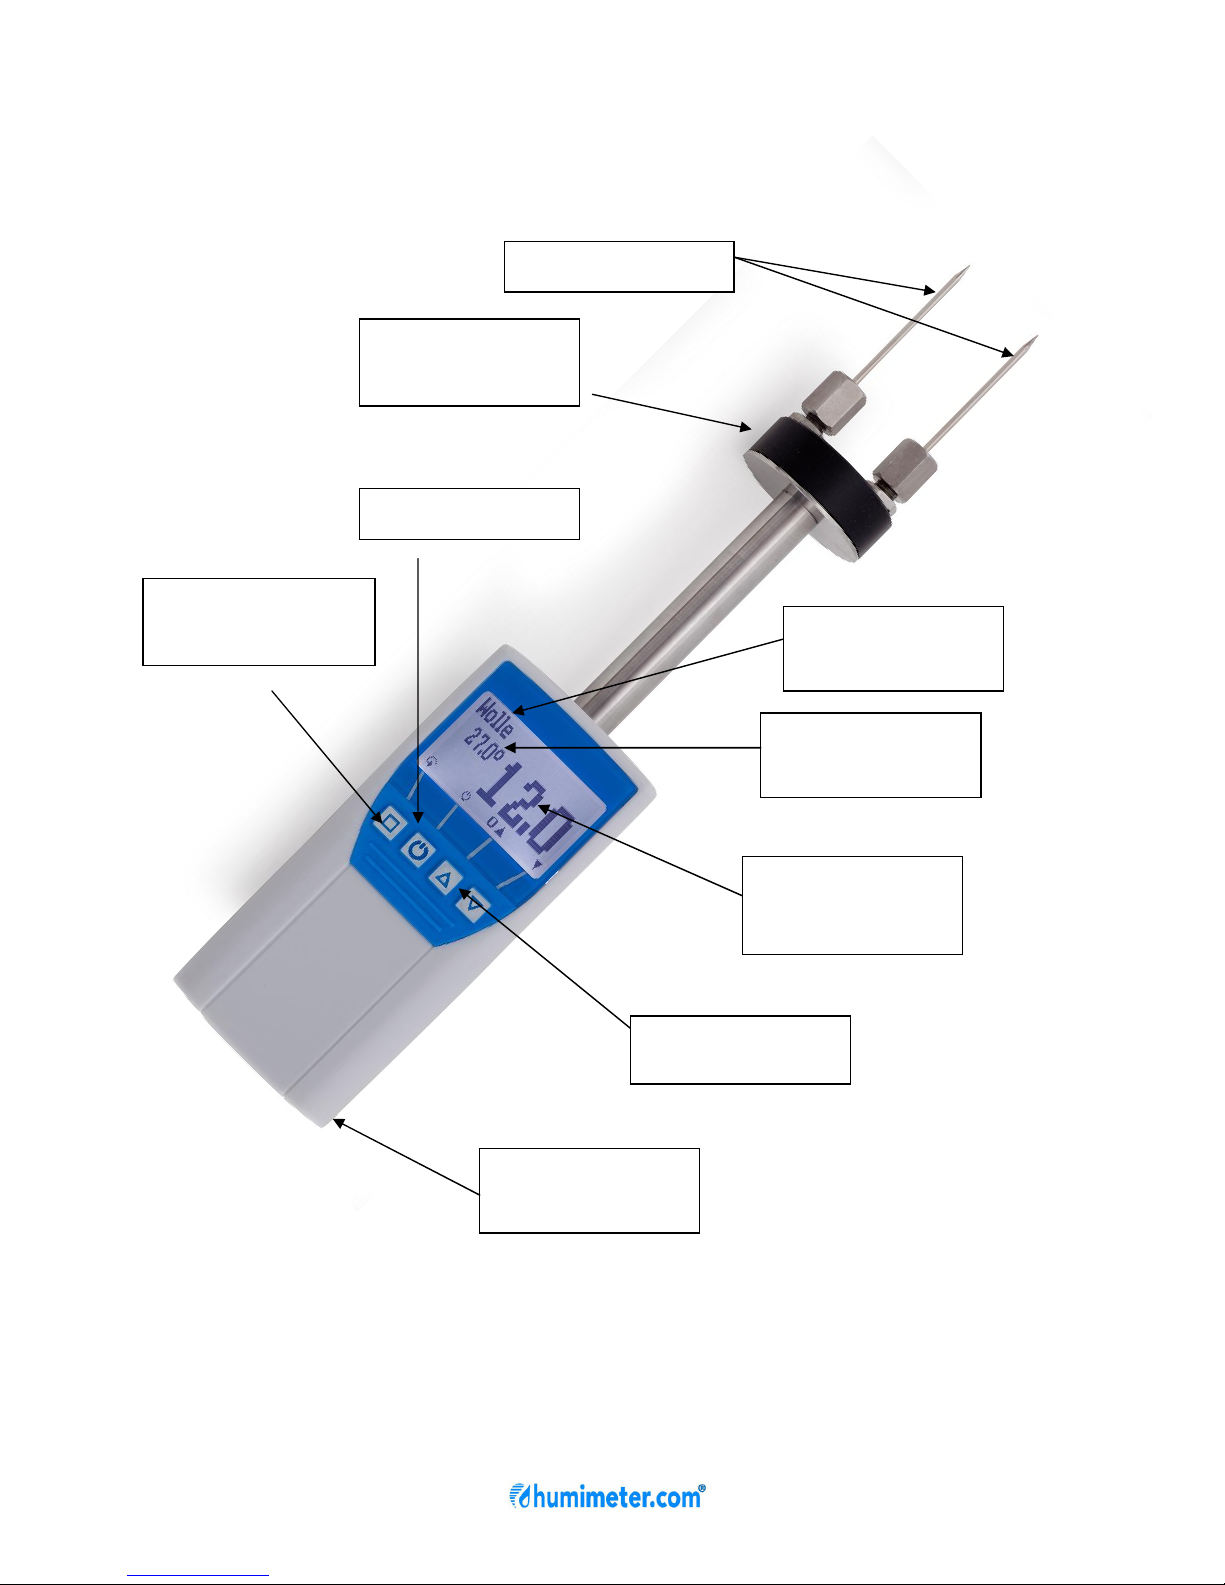
batteries
(flipside)
Power On key
measuring
value
temperature
value
measuring
head
change sort
electrodes
type of
material
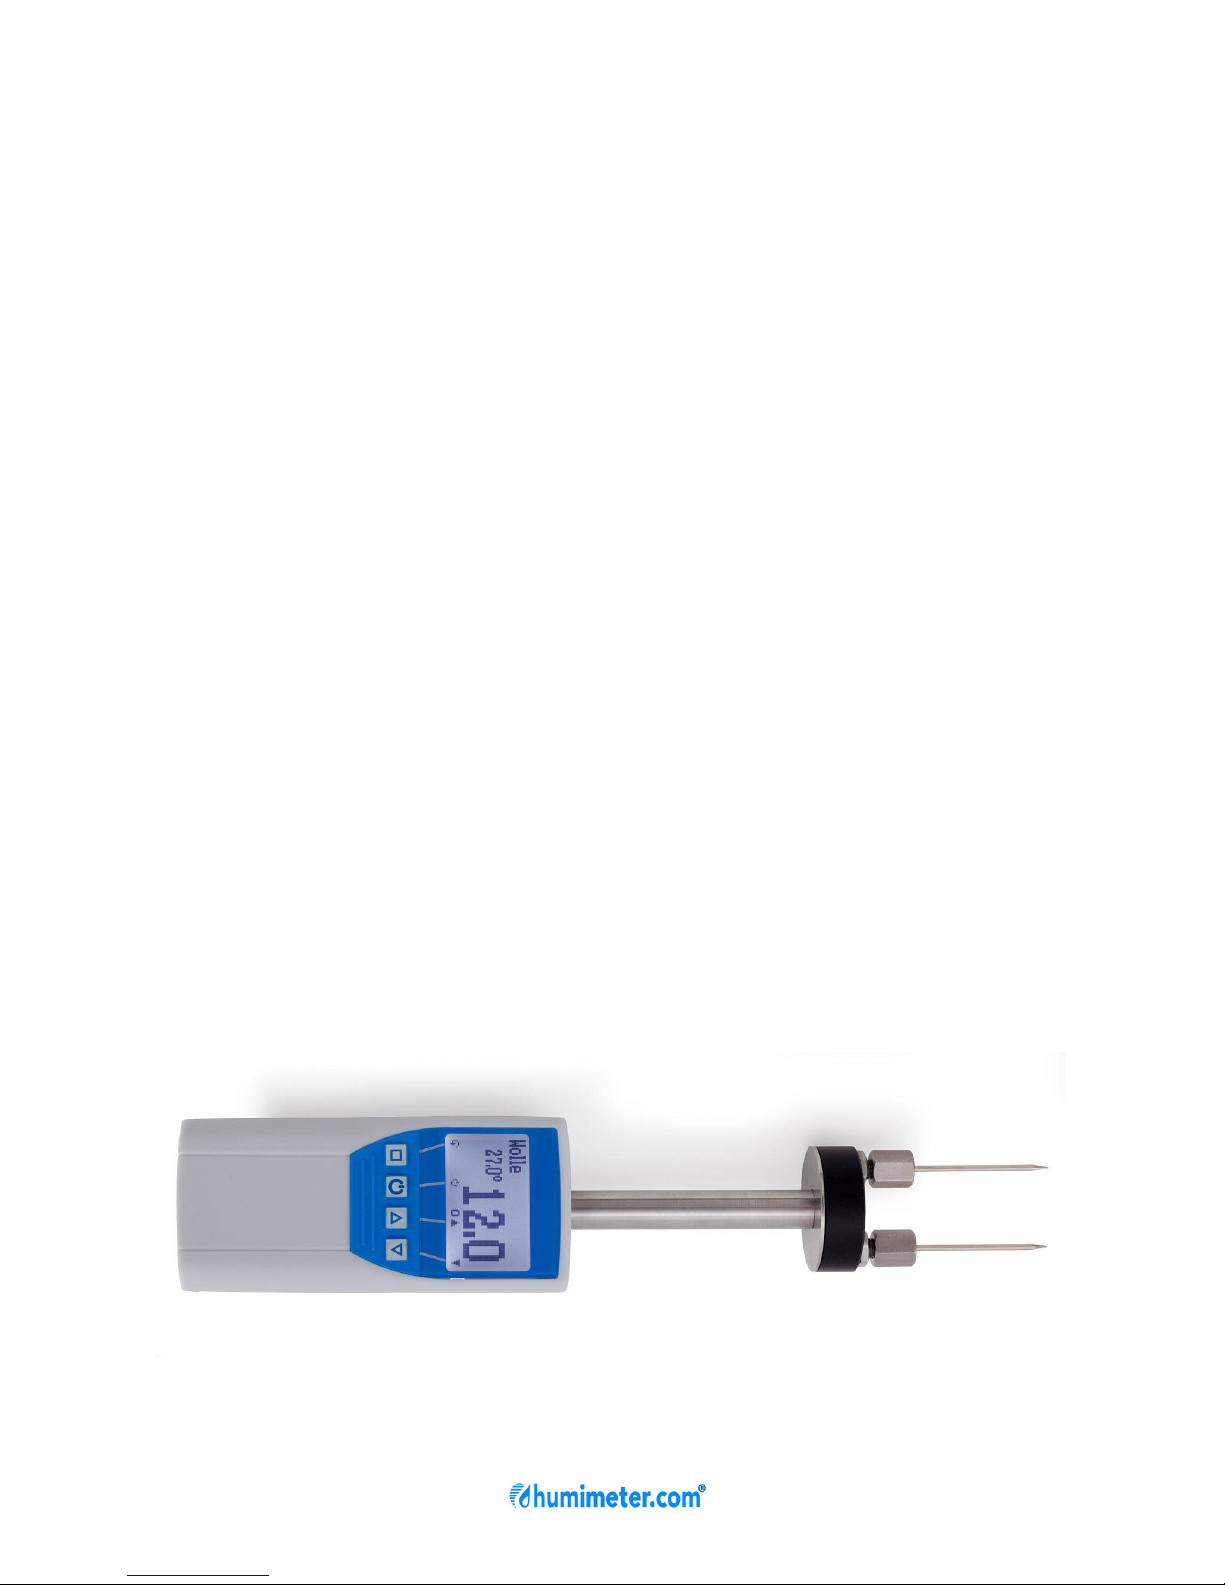
View of the instrument
rolling menu /
HOLD key
Page 5
page 5 Version 1.0
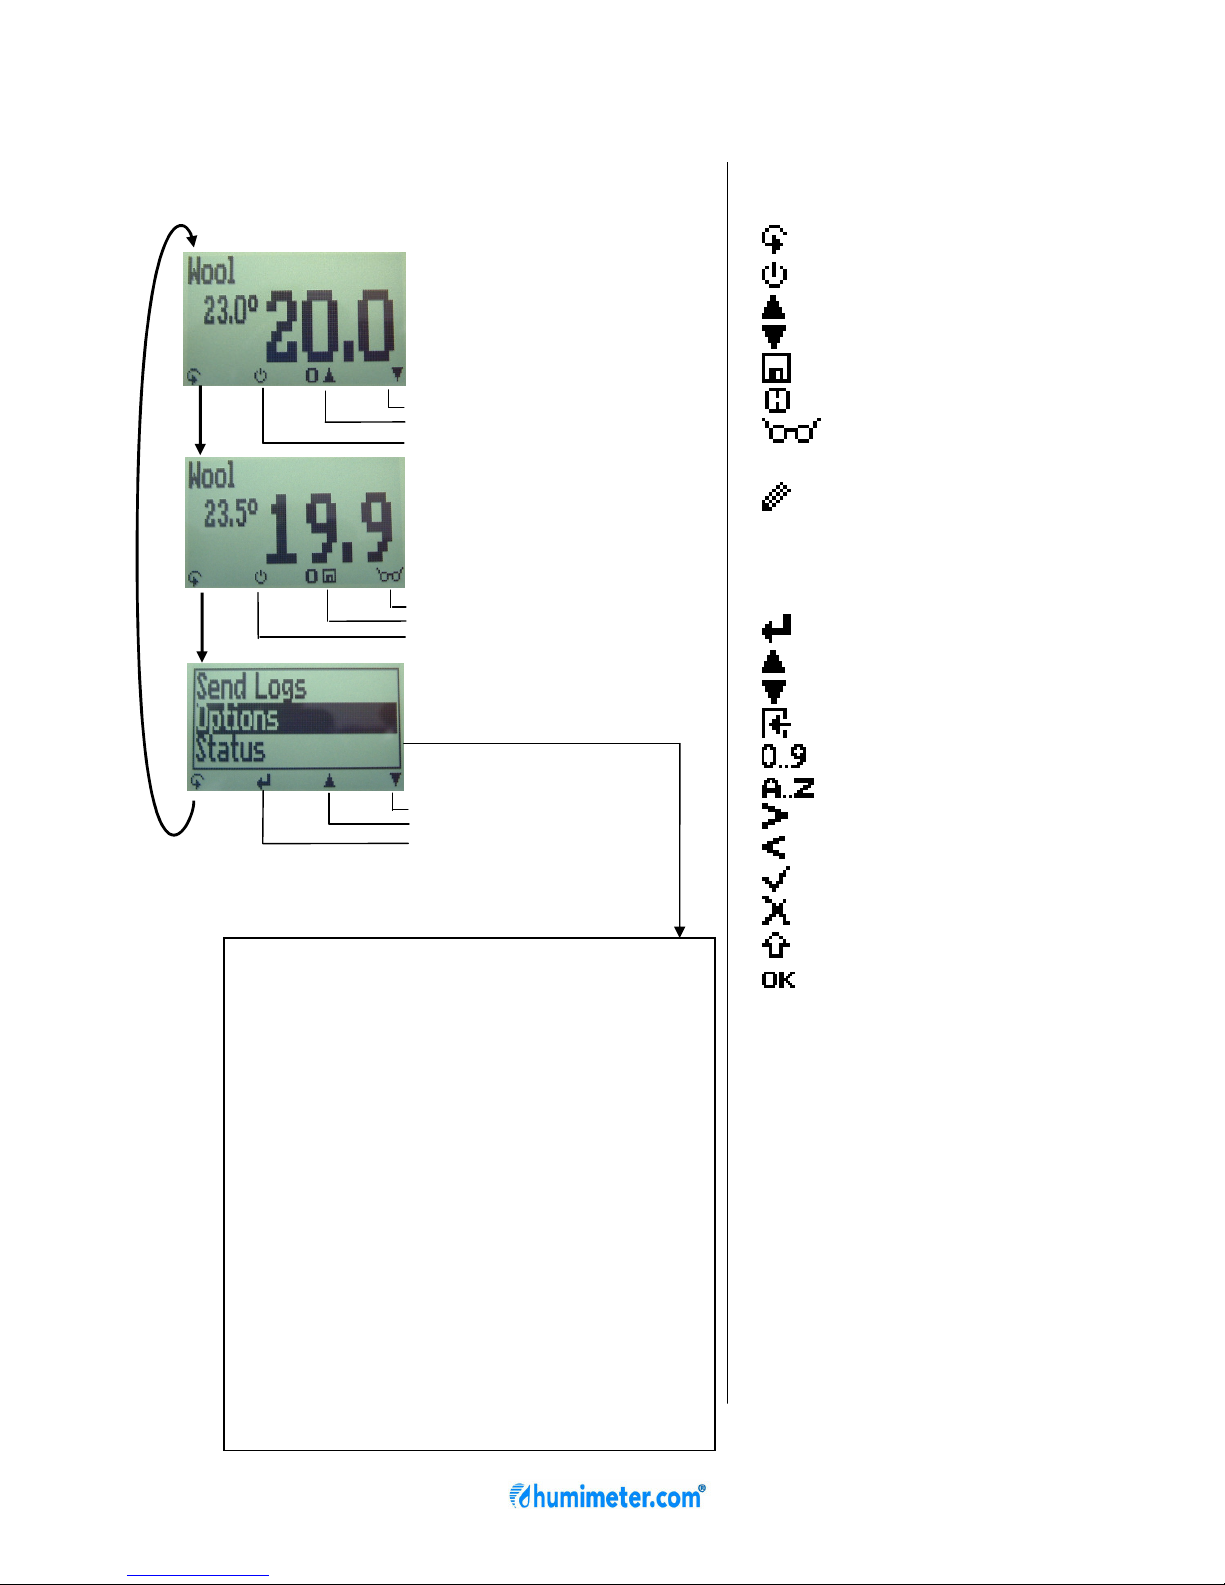
Main Menu
Menu level overview
Overview main menu
Type selection menu
Store menu
Next calibration curve
Previous calibration curve
Power Off
Watch the saved data (logs)
Save new value
Power Off
Switch lower
Switch upper
Open menu/confirm
Keypad symbols
Measuring window:
Rolling Menu
Power ON / OFF
Switch upper
Switch lower
Save
Hold
Watch the
saved data
Suppliers data
can be added
Menu:
Enter
Switch upper
Switch lower
Exit
Enter numbers
Enter letters
Next or right
Left
Yes
No
Shift
OK
Edit Logs
Manual Logs
Clear Logs
Print Logs
Last Log
All Logs
Clear Logs
Send Logs
Manual Logs
Clear Logs
Options
Status
Options
Date / Time
Log Time
Language
Unlock
°C / °F
o Userlevel
BL On Time
Auto Off Time
Material calib.
Password
Reset
Page 6
page 6 Version 1.0
Running the instrument
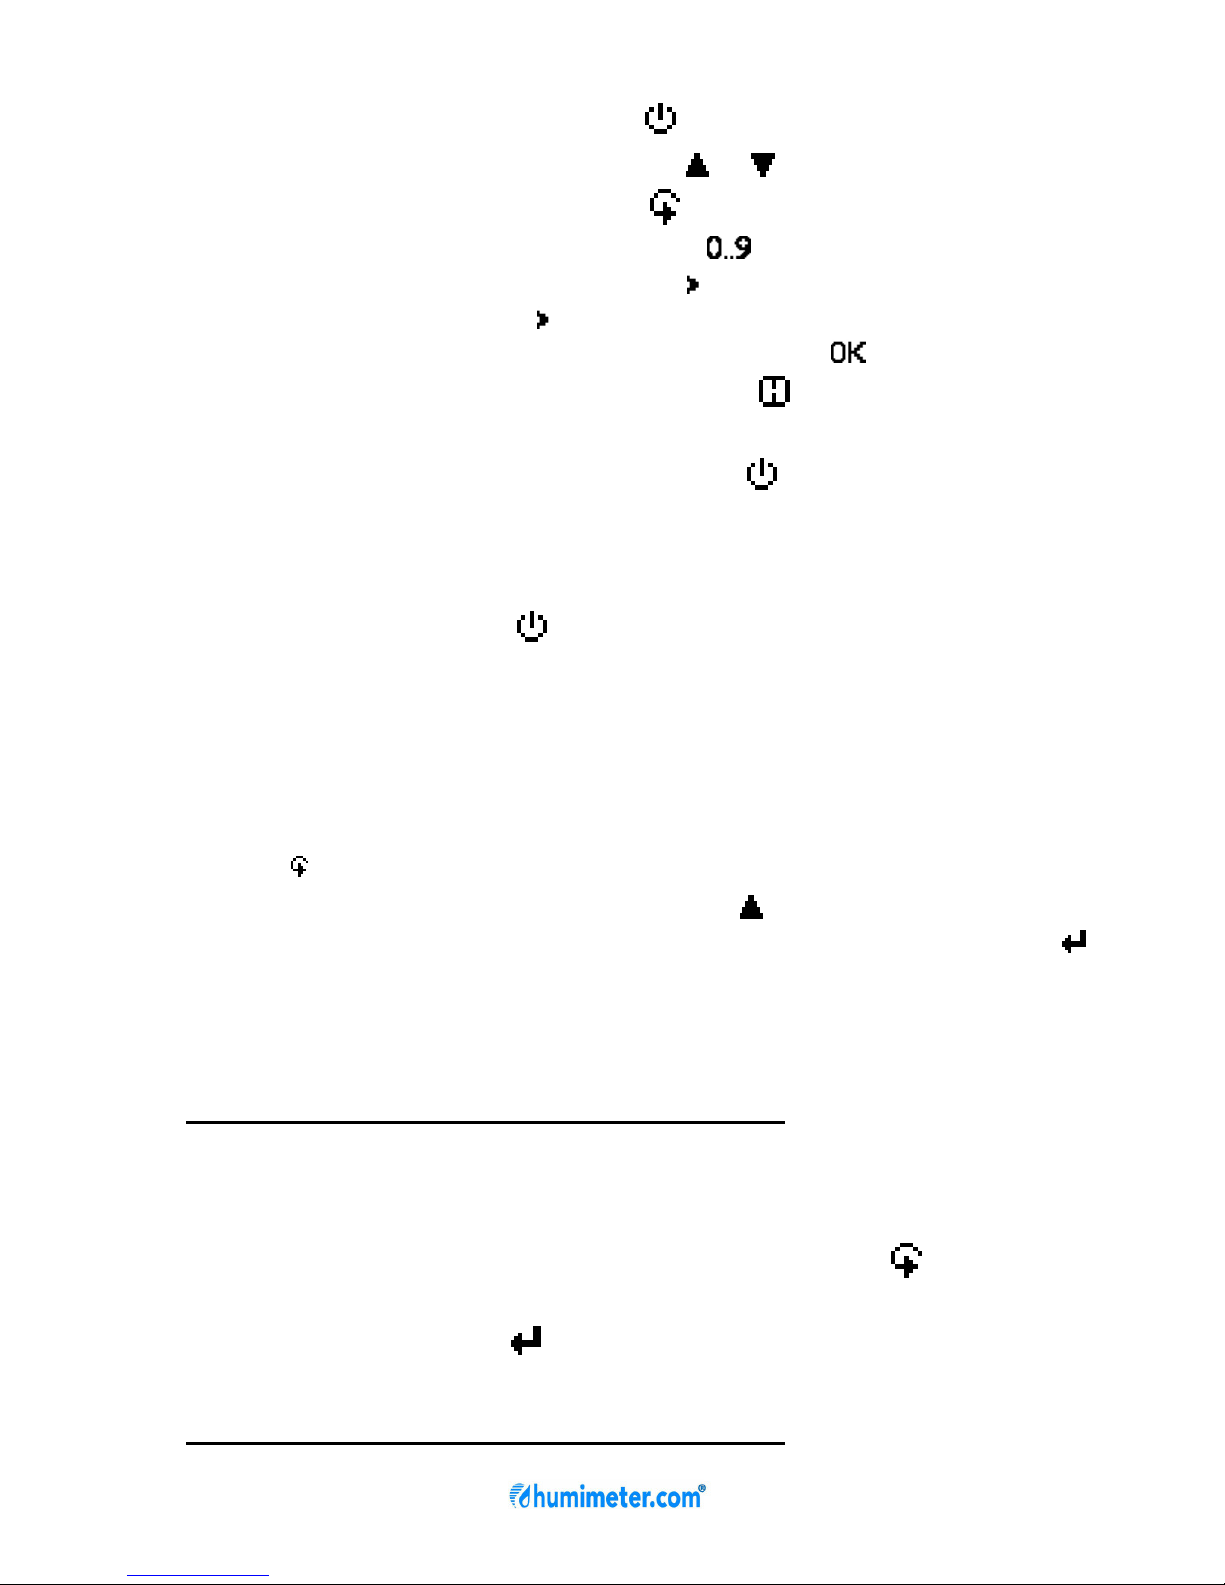
Switch on the device: Press the key for 3 seconds.
Change the kind of textile: Press the or key.
Set the clock: press 3 times the key - Options – Date / Time
Set date and the time by pressing the key (YY.MM.DD). When
you have entered the year, push the key to get to the month and
later to the day. Press the key again to get to the time. If you have
entered both date and time, confirm by pressing .
Holding the measuring value: Press the key in the save mode
(function has to be activated in options/log time menu)
Display background lighting: Press the key; backlight will turn
off automatically after 20 seconds. Backlight will be activated by
pressing any key. Furthermore the power off time is reset to 4
minutes. (Both times can be modified in the options menu.)
Power off: Press the key in the measuring window for 5
seconds; the device will switch off after releasing the key. The
device also switches off automatically when no key is pressed for 6
minutes (Time can be changed in the options menu.)
Activation of the “super user” function
2 times - Options – Unlock
Enter the 4-digit password by using the button (standard is the
4-digit serial number of the device) and confirm by pressing the
button.
Changing the Userlevel
Changing from advanced user to single user:
Make sure that you have activated the “super user” functions
according to the instructions above. Afterwards change to the
menu and choose „Options“.
In the submenu please select „o Userlevel“ (2 times - Options –
o Userlevel)
Confirm by pressing the button. Now the single user is activated.
Changing from single user to advanced user:
Page 7
page 7 Version 1.0
Keep both the buttons and pressed directly after switching on
the device. Your humimeter automatically starts the main menu.
Activate the “super user” functions according to the instructions
above.
Navigate to “Options – o Userlevel” and confirm by pressing the
button.
Overview of other instrument functions
Manual saving of single measuring values in a measurement
series.
Display of the measuring series and measuring values directly
on the instrument
Printout of saved measuring series (when device is equipped
with an interface)
Transfer and saving of the measuring series on a PC (when
device is equipped with an interface)
Display of memory and battery status
Selection of the menu language (DE, EN, FR, IT, ES, RU)
Temperature in degrees Celsius or degrees Fahrenheit
Activation of a simple user operation
Transfer of saved data to the PC
To send your saved logs to the PC, connect
the humimeter device to your PC using the
USB cable that was delivered with your
device. Carefully loose the protection cap on
your humimeter and plug in the USB mini B
connector. The bigger connector has to be
connected to a USB slot on your PC.
Start the LogMemorizer software on your
PC and switch on your humimeter SLW.
The data transfer can be started on your
humimeter or on the software:
Page 8
page 8 Version 1.0
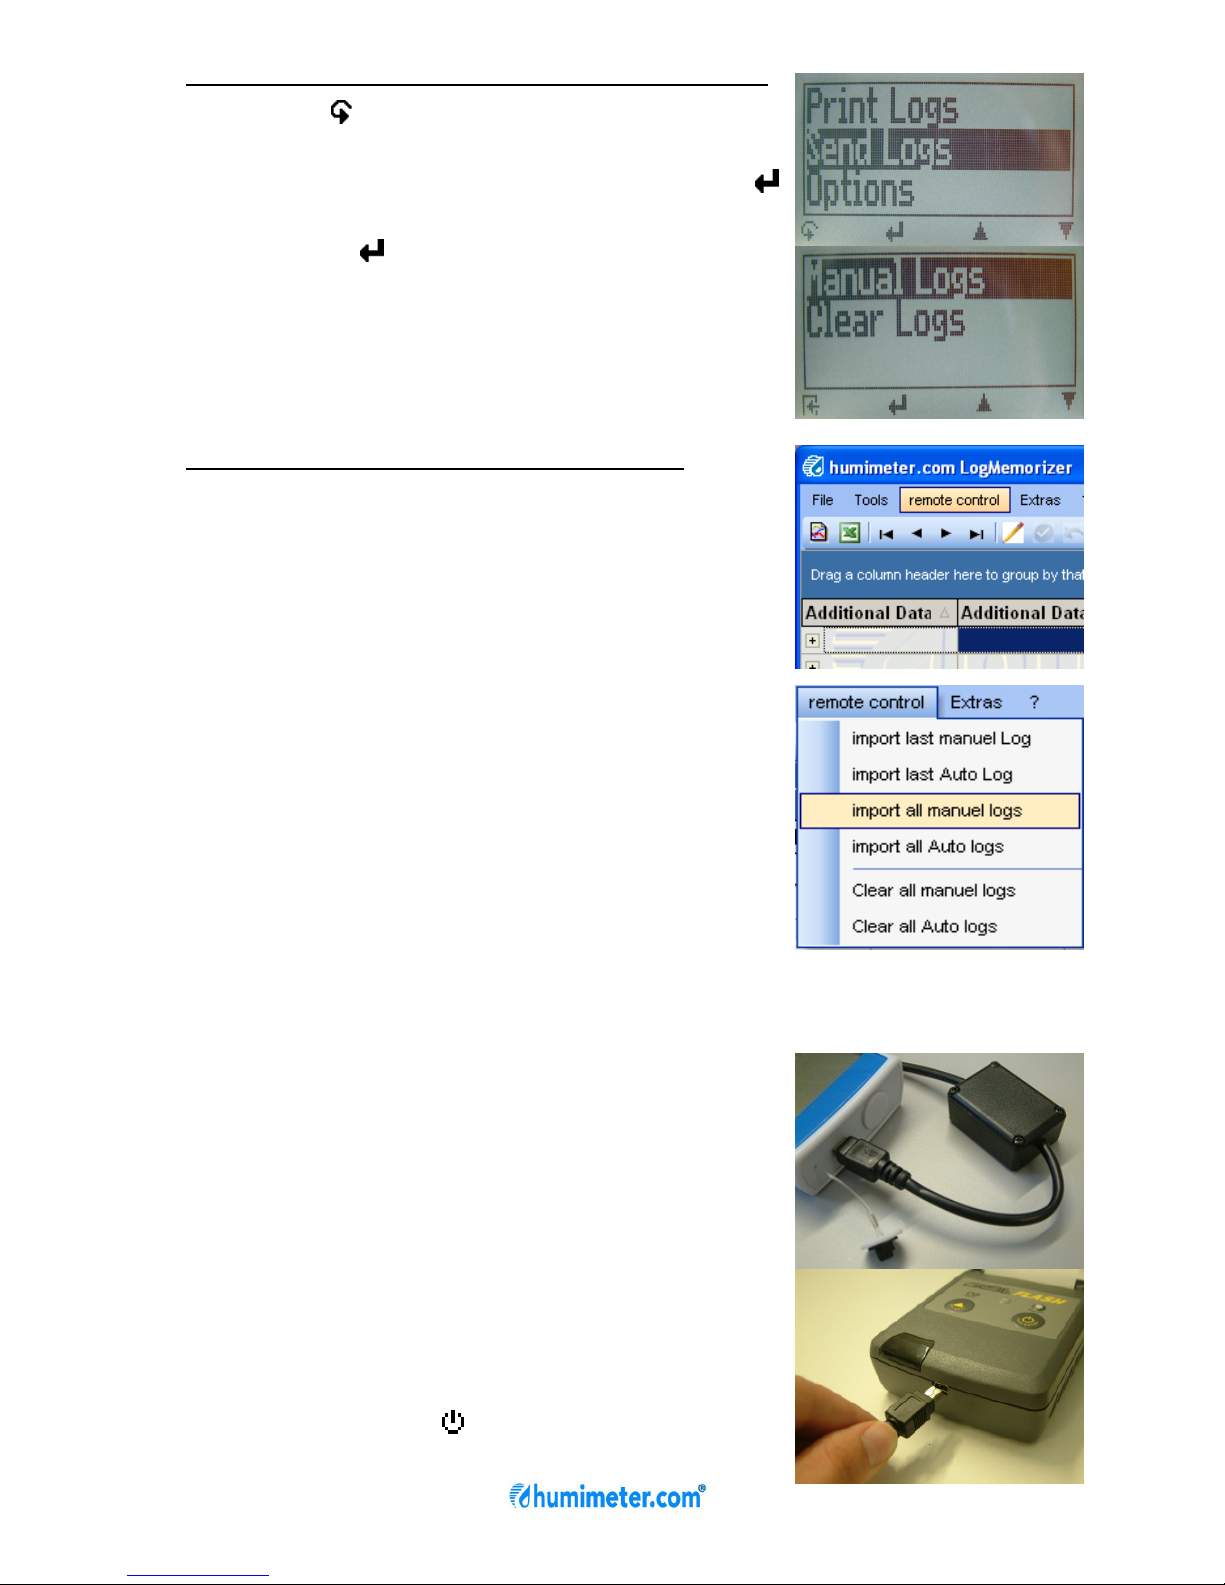
Starting the data transfer on the humimeter:
Press the key until you reach the menu
(see image on the right). Then choose
„Send Logs“ and confirm by pressing the
key. Now choose „Manual Logs“ and
confirm with again. All saved logs will be
sent to your PC.
Starting the data transfer on your PC:
Press the button „remote control“ in the
LogMemorizer software. A drop-down menu
with several options opens (see image
below).
For transferring the data you can select
„Import last manual log“ (the last saved
measuring series is transferred) or „Import
all manual logs“ (all saved logs are
transferred).
If you click on one of these menu items, the
transfer starts immediately.
For the basic adjustments of the software
please look through the instructions on the
LogMemorizer CD.
Print saved data
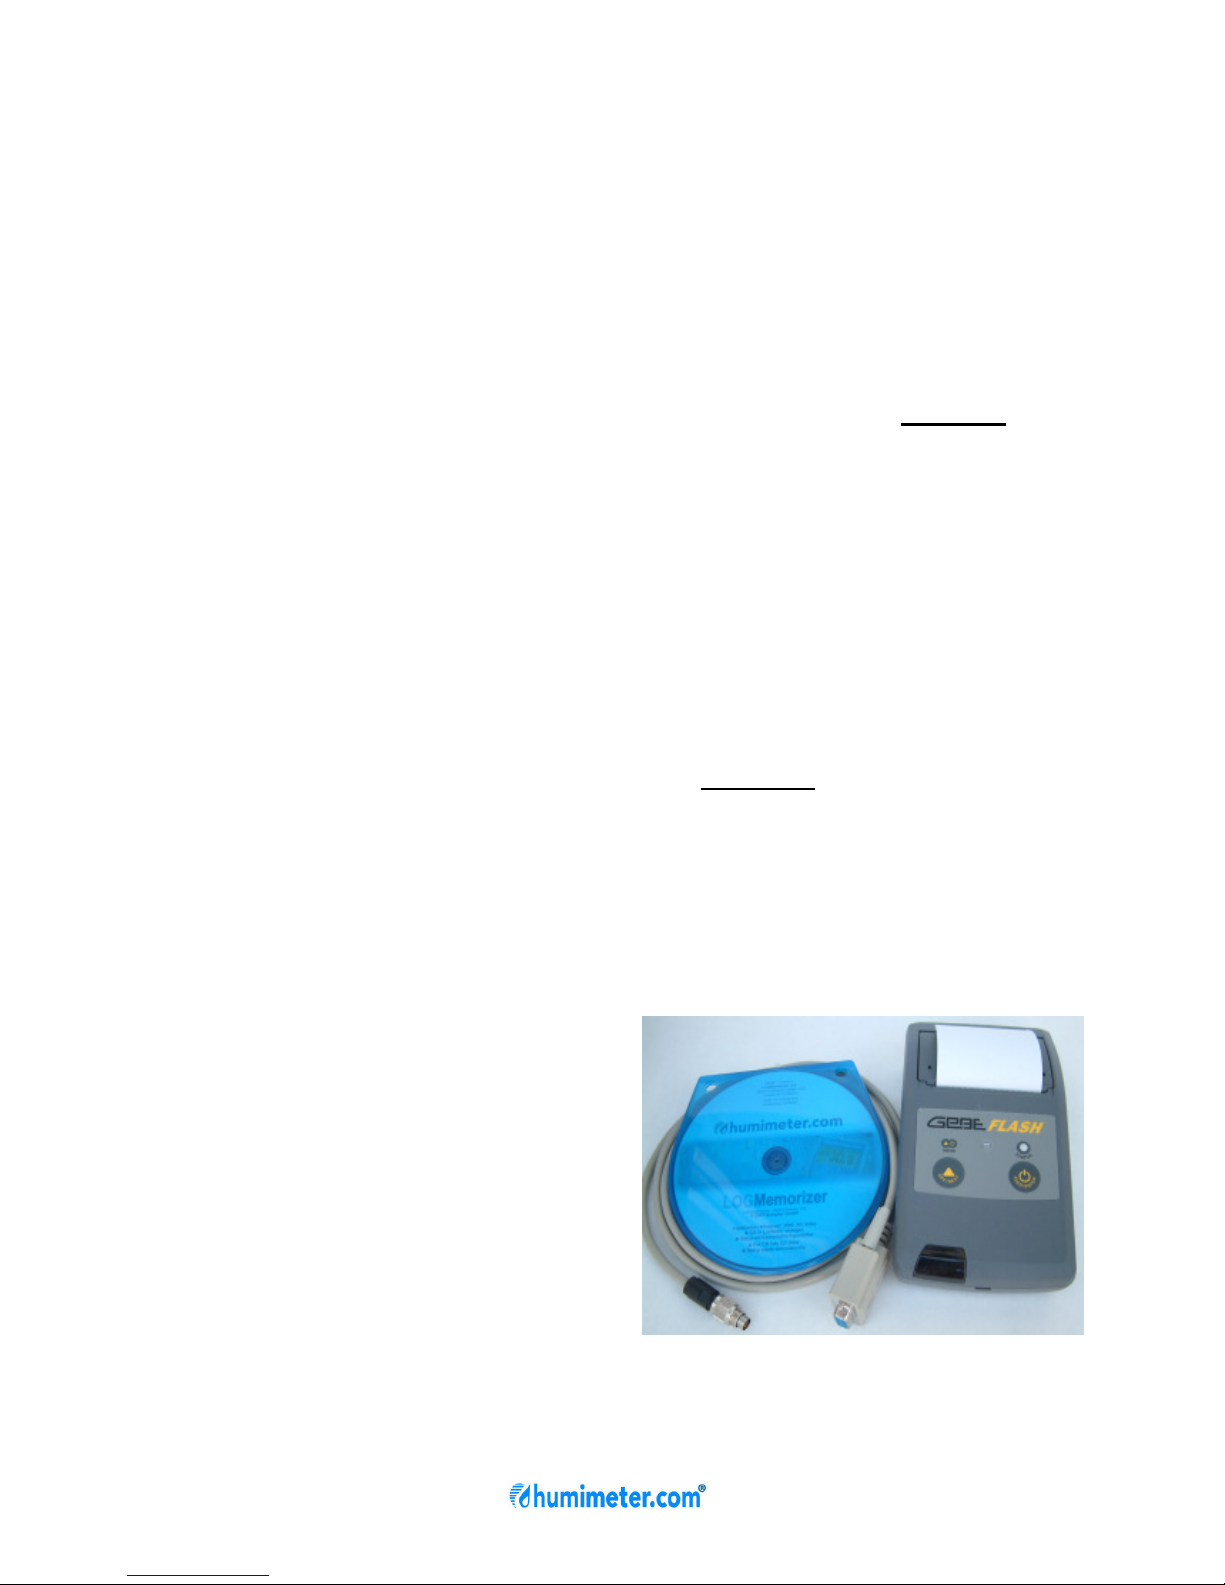
To print your saved data, connect the device
to the printer using the printer cable that
was delivered with your device. Carefully
loose the protection cap on the humimeter
SLW. At first plug in the side of the
connector with the close plastic casing at
the humimeter. Then switch on the device.
Not till then the other side of the cable has
to be plugged in at the printer. Switch on the
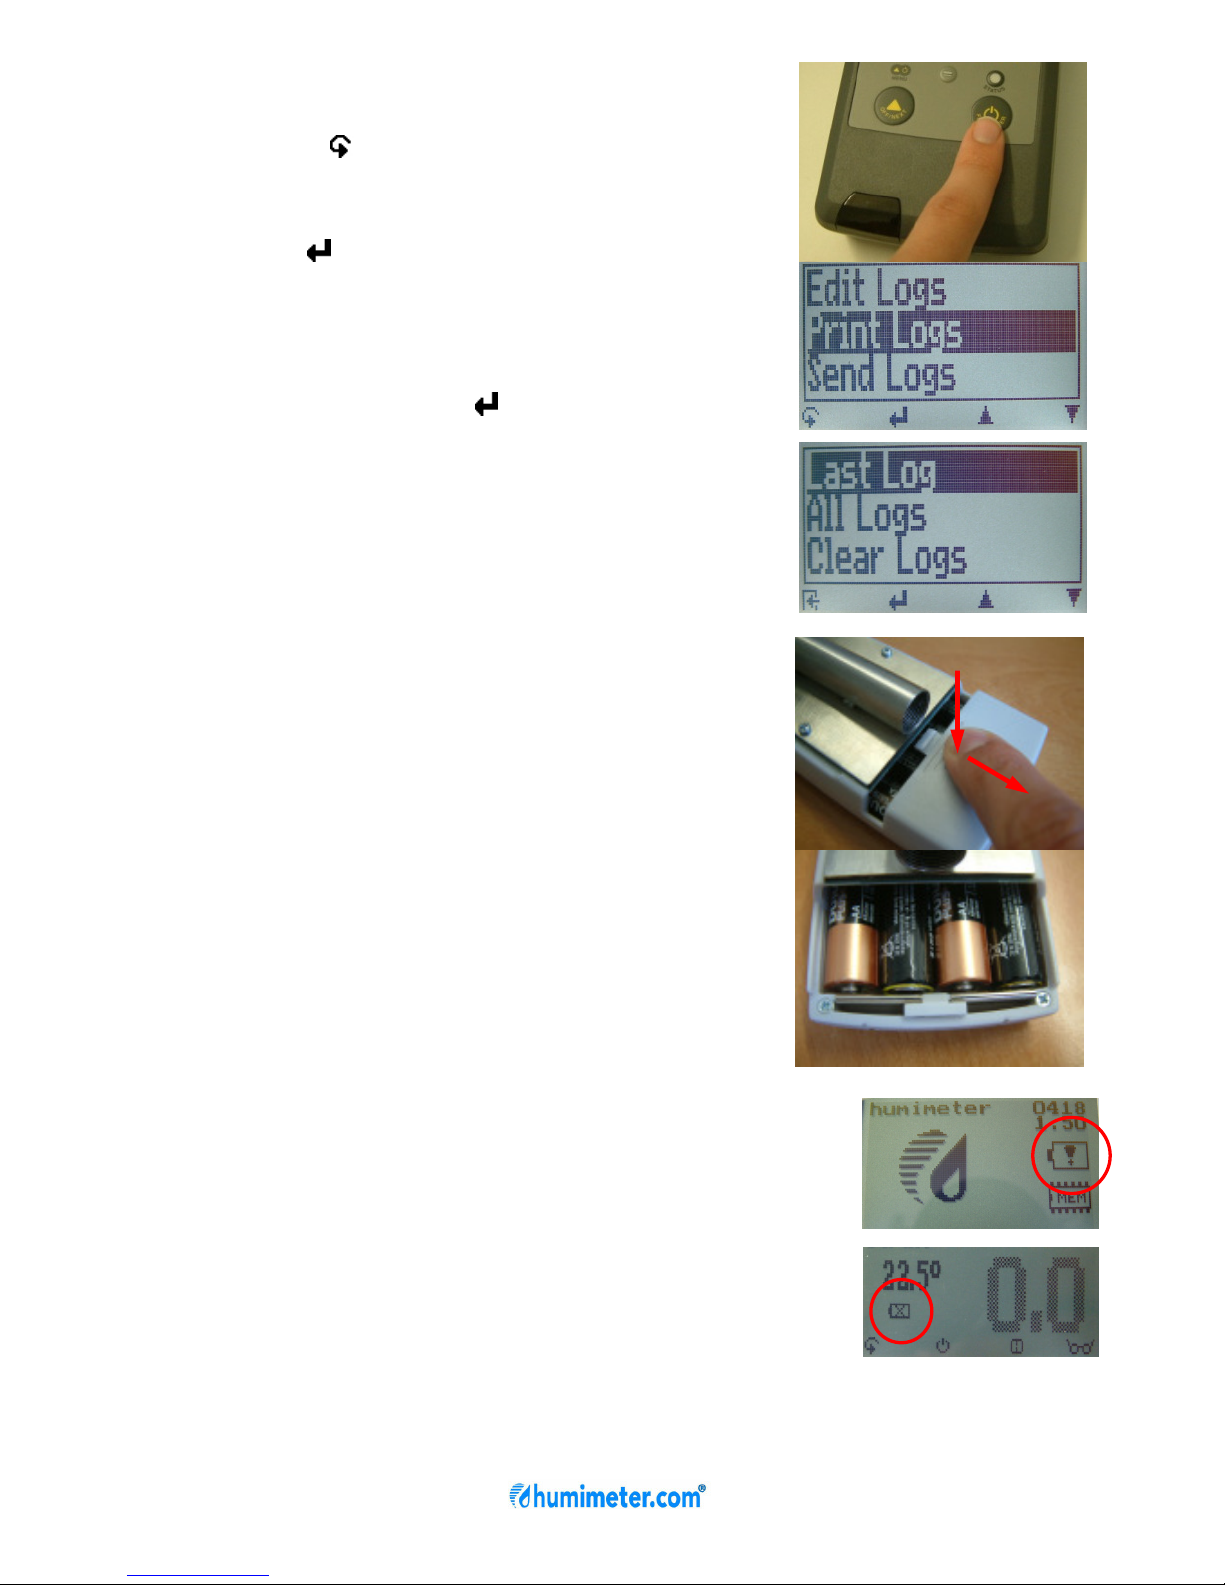
printer by pressing
. Now the green LED is
Page 9
page 9 Version 1.0
blinking. If it does not blink, please change
the batteries and try again.
Press the button at your humimeter until
you reach the menu (see image on the
right). Choose „Print Logs“ and confirm by
pressing .
Now you can select if you want to print the
last saved measuring series or all saved
measuring series (logs).
Confirm by pressing again. The selected
logs are printed out now.
To save paper, please think of clearing the
data storage regularly.
Changing batteries
Your new device is provided with batteries.
Changing batteries:
1.) Press with your finger onto the arrow of
the battery cap und pull it back.
2.) Remove the empty batteries.
3.) Put four new batteries in the device.
Make sure that the position of the
battery poles is correct.
4.) Press down the batteries and close the
cap.
If the battery symbol appears in the measuring
window resp. if a critical charge of battery is
shown in the status, the batteries have to be
changed IMMEDIATELY. If you do not use your
humimeter device for a longer period, remove the
batteries. For eventual resulting damages we
cannot provide any warranty.
Page 10

page 10 Version 1.0
Exemption from liability
For miss-readings and wrong measurements and of this resulting
damage we refuse any liability. This is a device for quick
determination of moisture. The moisture depends on multiple
conditions and multiple materials. Therefore we recommend a
plausibility check of the measuring results. Each device includes a
serial number and the guarantee stamp. If those are broken, no
claims for guarantee can be made. In case of a faulty device,
please contact Schaller GmbH (www.humimeter.com) or our
dealer.
Device maintenance instructions
To provide a long life of your device please do not expose it to
strong mechanical loads or heat e.g. dropping it or direct sunlight
exposure. Clean your device using a dry cloth. The measuring
chamber needs to be cleaned with a dry and soft brush.
Any kind of wet cleaning damages the device. The instrument is
not rainproof. Keep it in dry areas. When the device is not used for
a longer period (6 months) or when the batteries are empty, they
should be removed to prevent a leakage of battery acid.
Page 11
page 11 Version 1.0
Technical Data
Resolution of the display 0.5% water content
0.5°C temperature
Measuring range 0.2 to 26% water content
Operation temperature 0°C to 40°C
Storage temperature -20°C to 60°C
Temperature compensation automatically
Power supply 4 pcs. 1.5 Volt AA Alkaline
batteries (1000 measurements)
Auto Switch OFF after app. 6 minutes
Current consumption 55mA (with backlight)
Display 128 x 64 matrix display, lighted
Dimensions 740 x 65 x 40 mm
Weight app. 450 g (including batteries)
Degree of protection IP 40
Scope of supply humimeter SLW, 4 pcs. 1.5 Volt
AA Alkaline batteries, plastic
case, nails for reserve
Optional humimeter USB data interface
module for connecting to a PC
Option 2 (only with Opt. 1) Thermo printer, runs by battery
Page 12
page 12 Version 1.0
! IMPORTANT ! please read
Most common reasons for miss readings
• Product temperature out of application range
Material below 0°C resp. above +40°C (32 to 104 °F) may
cause faulty measurements. The storage of cold material in a
warm storage area usually creates condensed water which
may lead to major measuring errors.
• Not adjusted temperature of the device
Let your humimeter adjust to the surrounding temperature of
the material for approximate half an hour.
A very high temperature difference has a negative effect on
the stability of the measurement results.
• Wrong calibration curve
Before measuring, double check the correct selection of the
calibration curve.
• Water film at the measuring head
After measuring wet material a water film can arise on the
sensor head. This can lead to a too high measuring result for
the following measurements. After measuring wet material
clean both black plastic parts accurately with a dry cloth.
• Direct sun radiation
ATTENTION: Risk of injury
by measuring head!
Keep away from children under 16 years!
 Loading...