

Humboldt Redwood Napa Assembly Instructions Manual
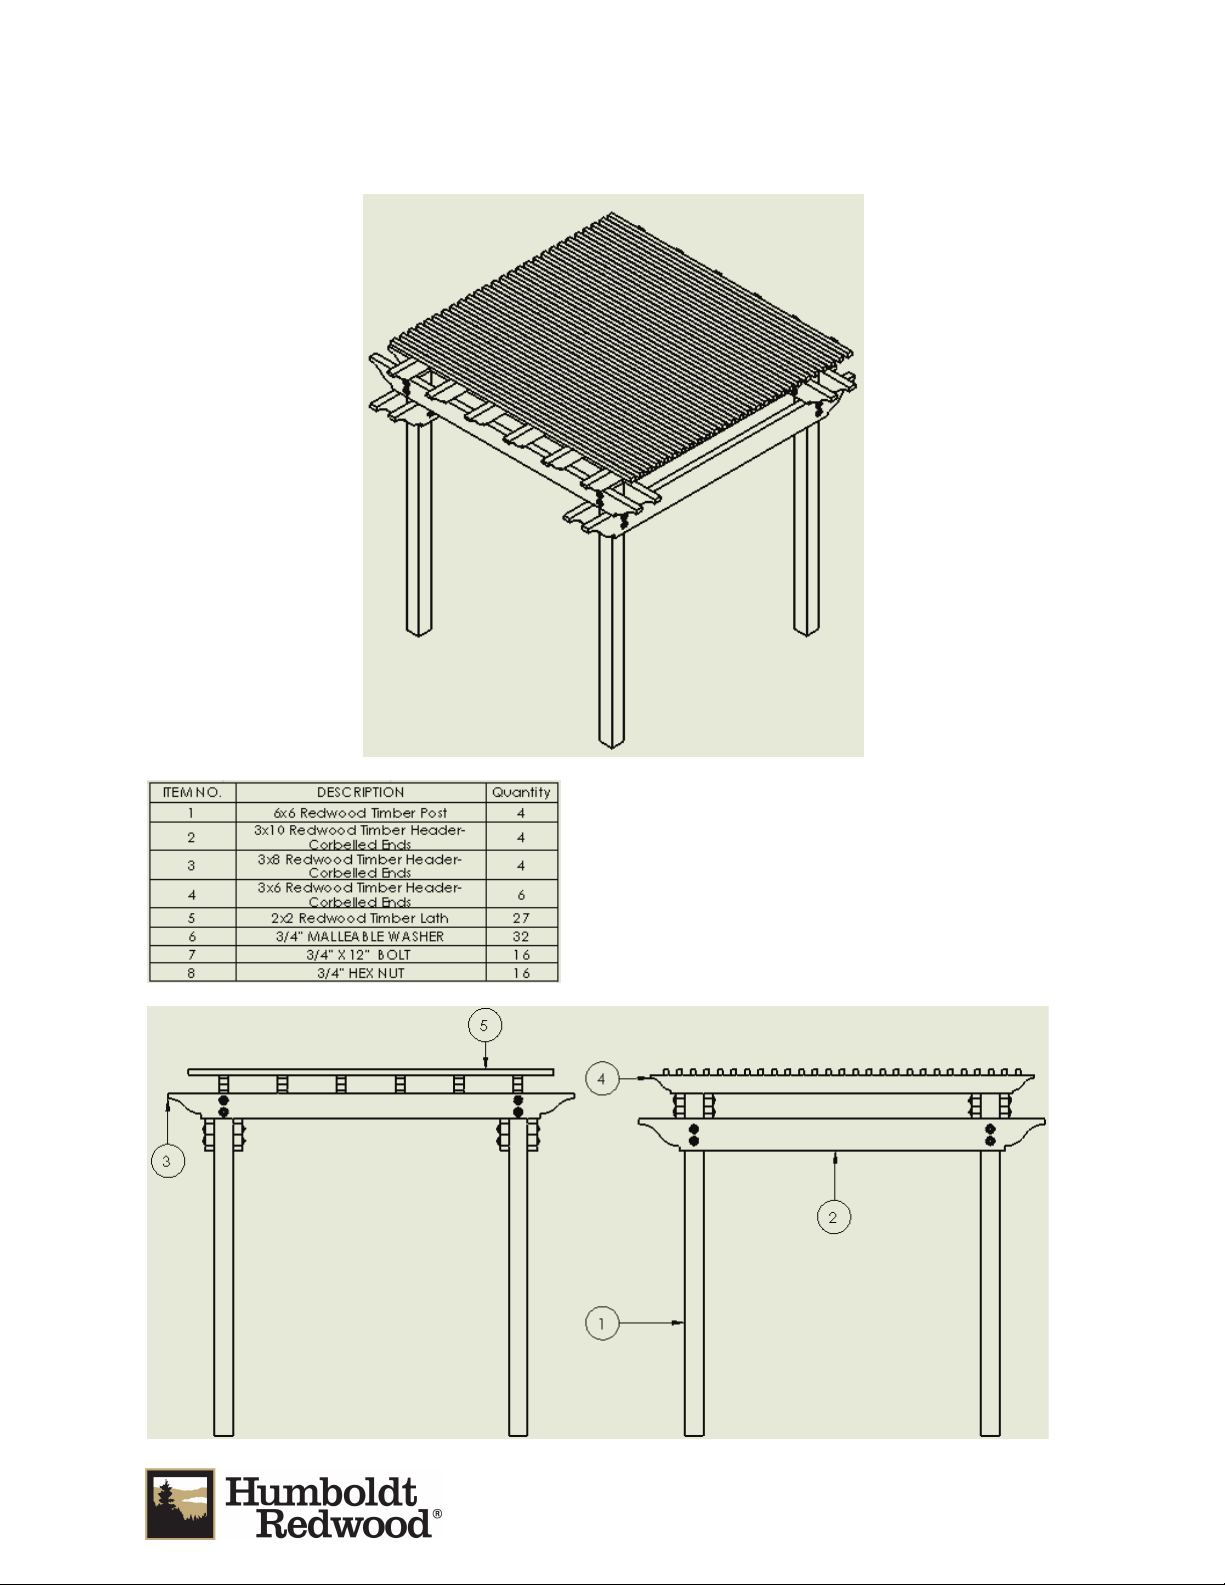
Napa Pergola Assembly Instructions
Napa Pergola Assembly Instructions
List of Tools required:
2 People
Drill
7/8” x 8” Drill Bit
15/16” Driver bit or wrench(s)
Nails or Woodscrews (Galvanized)
Hammer
Framing Square
Bubble Level
Measuring Tape
Pencil
(8) 4ft+ Long Scrap 2x4 for use as temporary bracing.
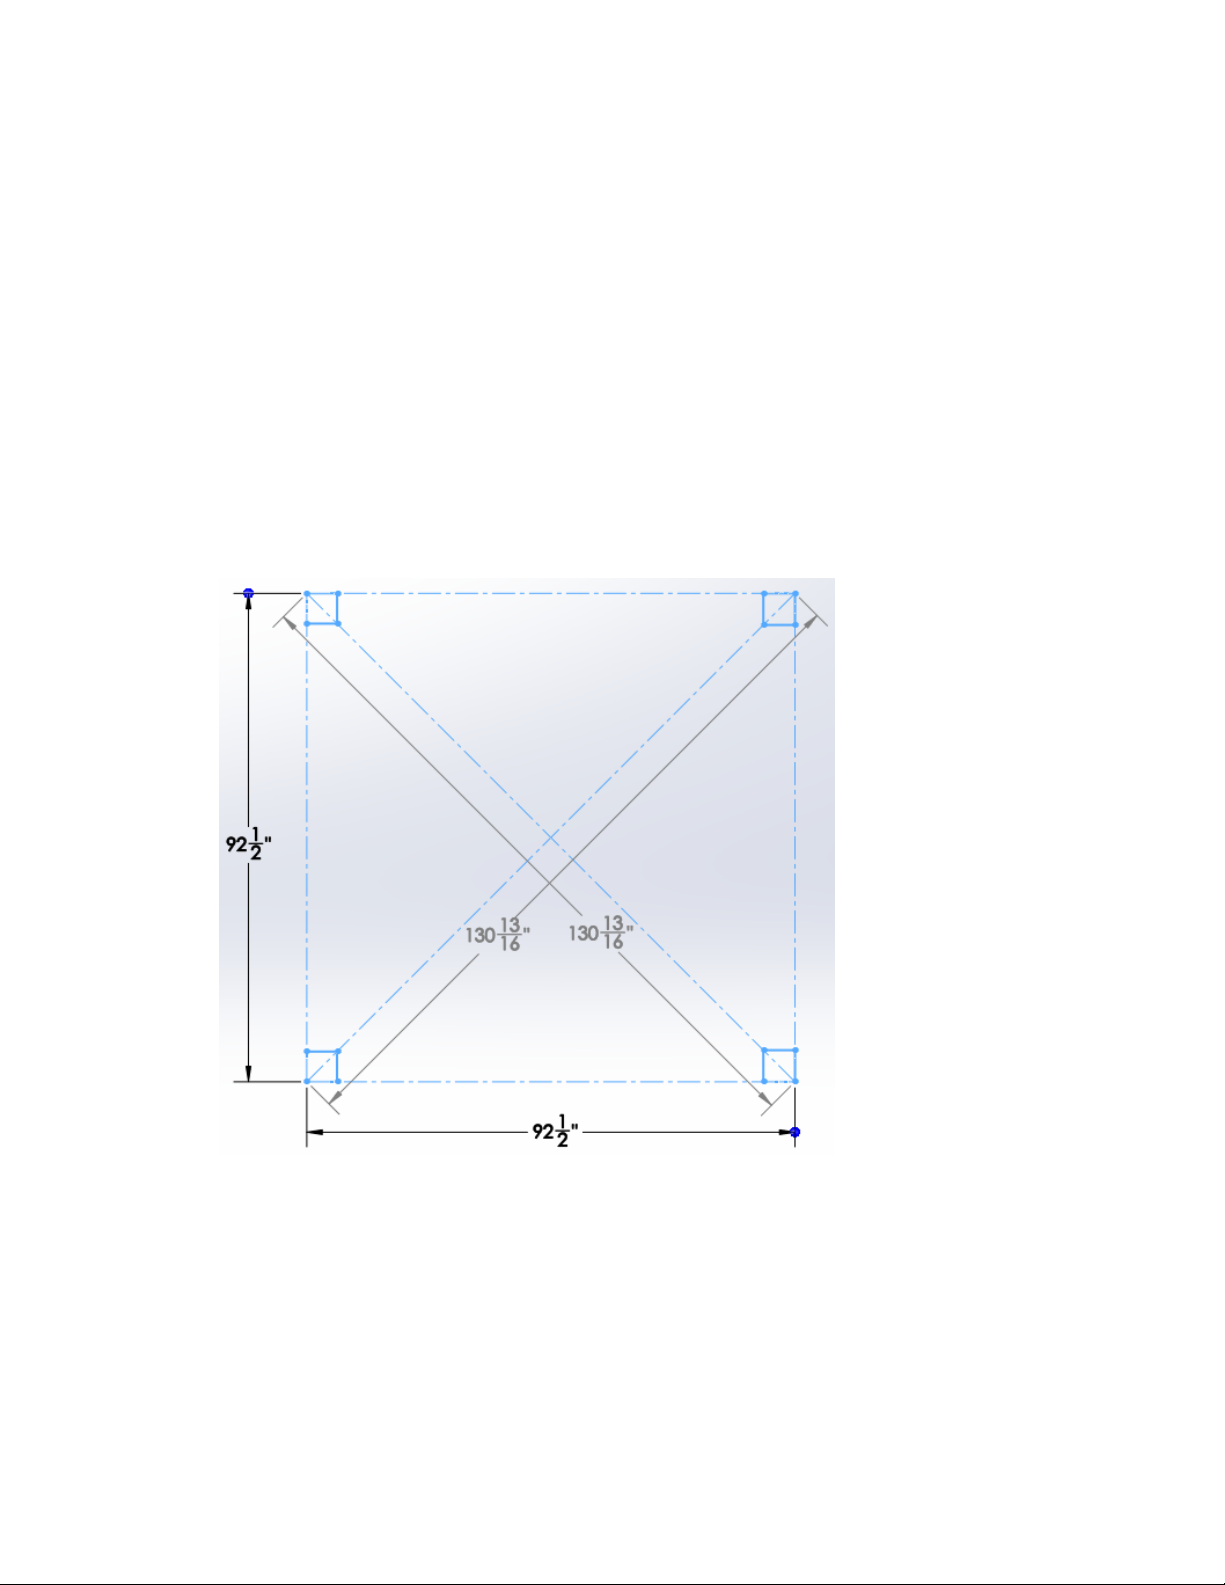
1) Layout Post Anchors
On Level ground mark location of the 4x included post anchors. Ensure that diagonal
measurements are equal to maintain square dimensions.
2) Secure Post Anchors
Install Post anchors in marked location. Consult Simpson installation instructions for proper
procedure.
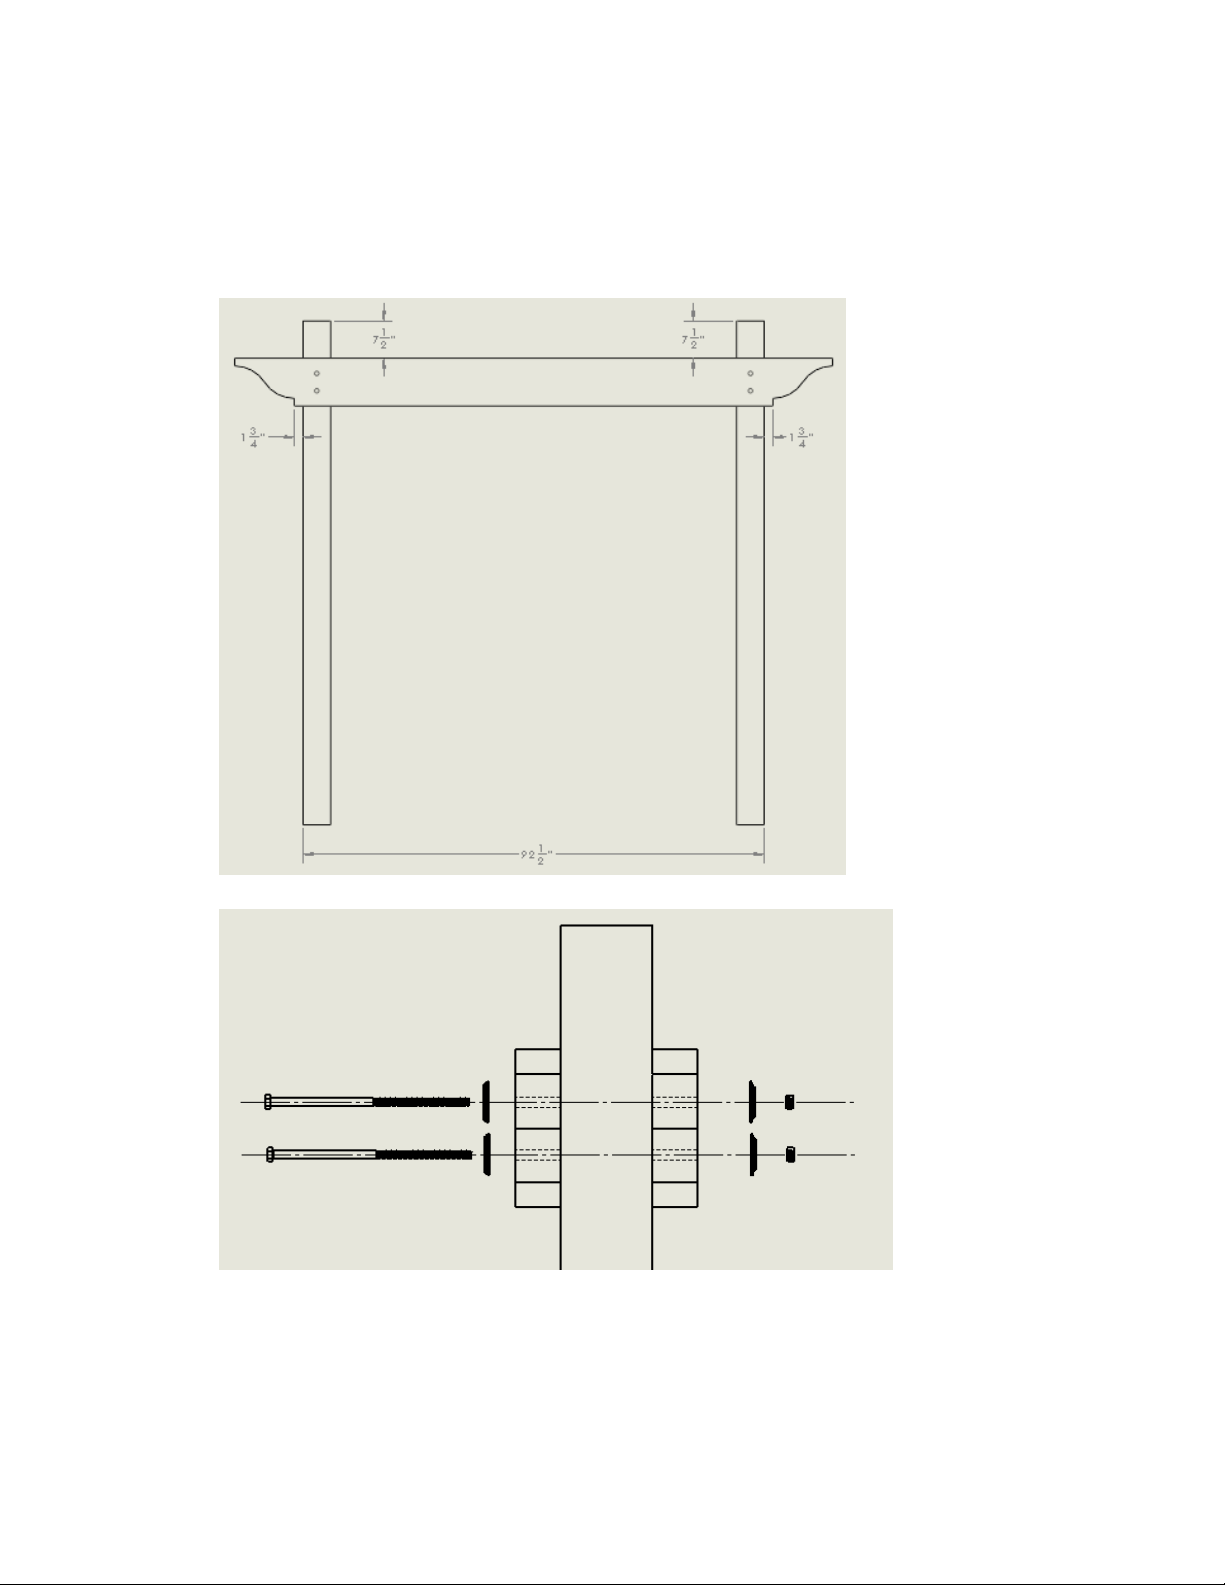
3) Assemble Posts and 3x10 Headers
With two 6x6 Post [1] laid flat on the ground measure 7 ½” from the top edge and mark for the
top of the 3x10 header. Center the pre-drilled holes of 3x10 Header [2] upon post. Ensure equal
92 ½” spacing along the length of the posts and use a framing square and bubble level to
maintain square dimensions. Mark hole location and drill holes through posts using 7/8” drill bit.
Assemble two 3x10 Headers on both sides of post using provided hardware
Repeat for remaining two posts and 3x10 headers
 Loading...