

Page 1
REPLACING THE BACKREST COVER
HT-135
It is imperative that Human Touch® products are repaired in a manner that ensures product safety and regulatory compliance and that is fully consistent with the practices used
during the manufacturing process. Therefore, Human Touch requires that all product repairs are performed using only factory-new parts and in accordance with these repair
instructions. Failure to adhere to these instructions voids the product warranty and releases Human Touch from all liability for injury or product damage resulting from the repair.
Tools Required: 4 mm (5/32") Allen key, Phillips-head screwdriver.
SAVE ALL REMOVED PARTS FOR USE DURING REASSEMBLY
July 30, 2013
SERVICE LEVEL: 2
REMOVING THE BACKREST COVER
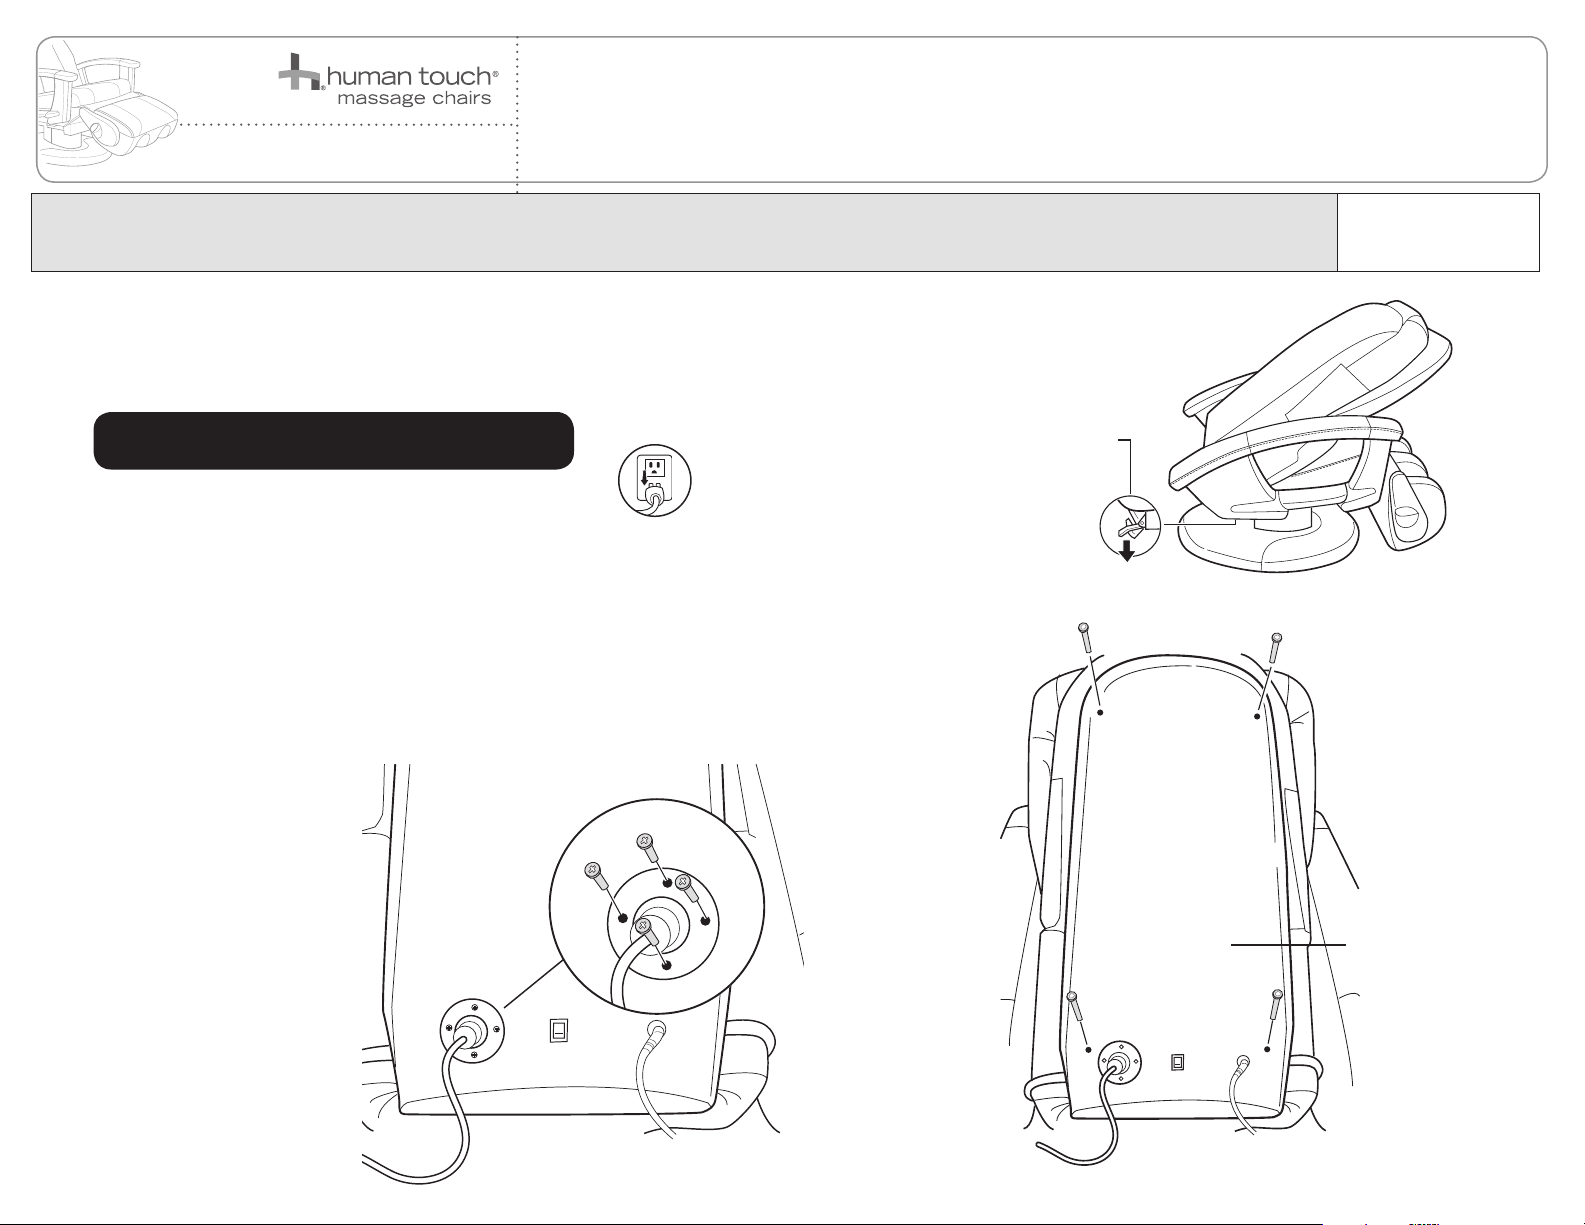
1. Power off the chair and unplug it.
2. Push down on the backrest release lever, then fold the backrest forward
onto the chair seat (Fig.1).
3. Using a Phillips-head screwdriver, remove the four screws that secure
the remote control bracket to the backrest cover (Fig.2).
4. Pull the remote control cables through the backrest cover, then disconnect the cables.
5. Using a 4 mm (5/32") Allen key, remove the four backrest cover screws (Fig.3).
Backrest release lever
(Fig.1)
Backrest cover
(Fig.2)
(Fig.3)
1
Page 2
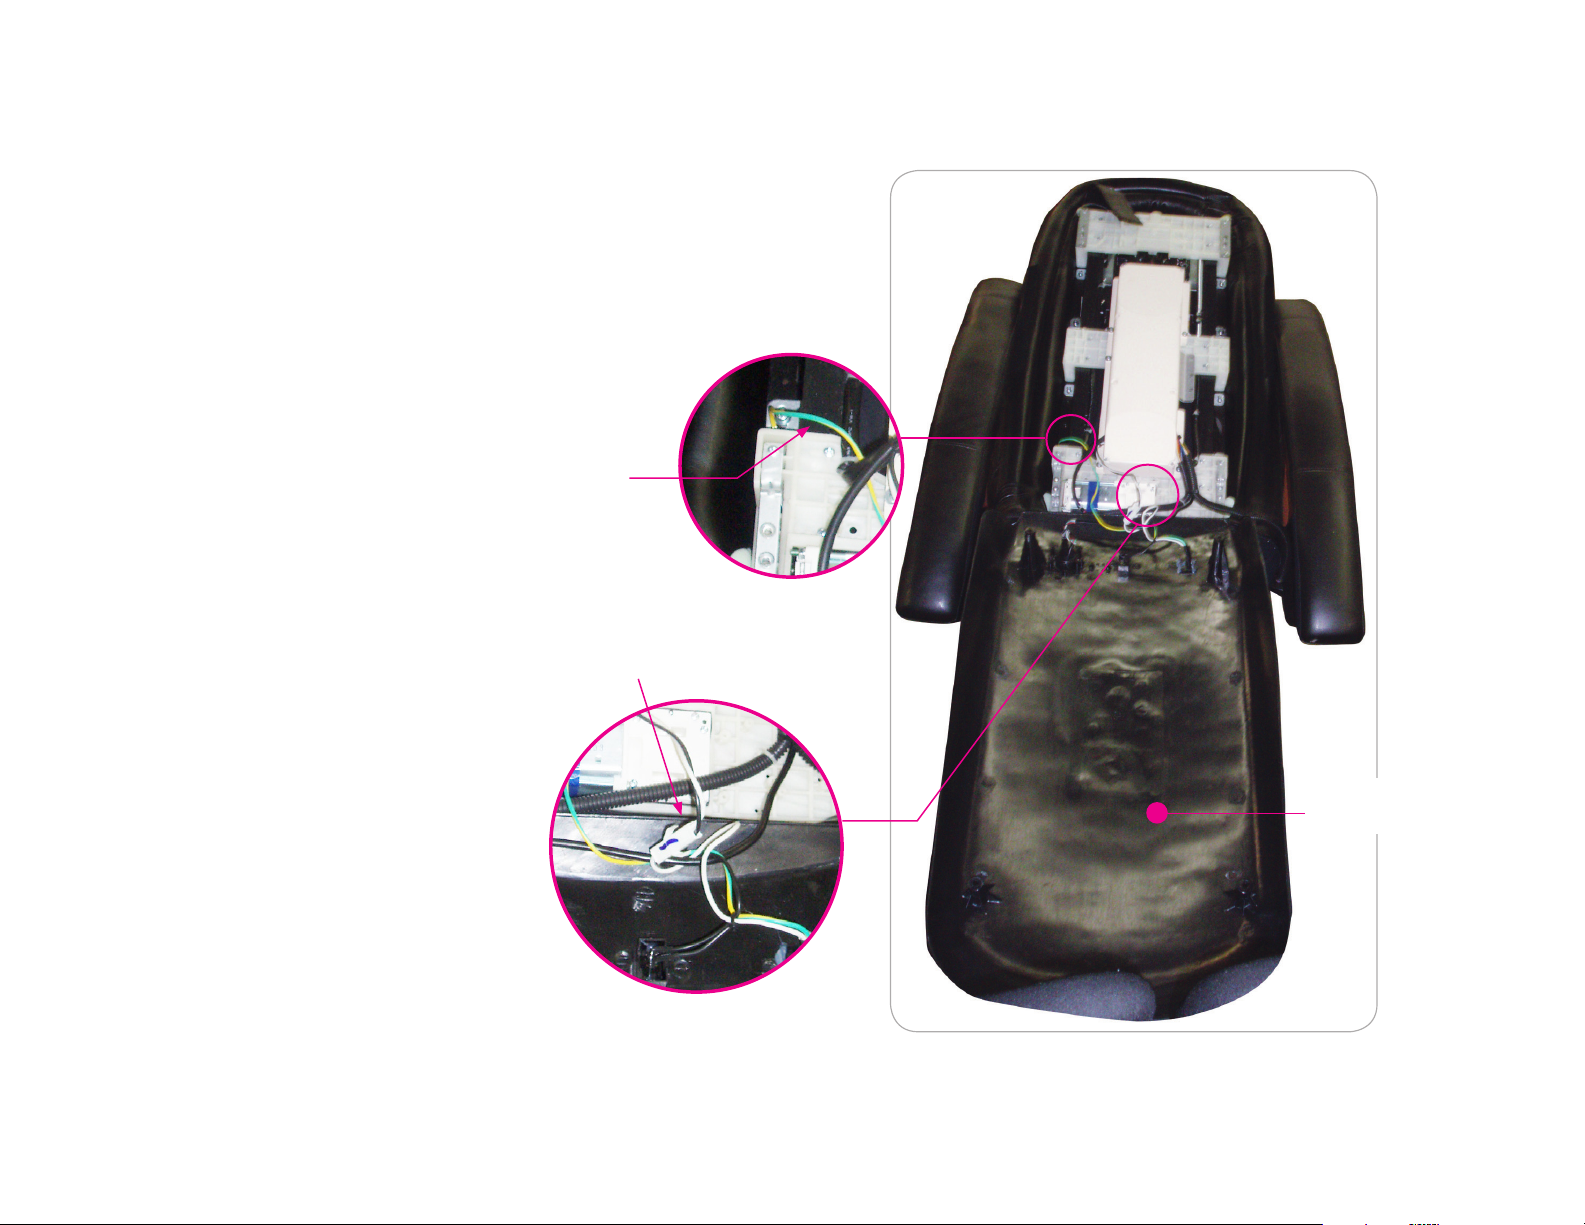
6. Tip the backrest cover backward then lay it carefully down on the floor
behind the chair.
7. Disconnect the connector at the base of the backrest (Fig.4).
8. Using a Phillips-head screwdriver, disconnect the green-and-yellow
ground wire from the chair frame (Fig.4).
9. Remove the backrest cover.
Disconnect the
green-and-yellow
ground wire
Connector
(Fig.4)
Backrest cover
2
Page 3

INSTALLING THE NEW BACKREST COVER
1. Place the new backrest cover on the floor behind the chair.
2. Connect the large connector.
3. Align the end of the yellow-and-green ground wire with the corresponding hole in the chair frame, then replace the screw to secure it.
4. Thread the remote control cables from the backrest through the backrest cover, so that they are accessible after the backrest cover is installed.
5. Place the backrest cover into position, aligning the four screw holes.
6. Using a 4 mm (5/32") Allen key, replace the four backrest screws. NOTE: Be sure to use the two longer screws in the upper screw holes and
the two shorter screws in the lower screw holes.
7. Reconnect the remote control cables, then push the cables into the backrest.
8. Using the Phillips-head screwdriver, replace the four remote control bracket screws.
Please send any questions or comments regarding these instructions to: documentation@humantouch.com
© 2013 Human Touch™, LLC.
3
 Loading...