

HumanTechnik signolux Operation Instructions Manual

DE
Seite 2
Bedienungsanleitung
Standard-Empfänger
sign lux
EN
Page 10
Operation Instructions
Standard receiver
FR
Page 18
Mode d’emploi
Récepteur standard
NL
Pagina 26
Gebruiksaanwijzing
Standaard ontvanger
IT
Pagina 34
Istruzioni per l’uso
Ricevitore standard
ES
Página 42
Instrucciones de servicio
Receptor estándar
•
10 English
We would like to congratulate you on purchasing a »signolux«. You have chosen a
modern and reliable system. Kindly read the
user manual carefully in order to start using
the device properly and to familiarise yourself with all the possibilities of the system.
Standard delivery scope
Kindly check if all following parts are
included:
– »signolux« receiver
– Wall mount
– 2 screws for the »signolux« receiver
– 2 wall dowels
– Operating manual
– Warranty card
Should any parts be missing, kindly contact
your specialist dealer or the manufacturer
directly.
Functioning principle
A »signolux« light signal system consists
of at least one transmitter (e.g. doorbell
pushbutton) ad a »signolux« receiver. Up to
8 transmitters can be integrated.
If e.g. the doorbell pushbutton is pressed, a
radio signal (radio impulses with 868 MHz)
are transmitted to the »signolux« receiver.
This one signals the received signals acoustically and visually with sounds and light
signals.
Safety instructions
– Prior to putting the device into operation
and using it, kindly read this manual thoroughly and in full.
– Store this operating manual in a safe place
so that it is also accessible for other users
at any time.
– When using power tools always follow the
instructions of the manufacturer and wear
suitable protective equipment (e.g. protective goggles).
– Kindly check before starting to drill if there
are any hidden electric cables and water
pipes in the walls. In case of doubt we
recommend using a a cable detector.
Commissioning
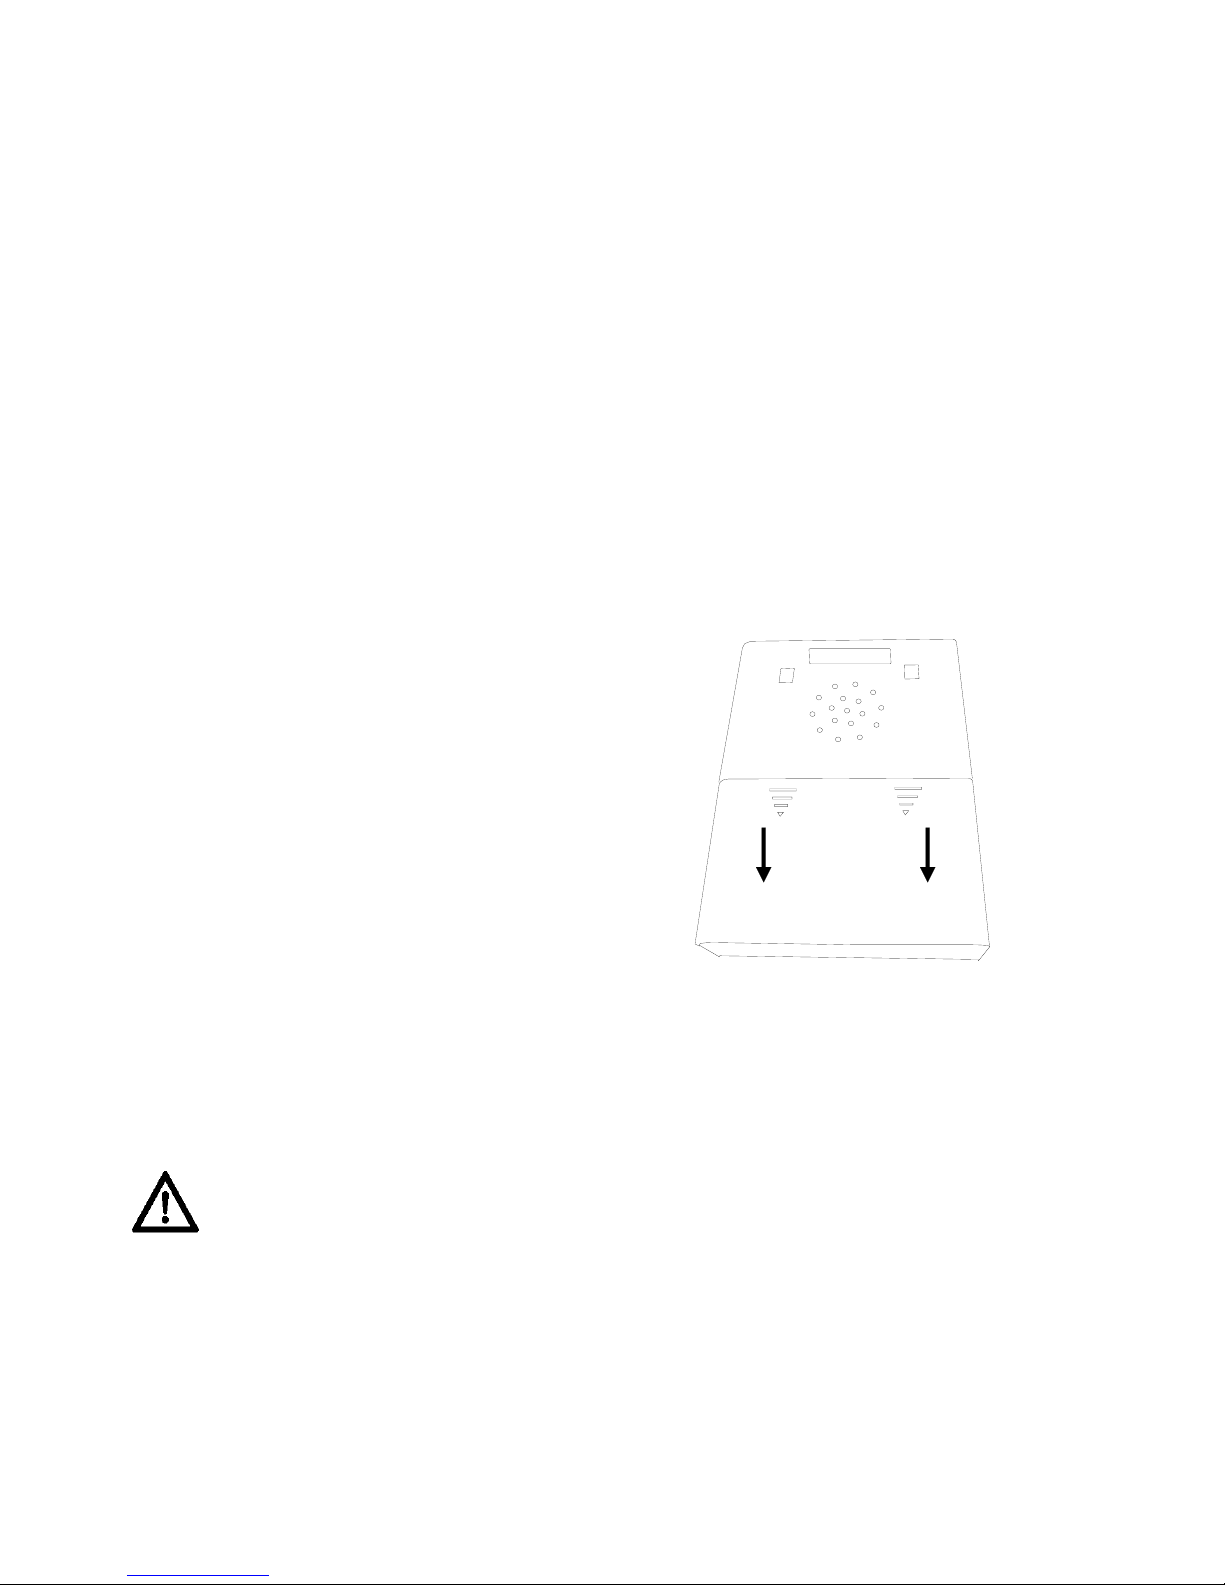
1. Inserting the batteries into the
»signolux« receiver
a) At the rear side there is a battery com-
partment the cover of which can carefully be pushed downwards so that the
compartment opens ( fig. 1).
Figure 1: Battery compartment of the
»signolux« receiver
b) Now insert 4 alkaline batteries type LR14
(also called C batteries, not included
in the delivery scope). Ensure correct
polarity of the batteries.
c) Close again the battery cover by care-
fully inserting the cover and pushing it
upwards.
English 11
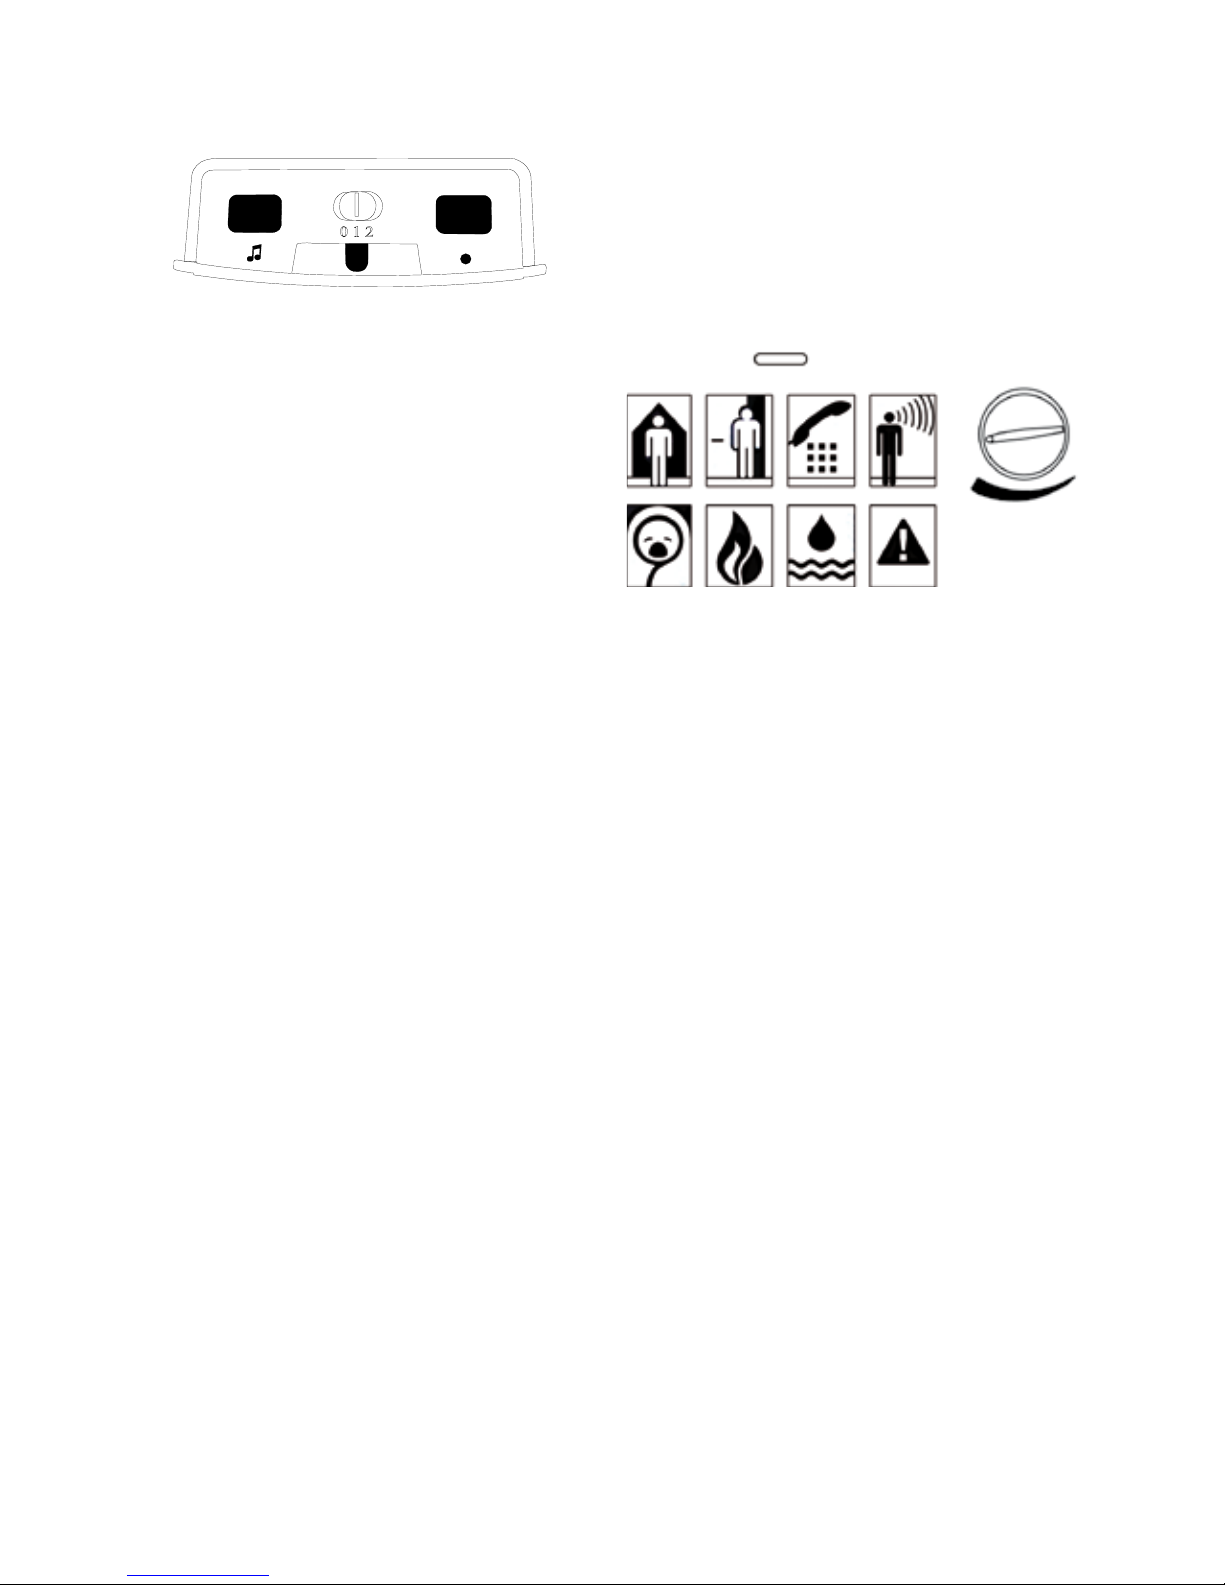
Figure 2: »signolux« top side
2. Setting the signal mode
Using the signal mode slide switch (in fig. 2
“0 1 2”) you can select the signal mode.
Kindly keep in mind that the symbols are always displayed with coloured light diodes.
– switch to position 0:
signal tone, no flash,
– switch to position 1:
signal tones and flash
– switch to position 2:
no signal tones, flash only
3. Setting the volume
The front side of the »signolux« is protected
by a screen that can be pushed upwards
after loosening the lock on the top side of
the »signolux«. Behind it you will find the
rotating volume control with which you can
set the volume of the signal tone.
Safety guidelines:
Kindly select a lower volume to begin with
and only then set the desired volume.
4. Setting the melody
You can adapt the melody for each symbol:
a) First trigger a signal (e.g. operate door-
bell pushbutton).
b) The symbol assigned to the transmit-
ter should illuminate and the previously
chosen melody should be heard.
c) Wait until the symbol flashes.
d) Press the melody setting button ♫ (fig. 2)
until you have found the desired melody
(you can choose from 15 melodies).
e) Once the symbol ceases to flash, the
selected melody has been assigned.
Setting and programming
012
5. Meaning of the symbols
Figure 3: Symbols, control lamp and volume
control
Each symbol is connected to a transmitter
(e.g. doorbell pushbutton) and can be reprogrammed at will.
The symbols stand for:
Doorbell 1 Colour: Green
Doorbell 2 Colour: Green
Telephone Colour: Orange
Person call Colour: Yellow
Baby Colour: White
Fire alarm Colour: Red
Flood alarm Colour: Blue
Alarm Colour: Red
 Loading...