

human care NSB-104-S, NSB-103-S, NSB-103-M, NSB-103-L, NSB-103-XL Quick Reference Manual
...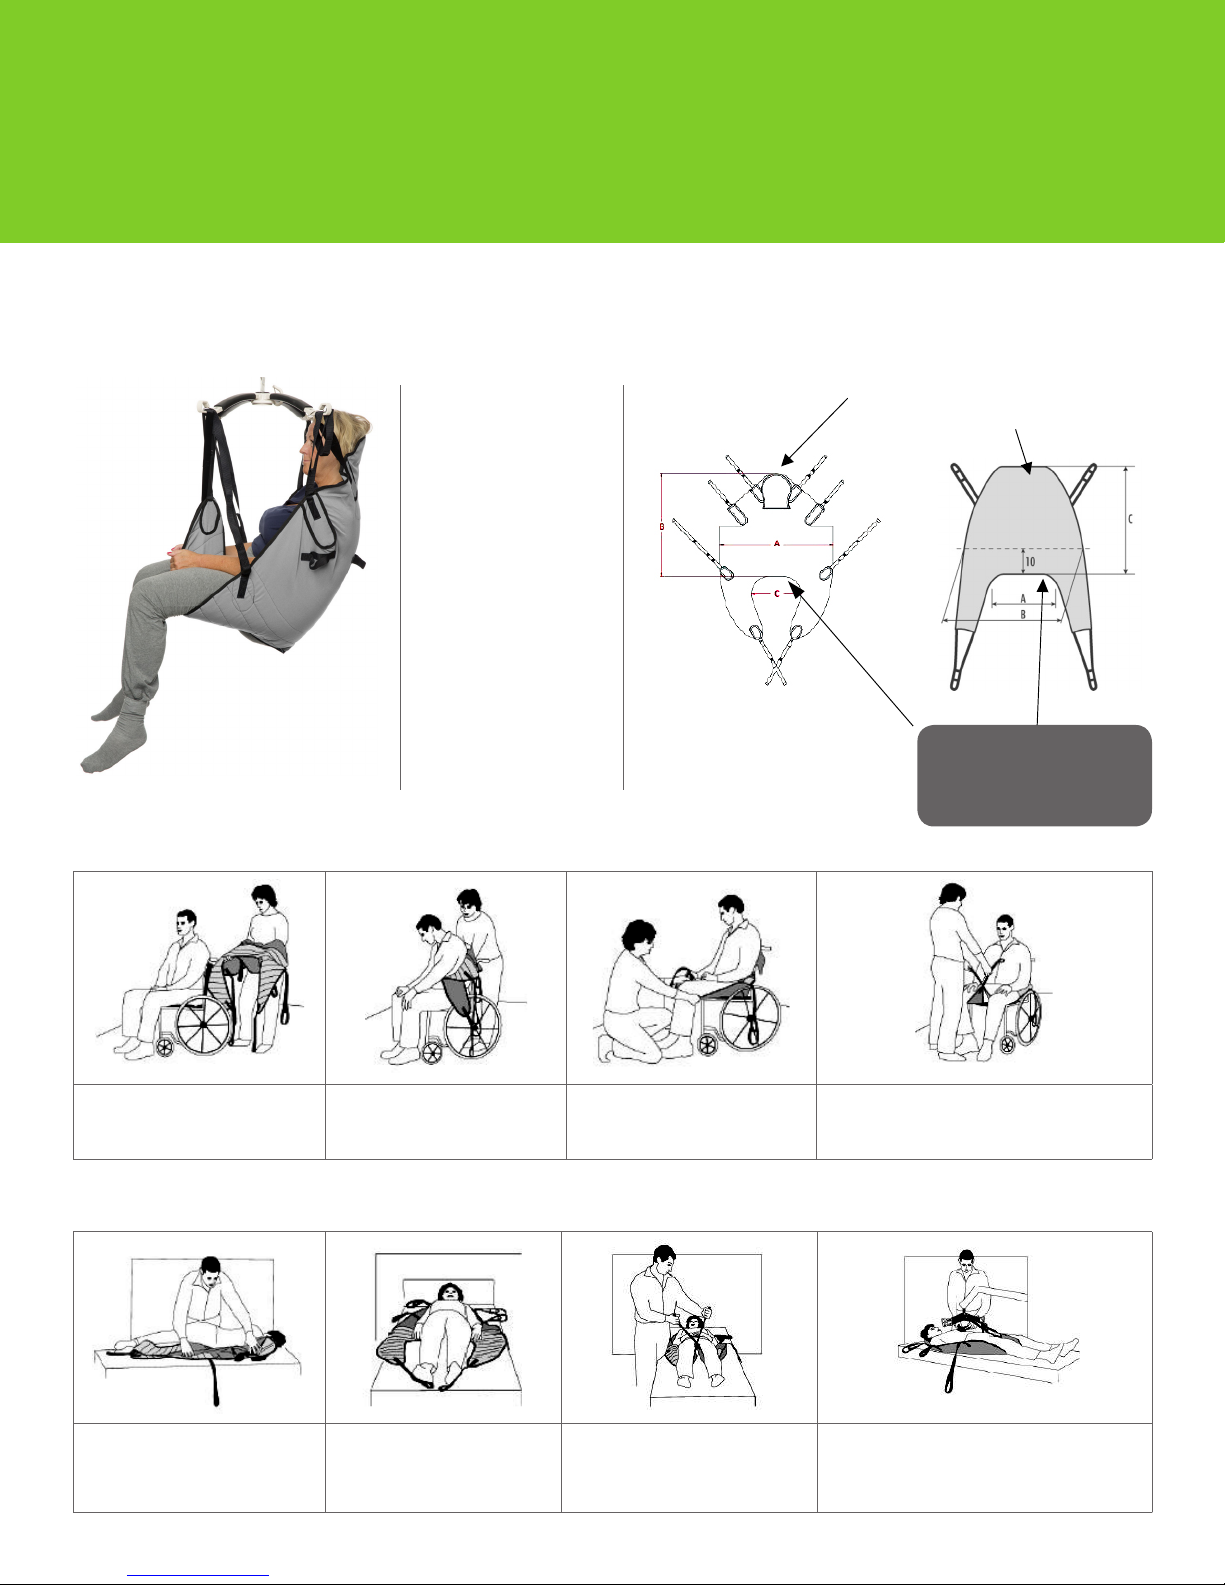
Quick Reference Guide
– General Purpose Sling
Description
The General purpose sling is available in two versions, reusable and single patient use. Both slings have an easy fit with built
in flexibility to achieve proper leg and body positioning for patients with some upper body control.
Page 1
Part no:
Single patient use:
NSB-104-S
NSB-104-M
NSB-104-L
NSB-104-XL
Reusable sling:
NSB-103-S
NSB-103-M
NSB-103-L
NSB-103-XL
NSB-109-2XPH (bariatric)
Reusable with clips:
NSB-103C-S
NSB-103C-M
NSB-103C-L
NSB-103C-XL
Applying the sling from a seated position
Different color loops on reusable
and single use models. Color
coded loops* on lifting straps to
customize fit during lift.
Look for top of head to be 1-2”/2,55,0 cm below top of sling for best fit.
Always position behind
the coxxyx, down to tip
of tailbone for proper fit.
1. Stand behind or to the side of the
patient and hold the sling with label
facing up and away.
2. Work the sling down the back
and the bottom edge must be
behind the coccyx.
Applying the sling from a lying position
1. Stand to side and turn the patient
to face you. Place gathered sling
behind back with label facing up
and away.
2. Turn the patient on back and
pull gathered sling towards you.
3. Pull the leg sections through to
the front. Raise each leg and pull
the band under patient.
3. Bring the leg bands underneath
the thighs to achieve the desired
positioning of the legs.
4. Position legs. Lower lift carry bar and securely attach straps with appropriate loop. Reverse
steps above to unload patient from sling.
4. Lower lift carry bar and securely attach straps
with appropriate loop. As lift ensure straps
secure and clear of patient head. Reverse steps
above to unload patient from sling.
www.humancaregroup.com
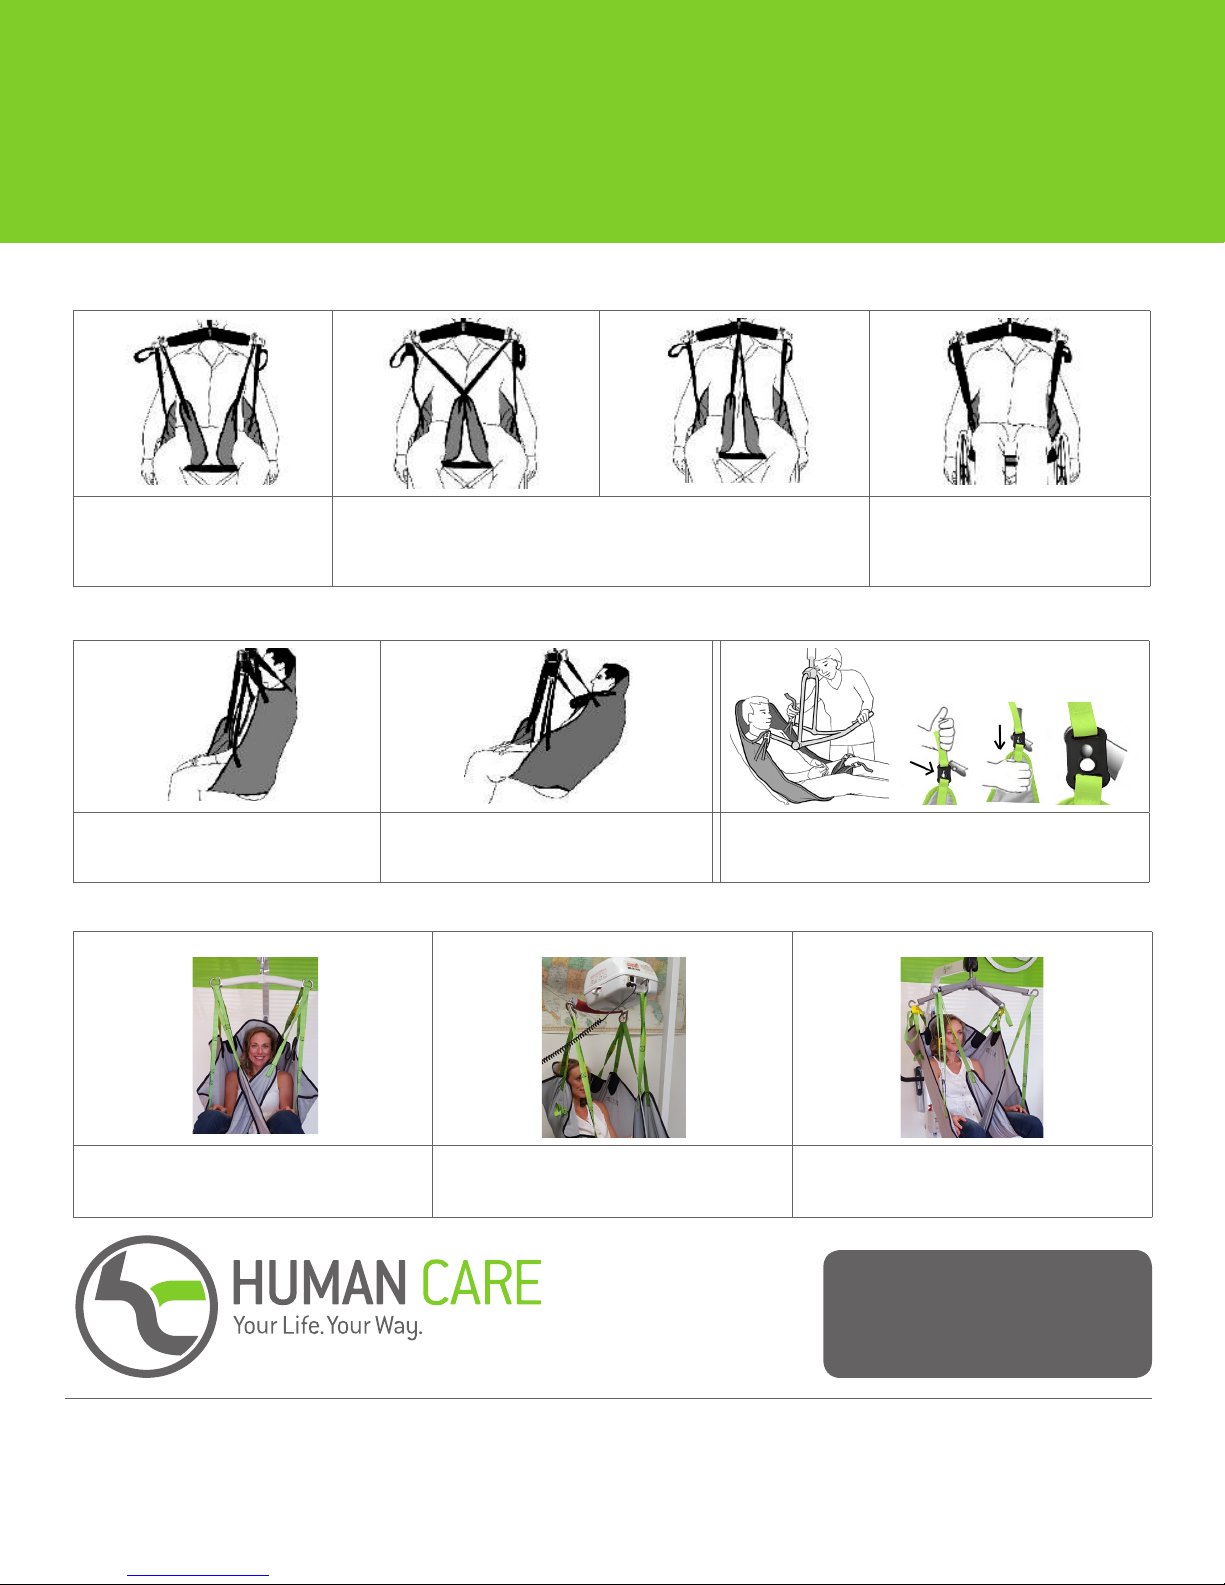
Quick Reference Guide
– General Purpose Sling
Positioning the legs (loop sling)
Page 2
To achieve the open position, bring
the leg bands up between the thighs
and attach the leg straps to the end
of carry bar.
To achieve the divided position, bring the leg bands up between the thighs,
thread one leg strap through the bottom opening of other (left) and attach the
leg straps to the end of carry bar cross over style. For a more relaxed position,
attached to center (right).
Positioning the body (loop sling)
To achieve the upright position, use the
short loops of the head and shoulders and
the long loops of leg straps.
To achieve the reclined position, use the middle
or long loops of the head and shoulders straps
and the middle or short loops of leg straps.
Attaching sling to hanger bars (loop sling)
2-point hanger bar
3-point hanger bar
To achieve the closed position, pull one
leg band than the other underneath
both thighs and attach to the end of
carry bar.
Clip sling attachment
99512-Quick reference guide-General purpose sling-Rev04 (2015-12-07)
Place clip on hanger bar through key hole and pull down to all
4 points.
4-point hanger bar
Starting from head, the 3 top straps on left attach
on left side, repeat on right side, leg straps can be
crossed for comfort as shown above.
AUSTRALIA
Unit 9, 271 Wells Road
Chelsea Heights, Victoria 3196
Phone:- +61 3 8773 1111
Fax:- +61 3 9773 4008
Email: info.au@humancaregroup.com
10-155 Colonnade Road
Ottawa, ON K2E 7K1
Phone:- 613.723.6734
Fax:- 613.723.1058
Email: info.ca@humancaregroup.com
Starting from head, the 3 top straps on left attach on
left side, repeat on right side, the 2 leg straps (right
and leg) attach to leg hook.
CANADA
Email: info.se@humancaregroup.com
SWEDEN
Årstaängsvägen 21C
117 43 Stockholm
Phone:- +46 8 665 35 00
Fax:- +46 8 665 35 10
Each hook should have 2 straps attached. The
bottom 2 leg straps can be crossed for comfort.
IMPORTANT! This quick reference
guide does not replace the user
manual which can be downloaded
at www.humancaregroup.com
UNITED STATES
4210 S. Industrial Drive, Suite 160
Austin, TX 78744
Phone:- 512.476.7199
Fax:- 512.476.7190
Email: info.us@humancaregroup.com
 Loading...