

human care 1475 Operating Manual
OPERATING MANUAL
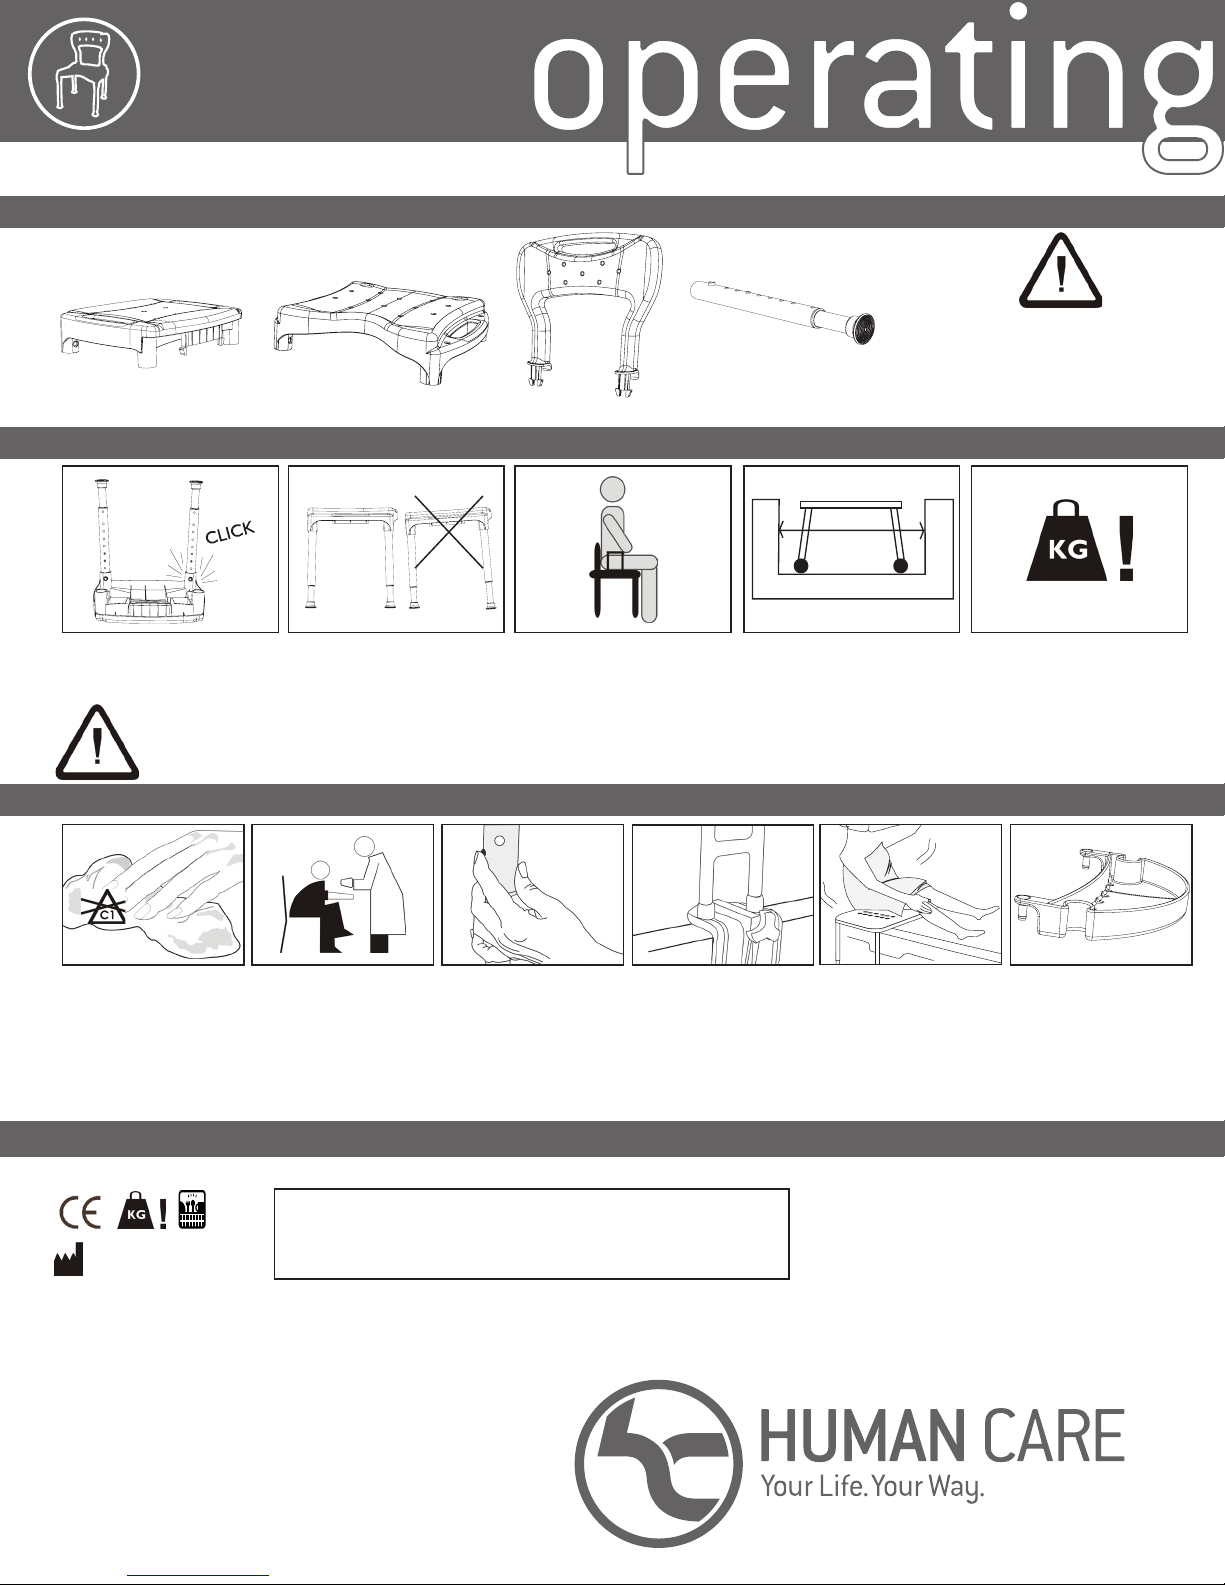
COMPONENTS
WARNINGS
ASSEMBLY/USAGE LOOK MODULAR SERIES
TRANSFER BENCH Model #1475
DO NOT USE ANY PIECE IF THERE
ARE ANY CRACKS OR DAMAGED
COMPONENTS
1 x Large Seat1 x Small Seat 1 x Large Backrest 6 x Legs
250lb / 113.4kg
Ensure legs are locked in before
sitting.
READ ALL WARNINGS CAREFULLY
KEEP THIS INFORMATION FOR FUTURE REFERENCE
CARE AND USE
DO NOT use chlorine bleach or
abrasive cleansers. To clean,
wipe down with a damp cloth
using a mild detergent only.
Rinse well after each use.
DISHWASHER
HUMAN CARE CANADA INC.
10-155 Colonnade Road
Ottawa, ON K2E 7K1
SAFE PLASTIC
Supervision or assistance
when using seats is
recommended for users with
limited mobility.
Ensure legs are adjusted to
be level before use to avoid
possible injury.
Periodically check the legs to
ensure that all push buttons
protrude fully through the
adjustment holes in the legs.
DO NOT stand on seat. Legs
must firmly touch the ground
when seated.
Increase safety by using a
slip resistant bath mat under
the seat. Shower seats are not
to be used for assistance in
entering/exiting the bathtub.
Use a bathtub safety rail to
assist you in sitting down if
necessary.
IF YOU HAVE ANY PROBLEMS OR REQUIRE ASSISTANCE WITH THE
PRODUCT PLEASE CALL:
613-723-6734
Only use on tub/shower floors
that are wide enough to ensure
stability of all four legs.
Ensure your weight is evenly
distributed when sitting.
Improper or uneven loading
may result in the chair tipping
over and/or falling.
DO NOT exceed weight capacity!
Use only authorized parts/
accessories with your chair.
SOLD SEPARATELY
Human Care Canada Inc. All rights reserved. This manual may not be reproduced in part
or in whole without the written permission of the publisher. (REV: SEPTEMBER 2013)
OPERATING MANUAL
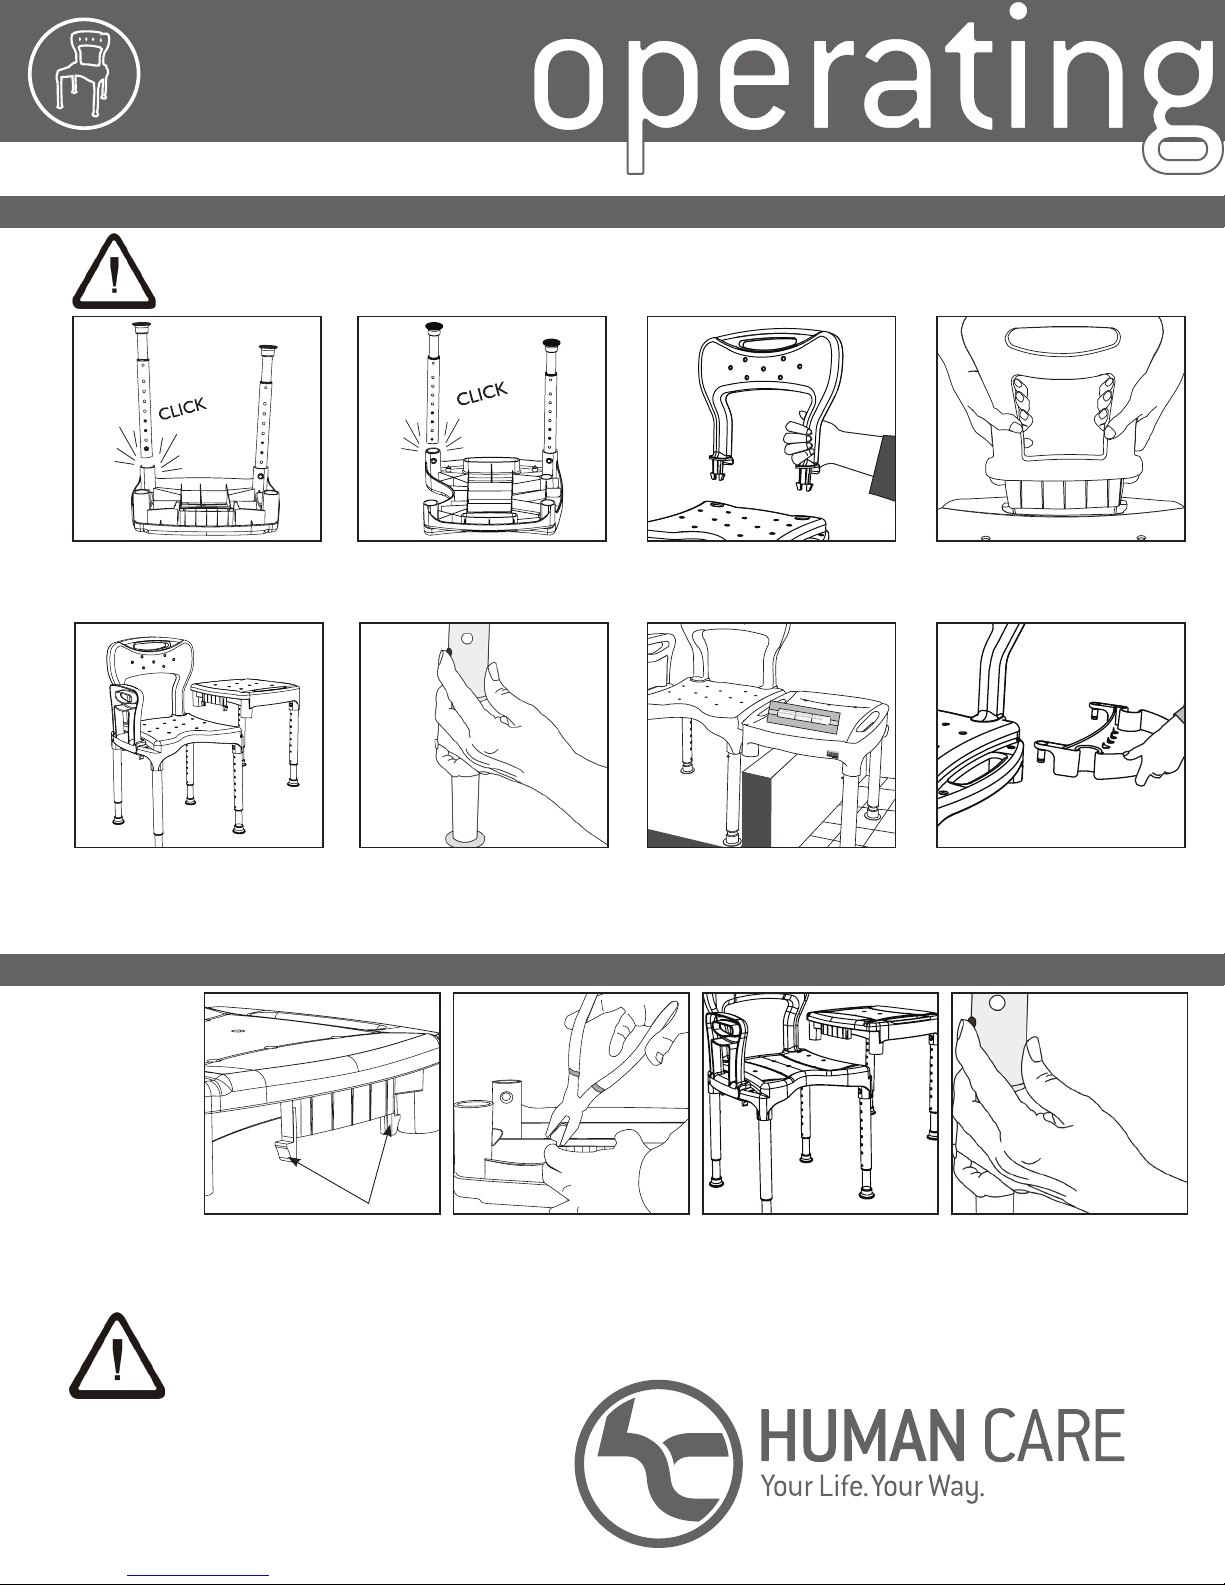
ASSEMBLY
IMPORTANT: ENSURE THAT ALL PUSH BUTTONS “CLICK” INTO POSITION. DO NOT USE PRODUCT IF PUSH
BUTTONS ARE DAMAGED IN ANY WAY.
ASSEMBLY/USAGE LOOK MODULAR SERIES
TRANSFER BENCH Model #1475
STEP 1
Flip over small seat and insert two (2)
legs into holes at bottom of seat on the
side without the clips.
STEP 5
Insert small seat into side slots in large
seat as shown.
EASY ON / EASY OFF FEATURE
To enable the
“Easy On/ Easy
Off” feature, the
clips must be
broken off first.
STEP 2
Flip over large seat and insert four (4) legs
into holes at bottom of seat. Ensure white
button “clicks” into place.
STEP 6
Push in brass coloured button and slide
inner tube up or down to adjust to desired
height. Ensure button “clicks” into place.
STEP 3
Insert large backrest into large seat.
STEP 7
Ensure transfer bench is level before
use. If Easy On/Easy Off feature is not
required (see below), ensure seat slips are
securely “locked” into position.
STEP 4
If desired, insert optional armrest into left
side of seat (when facing seat).
ARMREST SOLD SEPARATELY
NOTE: Soap dish can be added if desired
into small pegs of large seat (instead of
armrest).
SOAP DISH SOLD SEPARATELY
STEP 1
Locate the two clips on the bottom
of the small seat section.
NOTE! The four legs of the larger seat rest in the bathtub and the two legs of the smaller seat rest on the
bathroom floor. The legs on the smaller seat will need to be adjusted to ensure the transfer bench is level and
stable before using.
Human Care Canada Inc. All rights reserved. This manual may not be reproduced in part
or in whole without the written permission of the publisher. (REV: SEPTEMBER 2013)
STEP 2
Using pliers, break off the clips.
STEP 3
Place the small seat section into
the larger seat (transfer bench) as
shown.
STEP 4
Adjust legs to ensure transfer
bench is level.
 Loading...