

human care 1460, 1465 Operating Manual
OPERATING MANUAL
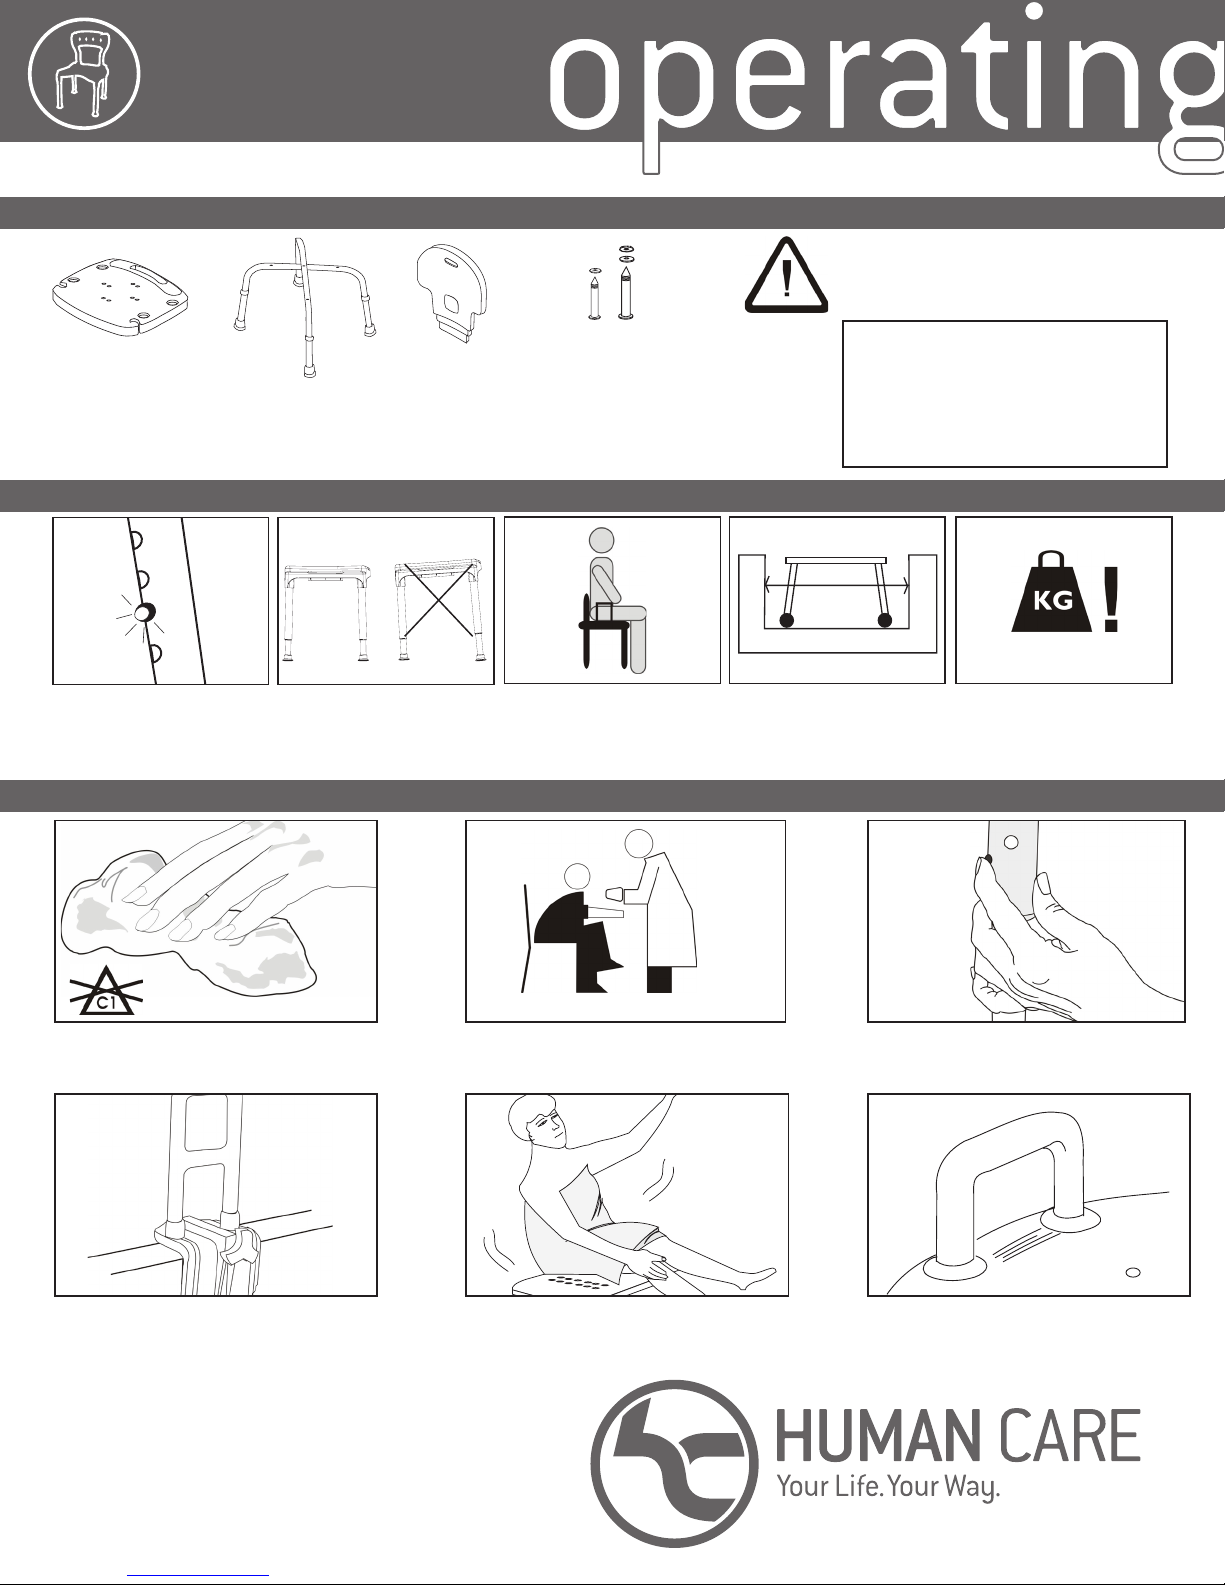
COMPONENTS
ASSEMBLY/USAGE SHOWER SEATS
Models #1460 / #1465 (with back)
DO NOT USE ANY PIECE IF THERE ARE ANY
CRACKS OR DAMAGED COMPONENTS
1 x Seat 2 x Legs
(Marked & )
WARNINGS
Ensure all push buttons are
securely in position before
sitting.
CARE AND USE
1 x Backrest
(Model #1465 Only)
Ensure legs are adjusted to
be level before use to avoid
possible injury.
4 x 42mm Screw
4 x Washers
1 x 50mm Screw
1 x Washer and Lock Washer
DO NOT stand on seat. Legs
must firmly touch the ground
when seated.
READ ALL WARNINGS CAREFULLY
KEEP THIS INFORMATION FOR FUTURE
Only use on tub/shower floors
that are wide enough to ensure
stability of all four legs.
REFERENCE
250lb / 113.4kg
DO NOT exceed weight capacity!
DO NOT use chlorine bleach or abrasive cleansers.
To clean, wipe down with a damp cloth using a
mild detergent only. Rinse well after use.
Increase safety by using a slip resistant bath mat
under the seat. Shower seats are not to be used
for assistance in entering/exiting the bathtub.
Use a bathtub safety rail to assist you in sitting
down if necessary.
Human Care Canada Inc. All rights reserved. This manual may not be reproduced in part
or in whole without the written permission of the publisher. (REV: SEPTEMBER 2013)
Supervision or assistance when using seats is
recommended for users with limited mobility.
Ensure your weight is evenly distributed when
sitting. Improper or uneven loading may result in
the chair tipping over and/or falling.
Periodically check the legs to ensure that
all push buttons protrude fully through the
adjustment holes in the legs.
Use only authorized parts/ accessories with
your chair. SOLD SEPARATELY
OPERATING MANUAL
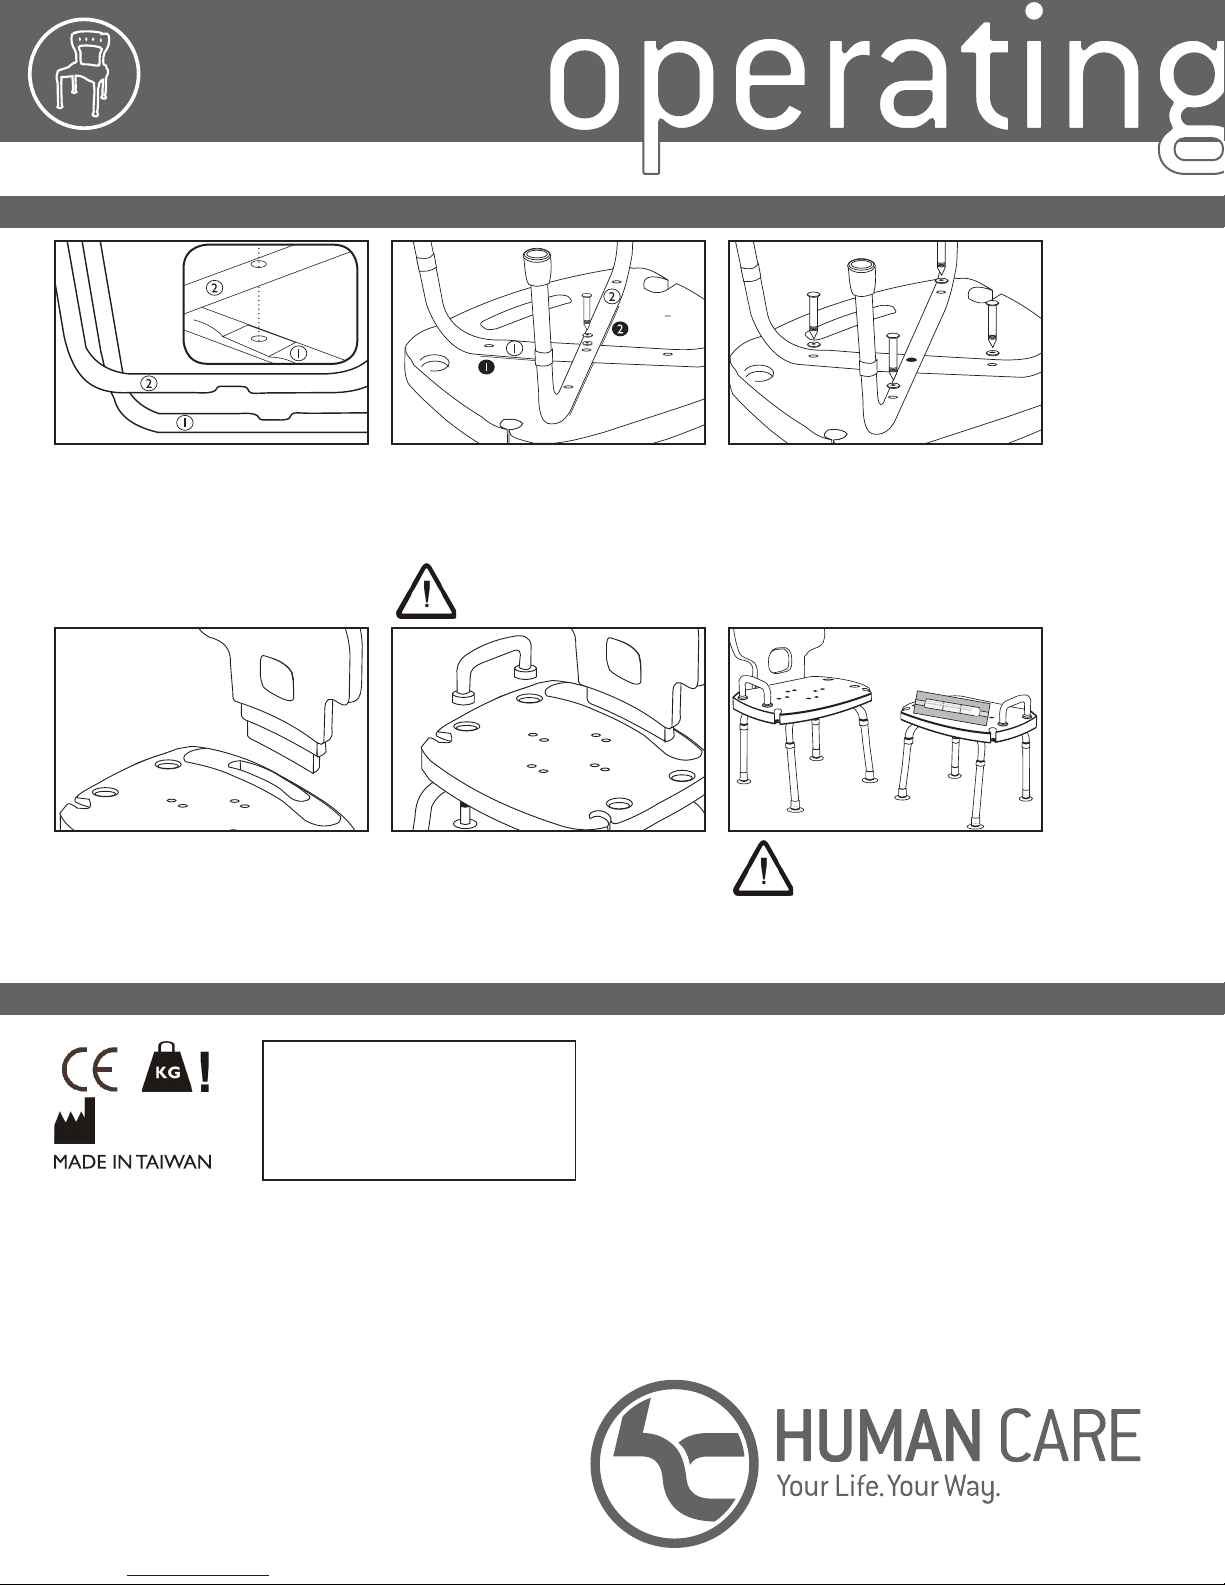
ASSEMBLY
ASSEMBLY/USAGE SHOWER SEATS
Models #1460 / #1465 (with back)
Legs are marked with a number and number
. Seat is also marked to indicate where leg is
to be placed.
Turn over seat and insert backrest firmly in
place by pushing into slot located in the seat.
Flip over the seat and place leg marked on
the seat indent marked . Place leg marked
on the seat indent marked . Use the
50mm screw and washer set and screw into the
center hole.
DO NOT USE A DRILL - HAND TOOLS
ONLY!
A red handle can be added by resting handle
into slots located on seat and holding in place
by screwing in from underneath. Red handle
can be added to either or both sides.
RED HANDLE SOLD SEPARATELY
Screw in the 42mm screws into the remaining
four holes. Caution: Do not overtighten as this
will strip the holes in the seat. If the longer
screw is used in any of these four holes it will
protrude through the seat! This will void the
warranty!
ENSURE SEAT IS LEVEL BEFORE
USING!
IF YOU HAVE ANY PROBLEMS OR REQUIRE
ASSISTANCE WITH THE PRODUCT PLEASE
HUMAN CARE CANADA INC.
10-155 Colonnade Road
Ottawa, ON K2E 7K1
CALL:
613-723-6734
Human Care Canada Inc. All rights reserved. This manual may not be reproduced in part
or in whole without the written permission of the publisher. (REV: SEPTEMBER 2013)
 Loading...