

human care 1260, 1265 Operating Manual
OPERATING MANUAL
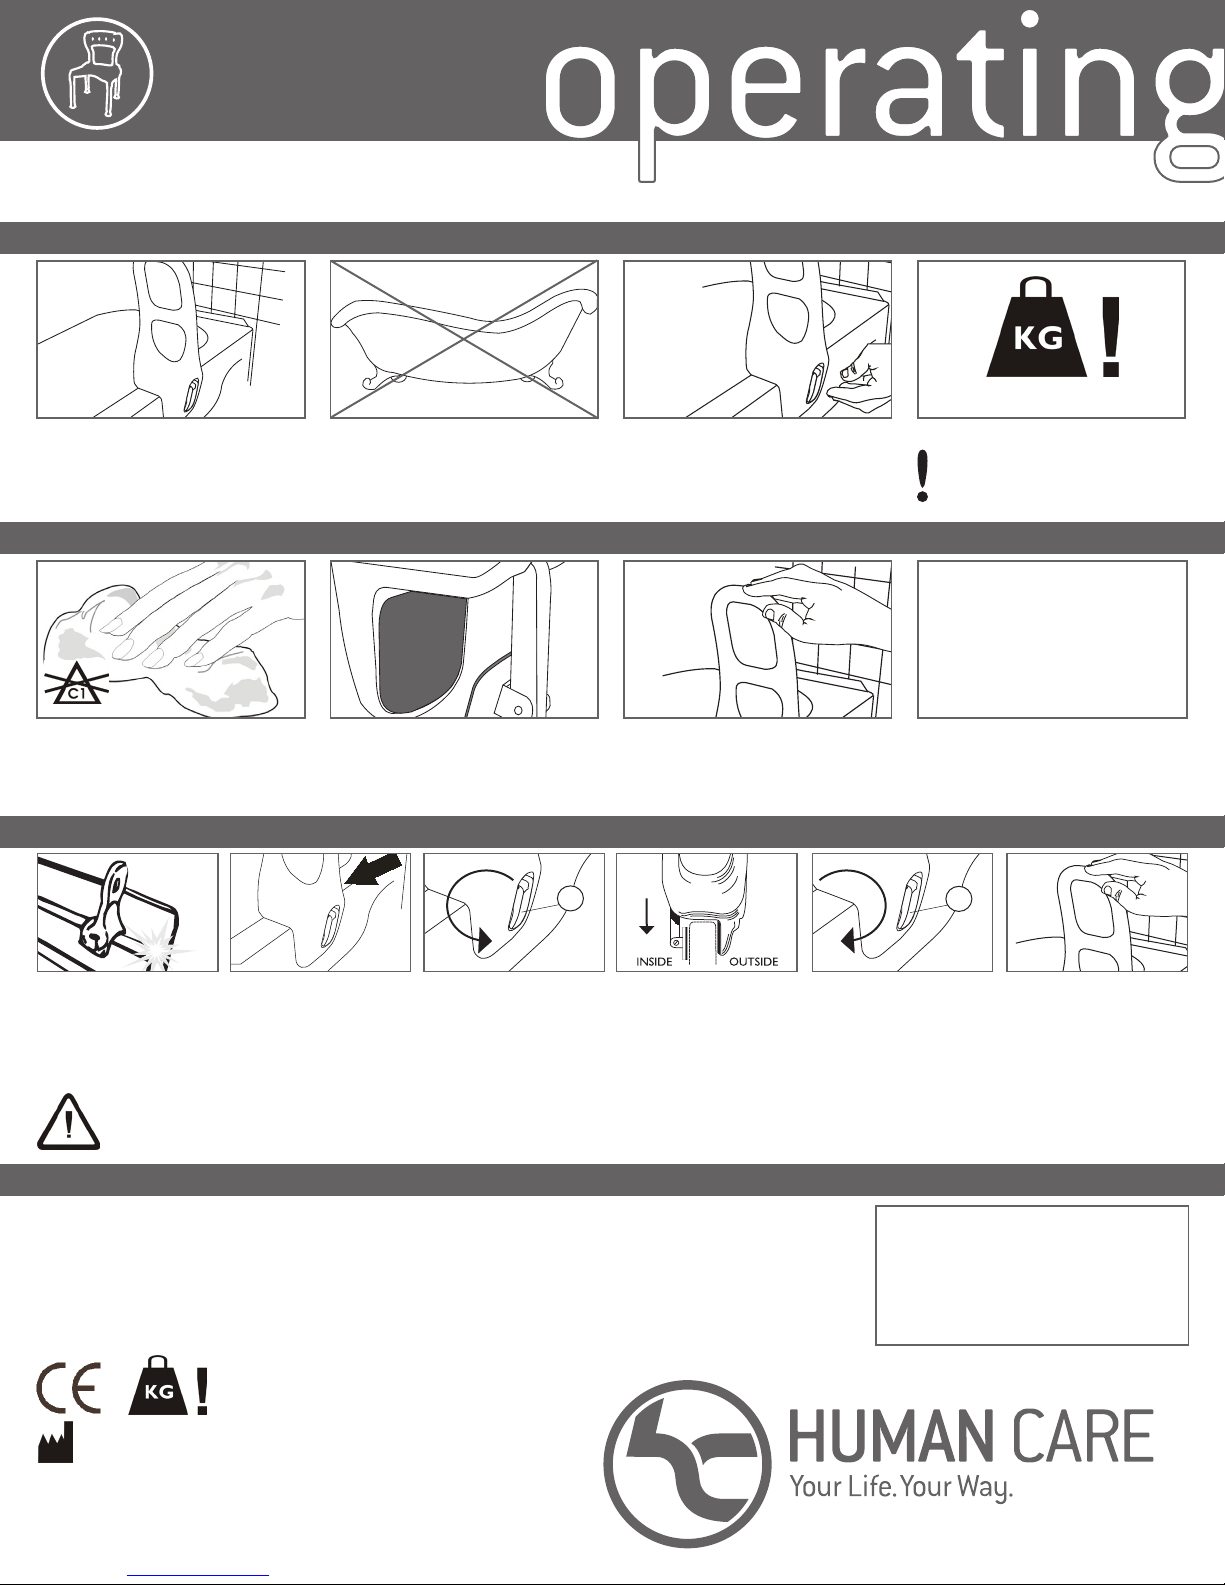
ASSEMBLY/USAGE SIGNATURE BATH SAFETY RAILS
FOR MODELS: 1260 Tall / 1265 Regular
WARNINGS
250lb / 113.4kg
Never overtighten the bath safety rail as
this could cause damage to the bathtub
or the rail itself.
CARE AND USE
DO NOT use chlorine bleach or abrasive
cleansers. Use soap and water or a mild
detergent. Rinse well before using it
again.
ASSEMBLY
Before installing your bath
safety rail, make sure your
bathtub is dry and dirt free. The
bath safety rail can be mounted
at either end of the tub.
CAUTION:
Verify the bath safety rail is firmly in place before use. If bath safety rail is not
securely in place, it may come loose causing injury.
Locate the flattest section of the
inner and outer bathtub wall.
AVOID curves in the bathtub
where bath safety rail cannot
properly grip.
Never install your bath safety rail on a
plastic or fiberglass tub. The tub rail will
not fit on curved bathtubs.
Periodically check the bath safety rail
to ensure the rubber pads are securely
affixed to the bath safety rail.
A
Pull adjustment handle (A) out
to use as a lever. Turn handle
counterclockwise to loosen
until clamp is wide enough to fit
bathtub wall.
Re-tighten your bath safety rail once a
week to maintain proper installation.
Verify the bath safety rail is firmly in
place before each use (should stay in
place when pressure applied or when
pulled).
Place the bath safety rail down
onto the bathtub wall with the
adjustment handle facing the
outside of the bathtub.
Make sure that the bath safety
rail is firmly in position before
tightening. Turn adjustment
handle (A) clockwise to tighten.
With the bath safety rail firmly
in place, fold down adjustment
handle until it locks into place.
DO NOT exceed weight capacity!
DO NOT USE THE BATH SAFETY
RAIL IF THERE ARE ANY CRACKS
OR DAMAGED COMPONENTS!
READ ALL WARNINGS
CAREFULLY
KEEP THIS INFORMATION FOR
FUTURE REFERENCE
A
Test mounting by pulling bath
safety rail forward, back and side
to side. If bath safety rail moves,
loosen adjustment handle (A).
Check that it is not threaded or
ensure that the pads are not
loose. If okay, replace at desired
position and re-tighten.
HUMAN CARE CANADA INC.
10-155 Colonnade Road
Ottawa, ON K2E 7K1
MADE IN CANADA
Human Care Canada Inc. All rights reserved. This manual may not be reproduced in
part or in whole without the written permission of the publisher. (REV: JULY 2013)
IF YOU HAVE ANY PROBLEMS OR REQUIRE
ASSISTANCE WITH THE PRODUCT PLEASE
CALL:
613-723-6734
 Loading...