

HUHD HW-390M User's Manual Manual
User manual guide for 2.4G
HW-390M
Wireles
s
Transmission S
HW-390M
(Work wi th X BOX 36 0/PS3 /WII/ MAC/ TV)PC/
yy
stem
Features
Interfaces:
1.Th e HW-390 M is a 2 .4 Ghz wireless head se t, s pecially desi gn ed
for use wi th X B OX 3 60 and PS3. The transmitt er h as a b uilt-in
Micros of t ap proved non-dr iv er U SB sound card and a do pt s a
pure -d ig it d ecoding syste m. You c an h ear both game sou nd s
and th e ch at t hr ough headset co ur te sy of the special c ir cu it
desi gn a nd i n bu ilt amplifier. H ea r ch at in real-time o ve rl ayed
with ste re o ga me sounds. Use vo lu me b uttons on the hea ds et
to adj us t th e vo lume..
2. Dig it al w ir eless technol og y al lows you to opera te t he
head ph on es a t a distance of up to 1 0 me te rs from the
transm it te r – allowing you fr ee do m to move around wi th ou t
wire s wh il e pl aying games. The head se t ca n be u sed for up to 8
hour s be tw ee n charges.
3. The headpho ne s fi t snugly over you r ea rs s ea ling in sounds so
you ca n pl ay g am es at reasonabl e vo lu mes without dis tu rb ing
thos e ne ar by. H ig h qu ality 40mm driver s de li ver crystal cle ar
soun d qu al it y and allow even lo w vo lu me sounds to be hea rd
duri ng g am e pl ay giving great a dv an tage to the serio us g am e
play er.
4. The headpho ne s ca n also be used with W II , PC ,M AC, and TV,
for go od s te re o sound effects while pla yi ng g ames, watchin g
movi es a nd l is tening to music . It i s pl ug-and-play a nd f ul ly
supp or ts U SB 2.,
5. The microph on e is d etachable, an d ca n be r em oved if not being
used ..
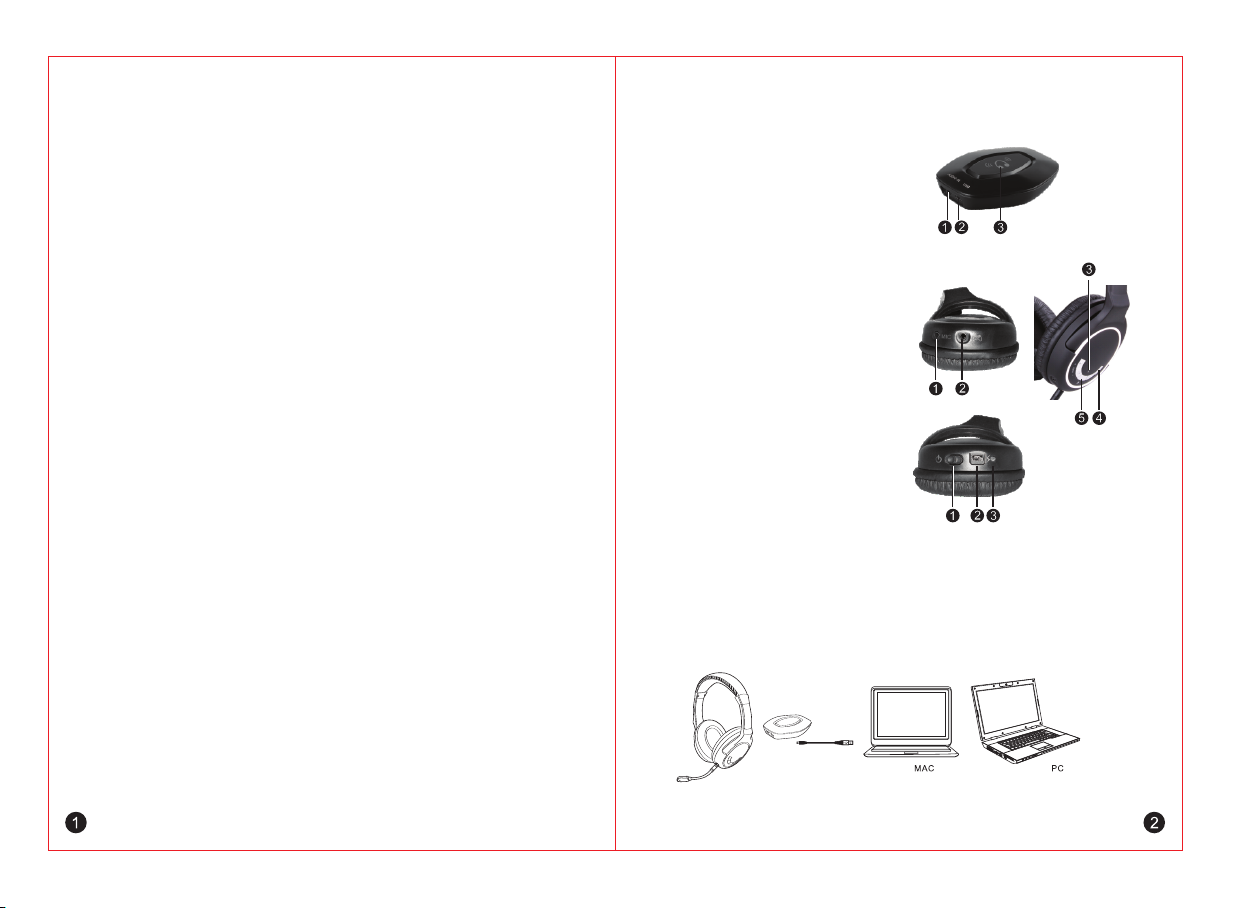
Transmitter:
1. 3.5mm a ud io i np ut
2. Mini US B po rt
3. Working indicat or l ig ht
A. The lef t pa rt o f he ad se t
1. 3.5mm m ic ro ph on e in terface
2. 3.5mm X BO X3 60 i nt er face.
3.Working indicat or l ig ht
4.Volume + / Vol um e_ b ut to ns
5. MIC mut e bu tt on
B. The rig ht p ar t of h ea ds et
1. Power o n/ off button
2. USB rec ha rg in g po rt
3. Recha rg in g in di ca tor light.
Connections:
1. Conne ct w it h PC : us e th e USB cable to connect the tr an sm it te r
with PC as p ic tu re d be lo w:
 Loading...