

Page 1
771 & 772
Hudson Valley Lighting, Inc.
P.O. Box 7459
106 Pierces Road
Newburgh, NY 12550
(800) 814-3993
www.hudsonvalleylighting.com
WARNING
TO REDUCE THE RISK OF FIRE, ELECTRICAL SHOCK OR PERSONAL
INJURY:
1. Turn off or unplug lamp and allow to cool before replacing the bulb.
2. Do not touch the bulb when the lamp is turned on.
3. Keep materials that may easily burn away from lighted bulb.
4. Use only the bulb type and wattage indicated on Wattage Label.
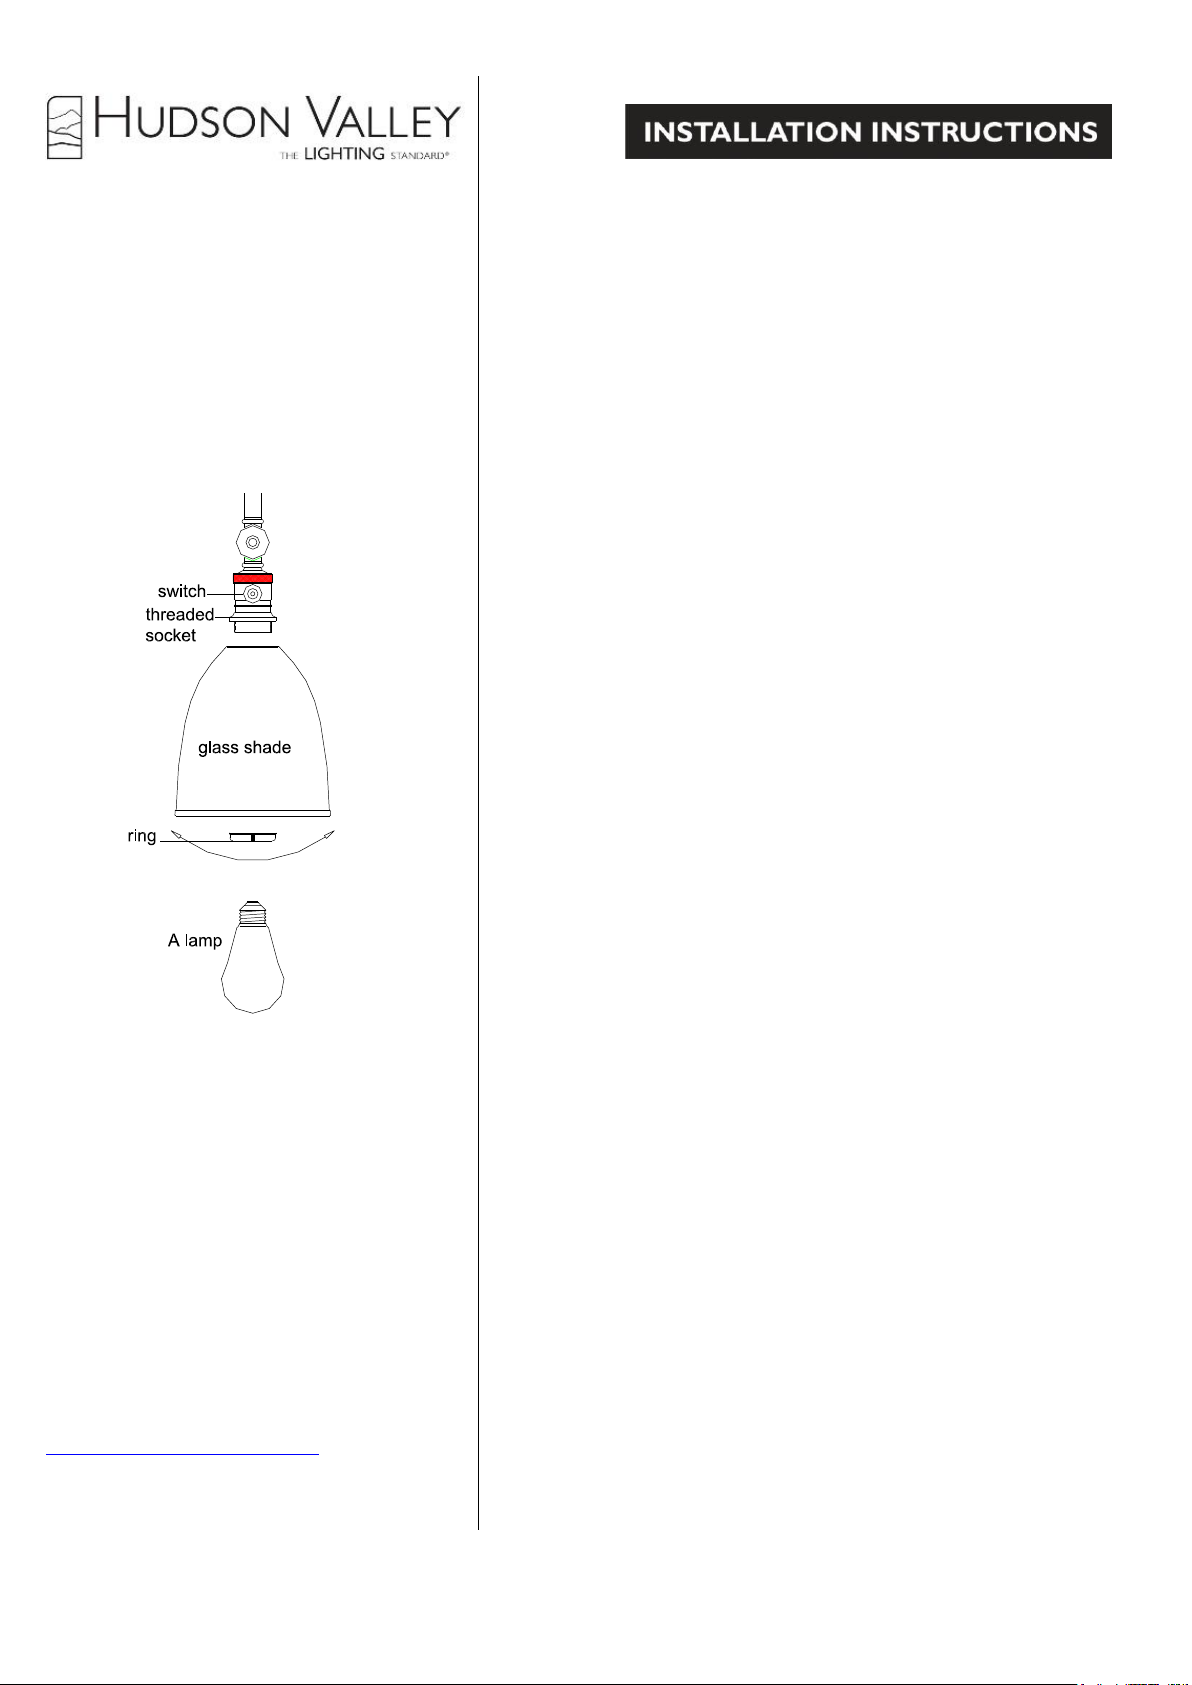
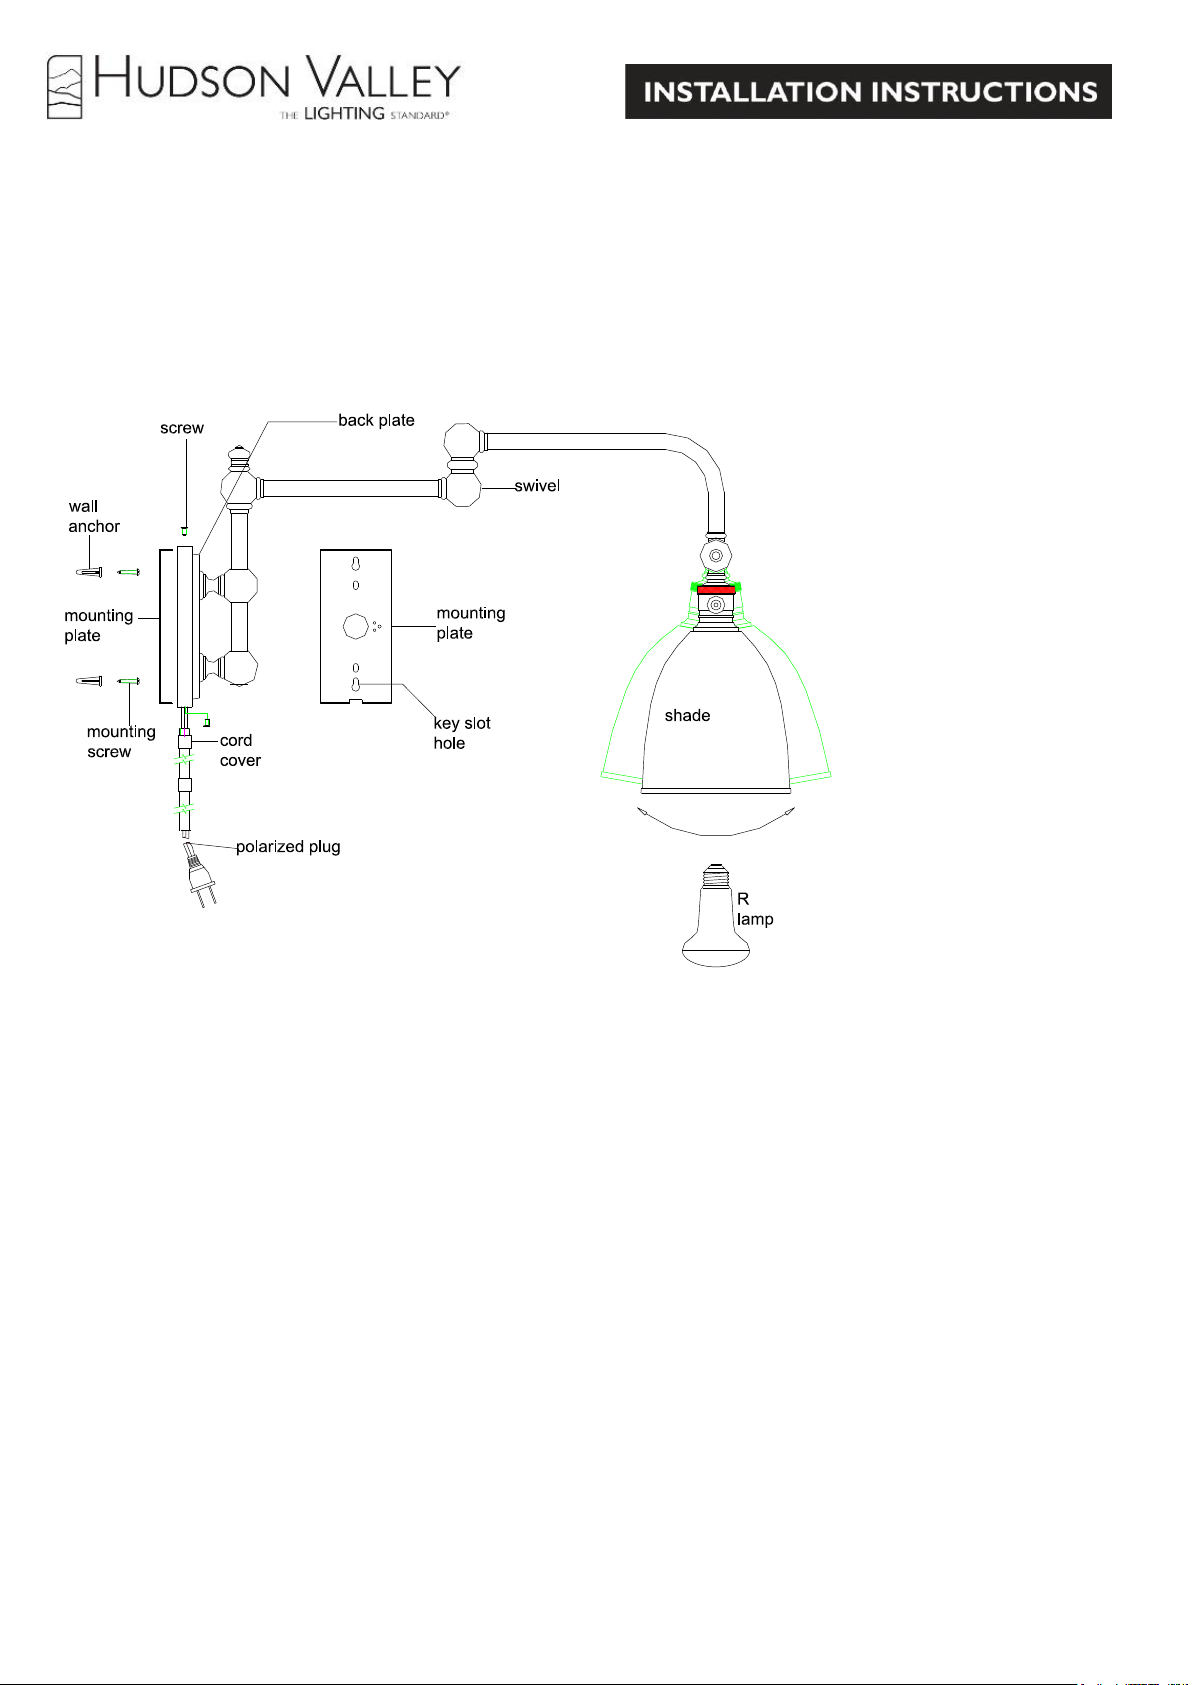
5. 771 (the metal shade fixture) is rated for a 75 watt type A
or R lamp. 772 (the glass shade fixture) is rated for a 75
watt type A lamp.
DO NOT EXCEED RECOMMENDED WATTAGE!
6. TOOLS NEEDED: Blade screwdriver, phillips screwdriver, drill and drill bit
(to make holes for wall anchors). NOTE: The important safeguards and instructions
outlined on this sheet are not meant to cover all possible conditions and situations
that may occur. It must be understood that common sense, caution and care are
factors that cannot be built into any product. Caution and care must be supplied by
the person(s) installing, operating and maintaining this lighting fixture.
WALL MOUNTING INSTALLATION
1. Remove the wall lamp and parts bag(s) from the carton.
Before discarding the carton, double check packing to make certain that all parts
are found.
2. Assemble the two cord cover (tube sections) together.
3. Assemble the cord cover to back plate of lamp.
4. Remove the three screws from the side of the back plate. (DO NOT LOOSE
THEM!) Remove the mounting plate from the back plate.
5. Determine the location for the lamp. Using the mounting plate as a template,
mark the location of the holes for the wall anchors. Make sure the notch in the
mounting plate is located at the bottom.
6. Drill the appropriate size holes for the wall anchors (the holes should be slightly
smaller than the size of the anchors) Install the wall anchors. Install the mounting
plate to wall.
7. Place the lamp back plate over the mounting plate. Secure it with the three
screws that were removed in Step 4.
8. Remove the ring from the threaded socket, place the shade over the socket and
reinstall the ring.
9. Install the bulb and plug the cord into the nearest outlet, control fixture with
rotary switch provided.
IMPORTANT SAFETY INSTRUCTIONS:
This portable lamp has a polarized plug (one blade is wider than the other) as a
safety feature. This plug can be used in polarized outlet only one way. If the plug
does not fit fully into the outlet, reverse the plug. If it still does not fit, contact a
qualified electrician. Never use with an extension cord unless the plug can be fully inserted.
Do not alter the plug.
Page 2
771 & 772
(continued)
Hudson Valley Lighting, Inc.
P.O. Box 7459
106 Pierces Road
Newburgh, NY 12550
(800) 814-3993
www.hudsonvalleylighting.com
 Loading...