

Page 1
Installation Instructions
g
gu
,
e
FF-4442,FF-4443,F-4444
Assembling the Fixture
Carefully remove the fixture from the carton,and check that all parts are included,
as shown in figure.Be careful not to misplace any of the screws or parts which are
needed for installing the fixture.
PLEASE NOTE:For 2LT
of correct position during shipment.Twist (by hand) to realign.
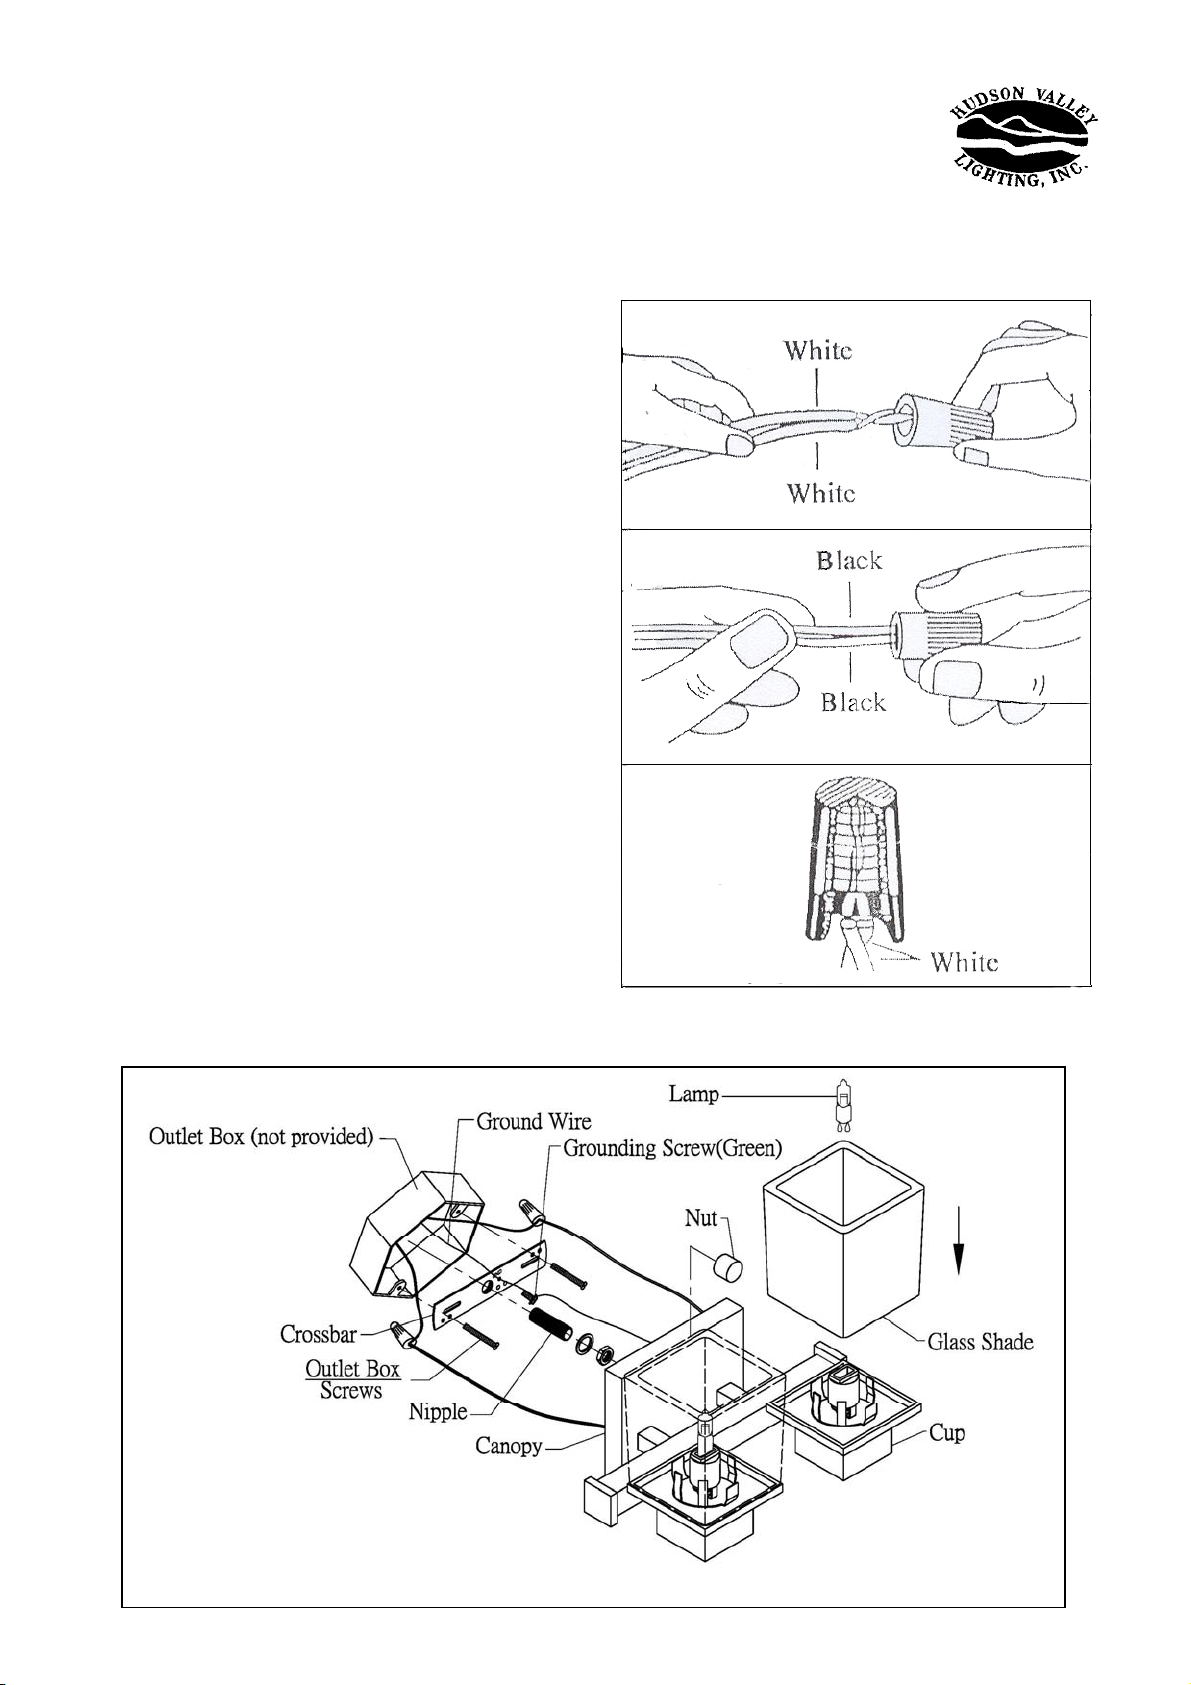
1 Attach crossbar to Outlet Box by means of the two screws
2 Screw nipple into the threaded hole in the crossbar.
Connecting the Wires
Connecting the wires to the connectors is shown in figure 2
1 If your OUTLET BOX is provided with a GROUNDING WIRE (GREEN or
BARE COPPER only). attach it to the GREEN GROUNDING SCREW on cross
bar by wrapping it around the SCREW under the HEAD OF THE SCREW. Tighten
the SCREW.
Warning:Do not attach any other wires to this screw
2 Place the white wires from the fixture evenly against the white wire from the Outlet
Box. and then twist together the bare parts of the wires.
3 Fit the connector over the twisted wires. and screw the connector in place until
you feel a firmness.
3LT,4LT,and 5LT versions,end ornaments may mov
Warnin
Be sure the electricity to the wires you are working on
is shut off-either the Fuse removed or the Circuit
Breaker set at Off.
4 Try gently to pull the connector off the wires. If you can pull the connector off,
carefully redo steps 2 and 3 above.and check again for a firm connection
5 Connect the black wires in the same manner.
6 After the wires are connected,tuck them carefully inside the Outlet Box. And then
slip the canopy over the nipple and lock against the wall by screwing the nut onto
the protruding nipple.
Fi
re 2-Wire Connectors
Figure 1-Fixture Parts
 Loading...