


See all instructions and videos at
hudl.com/sideline/premium
Setup Guide
Premium Package


Table of Contents
Table of Contents
Press Box Setup ..................................................................6
Press Box Router ..................................................................................... 8
Streaming Kit .......................................................................................... 11
End Zone Setup ................................................................. 14
End Zone Router and Bridge .................................................................. 16
HDMI Splitter .......................................................................................... 20
Streaming Kit .......................................................................................... 23
Connect Your iOS Devices ...............................................26
Instructions ............................................................................................ 27


Introduction
5
Before you get started
1. Download and log in to the Hudl Sideline app.
Use an internet or cellular connection to download the app to all
recording and viewing devices. Open the app and log in with your
Hudl username and password.
2. Set up your press box and end zone cameras
like normal.
Hudl Sideline’s Premium hardware will easily integrate with your
existing press box and end zone cameras.
Look for this icon in the App Store.

6
Press Box Setup

7
iOS Recording
Device
Camera
Streaming
Kit
Press Box
Router

Press Box Router
8
Ethernet Cord
Power Adapter
Power Cord
Press Box Router
Window Mount
Step #1
Set up your press box router.
What you’ll need:
Press Box Router
9
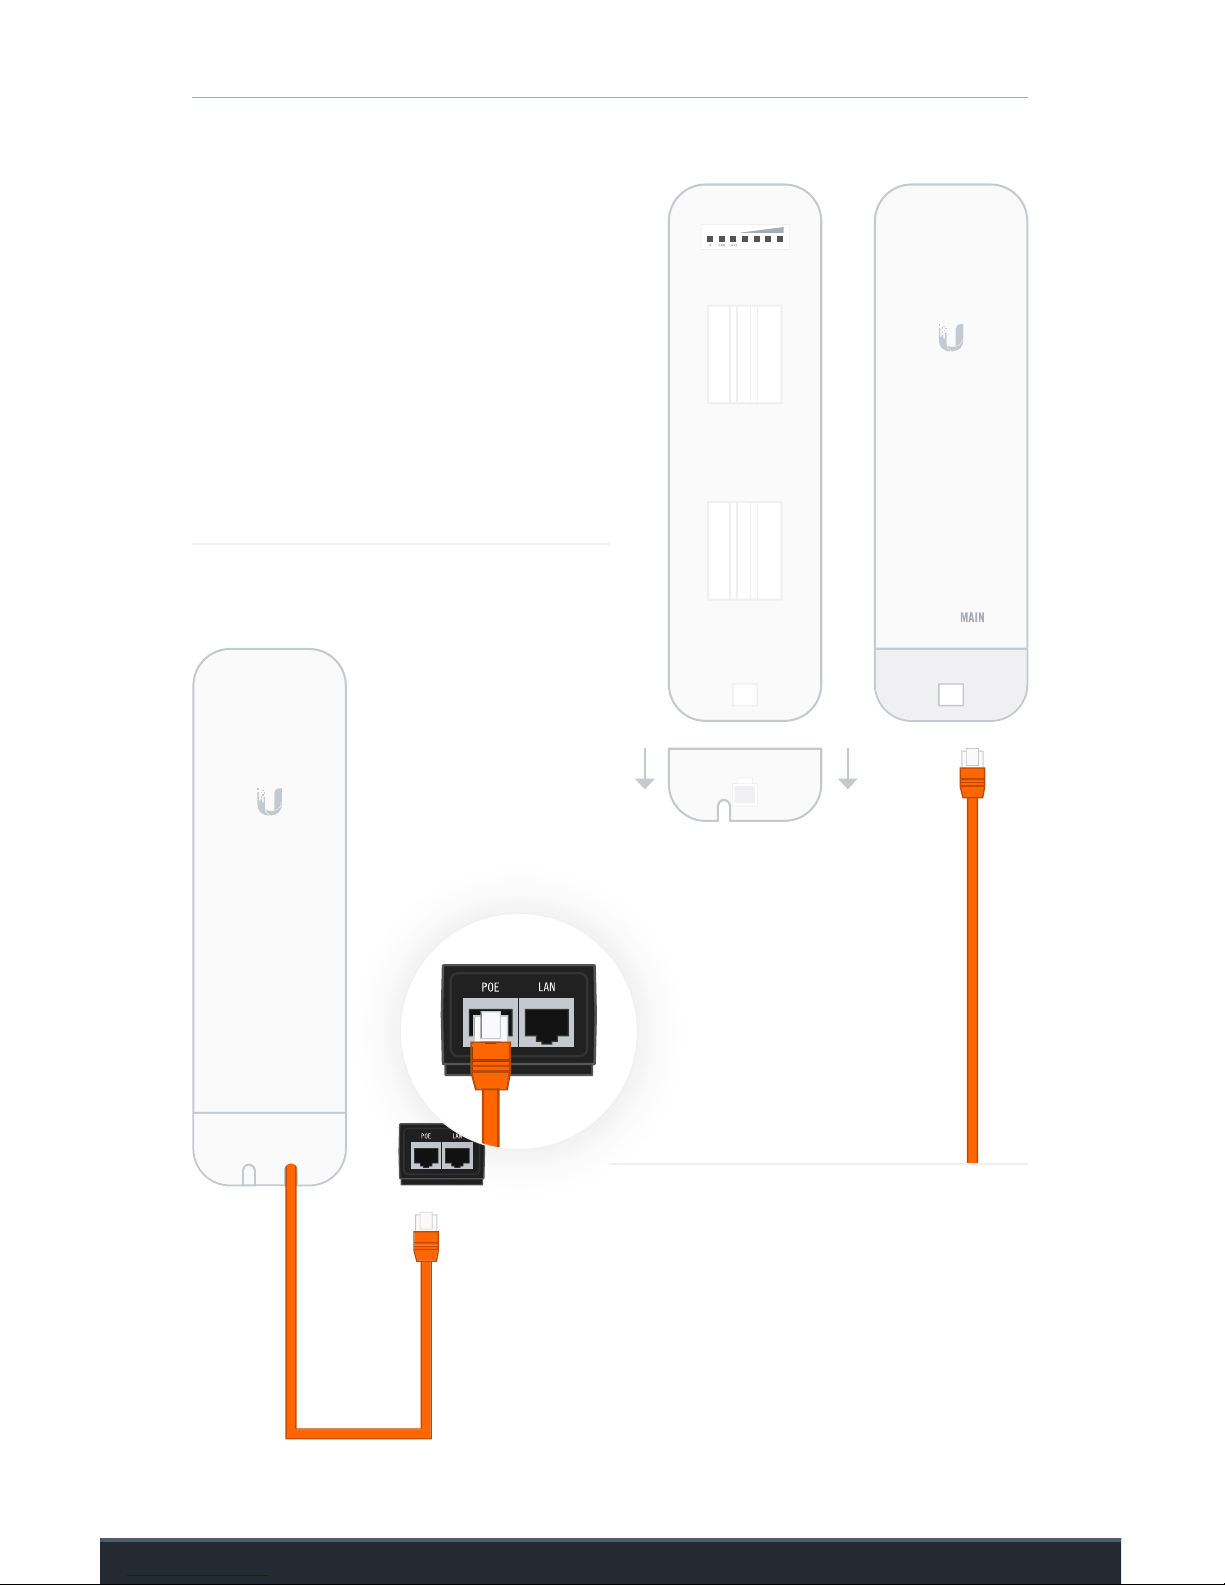
Front
A. Remove the cover from the
bottom of the press box router
and plug the orange ethernet
cord into the Main port.
Reattach the cover to protect
the connection.
Back
B. Plug the other end of the
ethernet cord into the POE port
on the power adapter.

Press Box Router
10
C. Plug one end of the power cord into the adapter and the
other end into the nearest outlet.
D. Use the provided window mount to attach the router to the outside
of your press box, facing the 25-yard line closest to your end zone
camera.
Point at
25-Yard Line

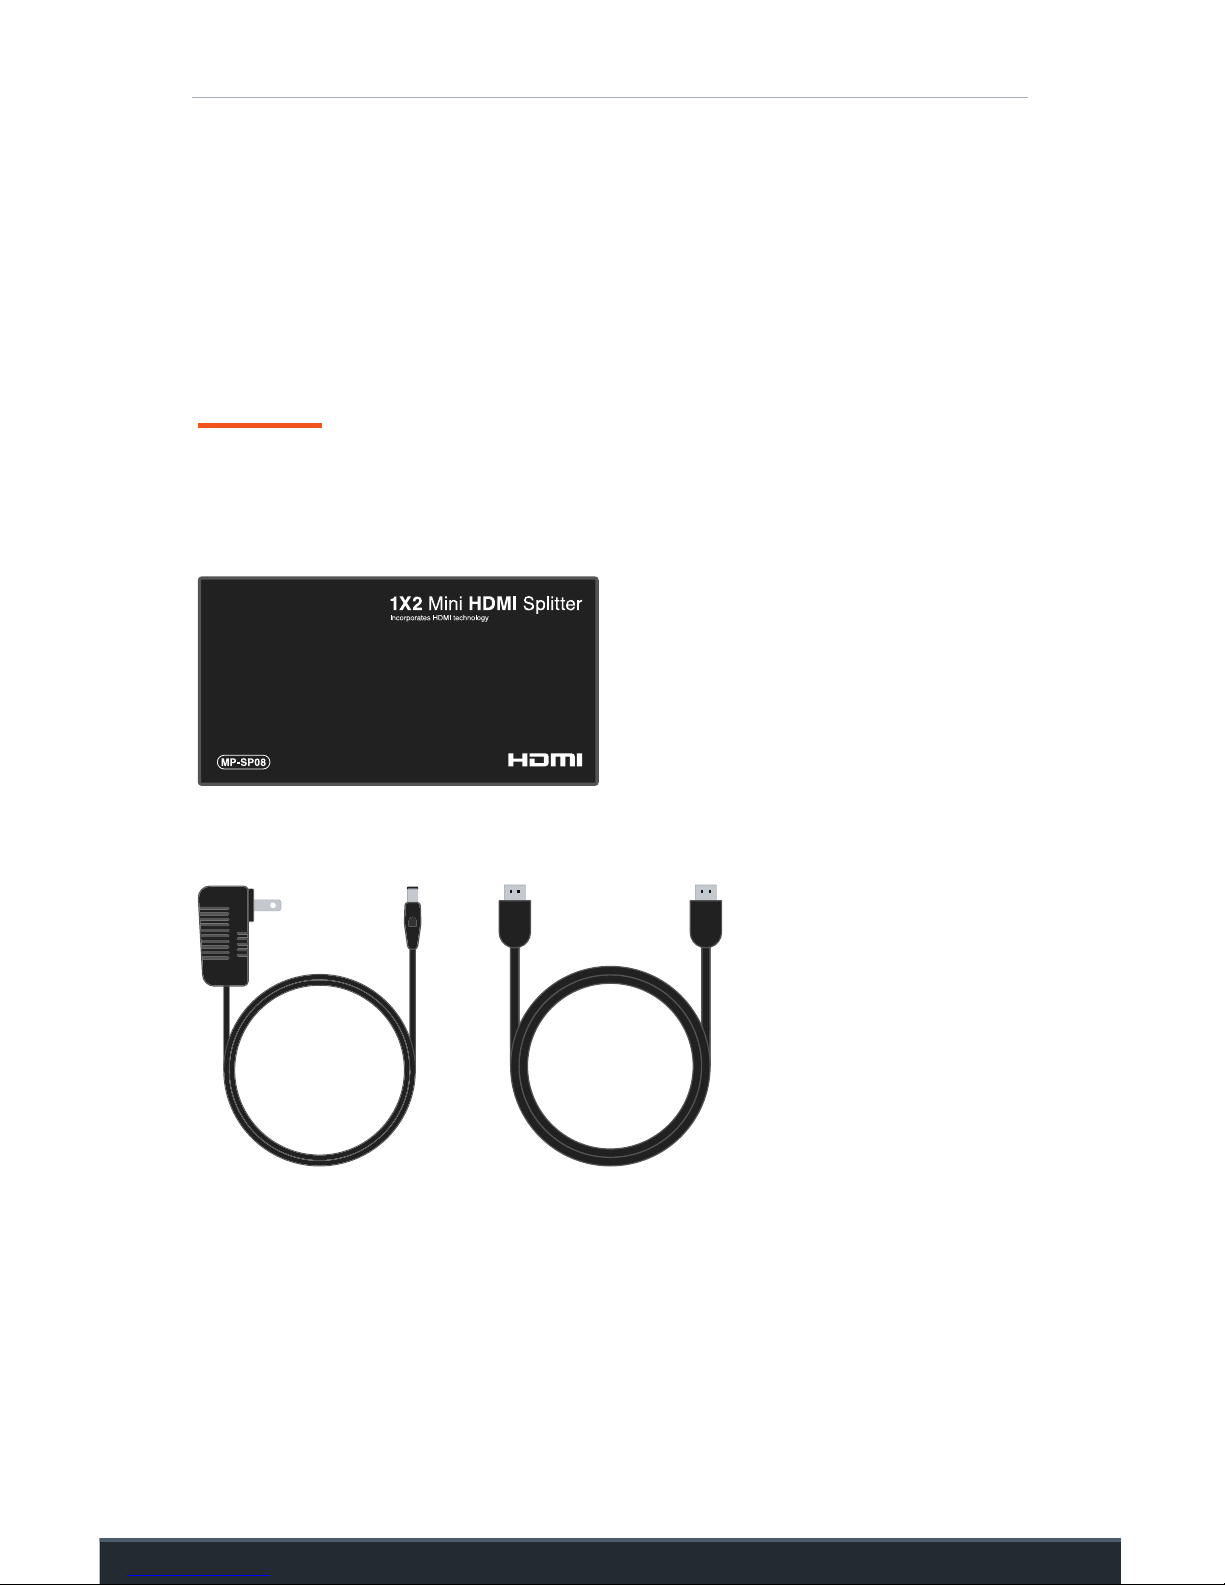
Press Box Streaming Kit
11
AC Power Cord
Press Box Streaming Kit
Adhesive Velcro
Step #2
Set up your streaming kit.
What you’ll need:
HDMI Cord

Press Box Streaming Kit
12
A. Plug one end of an HDMI cord into your camera. Depending on the
camera, you may need to use an adapter.
B. Plug the other end into the streaming kit’s HDMI port.
Do not let the streaming kit hang
from the camera. This could cause
the cord to break.
HDMI Cord

Press Box Streaming Kit
13
D. Connect the power cord to the power port on the streaming kit and
plug into the nearest outlet.
C. Apply one side of the adhesive velcro to
the back of the streaming kit and the other
to your tripod. Secure your streaming kit to
the tripod to prevent it from hanging freely.
Camera
Tripod
Adhesive Velcro

14
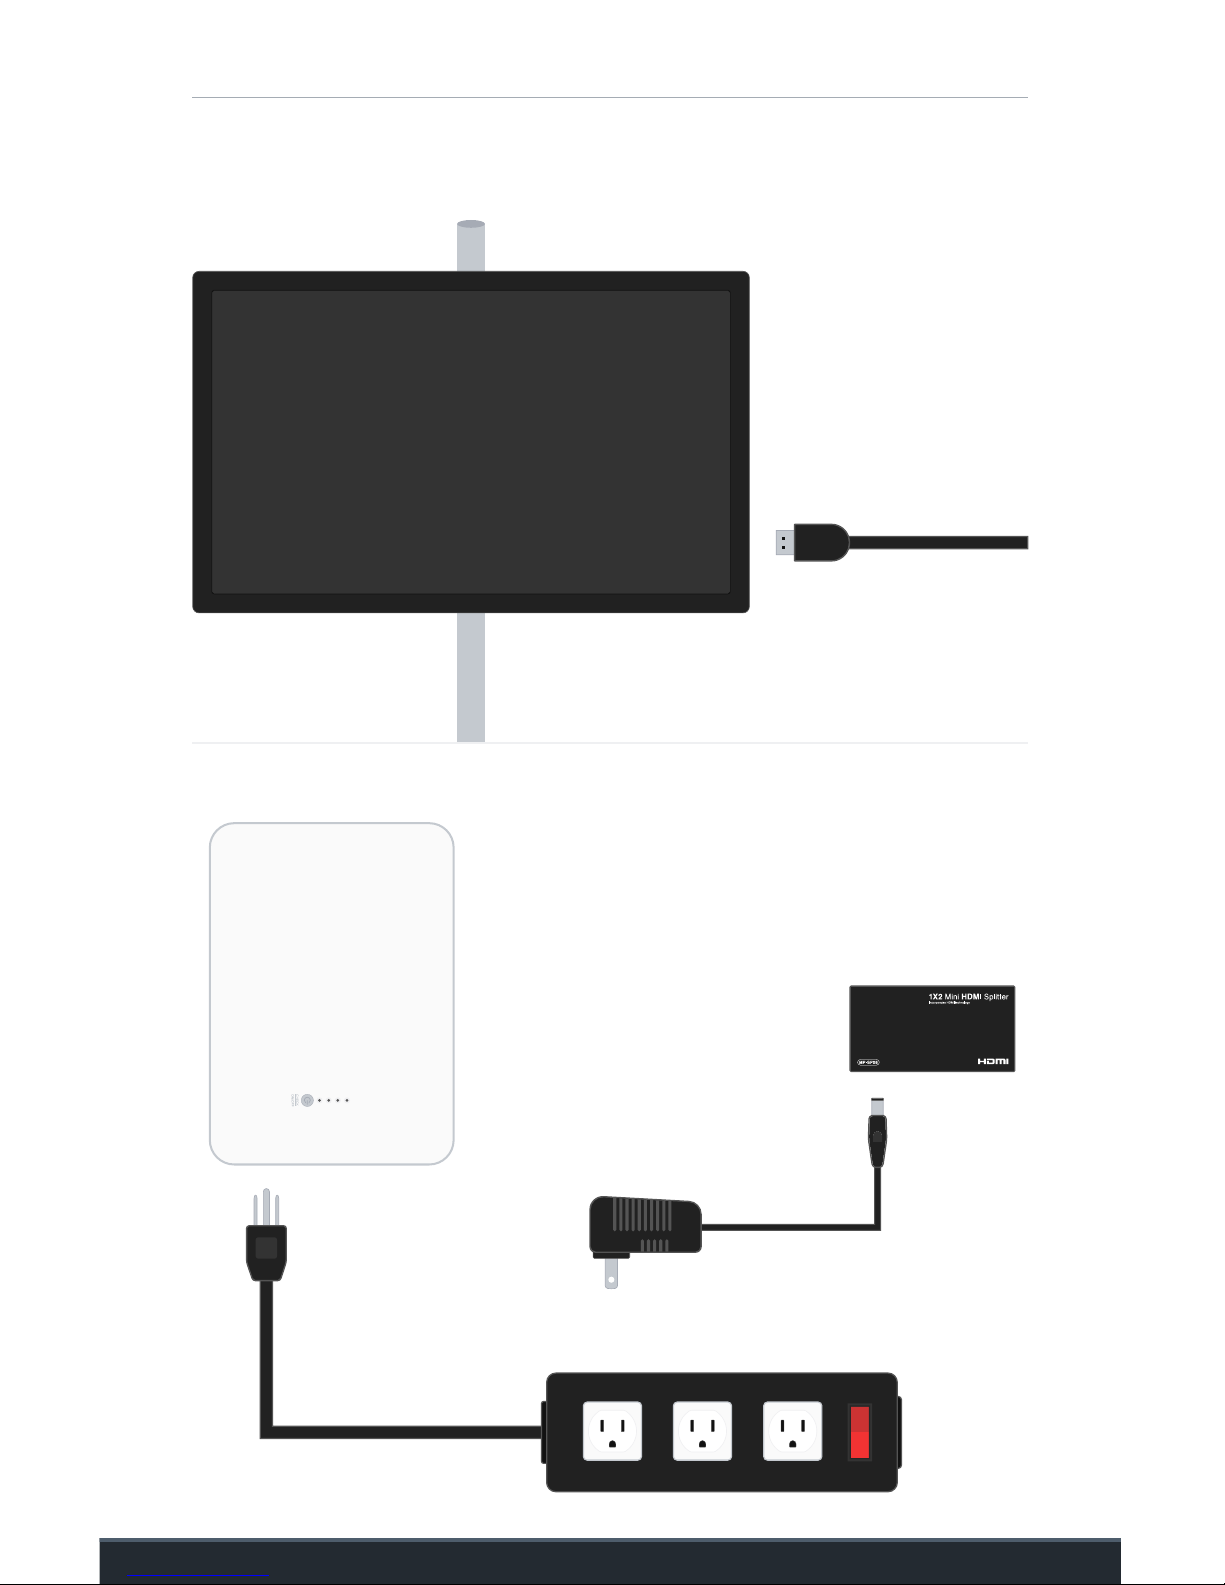
End Zone Setup
Streaming Kit
Camera
Portable Battery
HDMI Splitter
End Zone Router & Bridge

15

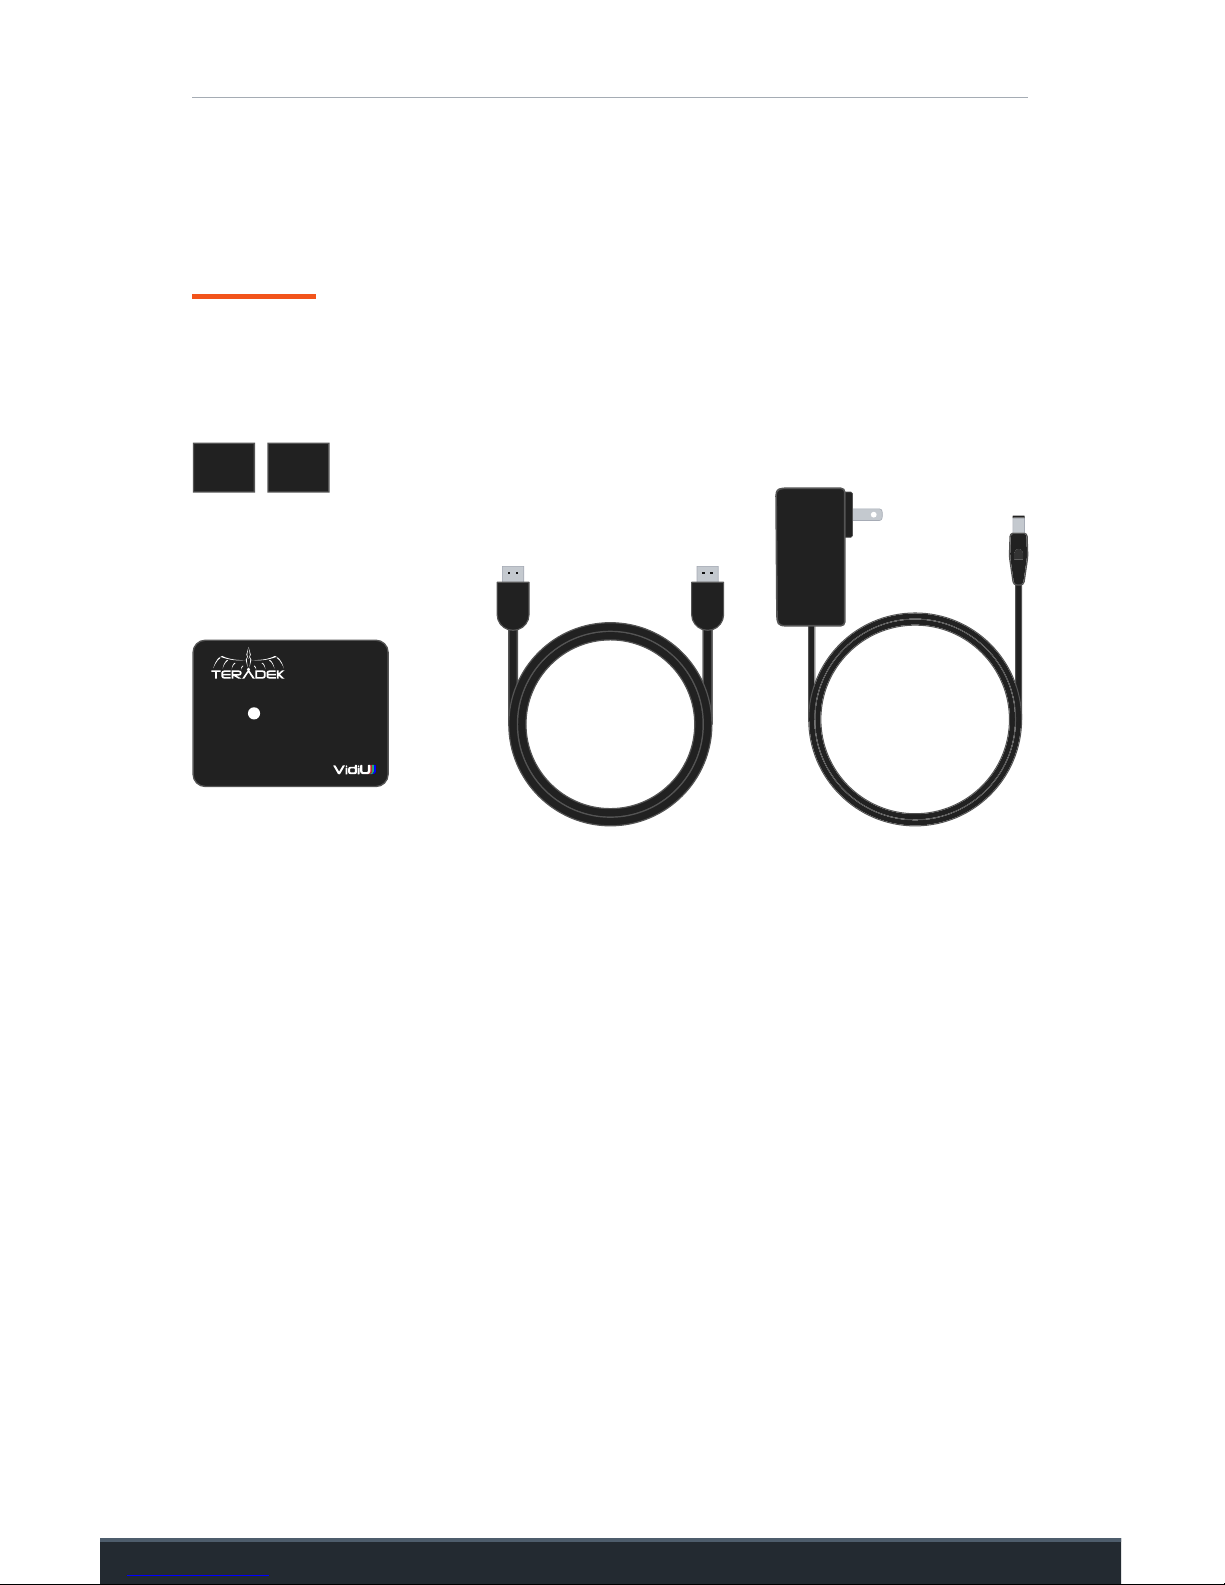
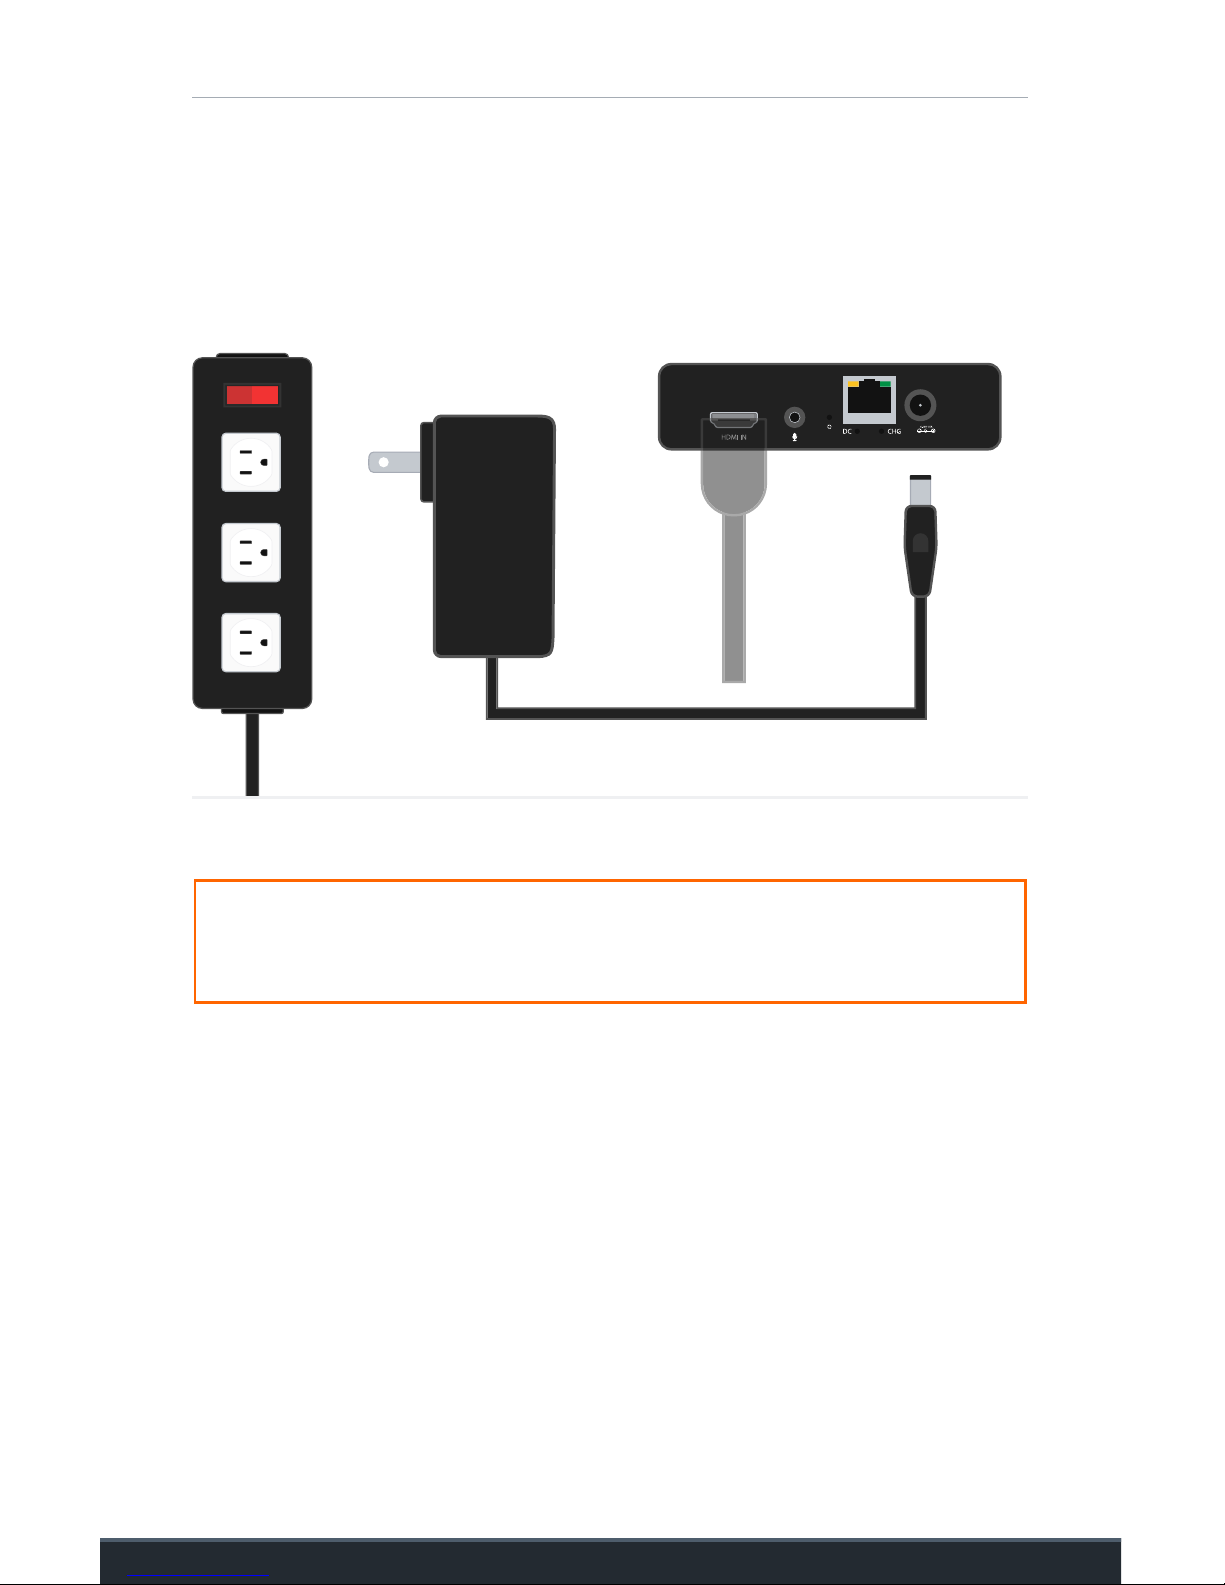
End Zone Router and Bridge
16
Power Adapter x2
Ethernet Cord
x2
Power Cord
x2
Portable BatteryEnd Zone Router Bridge Router
Power Strip (not included)
Step #1
Set up your end zone router and bridge.
What you’ll need:
Velcro Straps
Ethernet Cord

End Zone Router and Bridge
17
B. Plug the other end of each
ethernet cord into the POE port
on both power adapters.
FrontBack
A. Remove the bottom covers
from the end zone router and
the bridge router. Plug one
end of each ethernet cord into
the LAN port on each router.
Reattach the covers to protect
the connections.

End Zone Router and Bridge
18
C. Plug the short black ethernet cord into
the LAN port on each power adapter.
This will create a link between the end
zone and bridge routers.
D. Plug a power cord into each adapter and connect
to a power strip (not included).
E. Plug the power strip into the portable battery.
Flip the battery’s AC Output switch to On
before pressing the power button.
End Zone Router and Bridge
19
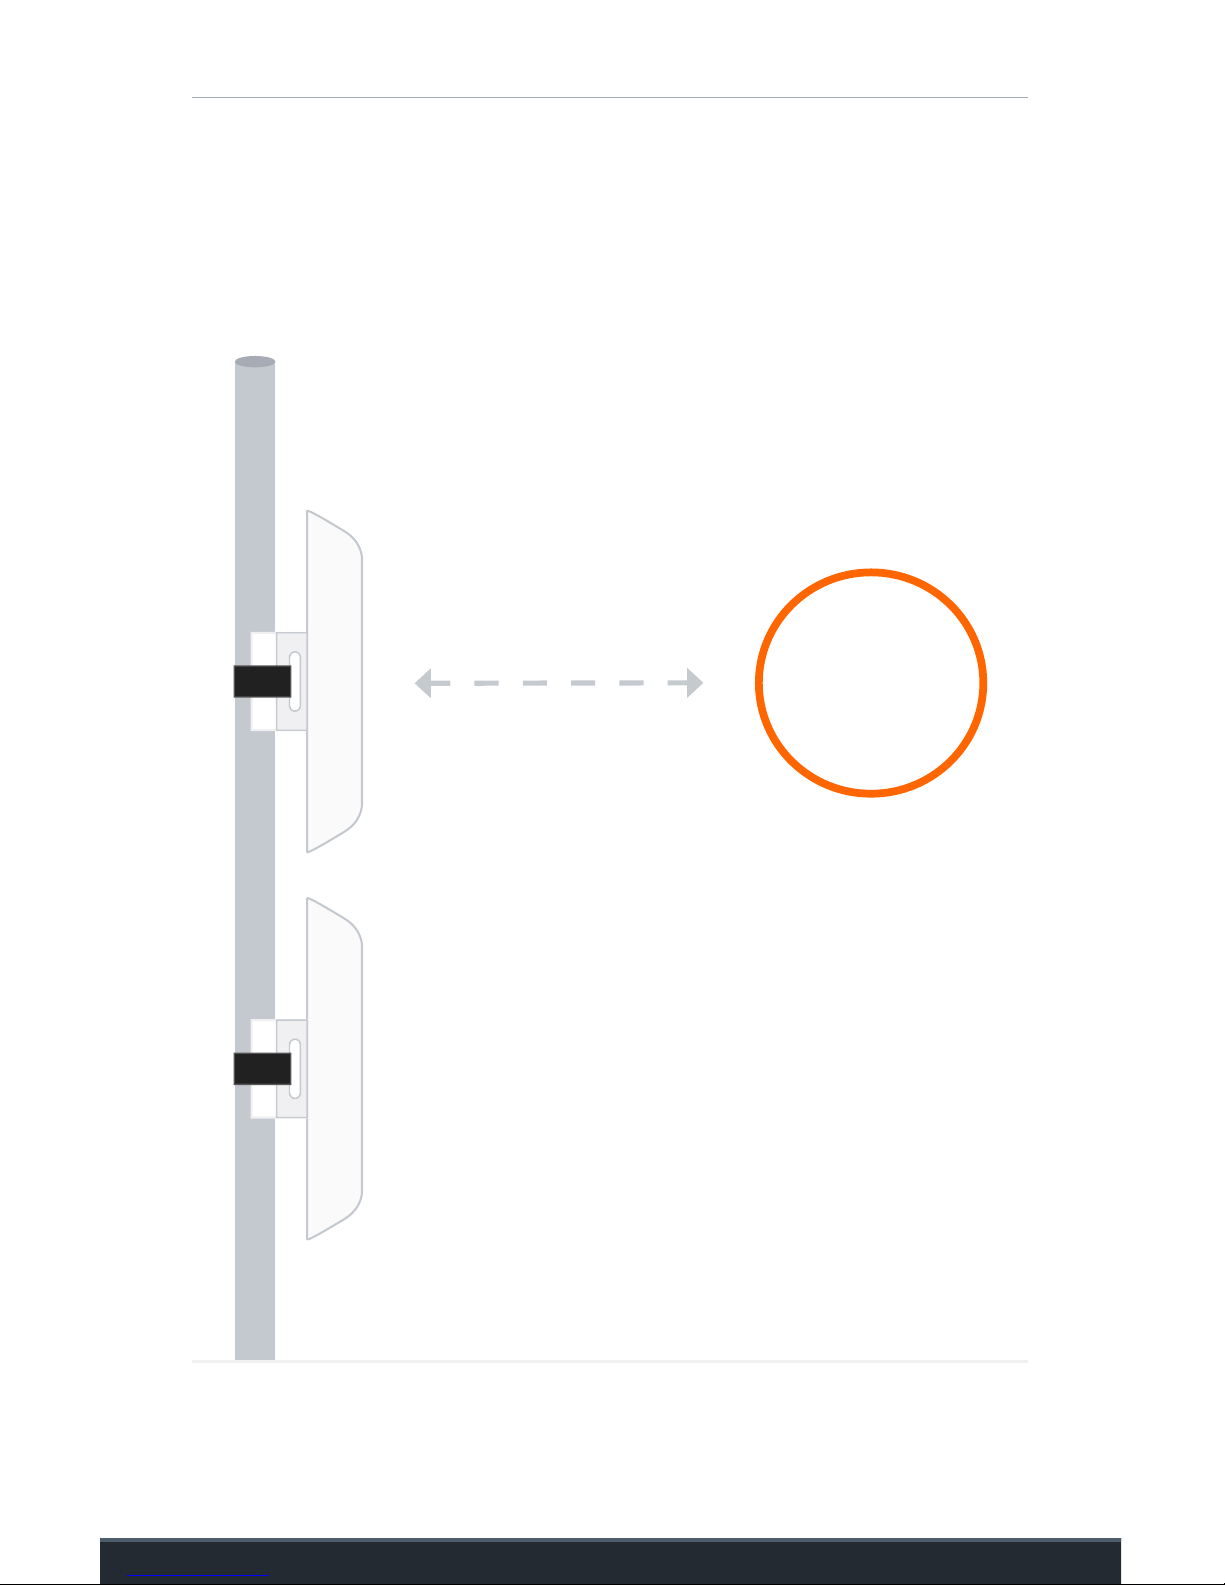
F. Use the velcro straps to secure both routers to the
pole of your end zone camera. Point them toward
your press box router.
Point at
Press Box
Router
HDMI Splitter
20
Step #2
Split your video feed between
a monitor and streaming kit.
What you’ll need:
HDMI Splitter
HDMI CordAC Power Cord
If your end zone camera does not use a monitor, skip to page 23.
HDMI Splitter
21
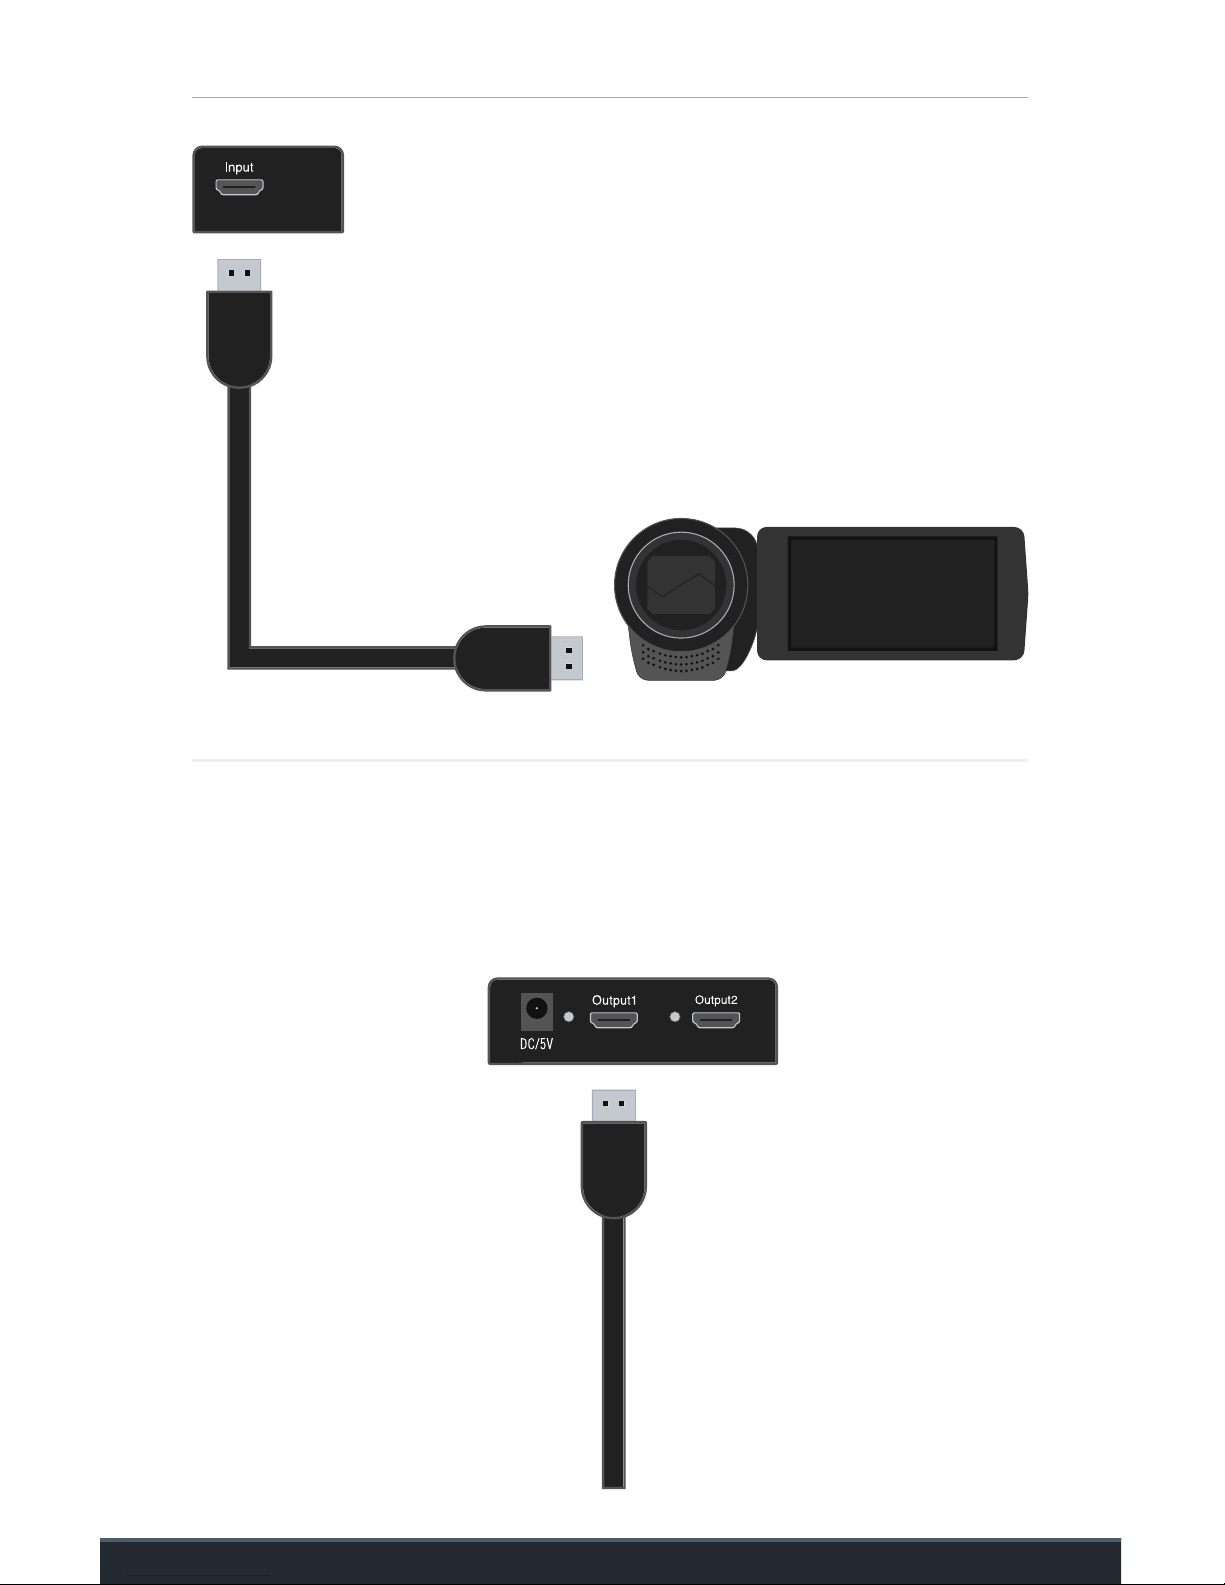
A. Plug the HDMI cord coming from your
camera (the one you normally connect
to your end zone monitor) into the HDMI
splitter’s INPUT port.
B. Plug one end of another HDMI cord into OUTPUT 1 on
the HDMI splitter.
To End Zone
Monitor
HDMI Splitter
22
C. Plug the other end of that HDMI cord into your end zone monitor.
End Zone
Camera Monitor
D. Plug the power cord to the
HDMI splitter and connect
to a power strip (not
included).
From HDMI
Splitter
End Zone Streaming Kit
23
AC Power Cord
End Zone Streaming Kit
Adhesive Velcro
Step #3
Set up your streaming kit.
What you’ll need:
HDMI Cord

End Zone Streaming Kit
24
A. Take your last HDMI cord and
plug one end into OUTPUT 2 on
the HDMI splitter.
B. Plug the other end into the HDMI port on the streaming kit.
If you are not using the HDMI
splitter, connect directly to
your camera.
End Zone Streaming Kit
25
C. Plug the power cord into the streaming kit’s power port and
connect to a power strip (not included).
Pro Tip: Use the provided adhesive velcro to attach the HDMI splitter and
streaming kit to the back of your monitor or tripod.

26
Connect Your
iOS Devices

Instructions
27
A. Download the Hudl Sideline app and log in.
Use an internet or cellular connection to download the app to all
devices. Log in with your existing Hudl username and password.
B. Connect to your Hudl Sideline network.
Use the password included with your hardware.

 Loading...