

Hubsan X4 DESIRE H502S Instruction Manual
®
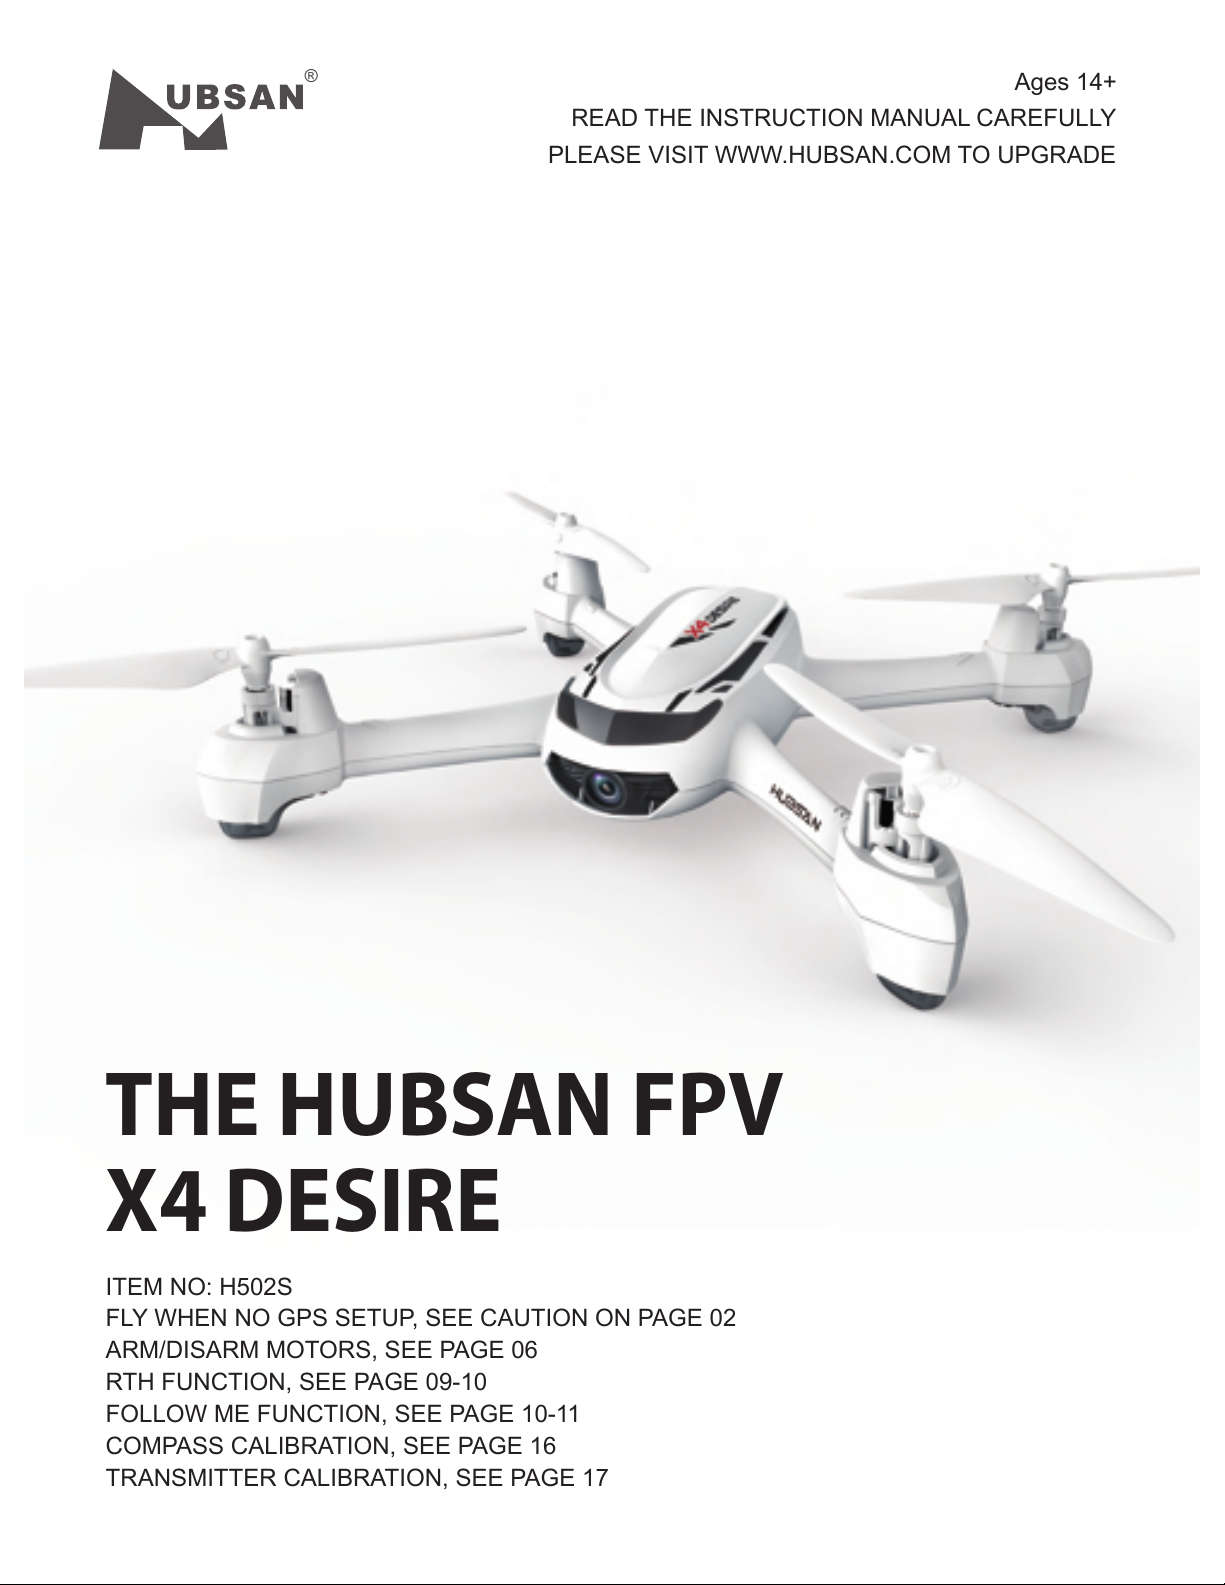
ITEM NO: H502S
FLY WHEN NO GPS SETUP, SEE CAUTION ON PAGE 02
ARM/DISARM MOTORS, SEE PAGE 06
RTH FUNCTION, SEE PAGE 09-10
FOLLOW ME FUNCTION, SEE PAGE 10-11
COMPASS CALIBRATION, SEE PAGE 16
TRANSMITTER CALIBRATION, SEE PAGE 17
THE HUBSAN FPV
X4 DESIRE
READ THE INSTRUCTION MANUAL CAREFULLY
Ages 14+
PLEASE VISIT WWW.HUBSAN.COM TO UPGRADE

02
©2016 Hubsan
IMPORTANT SAFETY NOTES
Hubsan FPV X4 Desire
Please read the instruction manual carefully!
OPERATION:
Flight:
Take responsiblity for the safety of yourself and others when flying the X4 !
Do not fly the X4 in crowded places.
Do not fly in bad weather.
Never try to catch the X4 while it is in flight.
This model is intended for experienced pilots age 14+.
Power off the X4 after flight to prevent the propellers from causing injuries.
Always remove the battery after you stop flying to avoid injuries from accidentally powering
on the motors.
Always take great caution to protect yourself when near the propellers. The flight system
will start after powering on regardless of the transmitter signal. The high speed propellers
are very dangerous.
Power off the X4 after every flight, otherwise the propellers may still rotate and cause injury.
Be extremely careful and responsible when using the drone. Small electronic components can
be damaged by crashing or by dropping the X4 into water. To avoid further damages, please
replace broken parts immediately.
0:08:49
M2
Exit
0:08:49
MAIN MENU
Set Reverse
Set Sensitivity
5.8G Frequency
Set Manual
Fly When no GPS
Show Version
Exit
M2
Fly When NO GPS
YES
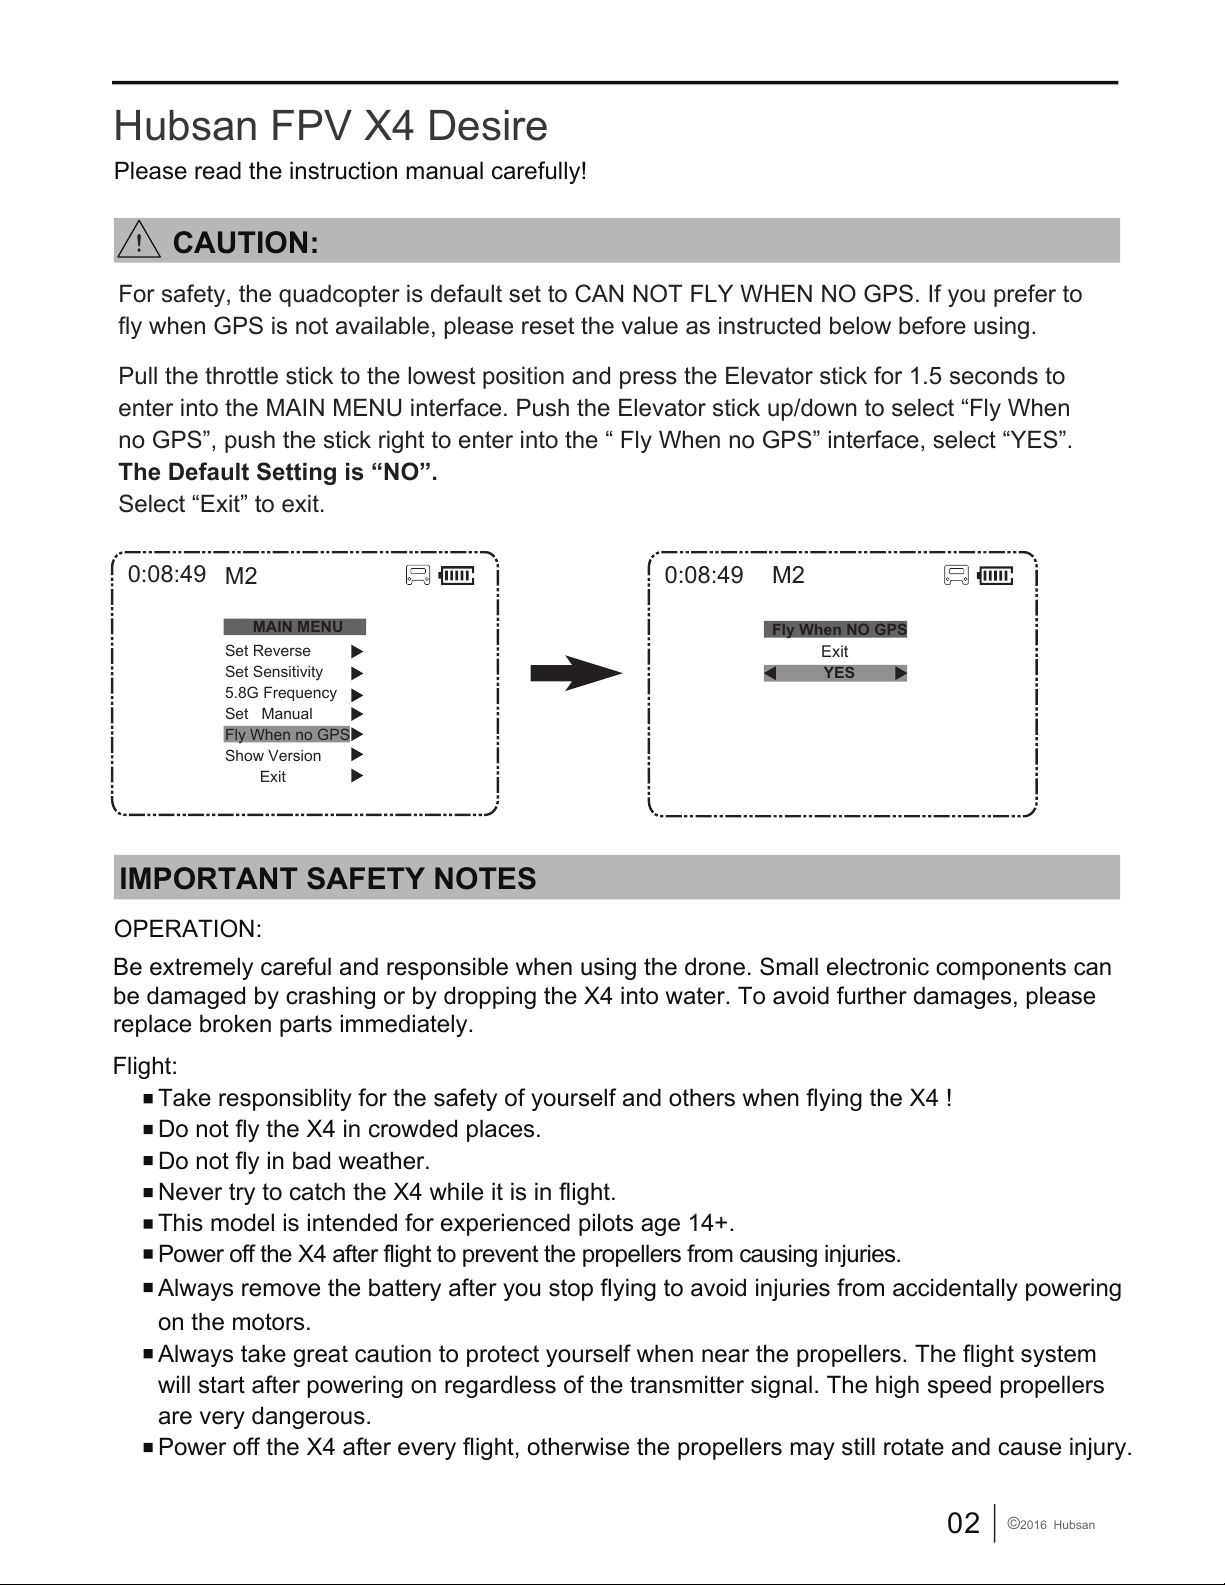
For safety, the quadcopter is default set to CAN NOT FLY WHEN NO GPS. If you prefer to
fly when GPS is not available, please reset the value as instructed below before using.
Pull the throttle stick to the lowest position and press the Elevator stick for 1.5 seconds to
enter into the MAIN MENU interface. Push the Elevator stick up/down to select “Fly When
no GPS”, push the stick right to enter into the “ Fly When no GPS” interface, select “YES”.
The Default Setting is “NO”.
Select “Exit” to exit.
CAUTION:

03
©2016 Hubsan
INTRODUCTION
1. ITEMS INCLUDED IN THE BOX
Check all the items in the box before using.
S/N Part Name Photos Q'ty Remarks
1 Quad copter 1PC
Equipped with smart flight
controller,GPS and compass
Propeller A 4pcs, Propeller
B 4pcs
2 Propellers 8PCS
FPV: First Person View Function enables you to experience every live moment of the flight
from the drone's point of view.
FPV Transmitter (powered by
4 X AA battery -Not included)
3 Transmitter 1PC
Thank you for buying the HUBSAN product. It is designed as an easy-to-use,
multi-functional RC model, capable of hovering and acrobatic flight maneuvers.
Please read the manual carefully and follow all the instructions. Be sure to keep the
manual for future reference.
6 Screw-driver 1PC
For removing propellers
4 7.4V Li-Po battery 1PC
For quad copter
7
2PCS
Disclaimer
Hubsan X4 Instruction Manual
User Manual
610mAh / 7.4V / 15C / 4.5Wh
5 1PCUSB Charger
For Li-Po battery charging
Quadcopter Weight: 155g(including battery)
04
©2016 Hubsan
3. QUAD COPTER BATTERY
3.1 INTRODUCTION
The quad copter battery is a rechargeable Li-Po battery with 610mAh capacity and 7.4V voltage.
The battery should only be charged with the HUBSAN charger to avoid overcharge.
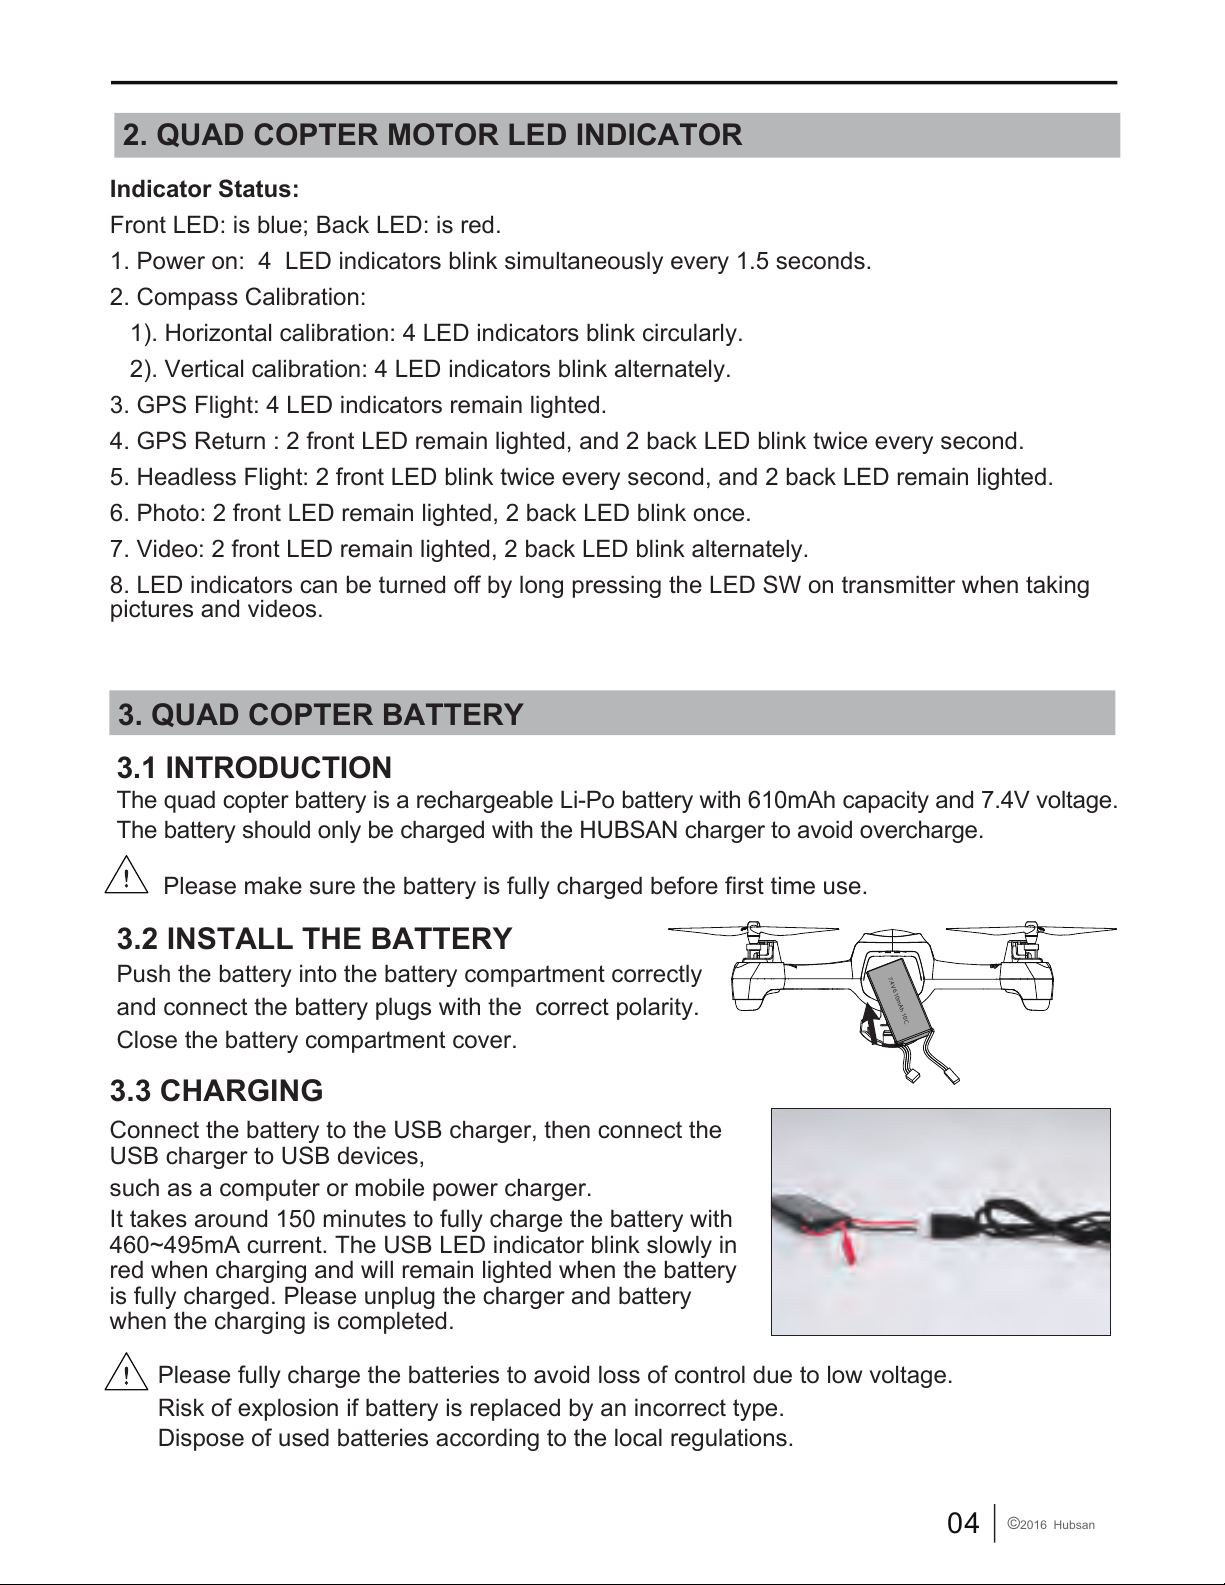
3.2 INSTALL THE BATTERY
Push the battery into the battery compartment correctly
and connect the battery plugs with the correct polarity.
Close the battery compartment cover.
3.3 CHARGING
Connect the battery to the USB charger, then connect the
USB charger to USB devices,
such as a computer or mobile power charger.
It takes around 150 minutes to fully charge the battery with
460~495mA current. The USB LED indicator blink slowly in
red when charging and will remain lighted when the battery
is fully charged. Please unplug the charger and battery
when the charging is completed.
Please make sure the battery is fully charged before first time use.
7.4V 610mAh 10C
2. QUAD COPTER MOTOR LED INDICATOR
Indicator Status:
Front LED: is blue; Back LED: is red.
1. Power on: 4 LED indicators blink simultaneously every 1.5 seconds.
2. Compass Calibration:
1). Horizontal calibration: 4 LED indicators blink circularly.
2). Vertical calibration: 4 LED indicators blink alternately.
3. GPS Flight: 4 LED indicators remain lighted.
4. GPS Return : 2 front LED remain lighted, and 2 back LED blink twice every second.
5. Headless Flight: 2 front LED blink twice every second, and 2 back LED remain lighted.
6. Photo: 2 front LED remain lighted, 2 back LED blink once.
7. Video: 2 front LED remain lighted, 2 back LED blink alternately.
8. LED indicators can be turned off by long pressing the LED SW on transmitter when taking
pictures and videos.
Please fully charge the batteries to avoid loss of control due to low voltage.
Risk of explosion if battery is replaced by an incorrect type.
Dispose of used batteries according to the local regulations.
05
©2016 Hubsan
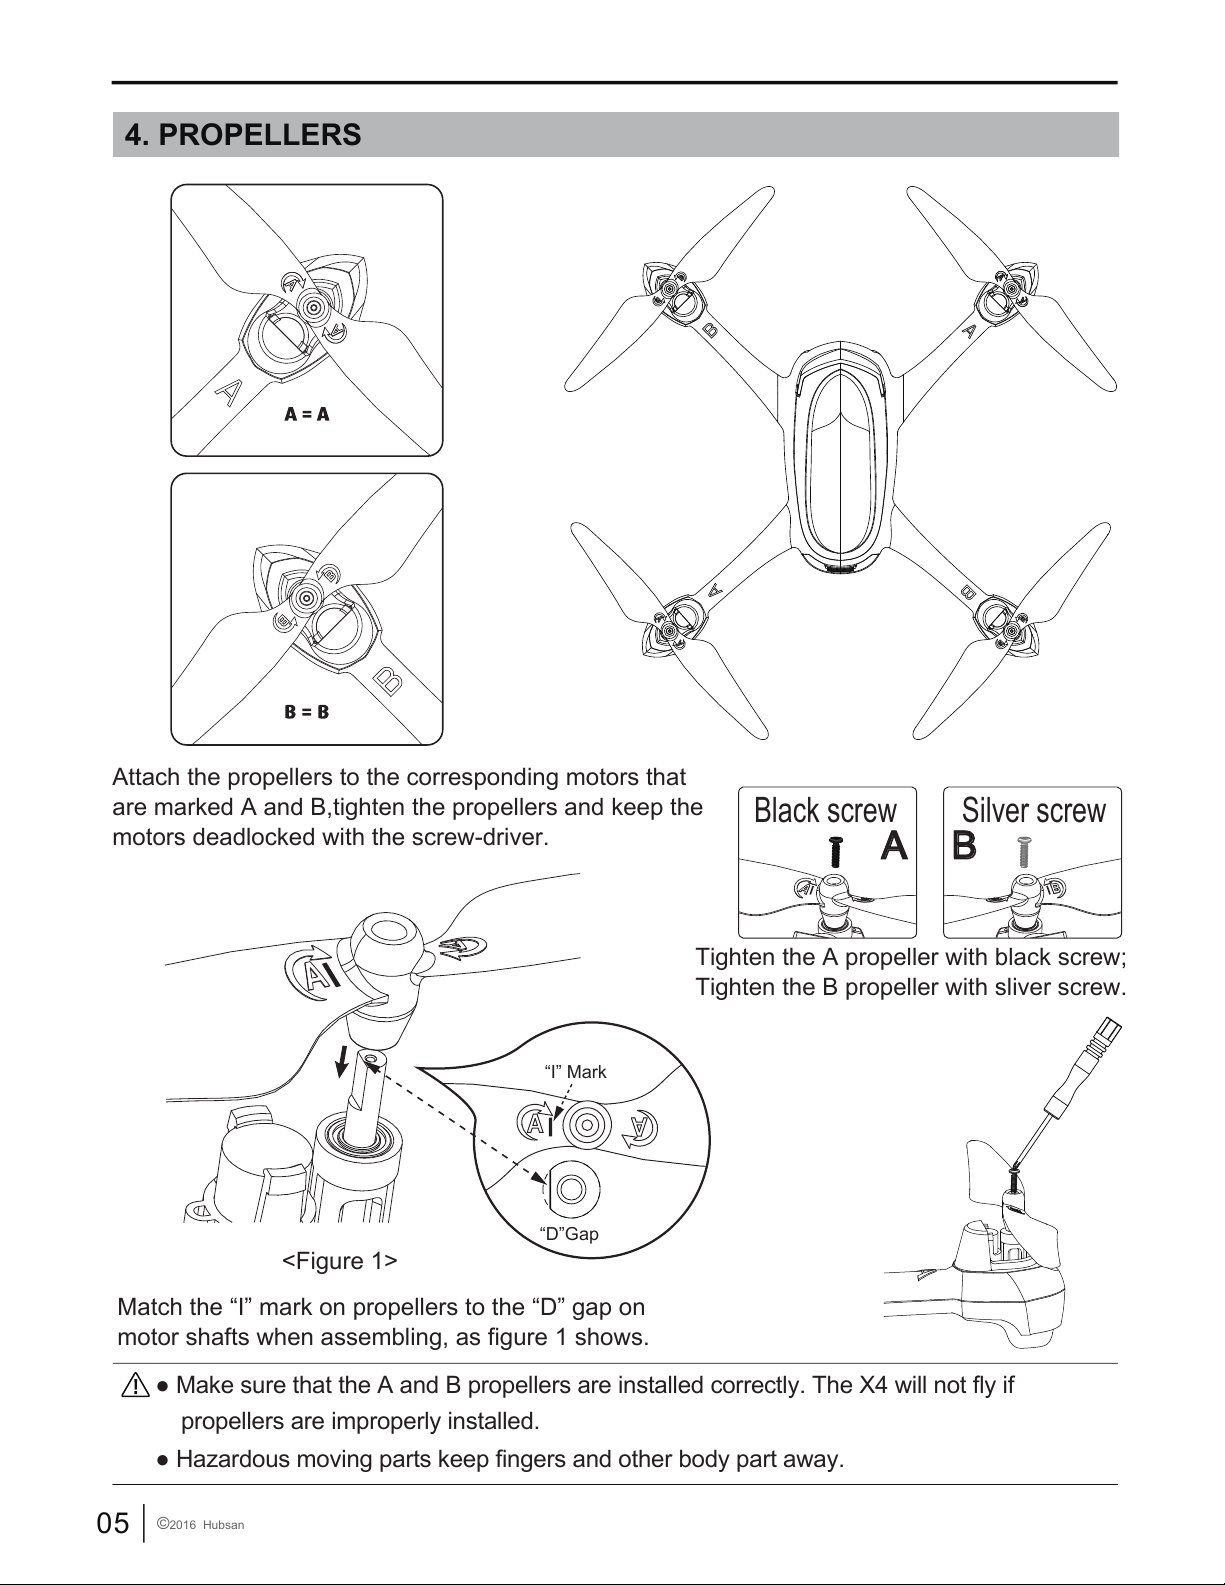
4. PROPELLERS
Attach the propellers to the corresponding motors that
are marked A and B,tighten the propellers and keep the
motors deadlocked with the screw-driver.
● Hazardous moving parts keep fingers and other body part away.
● Make sure that the A and B propellers are installed correctly. The X4 will not fly if
propellers are improperly installed.
Match the “I” mark on propellers to the “D” gap on
motor shafts when assembling, as figure 1 shows.
“I” Mark
“D”Gap
<Figure 1>
Black screw Silver screw
Tighten the A propeller with black screw;
Tighten the B propeller with sliver screw.
A B
06
©2016 Hubsan
5.1 FLIGHT ENVIRONMENT
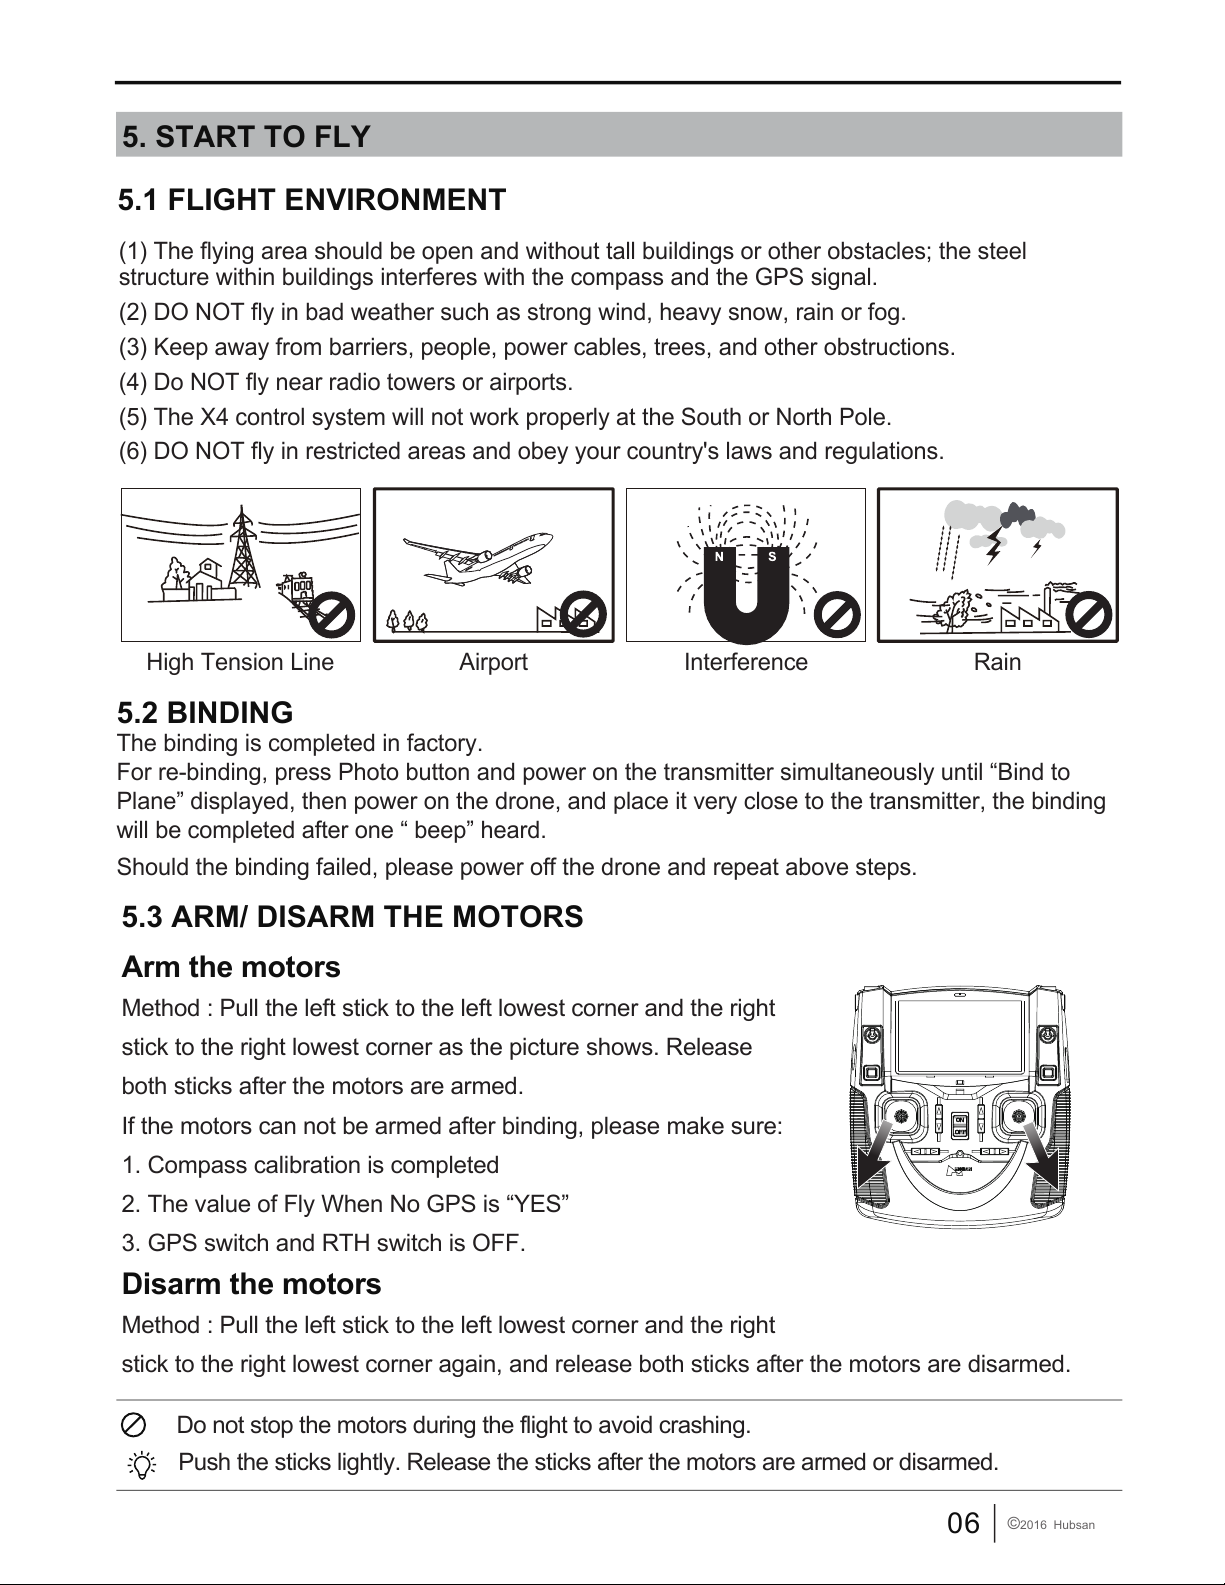
(1) The flying area should be open and without tall buildings or other obstacles; the steel
structure within buildings interferes with the compass and the GPS signal.
(2) DO NOT fly in bad weather such as strong wind, heavy snow, rain or fog.
(3) Keep away from barriers, people, power cables, trees, and other obstructions.
(4) Do NOT fly near radio towers or airports.
(5) The X4 control system will not work properly at the South or North Pole.
(6) DO NOT fly in restricted areas and obey your country's laws and regulations.
5. START TO FLY
High Tension Line RainInterferenceAirport
5.3 ARM/ DISARM THE MOTORS
Arm the motors
Method : Pull the left stick to the left lowest corner and the right
stick to the right lowest corner as the picture shows. Release
both sticks after the motors are armed.
If the motors can not be armed after binding, please make sure:
1. Compass calibration is completed
2. The value of Fly When No GPS is “YES”
3. GPS switch and RTH switch is OFF.
Disarm the motors
Method : Pull the left stick to the left lowest corner and the right
stick to the right lowest corner again, and release both sticks after the motors are disarmed.
Do not stop the motors during the flight to avoid crashing.
Push the sticks lightly. Release the sticks after the motors are armed or disarmed.
5.2 BINDING
The binding is completed in factory.
For re-binding, press Photo button and power on the transmitter simultaneously until “Bind to
Plane” displayed, then power on the drone, and place it very close to the transmitter, the binding
will be completed after one “ beep” heard.
Should the binding failed, please power off the drone and repeat above steps.
07
©2016 Hubsan
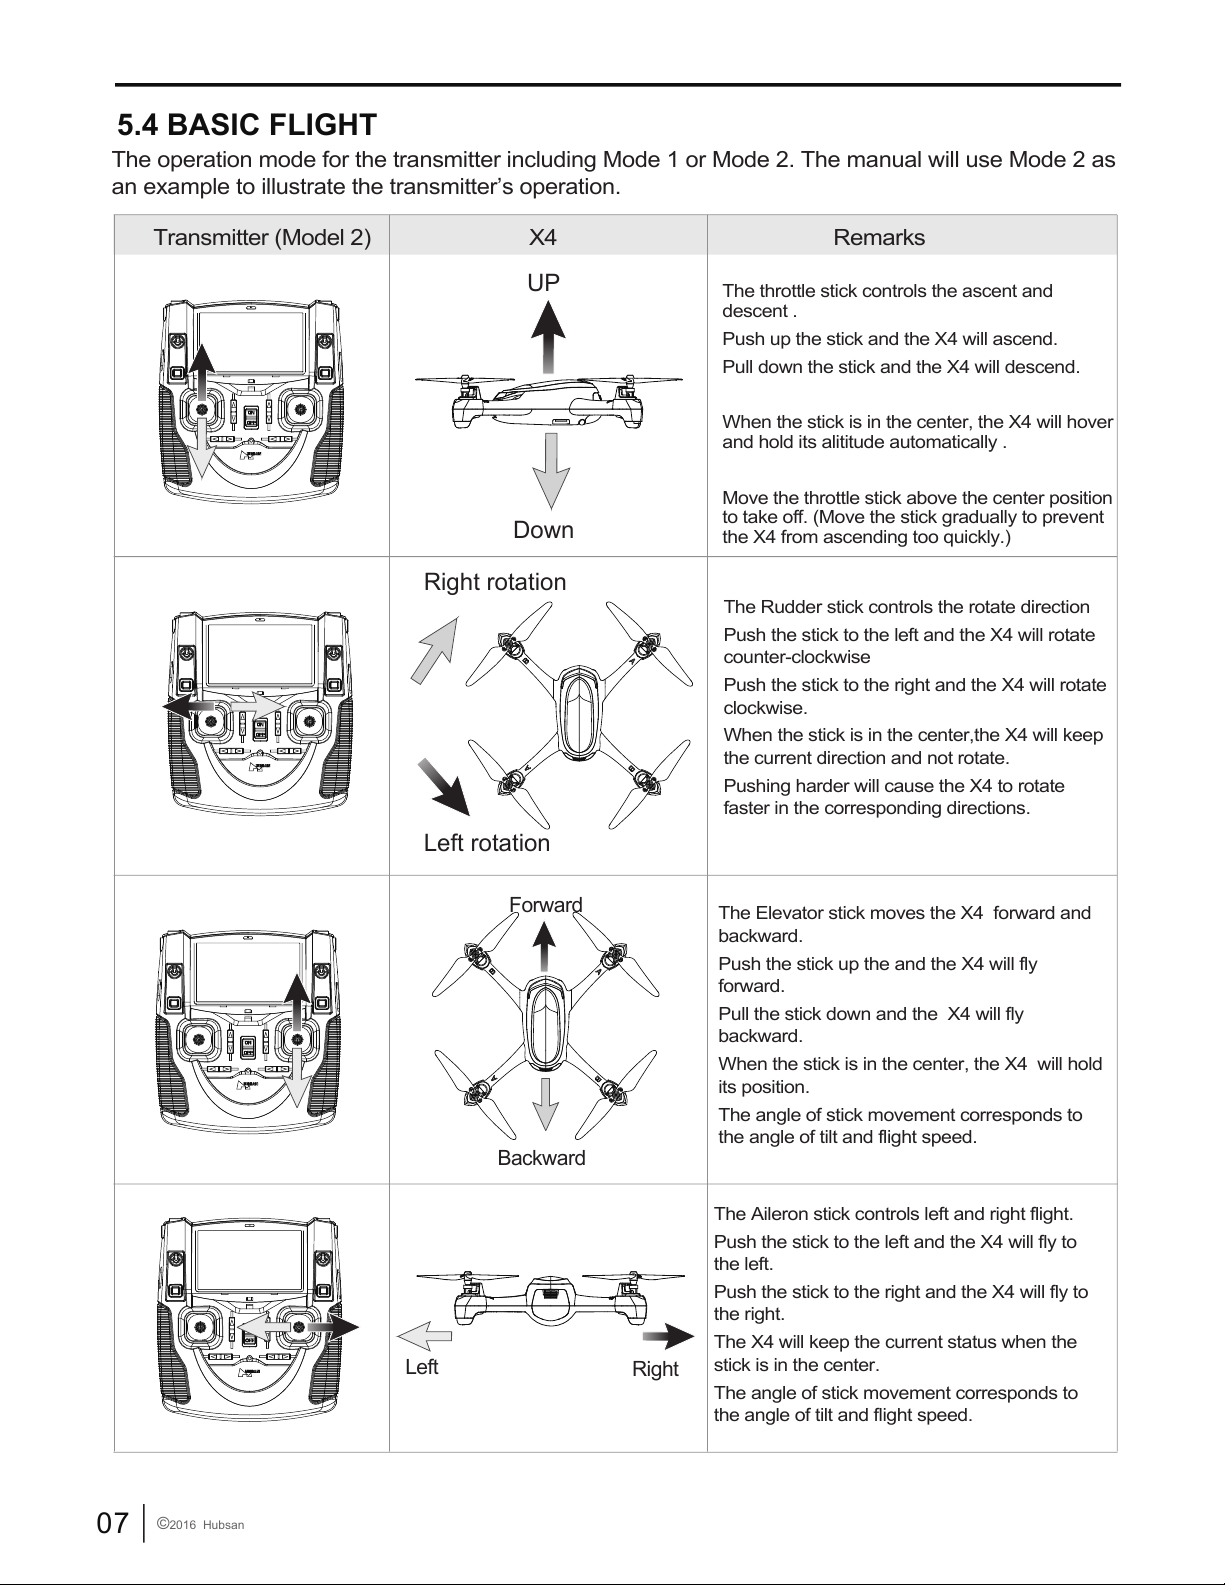
5.4 BASIC FLIGHT
Transmitter (Model 2) X4 Remarks
The operation mode for the transmitter including Mode 1 or Mode 2. The manual will use Mode 2 as
an example to illustrate the transmitter’s operation.
The throttle stick controls the ascent and
descent .
Push up the stick and the X4 will ascend.
Pull down the stick and the X4 will descend.
When the stick is in the center, the X4 will hover
and hold its alititude automatically .
Move the throttle stick above the center position
to take off. (Move the stick gradually to prevent
the X4 from ascending too quickly.)
The Elevator stick moves the X4 forward and
backward.
Push the stick up the and the X4 will fly
forward.
Pull the stick down and the X4 will fly
backward.
When the stick is in the center, the X4 will hold
its position.
The angle of stick movement corresponds to
the angle of tilt and flight speed.
The Aileron stick controls left and right flight.
Push the stick to the left and the X4 will fly to
the left.
Push the stick to the right and the X4 will fly to
the right.
The X4 will keep the current status when the
stick is in the center.
The angle of stick movement corresponds to
the angle of tilt and flight speed.
UP
Down
The Rudder stick controls the rotate direction
Push the stick to the left and the X4 will rotate
counter-clockwise
Push the stick to the right and the X4 will rotate
clockwise.
When the stick is in the center,the X4 will keep
the current direction and not rotate.
Pushing harder will cause the X4 to rotate
faster in the corresponding directions.
Right rotation
Left rotation
Forward
Backward
Right
Left
 Loading...