

Hubsan H122D, X4 STORM, HT015 Quick Start Manual
®
H122D X4 STORM
《H122D Quick Start Guide》
Version 1.0

Step 1
The first flight configuration: Aircraft + HT015
Transmitter
Binding the aircraft and transmitter
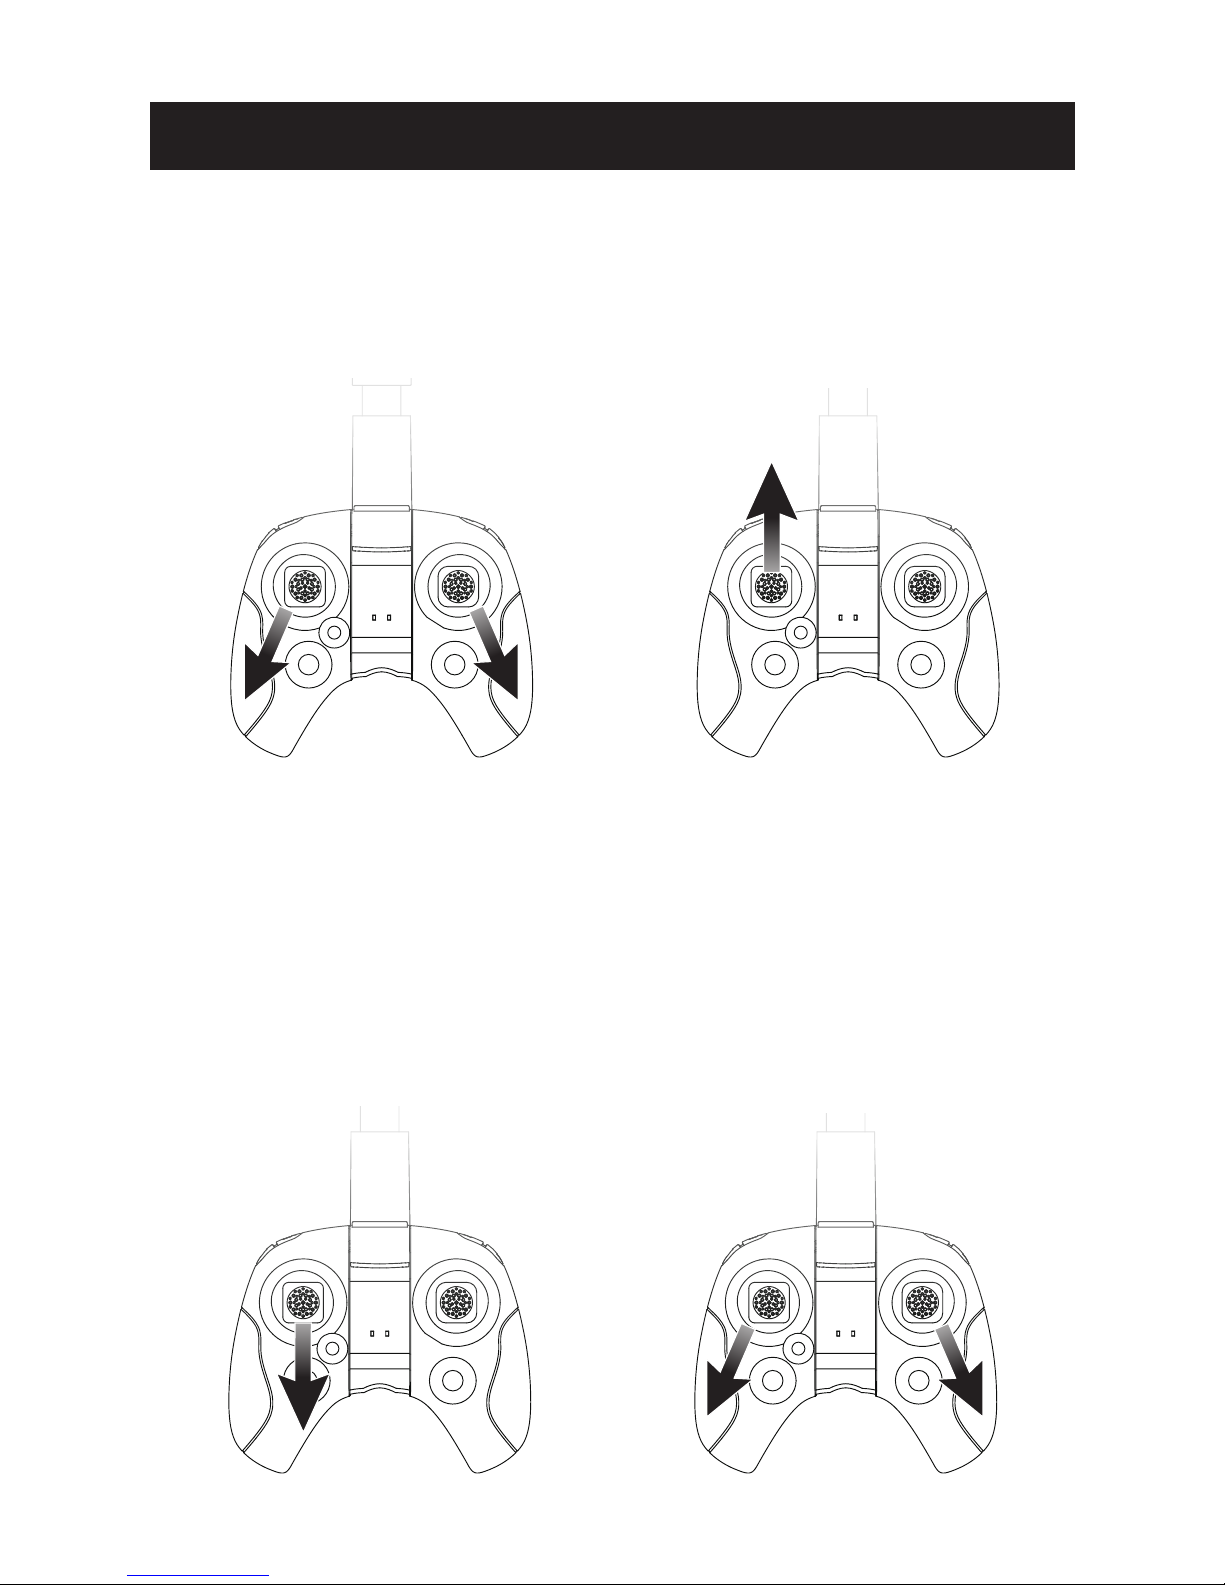
1 . Pull and hold the throttle to its lowest position.
2.Hold down the Photo key and power the transmitter on. The
transmitter’s status LED will flash red; please do not press or touch any
other keys, buttons or sticks while this process is ongoing. Users may let
go of the Photo key and throttle. Connect the aircraft to its battery and
allow it to bind to the transmitter. The two must be very close to each
other; when the bind is successful, the binding status LED will turn green.
Step 2
Horizontal calibration (also known as Gyro calibration)
Horizontal calibration is required when the aircraft drifts on the horizontal
All illustrations are shown in Mode 2 (American hand)

When using the horizontal calibration, please ensure that the aircraft is
on a completely flat surface. Aircraft motors should be completely
disarmed. Do not move the aircraft during calibration or calibrate on an
uneven/tilted surface, or there will be errors.
Hold the left stick to the
right side of its socket.
Start
Calibration complete
plane during flight. When this happens, land the aircraft and disarm its
motors. Follow the below steps to do a horizontal/gyro calibration.
1) Place the aircraft on a completely flat surface and then follow the below
calibration procedure. Hold the left stick to the right side of its socket.
Rapidly and continuously wiggle the right stick left and right until the rear
red LEDS flash alternately.
2) Calibration is complete when the LED indicators stop flashing. It is
recommended that users wait for 15-20 seconds after the calibration is
completed before flying again.
Rapidly and continuously wiggle
the right stick left and right until
the rear LEDS flash alternately.
Step 3
Takeoff
Simultaneously pull the transmitter joysticks diagonally down-out to arm
the motors (as shown in the left figure). Pull the left joystick (throttle)
upwards to take off.
Landing
Slowly and gently pull the throttle joystick down until the copter has
completed its descent on the ground. Simultaneously pull the transmitter
joysticks diagonally down-out to disarm the motors (as shown in the left
figure).
Step 1
Binding the aircraft and transmitter
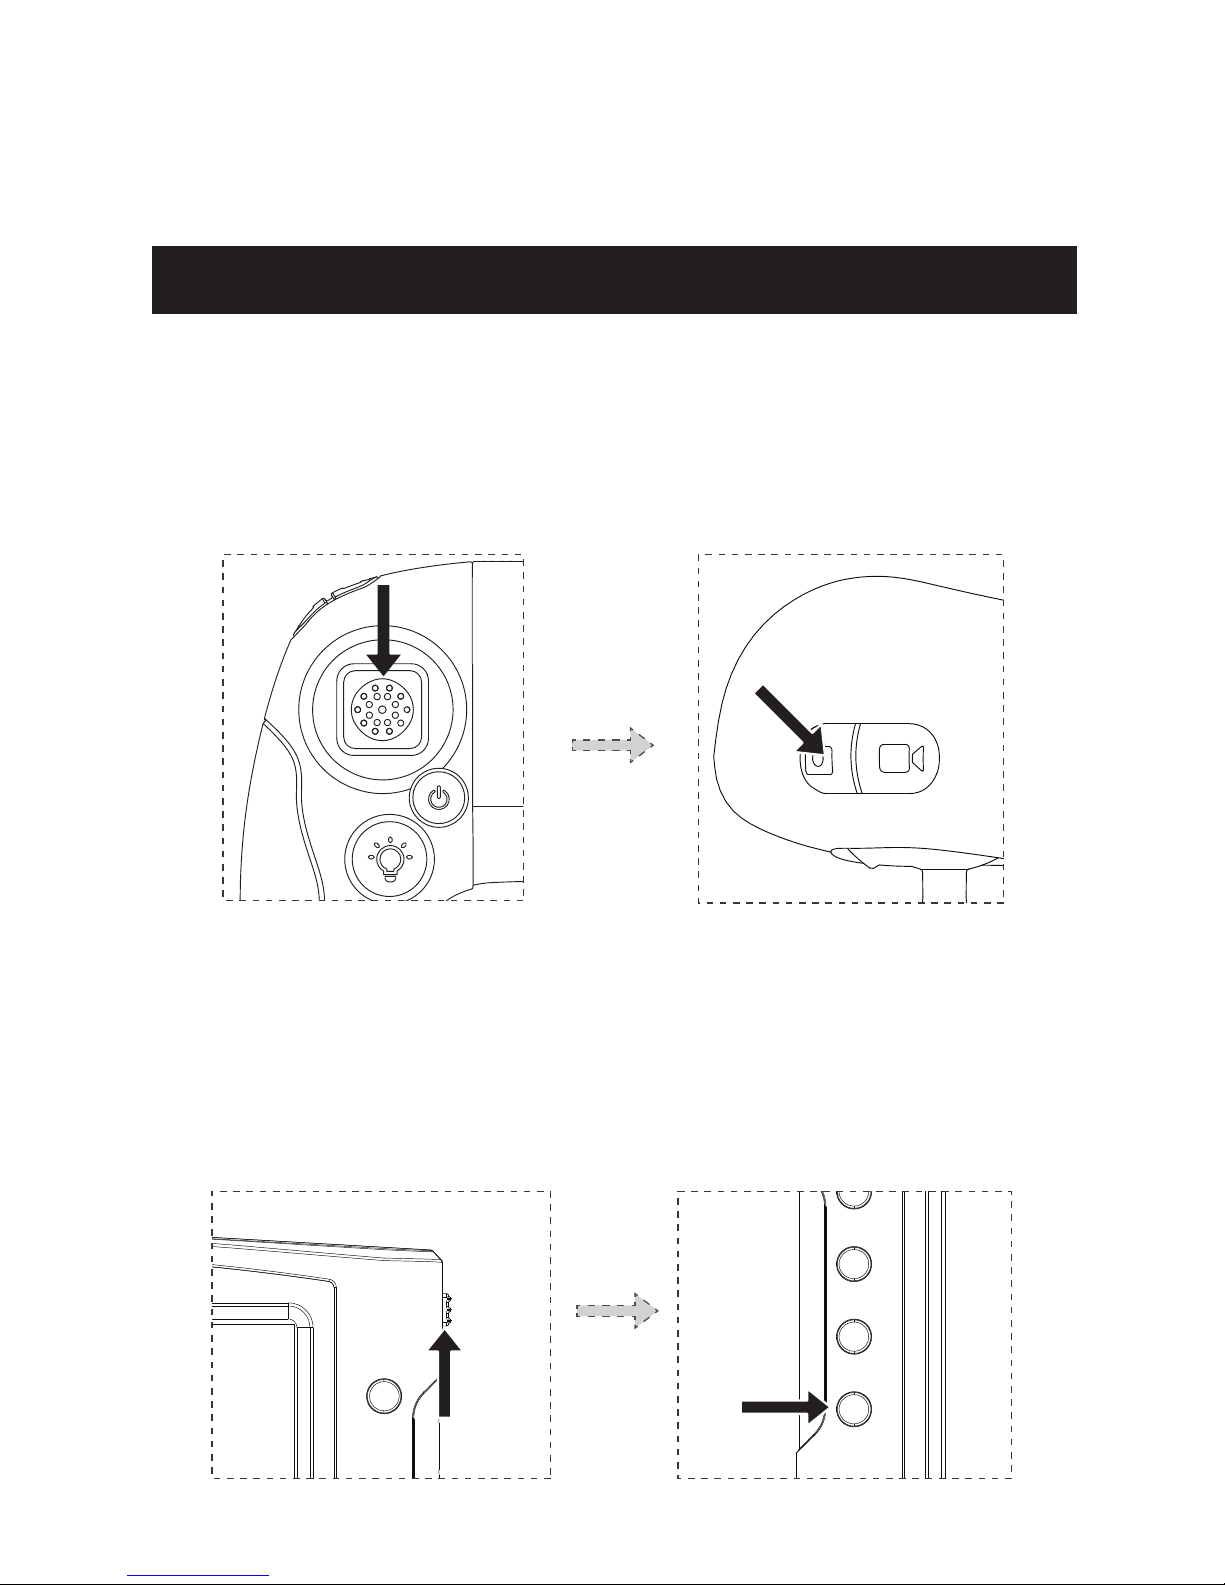
1. Pull and hold the throttle to its lowest position. Hold down the Photo key
and power the transmitter on; allow the transmitter to enter binding mode.
2. Power the HS001 on by pushing the power switch up. Long press the
display’s binding button (shown below) to allow the HS001 to enter
binding mode. The display will beep three times.
The second flight configuration: Aircraft + HS001+
HT015 Transmitter+HV002 Video glasses
All illustrations are shown in Mode 2 (American hand)
 Loading...