

HUBER+SUHNER MASTERLINE Extreme Hybrid User Manual
INSTALLATION
MANUAL
MASTERLINE Extreme Hybrid
Table of contents
RRH END OF ASSEMBLY
BASE STATION END OF ASSEMBLY
FIBRE OPTIC ALLOCATION
POWER CODING
RRH END OF ASSEMBLY
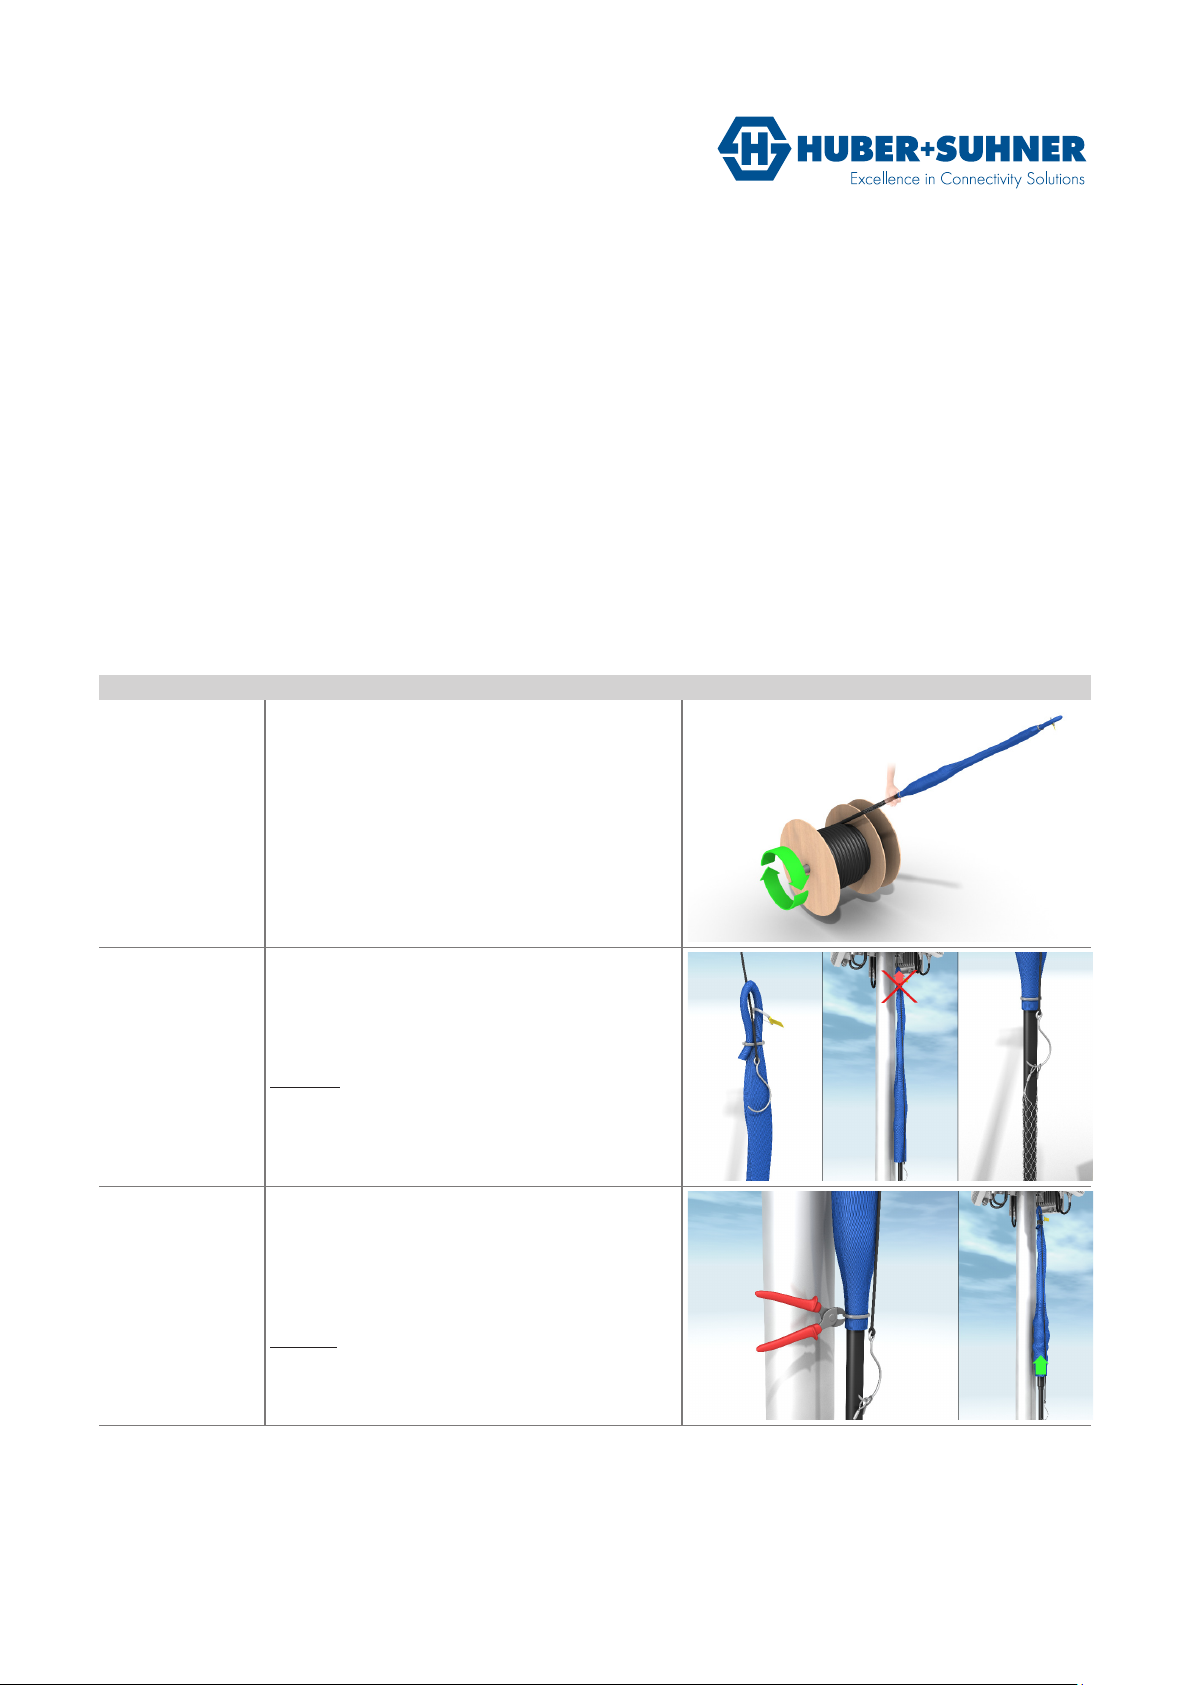
Step 1 Mount the cable spool onto suitable de-reeling
equipment.
Start unwinding side where the braided tube is
attached (picture to the right). Do not pull side where
pulling tube is attached. Make sure, that the spool can
turn freely when unspooling.
HUBER+SUHNER AG
Fiber Optics
MASTERLINE Extreme Hybrid
DOC-0000692200 Rev B
April 20, 2015
Page 1 of 12
1
4
9
10
Step 2 Rig a rope to allow cable assembly to be hoisted up.
Feed the rope through the loop in the braided tube
and down onto the cable hoist.
•
Pull Assembly up the mast
Important: NEVER pull on the divider or the breakout
(Fiber optic or power itself), only pull on the hybrid
cable below the divider using cable hoist.
Step 3 Remove cable tie from braided tube end to get
access to the housing .
• Once the divider is at the desired height and
position, proceed to the next step. Do NOT yet fix it to
the mast.
Comment: take length of break-out and jumpers in
consideration when the divider is positioned on the
mast.
HUBER+SUHNER disclaims any liability resulting from incorrect installation and use, including any damages resulting from the use of
tools and accessories other than the ones recommended herein. Any installation performed by unqualified personnel voids the product
warranty provided by HUBER+SUHNER. All due care and attention must be exercised when per forming the installation of these pro -
ducts. For advice concerning the general handling of these products please contact HUBER+SUHNER.
INSTALLATION MANUAL
MASTERLINE Extreme Hybrid
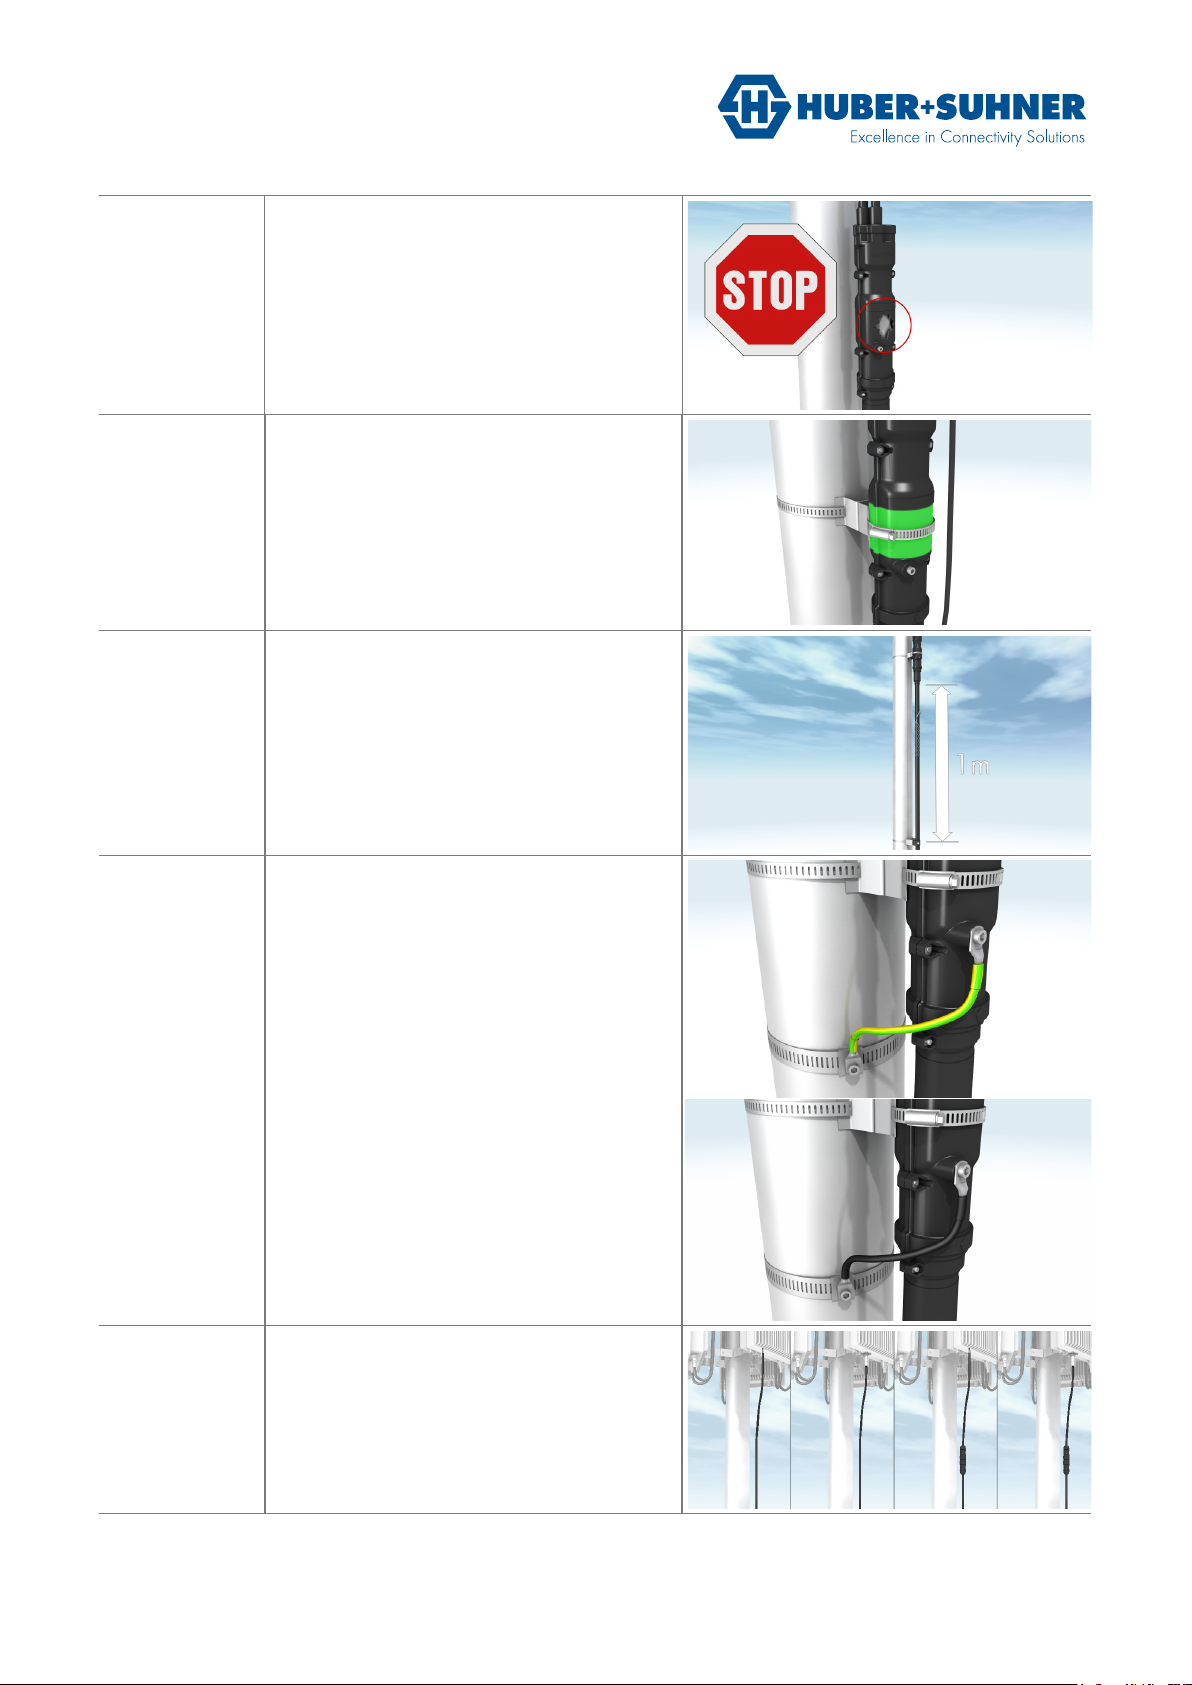
Step 4 Inspect condition of assembly especially the housing.
If any damage is detected do not install.
Step 5 Fix housing to mast using mounting adapter.
Be careful not to damage it by over-tightening the
clamp.
Only fix with tube clamps, as indicated in picture. For
6/7 configuration it is ideal to locate the band under
the molded lip on the enclosure.
Step 6 Fix cable to the mast using suitable clamps.
Recommended spacing between clamps is 1m.
Clamps should be applied to hybrid cable starting
from a point 1m below the housing proceeding down
to the bottom of the mast.
Step 7 Earth assembly to the mast using an earth link.
Recommendation is 16mm2 / 6 AWG with M8 lugs.
NOTE: the earthing cable can also come in black.
Step 8 Connect DC tails to relevant RRH as specified by the
RRH manufacturer.
FO and DC tails are numbered to aid identification.
Images 3 and 4 show pre-terminated DC jumpers
connected to the MLEH DC tails.
2. 1
HUBER+SUHNER disclaims any liability resulting from incorrect installation and use, including any damages resulting from the use of
tools and accessories other than the ones recommended herein. Any installation performed by unqualified personnel voids the product
warranty provided by HUBER+SUHNER. All due care and attention must be exercised when per forming the installation of these pro -
ducts. For advice concerning the general handling of these products please contact HUBER+SUHNER.
INSTALLATION MANUAL
MASTERLINE Extreme Hybrid
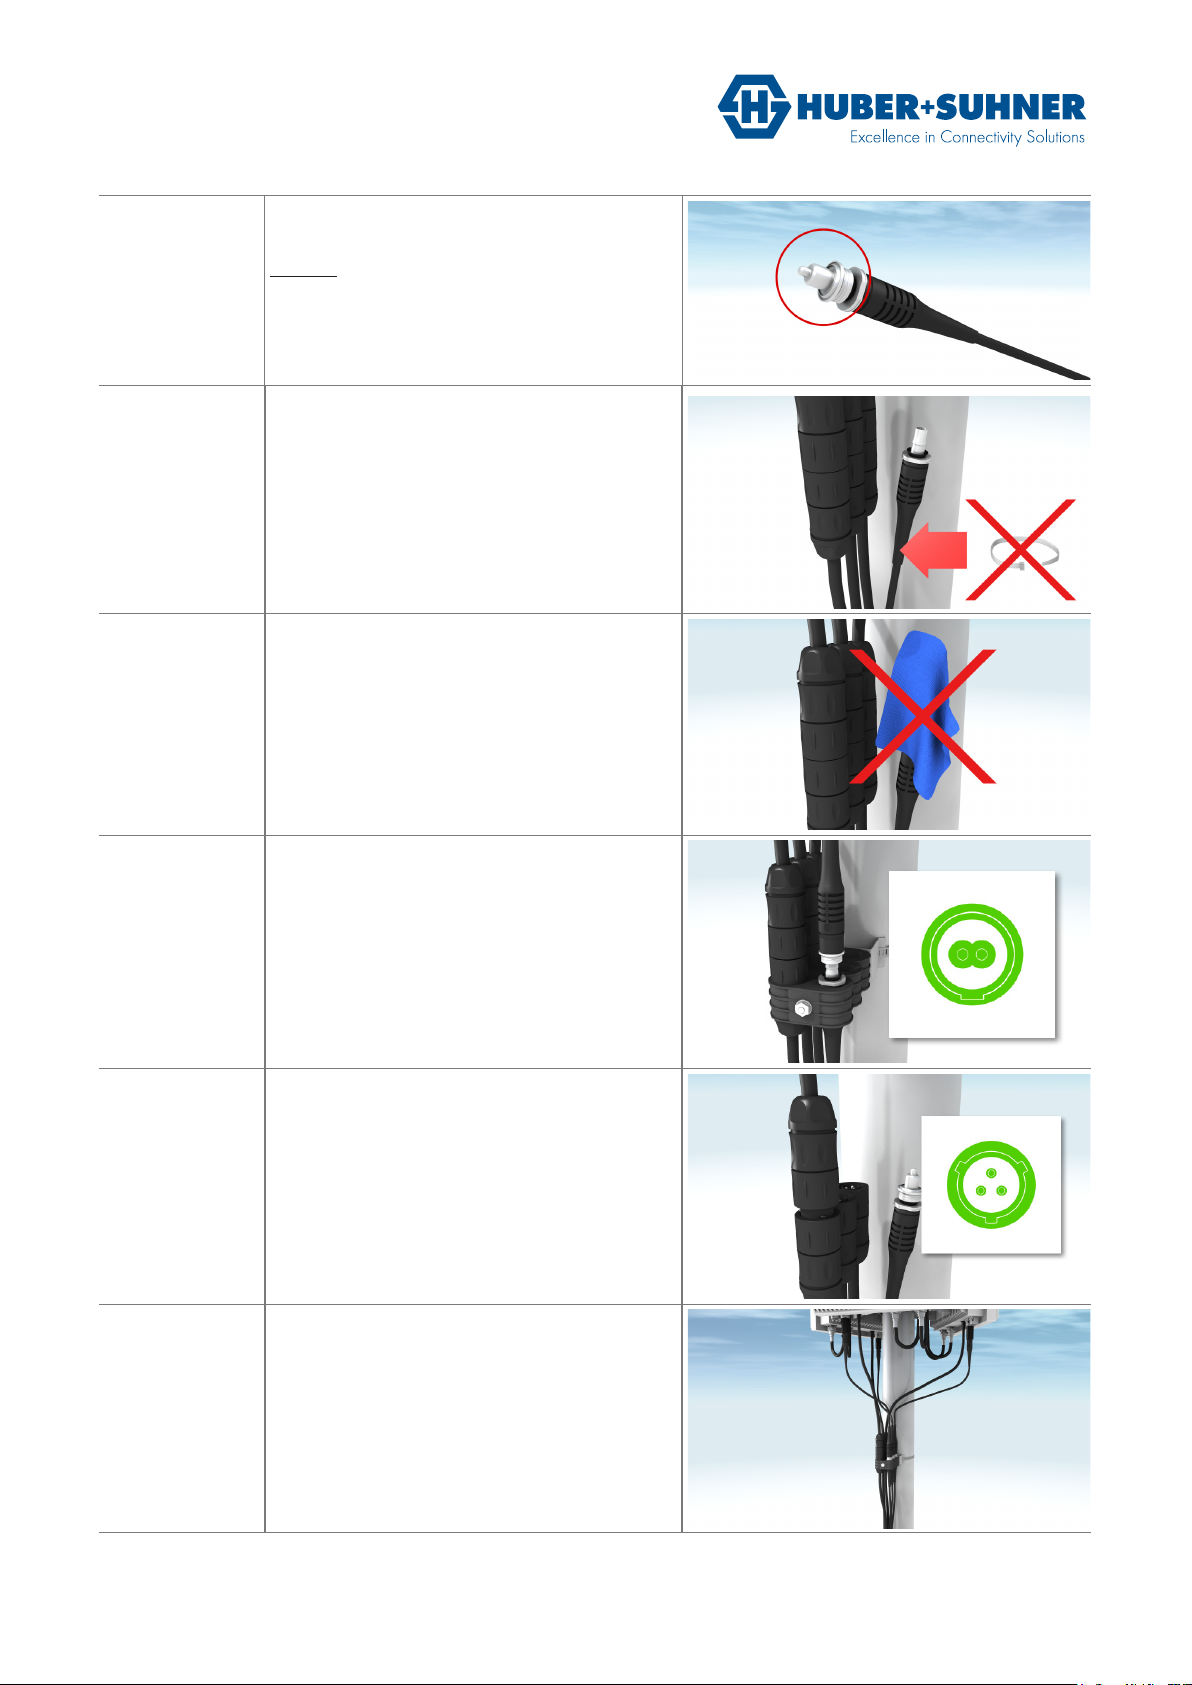
Step 9 Do NOT use cable ties to secure FO or DC tail as these
may cause damage.
Comment
protected with water proof (IP67) dust caps. Therefore
the MLE hybrid can be installed and left at the mast for later
installation of jumpers.
Step 10 Do NOT use cable ties to secure FO or DC tail as these
may cause damage.
S te p 11 Remove protective cap from FO tail ready to connect
RRH Jumper.
• Do NOT clean Q-ODC before connecting them
together. Q-ODCs are factory cleaned and verified to
ensure optimal performance. Cleaning during installation
potentially decreases performance.
Step 12 Connect FO jumper to FO tails by aligning keyway and
secure by pushing to latch mechanism.
: All connectors (fiber optic and power) are
Step 13 Connect power jumper to Power tail by aligning keyways
and secure using integral retaining nut.
St ep 14
Connect FO and DC tails with RRH jumper.
HUBER+SUHNER disclaims any liability resulting from incorrect installation and use, including any damages resulting from the use of
tools and accessories other than the ones recommended herein. Any installation performed by unqualified personnel voids the product
warranty provided by HUBER+SUHNER. All due care and attention must be exercised when per forming the installation of these pro -
ducts. For advice concerning the general handling of these products please contact HUBER+SUHNER.
 Loading...