

Page 1

REV: A
04-12-2012!
Linear LED ALF12LU5KBZ Series
Installation Instructions
WARNING
DISCONNECT POWER DURING INSTALLATION AND BEFORE SERVICING.
READ ALL INSTRUCTIONS COMPLETELY BEFORE STARTING INSTALLATION.
INSTRUCTIONS PERTAINING TO A RISK OF FIRE OR INJURY TO PERSONS
IMPORTANT SAFETY INSTRUCTIONS!
WARNING:!This product contains chemicals known to the State of California to cause cancer, birth
defects, and/or other reproductive harm. Thoroughly wash hands after installing, handling, cleaning,
or otherwise touching this product.
WARNING: Fixtures must be grounded in accordance with local codes or the National Electrical
Code. Portable spike mounts using a cord and plug must be plugged into a receptacle protected by
a Ground Fault Circuit Interrupter in accordance with the National Electrical Code. Failure to do so
may result in serious personal injury. DO NOT operate luminaire with missing or damaged lens.
WARNING:!This Product must be installed in accordance with the applicable installation code by a
person familiar with the construction and operation of the product and the hazards involved. In
accordance with the applicable installation code.
CAUTION: Fixtures are suitable for mounting within 4FT of the ground; and fixtures are available in
120 to 277 volt input (Not for connection to a voltage above 240Vac in Canada). Please verify
before wiring fixture to field wires.
KEEP THIS SHEET FOR FUTURE REFERENCE.
INSTALLATION
Tools Required:
□1/8” Allen Wrench □Thread Sealant □Adjustable Wrench □Phillips Screwdriver
1. Coat swivel threads with thread sealant. Attach coupling onto mounting device.
!
2. Attach fixture onto coupling.
Page 2
REV: A
04-12-2012!
Set
Screw
Linear LED ALF12LU5KBZ Series
Installation Instructions
WARNING
DISCONNECT POWER DURING INSTALLATION AND BEFORE SERVICING.
READ ALL INSTRUCTIONS COMPLETELY BEFORE STARTING INSTALLATION.
3. Attach fixture ground lead to circuit ground. Attach fixture leads to circuit leads observing polarity,
i.e., white-to-common and black-to-voltage.
IMPORTANT – Please verify input voltage! (Fixture is capable of 120 through 277 volt)
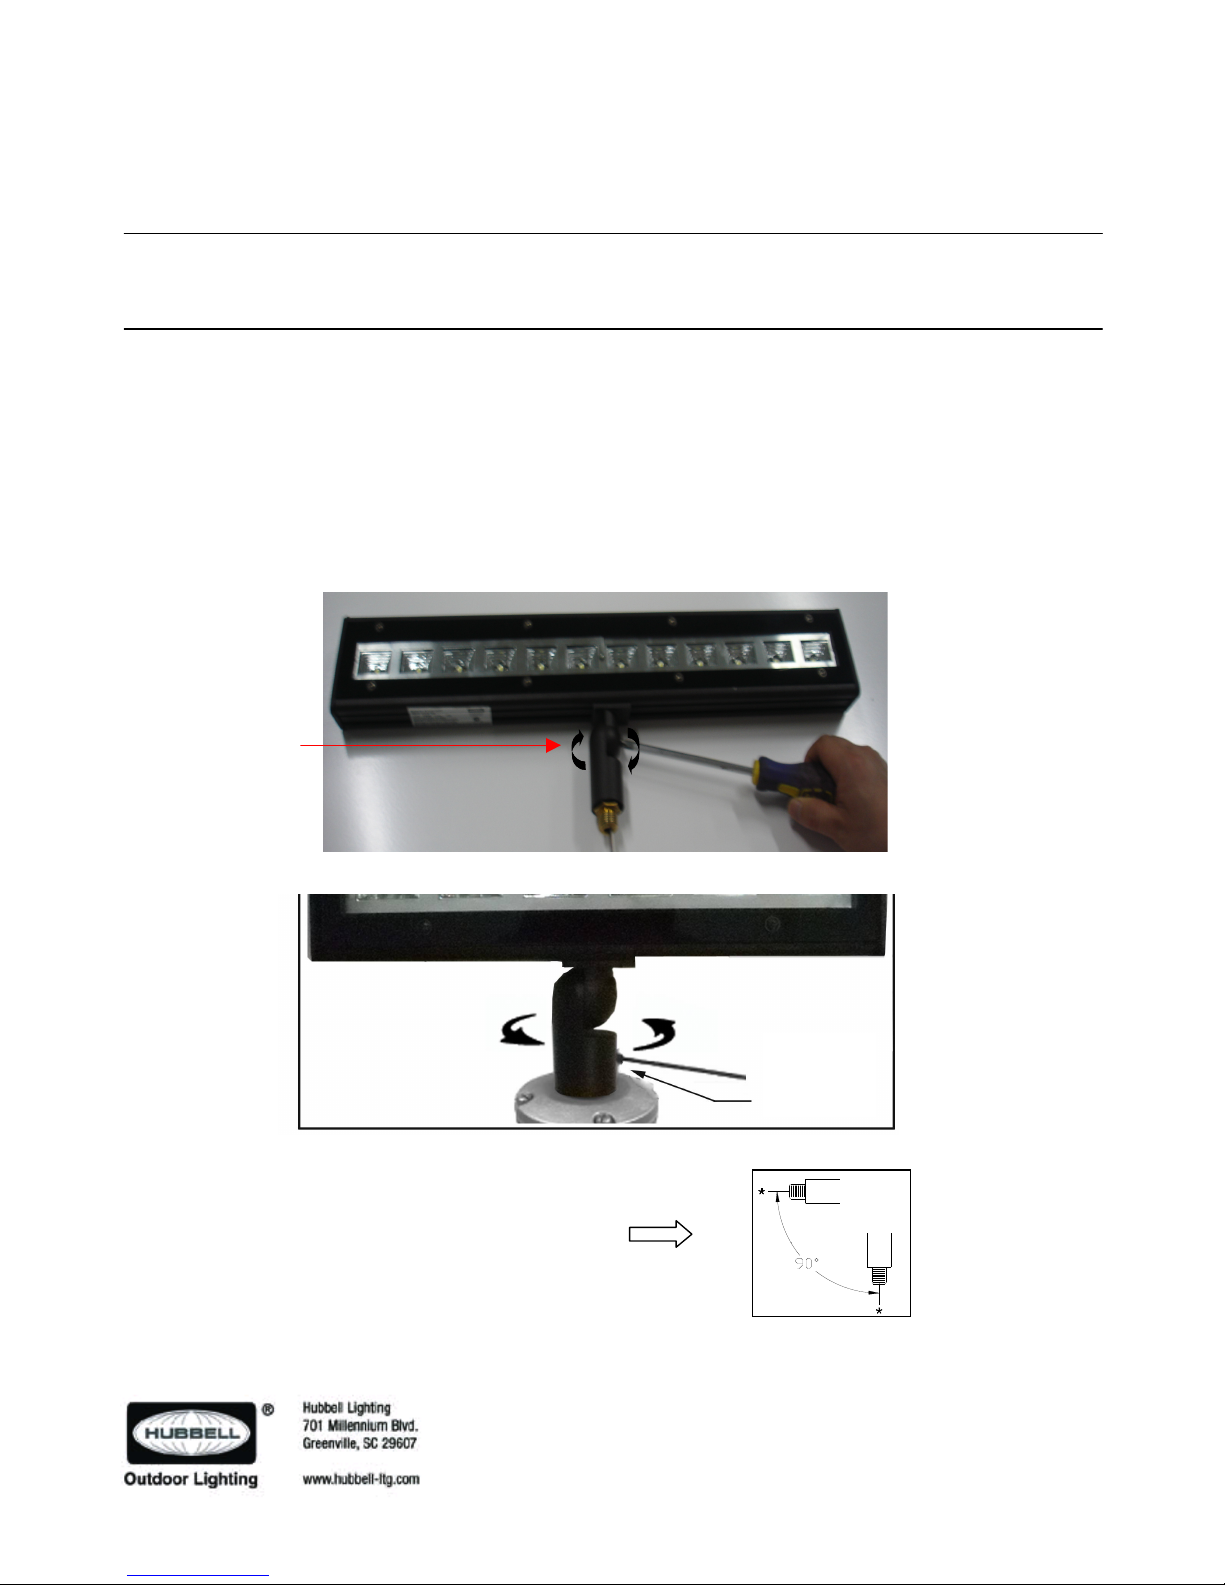
4. To adjust back tilt up to maximum, loosen swivel screw being careful not to disengage threads.
Hold fixture at desired angle and firmly tighten swivel screw.
5. Loosen set screw to adjust fixture rotation, and then tighten set screw.
NOTE: Swivel stem must be installed with the
mounting threads facing down-to-horizontal.
Fixtures may not be installed with mounting
threads facing upward unless shielded from
rain or sprinklers.
Swivel Screw
 Loading...