

Page 1

Wonderful Communication, Mobile Life.
Welcome to use U626 Handset from Huawei Technologies Co., Ltd.
HUAWEI U626 Handset
User manual
Page 2

Copyright © 2005 Huawei Technologies Co., Ltd.
All Rights Reserved
No part of this manual may be reproduced or transmitted in any form or by any
means without prior written consent of Huawei Technologies Co., Ltd.
Trademarks
and HUAWEI are trademarks of Huawei Technologies Co., Ltd. All other
trademarks mentioned in this manual are the property of their respective holders.
Notice
The information in this manual is subject to change without notice. Every effort has
been made in the preparation of this manual to ensure accuracy of the contents, but
all statements, information, and recommendations in this manual do not constitute
the warranty of any kind, expressed or implied.
Huawei Technologies Co., Ltd.
Address: Administration Building, Huawei Technologies Co., Ltd.,
Bantian, Longgang District, Shenzhen, P. R. China
Postal Code: 518129
Website:
http://www.huawei.com
Page 3
Safety Precautions
Please read the safety precautions carefully to ensure the correct and safe use of
your wireless device. For detailed information, see the section of “
Precautions”.
Do not switch your wireless device on when the use of wireless devices
is prohibited or when the wireless device may cause interference or
danger.
Do not use your wireless device while driving.
Follow relevant rules or regulations in hospitals and health care
facilities. Switch your wireless device off near medical devices.
Switch your wireless device off in aircraft. The radio signal from it may
cause interference to control signals of the aircraft.
Switch your wireless device off near high-precision electronic devices.
It may affect the performance of these devices.
Do not attempt to disassemble your wireless device or its accessories.
Only qualified personnel may service or repair the wireless device.
Do not place your wireless device and its accessories in containers with
strong electromagnetic field.
Do not place magnetic storage media near your wireless device.
Radiation from the wireless device may erase the information stored on
them.
Do not put your wireless device in a high-temperature place or use it in
a place with flammable gas such as a gas station.
Keep your wireless device and its accessories away from children. Do
not allow children to use your wireless device without guidance.
Observe any laws or regulations on the use of wireless device. Respect
others’ privacy and legal rights when using your wireless device.
Warnings and
Page 4
Operate strictly abiding by the relevant descriptions on page
manual while using the USB cable. Otherwise, your phone or PC may
be damaged.
168 of this
Page 5

Table of Contents
1 Getting to Know Your Phone................................................................................................ 1
Packing List.................................................................................................................... 1
Your Phone..................................................................................................................... 2
2 Getting Started.................................................................................................................... 11
Loading the Battery...................................................................................................... 11
Unload the Battery ....................................................................................................... 11
Charging the Battery .................................................................................................... 12
Loading the USIM Card............................................................................................... 14
Loading and Removing a Memory Card (SD/MMC)................................................... 16
Switching On/Off......................................................................................................... 17
3 Call Services....................................................................................................................... 19
Making and Answering Calls ....................................................................................... 19
Operations during a Call .............................................................................................. 24
4 Text Entry ........................................................................................................................... 27
“Pinyin” Text Input ...................................................................................................... 27
Stroke Simplified Chinese............................................................................................ 29
Bopomofo Chinese....................................................................................................... 30
HUA WEI
i
Page 6

TTaabbllee ooff CCoonntteennttss
Stroke Traditional Chinese ...........................................................................................
32
“Abc” Text Input .......................................................................................................... 32
“T9 English” Text Input ............................................................................................... 33
“123” Numeric Input.................................................................................................... 34
Symbol Input................................................................................................................ 35
5 Using the Menu Functions.................................................................................................. 37
6 Contacts.............................................................................................................................. 39
Searching for a Contact Entry ...................................................................................... 39
Adding a New Contact Entry ....................................................................................... 40
Deleting a Contact Entry.............................................................................................. 41
Copying a Contact Entry.............................................................................................. 42
Unselecting All Contact Entries ................................................................................... 42
Selecting All Contact Entries ....................................................................................... 43
Sending a Contact Entry............................................................................................... 43
Viewing Memory Status............................................................................................... 44
Speed Dialing Numbers ............................................................................................... 44
Groups.......................................................................................................................... 45
7 Call Logs ............................................................................................................................ 47
Missed Calls................................................................................................................. 47
Received Calls.............................................................................................................. 48
Dialed Calls.................................................................................................................. 49
HUA WEI
ii
Page 7

TTaabbllee ooff CCoonntteennttss
8 Messaging........................................................................................................................... 51
Creating Text Messages................................................................................................ 51
Creating Multimedia Messages.................................................................................... 52
Creating Emails............................................................................................................ 54
Text Message (SMS).................................................................................................... 55
Multimedia Message (MMS) ....................................................................................... 63
Email............................................................................................................................ 72
Alert Inbox ................................................................................................................... 79
Voice Mail Number ...................................................................................................... 80
Text template................................................................................................................ 81
9 Multimedia ......................................................................................................................... 83
Camera ......................................................................................................................... 83
Video Camera............................................................................................................... 86
Voice Recorder............................................................................................................. 88
Viewing Images............................................................................................................ 90
Playing Video............................................................................................................... 91
Playing Music .............................................................................................................. 92
Playing Voice Records.................................................................................................. 93
10 Tools................................................................................................................................. 95
Calendar ....................................................................................................................... 95
To Do ........................................................................................................................... 99
HUA WEI
iii
Page 8
TTaabbllee ooff CCoonntteennttss
Memo Pad ..................................................................................................................
101
Alarm Clock............................................................................................................... 101
Calculator................................................................................................................... 103
World Time ................................................................................................................ 103
Stopwatch................................................................................................................... 104
Timer.......................................................................................................................... 104
11 Gallery............................................................................................................................ 105
Images........................................................................................................................ 105
Music ......................................................................................................................... 106
Videos ........................................................................................................................ 107
eBook ......................................................................................................................... 108
Personal Folder .......................................................................................................... 108
Other .......................................................................................................................... 108
Memory Card ............................................................................................................. 108
12 Browser .......................................................................................................................... 109
Homepage .................................................................................................................. 109
Bookmarks ..................................................................................................................111
Go to URL.................................................................................................................. 112
Saved pages................................................................................................................ 112
Alert Inbox ................................................................................................................. 113
Select Profile.............................................................................................................. 113
iv
HUA WEI
Page 9
TTaabbllee ooff CCoonntteennttss
13 Stream Media ................................................................................................................. 115
Playing Stream Media Files ....................................................................................... 115
Operations during Playing Stream Media Files.......................................................... 115
Operations on URL Files............................................................................................ 116
14 V-Call ............................................................................................................................. 119
Introduction to the Screen Functions.......................................................................... 119
Function Options........................................................................................................ 120
15 Connections.................................................................................................................... 123
Bluetooth.................................................................................................................... 123
USB............................................................................................................................ 133
Notes to the Functions of the Connections................................................................. 138
Data Account.............................................................................................................. 139
16 Applications (APPS)....................................................................................................... 141
Applications & Games ............................................................................................... 141
Download More ......................................................................................................... 142
Memory Status ........................................................................................................... 144
17 STK Services.................................................................................................................. 145
18 Settings........................................................................................................................... 147
Call Setup................................................................................................................... 147
Video Call Setup ........................................................................................................ 155
Sound and Vibration................................................................................................... 156
HUA WEI
v
Page 10
TTaabbllee ooff CCoonntteennttss
Display .......................................................................................................................
158
Colour Themes........................................................................................................... 158
Wallpaper ................................................................................................................... 158
ON and OFF Setup..................................................................................................... 159
Profiles ....................................................................................................................... 159
Phone Setup................................................................................................................ 160
19 Warnings and Precautions............................................................................................... 165
Electronic Device....................................................................................................... 165
Hospital...................................................................................................................... 165
Traffic Safety.............................................................................................................. 165
Operating Environment.............................................................................................. 166
Emergency Call.......................................................................................................... 167
Battery........................................................................................................................ 167
Charger....................................................................................................................... 167
Using the USB Cable ................................................................................................. 168
Rules for Exposure to Radio Frequency Energy ........................................................ 168
Environmental Protection........................................................................................... 169
20 Abbreviations and Acronyms.......................................................................................... 171
vi
HUA WEI
Page 11

1 Getting to Know Your Phone
Your U626 can operate in WCDMA 2100 and GSM/GPRS 900/1800. It can switch from a
network to another automatically. So you can enjoy the mobile telecommunication services
at any time.
Note:
The services supported by your phone must be supported by the network where your
phone is in. For details, please consult your local network operator.
Packing List
Your phone package box contains the following articles:
y One U626 mobile phone
y One cable charger
y One Li-polymer battery
y One USB data cable
y One stereo headset
y One hand strap
y One user manual
y One CD-ROM disk which contains a user manual in PDF format and the software,
HUAWEI U626 MOBILE PHONE PC Assistant
HUA WEI
1
Page 12
1 Getting to Know Your Phone
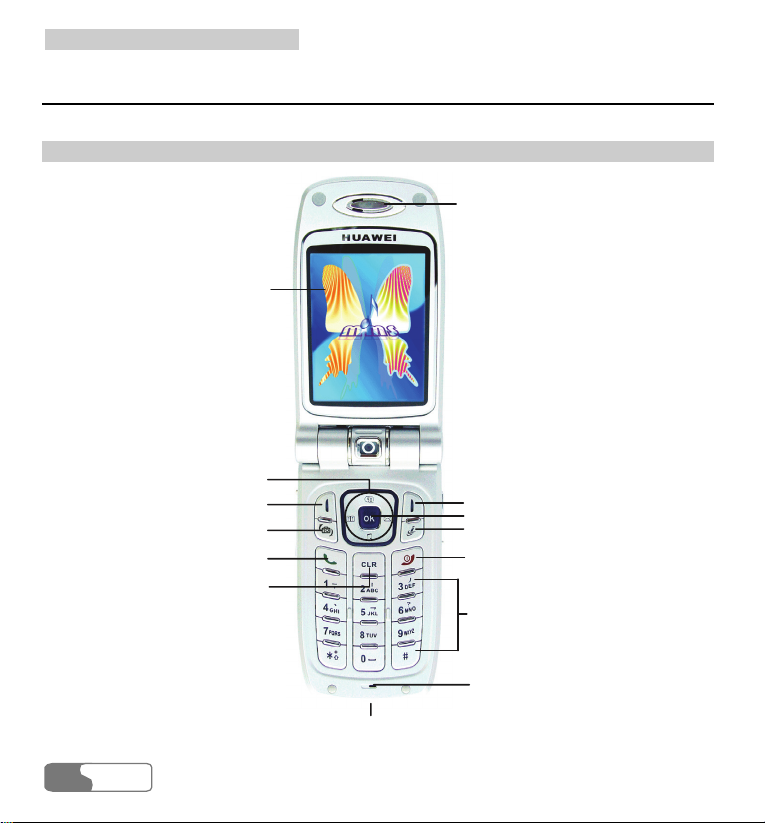
Your Phone
Front View
Scr een
Scroll key
Left function key
Camera shortcut key
Send ke y Power/End key
Clear/Return key
Earpiece
Rig ht functi on key
OK ke y
Browser shortcut key
Char acter /N umber keys
M icrophone
Charg er connector /Cable connec tor
HUA WEI
2
Page 13
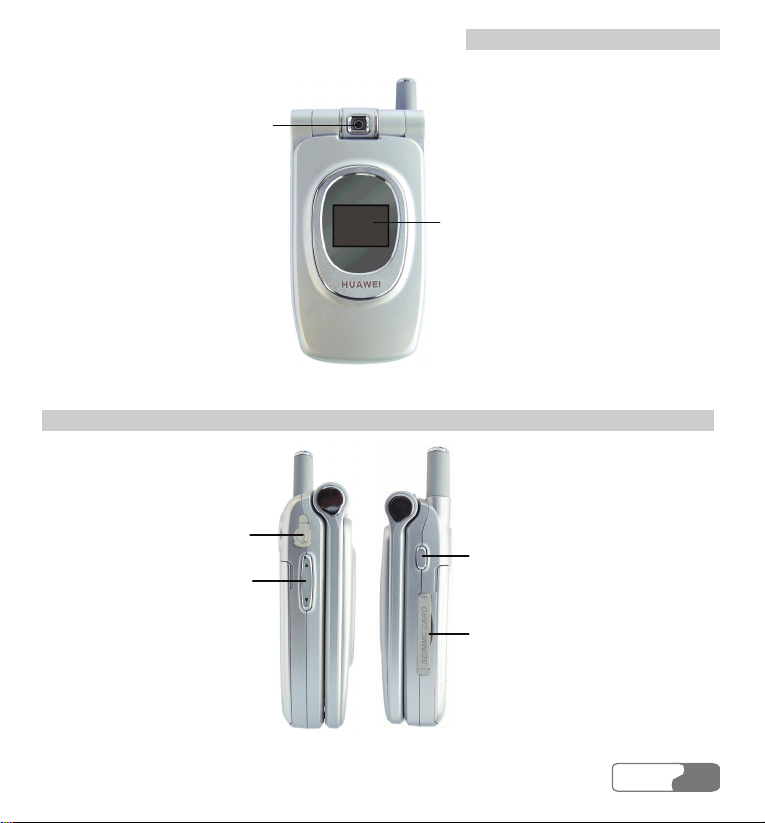
Camera
k
Side View and Back View
Heads e t jac
Volu me ke y
1 Getting to Know Your Phone
Ext ernal sc reen
Record key
Memory card slot
HUA WEI
3
Page 14

1 Getting to Know Your Phone
Battery l atch
Batt ery
Keys
Key Description
y Making or answering a call.
y In standby mode, press this key to access the Calls screen.
y Press this key to end an ongoing call or reject an incoming call.
y When it is not on Home screen, press this key to return to the Home
screen.
y Press this key to turn power on; or press and hold it to turn power off
in standby mode.
y It is a clear key when in editing mode. Press it to delete a character
before the cursor. However, when you press and hold it down for a
HUA WEI
4
moment, you will clear all the characters you have entered.
y Go back to the previous level menu.
Str ap hole
Page 15

1 Getting to Know Your Phone
Key Description
y Press it to activate the function indicated at the left of the prompt bar
on the screen.
y In standby mode, press it to access the Gallery.
y Press it to activate the function indicated on the right of the prompt
bar on the home screen.
y In standby mode, press it to access the APPS screen.
y In standby mode, press it to access the camera screen.
y In viewfinder mode, press it to rotate the image.
In standby mode, press it to open the Web homepage.
y Press it to start the prompt functions on the middle of the prompt bar
on the screen.
y In standby mode, press it to access the main menu.
y On a menu or on a mode selection screen, press it to scroll upward.
y In standby mode, press it to access the Tools screen.
y On a menu or on a mode selection screen, press it to scroll
downward.
y In standby mode, press it to access the Profiles screen.
y On a menu or on a mode selection screen, press it to scroll leftward.
y In standby mode, press it to access the Contacts screen.
y On a menu or on a mode selection screen, press it to scroll rightward.
y In standby mode, press it to access the Messages menu.
HUA WEI
5
Page 16
1 Getting to Know Your Phone
Key Description
Character/
Number key
y Used to enter numbers or characters.
y When menu items are numbered, press one of them to access a
corresponding menu item.
y On the main menu screen, press a Character/Number key to access a
menu whose location on the screen corresponds to that of the key.
For instance, you can press to access the Browser menu, or
to access the Tools menu.
Record key
y In standby mode with the flip opened, press and hold it for a moment
to activate the voice recorder.
y During a call, press it to activate the voice recorder.
y In standby mode with the phone folded, press and hold it to start
recording, and press it again to end the recording.
y In standby mode with the phone folded, press it to activate the
external screen and display relevant information; and press it again
within five seconds, the information will be displayed in a scroll bar
on the external screen.
y During charging with power is off and the phone folded, press it to
display the percentage of the battery power on the external screen.
Vo l um e k ey
y In standby mode or during a call, press it to adjust the volume of the
earpiece.
y In standby mode with the phone folded, press it to activate the
external screen and display relevant information; and press it again
within five seconds, the information will be displayed in a scroll bar
on the external screen.
y During charging with power is off and the phone folded, press it to
display the percentage of the battery power on the external screen.
HUA WEI
6
Page 17

Home Screen
1 Getting to Know Your Phone
Icon bar
Desktop
Prompt bar
Icon bar
This bar displays the phone status. The following table illustrates all the icons that may
appear on this bar.
Icon Description
Indicating signal strength. The more horizontal bars indicate the stronger
signal.
The current network is a GPRS. The horizontal bars indicate the signal
strength. The more horizontal bars indicate the stronger signal.
The current network is a GSM.
HUA WEI
7
Page 18

1 Getting to Know Your Phone
Icon Description
It is in WCDMA currently.
You are using the roaming service.
Internet connection status
Security connection
Forwarding all incoming calls
In a call
Alarm clock is enabled.
You have one or several new messages.
You have one or several PUSH messages.
You have one or several new multimedia messages.
The vibration mode is enabled.
In mute mode
Bluetooth is enabled
Bluetooth findable
Bluetooth connected
HUA WEI
8
Page 19
1 Getting to Know Your Phone
Icon Description
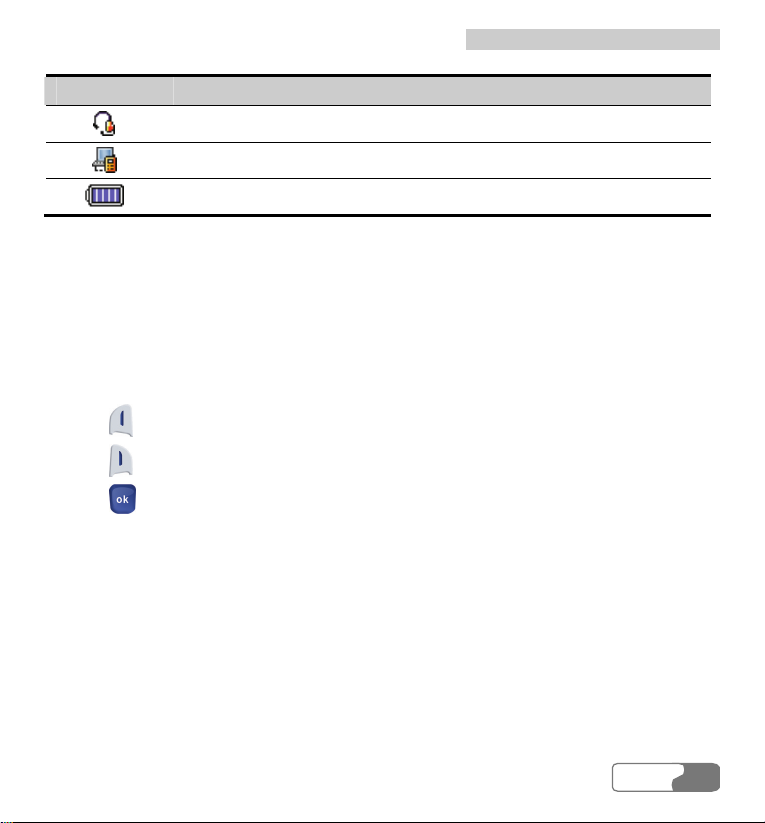
The headset is plugged in.
Your PC is connected to the Internet via your phone.
Indicating battery power level. The more bars indicate more power.
Desktop
This field displays the options of the operations and functions.
Prompt Bar
This field displays the currently available operations. The content displayed here differs
according to the content of the screen.
y Press to execute the operation indicated on the left of the prompt bar.
y Press to execute the operation indicated on the right of the prompt bar.
y Press to execute the operation indicated in the middle of the prompt bar.
HUA WEI
9
Page 20

Page 21

2 Getting Started
Loading the Battery
To load the battery:
1 Fit the battery into the battery slot on back of the phone.
2 Press the battery down until it clicks into place.
Unload the Battery
Always unload the battery after your phone is switched off. Otherwise, your phone may be
damaged.
To unload the battery:
1 Push the battery latch upward.
2 Take out the battery.
HUA WEI
11
Page 22

2 Getting Started
Charging the Battery
Before charging the battery, please read carefully the following precautions.
Caution:
y When you charge the battery for the first time, please charge it for at least 12
hours.
y The battery discharges if you do not use it for a long time, please charge it before
you use it again.
y The charging time depends on the environmental temperature and the age of the
battery.
y The battery can be recharged repeatedly, but it will eventually wear out. After
normal charging, if the time that the battery powers your phone becomes much
shorter than usual, please replace the battery with one of the same type.
y Do not strike or shock violently the battery or toss it; otherwise, liquid leakage,
body damage, overheating, explosion or fire may occur to the battery.
y Charge the battery by using the charger supplied with your phone.
You can charge the battery at any time you want. And you can use your phone during
charging.
When the battery power level is too low to support normal operation of the phone, the
12
HUA WEI
Page 23

2 Getting Started
phone will switch off automatically.
y When you charge the battery with your phone powers on, the battery level icon
appear on the upper right corner of your phone screen. In battery charging, the vertical
will
bars of the icon will blink continuously. When the vertical bars fill up the whole icon and
the icon stops blinking, it indicates that the charging is completed.
y During charging with your phone powers off, a cylinder icon indicating the power level
of the battery will appear on the screen and will blink continuously. When the cylinder is
filled and stops blinking, it indicates that the charging is completed.
Charging with a Cable Charger
Before charging the battery with a cable charger, please make sure that the battery has been
properly loaded into your phone.
To charge the battery:
1 Plug in the connector of the charger into an electrical outlet.
2 As shown in the following figure: Insert the plug of the charger into the connector of the
phone. Before the insertion, please check whether the arrow on the charger output jack
points to the front side of the phone.
3 After charging, please pull out the charger plug from the AC socket at first, and then
press and hold the gray buttons on the two sides of the charger output jack and pull out
the charger plug from the phone.
HUA WEI
13
Page 24
2 Getting Started
Loading the USIM Card
Your USIM card contains such information as phone numbers and contacts. Load your
USIM card before using your phone. To use the USIM card properly, please read carefully
the following instructions:
Note:
y Put the USIM card in a place that is unreachable for a child.
y The USIM card and the metal contactors are easily damaged by scratch or bend.
So be careful when you carry, load or remove it.
y Always disconnect the charger from the phone before loading or removing the
USIM card.
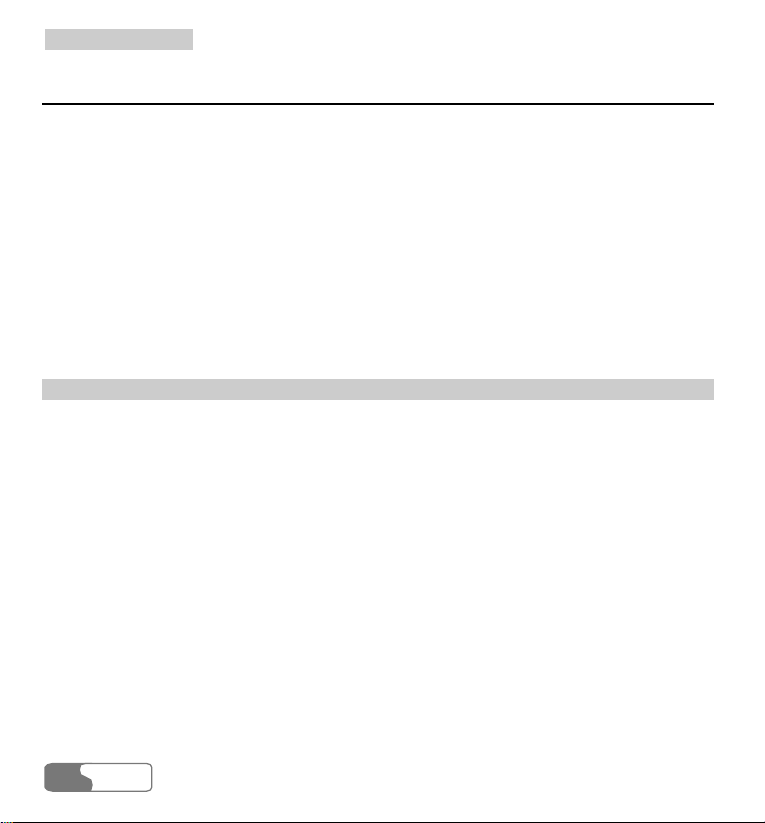
Loading the USIM Card
To load the USIM card:
1 Switch off the phone and remove the battery.
2 Put the card at the card slot entrance. Be aware of the direction of the card.
14
HUA WEI
Page 25
3 Slide the USIM card into the card slot as shown in the above figure.
2 Getting Started
HUA WEI
15
Page 26
2 Getting Started
Removing the USIM Card
To remove it, follow the procedures reversed to those when the USIM card is loaded.
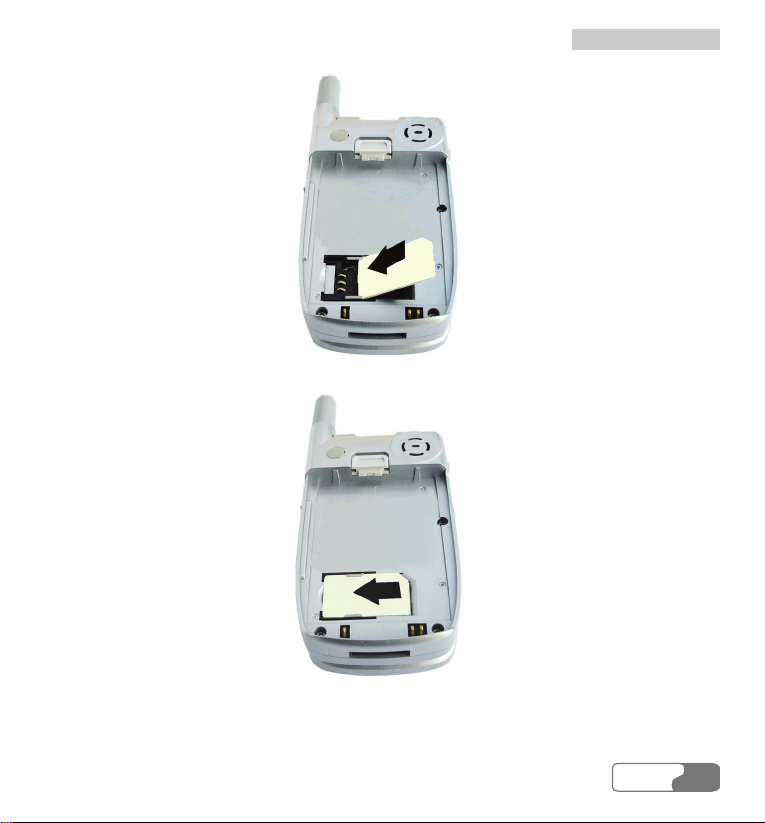
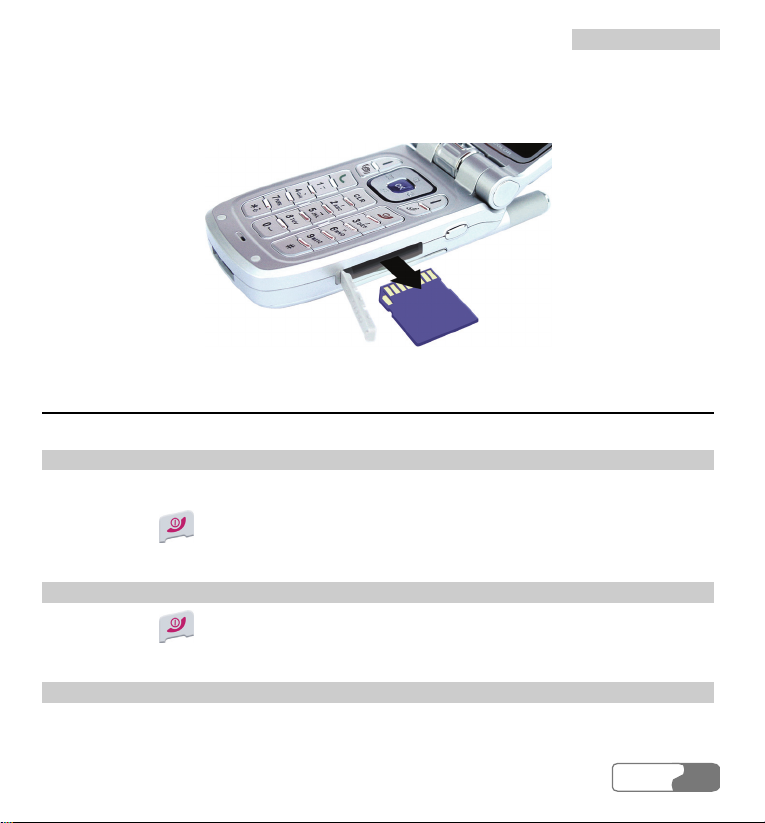
Loading and Removing a Memory Card (SD/MMC)
The U626 phone supports a memory card with a maximum of 512MB.
1 Remove the rubber cap from the memory card slot; then insert the memory card into the
slot, as shown in the following figure.
2 After inserting the memory card completely, put on the rubber cap again.
16
HUA WEI
Page 27
2 Getting Started
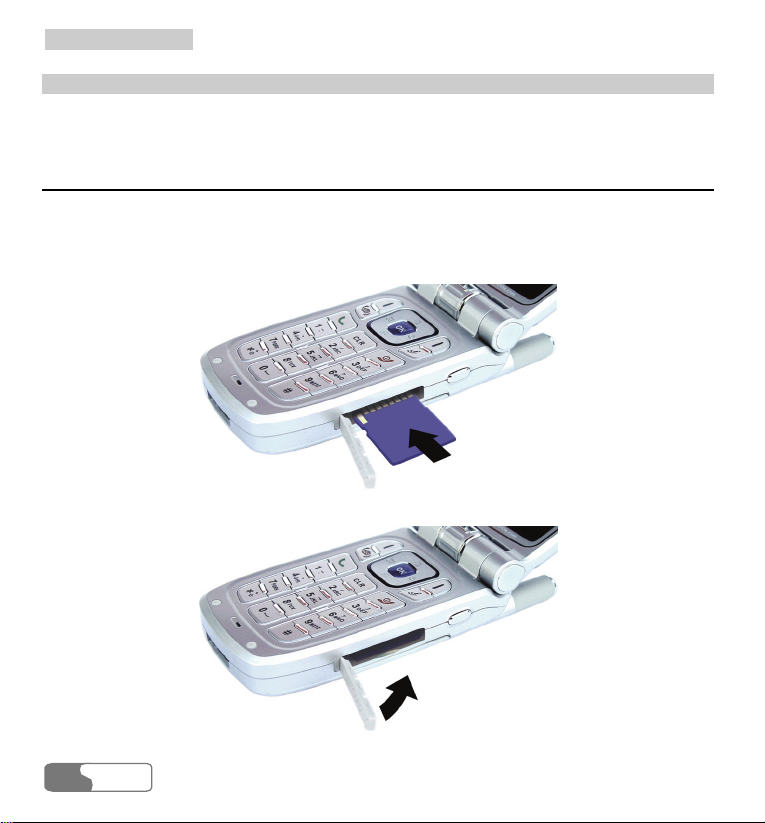
3 To remove a memory card, open the rubber cap and press the memory card gently. Now
the memory card will pop up automatically. Then take it out as shown in the following
figure.
Switching On/Off
Switching On
Ensure that the USIM card is in your phone and that the battery has been charged.
Press and hold
Switching Off
Press and hold
Access Codes
If you have set the phone password, PIN1 to be ON, then you have to enter the
corresponding access codes when you switch on your phone. For setting and changing the
until power is on.
until power is off.
HUA WEI
17
Page 28

2 Getting Started
access codes, please refer to “Settings/Phone setup/Security” on page
162.
Phone Password
The phone password is used to protect your phone from unauthorized use. No phone
password is preset for a U636 phone. You may set it.
PIN1
The PIN (Personal Identification Number) 1 code is used to protect your USIM card from
unauthorized use. Usually you are supposed to get the PIN1 code when you get the card
from your USIM card provider. If you have not got or you have lost it, please consult your
service provider.
PUK
To unlock the locked USIM card, you have to enter the PUK (PIN Unblocking Key) code.
Usually you are supposed to get the PUK code when you get the card from your USIM card
provider. If you have not got or you have lost it, please consult your service provider.
18
HUA WEI
Page 29
3 Call Services
Making and Answering Calls
Making Video Calls
With the video call function, you can use your U626 to make video calls. To make such a
call, the phone you are calling must be capable of video calls.
Step Operation
1 y Enter a phone number by the keypad, and then choose V-Call to dial out.
y Press , choose a number from the call lists, and then choose V-C all to
dial out.
Note:
y To correct a wrong input number, just press . Pressing once you
can delete the digit in front of the cursor; pressing and holding ,
you can delete the whole number.
y Maybe you have to wait for a moment to get through a video call. The
time you need to wait also depends on the response time of the other
party.
2 You can also adjust the shooting direction of your camera.
HUA WEI
19
Page 30

3 Call Services
Step Operation
3
Press
to end the call.
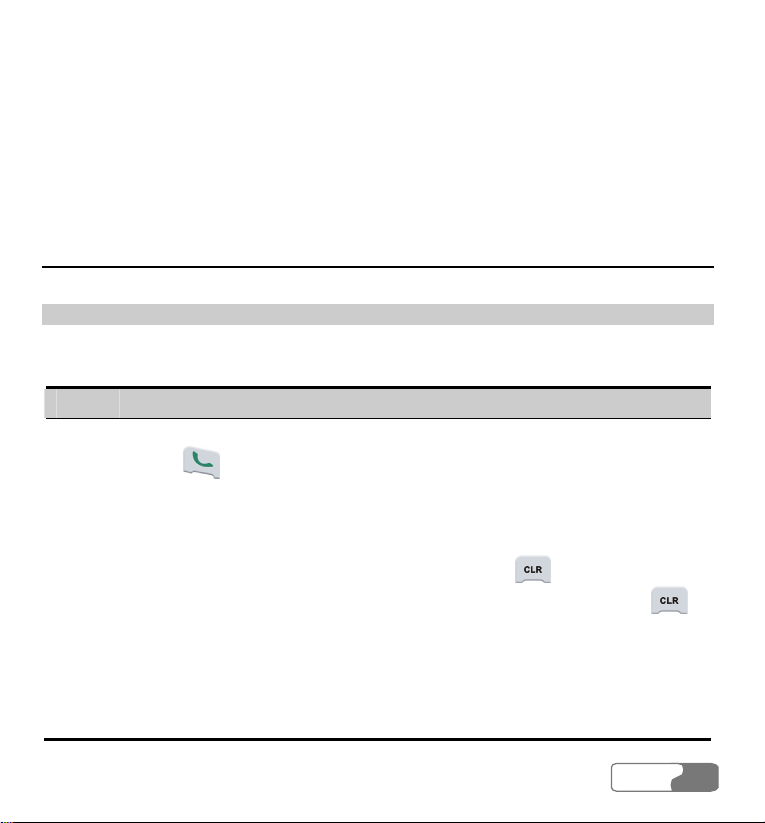
Making Voice Calls
Step Operation
1 y Enter a phone number by the keypad.
y Press , and choose a number from the call log lists.
2
Press
3
Press
to dial out.
to end the call.
Making Voice/Video Calls Using the Contacts
You can make voice/video calls by choosing a number from the contacts list.
Step Operation
1 Access the Contacts.
2 Press the scroll key to choose Phone or USIM.
3
Choose a contact and press to access the Details screen.
4
Choose a number and press
to make a voice call; or choose V-Call to
make a video call.
20
HUA WEI
Page 31

3 Call Services
Step Operation
5
Press
to end the call.
Making Voice Calls Using Speed Dialing
You can save the phone numbers you often dial to positions titled with numbers from “2”
through “9” respectively; then, in standby mode, press one of the number keys from “2”
through “9” you can dial the number that you have saved under it instantly. For more
information, please refer to “Contacts/Speed Dialing Numbers” on page
44.
To make an instant call by speed dialing, follow these steps:
Step Operation
1 Press and hold a number key which you have saved during speed dialing setting.
2 The phone number you have saved under this number will be dialed out.
Answering/Rejecting Incoming Calls
The phone will ring or vibrate to prompt an incoming call. If the call number has been saved
in the Contacts, the name of the calling party will be displayed on the screen.
You can set an answering mode for your phone: “Open flip”, “Any key” or “Send key”. The
method for answering a call is different under different answering modes. To set the
answering modes, please refer to “Settings/Call Setup/Answer Mode” on page
147.
You can also launch and set the auto answer mode for your phone. For more information,
please refer to “Settings/Call Setup/Auto Answer” on page
148.
HUA WEI
21
Page 32
3 Call Services
Note:
The control key on the headset is available for answering or ending a call only. It
can not be used to reject a coming call.
With Auto Answer Mode Disabled
If you have disabled the auto answer mode of your phone, you will answer or end an
incoming call as follows:
Note Operation
Answering
a call
If you have selected one of the following answering modes:
y Open flip: You can answer a call by unfolding the phone.
y Any key: You can answer a call by pressing any key except for
and
y Send key: You can answer a call by pressing .
y If the headset is used: You can answer a call by pressing the answer key
with your phone unfolded.
on the headset.
Ending a
call
y If the headset is not in use, you can fold the phone or press to end
a call.
y If the headset is in use, you can press the control key of the headset to
end a call.
22
HUA WEI
Page 33

3 Call Services
Note:
When a call comes, if the phone is folded and is not during a call:
y Press and hold the volume key to reject the call.
y Press and hold the record key to dumb the ring.
With Auto Answer Mode Enabled
You can set your phone to automatically answer or end a call, the steps are shown as below:
Note Operation
Answering
a call
If you have selected one of the following answering modes:
y Immediate answer: The phone will answer a call automatically in 5
seconds.
y Text message: The phone will automatically send the preset message to
the caller in 20 seconds.
y Recorded message: The phone will automatically answer a call in 20
seconds by playing the audio file you recorded and preset.
Ending a
call
y If the headset is not in use, you can end a call by folding the phone or by
pressing
y If the headset is in use, you can end a call by pressing the control key on
.
the headset.
HUA WEI
23
Page 34

3 Call Services
Operations during a Call
Basic Operations
Dialing a Second Number
You can directly enter a second number, or select Menu/Contacts to choose a phone
number, and then press
Answering a New Call
When a call is going on, you can also answer a new call if your network operator supports
the function. You can use the U626 phone to answer up to 6 incoming calls simultaneously.
When a new call comes, the icon
To answer it, select this information and press
Icons Description
: A call is going.
: This call is held on.
:A new call comes during a call.
Other Operations During a Call
Answer/Reject
During a call, you can press the left function key and select Answer or Reject from the
popup menu to answer or reject a coming call.
HUA WEI
24
to dial out.
and the caller’s information will appear on the screen.
.
Page 35

3 Call Services
Swap
During a call, you can press the left function key and select Swap from the popup menu to
resume the held call and keep the ongoing call.
Resume and Reject
During a call, you can press the left function key and select Resume and reject from the
popup menu to reject a coming call and resume the held call.
Handfree/Earpiece Switching
By pressing
you can switch between the loud speaker of the phone and the earpiece (or
the headset) for listening.
Mute
During a call, you can press the right function key to make your voice mute or to restart the
conversation by pressing it again.
Contacts
During a call, you can press the left function key to pop up a menu, and then select
Contacts from the menu for operations.
SMS
During a call, you can press the left function key to pop up a menu, and then select SMS
from the menu for operations.
Hold/Resume a Call
During a call, you can press the left function key to pop up a menu, and then select Hold
/Resume to pauses or restart the call.
Conference Call
If there are three or more parties involved in the same call, you can press the left function
key to pop up a menu, and select Conference to add all the saved parties into a conference.
HUA WEI
25
Page 36

3 Call Services
Private Talk
During a conference call, you can press the left function key to pop up a menu from where
you can select Private to talk privately to one of the parties who are involved in the call
conference.
Ending Current/All Calls
During a call conference, you can press the left function key and select End call or End
connect calls from the popup menu to end the current or all calls.
If you select to end the current talk, press the left function key at the selected talk, and then
execute the relevant operations.
Ending Active/Held Calls
During a call, you can press the left function key and select End active/held calls from the
popup menu to end all the ongoing or held calls.
Start/Stop Record
During a call, you can press the left function key to pop up a menu, and then select Start
record/Stop record to record or stop recording the other party’s voice.
New Call
During a call, you can press the left function key and select New call. Then, the DTMF tone
of your pressing keys is not sent to the other party.
26
HUA WEI
Page 37

4 Text Entry
You can use the keypad to enter English letters, symbols and numbers. For example, when
you add entries to the Contacts, write messages or schedule events on the calendar, you
need to enter text.
Note:
While entering characters or symbols:
y Press and hold the number key corresponding to the number over the character or
symbol to be entered on the lower part of the screen, the character or symbol to be
entered appears on the editing field.
y Press the up/down scroll key to turn the pages of the displayed characters or
symbols for candidates.
“Pinyin” Text Input
Based on the most common-used Pinyin combinations, the Pinyin text input method helps
you input Chinese characters quickly and conveniently.
y Press the keys carrying the wanted letters in turn of the wanted Pinyin combination. Press
a key for once without regard to the position of the wanted letter on the key. The Pinyin
text input method will select the most suitable Pinyin combination automatically
according to the rules of Pinyin.
HUA WEI
27
Page 38

4 Text Entry
拼
音
音
y The current selected combination in the list of Pinyin combinations for candidate is
highlighted. You can select the wanted Chinese character from the corresponding list of
Chinese characters for candidate.
y After inputting a Chinese character, a list of Chinese characters belonging to some
common-used Chinese words initialized by the inputted Chinese character will be
displayed. This intelligent function can improve the efficiency of inputting Chinese
characters.
Let’s take inputting the Chinese word “拼音” by the Pinyin text input method for example.
Follow these steps:
Step Operation
1
Press in turn , and that carries the letter of “P”, “I” and “N”
respectively. The Pinyin combinations composed of the letters carried by these
three keys will be displayed on the screen.
2 Press the left/right scroll key to select “pin”.
3 You can operate this step in two ways:
y Press and hold corresponding to “
y Press to highlight a Chinese character in the candidate bar, and press the
left/right scroll key to select “
Now the character of “
The next Chinese characters of some common-used Chinese words initialized
4
by “
” are listed on the candidate bar. Now you can select the character of
拼
” in two ways:
“
拼
” appears in the editing field.
拼
”.
”. Then, press to confirm.
28
y Press and hold to select “
y Press the left/right scroll key to select “
HUA WEI
音
”.
”, and then press to confirm.
Page 39

4 Text Entry
Stroke Simplified Chinese
With this method of inputting Chinese characters, you can input the strokes of a Chinese
character, and then select the wanted Chinese character from the candidate characters listed
on the screen.
The strokes of Simplified Chinese used in the U626 phone are shown in the following table:
Key Stroke Key Stroke
For instance, to input the Chinese character “
input method, you can operate the following steps:
” with the “Stroke Simplified Chinese” text
简
? Wildcard
HUA WEI
29
Page 40

4 Text Entry
简
Step Operation
1
Press
The Chinese characters containing the strokes carried by these three keys
2
, and in turn.
are listed on the screen:
y Press can hold the key corresponding to the character “
y Press , and then press the left/right scroll key to highlight the
character “简”. Then, press to choose it.
Bopomofo Chinese
With this text input method, you can input Chinese characters according to the phonetic
notation symbols. The following table shows the comparison of the phonetic notation
symbols and the keys:
Key Phonetic Notation Key Phonetic Notation
ㄅㄉㄚ
30
HUA WEI
ㄎㄑㄟ
ㄇㄋㄜ
ㄓㄗㄢㄦ
ㄕㄙㄤㄨ
”.
ㄍㄐㄞ
ㄆㄊㄛ
ㄔㄘㄣㄧ
ㄏㄒㄠㄡ
ㄈㄌㄝ
Page 41

Key Phonetic Notation Key Phonetic Notation
音
音
音
ㄩ
4 Text Entry
For instance, to input “
” with the “Bopomofo Chinese” text input method, you can
注音
operate the following steps:
Step Operation
1
Pressing
and in turn, combinations of phonetic notation symbols
indicated by these two keys are listed on the screen.
2
Select “
ㄓㄨ
”.
3 You can operate this step in two ways:
y Press and hold the key corresponding to the character “
y Press to highlight a candidate Chinese character, and then press the
left/right scroll key to choose the character “注”. Then, press to
confirm.
Now the character “
4
The other character of some common-used Chinese words initialized by “注”
” appears in the editing field.
注
are listed on the screen for candidate. Then, you can choose the character “
in two ways:
y Press and hold to choose the character “
y Press the left/right scroll key to select the character “
to confirm.
”.
”, and then press
注
”.
HUA WEI
”
31
Page 42

4 Text Entry
簡
簡
簡
Stroke Traditional Chinese
This method is used to input Traditional Chinese. You can input the strokes of a Chinese
character, and then select the wanted Chinese character from the candidate characters listed
on the screen.
The strokes of Traditional Chinese used in the U626 phone are the same as those of the
Simplifies Chinese. You can refer to it.
For instance, to input the Chinese character “
input method, you can operate the following steps:
Step Operation
1
Press , and in turn.
The Chinese characters containing the strokes carried by these three keys are
2
listed on the screen:
” with the “Stroke Traditional Chinese” text
y Press can hold the key corresponding to the character “
y Press , and then press the left/right scroll key to highlight the character
“
”. Then, press to choose it.
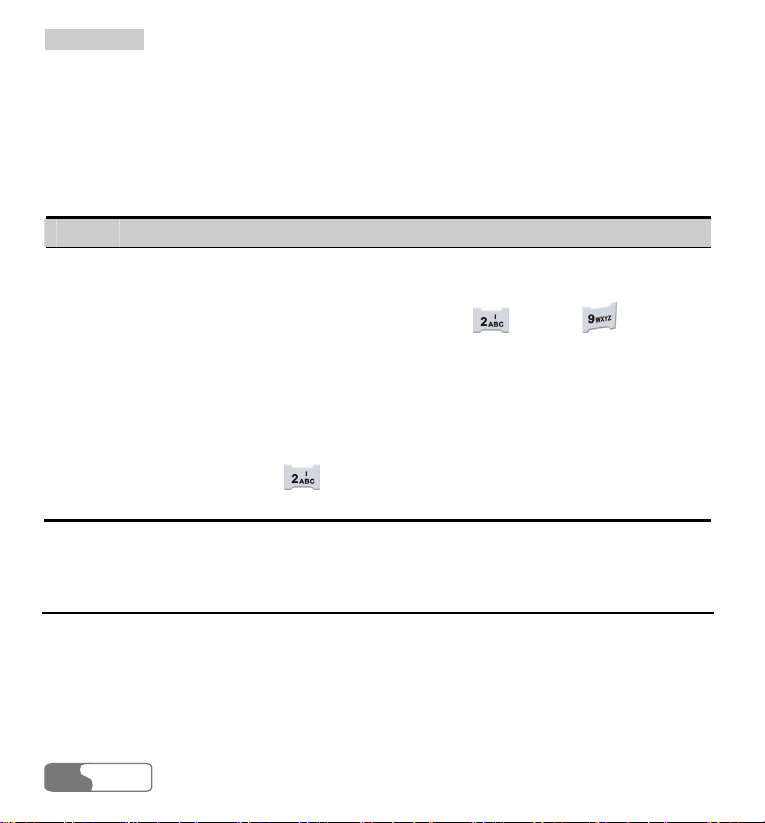
“Abc” Text Input
The “Abc” text input method is a common method for entering alphabetic characters. You
can press repeatedly the key that carries the letter to be entered until it appears on the
screen.
For example, to enter the word “hello” with the “Abc” text input method, you can do as
HUA WEI
32
”.
Page 43

follows:
Step Operation
1
Press that carries the letter “h” repeatedly, you will see g, h, i, and 4
successively on the screen. Now the current letter is in contrast background.
Stop until you see an “h” on the screen.
Wait until the background disappears and the cursor goes to the right of the letter
2
you entered just now, you can enter another letter. However, you can also use the
scroll key to move the cursor to the right of the letter and enter another letter.
3 Enter “ello” in the same way.
Note:
y Press , you will see “abc”, “Abc” or “ABC” on the lower left corner of the
screen; representing you are going to enter small letters, words with the first letter
being capitalized or words with all letters being capitalized.
y Press repeatedly, you can enter commonly used punctuation marks and
symbols.
“T9 English” Text Input
4 Text Entry
With the “T9 English” text entry method, you can enter easily and quickly English words
with predictive wording scheme.
y Press once the key where the expected letter belongs to, regardless in which sequence the
letter is supposed to appear normally at the key; the predictive wording scheme will
present a most commonly used word, which is in contrast background.
HUA WEI
33
Page 44

4 Text Entry
y After entering all the letters, if the current word is not the expected one, you can press the
up/down scroll key to choose another one. Stop pressing the up/down scroll key until you
find the expected word and then press the right scroll key to move the cursor to the right
of the word.
For example, to enter the word “hello” with the “T9 English” text entry method, you can do
as follows:
Step Operation
1
Press successively , , , and which “h”, “e”, “l”, “l”
and “o” belong to, the screen will show the English word that consists of these
letters that the keys represent.
2 The word “hello” appears on the screen.
Note:
y Pressing , “T9 abc”, “T9 Abc” or “T9 ABC” appears on the lower left of the
screen in succession, indicating the word to be entered will be all in small letters,
first letter capitalized or all letters capitalized.
y Pressing , and then pressing the up/down scroll key, you can choose to enter
commonly used punctuation marks and symbols.
“123” Numeric Input
With the “123” numeric input method, you can enter corresponding numeric characters by
pressing the Character/Number key.
For example, to enter “1” with the “123” numeric input method, you can press
HUA WEI
34
. Then
Page 45

“1” appears on the screen.
Note:
4 Text Entry
Under any other entry method, you can press and hold
to switch between the
“123” numeric input method and the current input method.
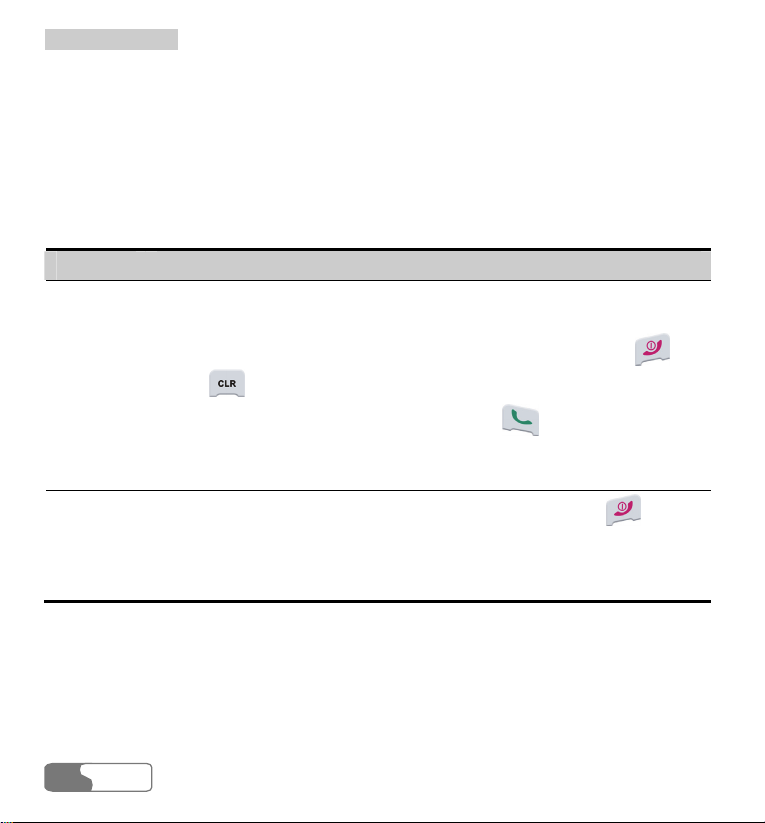
Symbol Input
The U626 provides an independent symbol entry method.
For example, you have chosen the symbol input method and you want to enter “?”. You can
enter this punctuation mark in two ways:
y Press and hold that is corresponding to “?”.
y Or press the left/right scroll key to select “?”, and then press .
Note:
In any other entry method, you can press and hold to switch between the
symbol entry method and the current entry method.
HUA WEI
35
Page 46

Page 47

5 Using the Menu Functions
The function menu of the U626 phone includes the following items: Contacts, Calls,
Messages, Media, Tools, Gallery, Browser, Profiles, Connect, APPS, STK and Settings.
The operations of the menu are shown as follows:
Step Operation
1
In standby mode, press
2
Press a scroll key to choose a menu item, and then press to enter a
submenu.
3
Press a scroll key to choose an item from the submenu, and then press
enter the mode you want.
4 Operate according to the prompt on the screen.
5
Press
6
Press
to return to the previous menu.
to return to the standby mode.
to enter the main menu.
to
HUA WEI
37
Page 48

Page 49

6 Contacts
The Contacts function enables you to save and manage such information as phone numbers
and addresses of your contacts. You can save such information on your phone or your USIM
card. Meanwhile, you can also set some often-used numbers for speed dialing for your
convenience.
Searching for a Contact Entry
With this function, you can find the information of the desired contact from the contacts list
easily and quickly. You can perform this function on either the Phone screen or the USIM
screen.
Step Operation
Enter the Contacts screen, and then press the left/right scroll key to select
1
Phone or USIM.
Press the left function key to enter Options, and select Search from the
2
submenu.
Press the left function key to choose Search, and then enter letters or Chinese
3
characters contained in the name to be searched for, and then press
phone will display the related information of the contacts whose names contain
the letters or Chinese characters you entered.
. The
HUA WEI
39
Page 50
6 Contacts
Note:
No matter you search in the Phone screen or the USIM screen, the search will cover
all the contacts from the both memories.
You can also search contacts in speed on the Phone or USIM screen. Perform the following
steps:
Step Operation
Enter the Contacts screen, and then press the left/right scroll key to select
1
Phone or USIM.
2
Pressing one of the character/number keys from
one of the entries whose names are initialized by the letter corresponding to the
key you pressed will be highlighted. While selecting letters, if you press a key
once, the first letter signed on the key will be selected; if you press a key
quickly twice, the second letter signed on the key will be selected. The third and
the forth letters signed on the keys can be entered analogically.
For instance, to search for the information of a contact whose name is initialized
with C, you can press
the first entry of the contacts whose names are initialized with C.
quickly for three times, and then the cursor skips to
through , the first
Adding a New Contact Entry
To add a new contact entry to your phone, you can add the contact’s Name, Mobile phone
number, Office telephone/address, Home telephone/address, Email address and Fax number.
You can also select icons, groups and ring tones for the incoming calls.
To add a new contact entry to the USIM card, you can only enter the Name, Phone number
and Email address of the contact (Whether Email addresses can be added depends on your
HUA WEI
40
Page 51

6 Contacts
USIM card.
Step Operation
Enter Contacts screen, and then press the left/right scroll key to select Phone or
1
USIM.
2 Press the left function key to activate the Options menu, and then select Add.
3 Enter relevant information, and select Save to end the operation.
Deleting a Contact Entry
You can delete entries from the phone or USIM card. You can select to delete them one by
one or to delete all of them in one time.
Step Operation
Enter the Contacts screen, and press the left/right scroll key to select Phone or
1
USIM.
y Press the right function key to select entries to be deleted one by one (the
2
selected entry will be checked on the checkbox to the right of the entry).
y To delete one entry, just highlight the entry to be deleted; then go to the
Delete step directly without checking the entry.
3 Press the left function key to pop up the Options submenu and select Delete.
4 Select Ye s to confirm the deletion, or press No to cancel it.
HUA WEI
41
Page 52

6 Contacts
Copying a Contact Entry
You can copy one or several entries from your phone memory to your USIM card or from
your USIM card to your phone.
Step Operation
Enter the Contacts screen, and then press the left/right scroll key to select
1
Phone or USIM.
y Press the right function key to select the entries to be copied one by one. The
2
checkboxes of entries are checked.
y To copy one entry, you can just highlight the entry, and then select Copy
without checking the entry with the right function key.
Press the left function key to pop up the Options, and then select Copy to
3
USIM or Copy to phone.
4 Select Ye s to confirm the copy, or select No to cancel it.
Note:
To copy entries from the phone to the USIM card, you can only copy the names, the
first non-empty number and Email addresses.
Unselecting All Contact Entries
You can perform this function on the phone screen or the USIM card screen separately:
HUA WEI
42
Page 53

Step Operation
Enter the Contacts screen, and then press the left/right scroll key to select
1
Phone or USIM.
2 Press the left function key to pop up the Options, and then select Unselect all.
3
Press to confirm the operation.
Selecting All Contact Entries
You can select all the entries on the phone or those on the USIM card separately:
Step Operation
Enter the Contacts screen, and then press the left/right scroll key to select
1
Phone or USIM.
2 Press the left function key to pop up the Options, and then select Select all.
3
Press
to confirm the operation.
Sending a Contact Entry
6 Contacts
This option is used to send the selected contact entries to other Bluetooth devices via
Bluetooth.
Before sending via Bluetooth, you need to switch on the Bluetooth device.
HUA WEI
43
Page 54

6 Contacts
Viewing Memory Status
You can view the memory status of both the phone and the USIM card, including the
number of the saved entries and total capacity of the phone and the USIM card. You can
access it from either the Phone screen or the USIM screen.
Step Operation
Enter the Contacts screen, and then press the left/right scroll key to select
1
Phone or USIM.
Press the left function key to pop up the Options, and then select Memory
2
status.
3
Press
to view it.
Speed Dialing Numbers
You can save the often-used numbers to the positions for speed dialing keys. You can select
one from the numbers from “2” through “9”.
Step Operation
Enter the Contacts screen, and then press the left/right scroll key to select
1
Q-Dial.
2 Select a position for saving the speed dialing number, and then select Edit.
3 Select Search to find the desired phone number.
44
HUA WEI
Page 55

6 Contacts
Groups
You can manage the group information by renaming a group, adding group members, or
deleting a group.
Note:
You can not edit or delete the group names preset in the U626 phone.
Step Operation
Enter the Contacts screen, and then press the left/right scroll key to select
1
Groups.
2 Select the expected group, and follow the prompt for corresponding operation.
Renaming a Group
You can select the group to be modified from the Groups list, and then choose Rename.
Adding/Deleting a Group Member
You can add a member to a group preset in your U626 or a group that has been renamed, or
delete a member from it. Follow these steps:
Step Operation
1
2 Select Add to access the screen for adding members to a group.
Select a group and press
to view the details.
HUA WEI
45
Page 56

6 Contacts
Step Operation
3
Select Search to select the contact to be added and then press
Note:
Only the contact entries saved in the phone can be added.
.
4
After adding a member, return to the “Group member list”. Now, the
member you added appears on the group member list.
5
Select a member from the group member list, and then press the left
function key to delete it.
Deleting a Group
Selecting the group to be deleted from the Groups list, and then selecting Delete, you can
delete the group and all the members of this group.
HUA WEI
46
Page 57

7 Call Logs
Missed Calls
Access the Calls screen from the main menu and select Missed.
Making Voice Calls/V-Calls
You can select a call number from the missed call logs, and then press
voice call or select V-C al l to make a video call.
Relevant Options
On the missed calls screen, select Options, then, you can perform the following operations:
Save number
This option is used to save the numbers of the selected missed calls to the phone, the USIM
card, or an existing entry of the Contacts.
y Save to phone: to save the number to the phone.
y Save to USIM: to save the number to the USIM card.
y Add to the existing one: to add the number to an existing entry of the Contacts list.
Send SMS
This option is used to send a message to the number of a selected missed call.
to make a
HUA WEI
47
Page 58

7 Call Logs
Delete
This option is used to delete the numbers of missed calls you select.
Unselect all
This option is used to cancel all the selections in the missed calls list.
Select all
This option is used to select the numbers of all the missed calls.
Calls status
This option is used to display the information of voice calls, video calls or data services.
You can perform this function on the screens of missed calls, the received calls or the dialed
calls.
y Voice call/V-Call: Displaying the last call duration, the incoming call duration, the
outgoing call duration, the total time of all calls, and the last reset time.
y Data: Displaying the total uplink flow, the total downlink flow, and the total connecting
duration; the last uplink flow, the last downlink flow and the last connecting duration; and
the last reset time.
y From any of the Voice call, V-Call or Data service screens, you can reset all the statistic
information on that screen by selecting Reset.
Received Calls
Enter the Calls screen from the main menu and select Received.
Making Voice/Video Calls
You can select a call number from the received call log, and then press to make a
voice call or select V-C al l to make a video call.
HUA WEI
48
Page 59

7 Call Logs
Relevant Options
On the received calls screen, select Options, then, you can execute the following
operations:
Save number
This option is used to save the number of a selected received call to the phone or the USIM
card.
y Save to phone: to save the number to the phone.
y Save to USIM: to save the number to the USIM card.
y Add to the existing one: to save the number to an existing entry of the contacts list.
Send SMS
This option is used to send a message to the number of a received call you select.
Delete
This option is used to delete the numbers of selected received calls.
Unselect all
This option is used to cancel all the selections on received calls screen.
Select all
This option is used to select all the entries on the received calls screen.
Dialed Calls
Enter the Calls screen from the main menu and select Dialed.
HUA WEI
49
Page 60

7 Call Logs
Making Voice/Video Calls
You can select a call number from the dialed call log, and then press to make a voice
call or select V-Call to make a video call.
Relevant Options
On the dialed calls screen, select Options, then, you can execute the following operations:
Save Number
This option is used to save the number of a selected dialed call to the phone or the USIM
card.
y Save to phone: to save the number to the phone.
y Save to USIM: to save the number to the USIM card.
y Add to the existing one: to save the number to an existing entry of the contacts.
Send SMS
This option is used to send a message to the number of a selected dialed call.
Delete
This option is used to delete the numbers of selected dialed calls.
Unselect All
This option is used to cancel all the selections on the dialed calls screen.
Select All
This option is used to select all the entries on the dialed calls screen.
HUA WEI
50
Page 61

8 Messaging
Creating Text Messages
Before using the messaging service, you need to set the message center number. For more
information, please refer to “Text Message (SMS)/Settings” on page
A text message to be sent can contain 160 English characters or 70 Chinese characters at
most. If the characters you entered are more than this limit, the text will be divided into two
or more continuous messages for sending.
Step Operation
1 Enter the Menu, and select Messages.
2
Select New SMS, and press
3 From the “Edit SMS” screen, select Options:
y You may select one of the text entry methods to enter the message contents.
y Selecting Text template, you can speed up the text entry.
Press to confirm.
4 Access the “Edit numbers” screen:
y Enter the phone number and select Send.
y Select Options/Group or Contacts to choose a number and send the
message.
y Select Options/Save to save the message.
to enter the “Edit SMS” screen.
62.
HUA WEI
51
Page 62

8 Messaging
Creating Multimedia Messages
Before using the multimedia messaging service, you need to perform relevant settings for
the service. For more information, please refer to “Multimedia Message/Settings” on page
70.
You can send messages attached with images, text and music under this mode.
Creating a Multimedia Message
Step Operation
1 Enter the Menu, and select Messages.
2
Select New MMS, and press
Select <To >, <Cc> or <Bcc>, and then select Options/Group to add all the
3
numbers of a group to the related recipients list; or select <To> , <Cc> or <Bcc>,
and then select Edit:
y Select a position from the recipients and press Edit to enter a phone number.
y Select a position from the recipients and press Options, then select Contact
and phone numbers.
From the recipients list window select phone numbers you need for To, Cc or
4
Bcc. Then, select Options, select Set To, Set Cc or Set Bcc. Meanwhile you
may also select Delete or Delete all to delete the selected numbers or all
numbers.
Press Back to go back to the “Edit MMS” screen, select <Subject> to enter text
5
as subject, and then press
6 Select <Content> to edit the pages, and then go back.
to enter the “Edit MMS” screen.
.
52
HUA WEI
Page 63

Step Operation
7 y Select Send to send this multimedia message.
y Select Options/Save to save this message to Messages/MMS/Drafts.
y Select Add to sample from the Options to save this message at
Messages/MMS/Sample.
y Select Send settings from Options to set relevant sending parameters for
sending multimedia messages. For details, please refer to “MMS/Settings” on
page 70.
Making Multimedia Pages
Step Operation
1 Enter the “Message editor” to make a multimedia message.
2
Select
3
Select to enter the image editing field where you can choose images or
to access the text entry field, and then edit text.
video files.
4
Select
5
Enter the field indicated by
to enter the music editing field where you can choose audio files.
and press the left/right scroll key to select one
from different pages if there are more pages.
6
Enter the field indicated by
and press the left/right scroll key to adjust the
playing time (in seconds) of the current page.
8 Messaging
HUA WEI
53
Page 64

8 Messaging
Step Operation
7 Select Options and you have the following options:
y Remove object: to remove the content from the selected field.
y Insert page: to insert a new page.
y Delete page: to delete the current page.
y Preview: to preview this page.
Note:
If the video file is chosen, you can not edit the audio files any more.
Creating Emails
To send Emails, you need to set up corresponding accounts. For more information, please
refer to “Email/Settings” on page
Step Operation
1 Select Messages from the Menu.
2
Select New Email and press
3
Select
y Select a position from the recipient list and then select Edit to input an Email
4
and press .
address.
y Select Options and then select Contact, Group or History, and then select
an Email address.
78.
.
54
HUA WEI
Page 65

Step Operation
From the recipients list interface, select Email addresses and select Options.
5
From the pop-up menu, you can select Set To, Set Cc or Set Bcc; or select
Delete, or Clear to delete the selected or all Email addresses.
6
Go back to the “Edit Email” screen, select
subject.
7
Go back to the “Edit Email” screen, select the content field and press
write the content.
8
Go back to the “Edit Email” screen, select the attachment field and press
you can Add files of images, music, video clips, eBooks, and so on.
From the “Attachment” screen, select Options and you can do the following
operations
y Open: to open a selected attachment.
y Delete: to delete a selected attachment.
y Clear: to delete all attachments.
9 Go back to the “Edit Email” screen:
y Select Send to send the Email.
y Select Save to save the Email to the Drafts of the Messages/Email.
8 Messaging
and press to write a
to
,
Text Message (SMS)
The U626 provides three mailboxes for SMS (Short Messaging Service), namely, the Inbox,
Outbox and Draft.
HUA WEI
55
Page 66

8 Messaging
Inbox
You can save the received messages in the Inbox.
Icons in the Inbox
Icon Description
A read message on the phone
An unread message on the phone
A read message on the USIM card
An unread message on the USIM card
A message report
Viewing Messages in the Inbox
Step Operation
1 Select Messages/SMS from the Menu.
2 Select Inbox.
3 Press the up/down scroll key to view the messages.
4 Select a message and then select Details to view the details.
5
y Select Reply to reply with a text message.
y Select V-Call to make a video call.
56
HUA WEI
Page 67

Step Operation
Select Options, and then you can do the following operations:
6
y Delete: to delete the message.
y Reply: to reply the message.
y New: to create a message.
y Forward: to forward the message.
y Save number: to obtain a phone number from the message (If there are
several numbers, you will be prompted to make selections.) and save it to
your phone or USIM card or to add it to an existing entry in the Contacts.
y Copy to USIM: to copy the message to the USIM card.
y New Email: to obtain an Email address from the message and use it (If there
are several addresses, you will be prompted to make selections.) to create an
Email.
y Extract URL: to obtain an URL address from the message and use it (If there
are several URL addresses, you will be prompted to make selections.) to
access the Internet or stream media.
y Settings: To set parameters related to messages. Please refer to the
“SMS/Settings” on page
y Save address: to obtain an Email address from the message (If there are
62 for details.
several addresses, you will be prompted to make selections.) and save it.
Other Operations for the Inbox
Step Operation
1 Select Messages/SMS from the Menu.
2 Select Inbox.
8 Messaging
HUA WEI
57
Page 68

8 Messaging
Step Operation
3 Select Options, and then you can do the following operations:
y Reply: to reply to the selected message.
y Delete: to delete the selected message.
y New: to create a new message.
y Forward: to forward the selected message.
y Save number: to save the sender’s number corresponding to the selected
message. You can save it to the phone or the USIM card as a new entry, or
add it to an existing entry in the Contacts.
y Copy to USIM: to backup one or more selected messages to the USIM card.
y Unselect all: to cancel all the selections in the Inbox.
y Select all: to select all the messages in the Inbox.
y Settings: to set parameters relating to messaging. Please refer to
“SMS/Settings” on page
y Memory status: to view the memory status of the phone or the USIM card,
62 for details.
including quantity of saved messages and the total capacity.
Outbox
The Outbox is used to save the messages that have been sent out.
Icons in the Outbox
Icon Description
A text message that have been sent out and saved to the phone
A text message that have been sent out and saved to the USIM card
HUA WEI
58
Page 69

Viewing Messages in the Outbox
Step Operation
1 Select Messages/SMS from the Menu.
2 Select Outbox.
3 Press the up/down scroll key to view the messages.
4 Select a message and press Details to view the details.
5
y Select Forward to forward this message.
y Select V-Call to make a video call.
You can select from the Options to execute the same operations as that in the
6
Inbox of SMS. You can also edit the selected messages.
Other Operations for the Outbox
Step Operation
1 Select Messages/SMS from the Menu.
2 Select Outbox.
8 Messaging
HUA WEI
59
Page 70

8 Messaging
Step Operation
3 Select Options, and then you can do the following operations:
y Edit: to edit the selected message.
y Delete: to delete the selected message.
y New: to create a new message.
y Forward: to forward the selected message.
y Save number: to save the recipient’s number corresponding to the selected
message. You can save it to the phone or the USIM card as a new entry, or
add it to an existing entry in the Contacts.
y Copy to USIM: to backup one or more selected messages to the USIM card.
y Unselect all: to cancel all the selections in the Outbox.
y Select all: to select all the messages in the Outbox.
y Settings: to set parameters relating to messaging. Please refer to
“SMS/Settings” on page
y Memory status: to view the memory status of the phone or the USIM card,
62 for details.
including quantity of saved messages and the total capacity.
Draft
The Draft box is used to save the messages you created and saved and those failed to be
sent.
Icons in the Draft
Icon Description
A text message saved to the phone
A text message saved to the USIM card
HUA WEI
60
Page 71

Viewing and Editing Messages in the Draft
Step Operation
1 Select Messages/SMS from the Menu.
2 Select Draft.
3 Press the up/down scroll key to view the messages.
4 Select the message to be viewed and select Edit to edit it.
Other Operations for the Draft
Step Operation
1 Select Messages/SMS from the Menu.
2 Select Draft.
8 Messaging
HUA WEI
61
Page 72

8 Messaging
Step Operation
3 Select Options, and then you can execute the following operations:
y Delete: to delete the selected message.
y Edit: to edit the selected message.
y New: to create a new message.
y Forward: to forward the selected message.
y Save number: to save the recipient’s number corresponding to the selected
message. You can save it to the phone or the USIM card as a new entry, or
add it to an existing entry in the Contacts.
y Copy to USIM: to backup one or more selected messages to the USIM card.
y Unselect all: to cancel all the selections in the Draft.
y Select all: to select all the messages in the Draft.
y Settings: to set parameters relating to messaging. For details, please refer to
“SMS/Settings” on page
y Memory status: to view the memory status of the phone or the USIM card,
62.
including quantity of saved messages and the total capacity.
Settings
You can change the SMS settings from the three tabs of Inbox, Outbox or Draft.
Let’s take the Inbox screen as an example:
Step Operation
1 Select Messages/SMS from the Menu.
2 Select Inbox.
HUA WEI
62
Page 73

8 Messaging
Step Operation
Select Options, and then select Settings to set the parameters related to
3
messaging:
y Message center: The U626 phone can automatically read the number of the
message centre from the USIM card. If no such information or you have
deleted the information by accident, please contact your network operator for
it.
y Valid period: The time of keeping a message in the message centre after it is
sent.
y Auto save: You can set whether a message will be saved automatically to the
Outbox when it is sent. You have three options: Yes, No and Remind before.
y Save to: For setting the location for saving a newly created message. You
have two alternatives: Phone preferred or USIM preferred.
y Signature: For setting whether your signature will be sent along with the
message. You can edit the signature by yourself.
y Status report: You can set it to “On” or “Off”. If you set it to “On”, the
network will send you the information on whether the message has reached to
the recipient.
Multimedia Message (MMS)
The U626 provides four mailboxes for MMS (Multimedia Messaging Service), namely,
Inbox, Drafts, Sent and Sample.
Inbox
The Inbox is used to save the multimedia messages you received.
HUA WEI
63
Page 74

8 Messaging
Icons in the Inbox
Icon Description
A message that has been read
A message that has not been read
A notice that has been read for receiving a multimedia message, or a
report that has been read for having sent a multimedia message.
An unread notice for receiving a multimedia message, or an unread
report for having sent a multimedia message.
Viewing Messages in the Inbox
Step Operation
1 Select a multimedia message to view its contents.
2 During the playing, you can select Stop to stop playing.
3 During the playing, select Options to perform the following operations:
y Next page: to play the next page.
y Previous page: to play the previous page.
y Rewind: return to the first page.
y Object list: After entering the content list of this message, you may select an
item and select Save to save the message to a corresponding directory of the
folder.
64
HUA WEI
Page 75

Other Operations for the Inbox
Step Operation
1 Access the Inbox of MMS.
2 Select Options, and then you can do the following operations:
y Reply: to reply to a selected multimedia message.
y Forward: to forward a selected multimedia message.
y Delete: to delete a selected multimedia message.
y Move: to move selected multimedia message(s) to a specified folder.
y Folder: to save the multimedia message(s) you moved.
y Callback: to call back a selected multimedia message sender.
y Save contact: to save a selected multimedia message sender’s information.
y Sort: to sort the messages in the Inbox by senders or by date.
y Unselect all: to cancel all the selections in the Inbox.
y Select all: to select all the multimedia messages in the Inbox.
y Settings: to set parameters relating to multimedia messaging. For details,
please refer to “MMS/Settings” on page
y Memory status: to view the memory status of multimedia messages, including
70.
the occupied memory of every mailbox, Sample and Folder and that of the
total.
8 Messaging
Drafts
The Drafts is used to save the multimedia messages you created and saved and those failed
to be sent.
HUA WEI
65
Page 76

8 Messaging
Icons in the Drafts
Icon Description
A multimedia message saved after you created it
A multimedia message failed to be sent
Viewing and Editing Messages in the Drafts
Step Operation
1 Enter the Drafts and select the multimedia message to be viewed or edited.
2
Press
Now you can edit the message. The operations are the same as those for creating
3
to enter the editing screen.
a multimedia message.
66
HUA WEI
Page 77

8 Messaging
Other Operations for the Drafts
Step Operation
1 Access the Drafts of the MMS.
2 Select Options, and you can perform the following operations:
y New: to create a new multimedia message.
y Delete: to delete the selected multimedia messages.
y Move: to move the selected multimedia messages to a specified folder.
y Folder: to save the multimedia messages you moved.
y Sort: to sort the messages in the Drafts by recipients or by date.
y Unselect all: to cancel all the selections in the Drafts.
y Select all: to select all the multimedia messages in the Drafts.
y Settings: to set parameters related to multimedia messaging. For details,
please refer to “MMS/Settings” on page
y Memory status: to view the memory status of multimedia messages, including
70.
the occupied memory of every mailboxes, Sample and Folder and that of the
total.
Sent
The Sent is used to save the multimedia messages that have been sent successfully.
Icons in the Sent
Icon Description
A multimedia message that has been sent
HUA WEI
67
Page 78

8 Messaging
Viewing Messages in the Sent
Step Operation
1 Select a multimedia message and then select View.
2 During playing, you can select Stop to stop playing.
3 During playing, you may select Options to do the following operations:
y Next page: to play the next page.
y Previous page: to play the previous page.
y Rewind: return to the first page.
y Object list: After entering the content list of this message, you may select an
item and select Save to save this item to a directory of the folder.
68
HUA WEI
Page 79

8 Messaging
Other Operations for the Sent
Step Description
1 Access the Sent of the MMS.
2 Select Options and you have the following options:
y Forward: to forward a selected multimedia message.
y Delete: to delete selected multimedia messages.
y Move: to move selected multimedia messages to a specified folder.
y Folder: to save the multimedia messages you moved.
y Sort: to sort the messages in the Sent by recipients or by date.
y Unselect all: to cancel all the selections in the Sent.
y Select all: to select all the multimedia messages in the Sent.
y Settings: to set parameters relating to multimedia messages. For details,
please refer to “MMS/Settings” on page
y Memory status: to view the memory status of multimedia messages, including
70.
the occupied memory of every mailboxes, Sample and Folder and that of the
total.
Sample
To send messages quickly, you can turn the content of commonly used multimedia
messages into templates and have them saved. All operations on the Sample menu are
basically the same as those for the Drafts. Please refer to the Drafts for details.
Folder
You can save your multimedia messages into different folders.
You can access the Folder from the four tabs of Inbox, Drafts, Sent or Sample. The
HUA WEI
69
Page 80

8 Messaging
management of the Folder is similar to that for the Drafts or Sample. Please refer to these
sections for details.
Now let’s take the operations in the Inbox screen as example for description.
Select MMS/Inbox. Then, select Options/Folder. You can perform the following
operations:
y Rename: to rename a folder.
y Select: to enter a folder. Operations for that folder are similar to those for the Drafts or
Sample. Please refer to them for details.
Settings
You can set parameters related to multimedia messages from any of the four tabs of Inbox,
Drafts, Sent or Sample.
Now let’s take the operations in the Inbox screen as example for description.
Select MMS/Inbox. Then, select Options/Settings. You have the following options:
Sending
This option is used to set parameters related to sending multimedia messages.
y Expire time: The time for a multimedia message to be stored in the message centre since
it has been sent.
y Send report: You have two alternatives: On and Off. With this mode being enabled (On),
the network will send a report for successfully sending a multimedia message.
y Send limit: To set the size limit of a multimedia message to be sent.
y Save on send: To decide whether a multimedia message will be saved to the Sent after it
has been sent.
y Sender visibility: To set whether the sender information will be displayed when a
multimedia message is sent.
70
HUA WEI
Page 81

8 Messaging
Retrieval
This option is used to set parameters related to retrieval of multimedia messages.
y Send delivery report: You have two alternatives: On and Off. With this mode being
enabled (On), the network will reply to the sender’s multimedia message with a report
indicating that you have received the message.
y Retrieval limit: To set the size limit of a multimedia message that you can receive.
y Auto retrieval: To set whether the phone automatically receives multimedia messages or
not.
Data Account
This option is used to choose the information about the data account to be adopted when
you send multimedia messages. For more information, please refer to “Connections/Data
account” on page 139. And please consult your network operator for the content to be set.
WAP Gateway
This option is used to set parameters related to the WAP gateway: including the WAP
gateway address, HTTP Port, User name and Password. Please consult your network
operator for specific parameters.
When entering different parameters of the WAP gateway, you can use the up/down scroll
key to access different items.
MMS Center
The number of the multimedia centre has been preset on your phone. If you have deleted or
changed it by accident, please contact your network operator.
Connection Type
This option is used to set the connection type of multimedia messages.
HUA WEI
71
Page 82

8 Messaging
Select Email from the Messages screen, you can see four tabs: Inbox, Drafts, Outbox and
Sent.
Inbox
The received Emails are saved in the Inbox.
Icons in the Inbox
Icon Description
An Email that has been read
An Email that has not been read
Viewing an Email
Step Operation
1 Select an Email.
Select View. If the selected Email contains only the title, you will be prompted
2
whether to “Download” more information from the server.
Accessing the screen with the detailed content of the message, you can select
3
Reply to reply the sender.
72
HUA WEI
Page 83

Other Operations for the Inbox
Step Operation
1 Enter the Inbox tab from the Email.
2 Select Options, and you have the following options:
y Reply: to reply to a selected Email.
y Forward: to forward a selected Email.
y Delete: to delete a selected Email.
y Move to: to move a selected Email to a specified folder.
y My folders: to enter “My folders” screen for saving your moved Emails in a
different folder.
y Sort: to sort the Emails in the Inbox by date, by sender or by subject.
y Sync inbox: to retrieve Emails from the Email server.
y Unselect all: to cancel all the selections in the Inbox.
y Select all: to select all the Emails in the Inbox.
y Settings: to set parameters related to Emails. For more information, please
refer to “Email/Settings” on page
78.
Drafts
The Drafts is used to save the Emails you created.
8 Messaging
Icon in the Drafts
Icon Description
An Email ready for being sent
HUA WEI
73
Page 84

8 Messaging
Viewing and Editing Emails in the Drafts
Step Operation
1 Enter the Drafts and select an Email to be viewed or edited.
2
Press
to edit the Email.
3 The methods of editing an Email are the same as those of creating a new Email.
Other Operations for the Drafts
Step Operation
1 Enter the Drafts tab from the Email.
2 Select Options, and you have the following options:
y New Email: to create a new Email.
y Delete: to delete the selected Email.
y Move to: to move the selected Email to a specified folder.
y My folders: to enter the “My folders” screen.
y Sort: to sort the Emails in the Draft by date or by subject.
y Unselect all: to cancel all the selections in the Draft.
y Select all: to select all the Emails in the Draft.
y Settings: to set parameters related to Emails. For more information, please
refer to “Email/Settings” on page
78.
Outbox
The Outbox is used to save the Emails that failed to be sent.
Icon in the Outbox
HUA WEI
74
Page 85

Icon Description
An Email that failed to be sent
Viewing and Editing Emails in the Outbox
Step Operation
1
Select an Email and press
Now you can edit the Email. The methods of editing an Email are the same as
2
to enter the “Edit email” screen.
those of creating a new Email. For details, please refer to “New Email” on page
54.
Other Operations for the Outbox
Step Operation
1 Enter the Outbox tab from the Email.
2 Select Options, and you have the following options:
y Send: to send the selected Emails.
y Delete: to delete the selected Emails.
y Move to: to move the selected Emails to a specified folder.
y My folders: to enter the “My folders” screen.
y Sort: to sort the Emails in the Outbox by date or by subject.
y Unselect all: to cancel all the selections in the Outbox.
y Select all: to select all the Emails in the Outbox.
y Settings: to set parameters related to Emails. For more information, please
refer to “Email/Settings” on page
78.
8 Messaging
HUA WEI
75
Page 86

8 Messaging
Sent
It is used to save the Emails that have been successfully sent to the Email server.
Icons in the Sent
Icon Description
An Email that has been read
An Email that has not been read
Viewing the Sent Emails
Step Operation
1
Select an Email and press
On the screen with detailed content of an Email, you can select Reply to answer
2
to enter the “View Email” screen.
the sender.
76
HUA WEI
Page 87

8 Messaging
Other Operations for the Sent
Step Operation
1 Enter the Sent tab from the Email.
2 Select Options to perform the following operations:
y Forward: to forward a highlighted Email.
y Delete: to delete selected Emails.
y Move to: to move selected Emails to a specified folder.
y My folders: to enter the “My folders” screen.
y Sort: to sort the Emails in the Sent by date or by subject.
y Unselect all: to cancel all the selections in the Sent.
y Select all: to select all the Emails in the Sent.
y Settings: to set parameters related to Emails. For more information, please
refer to “Email/Settings” on page
78.
My Folders
You can store your Emails into different folders.
You can access folders from any of the Inbox, Drafts, Outbox or Sent. The management of
the information in the folders is the same as that for the Sent. For more information, please
refer to the descriptions for it.
Now let’s take the operations in the Inbox as example for description.
Select Email/Inbox. Then, select Options/My folders. You have the following options:
y Rename: to rename a folder.
y Select: to enter a folder. Operations for that folder are similar to those for the Sent. For
more information, please refer to that section.
HUA WEI
77
Page 88

8 Messaging
Settings
You can set parameters related to Emails from the options of any of the Inbox, Drafts,
Outbox, Sent or a directory of My folders.
Now let’s take the operations in the Inbox screen as example for description.
Select Email/Inbox. Then, select Options/Settings. You have the following options:
Accounts
It is used to add, edit and delete Email accounts.
1 Select Options/Add account. You can enter the account name and then press
to
enter “General settings” screen.
2 You can enter parameters related to your account, including “From name”, “From addr”,
“Protocol”, “Incom. server”, “User name”, “Password” and “Outgo. server”.
3 Select Advanced to enter the “Advanced settings” screen. The advanced settings include
“Signature for” (whether your signature is used), “Edit signature”, “Delete on server”,
“Incom. port” (the port for incoming Emails), “Outgo. port (the port for outgoing Emails)
“Use authentication”, “Same as incoming” (whether it is the same as the settings for
incoming Emails), “User name” and “Password”. After the setting, press General.
Note:
For more information of the requirements on the account settings, please contact
your Email service provider.
4 On the “General settings” screen, select Save to save this account setting.
5 On the “Accounts” screen, select Activate to activate this account.
6 To delete an account, select the account to be deleted from the “Accounts” screen, then
select Options and select Delete account.
HUA WEI
78
Page 89

8 Messaging
Common Options
y Reply include origin: to reply to an Email with the original text included.
y Save sent messages: to save an Email that has been sent to the Sent.
y Send limit: to set the size limit of an Email to be sent.
y Receive limit: to set the size limit of an Email that can be received. When an Email
comes, if the size of it is more than the limit, you will only receive the header of the
Email. If you have enabled Only header, you will only receive the header when an Email
comes.
y Data account: to set the data account information for sending your Emails. For more
information, please refer to “Connections/Data Account” on page
139 and consult your
Email service provider for data account parameters.
After the setting, select Back to exit.
Memory Status
It displays the occupied memories of the Inbox, Drafts, Outbox, Sent and My folders
respectively and the Total (occupied memory) by Emails.
Alert Inbox
The Alert Inbox is used to save the Push messages you received.
To receive Push messages, you need to switch on the Alert Inbox at first. For details, please
refer to “Browser/Homepage/Settings” on page
to set the network. For more information, please refer to “Browser/Select Profile” on page
113.
111. To use the browser functions, you need
Viewing Push Messages
Enter the Alert Inbox and select a Push message. Select Detail to view the properties of the
Push message. Then, select Load to start the WAP browser. Connect a URL specified by the
Push message and view the details.
HUA WEI
79
Page 90

8 Messaging
y : A Push message that has been read
y : A Push message that has not been read
Other Operations for the Alert Inbox
Enter the Alert Inbox and select Options to perform the following operations:
Load
Start the WAP browser and connect a URL specified by the Push message.
Delete
It is used to delete the selected messages.
Unselect all
It is used to cancel all the selections upon the Push messages.
Select all
To select all the Push messages.
Voice Mail Number
To use the voice mail services, you need to apply to your network operator for it. After
setting the correct number provided by your network operator, if you press and hold
in standby mode, the phone will dial out the voice mail number automatically to access the
voice mailbox.
HUA WEI
80
Page 91

8 Messaging
Step Operation
1 Select Menu/Messages/Voice mail No..
2 Input the voice mail number and select OK.
Text template
Your U626 has been preset with some commonly used phrases in inputting message,
sending messages while making a call and auto replying. You can edit them if you want.
Step Operation
1 Select Menu/Messages.
2 Select Text template.
3 Select the phrase to be modified; and then select Modify.
HUA WEI
81
Page 92

Page 93

9 Multimedia
The Multimedia function provides you with various multimedia services such as taking
photos, making videos, recording voice, viewing images, playing music and playing video.
Camera
With this function, you can take photos with your phone at any moment.
Access the Camera function to display the viewfinder screen. If the image on the screen is a
reversal one, you can press to overturn it manually. You can also find views by
rotating the camera lens.
In viewfinder mode, press
In viewfinder mode, pressing the right function key to select the Gallery, you can access
the camera gallery to view the existing pictures. Then, you can press
viewfinder.
The pictures taken with the phone will be saved to the Gallery/Images/Camera folder.
to capture pictures.
to back to
HUA WEI
83
Page 94

9 Multimedia
Note:
If you exit from the camera function and access it again, it takes pictures with the
resolution used in the last time. If you select the full screen mode with resolution of
240 × 320, you can open the screen function menu in this way: under the full screen
viewfinder mode, press the left function key, and select Zoom display from the
popup menu to access the non-full-screen mode with resolution of 240 × 320.
Introduction to the Screen Functions
The control panel at the bottom of the viewfinder screen contains two parts, namely, the
screen function menu and the resolution of the current photo.
The screen function menu contains the following functions:
Function Description
The brightness: You can press the up/down scroll key to adjust the
brightness.
The contrast: You can press the up/down scroll key to adjust the contrast.
The foci: You can press the up/down scroll key to adjust the foci of the
camera lens.
The resolution: You can press the up/down scroll key to adjust the
resolution.
The frame: You can add a frame for each of the pictures. To select a
frame, you can press the up/down scroll key.
Introduction to the Menu Functions
In the viewfinder mode, press the left function key to open a menu where you can execute
HUA WEI
84
Page 95

the following operations:
Operation Description
Frame
With this function, you can select a frame file, or cancel using
frames in the process of taking pictures.
Zoom display
With this function, you can adjust the size of the viewfinder
without changing the solution.
Image quality
With this function, you can select an image quality for your
picture.
Effects
With this function, you can select an effect for your picture.
9 Multimedia
White balance
The phone provides you with several kinds of white balance
including Auto, Fluorescent, Incandescent, Daylight and
Cloudy.
Self timer
With this function, you can take pictures on the basis of timing.
The count-down time is 10 seconds.
Save prompt
If this function is enabled, you will be prompted whether to save
the photo after you take a photo; If this function is disabled, the
photo will be saved automatically.
Rotate image
With this function, you can rotate the picture when you find a
view. You can also press to rotate it.
Save to
With this function, you can select to save your pictures in your
Phone or on the Memory card.
Shutter tone With this function, you can select a sound for the shutter.
Reset
With this function, you can restore the defaulted settings of the
camera.
Video camera With this function, you can access the functions of video camera.
HUA WEI
85
Page 96

9 Multimedia
Video Camera
With this function, you can make video with your phone at any moment.
In the menu, select Media/Video camera, and press
In the viewfinder mode, you can press
In the viewfinder mode, you can press the right function key to select the Gallery to view
the recorded video files. Then, you can press
Introduction to the Functions on Viewfinder Screen
After accessing the viewfinder, if the image is a reversal one, you can press to
overturn it manually. You can also rotate the lens to adjust the shoot angle.
Introduction to the Screen Functions
The control panel at the bottom of the viewfinder screen displays the progress bar, the
screen function menu and the resolution.
The screen function menu contains the following functions:
Function Description
The brightness: You can press the up/down scroll key to adjust the
brightness.
The contrast: You can press the up/down scroll key to adjust the contrast.
The foci: You can press the up/down scroll key to adjust the foci of the
lens.
to make video.
to access the viewfinder screen.
to back to the viewfinder mode.
86
HUA WEI
Page 97

9 Multimedia
Function Description
The resolution: You can press the up/down scroll key to adjust the
resolution.
Introduction to the Menu Functions
In the state of viewfinder, press the left function key to open a menu where you can execute
the following operations:
Operation Description
Zoom display
With this function, you can adjust the size of the viewfinder
without changing the solution.
Quality
With this function, you can select an image quality for your
picture.
Frame rate With this function, you can select frame rate for your picture.
Audio
With this function, you can select to record audio while making
video.
Duration With this function, you can select the duration for making a video.
Rotate image
With this function, you can rotate the picture. You can also press
to rotate it.
Save to
With this function, you can select to save your video files in the
Phone or on the Memory card.
Memory size
With this function, you can view the ratio of the used space to the
total space and the duration for the free space.
HUA WEI
87
Page 98

9 Multimedia
Operation Description
Reset
Camera With this function, you can access the functions of camera.
Introduction to the Functions During Shooting
With this function, you can restore the defaulted settings of the
video camera.
In the state of viewfinder, you can press
can execute the following functions:
Introduction to the Screen Functions
In the state of making video, you can adjust the brightness, contrast and foci. You can use
the left/right scroll key to select a function from the screen function menu, and use the
up/down scroll key to adjust it.
Introduction to the Softkey Functions
In the process of making video, you can press
the shooting; or you can press the right function key to stop the shooting.
In the state of making video, if you press the right function key to stop making video, the
video files will be saved at the Gallery/Videos/Video camera folder.
to make video. In the state of shooting, you
to switch between pause and going on
Voice Recorder
The U626 phone provides you with the function of recording voice. You can set the duration
for the recording.
HUA WEI
88
Page 99

9 Multimedia
Select Menu/Media/Voice recorder, then, press
to access the voice recorder screen
where you can execute the following operations:
Preparations Before the Recording
1 Setting duration: On the standby screen of the voice recorder, you can press the left
function key to set the duration.
2 Viewing record: On the standby screen of the voice recorder, you can press the right
function key and select Gallery to view the audio files.
3 Starting recording: On the standby screen of the voice recorder, you can press
to
start recording.
Operations During the Recording
1 Pause: In the process of recording, you can press
to stop the current recording, and
press again to continue.
2 Stopping and saving: In the process of recording, you can press the left scroll key to stop
the current recording. And the audio file is saved in Gallery/Music/Voice recorder
automatically.
3 Exiting the current audio file: In the process of recording, you can press the right
function key or press
to exit the current audio file.
Operations After the Recording
To play an audio file instantly: When the recording is finished, you can press the right scroll
key to play it instantly. You can press the left scroll key to stop the playing, and press the
right scroll key to switch between the two functions of play and pause.
HUA WEI
89
Page 100

9 Multimedia
Note:
While playing a recorded audio file instantly, you can press the Volume key to
adjust the volume.
Viewing Images
With this function, you can view various images including those coming with the phone,
those shot by yourself with the phone, those downloaded from the Internet and those
attached to messages and Emails.
The phone supports images of many formats including JPG, BMP, WBMP, PNG, GIF
87a/89a, GIF animation and BCI.
You can view an image in two ways: browse it; or to zoom it in to view it in the original
size. You can press
follows:
Browsing the Images
to switch between these two modes. The detailed description is as
Select one or several images from the image list. Then, press
of browsing.
The image is zoomed proportionally and displayed when you view it on the screen of
browsing status, during which you can see such information as the name and size of the
image.
In the state of browsing images, you can execute the following operations by following the
prompts of the functional keys:
Operation Description
Press the left scroll key to view the previous image.
90
HUA WEI
to view them in the state
 Loading...