

Huawei U2800A Owner's Manual

1 Copyright . . . . . . . . . . . . . . . . . . . . 1
6 Messaging . . . . . . . . . . . . . . . . . . 13
2 Getting Started . . . . . . . . . . . . . . . . 4
Your Phone at a Glance . . . . . . . . 4
Keys and Functions . . . . . . . . . . . . 5
Inserting the SIM Card and the
Battery . . . . . . . . . . . . . . . . . . . . . . 6
Charging the Battery . . . . . . . . . . . 7
Status Icons . . . . . . . . . . . . . . . . . . 7
3 Text Entry . . . . . . . . . . . . . . . . . . . . 9
Entering English . . . . . . . . . . . . . . . 9
Entering Spanish . . . . . . . . . . . . . 10
Entering a Number . . . . . . . . . . . 10
4 Voice Services . . . . . . . . . . . . . . . 11
Making a Call . . . . . . . . . . . . . . . . 11
Creating and Sending a Text
Message . . . . . . . . . . . . . . . . . . . 13
Reading a Message . . . . . . . . . . . 13
7 My Stuff . . . . . . . . . . . . . . . . . . . . 14
Alarm . . . . . . . . . . . . . . . . . . . . . . 14
Memo . . . . . . . . . . . . . . . . . . . . . . 14
Calendar . . . . . . . . . . . . . . . . . . . 14
Recorder . . . . . . . . . . . . . . . . . . . 14
Stopwatch . . . . . . . . . . . . . . . . . . 15
World Time . . . . . . . . . . . . . . . . . 15
Calculator . . . . . . . . . . . . . . . . . . 15
Gallary . . . . . . . . . . . . . . . . . . . . . 15
8 Mobile Web . . . . . . . . . . . . . . . . . 16
Answering a Call . . . . . . . . . . . . . 11
5 Contacts . . . . . . . . . . . . . . . . . . . . 12
Adding a Contact . . . . . . . . . . . . . 12
Searching for a Contact . . . . . . . 12
Connect to a service . . . . . . . . . 16
9 AppCenter . . . . . . . . . . . . . . . . . . 17
10 Services . . . . . . . . . . . . . . . . . . . 18

Mobile Care . . . . . . . . . . . . . . . . . 18
Data Balance . . . . . . . . . . . . . . . . 18
11 Settings . . . . . . . . . . . . . . . . . . . . 19
Enabling/Disabling the Phone
Lock . . . . . . . . . . . . . . . . . . . . . . . 19
PIN and PUK . . . . . . . . . . . . . . . . 19
Locking the Keypad . . . . . . . . . . . 20
Adjusting the Volume . . . . . . . . . 20
Setting the Date and Time . . . . . 20
12 TTY Operation . . . . . . . . . . . . . . 22
Using TTY . . . . . . . . . . . . . . . . . . . 22
Setting the TTY Mode . . . . . . . . . 22
13 Warnings and Precautions . . . . 23

1 Copyright
are approved by respective copyright holders
under licenses.
Devices purchased for use on AT&T's system
Copyright © Huawei Technologies Co.,
Ltd. 2011. All rights reserved.
No part of this document may be reproduced
or transmitted in any form or by any means
without prior written consent of Huawei
Technologies Co., Ltd.
The product described in this manual may
clude copyrighted software of Huawei
in
Technologies Co., Ltd and possible licensors.
Customers shall not in any manner
reproduce, distribute, modify, decompile,
disassemble, decrypt, extract, reverse
engineer, lease, assign, or sublicense the said
software, unless such restrictions are
e designed for use exclusively on AT&T’s
r
a
system. You agree that you won't make any
modifications to the Equipment or
programming to enable the Equipment to
operate on any other system. A voice plan is
required on all voice-capable devices, unless
specifically noted otherwise in the terms
governing your agreement. Some devices or
plans may require you to subscribe to a data
plan.
Your phone is designed to make it easy for
ou to
y
your protection, AT&T wants you to be aware
that some applications that you enable may
access a wide variety of content. For
prohibited by applicable laws or such actions
involve the location of your phone being
1

shared. For applications available through
devices which bypass AT&T controls. AT&T
AT&T,
you decide how an application may use the
location of your phone and other phones on
your account. However, AT&T's privacy tools
do not apply to applications available outside
of AT&T. Please review the terms and
conditions and the associated privacy policy
for each location-based service to learn how
location information will be used and
protected.
Your phone may be used to access the
n
I
goods, applications, and services from AT&T
or elsewhere from third parties. AT&T
AT&T offers privacy controls that let
ternet and to download, and/or purchase
may collect certain types of information from
your device when you use AT&T services to
provide customer support and to improve its
services. For more information on AT&T's
Privacy Policy, visit att.com/privacy.
Trademarks and Permissions
, HUAWEI, and are trademarks or
registered trademarks of Huawei
Technologies Co., Ltd.
Other trademarks, product, service and
ompa
c
of their respective owners.
ny names mentioned are the property
provides tools for you to control access to the
Internet and certain Internet content. These
controls may not be available for certain
Notice
Some features of the product and its
accessories described herein rely on the
software installed, capacities and settings of
2

local network, and may not be activated or
ARE MADE IN RELATION TO THE ACCURACY,
may be
network service providers, thus the
descriptions herein may not exactly match
the product or its accessories you purchase.
Huawei Technologies Co., Ltd reserves the
ht to change or modify any information or
rig
specifications contained in this manual
without prior notice or obligation.
limited by local network operators or
NO WARRANTY
THE CONTENTS OF THIS MANUAL ARE
PROVIDED “AS IS”. EXCEPT AS REQUIRED BY
APPLICABLE LAWS, NO WARRANTIES OF ANY
RELIABILITY OR CONTENTS OF THIS MANUAL.
TO THE MAXIMUM EXTENT PERMITTED BY
P
PLICABLE LAW, IN NO CASE SHALL
A
HUAWEI TECHNOLOGIES CO., LTD BE LIABLE
FOR ANY SPECIAL, INCIDENTAL, INDIRECT, OR
CONSEQUENTIAL DAMAGES, OR LOST
PROFITS, BUSINESS, REVENUE, DATA,
GOODWILL OR ANTICIPATED SAVINGS.
Import and Export Regulations
Customers shall comply with all applicable
export or import laws and regulations and
will obtain all necessary governmental
KIND, EITHER EXPRESS OR IMPLIED,
INCLUDING BUT NOT LIMITED TO, THE
IMPLIED WARRANTIES OF MERCHANTABILITY
AND FITNESS FOR A PARTICULAR PURPOSE,
permits and licenses in order to export, reexport or import the product mentioned in
this manual including the software and
technical data therein.
3
2 Getting Started
16
15
1
13
12
11
10
3
4
9
5
6
2
7
8
14
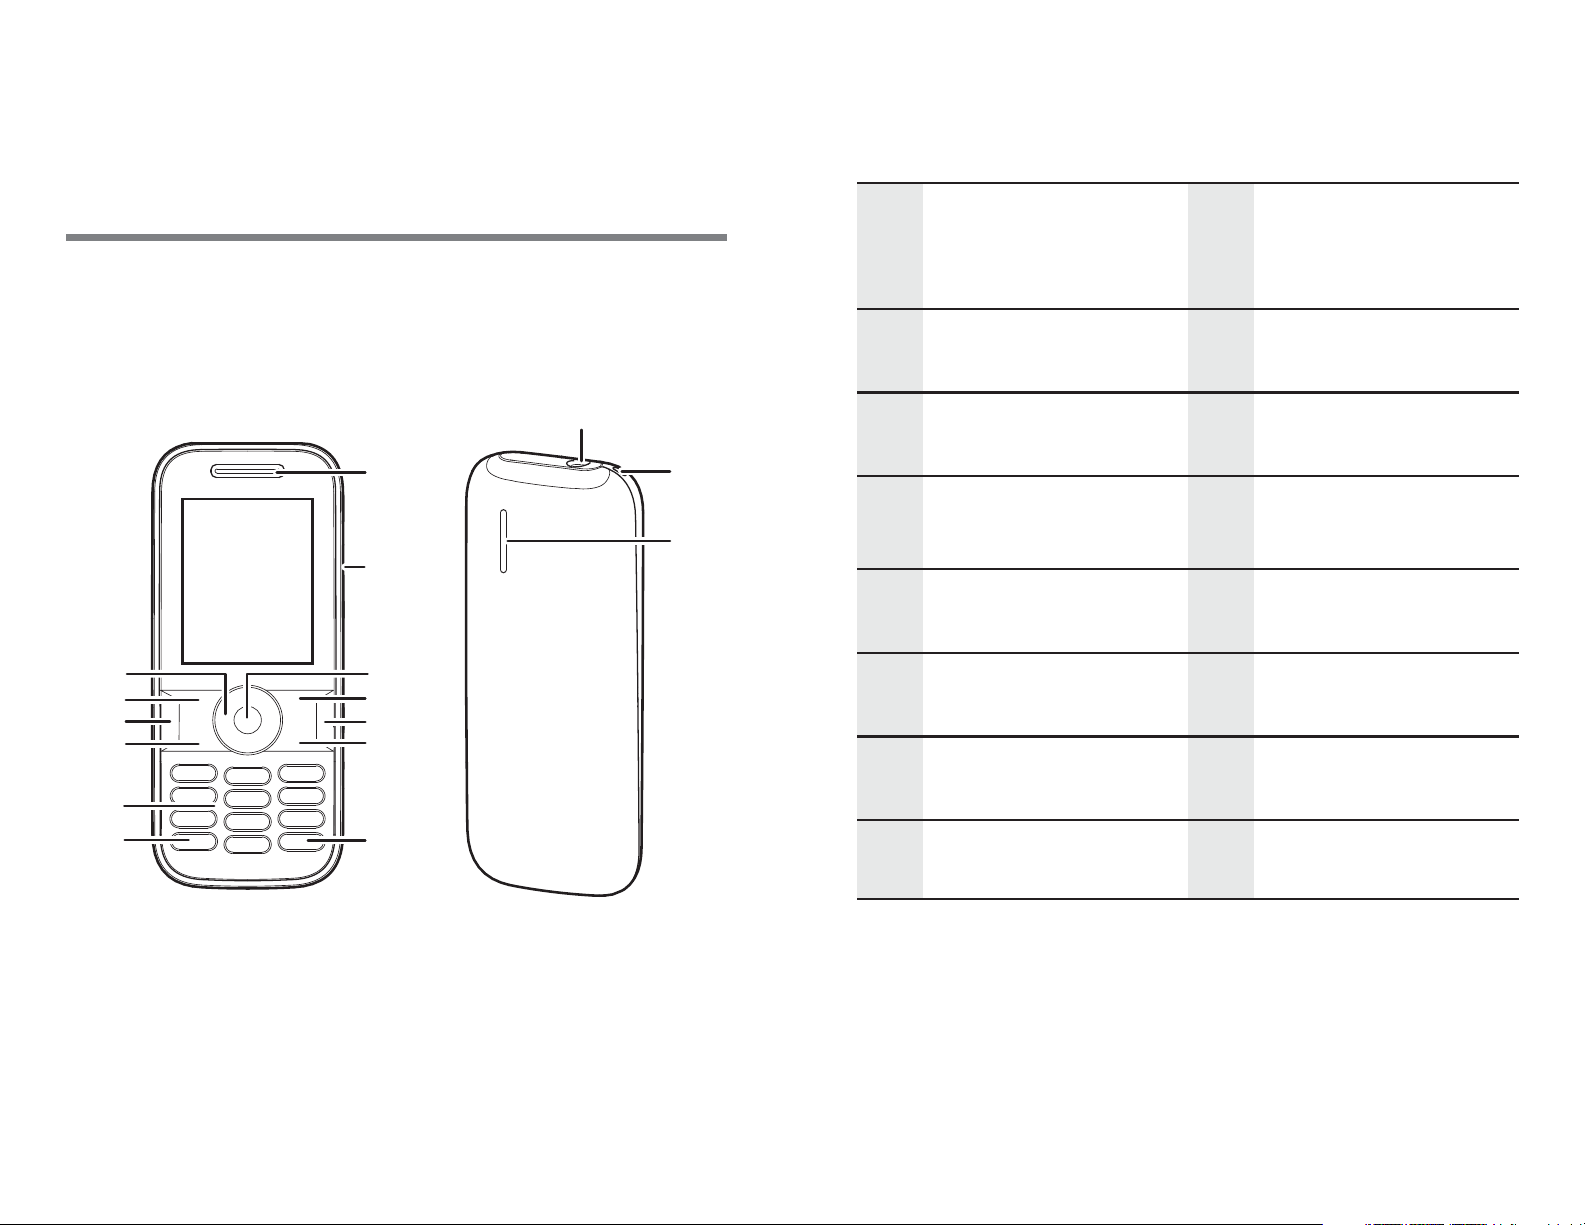
Your Phone at a Glance
Charger/Data
1 Earpiece 2
cable connector
3
5
7
9
11
13
Confirm Key
Clear Key
# Key
Numeric Keys
Speaker Key
Navigation Keys
4
6
8
10
12
Right Soft Key
End Key
* Key
Call Key
Left Soft Key
14 Headset jack
15 Strap Hole 16 Speaker
4

Keys and Functions
Delete a character in editing
Call Key
End Key
Left Soft
Key
Right Soft
y
Ke
• Make or answer a call.
• Access recent calls in standby
mode.
• Press and hold to power the
phone on or off.
• End or reject a call.
• Return to standby mode.
• Turn backlight on or off.
Select the
the lower left
screen.
Select the option displayed in
the lo
screen.
wer right corner of the
option displayed in
corner of the
Clear Key
Speaker
Key
* Key
# Key
mode
in an application.
Press and hold to switch
betw
modes.
Press and hold to switch
be
Meeting mode.
Switch between text input
methods
or delete a selected item
een speaker and headset
tween current mode and
when editing te
xt.
5

• Enter numbers, letters, and
12
34
sym
bols.
• Access voicemail in standby
Inserting the SIM Card and the
Battery
Keys 0-9
Confirm
Key
Navigation
ys
Ke
mode by pres
the 1 key.
• Press and hold a number 2-9
to sp
number assigned to that key.
onfirm a selection.
C
•S
• Access the corresponding
sh
screen:
Up: Messaging;
Down: Address Book;
eed-
croll through a menu.
ortcut menu from the idle
sing and holding
dial the phone
Right: Alarm;
Left: Calendar.
6
Charging the Battery
Before charging the battery with the travel
Status Icons
charger, ensure that the battery is installed in
your phone. Do not use a damaged battery or
charger.
1. Connect the charger to a power outlet.
2. Connect the charger to the connector of
the ph
When the battery icon changes to fully
charged, it indicates that your phone is
fully charged.
3. When the phone is fully charged,
disc
and then from the power outlet.
one. The phone begins charging.
onnect the charger from the phone
Signal strength Roaming
2G network
available
The phone is
receiving and
sending data
through 2G
network
Call in
3G network
available
The phone is
receiving and
sending data
through 3G
network
The memory
for text
7
progress
messages is
full
New text
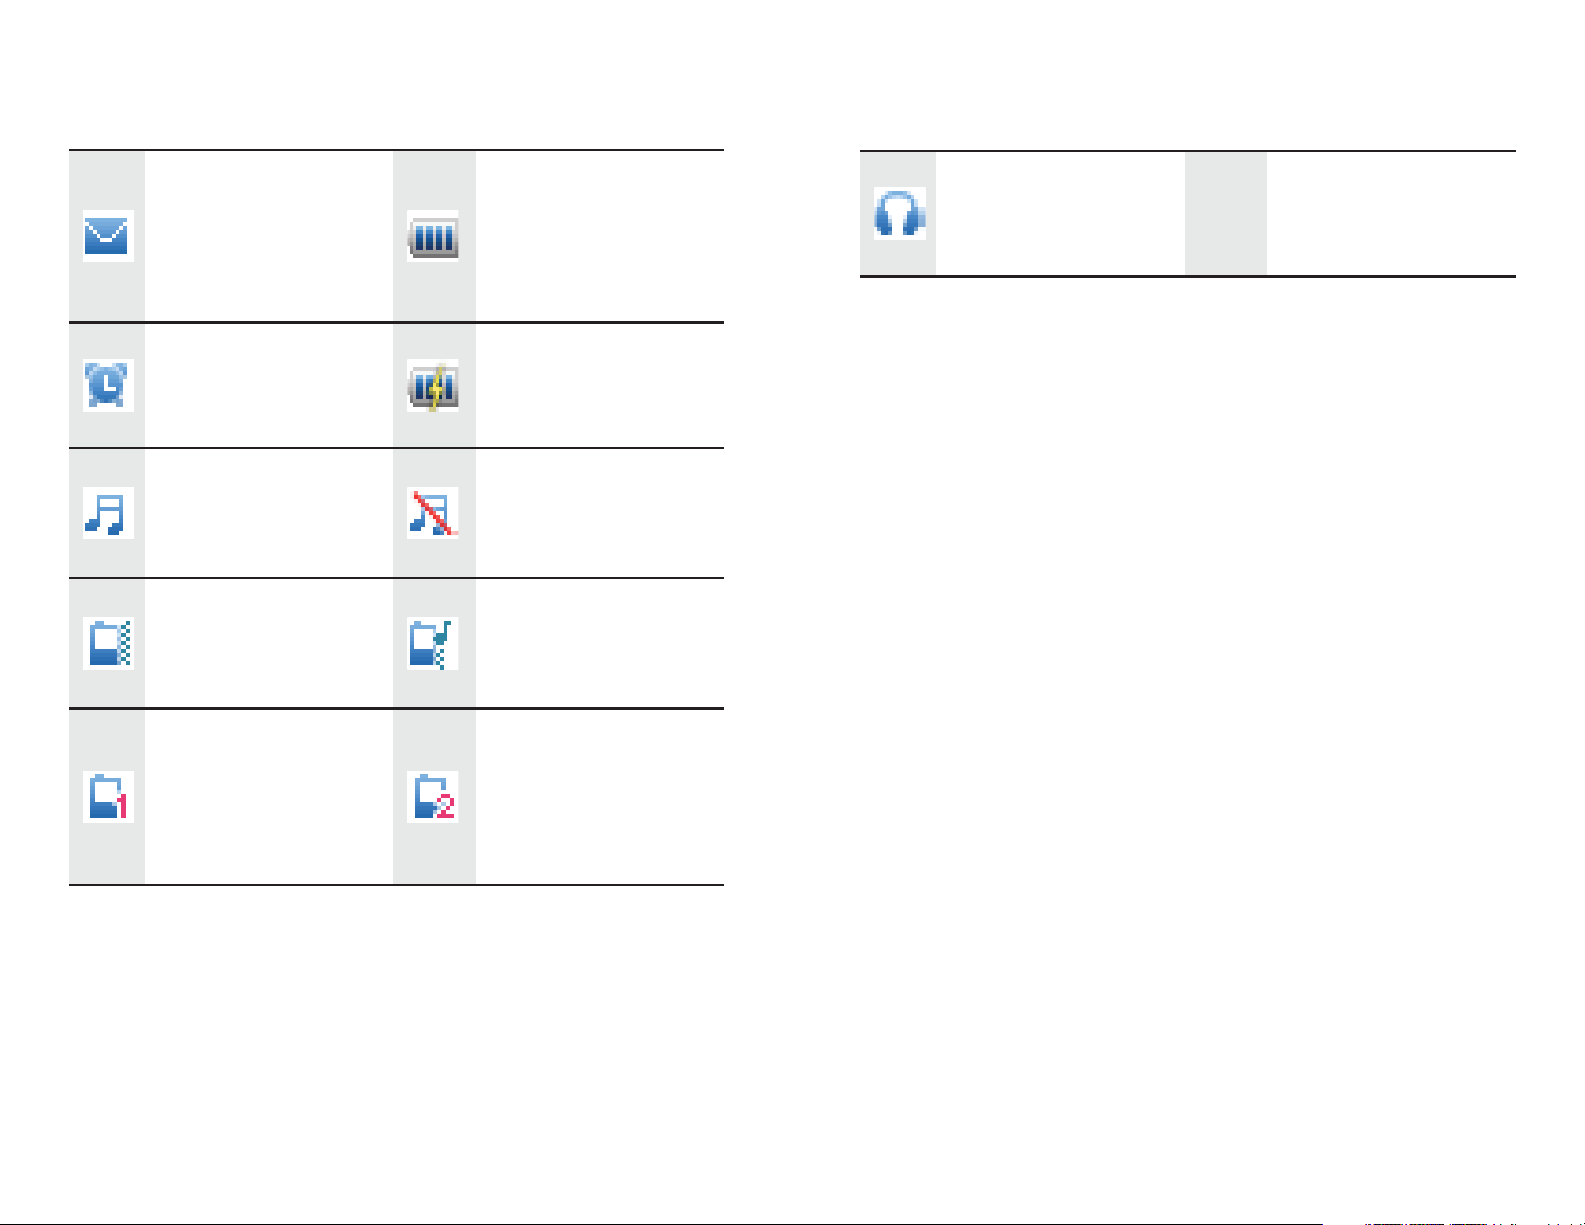
Headset
message
received
Alarm clock
enabled
General mode
activated
Meeting mode
activated
My Profile 1
mode
Battery level
Battery
charging
Silent mode
activated
Outdoor mode
activated
My Profile 2
mode
connected
activated
activated
8

3 Text Entry
Entering English
Select Menu > Settings > Phone > Text Input
Settings > Predictive Onput to turn on or off
the smart English input mode.
Smart English Input Method
1. Begin spelling a word by pressing the key
labeled with the desired letter once. Then
the phone predicts the commonly used
words according to the numeric sequence
of key presses.
to display the symbol list. Then you can
select and enter a symbol.
Note:
The indicator of the current input method is
displayed in the upper left corner of the
screen. You can press # Key to change the
input method.
Traditional English Input Method
The traditional text input method allows you
to enter uppercase or lowercase English
letters. You can press the key labeled with
the desired letter once to enter the first letter
on the key, twice to enter the second letter
2. Select the desired word, and press
Conf
3. Press 1 Key to enter a pe
commonly used punctuation. Press * Key
irm Key or 0 Key to enter the word.
riod or other
9
on the key, and so on.
• Press 1 Key to enter a period or another
mmonly used punctuation.
o
c

• Press * Key on
enter a carriage return, and three times to
ce to enter a space, twice to
to the digit and press Confirm Key to
enter it.
enter 0.
Entering Spanish
You can enter Spanish words using Spanish
text input methods.
The traditional Spanish input method and the
ar
sm
traditional English input method and the
smart English input method. For details, see
"Entering English".
t Spanish input method are similar to the
Entering a Number
• In "123" input mode, press the key
labeled with your desired digit.
• In any text input mode, except the "123"
i
to enter the digit.
t mode, press and hold a number key
npu
• In "Abc" input mode, press a number key
consecutively until the digit appears.
• In "En" input mode, press a number key
a
nd th
en press Navigation Keys to scroll
10

4 Voice Services
Dialing via Call Log
Select Menu > Recent Calls or press Call Key
to select the number from call logs. Press the
Making a Call
Dialing via Keypad
1. In standby mode, enter the phone
number. To make an international call,
press
international long-distance code (+), and
then enter the country code or region
code, area code, and phone number.
2. Press Ca
3. Press End Key or Select En
call.
Dialing via Contacts
* Key twice to enter the
ll
Key to dial the number.
d to end the
Navigation Keys to switch between all calls,
ssed calls, received calls and dialed calls.
mi
Then press Cal
l Key to dial the number.
Answering a Call
When there is an incoming call, you can press
Call Key to answer it, press End Key to reject
it.
• If the any-key answer function is enabled,
you can pr
Right Soft Key to answer an incoming call.
• If the headset auto-answer function is
enab
to the phone, the incoming call is
answered automatically.
led, when the headset is connected
ess any key except End Key and
Select Menu > Address Book, Select a
contact, and press Call Key to make a call.
11

5 Contacts
Adding a Contact
1. Select Menu > Address Book > Create
Contact.
2. On the Edit screen, enter the information
about th
least one number needs to be entered.)
3. Select Save to
e contact. (For each contact, at
save the contact.
Searching for a Contact
1. Select Menu > Address Book.
2. Enter the name of the contact in the text
The phone automatically lists the
box.
contacts that match the search
information you entered.
12

6 Messaging
Creating and Sending a Text
Message
1. Select Menu > Messaging > Create
Message.
2. Enter one or more recipient’s numbers
ctly, or press Confirm Key to access
dire
the contact list and then select one or
multiple recipients.
3. Enter text contents in the text box.
1. Select Menu >
2. Press Navi
message. Press Confirm Key to read the
message.
gation Keys to scroll to a
Messaging > Inbox.
n
4. Select Optio
message
s > Send to send the
Reading a Message
To read a text message stored in the inbox,
do the following:
13

7 My Stuff
Alarm
1. In standby mode, select Menu > My stuff >
Alarm.
2. Select On or Off to
Pres
s Confirm Key to edit.
Memo
1. In standby mode, select Menu > My stuff >
Memo.
ate
2. Select Cre
3. Press Confirm Key to save the new memo.
to create a new memo.
turn on/off the alarm.
2. Select Options,
are available.
• View: To view all the reminders.
• Add: To add a new reminder.
• View by: To set the calendar view by
Day, Week or List.
• Go to Date: To go to a date.
• Settings: To set the firest day of week.
and the following options
Recorder
1. In standby mode, select Menu > My stuff >
Recorder
2. Press Conf
Press Confirm Key to pause or continue.
irm Key to start recording.
Calendar
1. In standby mode, select Menu > My stuff >
Calendar.
14
3. Select Stop to
clip is automatically saved to the
stop recording. The sound

Recorders folder of the default storage
you select.
that
2. Use the Navigation Keys to move the
creen time line to the new desired
ons
4. Press Con
Note:
When recording a sound clip, keep the
microphone of your phone near the sound
source for better recording quality.
firm Key to play the sound clip.
Stopwatch
1. In standby mode, select Menu > My stuff >
Stopwatch.
2. Select Sta
Stop to stop the stopwatch.
rt to s
tart the stopwatch. Select
World Time
1. In standby mode, select Menu > My stuff >
time zone.
Calculator
1. In standby mode, select Menu > My stuff >
Calculator.
2. Enter numbers using the numeric keys.
Enter
by pressing the Navigation Keys.
the operation
for your calculation
Gallary
1. In standby mode, select Menu > My stuff >
Gallary.
2. You can view pictures, ringtones and
e
oth
r files from the gallary.
World Time.
15

8 Mobile Web
Connect to a service
Connect to the service in one of the
You can access various mobile internet
services with your device browser.
Check the availability of thes
pricing, and instructions with your service
provider.
With the device browser you can view the
e
rvices that use wireless markup language
s
(WML) or extensible hypertext markup
language(XHTML) on their pages. Appearance
may vary due to screen size. You may not be
able to view all detail of the internet pages.
Note:
e services,
following ways:
1. In standby mode, select Menu > Mobile
Web.
2. In the mobile web homescreen:
• Select Bo
of service.
• Select Open New Page to enter the
ad
dress of a website.
okmarks to sel
ect a bookmark
Use only services that you trust and that offer
adequate security and protection against
harmful software.
16

9 AppCenter
In standby mode, select Menu > AppCenter.
The AppCenter website provides links to a
variety of content such as ringing tones,
games, graphics, multimedia, and applications
that may be pruchased and downloaded to
your device.
For information about billing or accessing this
webs
ite, contact your service provider.
17

10 Services
Mobile Care
In standby mode, select Menu > AT&T Mobile
Care to access a self-help menu to manage
your account. Mobile Care provides links to
help with your device and service.
For information about billing or about
cces
a
provider.
sing this website, contact your service
Data Balance
To check your data package balance anytime
– enter *777*3# and press SEND from your
device.
In standby mode, you can also select Me
Da
ta Balance.
nu >
18

11 Settings
Enabling/Disabling the Phone
Lock
The phone lock protects your phone from
unauthorized use. The phone lock function is
not enabled when you purchase the phone.
You can change the default phone lock code
000000 to any string of 4 to 8 digits.
PIN and PUK
The personal identification number (PIN)
protects your SIM card from unauthorized
use. The PIN unblocking key (PUK) can unlock
blocked PIN. Both PIN and PUK are delivered
with the SIM card. For details, contact your
service provider.
If you enter wrong PINs for a specified
mber of times consecutively, the phone
u
n
asks you to enter the PUK.
1. Select Menu > Settings >
Lock.
2. Press Nav
following options:
• On: The phone lock wil
next time the phone is powered on.
• Off: The phone
igation Keys to select one of the
lock will be disabled.
Security > Phone
l be enabled the
19
If you enter wrong PUKs for a specified
u
mber of times consecutively, the SIM card
n
is invalidated permanently. Contact your
service provider for a new one.
 Loading...