

Page 1

S1700-8-AC&S1700-8G-AC Unmanaged Switches
Installation Quick Start
HUAWEI TECHNOLOGIES CO., LTD.
Page 2
1 About This Guide
1 关于本手册
Thank you for purchasing a Huawei S1700 series switches. This guide describes the positioning, features, installation,
and cable connections of S1700 series switches. Figures in the document are for reference only and may be different
from actual devices.
2 Packing List
Chassis: S1700-8-AC or S1700-8G-AC
Quick Start Guide
Power Adapter
3 Safety Guidelines
Take ESD protection measures before the installation, for example, wear ESD gloves or ESD wrist strap.
Do not place other objects on the chassis.
4 Installing the Switch
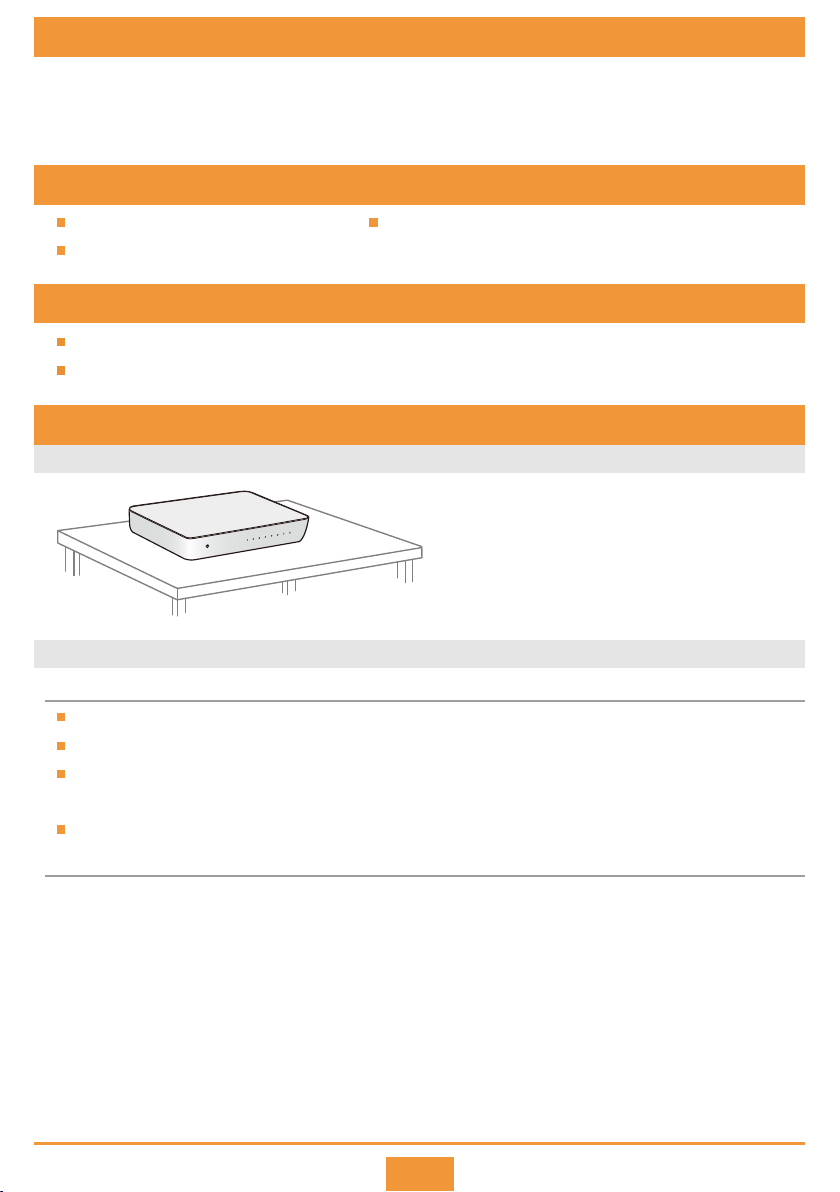
Scenario 1: Installing the Device on a Worktable
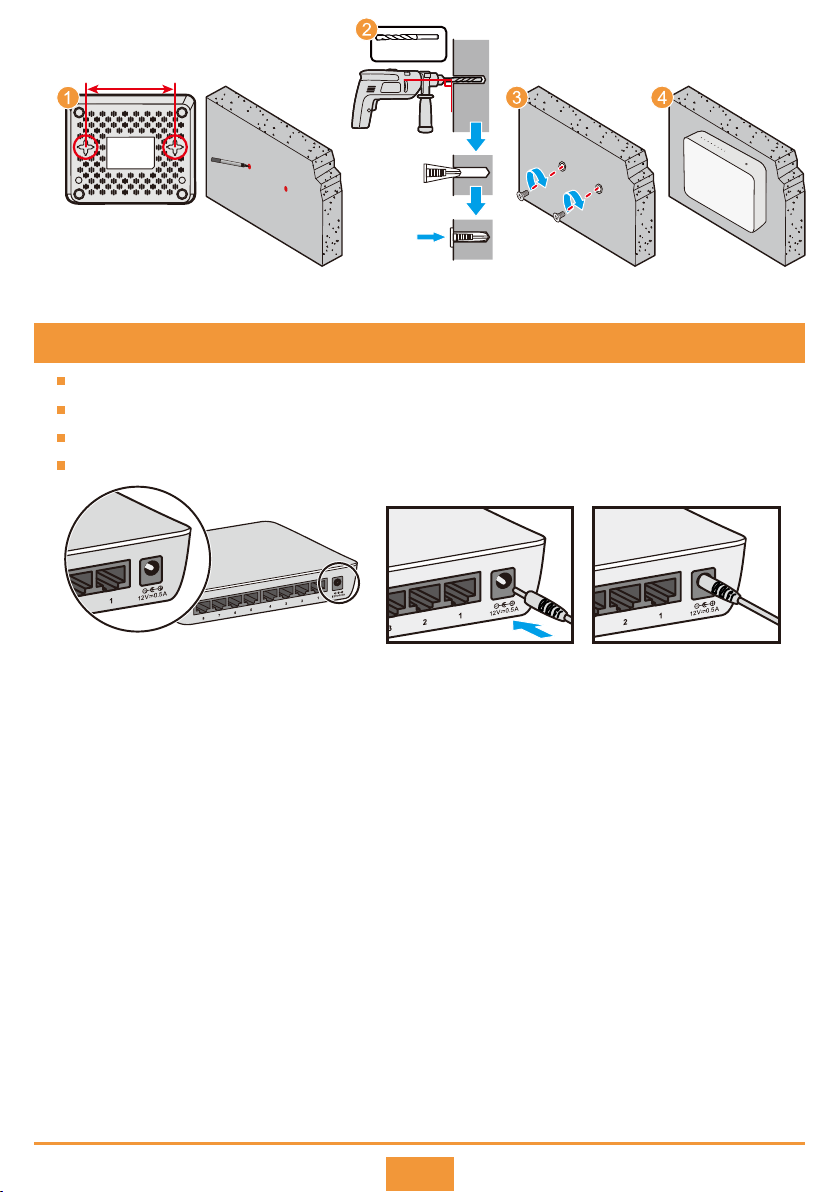
Scenario 2: Installing the Device on a Wall
Before You Start
Before drilling holes in a wall, make sure there are no power cables in the wall to avoid electric shock.
The panel with ports must face down to protect the ports from water.
Ensure that there are no flammable or explosive materials near the switch and no obstructions within 100 mm
around the switch.
The M4 screws and plugs need to be purchased separately.
Installation Procedure
Measure the distance between two mounting holes on the rear panel of the switch, and mark the
Step 1
positions to drill holes on the wall according to this distance.
Use a hammer drill with φ6 drill bit to drill holes on the wall, and fix the plugs on the wall.
Step 2
Secure the M4 screws to the plugs.
Step 3
Install the switch on the wall.
Step 4
1
Page 3
φ6 drill
。
90
Expansion plug
5 Connecting Power Adapter
Do not power on the device before device installation and cabling are completed.
S1700-8-AC and S1700-8G-AC can use only the power adapter delivered with them.
The power input of S1700-8-AC is 5 V/1 A.
The power input of S1700-8G-AC is 12 V/0.5 A.
2
Page 4
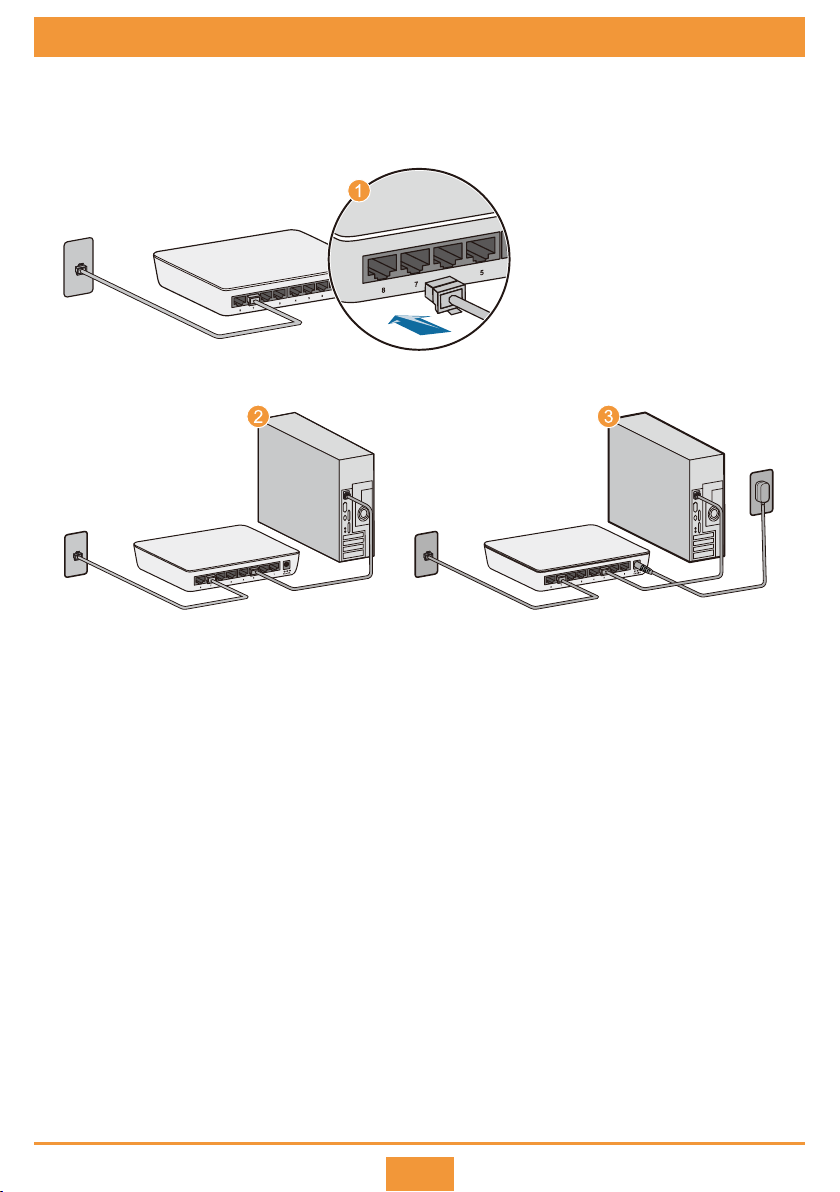
6 Laying out Cables
Connect the device to network interface.
Step 1
Connect the device to the computer.
Step 2
Power on the device.
Step 3
3
Page 5
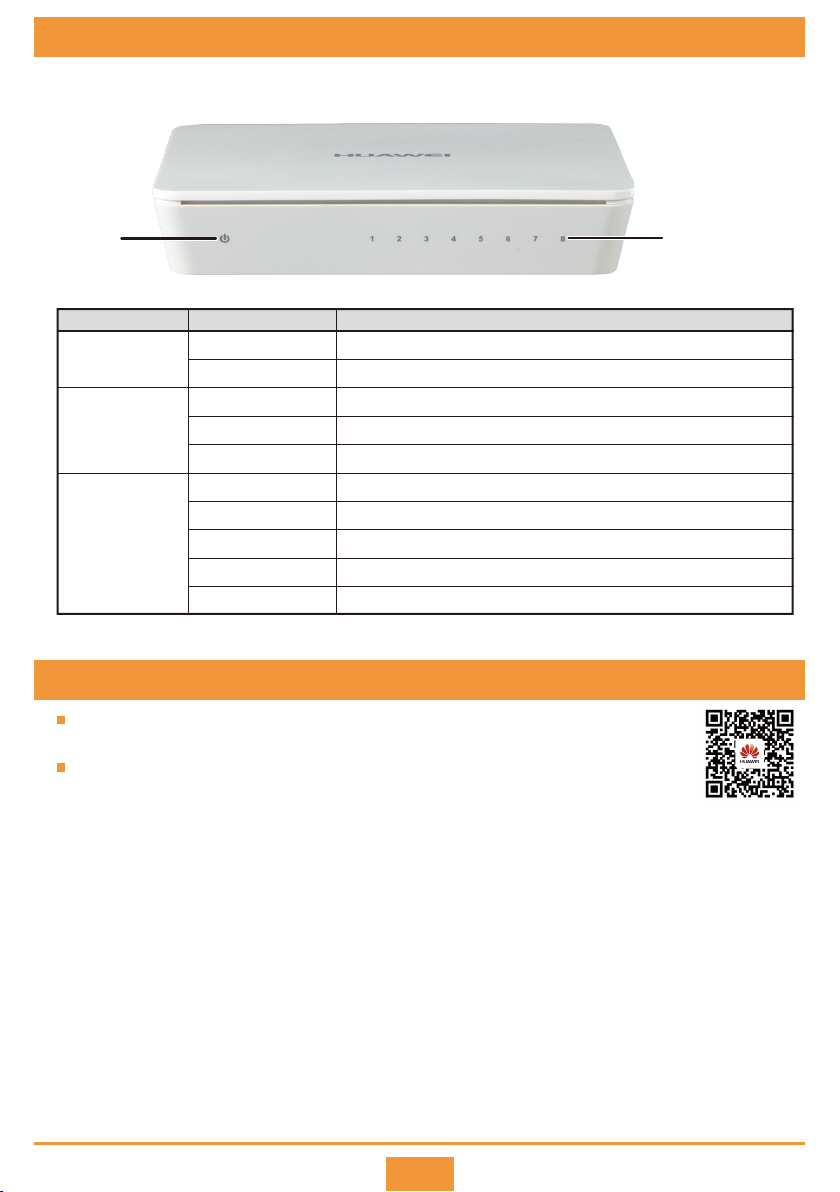
7 Powering on the System
After the device is powered on, the PWR LED is on, the port LED status is as shown in below.
PWR LED Ports LED
Indicator Status Description
1 - 8 Port
(S1700-8-AC)
1 - 8 Port
(S1700-8G-AC)
On Green
Off Power off.
On Green
Blinking Green Blinking indicates activity.
Off No link.
On Green The port has a valid 1000Mbps link.
Blinking Green Blinking indicates activity.
On Yellow
Blinking Yellow
Off
Internal power is operating normally.PWR
The port has a valid 10/100Mbps link.
The port has a valid 10/100Mbps link.
Blinking indicates activity.
No link.
9 Obtaining Product Documentation and Technical Support
Log in to Huawei enterprise technical support website (http://support.huawei.com/enterprise),
and select a specific product model and version to find its documentation.
Log in to Huawei enterprise support community
(http://forum.huawei.com/enterprise/en/index.html) and post your questions in the community.
4
Huawei Enterprise
Technical Support
Page 6
Trademarks and Permissions
and other Huawei trademarks are trademarks of Huawei Technologies Co., Ltd.
All other trademarks and trade names mentioned in this document are the property of their respective holders.
Copyright © Huawei Technologies Co., Ltd. 2018. All rights reserved.
No part of this document may be reproduced or transmitted in any form or by any means without prior written consent of Huawei
Technologies Co., Ltd.
Qualification Card
PASS
Unique Identifier: trade name: HUAWEI; product name: Switch;
Supplier’s Declaration of Conformity (SDoC)
model number: S1700 series switches
Responsible Party- U.S. Contact Information
Huawei Technologies USA Inc.
5700 Tennyson Parkway, Suite 500
Plano, Texas 75024
Main: 214-919-6000 / TAC Hotline: 877-448-2934
FCC Compliance Statement ( for products subject to Part 15)
This device complies with part 15 of the FCC Rules. Operation is subject to the following two conditions: (1) This device may not
cause harmful interference, and (2) this device must accept any interference received, including interference that may cause
undesired operation.
5
 Loading...