

Huawei Quidway S1700-24-AC User Manual & Installation Quick Start
技术支持
Tool List
工具参考
M6
螺钉
M6 screw
Percussion drill(φ8 Drill bit)M6 Plug boltMarker penCrosshead screwdriver Flathead screwdriver
十字螺丝刀 一字螺丝刀 冲击钻(φ8钻头)M6膨胀螺栓记号笔
斜口钳
Diagonal pliers
Cable tie
线扣
防静电手套
ESD-preventive
活动扳手
Adjustable spanner
羊角锤
Claw hammer
浮动螺母
Captive nut
M4
螺钉
M4 screw
长挂耳
Long rack-mounting ear
Service and Support
Rev: 02
快速安装指南以及简易使用说明书
Quidway S1700-24-AC以太网交换机
Quidway S1700-24-AC Ethernet Switch
User Manual & Installation Quick Start
胶垫贴
Rubber pads
Accessories (S1700-24-AC)
设备附件介绍(S1700-24-AC)
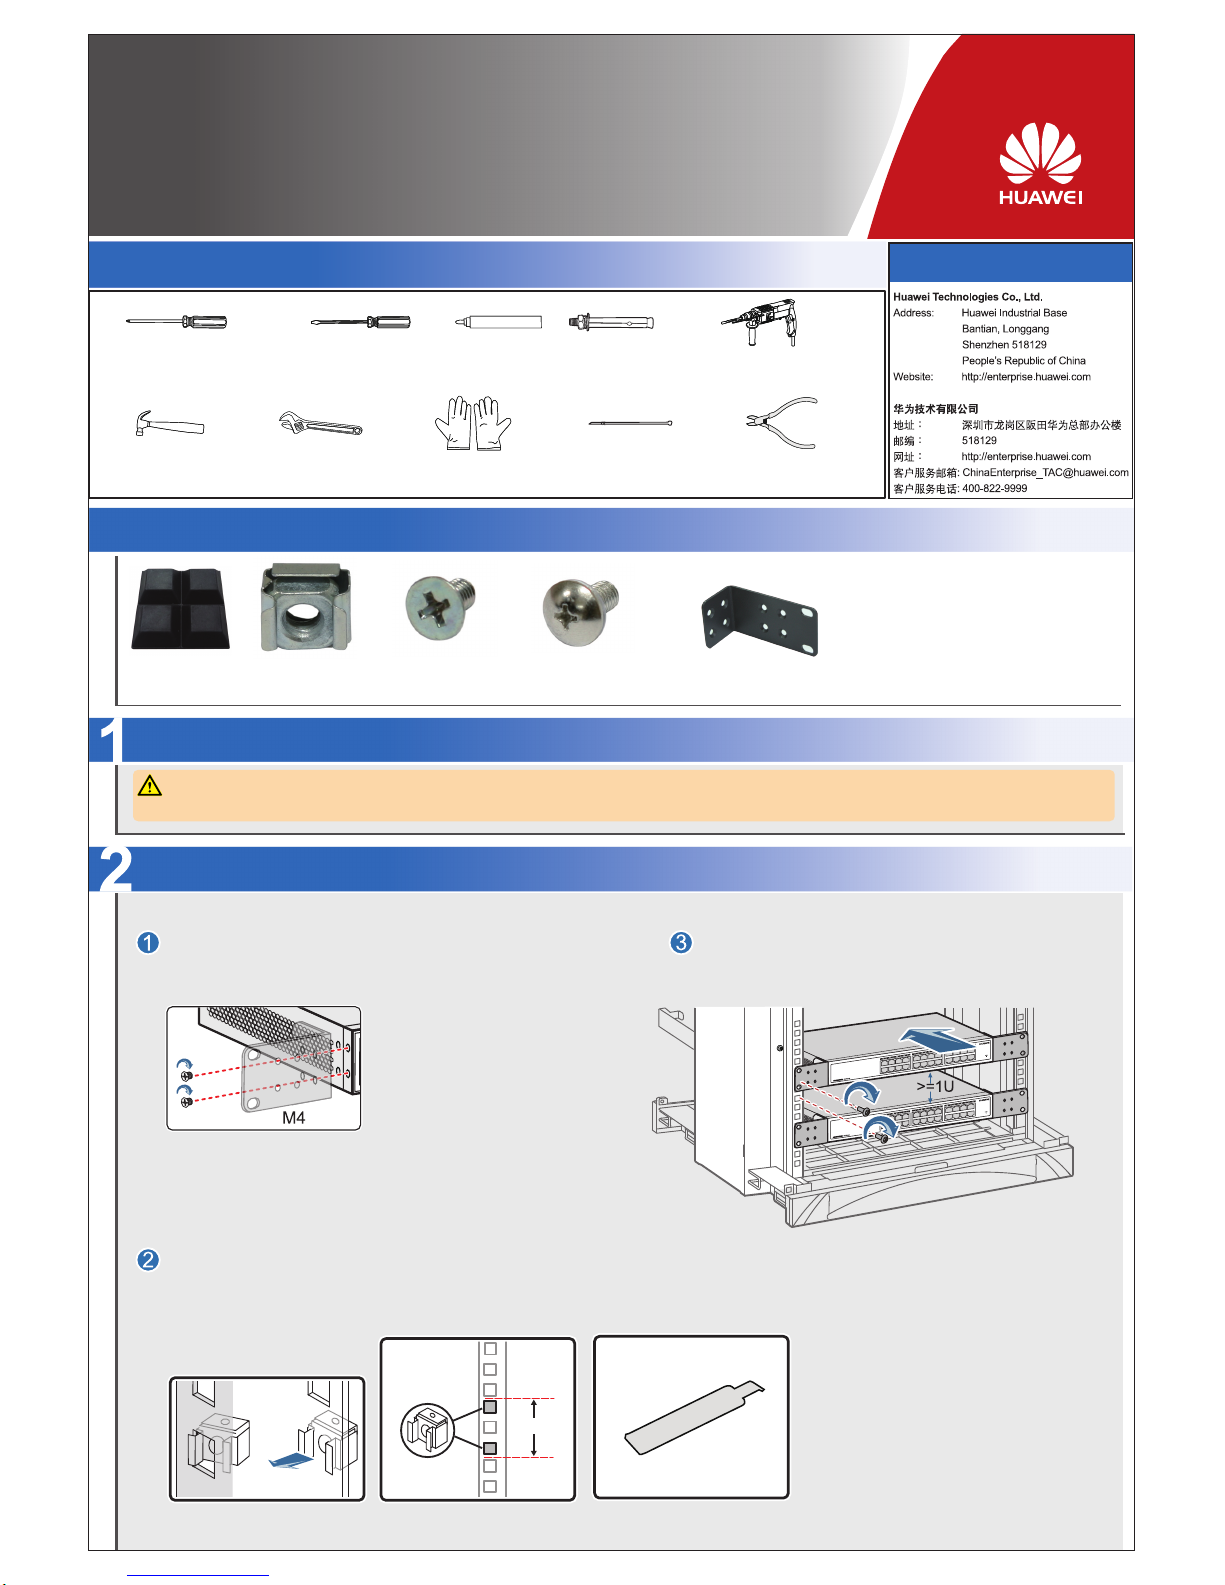
Fix the rack-mounting ears.
安装挂耳。
IEC cabinet (19 inch)
IEC 机柜(19英寸)
Install the device in a cabinet.
安装设备到机柜。
Fix the captive nuts.
安装浮动螺母。
1U
1U=44.45mm
Before installation, take ESD-preventive measures, for example, wear ESD-preventive gloves or a wrist strap.
安装前请做好防静电保护措施,如配戴防静电手套或防静电手腕。
Installing the Device in a 19'' Cabinet
安装设备到19英寸标准机柜中
Precautions
注意事项
Use installation strip to fix the captive nuts.
使用安装条安装浮动螺母。
4
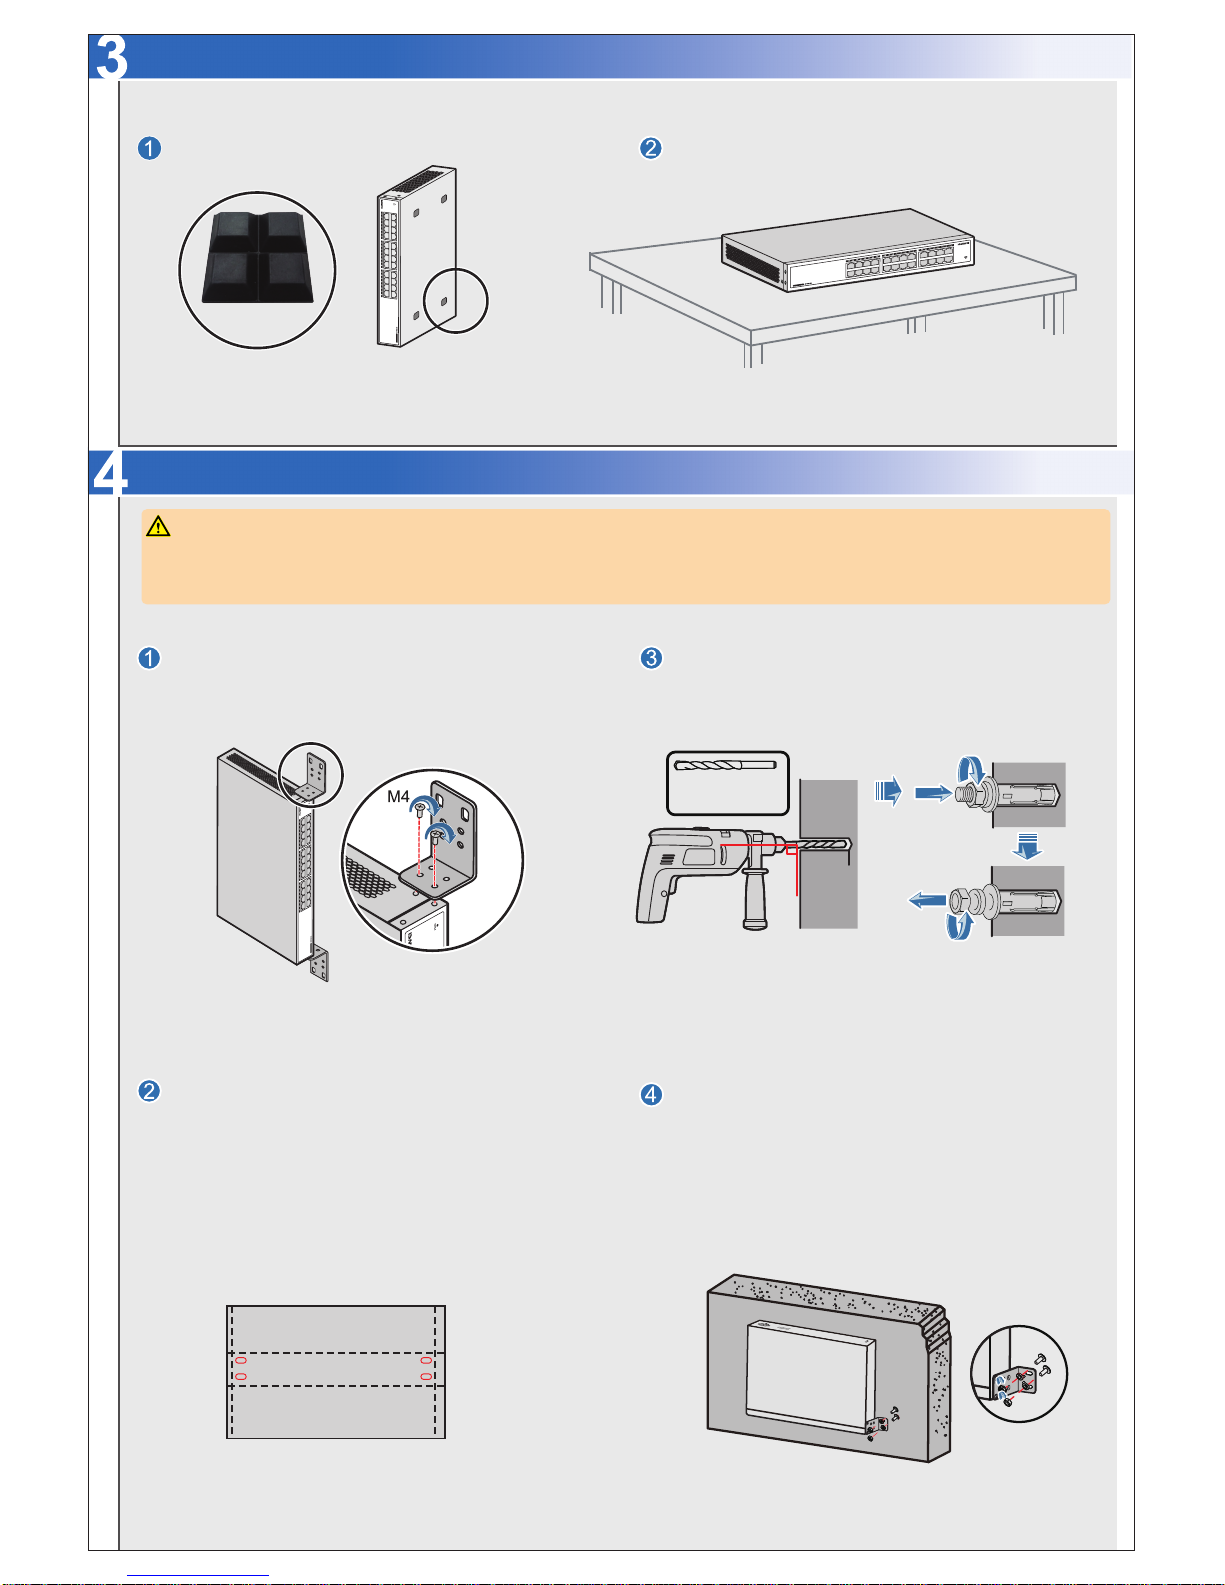
Install the device on the wall.
安装设备到墙面。
Mark the hole locations on the wall according to
the device installed with rack-mounting ears.
根据已安装挂耳的设备,用记号笔标记打孔位置。
φ8 Drill bit
φ8钻头
M6 plug bolt
M6膨胀螺栓
90
。
Install the plug bolt.
安装膨胀螺栓。
Fix the rack-mounting ears.
安装挂耳。
Installing the Device on a Worktable
安装设备到工作台
Powering on the System
上电检查
安装设备到墙面
Installing the Device on a Wall
Rubber pads
胶垫贴
Adhibit the rubber pads.
粘贴胶垫贴。
Install the device on a worktable.
安装设备到工作台。
●To prevent injuries, check that there is no electrical wire at the locations to be drilled before drilling holes in the wall.
●
●
●
Flammable and explosive items under the device is prohibited. Leave more than 100 mm of space around the device for proper heat dissipation.
在墙上打孔时,必须确认打孔处没有墙电,避免造成人身伤害。
设备下方禁止摆放易燃易爆物品,距离设备100mm范围内不能有异物挡住。
5
 Loading...