

Huawei Quidway S1700 Web User Manual

Quidway S1700 Series Ethernet Switches
V100R006C00
Web User Manual
Issue 01
Date 2011-11-17
HUAWEI TECHNOLOGIES CO., LTD.

Copyright © Huawei Technologies Co., Lt d. 2011 . All right s reserv ed.
No part of this document may be reproduced or transmitted in any form or by any means without prior
written consent of Huawei Technologies Co., Ltd.
Trademarks and Permissions
and other Huawei trademarks are trademarks of Huawei Technologies Co., Ltd.
All other trademarks and trade names mentioned in this document are the property of their respective
holders.
Notice
The purchased products, services and features are stipulated by the contract made between Huawei and
the customer. All or part of the products, services and features described in this document may not be
within the purchase scope or the usage scope. Unless otherwise specified in the contract, all statements,
information, and recommendations in this document are provided "AS IS" without warranties, guarantees or
representations of any kind, either express or implied.
The information in this document is subject to change without notice. Every effort has been made in the
preparation of this document to ensure accuracy of the contents, but all statements, information, and
recommendations in this document do not constitute the warranty of any kind, express or implied.
Huawei Technologies Co., Ltd.
Address: Huawei Industrial Base
Bantian, Longgang
Shenzhen 518129
People's Republic of China
Website: http://www.huawei.com
Email: support@huawei.com
Issue 01 (2011-11-17) Huawei Proprietary and Confidential
Copyright © Huawei Technologies Co., Ltd
i

Quidway S1700 Series Ethernet Switches
Web User Manual Contents
Contents
1 WEB Configuration....................................................................................................................... 1
1.1 Logging In to the Web Interface ....................................................................................................................... 1
1.1.1 Background Information ......................................................................................................................... 1
1.1.2 Connecting to the Web Interface ............................................................................................................. 1
1.2 Navigating the web browser interface .............................................................................................................. 2
1.2.1 Home page .............................................................................................................................................. 2
1.2.2 Navigation Tree ....................................................................................................................................... 3
1.2.3 Buttons .................................................................................................................................................... 5
1.2.4 Common Interface Elements ................................................................................................................... 5
1.3 Idle-Time .......................................................................................................................................................... 6
1.4 Save Configuration ........................................................................................................................................... 6
1.5 Logout .............................................................................................................................................................. 6
2 Site Map .......................................................................................................................................... 8
2.1 Panel Display ................................................................................................................................................... 8
2.2 Displaying Switch Information ........................................................................................................................ 9
2.3 Switch Health ................................................................................................................................................... 9
3 System Management .................................................................................................................. 11
3.1 Setting System General Information .............................................................................................................. 11
3.2 Setting the Switch’s IP Address ...................................................................................................................... 12
3.3 Managing System Files .................................................................................................................................. 14
3.3.1 Upgrade Firmware ................................................................................................................................ 14
3.3.2 Setting the Start-Up File ....................................................................................................................... 15
3.3.3 Showing/Deleting System Files ............................................................................................................ 16
3.3.4 Saving the Running Configuration to a Local File ................................................................................ 17
3.4 Setting the System Clock ............................................................................................................................... 19
3.5 Displaying CPU Utilization ........................................................................................................................... 20
3.6 Displaying Memory Usage ............................................................................................................................. 20
3.7 Resetting the System ...................................................................................................................................... 21
3.8 Displaying RFID ............................................................................................................................................ 21
4 Interface Configuration ............................................................................................................. 24
4.1 Port Configuration .......................................................................................................................................... 24
4.1.1 General .................................................................................................................................................. 24
Issue 01 (2011-11-17) Huawei Proprietary and Confidential
Copyright © Huawei Technologies Co., Ltd
ii

Quidway S1700 Series Ethernet Switches
Web User Manual Contents
4.1.2 Configuring Local Port Mirroring ......................................................................................................... 27
4.1.3 Showing Port Statistics ......................................................................................................................... 28
4.1.4 Performing Cable Diagnostics .............................................................................................................. 29
4.2 Trunk Configuration ....................................................................................................................................... 30
4.2.1 Configuring System Priority ................................................................................................................. 31
4.2.2 Configuring a Trunk .............................................................................................................................. 32
4.2.3 Showing Trunk Statistics ...................................................................................................................... 34
4.3 Transceiver ..................................................................................................................................................... 35
4.4 Power Saving ................................................................................................................................................. 36
5 VLAN Configuration .................................................................................................................. 38
5.1 Configuring Static VLAN .............................................................................................................................. 38
5.1.1 Creating a Static VLAN ........................................................................................................................ 38
5.1.2 Adding Static Members to VLANs ....................................................................................................... 39
5.1.3 Modify VLAN ...................................................................................................................................... 39
5.1.4 Edit/Show Member by VLAN .............................................................................................................. 40
5.1.5 Edit/Show member by interface ............................................................................................................ 42
5.1.6 Edit/Show member by interface range .................................................................................................. 42
5.1.7 Show/delete Static VLAN ..................................................................................................................... 43
6 MAC Address Configuration.................................................................................................... 45
6.1 Setting Static Address ..................................................................................................................................... 45
6.2 Setting Dynamic Address ............................................................................................................................... 47
6.2.1 Changing the Aging Time ..................................................................................................................... 47
6.2.2 Displaying the Dynamic Address Table ................................................................................................ 47
6.2.3 Clearing the Dynamic Address Table .................................................................................................... 48
7 Spanning Tree Algorithm.......................................................................................................... 50
7.1 Configuring Global STP ................................................................................................................................. 50
7.2 Showing Global Settings for STP .................................................................................................................. 52
7.3 Configuring Interface Settings for STP .......................................................................................................... 54
7.4 Displaying Interface Settings for STP ............................................................................................................ 56
8 Rate Limit Configuration .......................................................................................................... 58
8.1 Configuring Rate Limit .................................................................................................................................. 58
8.2 Configuring Storm Control ............................................................................................................................ 59
8.3 Configuring Class of Service ......................................................................................................................... 60
8.3.1 Setting the Default Priority for Interface............................................................................................... 60
8.3.2 Selecting the Queue Mode .................................................................................................................... 61
8.3.3 Configuring Trust Mode........................................................................................................................ 63
8.3.4 Mapping Ingress DSCP Values to Internal DSCP Values ...................................................................... 64
8.3.5 Mapping CoS Priorities to Internal DSCP Values ................................................................................. 65
8.3.6 Mapping PHB Values to Egress Queues ............................................................................................... 67
8.4 Configuring Voice VLAN .............................................................................................................................. 69
Issue 01 (2011-11-17) Huawei Proprietary and Confidential
Copyright © Huawei Technologies Co., Ltd
iii

Quidway S1700 Series Ethernet Switches
Web User Manual Contents
8.4.1 Configuring Voice VLAN ..................................................................................................................... 69
8.4.2 Configuring Voice VLAN OUI ............................................................................................................. 70
8.4.3 Configuring VoIP Traffic Ports ............................................................................................................. 72
9 Security Measures ....................................................................................................................... 74
9.1 AAA ............................................................................................................................................................... 74
9.1.1 Configuring Local/Remote Logon Authentication ................................................................................ 75
9.1.2 Configuring Remote Logon Authentication Servers ............................................................................. 76
9.2 Configuring User Accounts ............................................................................................................................ 77
9.3 Network Access .............................................................................................................................................. 79
9.4 Filtering IP Addresses for Management Access ............................................................................................. 80
9.4.1 Creating a list of IP addresses authorized ............................................................................................. 80
9.4.2 Showing/deleting a list of IP addresses authorized ............................................................................... 81
9.5 Configuring Port Isolation .............................................................................................................................. 82
9.6 Configuring 802.1x Port Authentication ........................................................................................................ 82
9.6.1 Configuring 802.1x Global Settings ..................................................................................................... 83
9.6.2 Configuring Port Authentication Settings for 802.1x ............................................................................ 84
9.6.3 Displaying 802.1x Statistics .................................................................................................................. 87
10 Management ............................................................................................................................... 89
10.1 Configuring Event Logging ......................................................................................................................... 89
10.1.1 System Log Configuration .................................................................................................................. 89
10.1.2 Show/download log ............................................................................................................................ 91
10.1.3 Remote Log Configuration ................................................................................................................. 91
10.2 Link Layer Discovery Protocol .................................................................................................................... 92
10.2.1 Setting LLDP Timing Attributes ......................................................................................................... 93
10.2.2 Configuring LLDP Interface Attributes .............................................................................................. 94
10.2.3 Displaying LLDP Local Device Information ...................................................................................... 96
10.2.4 Displaying LLDP Remote Port Information ....................................................................................... 99
10.2.5 Displaying Device Statistics ............................................................................................................. 103
11 IP Configuration ...................................................................................................................... 107
11.1 Using the PING Function ........................................................................................................................... 107
11.2 Address Resolution Protocol ...................................................................................................................... 108
11.2.1 Setting ARP Timeout ......................................................................................................................... 108
11.2.2 Displaying ARP Entries .................................................................................................................... 109
12 Multicast Configuration ........................................................................................................ 110
12.1 IGMP Snooping Configuration .................................................................................................................. 110
12.1.1 Configuring IGMP Snooping and Query Parameters ........................................................................ 110
12.1.2 Static Multicast Router ...................................................................................................................... 111
12.1.3 Assigning Interfaces to Multicast Services ....................................................................................... 113
12.1.4 Setting IGMP Snooping Status per Interface .................................................................................... 115
12.1.5 Displaying Multicast Groups Discovered by IGMP Snoopoing ....................................................... 117
Issue 01 (2011-11-17) Huawei Proprietary and Confidential
Copyright © Huawei Technologies Co., Ltd
iv

Quidway S1700 Series Ethernet Switches
Web User Manual 1 WEB Configuration
1 WEB Configuration
About This Chapter
Use the System menu items to display and configure basic administrative details of the
switch.
This section describes the basic switch features, along with a detailed description of how to
configure each feature via a web browser.
1.1 Logging In to the Web Interface
1.2 Navigating the web browser interface
1.3 Idle-Time
1.4 Save Configuration
1.5 Logout
1.1 Logging In to the Web Interface
Before configuring the switch, you must log in to the web interface.
1.1.1 Background Information
z
The Web interface client connects to the switch through HTTP; therefore, you must log
in to the Web interface through HTTP.
z
The Web interface supports the Microsoft Internet Explorer 6.0 (IE6.0) or above, Mozilla
Firefox 4.0 or above, and Chrome. The Web interface described in this document uses
the IE8.0.
1.1.2 Connecting to the Web Interface
Prior to accessing the switch from a web browser, be sure you have first performed the
following tasks:
1. Open IE browser .
2. Enter the default IP address: http://192.168.0.1. Press ENTER.
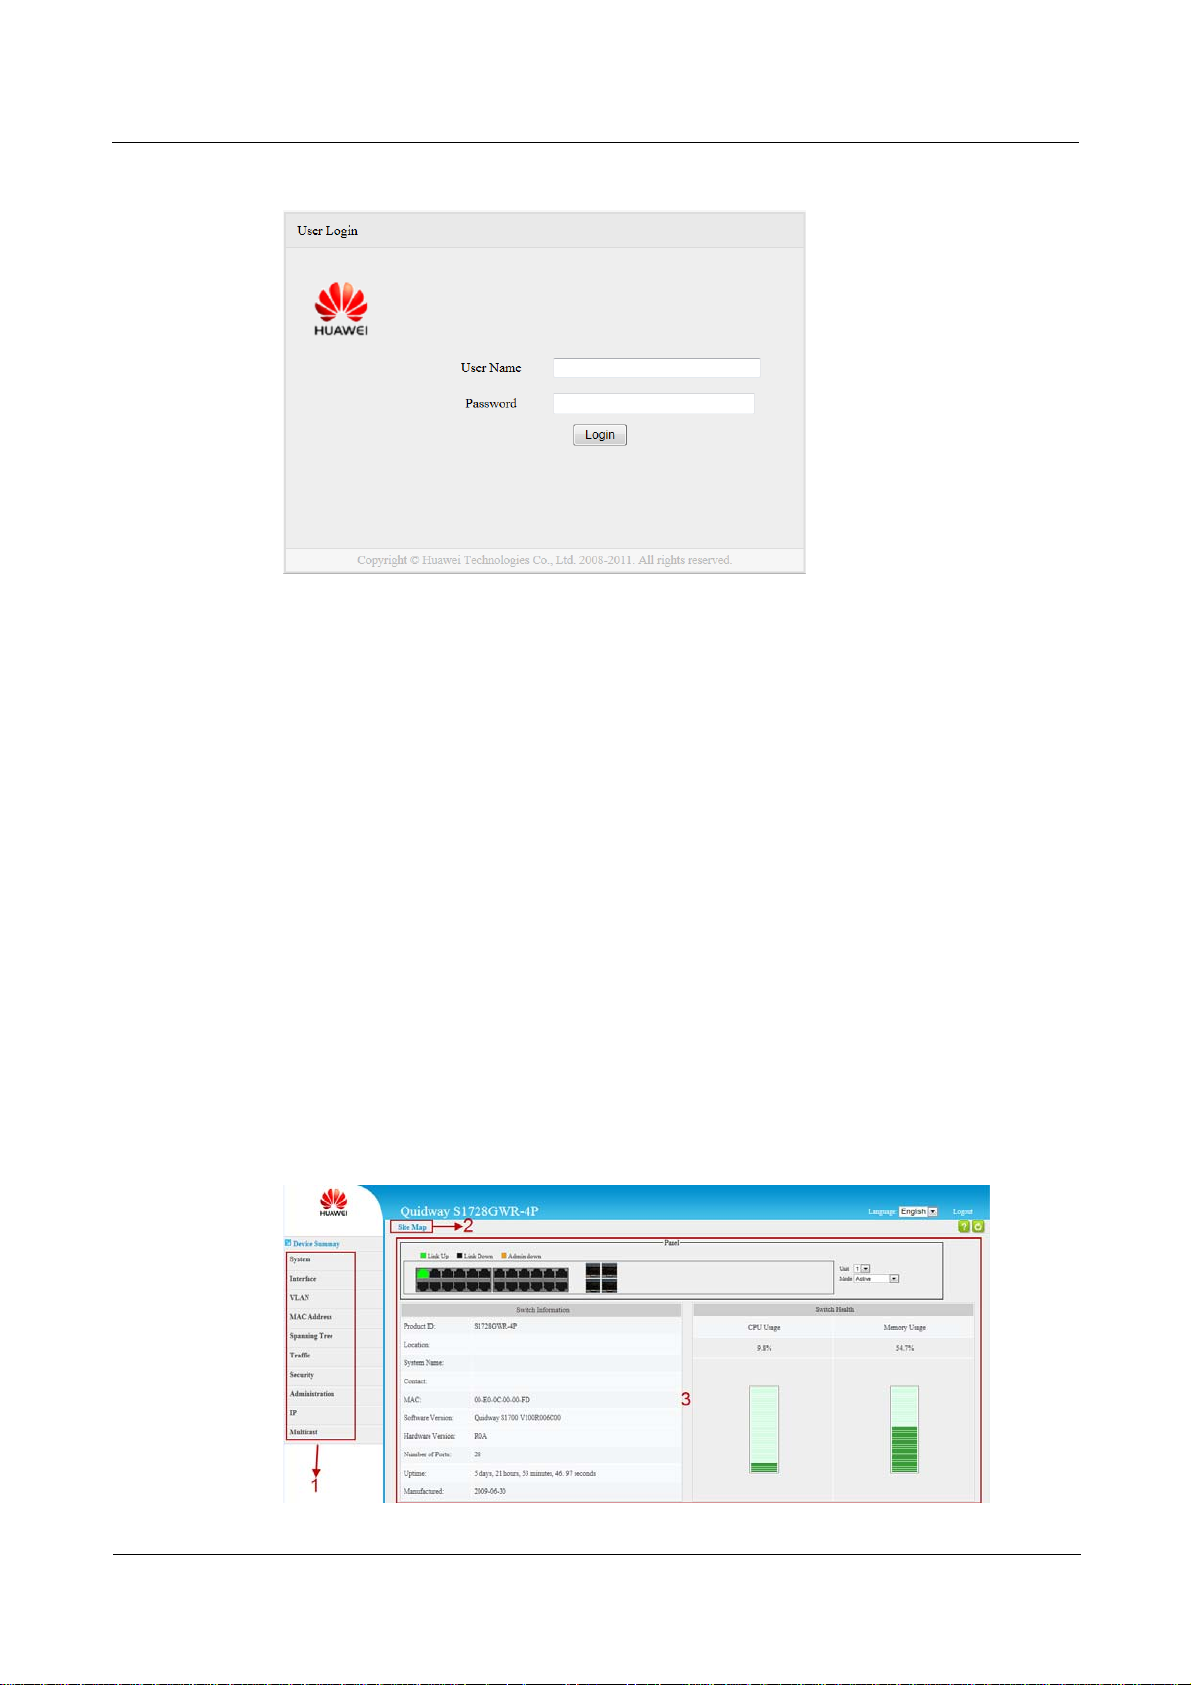
The user login dialog box is displayed, see Figure 1-1.
Issue 01 (2011-11-17) Huawei Proprietary and Confidential
Copyright © Huawei Technologies Co., Ltd
1
Quidway S1700 Series Ethernet Switches
Web User Manual 1 WEB Configuration
Figure 1-1 User Login
3. Enter values in User Name and Password. Click LOGIN.
z
The default User Name and Password of S1700 are admin.
z
Choose Security > User Accounts > Modify to change user names and passwords.
4. The system configuration program is displayed after logging in to the Web interface.
----End
1.2 Navigating the web browser interface
The following sections help you understand the Web interface and improve your operation
efficiency.
1.2.1 Home page
The layout and style of the Web interface are described in this section.
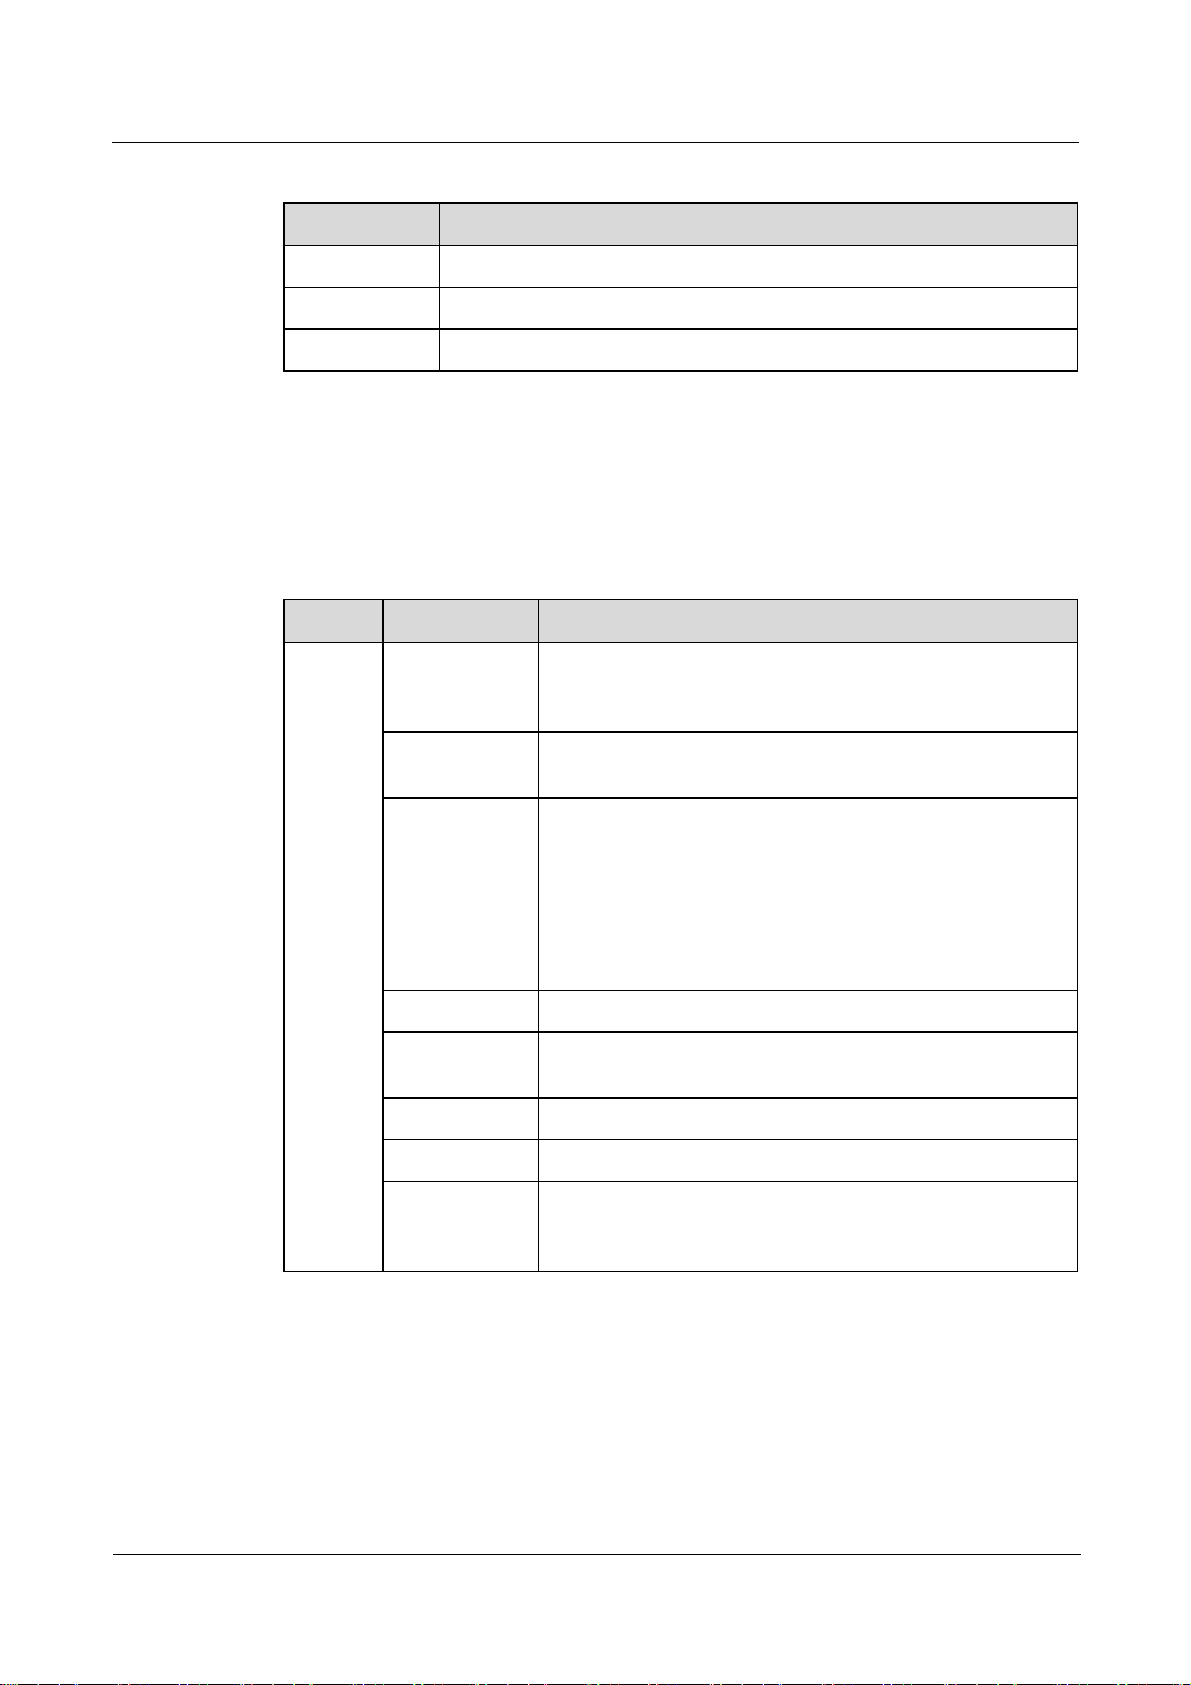
Figure 1-2 shows a typical operation user interface of the Web interface.
Figure 1-2 Home page
Issue 01 (2011-11-17) Huawei Proprietary and Confidential
Copyright © Huawei Technologies Co., Ltd
2
Quidway S1700 Series Ethernet Switches
Web User Manual 1 WEB Configuration
Table 1-1 Home page
Title Description
1 Main Menu
2 Your location
3 System Information
1.2.2 Navigation Tree
The navigation tree consists of ten nodes: System, Interface, VLAN, MAC Address, Spanning
Tree, Traffic, Security, Administration, IP, and Multicast.
Table 1-2 Switch Main Menu
Menu Sub-Menu Description
System General Provides basic system description, system uptime, system
name, system location, system contact, system jumbo frame
and system EEE.
IP Displays and Sets VLAN and the IPv4 address for
management access and displays local MAC address, etc.
File
z
Upgrade: upgrade the firmware for switch.
z
Set start-up:Sets the startup file
z
Show/Delete:Shows the files stored in flash memory;
allows deletion of files.
z
Config file: Save/Upload/Download the config file of the
switch.
Time Manually setts the current time.
CPU
Displays information on CPU utilization
Utilization
Memory Usage Shows memory utilization parameters
Reset Restarts the switch immediately.
RFID QA information by Huawei factory, to confirm if the factory
device system is normal and to guarantee every device has the
right version.
Issue 01 (2011-11-17) Huawei Proprietary and Confidential
Copyright © Huawei Technologies Co., Ltd
3

Quidway S1700 Series Ethernet Switches
Web User Manual 1 WEB Configuration
Menu Sub-Menu Description
Interface Port
z
General: Configures connection settings per port,
Configures connection settings for a range of ports,
Displays port connection status.
z
Mirror: Sets the source and target ports for mirroring,
Shows the configured mirror sessions,
z
Statistics: Show Interface statistics.
z
Cable Test: Performs cable diagnostics for selected port to
diagnose any cable faults (short, open etc.) and report the
cable length
Trunk
z
System Priority: Configuring system priority
z
Static: Configuring Static/Manul Trunks
z
Statistics: Show statistics of trunk.
Transceiver Information: show information of transceiver.
Green Ethernet Enable or disable the power saving mode on the specified
port.
VLAN Static Configures Static VLAN: Add, Show/Delete, Modify,
Edit/Show Member by VLAN, Edit/Show Member by
interface, and Edit member by Interface Range.
MAC
Static Configures Static MAC Addresses: Add, Show/Delete.
Address
Dynamic Configures Dynamic MAC Addresses: Show Dynamic MAC,
Clear Dynamic MAC, and Configure Aging.
Spannin
g Tree
STP Configures STP parameters: Configure Global, Configure
Interface.
Traffic Rate Limit Sets the output rate limits for a port
Storm Cotrol Configuring strom control.
Priority Sets the default priority for each port or trunk, Queue, Trust
mode,DSCP to DSCP, CoS to DSCP PHB to Queue
Voice VLAN Configuring Voice VLAN.
Security AAA Sets system authentication, server
User Accounts Configuring user accounts.
Network
Configuring network access.
Acceess
IP Filter Configuring IP filtering.
Port Isolation Configuring port isolation.
Port
Configuring port authentication.
Authentication
Adminis Log Configuring system, remote log of administrator
Issue 01 (2011-11-17) Huawei Proprietary and Confidential
Copyright © Huawei Technologies Co., Ltd
4
Quidway S1700 Series Ethernet Switches
Web User Manual 1 WEB Configuration
Menu Sub-Menu Description
1.2.3 Buttons
The buttons that you usually use on the Web interface are described in this section.
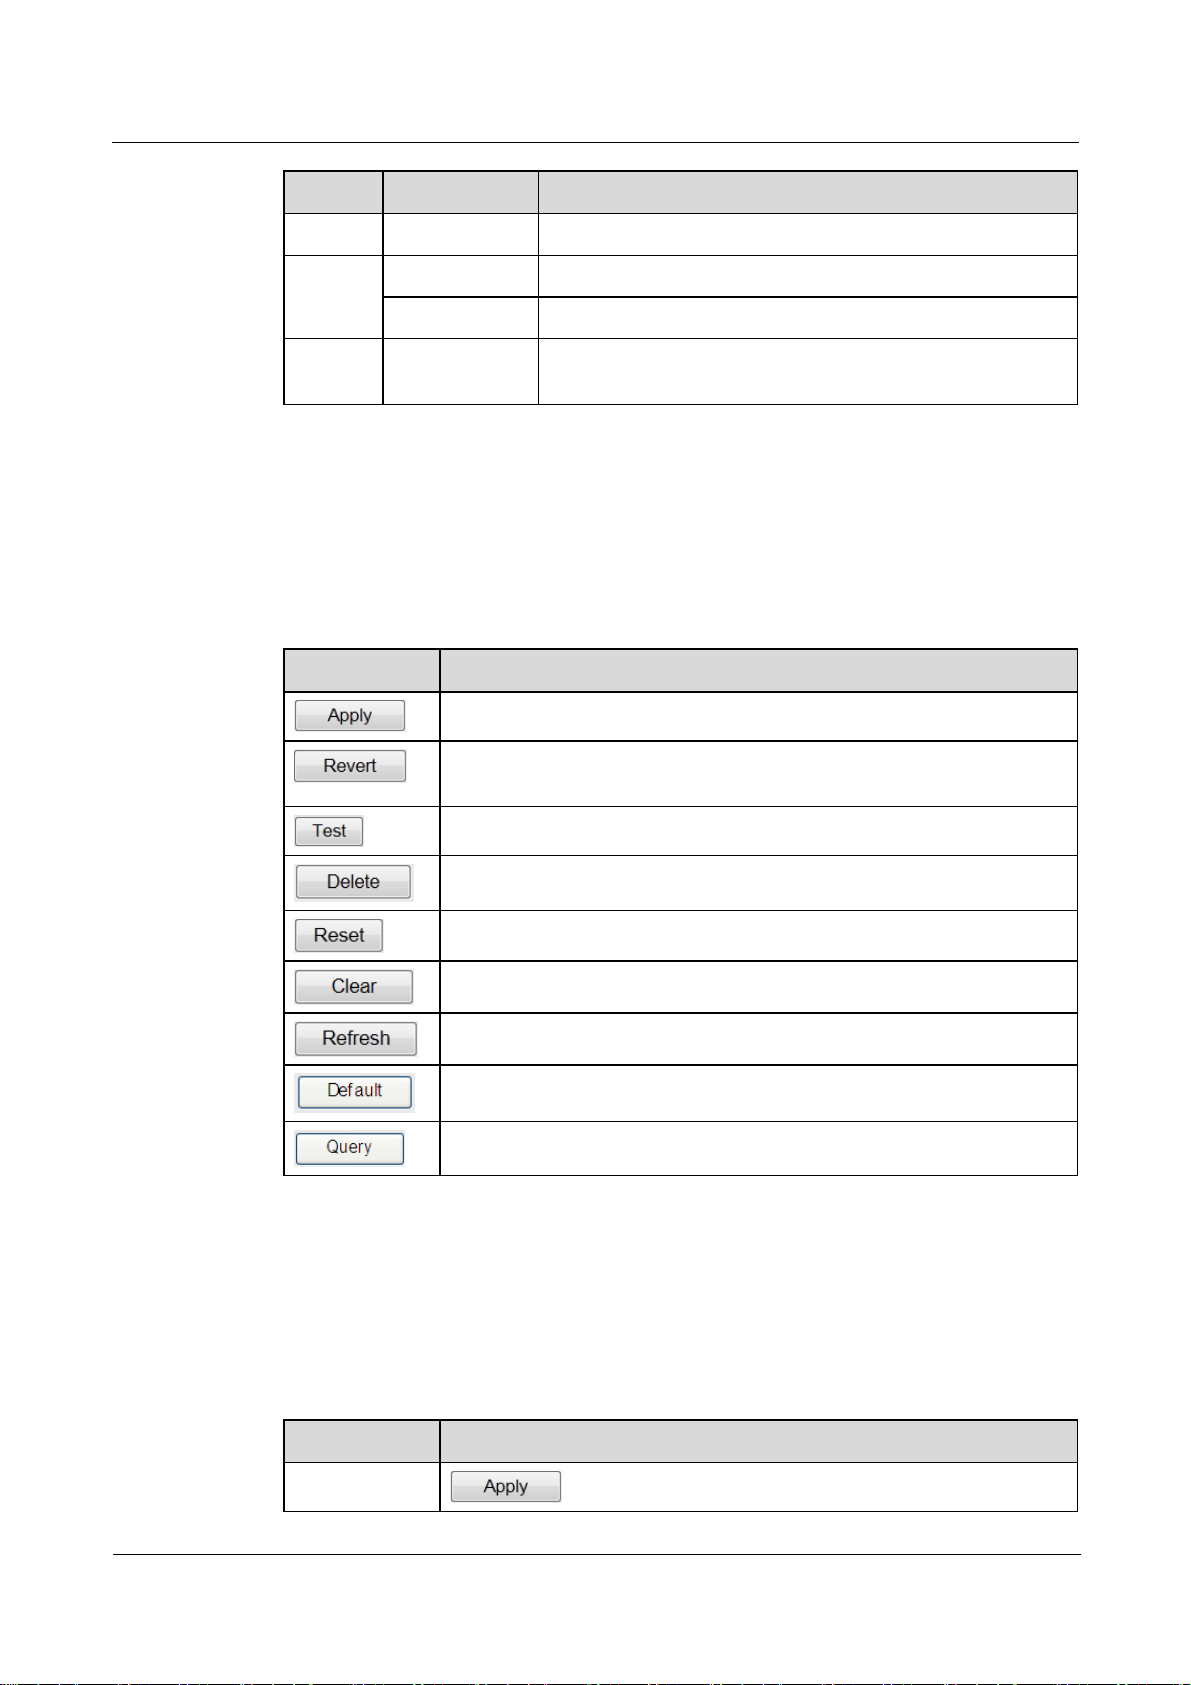
Table 1-3 describes the buttons and functions.
Table 1-3 Button description
tration
IP General Configuring Ping
Multicast IGMP
Button Action
LLDP Configuring LLDP
ARP Configuring ARP
Configuring IGMP related parameters, such as general,
Snoopoing
Sets specified values to the system.
Cancels specified values and restores current values prior to pressing
“Apply.”
multicast router, IGMP member, Interface, forwarding entry
Click to test the corresponding testing.
Click to delete the selected data.
Click to reset the swtich.
Click to clear the statistics on the system.
Click to refresh the statistics on the system.
Click to reset the configuration settings to the factory defaults.
Click to query on the system.
1.2.4 Common Interface Elements
The elements that you usually use on the Web interface are described in this section.
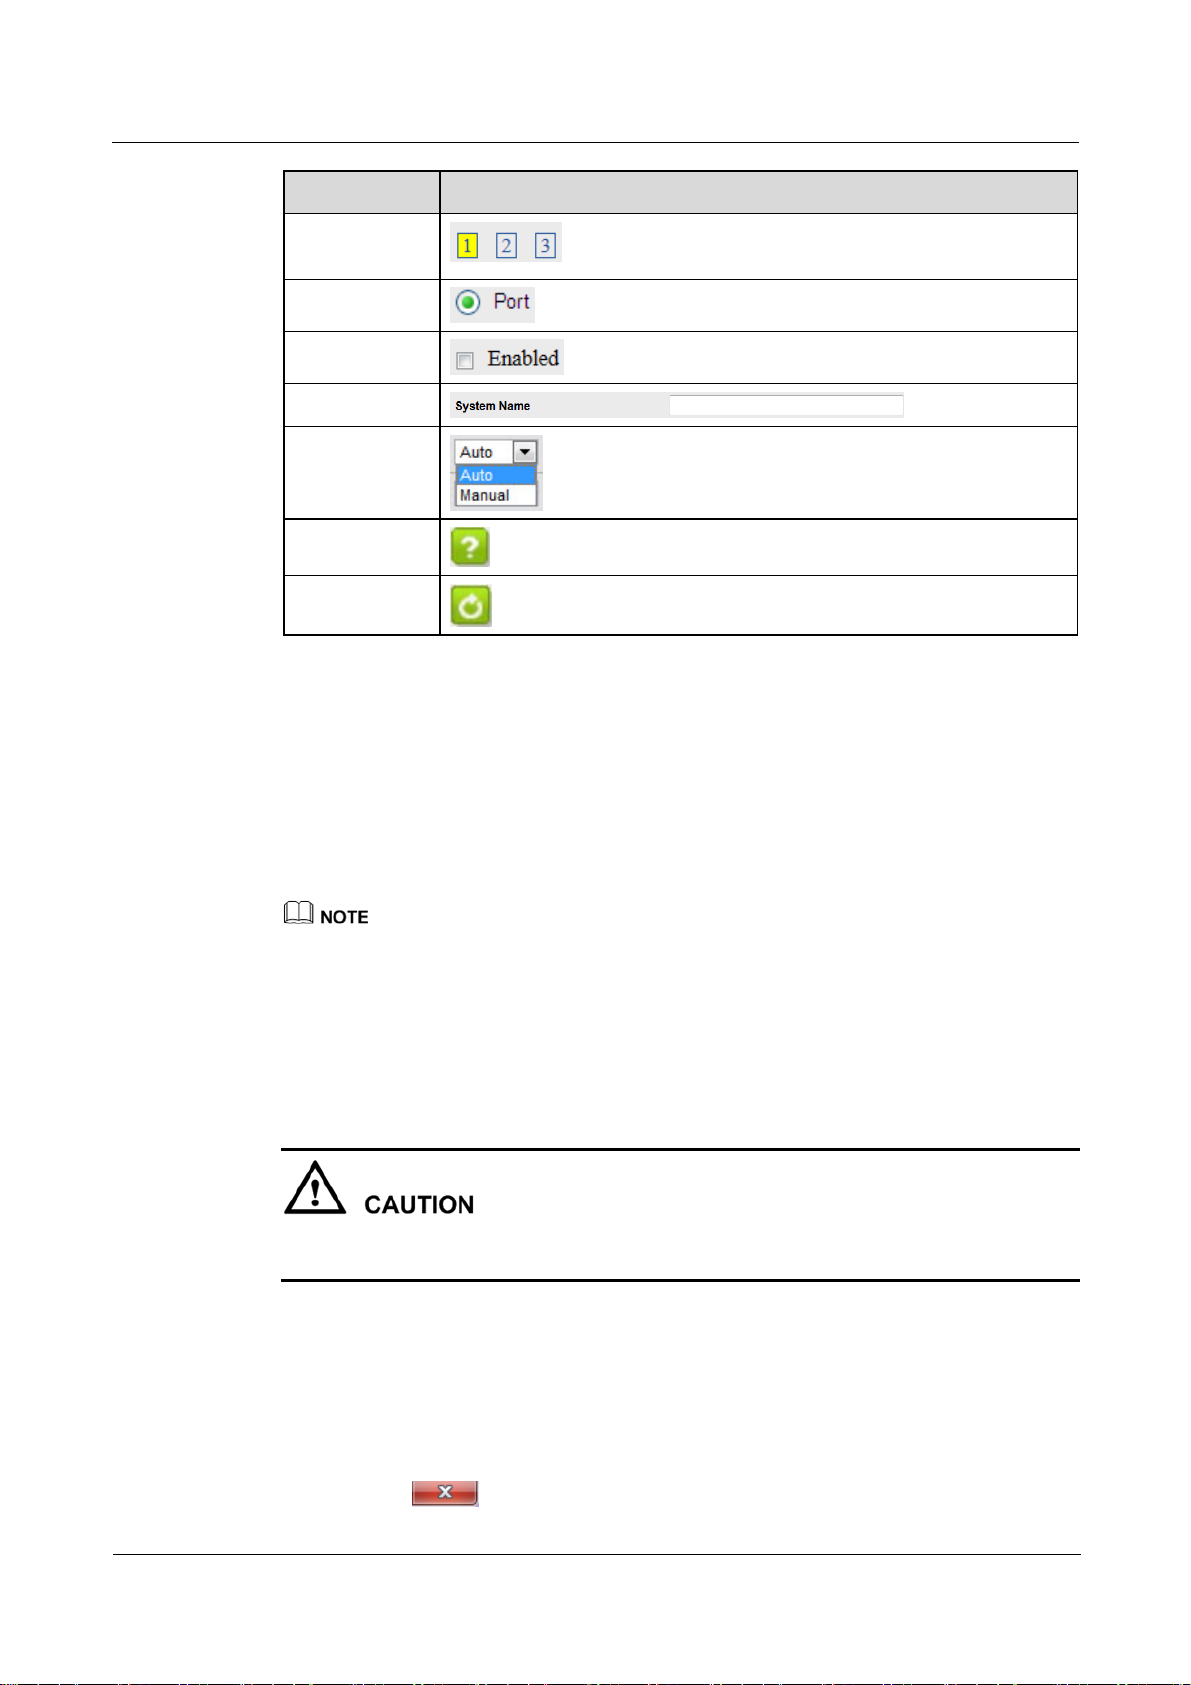
Table 1-4 describes the common elements that you usually use on the Web interface.
Table 1-4 Common Interface Elements
Element Description
Button
Issue 01 (2011-11-17) Huawei Proprietary and Confidential
Copyright © Huawei Technologies Co., Ltd
5
Quidway S1700 Series Ethernet Switches
Web User Manual 1 WEB Configuration
Element Description
Page selection
button
Radio button
Check Box
Text box
Drop-down list
Help
refresh
1.3 Idle-Time
If you do not perform any operation on the web interface for a long time, you are logged out
and the longin page is displayed. If you need to continue operations, log in again.
Figure 1-1 shows the login page.
Default idle time is 20minites.
1.4 Save Configuration
After performing configuration, you need to save the configuration data.
If you do not save the configuration data, the configuration that you made will be lost after
modifying or refreashing.
1.5 Logout
After the configuration finished, sugguest to logout to ensure the system security.
Following is the 2ways to logout.
z
Click the button to close the web browser.
Issue 01 (2011-11-17) Huawei Proprietary and Confidential
Copyright © Huawei Technologies Co., Ltd
6

Quidway S1700 Series Ethernet Switches
Web User Manual 1 WEB Configuration
z
Click the to logout the system.
Issue 01 (2011-11-17) Huawei Proprietary and Confidential
Copyright © Huawei Technologies Co., Ltd
7
Quidway S1700 Series Ethernet Switches
Web User Manual 2 Site Map
2 Site Map
About This Chapter
This chapter describes the following topics: Panel Display, Switch Information, and swtich
health.
2.1 Panel Display
2.2 Displaying Switch Information
2.3 Switch Health
2.1 Panel Display
This section provides information about the device panel.
Click Device Summary in the navigation tree to open the Device Summary page. You can
view the panel tab page, as shown in Figure 2-1.
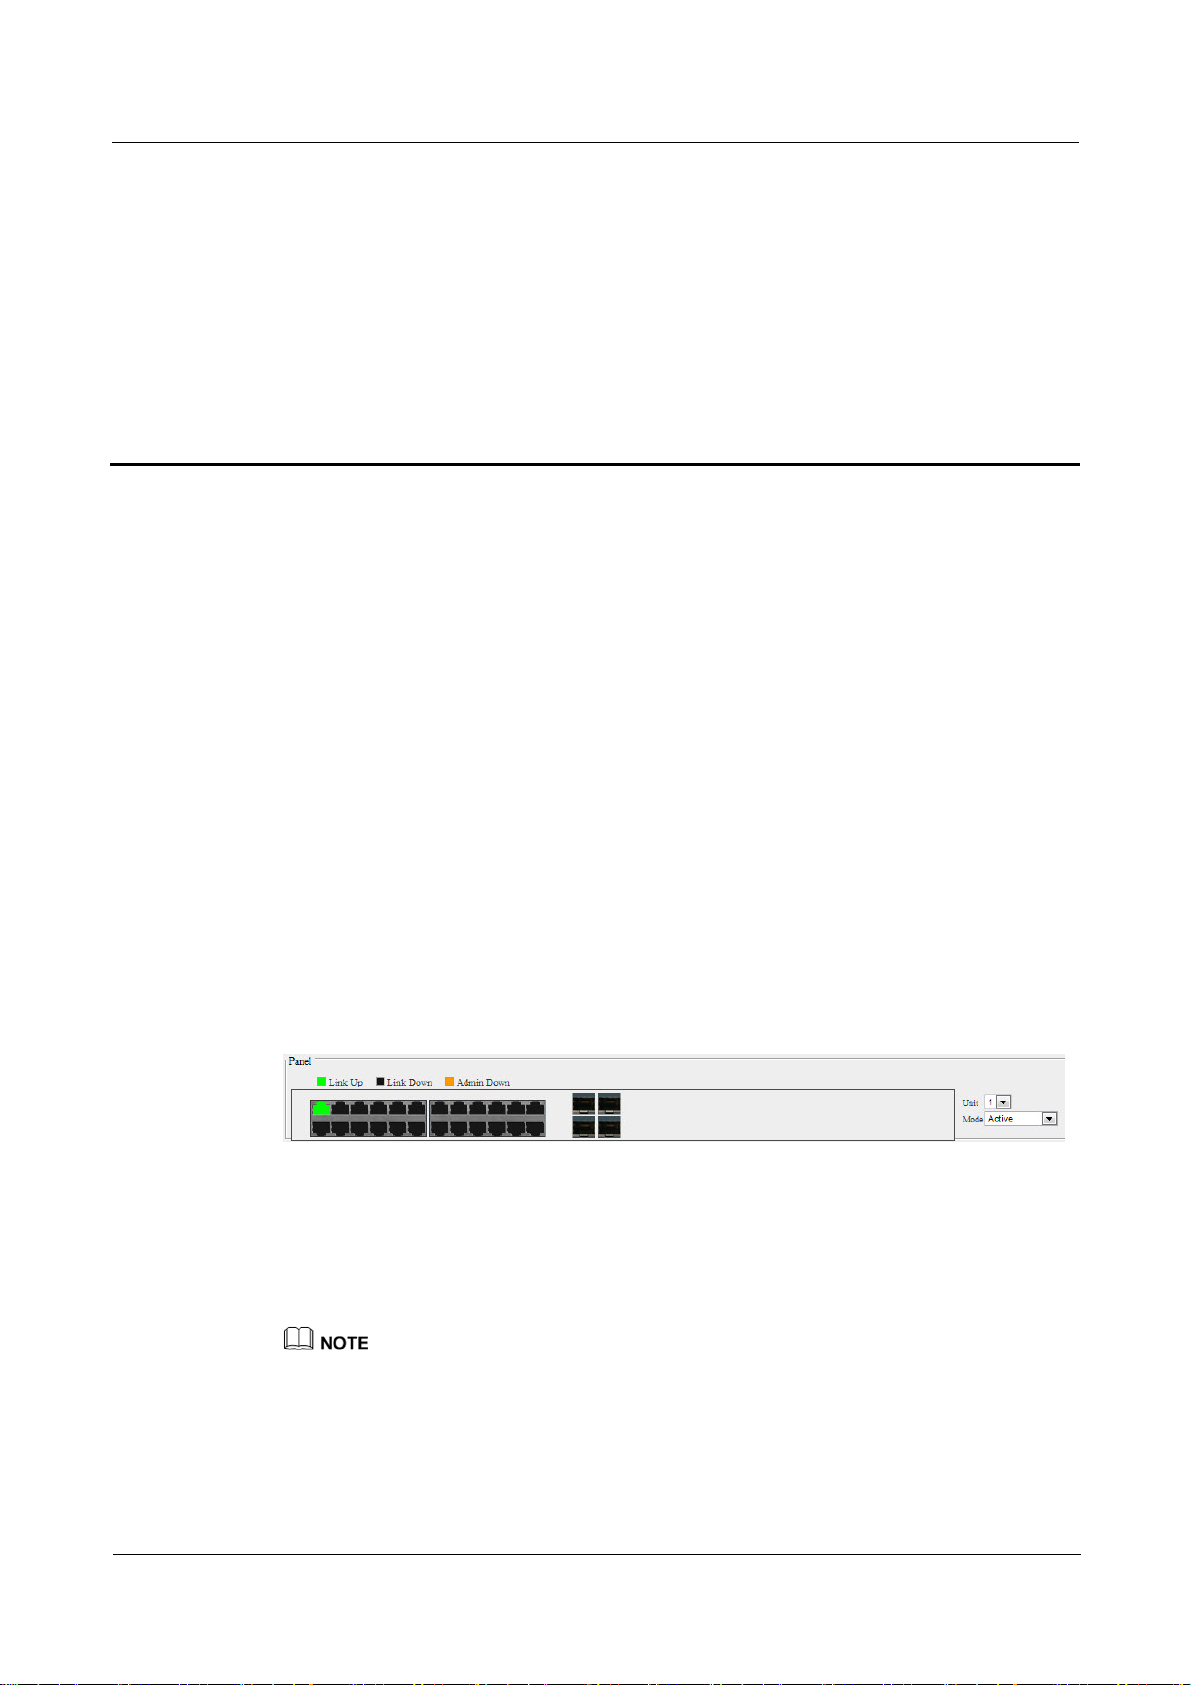
Figure 2-1 Front panel Indicators
The panel area on the Web interface displays information about each port of the selected
switch, including:
z
Number of ports
z
Operating mode of each port: Active, Duplex, and Flow Control.
You can place the cursor on a port to view the port number.
Issue 01 (2011-11-17) Huawei Proprietary and Confidential
Copyright © Huawei Technologies Co., Ltd
8
Quidway S1700 Series Ethernet Switches
Web User Manual 2 Site Map
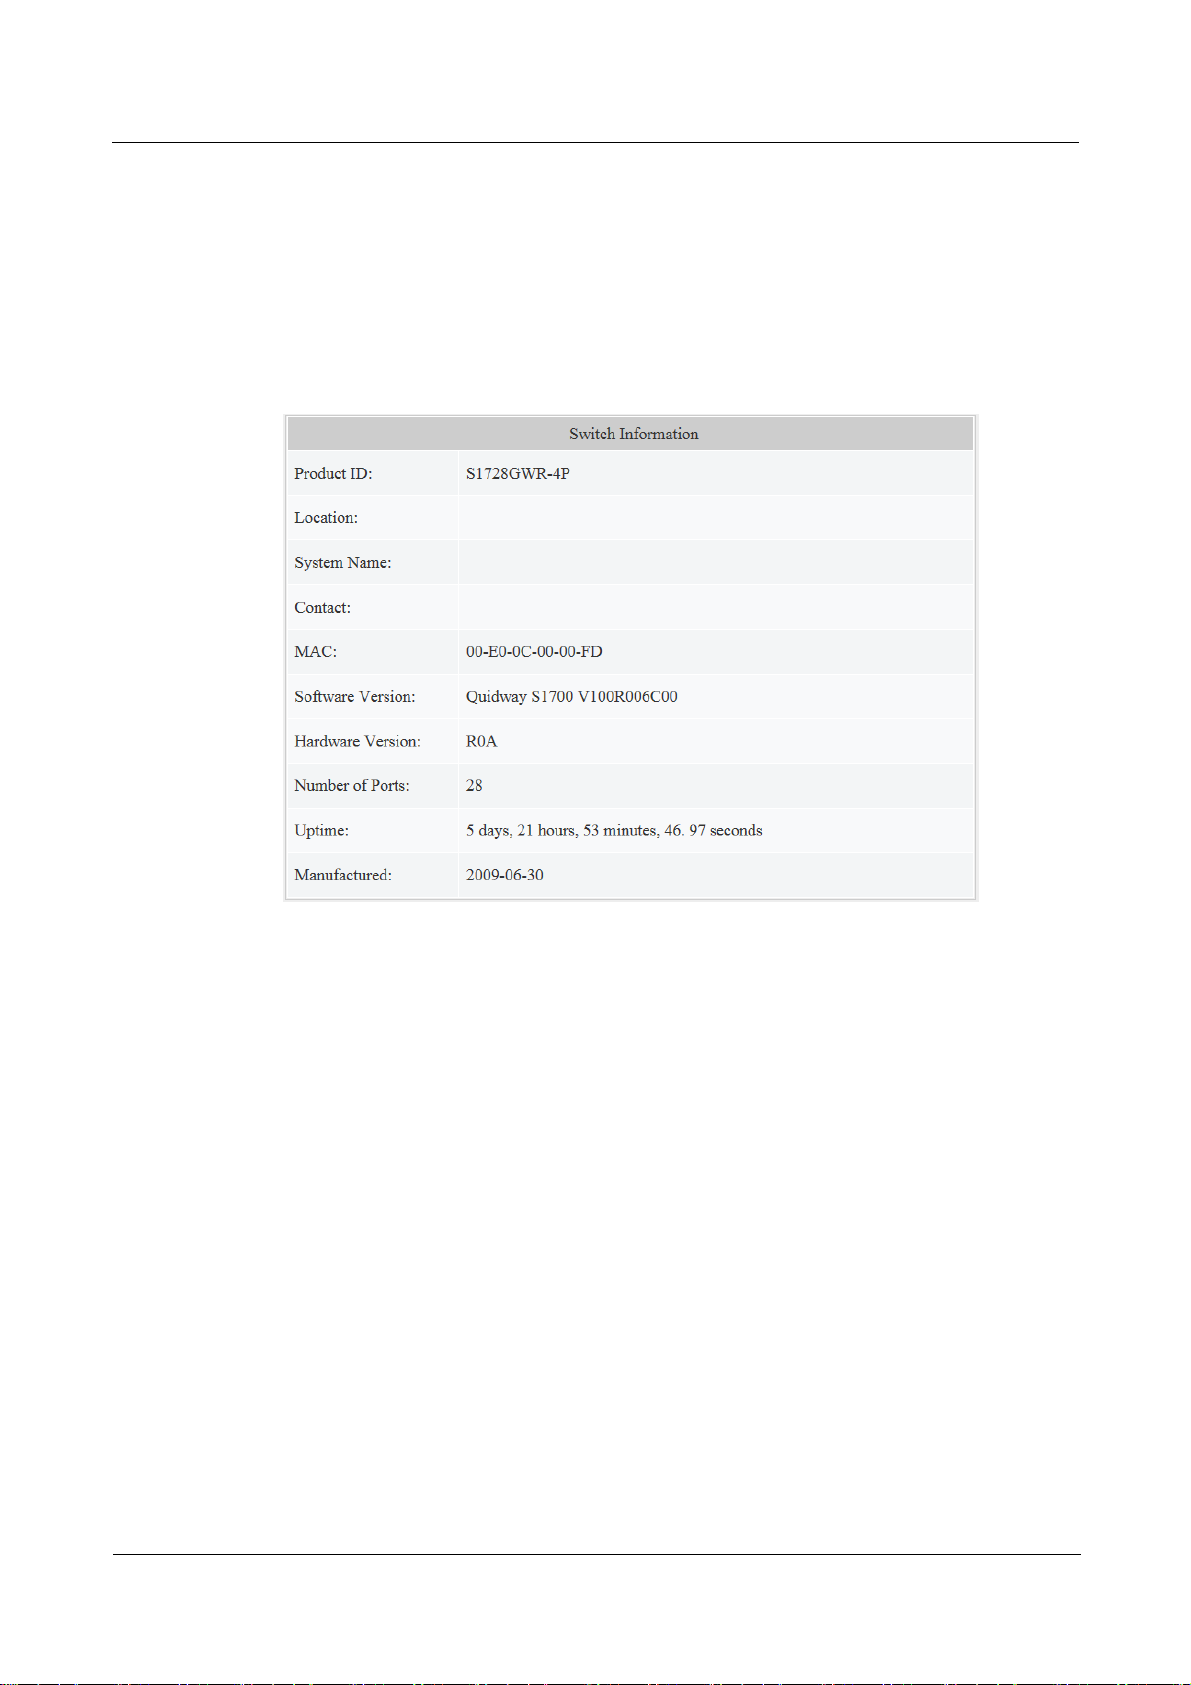
2.2 Displaying Switch Information
This section displays the product ID, Location, System Name, Contact, MAC, Software
Version, number of Ports, Uptime, and manufactured.
Click Device Summary in the navigation tree to open the Device Summary page. You can
view the Switch Information page, as shown in Figure 2-2.
Figure 2-2 Switch Information
2.3 Switch Health
This section displays the current CPU usage and Memory Usage.
Click Device Summary in the navigation tree to open the Device Summary page. You can
view the Switch Heath page, as shown in Figure 2-3.
Issue 01 (2011-11-17) Huawei Proprietary and Confidential
Copyright © Huawei Technologies Co., Ltd
9

Quidway S1700 Series Ethernet Switches
Web User Manual 2 Site Map
Figure 2-3 Switch Health
Issue 01 (2011-11-17) Huawei Proprietary and Confidential
Copyright © Huawei Technologies Co., Ltd
10
Quidway S1700 Series Ethernet Switches
Web User Manual 3 System Management
3 System Management
About This Chapter
This chapter describes the following topics:
3.1 Setting System General Information
3.2 Setting the Switch’s IP Address
3.3 Managing System Files
3.4 Setting the System Clock
3.5 Displaying CPU Utilization
3.6 Displaying Memory Usage
3.7 Resetting the System
3.8 Displaying RFID
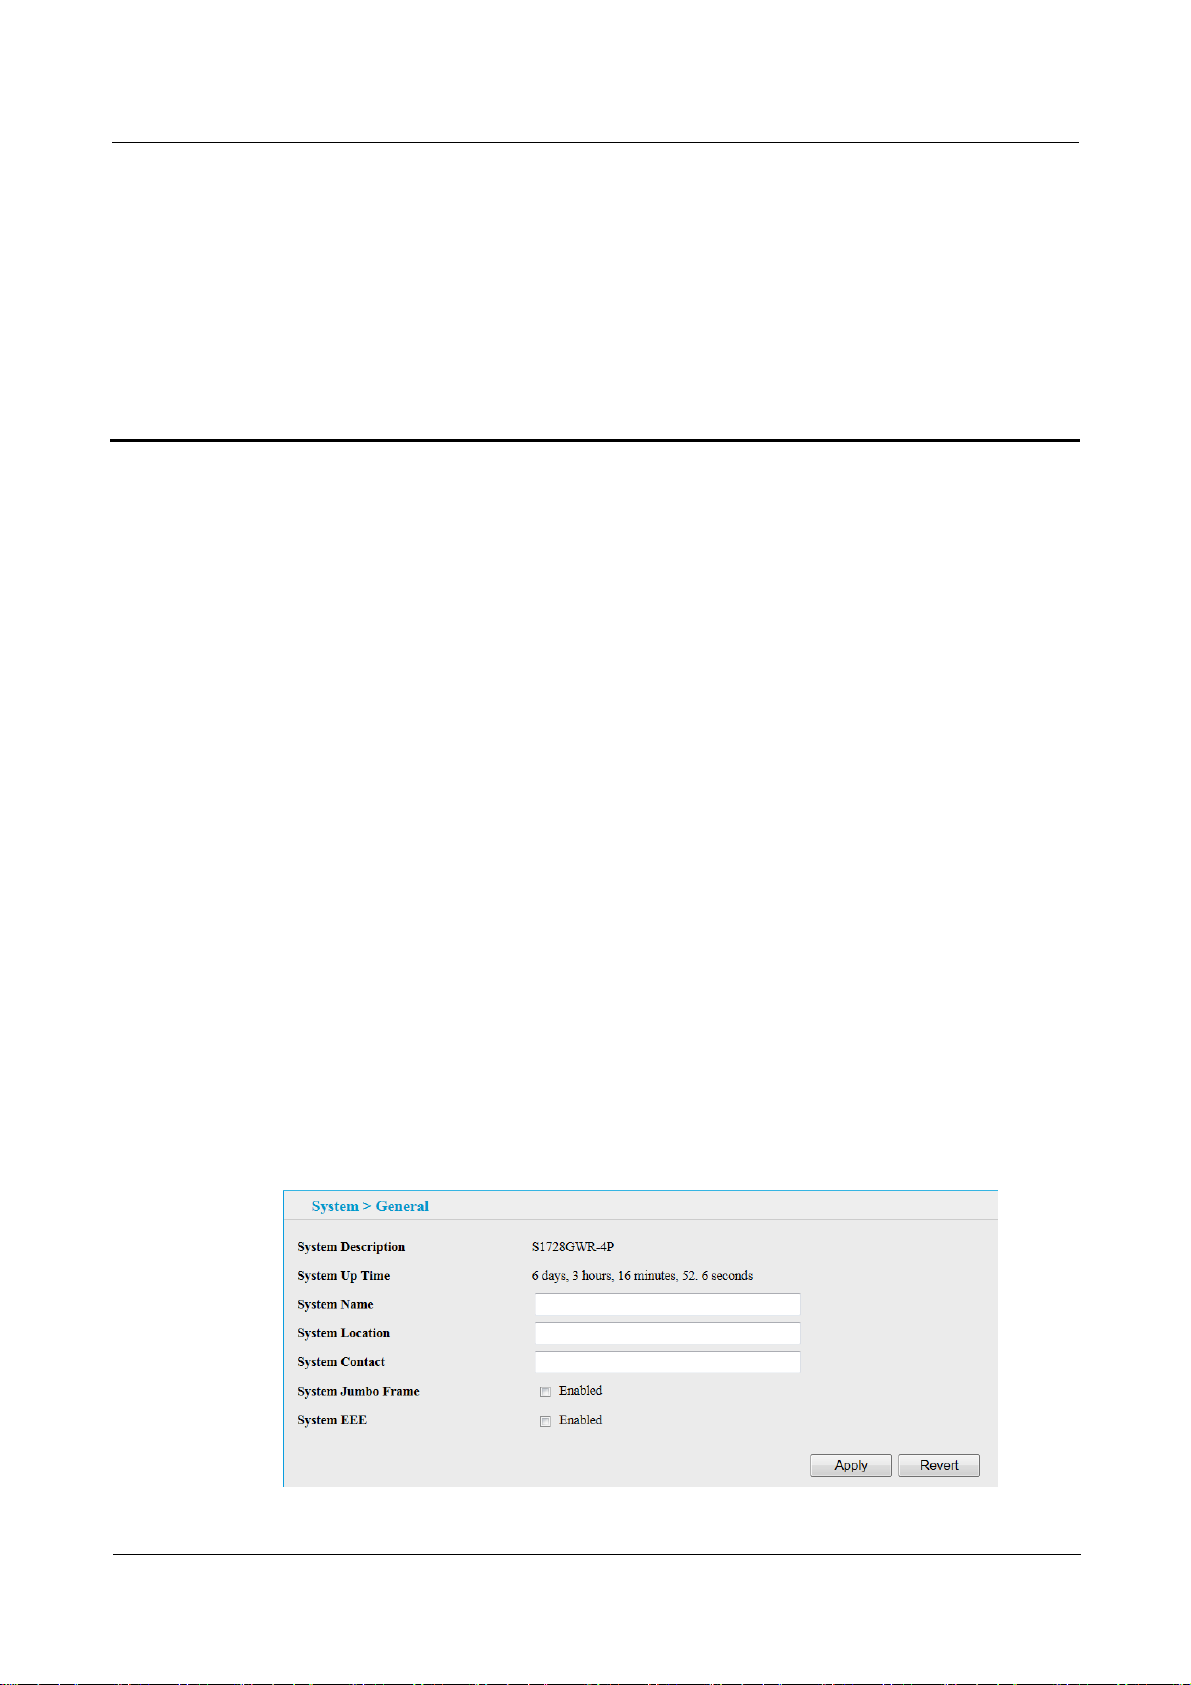
3.1 Setting System General Information
Use the System > General page to identify the system by the information displayed, including
the System Information, System UP Time, System Name, System Location, System Contact,
System Jumbo Frame, and System EEE, as shown in Figure 3-1.
Figure 3-1 “System > General” Information
Issue 01 (2011-11-17) Huawei Proprietary and Confidential
Copyright © Huawei Technologies Co., Ltd
11

Quidway S1700 Series Ethernet Switches
Web User Manual 3 System Management
Table 3-1 Parameters of “System > General” Information
Title Description
System Description Brief description of device type
System Up Time Length of time the management agent has been up.
System Name Name assigned to the switch system
System Location Specifies the system location.
System Contact The contact information of the administrator
System Jumbo Frame Enable or disable system jumbo frame. (default:disabled)
System EEE Enable or disable system EEE. (default:disabled)
1. Click System > General.
2. Specify the system name, location, and contact information for the system administrator,
enable or disable system jumbo frame and system EEE.
3. Click Apply.
----End
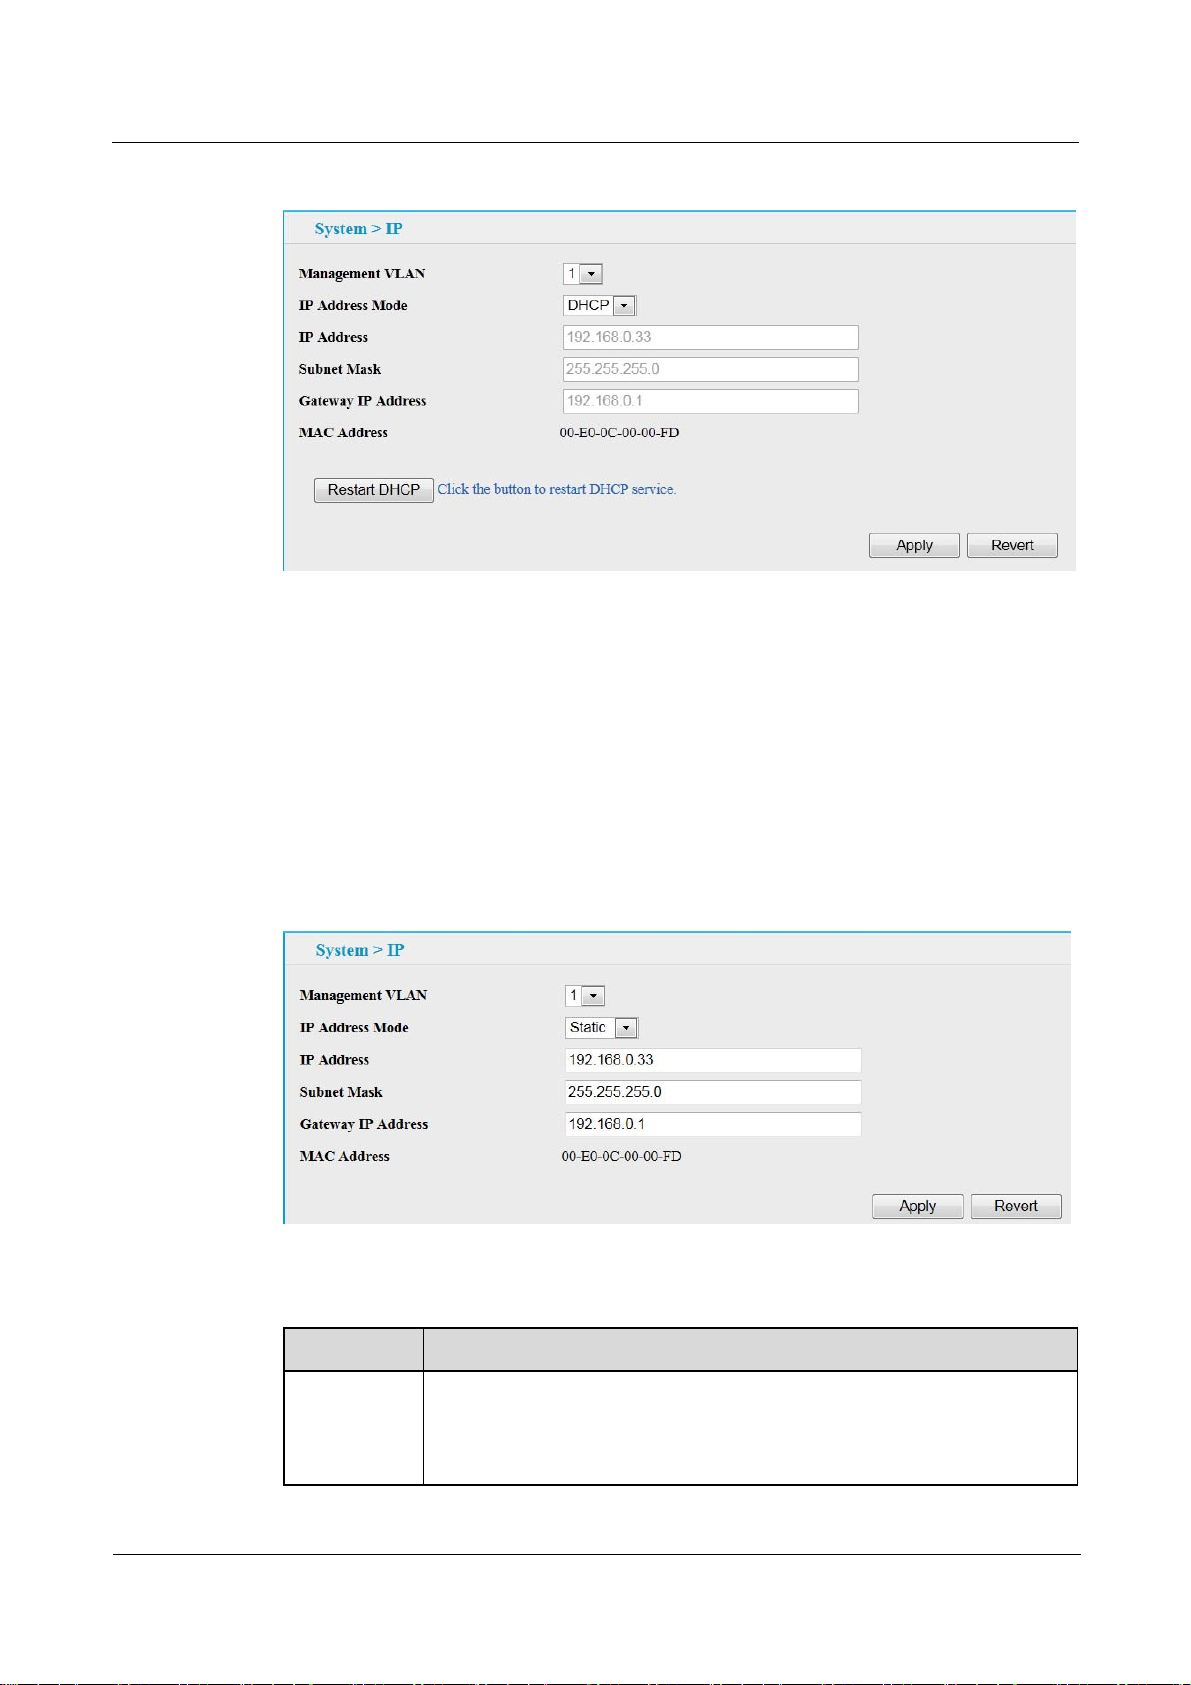
3.2 Setting the Switch’s IP Address
Use the System > IP page to configure VLAN and an IPv4 address for management access
over the network.
At default, the device obtains an address from DHCP server. If failed to obtain IP address, a
static address of 192.168.0.1 will be assigned.
To obtain a dynamic address through DHCP for the switch:
1. Click System > IP.
2. Select the VLAN through which the management station is attached, set the IP Address Mode
to “DHCP”.
3. Click Apply to save your changes.
4. Then click Restart DHCP to immediately request a new address.
Issue 01 (2011-11-17) Huawei Proprietary and Confidential
Copyright © Huawei Technologies Co., Ltd
12
Quidway S1700 Series Ethernet Switches
Web User Manual 3 System Management
Figure 3-2 Configuring a DHCP IPv4 Address
----End
To set a static address for the switch:
1. Click System > IP.
2. Select the VLAN through which the management station is attached, set the IP Address Mode
to “Static,” enter the IP address, subnet mask and gateway.
3. Click Apply.
Figure 3-3 Configuring a Static IPv4 Address
Table 3-2 Parameter of Configuring IP Address for Switch
Title Description
Management
VLAN
ID of the configured VLAN (1-4093). By default, all ports on the switch are
members of VLAN 1. However, the management station can be attached to
a port belonging to any VLAN, as long as that VLAN has been assigned an
IP address.
Issue 01 (2011-11-17) Huawei Proprietary and Confidential
Copyright © Huawei Technologies Co., Ltd
13

Quidway S1700 Series Ethernet Switches
Web User Manual 3 System Management
Title Description
IP Address
Mode
IP Address Address of the VLAN to which the management station is attached. Valid IP
Subnet Mask This mask identifies the host address bits used for routing to specific
Gateway IP
Address
MAC
Address
Restart
DHCP
----End
Specifies whether IP functionality is enabled via manual configuration
(Static), Dynamic Host Configuration Protocol (DHCP). If DHCP is
enabled, IP will not function until a reply has been received from the server.
Requests will be broadcast periodically by the switch for an IP address.
DHCP responses can include the IP address, subnet mask, and default
gateway. (Default: DHCP)
addresses consist of four numbers, 0 to 255, separated by periods. (Default:
192.168.0.1)
subnets. (Default: 255.255.255.0)
IP address of the gateway router between the switch and management
stations that exist on other network segments. (Default: null)
Show the Physical address for this switch.
Click to restart DHCP service.
3.3 Managing System Files
Use the System > File page to manage the switch system files, including upgrading the switch
operating software or configuration files, setting the system start-up files, etc.
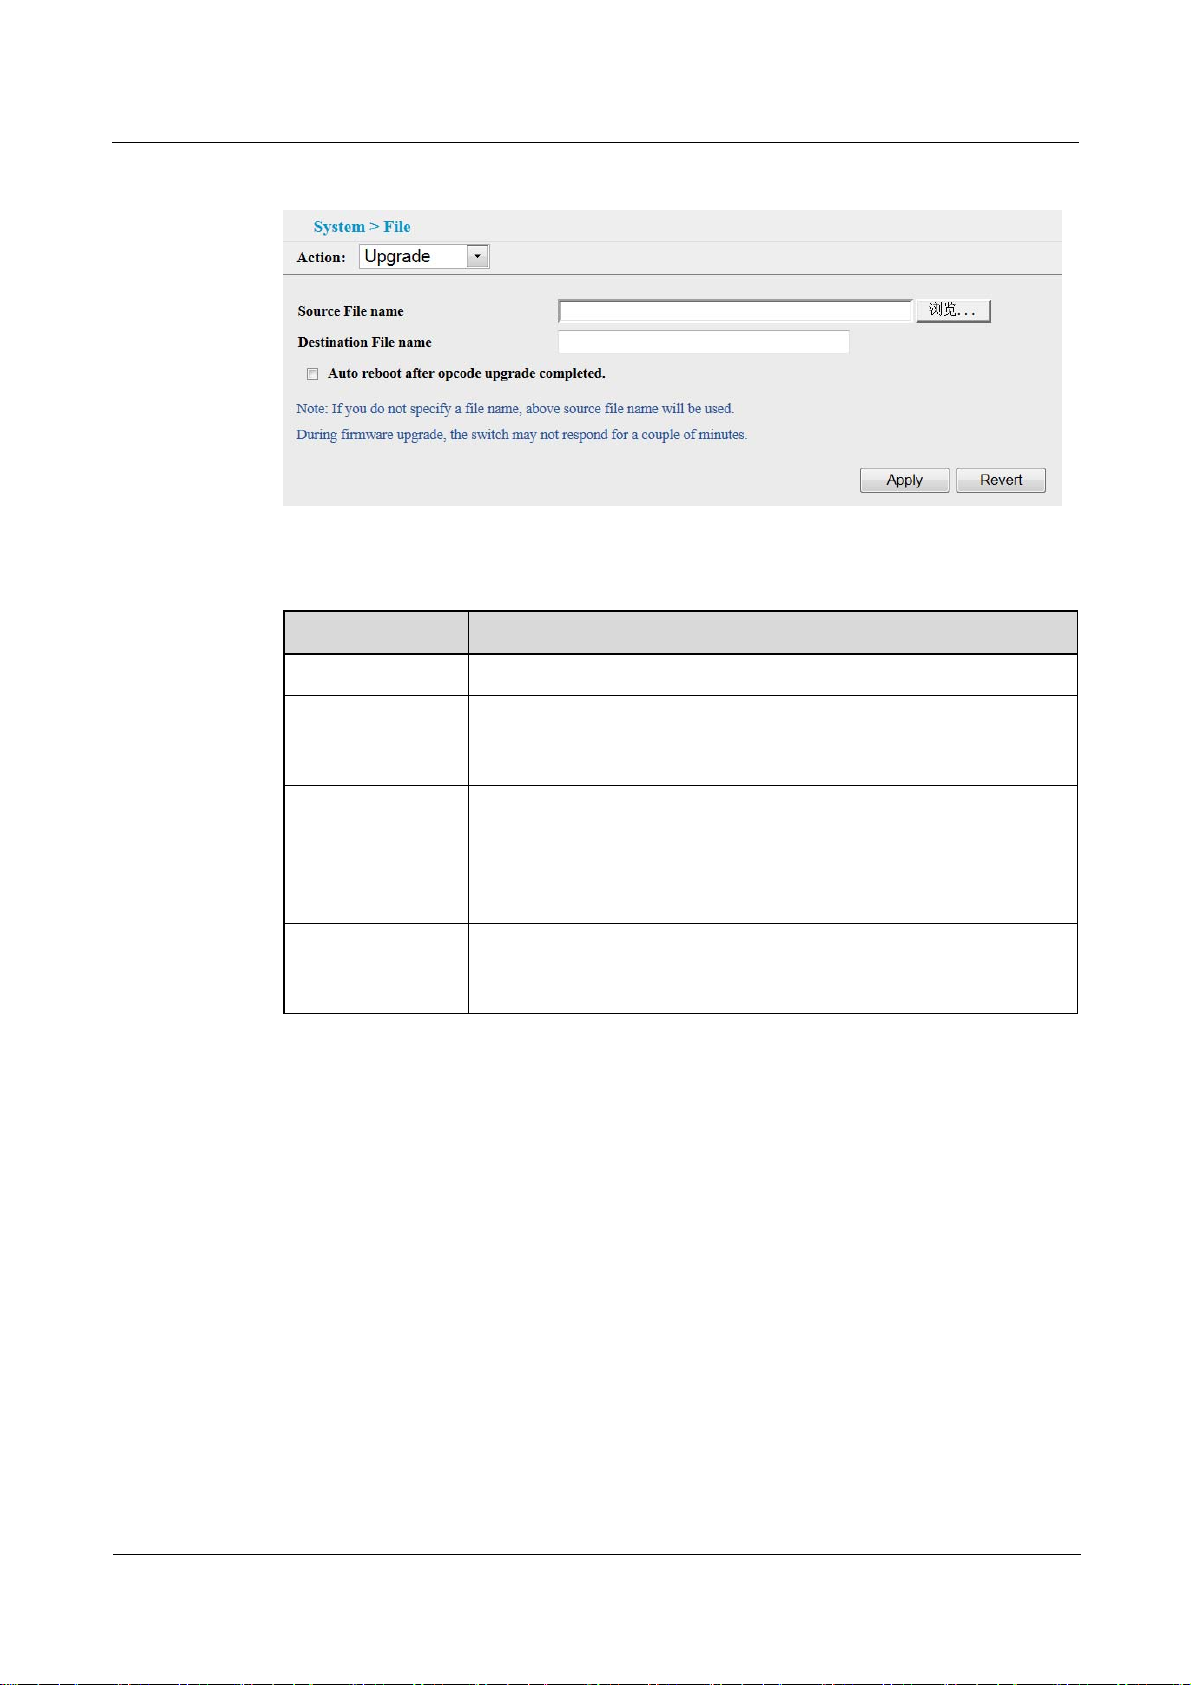
3.3.1 Upgrade Firmware
Use the System > File (Upgrade) page to upgrade the firmware to use for system
initialization.
To upgrade the firmware for switch:
1. Click System > File, see Figure 3-4.
2. Select Upgrade from the Action list.
3. Set the corresponding configuration parameters, and then click Apply.
SeeTable 3-3 for the parameters of upgrade switch.
Issue 01 (2011-11-17) Huawei Proprietary and Confidential
Copyright © Huawei Technologies Co., Ltd
14
Quidway S1700 Series Ethernet Switches
Web User Manual 3 System Management
Figure 3-4 Upgrade Switch
Table 3-3 Parameter of Upgrade Switch
Title Description
Action Select upgrade to upgrade the firmware (Required).
Source File name The file name of the firmware in the management station.
Click”Browse”button to choose the upgrading firmware. For example:
S1700_V100R006C00B003.bin.
Destination File
name
Auto reboot after
opcode upgrade
completed
4. The switch reboot automatically if you enable the chck box Auto reboot after opcode upgrade
completed. After rebooting, the page automatically jumps to the login page when you click it.
5. Input User Name and Password to log in the Web interface.
----End
The destination file name of the firmware in the switch. The file name
should not contain slashes( or /), the leading letter of the file name
should not be a period (.), and the maximum, length for file names is
63 characters for files on the switch. (Valid characters: A-Z, a-z, 0-9,
".", "-", "_").
Enable the check box to auto reboot after opcode upgrade completed.
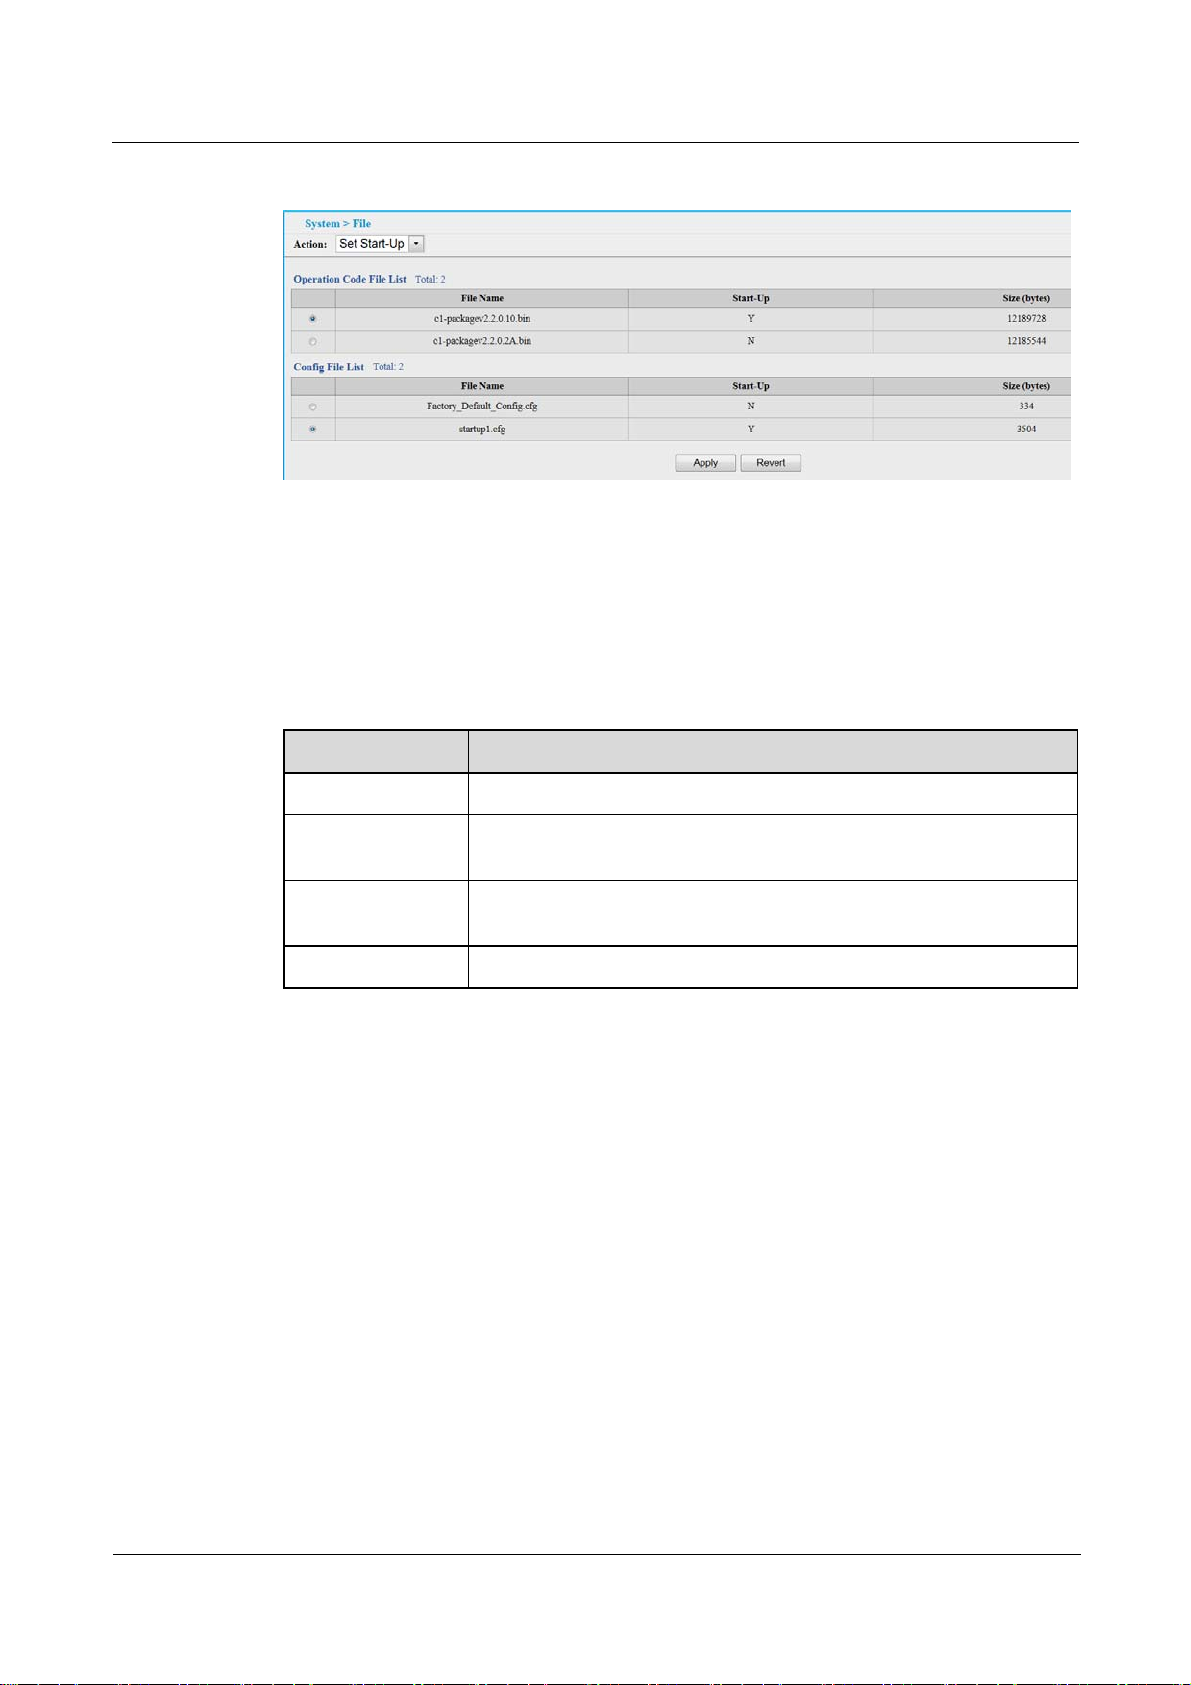
3.3.2 Setting the Start-Up File
Use the System > File (Set Start-Up) page to specify the firmware or configuration file to use
for system initialization.
Issue 01 (2011-11-17) Huawei Proprietary and Confidential
Copyright © Huawei Technologies Co., Ltd
15
Quidway S1700 Series Ethernet Switches
Web User Manual 3 System Management
Figure 3-5 Setting Start-Up Files
1. Click System > File. See Figure 3-5.
2. Select Set Start-Up from the Action list.
3. Mark the operation code or configuration file to be used at startup.Click Apply, and it takes
effect when you reboot the system.
Table 3-4 Parameter of Upgrade Switch
Title Description
Action Select Set Start-Up to specify the Start-Up file (Required).
File name The Start-Up File. Mark the Operation Code File List and Config File
List (Required).
Start-Up Activation status. “Y”means the corresding file is the Start-Up file.
“N”means not.
Size (bytes) The size of this file.
----End
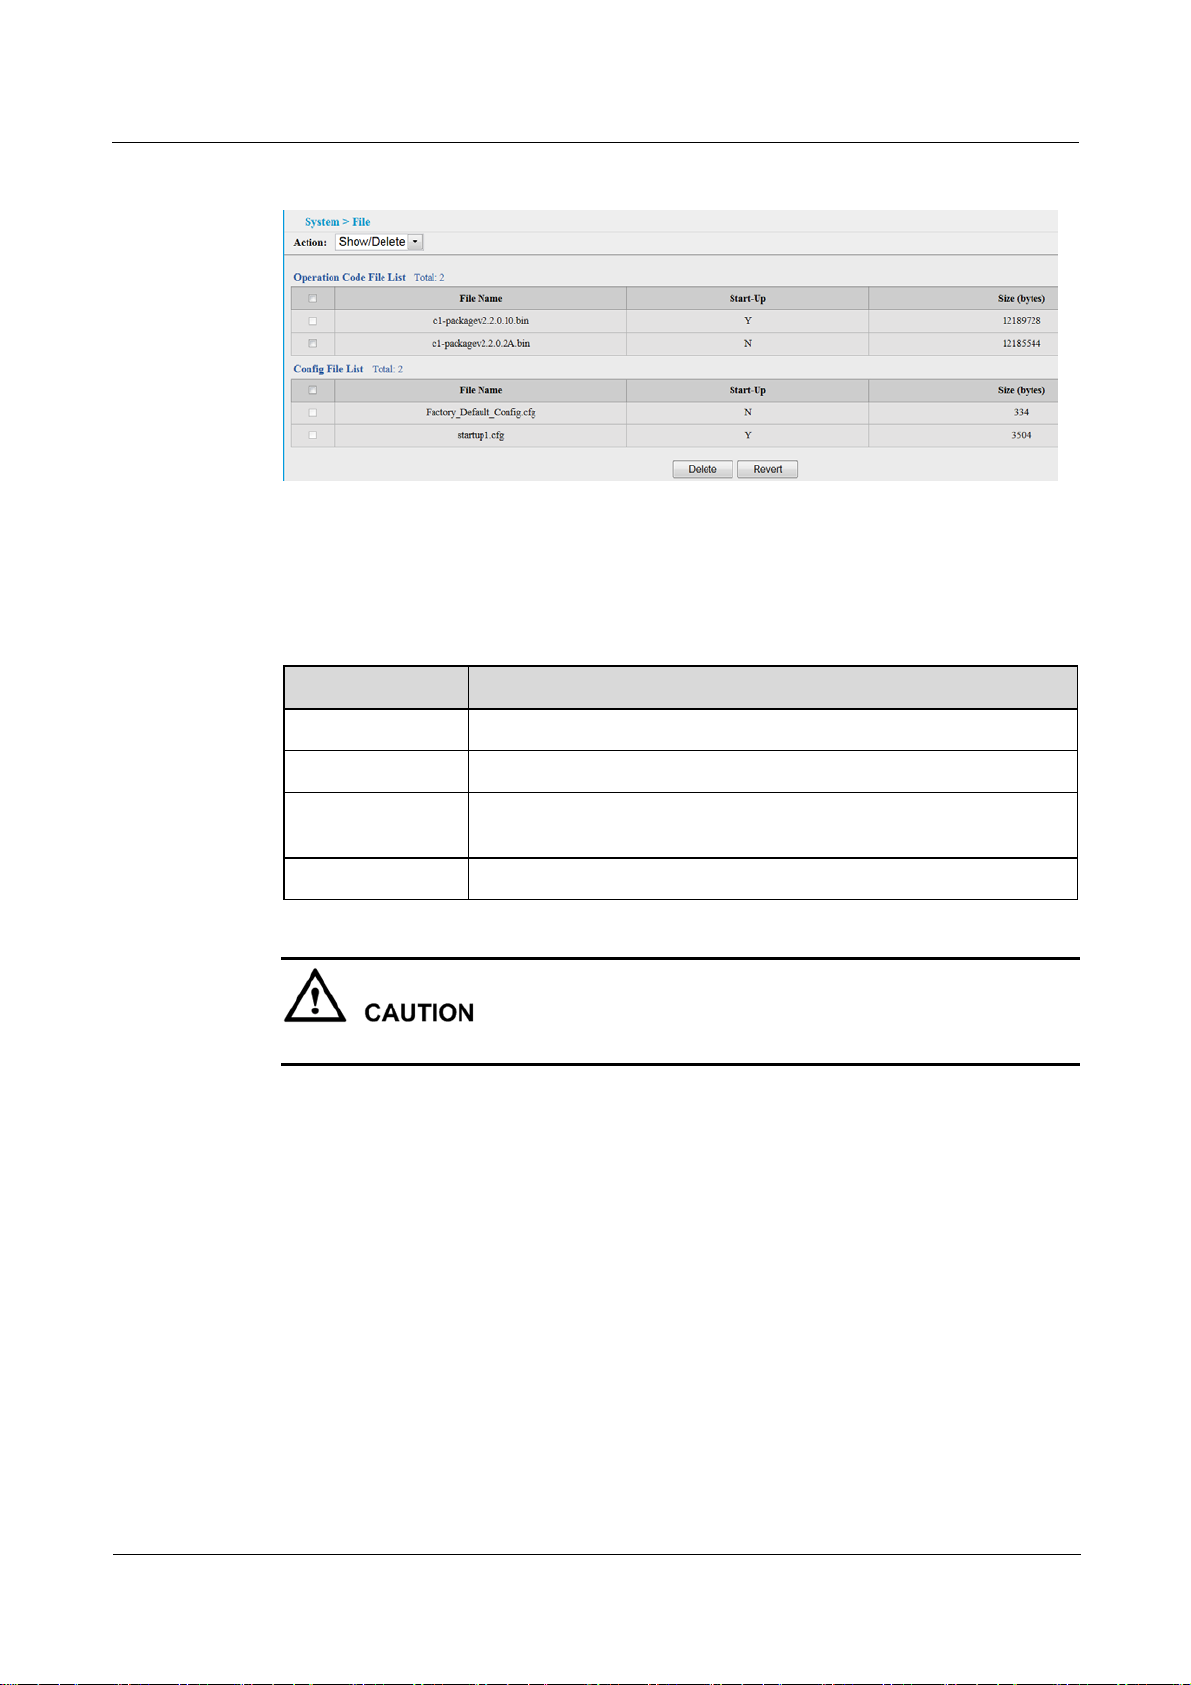
3.3.3 Showing/Deleting System Files
Use the System > File (Show/Delete) page to show the files in the system directory, or to
delete a file.
Issue 01 (2011-11-17) Huawei Proprietary and Confidential
Copyright © Huawei Technologies Co., Ltd
16
Quidway S1700 Series Ethernet Switches
Web User Manual 3 System Management
Figure 3-6 Showing System Files
1. Click System, then File.
2. Select Show from the Action list.
3. To delete a file, mark it in the File List and click Delete.
Table 3-5 Parameter of Upgrade Switch
Title Description
Action Select Show/Delete to Show/Delete the switch system file (Required).
File name The Start-Up File.
Start-Up Activation status. “Y”means the corresding file is the Start-Up file.
“N”means not.
Size (bytes) The size of this file.
Files designated for start-up, and the Factory_Default_Config.cfg file, cannot be deleted.
----End
3.3.4 Saving the Running Configuration to a Local File
Use the System > File (Config File) page to save the current configuration settings to a local
file and to upload/download configuration files by using HTTP. See Figure 3-7, Figure 3-8,
and Figure 3-9.
Issue 01 (2011-11-17) Huawei Proprietary and Confidential
Copyright © Huawei Technologies Co., Ltd
17

Quidway S1700 Series Ethernet Switches
Web User Manual 3 System Management
Figure 3-7 Saving the Running Configuration
Figure 3-8 HTTP Uploading Configuration
Figure 3-9 HTTP Downloading Configuration
1. Click System > File. Figure 3-7 is displayed.
2. Select Config File from the Action list.
3. Select the corresponding operation from the Operation list: Running-Config, HTTP Upload,
and HTTP Download. Table 3-6 describes the operation parameters.
4. Click Apply.
Table 3-6 Operation Parameters
Title Description
Save
Copies the current configuration settings to a local file on the switch.
Running-Config
Issue 01 (2011-11-17) Huawei Proprietary and Confidential
Copyright © Huawei Technologies Co., Ltd
18
Quidway S1700 Series Ethernet Switches
Web User Manual 3 System Management
Title Description
HTTP Upload Uploads the PC local configuration files to the switch system by using
Specify Destination file names.
HTTP.
HTTP
Download
----End
Downloads the original configuration files to the local PC.
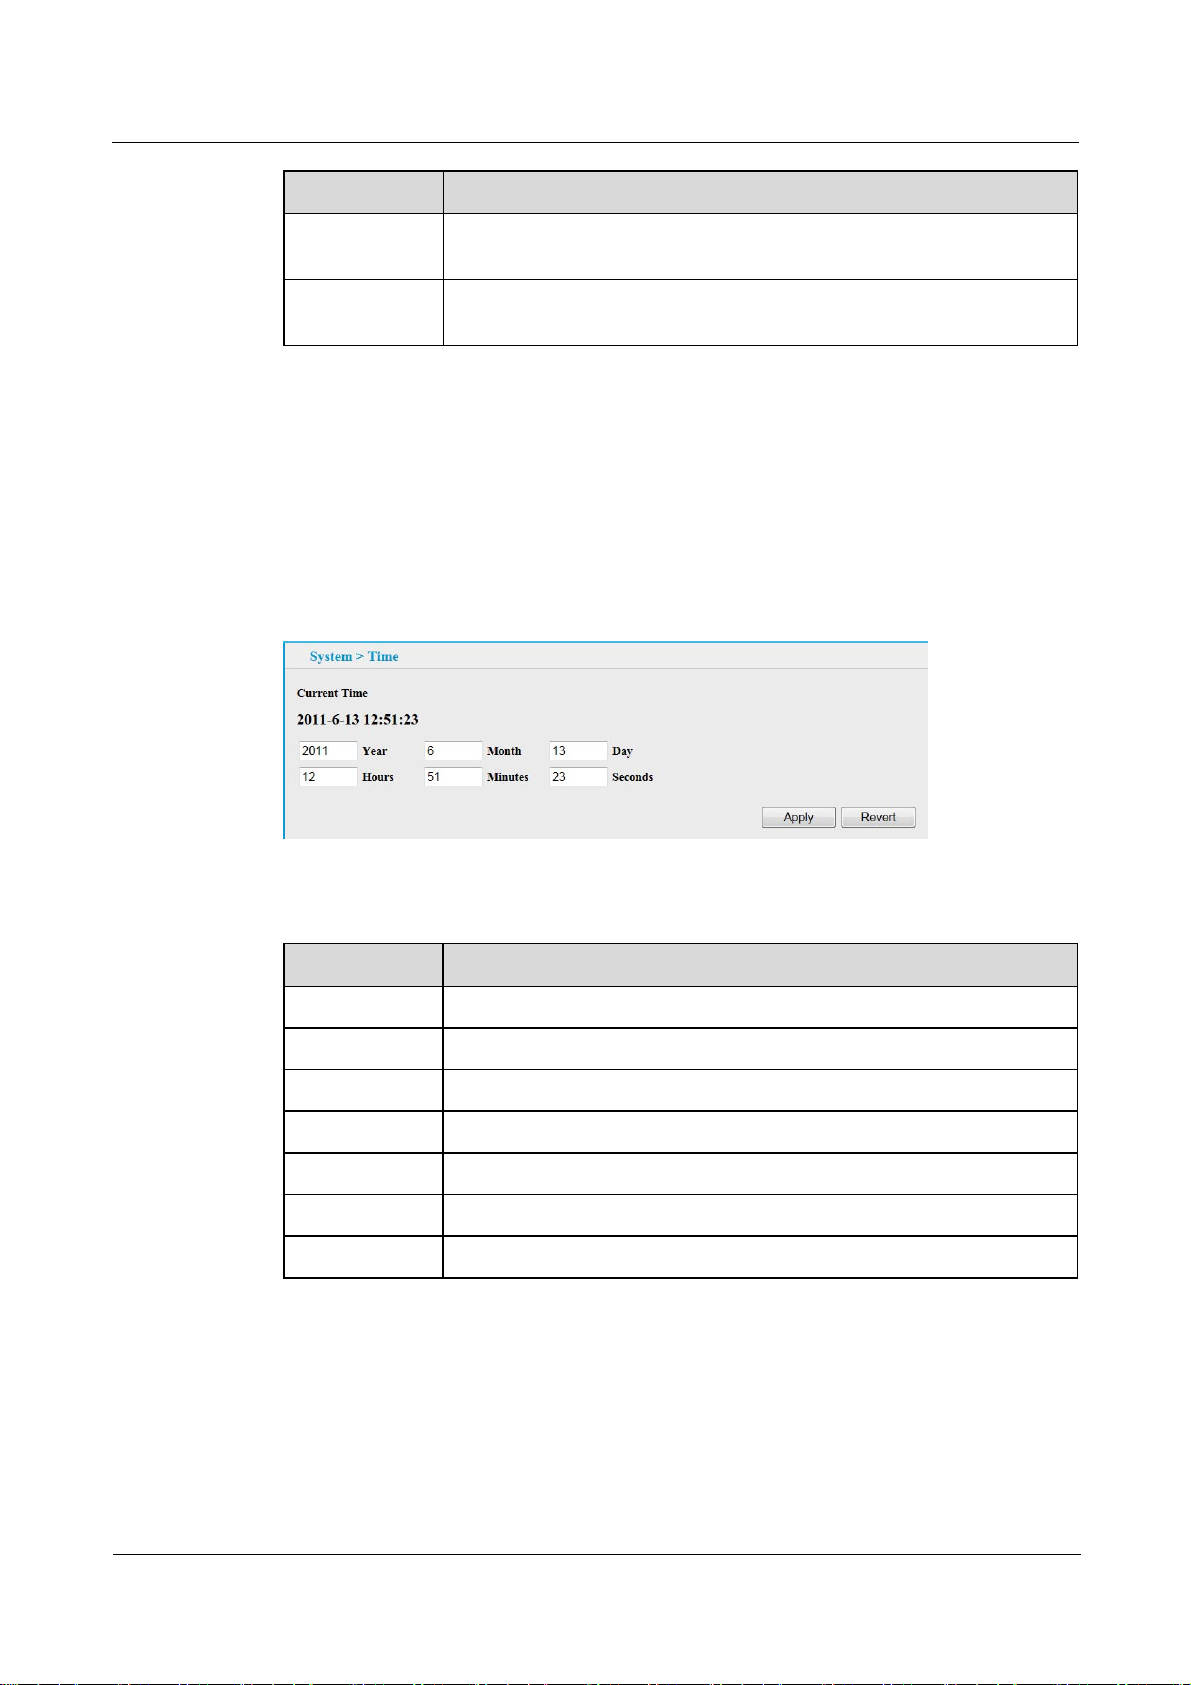
3.4 Setting the System Clock
Use the System > Time page to set the system time on the switch manually.
Figure 3-10 Manually Setting the System Clock
Table 3-7 Manually Setting the System Clock Parameters
Title Description
Current Time Shows the current time set on the switch.
Year Sets the year. (Range: 1970-2037)
Month Sets the month. (Range: 1-12)
Day Sets the day of the month. (Range: 1-31)
Hours Sets the hour. (Range: 0-23)
Minutes Sets the minute value. (Range: 0-59)
Seconds Sets the second value. (Range: 0-59
1. Click System > Time.
2. Enter the time and date in the appropriate fields as required.
3. Click Apply.
----End
Issue 01 (2011-11-17) Huawei Proprietary and Confidential
Copyright © Huawei Technologies Co., Ltd
19
Quidway S1700 Series Ethernet Switches
Web User Manual 3 System Management
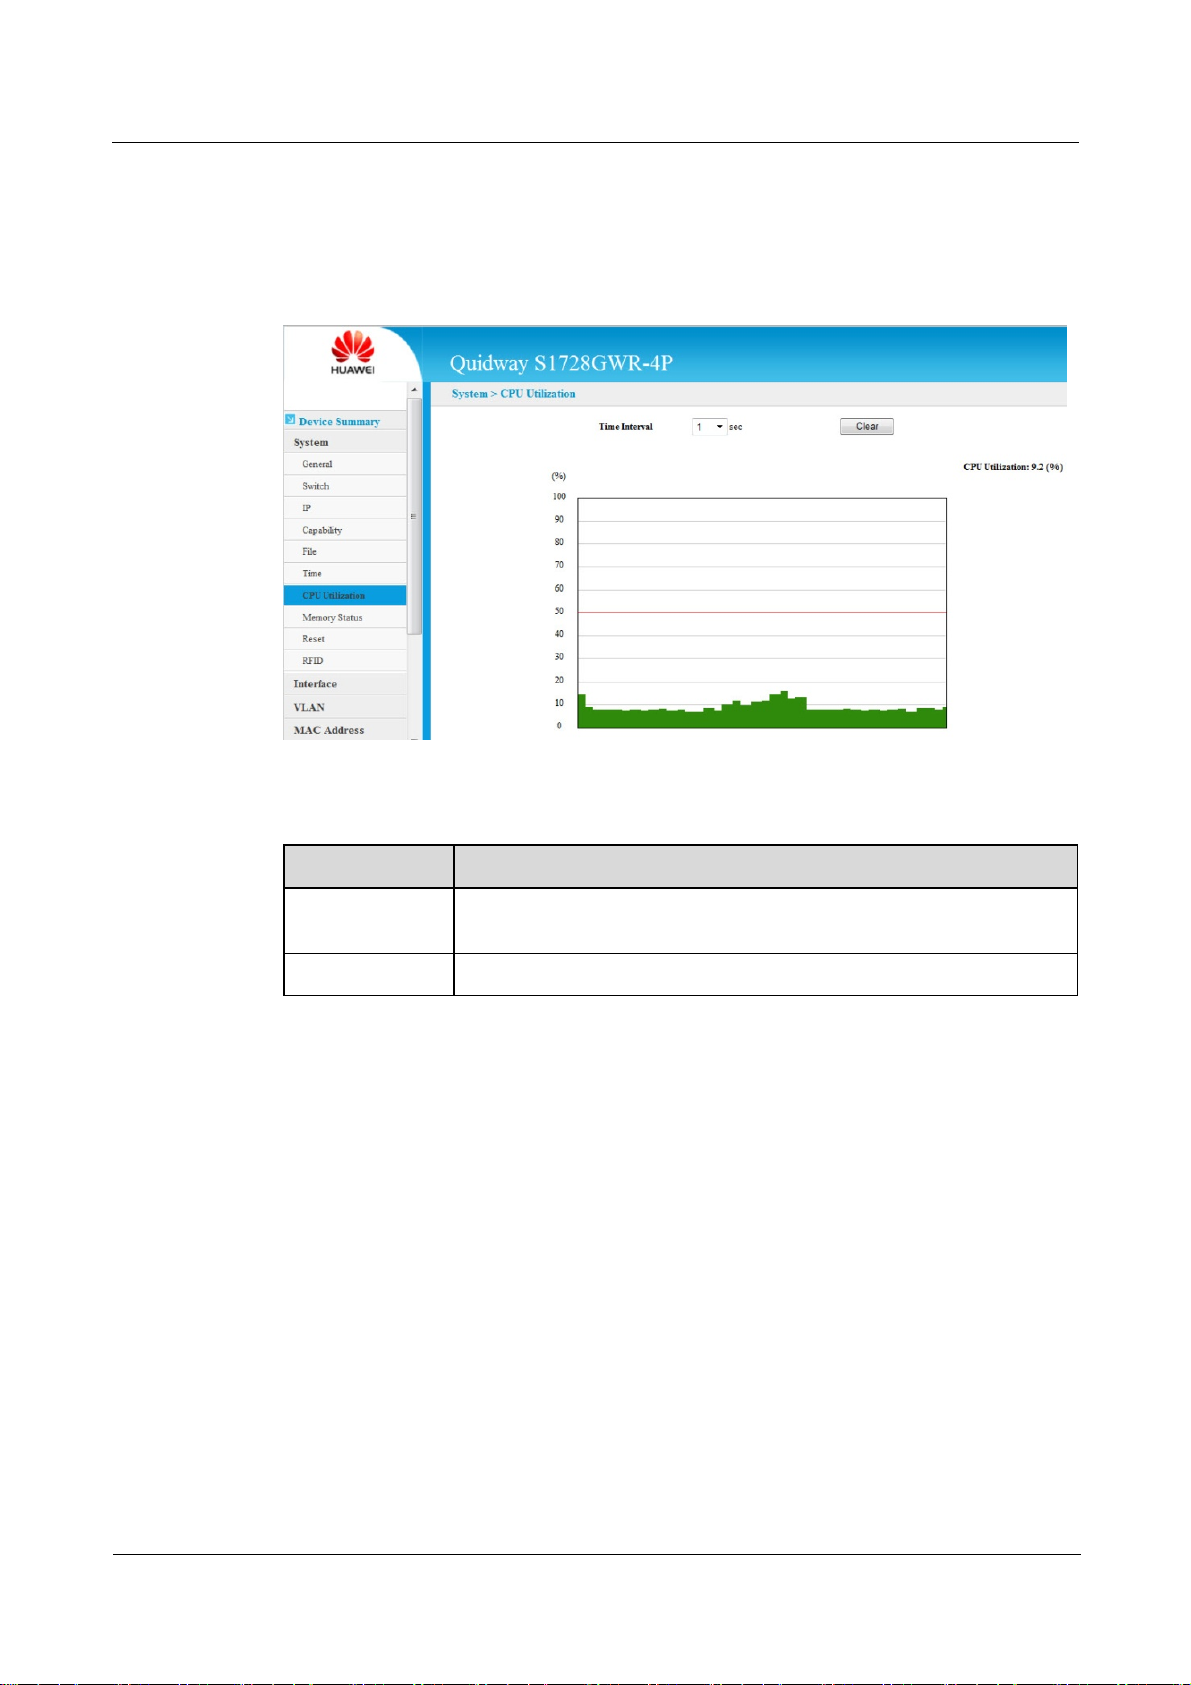
3.5 Displaying CPU Utilization
Use the System > CPU Utilization page to display information on CPU utilization.
Figure 3-11 Displaying CPU Utilization
Table 3-8 Displaying CPU Utilization Parameters
Title Description
Time Interval The interval at which to update the displayed utilization rate. (Options:
1, 5, 10, 30, 60 seconds; Default: 1 second)
CPU Utilization CPU utilization over specified interval in percentage.
To display CPU utilization:
1. Click System > CPU Utilization.
2. Change the update interval if required. Note that the interval is changed as soon as a new
setting is selected.
----End
3.6 Displaying Memory Usage
Use the System > Memory Usage page to display memory usage parameters.
Issue 01 (2011-11-17) Huawei Proprietary and Confidential
Copyright © Huawei Technologies Co., Ltd
20

Quidway S1700 Series Ethernet Switches
Web User Manual 3 System Management
Figure 3-12 Displaying Memory Usage
Table 3-9 Displaying Memory Usage Parameters
Title Description
Free Size The amount of memory currently free for use.
Used Size The amount of memory allocated to active processes.
Total The total amount of system memory.
3.7 Resetting the System
Use the System > Reset menu to restart the switch.
Figure 3-13 Restarting the Switch
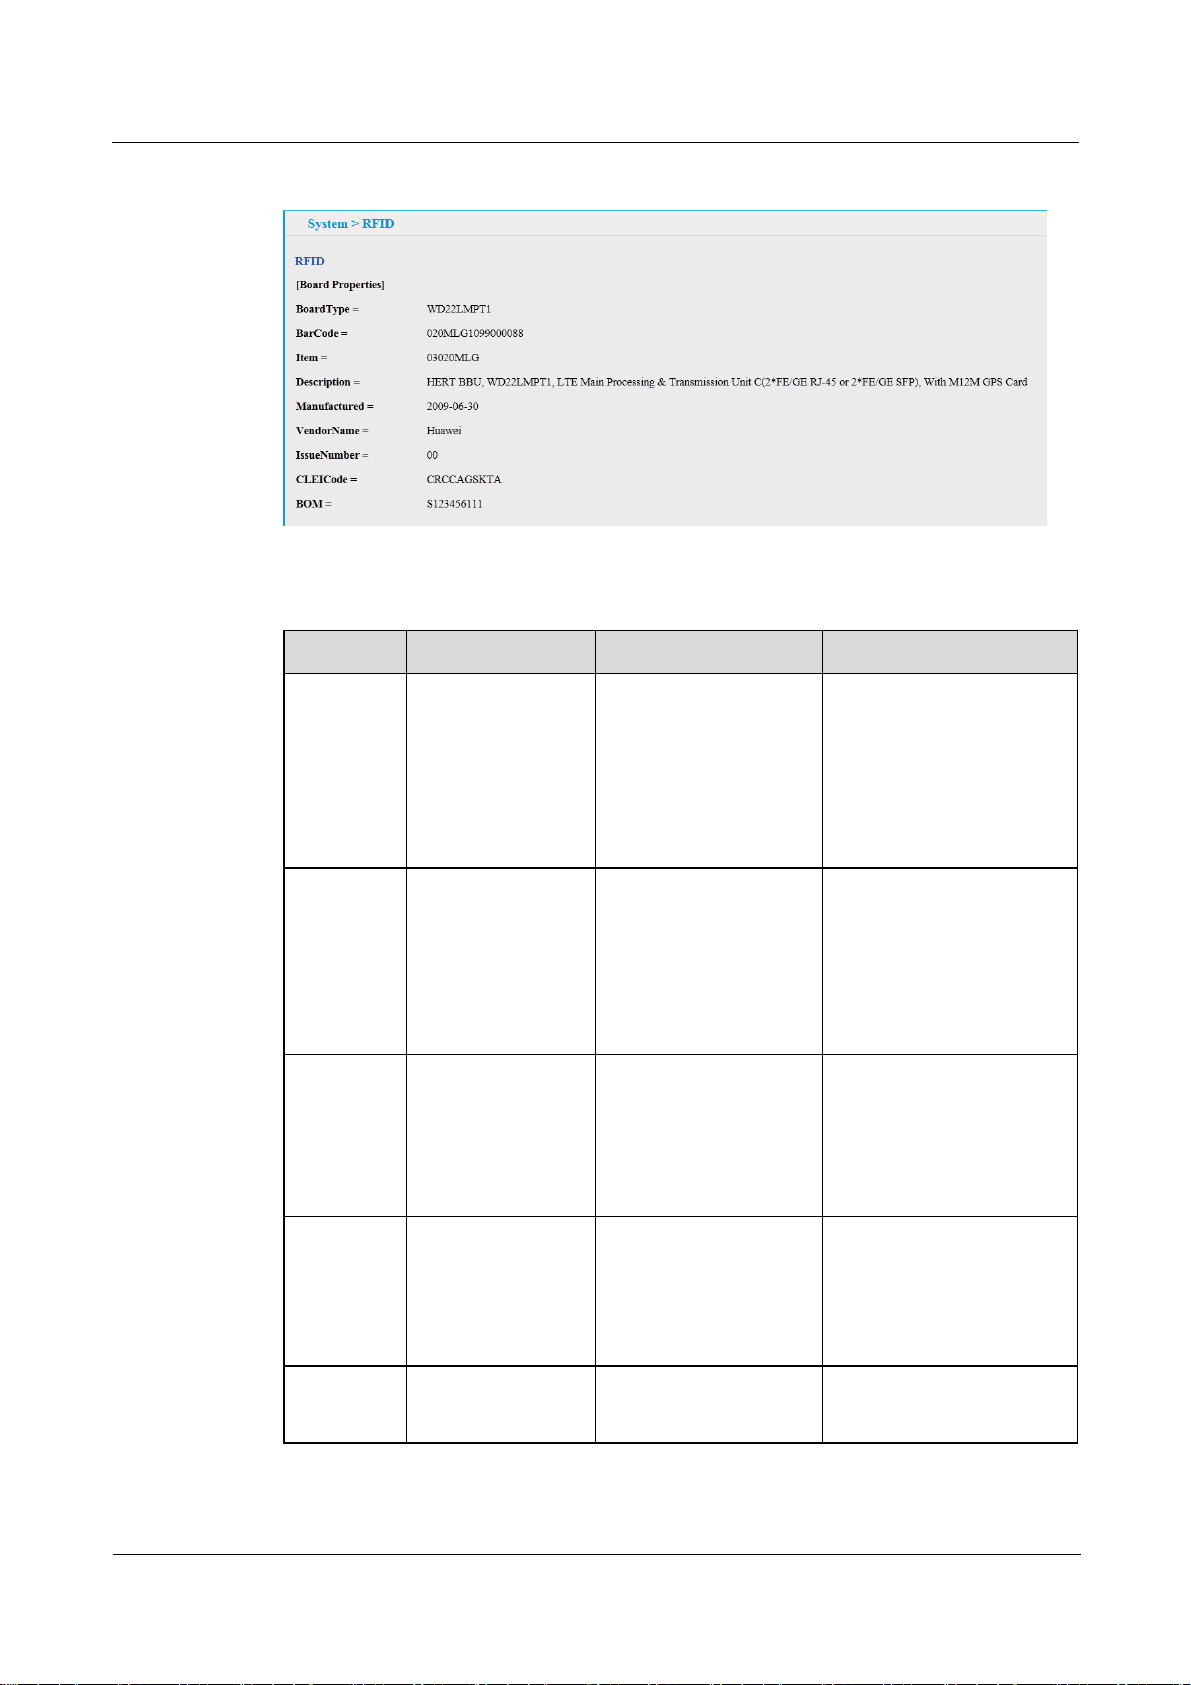
3.8 Displaying RFID
Use the System > RFID menu to show RFID information.
Issue 01 (2011-11-17) Huawei Proprietary and Confidential
Copyright © Huawei Technologies Co., Ltd
21
Quidway S1700 Series Ethernet Switches
Web User Manual 3 System Management
Figure 3-14 RFID
Table 3-10 Displaying RFID Information
Title Description Source Format
Board Type Type of FRU
(Board, Back Panel,
Power, etc).
T with the exsiting
Be consistent with the
information displayed in
Attribute > Internal
Type in PDM
standards, English
title for short is still
Board Type.
BarCode FRU BarCode The attached bar code
for board: finished
board or manufactured
board; the configuration
board bar code: the top
level bar code for boards
or parts
Item BBOM Code Be consistent with the
information displayed in
Code for parts in PDM;
for board, the BBOM
Code is for produced
board.
Description The description of
FRU
Be consistent with the
information displayed in
English Description for
parts in PDM
String
E.g: SSA1SL1601
(Take optical network
products as example, the
same below )
String
E.g:
0359231049000004
String
E.g:03032760
String
E.g:OptiX
10G(V2.0),SSA1SL1601,S
TM-16 Optical Interface
Board(S-16.1,SC)
Manufactur
ed
Issue 01 (2011-11-17) Huawei Proprietary and Confidential
The date of MRU
manufactured
Copyright © Huawei Technologies Co., Ltd
The date that RFU is
stored into the tag
YYYY-MM-DD
E.g:2002-01-23
22

Quidway S1700 Series Ethernet Switches
Web User Manual 3 System Management
Title Description Source Format
VendorNa
me
The name of
Vendor Name
The vendor name is
“Huawei” for the
products produced in
huawei or the products
outsourced to other
companies.
The vendor name is the
corresponding supplier
name for the products
purchased by Huawei.
Issue
number
Issue number The sub-version of
hardware and the data is
from the supply chain of
IT system.
CLEI Code The CLEI Code of
FRU
BOM Precise item code
of FRU
The international
standard material code
More precise item code
only reserved for the
products that Huawei
Item can not meet the
customer asset
management.
String
E.g:Huawei
String
Numbers only.
E.g:00
String:
Captitals and numbers only
E.g:FC9612PW11
String
Captitals and numbers only
E.g:
BOM030702250119360
Issue 01 (2011-11-17) Huawei Proprietary and Confidential
Copyright © Huawei Technologies Co., Ltd
23

Quidway S1700 Series Ethernet Switches
Web User Manual 4 Interface Configuration
4 Interface Configuration
About This Chapter
4.1 Port Configuration
4.2 Trunk Configuration
4.3 Transceiver
4.4 Power Saving
4.1 Port Configuration
This section describes how to configure port connections, mirror traffic from one port to
another, and run cable diagnostics.
4.1.1 General
Use the Interface > Port > General (Show Information) page to display the current connection
status, including link state, speed/duplex mode, flow control, and auto-negotiation.
Figure 4-1 Displaying Port Information
Issue 01 (2011-11-17) Huawei Proprietary and Confidential
Copyright © Huawei Technologies Co., Ltd
24
Quidway S1700 Series Ethernet Switches
Web User Manual 4 Interface Configuration
Table 4-1 Parameters of Displaying Port Information
Title Description
Port Port identifier.
Type Indicates the port type. (1000Base-T, 1000Base SFP)
Name Interface label.
Admin Shows if the port is enabled or disabled.
Oper Status Indicates if the link is Up or Down.
Media Type Media type used.
(Options: RJ-45 – Copper-Forced; SFP-Forced,; Default: RJ-45 –
Copper-Forced)
Autonegotiation Shows if auto-negotiation is enabled or disabled.
Oper Speed
Duplex
Oper Flow Control Shows if flow control is enabled or disabled.
To display port connection parameters:
1. Click Interface > Port > General. Figure 4-1 is displayed.
2. Select Show Information from the Action List.
----End
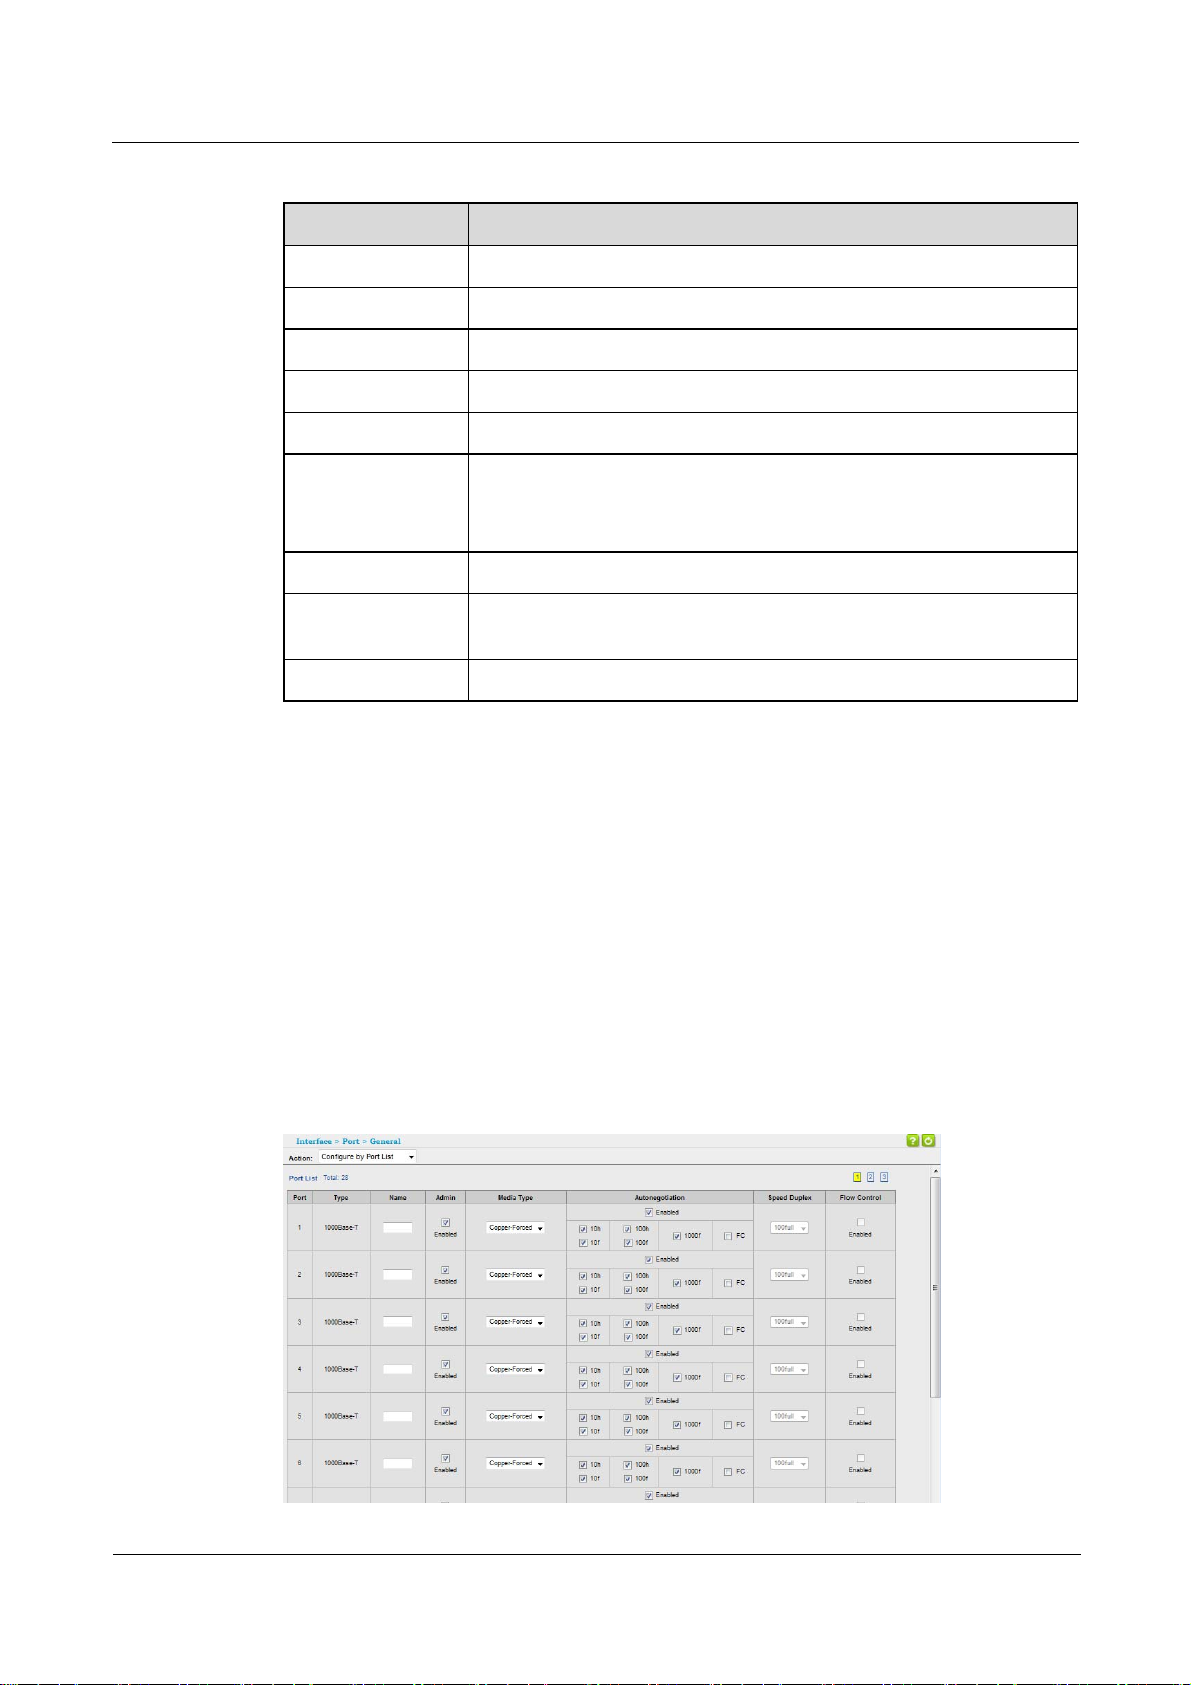
Configuring by Port List
Use the Interface > Port > General (Configure by Port List) page to enable/disable an
interface, set auto-negotiation and the interface capabilities to advertise, or manually fix the
speed, duplex mode, and flow control.
Figure 4-2 Configuring Connections by Port List
Shows the current speed and duplex mode.
Issue 01 (2011-11-17) Huawei Proprietary and Confidential
Copyright © Huawei Technologies Co., Ltd
25
 Loading...