

Page 1

Wonderful Communication, Mobile Life
Welcome to HUAWEI C3300 CDMA Mobile Phone
HUAWEI C3300 CDMA Mobile Phone
User Manual
Page 2

Page 3

Copyright © 2006 Huawei Technologies Co., Ltd.
All Rights Reserved
No part of this manual may be reproduced or
transmitted in any form or by any means without prior
written consent of Huawei Technologies Co., Ltd.
Trademarks
and HUAWEI are trademarks of Huawei
Technologies Co., Ltd.
All other trademarks mentioned in this manual are the
property of their respective holders.
Notice
The information in this manual is subject to change
without notice. Every effort has been made in the
preparation of this manual to ensure accuracy of the
contents, but all statements, information, and
recommendations in this manual do not constitute the
warranty of any kind, express or implied.
Page 4

Page 5
Safety Precautions
Before using the phone, please read the safety
precautions carefully and let your children know these, so
that you can use your phone correctly and safely. For
details, see “Warnings and Precautions”.
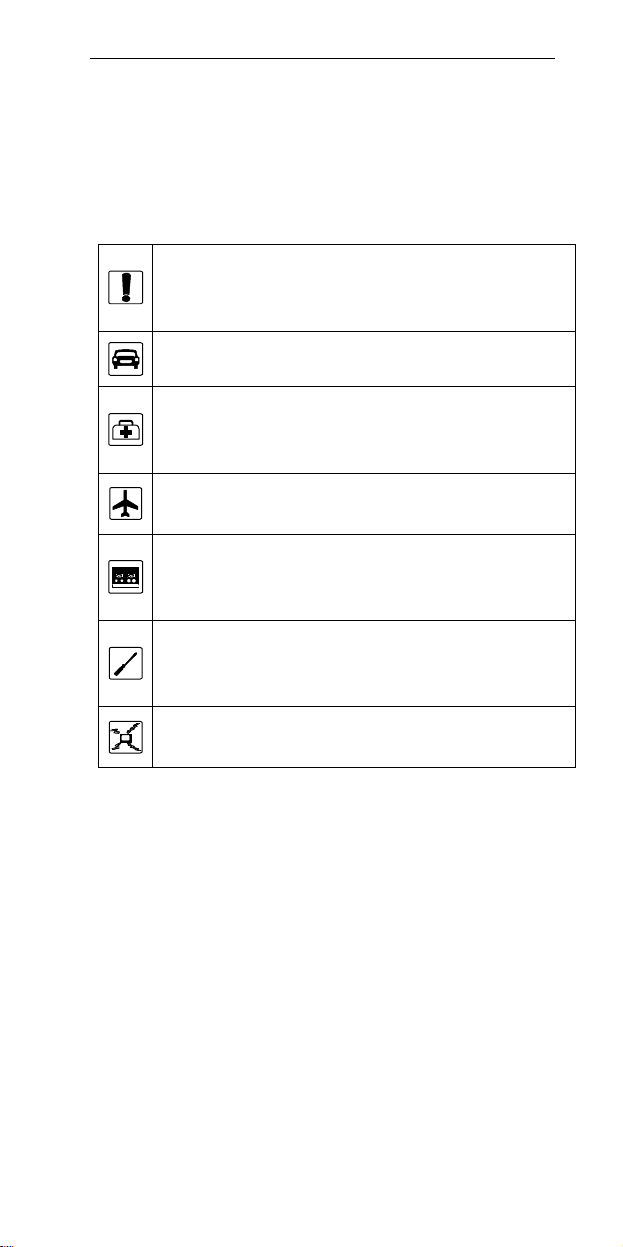
Do not switch on your phone when phone use is
prohibited or when phone use may cause
interference or danger.
Do not use your phone while driving.
Follow the rules or regulations in hospitals and
health care facilities. Switch off your phone near
medical apparatus.
Switch off your phone in an aircraft. The phone may
cause interference to control signals of the aircraft.
Switch off your phone near high-precision electronic
devices. The phone may affect the performance of
these devices.
Do not attempt to disassemble your phone or its
accessories. Only qualified personnel are allowed
to service or repair the phone.
Do not place your phone or its accessories in
containers with strong electromagnetic field.
Page 6
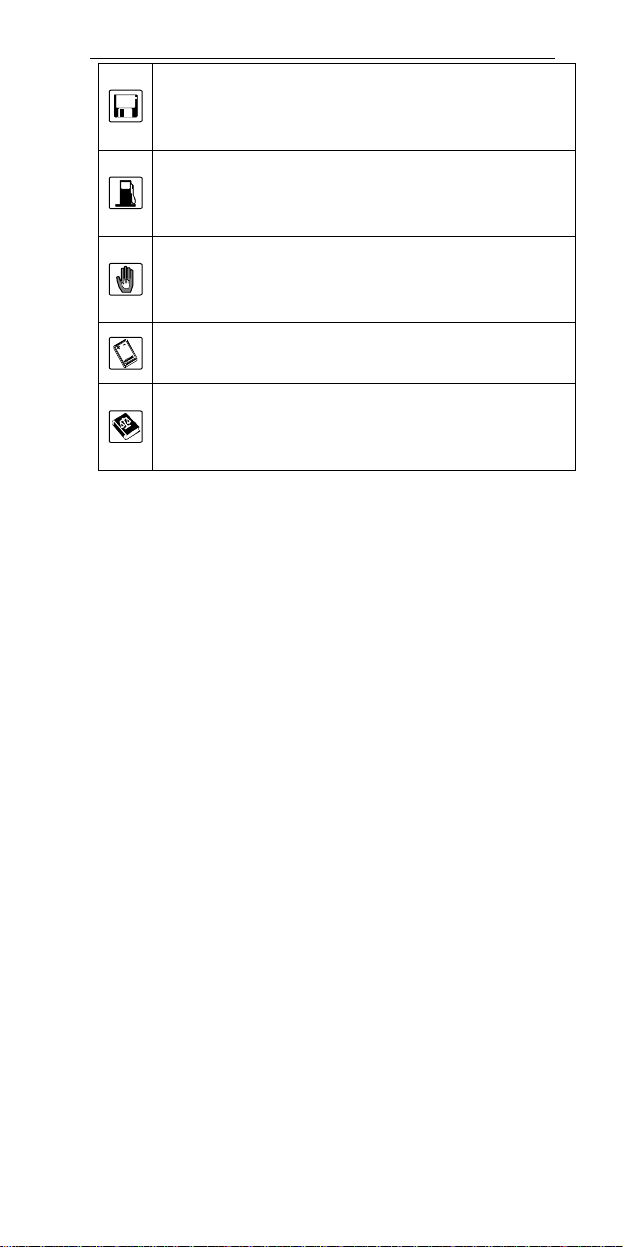
Do not place magnetic storage media near your
phone. Radiation from the phone may erase the
information stored on them.
Do not put your phone in a high-temperature place
or use it in a place with flammable gas such as a
gas station.
Keep your phone and its accessories away from
children. Do not allow children to use your phone
without guidance.
Use approved batteries and chargers only to avoid
explosion.
Observe the laws or regulations on phone use.
Respect others’ privacy and legal rights when using
your phone.
II
Page 7

Table of Contents
1 Getting to Know Your Phone ............................1
Phone and Accessories.......................................1
General Conversions...........................................1
Your Phone.............................................................3
2 Getting Started.......................................................8
Installing and Removing the Battery................8
Inserting and Removing the UIM Card..........11
3 Functions...............................................................15
Powering On and Off Your Phone...................15
Making a Call.......................................................15
Answering a Call.................................................16
Available Options During a Call.......................18
Manually Locking Your Phone.........................19
4 Text Entry...............................................................20
Changing Input Mode........................................20
Entering Text in English Mode.........................21
Entering Text in Predictive Input Mode..........22
Hindi Input Mode.................................................23
i
Page 8

Entering Text in Hindi.........................................24
Entering Numbers...............................................25
Entering Symbols................................................25
5 Short Message Service......................................26
Creating a Message...........................................26
Inbox......................................................................27
Outbox...................................................................28
Draftbox................................................................28
Voice Mail.............................................................29
Deleting All...........................................................29
Settings.................................................................30
6 Phonebook ............................................................32
Searching a Contact..........................................32
Adding a Contact................................................32
Groups...................................................................33
Speed Dial............................................................34
Copying All Contacts..........................................34
Deleting All Contacts..........................................35
Options..................................................................35
ii
Page 9

7 Call Records..........................................................37
Missed Calls.........................................................37
Answered Calls...................................................37
Dialed Calls..........................................................38
Clearing Records................................................38
Call Duration........................................................38
8 Extras......................................................................39
Alarms...................................................................39
Calendar...............................................................40
Calculator.............................................................40
Stopwatch.............................................................41
Time Zone ............................................................42
Games...................................................................42
9 Sound......................................................................43
Adjusting Volume................................................43
Setting Alert Mode..............................................43
Setting Ring Tone...............................................44
Setting the Alarm Tone......................................44
Setting the SMS Receive Tone........................44
Setting the SMS Send Tone.............................44
iii
Page 10

Setting Other Tones...........................................45
10 Settings ................................................................46
Display...................................................................46
Time.......................................................................48
Call.........................................................................49
Language..............................................................53
Security.................................................................53
Restoring..............................................................56
11 Troubleshooting................................................58
12 Warnings and Precautions............................60
iv
Page 11
1 Getting to Know Your Phone
Phone and Accessories
Before using your phone, check the package for the
following items:
l C3300 phone
l Travel charger
l Li-ion battery
l C3300 CDMA Mobile Phone User Manual
l After-sales Service Manual
l Warranty Card
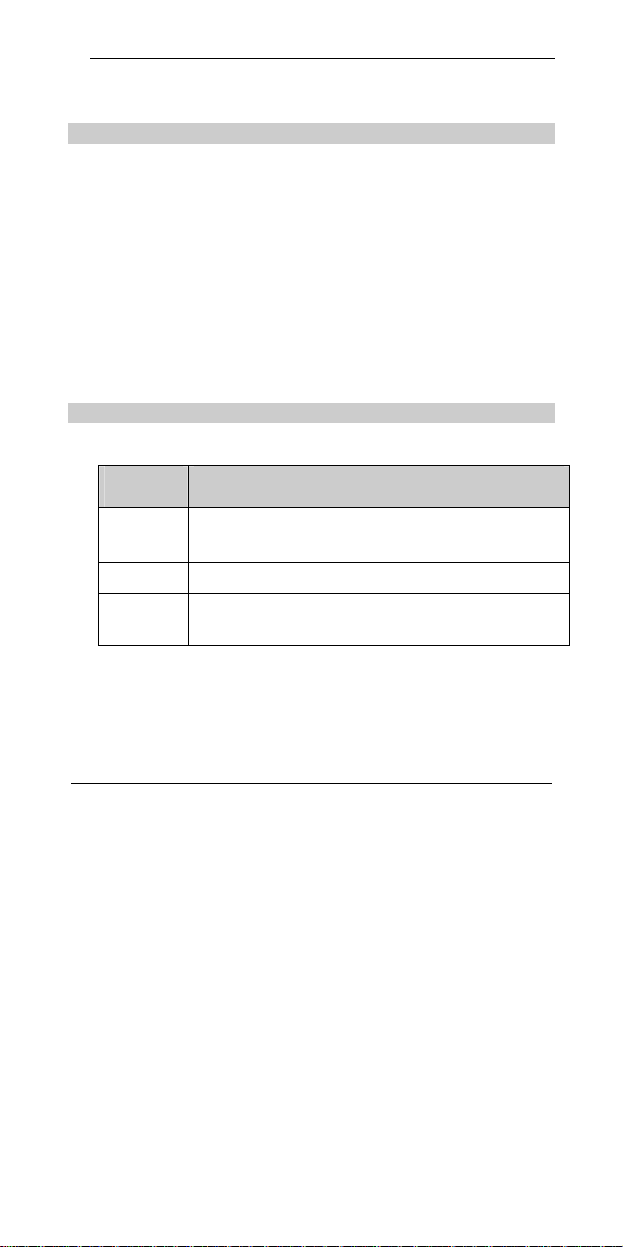
General Conversions
Operation Conventions
Action
Press and
hold
Press
Select
Description
Press a key for two or three seconds.
Press a key and release it immediately.
Select an option on the screen by pressing the
corresponding key
1
Page 12

GUI Conventions
Convention
Boldface
>
The name of an item appear on the phone display
are in boldface. For example, Messages.
Multi-level menus are spearated by a rightward
arrow. For example, Menu > Messages indicates
the Messages submenu under Menu.
Description
Symbols
Eye-catching symbols are used in this manual to highlight
the points worthy of special attention during the operation.
They are defined as follows.
Symbol Name
Note Means a complementary description.
&
Caution
Means reader be extremely careful during the
operation.
Definition
2
Page 13

Your Phone
Antenna
Indicator
Speaker
3
Page 14
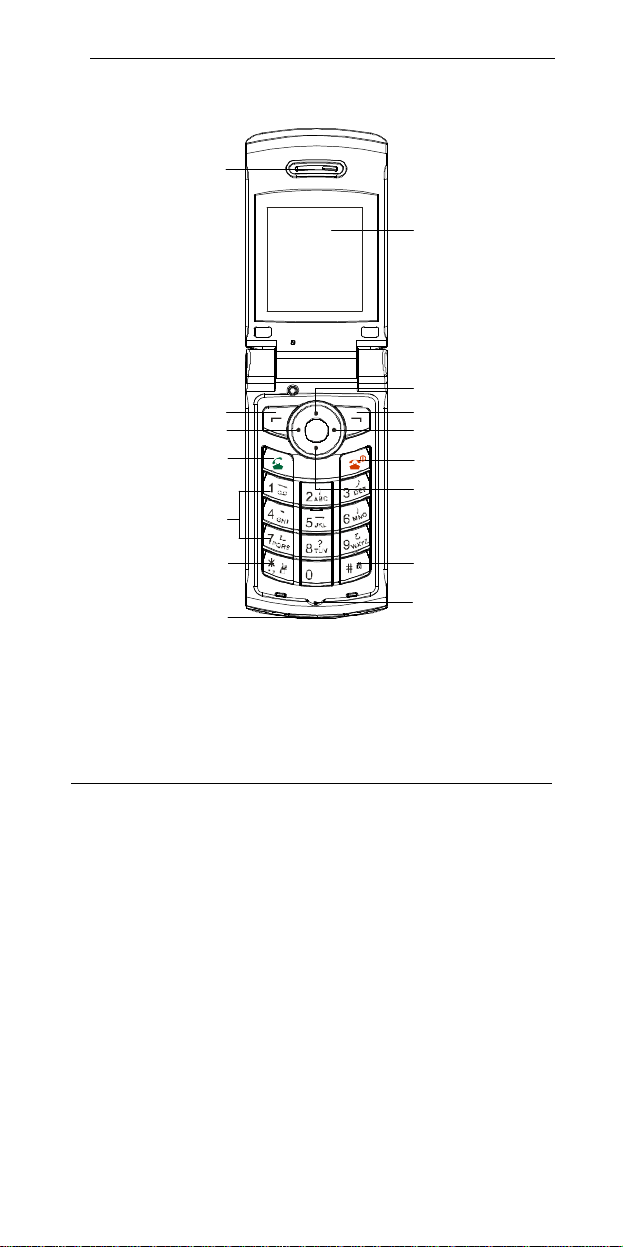
Front Veiw
Left soft key
Alphanumeric keys
Earpiece
Send key
LCD screen
Up key
Right soft key
Left keyRight key
Power key
Down key
Star key
Charger connector
Hash key
Microphone
4
Page 15
Key Description
Key Description
Send key
End key
Left soft key
Right soft key
Star key
Hash key
Press it to make or answer a call.
l
In the standby mode, press it to access the Call
l
Record menu.
Press it to power on or off your phone.
l
Press it to end a call.
l
Press it to reject a call.
l
Press it to return to the standby screen.
l
In the standby mode, press it to select Menu.
l
Press it to select a corresponding option when
l
your phone is not in the standby mode.
In the standby mode, press it to select
l
Favourites
Press it to select a corresponding option when
l
your phone is not in the standby mode.
During the editing, press and hold it to display the
l
list of symbols.
In the English input mode, press it to switch
l
between the case mode.
In the standby mode, press and hold it to mute or
l
un-mute the microphone.
When the keypad is locked, press and hold it to
unlock the keypad.
5
Page 16

Alphanumeric
keys
Upward key
Downward
key
Left key
Right key
Key Description
In the standby mode, press them to enter a
l
phone number.
During the editing, press them to enter letters,
l
numbers or symbols.
For items with a number prefix, press the numeric
l
key to select a corresponding item.
In the standby mode, press it to create a new
l
message.
Press it to scroll up items.
l
In the standby mode, press it to access
l
Phonebook.
Press it to scroll down items.
l
In the standby mode, press it to access
l
Calendar.
Press it to scroll up items.
l
In the standby mode, press it to access Inbox.
l
Press it to scroll down items.
l
6
Page 17
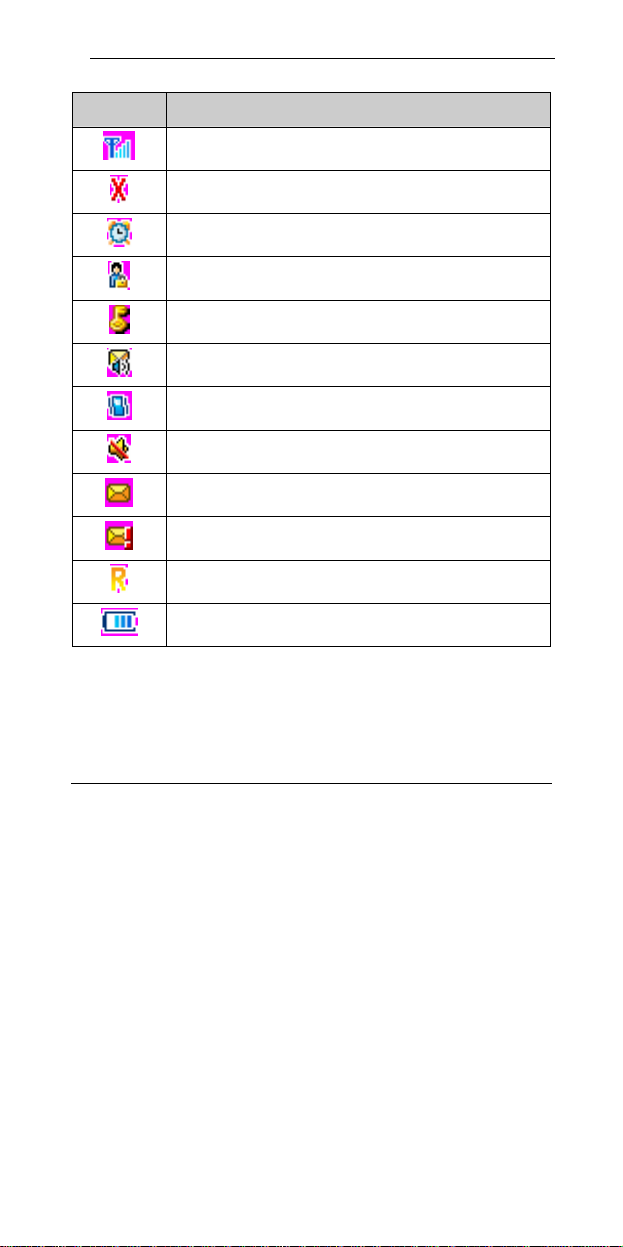
Icon Description
Icon
Description
Network signal strength.
Outside the network service area.
Alarm clock on.
Call privacy set.
Phone lock set.
Voice mail received.
Vibration on.
Silence on.
New message received.
Urgent or high urgent message received.
Roaming.
Battery level.
7
Page 18
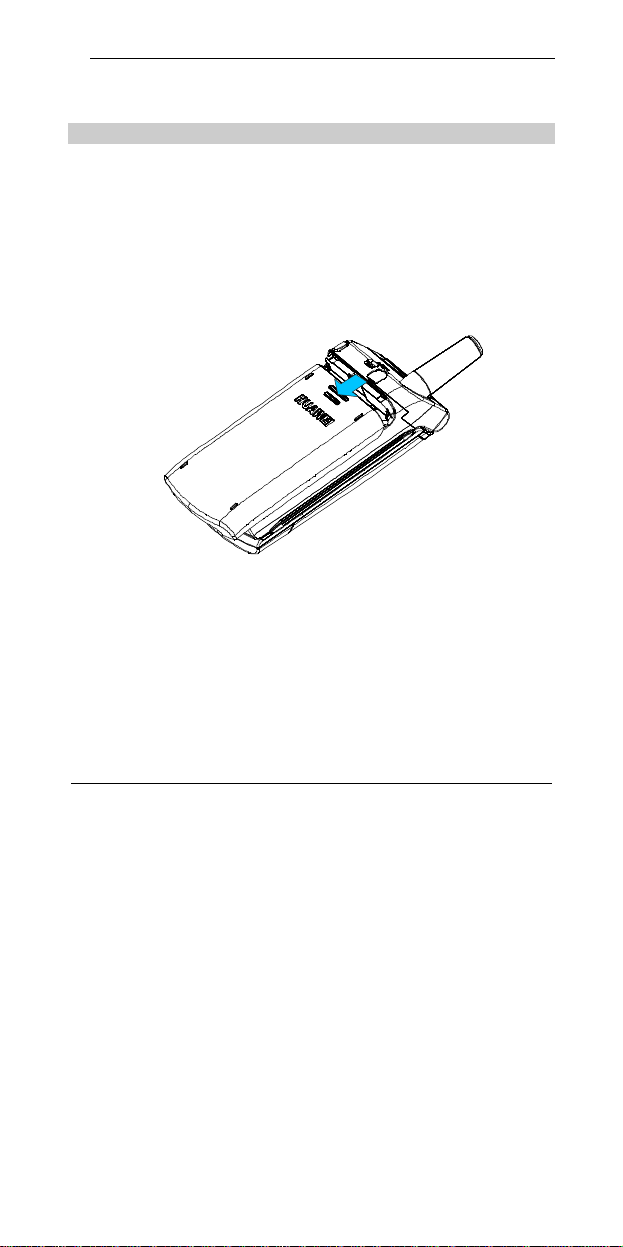
2 Getting Started
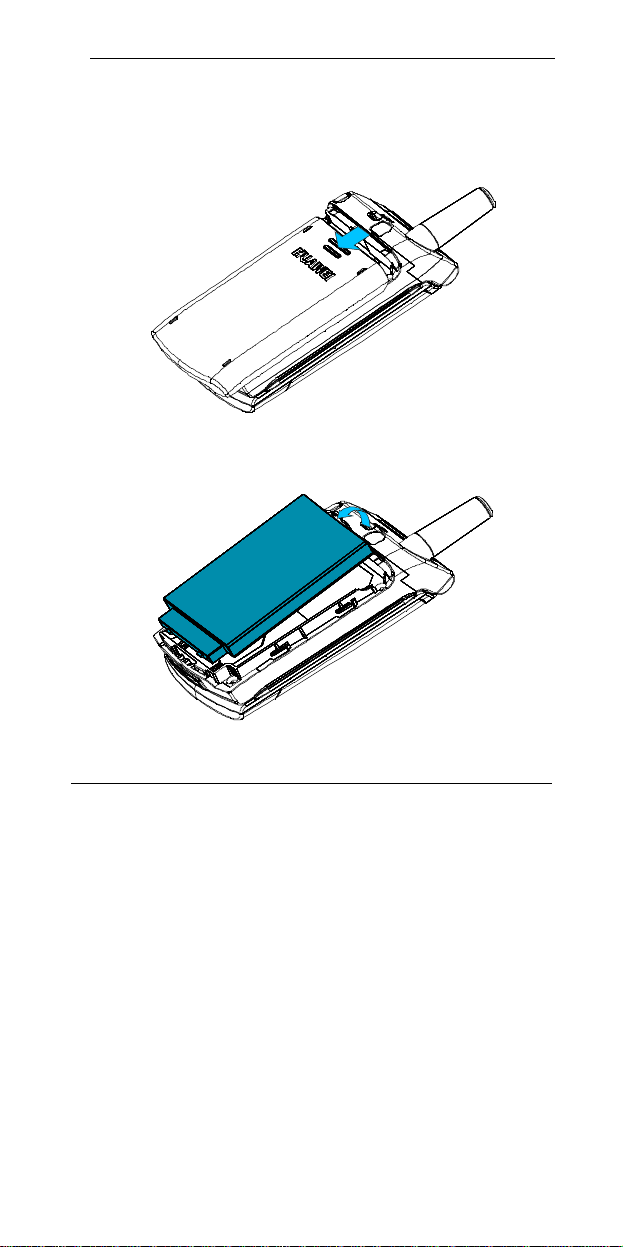
Installing and Removing the Battery
Your phone is powered by the Li-ion battery. Use the
battery approved by Huawei only. Handle the battery with
care.
Installing the Battery
1. Press and slide the back cover away.
8
Page 19
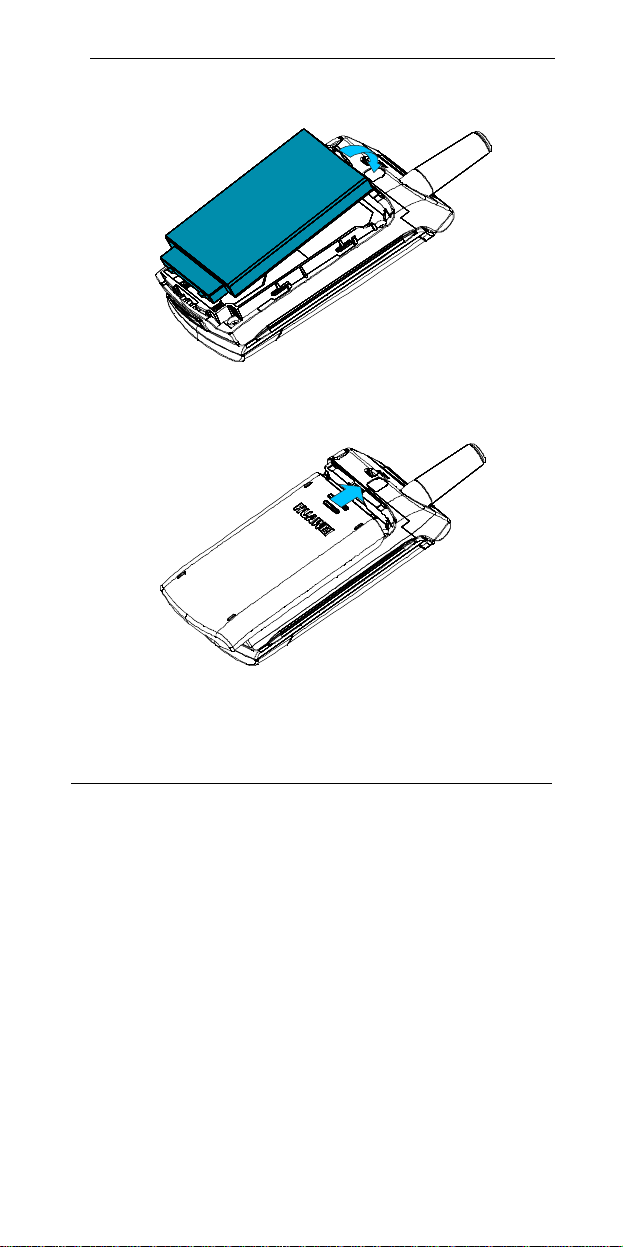
2. Install the battery into the battery compartment.
3. Slide the back cover back.
9
Page 20
Removing the Battery
1. Press and hold the End key to power off your phone.
2. Press and slide the back cover away.
3. Take out the battery.
10
Page 21
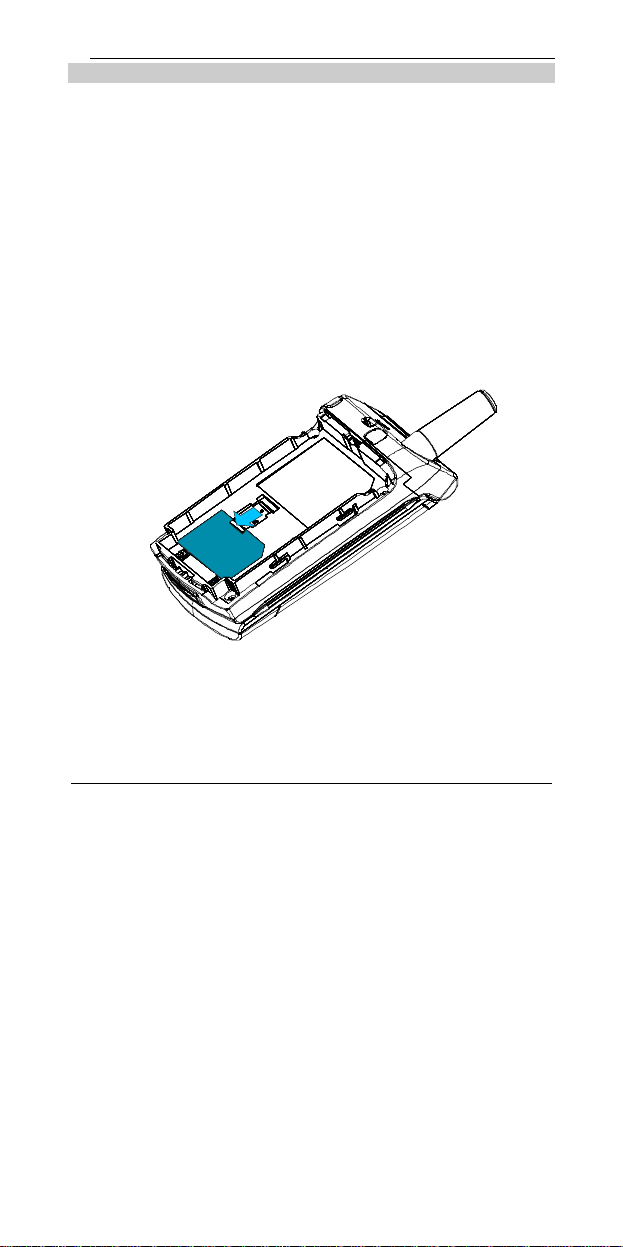
Inserting and Removing the UIM Card
A UIM card tracks subscriptions you subscribe to and
contacts.
Insert a UIM card into your phone before use.
Inserting the UIM Card
1. Power off your phone
2. Remove the battery.
3. Slide the UIM card into the cardholder. Make sure that
the golden contact of it is facing the connectors in the
cardholder.
4. Push the latch downwards.
Removing the UIM Card
1. Power off your phone
2. Remove the battery.
11
Page 22
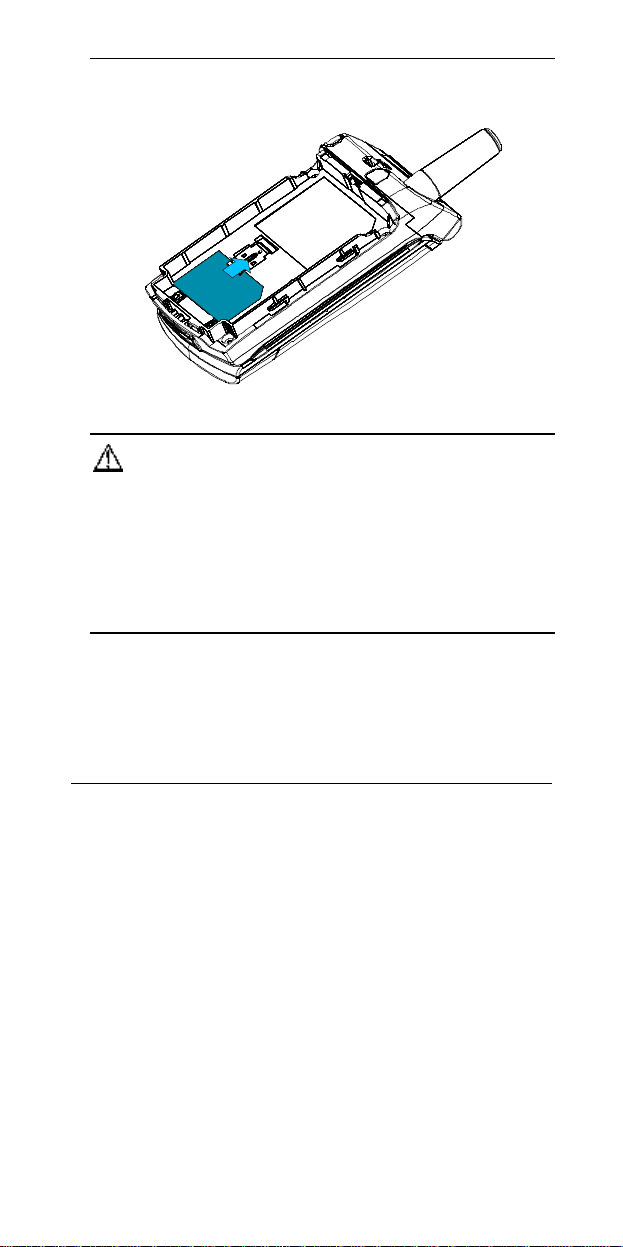
3. Push the latch upwards
4. Take out the UIM card.
Caution:
l Before inserting or removing a UIM card,
l Keep a UIM card out of the reach of children.
l To avoid damage to a UIM card or its golden contact,
do not scratch or bend the UIM card when using,
inserting or removing it.
Charging
Use the travel charger delivered with the C3300 phone.
Unapproved charger may cause explosion.
1. Install the battery.
12
Page 23

2. Connect the plug of the travel charger to the charger
connector of your phone.
3. Connect the power cord of the travel charger to the
power socket.
4. After the charge completes, disconnect the travel
charger from the power socket and your phone.
13
Page 24

Caution:
l To avoid damage to your phone or the charger,
connect or disconnect the charger with care.
l To avoid damage to your phone or the charger, do not
charge your phone when the battery is not installed.
l Do not use damaged or worn out batteries or damaged
charger.
l To achieve the best performance of the battery, charge
the battery at least eight hours.
l A new battery can reach its best performance after it is
charged and recharged several times.
l The battery can be charged and discharged for
hundreds of times. However, it will finally wear out. If
the standby time and the talk time of the battery is
noticeably shorter than normal, replace it.
14
Page 25

3 Functions
Powering On and Off Your Phone
Powering On
When your phone is off, press and hold the Power key to
power on it.
Powering Off
In the standby mode, press and hold the Power key to
power off it.
Making a Call
Through the Keypad
1. In the standby mode, press alphanumeric keys to enter
the area code and phone number.
2. Press the Send key to dial.
From the Phonebook
1. In the standby mode, press the Down key to access
Phonebook.
2. Select a contact.
3. Press the Send key to dial.
From the Call History
1. Press the Send key to access Call Records.
2. Select a record.
3. Press the Send key to dial.
15
Page 26

From a Message
1. Press the Right key to access Inbox.
2. Select a message.
3. Select View > Options > Call to dial.
Speed Dialing
Press and hold 2 to 9 to speed dial a contact. For details,
see "Speed Dial" on page 31
Making an International Call
1. Press the Star key to enter +.
2. Enter the country code, area code and phone number.
3. Press the Send key to dial.
& Note:
l While waiting a call to be put through, to avoid damage
to your hearing, do not place your phone too close to
your ear.
l When a call is put through, your phone plays an alert to
remind you of it. To avoid damage to your hearing, do
not put your phone close to your ear at this time.
Answering a Call
When there is an incoming call, your phone plays the
ringtone and you can press the Send key to answer it. If
16
Page 27

you have save the phone number of the incoming call as
a contact to the phonebook, your phone displays the
name and the phone number. Otherwise, you phone only
displays the phone number.
The caller ID display is network dependent.
& Note:
l To avoid damage to your hearing, adjust the earpiece
volume before putting your phone close to your ear.
l You can answer a call when the keypad is locked.
Flip Open
You can answer a call by flipping open your phone. For
details, see "Answer Mode" on page
Any Key
You can press any key to answer a call. For details, see
"Answer Mode" on page 50.
Auto
Your phone will auto answer a call when no body answers
it. For details, see "Answer Mode" on page 50.
Rejecting
You can press the Power key to reject a call.
17
Page 28

Available Options During a Call
During a call, you can:
l Adjust the earpiece volume
l Switch between the handsfree and handheld mode
l Set the voice privacy
l Mute the call
l View the phonebook
l Send a message
Adjusting Volume
Press the Up or Down key to adjust the earpiece volume.
Handsfree
1. Press the right soft key to switch your phone to the
handsfree mode. Then, you do not need to hold your
phone close to an ear to listen.
2. Press the right soft key again to switch back to the
handheld mode.
Muting
1. Press the left soft key to select Mute.
2. Press the left soft key to set the mute function. After
you mute the call, the other side cannot hear your
voice.
3. You can press the right soft key to cancel the muting.
Voice Privacy
1. Press the left soft key to select Voice Privacy.
18
Page 29

2. Select the voice privacy level. You can select Standard
or Enhanced. For details, see "Privacy" on page
Short Message
1. Press the left soft key to select Messages.
2. Press the left soft key to access Messages to use the
function. For details, see "Short Message Service" on
page 26.
Phonebook
1. Press the left soft key to select Phonebook.
2. Press the left soft key to access Phonebook. For
details, see "Phonebook" on page 32.
Manually Locking Your Phone
In the standby mode, you can manually lock your phone.
1. Enable the phone lock function. For details, see
"Phone Lock" on page 53.
2. Press and hold the Hash key to manually lock your
phone.
19
Page 30

4 Text Entry
Input Modes
You can enter English and Hindi characters, numbers,
and symbols on your phone. The following input modes
are available:
l \ \ : Upper case/Initial capital/Lower
case English input mode
l \ \ : Upper case/Initial capital/Lower
case predictive English input mode
l : Hindi input mode
l : Predictive Hindi input mode
l 123: Number input mode
In the text entry mode, the following shortcut keys are
available:
l The 1 key: Press it to enter a symbol.
l The Hash key: Press it to switch between English input
mode and number input mode. In the English input
mode or predictive input mode, press and hold the key
for a few seconds to switch between upper case, lower
case, and initial capital.
20
Page 31

l The Star key: In the English input mode and number
input mode, press this key to display the symbol list. In
the English input mode press and hold this key to
switch to the predictive input mode.
l The Up key or Down key: In the predictive input mode,
press this key to select the previous or next word.
l You can enter 160 characters at most. During the
process of text entry, the screen displays the number of
residual characters.
Entering Text in English Mode
In the , or mode, you can press and hold
# to switch between upper case, initial capital, and lower
case.
To enter text, you must press the numeric key labeled with
the required letters. Press the key once to enter the first
letter on the key, twice to enter the second letter and so
on.
If the letter you want to enter is on the same key as the
previous letter, you can enter the latter one only after the
cursor appears again. Alternatively, you can press Down
to move the cursor to the next space.
Example:
To enter "HUAWEI", do as follows:
1. Switch to the upper case mode .
2. Press 4 twice to enter the letter "H".
21
Page 32

3. Press 8 twice to enter the letter "U".
4. Press 2 once to enter the letter "A".
5. Press 9 once to enter the letter "W".
6. Press 3 twice to enter the letter "E".
7. Press 4 three times to enter the letter "I".
Entering Text in Predictive Input Mode
In the , or mode, you can press and hold
# for a few seconds to switch between upper case, initial
capital, and lower case predictive input mode.
To enter a word in the predictive input mode, perform the
following steps:
1. Press the numeric keys corresponding to the letters of
the word.
2. Press Up or Down until the desired word appears.
3. Press 0 to select the word and enter a space after this
word.
Example:
To enter the word "english", do as follows:
1. Switch to the lower case predictive input mode .
2. Press 3, 6, 4, 5, 4, 7, and 4 in turn.
3. The word "english" is displayed.
4. Press Up or Down to select the predictive
term ”english” and then press the left soft key to enter
it.
22
Page 33

Hindi Input Mode
Hindi characters are based on the Devanagari script. It
consists of independent vowel characters, dependent
vowel signs, and consonants.
Key 1 corresponds to independent vowels; keys 3 and 9
correspond to dependent vowel signs; keys 4, 5, 6, 7, and
8 correspond to consonants. You can type complex
characters by combining consonants with dependent
vowel signs. You can press the key 0 to insert space in
your text.
The following table illustrates the mapping of the keys in
the keypad to the corresponding Hindi characters.
23
Page 34

Entering Text in Hindi
The Hindi input mode is a Multitap mode. To type a
character associated with a key, you must tap the key a
multiple number of times, until you get the desired
character. The following example illustrates how to enter
text in the Hindi input mode.
Press # key to select the Hindi input mode . Press
and hold * for a few seconds to switch to the predictive
Hindi mode .
Example:
24
Page 35

To type , do as follows:
1. Press # to switch to the Hindi input mode .
2. Press 8 eight times to type .
3. Press 3 four times to type .
4. Press 2 twice to type .
5. Press 8 five times to type .
6. Press 3 seven times to type .
Entering Numbers
Switch the text input mode to “123” and press the numeric
keys to enter the numbers.
Entering Symbols
In the English input mode, you can press * to display a list
of symbols. Then press Up or Down to look for the
desired symbol and press a numeric key to enter the
corresponding symbol.
Alternatively, you can press 1 in the text entry mode to
directly enter a desired symbol. If the symbol displayed is
not the desired one, continue pressing the numeric key 1
until the desired symbol appears.
25
Page 36

5 Short Message Service
You can use your phone to send and receive messages.
Creating a Message
Create a message to send it to a phone number or
contact.
1. Select Menu > Messages > White Message. Also,
you can press the Up key to access White Message.
2. Enter the content in the Edit window. The upper side of
it displays the remaining characters you can enter.
3. Press the left soft key to select Options to:
Ø Send to send the message to a recipient.
Ø Send & Save to send the message to a recipient
and save it to the outbox.
Ø Save to save the message to the outbox.
Ø Insert Phrase to insert frequently used phrases.
There are ten phrases to select.
Ø Insert Number to insert a phone number of a
contact in the phonebook into the message.
Ø Insert Name to insert a name of a contact in the
phonebook into the message.
4. Select Send to access the Add Number menu. You
can select Find to access Name List to select a
contact or you can enter a phone number directly.
26
Page 37

5. After selecting a contact, you can press the Send key
to send the message. Alternatively, you can press the
left soft key to select Option to select:
Ø Send to send the message.
Ø Add to add more contacts.
Ø Delete to delete a selected contact.
Ø Priority > Normal/Urgent/Emergency.
Ø Call Back No. to set the call back number.
6. Select Send to send the message.
Inbox
The inbox saves received messages. When there is an
incoming message, your phone plays the SMS receive
tone and displays . If blinks, it indicates that the
inbox is full.
1. Select Menu > Messages > Inbox.
2. Press the Up or Down key to scroll to a message.
Press the left soft key to select View to read the
message.
3. Select Options to select:
Ø Reply to reply to the sender.
Ø Delete to delete the message.
Ø Forward to forward the messge.
Ø Call to call the sender.
27
Page 38

Ø Save Number to save the sender's phone number
to the phonebook.
Ø Add to Name to add the sender's phone number to
a contact in the phonebook.
4. After reading the message, press the right soft key to
return to the previous menu.
Outbox
The outbox saves sent messages.
1. Select Menu > Messages > Outbox.
2. Press the Up or Down key to scroll to a message and
press the left soft key to select View to read the
message.
3. Select Options to select:
Ø Resend to resend the message.
Ø Edit to edit the message.
Ø Delete to delete the message.
Ø Forward to forward the message.
4. Press the right soft key to return to the previous menu.
Draftbox
The draftbox saves drafts.
1. Select Menu > Messages > Draftbox.
2. Press the Up or Down key to scroll to a draft and press
the left soft key to select View to read the draft.
28
Page 39

3. When reading the draft, press the left soft key to select
Options to select:
Ø Edit to edit the draft.
Ø Send to send the draft.
Ø Delete to delete the draft.
4. Press the right soft key to return to the previous menu.
Voice Mail
The voice mail function is network dependent. For details,
consult your service provider.
1. You can access Voice Mail in two ways:
Ø Select Menu > Messages > Voice Mail.
Ø In the standby mode, press and hold 1.
2. Select a voice mail and select Options to select:
Ø Call to call your voice mail box to check the voice
mail.
Ø Delete to delete the voice mail.
Deleting All
Select Menu > Messages > Delete All to select:
29
Page 40

l Inbox to delete all messages in the inbox.
l Outbox to delete all messages in the outbox.
l Draftbox to delete all drafts in the draftbox.
l All to delete all messages and drafts.
Settings
Select Menu > Messages > Settings to access Settings.
You can set Voice Mail No., Call Back No., Memory
Status, Delivery ACK, Phrase, Signature and Statistic.
Voice Mail Number
If you want to use the voice mail function, you need to
subscribe to your service provider for a voice mail
number.
1. Select Voice Mail No..
2. Enter the voice mail number
3. Select OK.
Call Back Number
You can set the call back number.
1. Select Call Back No..
2. Select Enable to enter the phone number.
3. Select OK.
Memory Staus
1. Select Memory Status.
2. You can view the message memory status of your
phone and the UIM card.
30
Page 41

You phone can save up to 80 messages. The UIM card
capacity decides how many messages it can save.
Delivery Acknowledgement
1. Select Delivery ACK.
2. Press the Up or Down key to scroll to On or Off.
3. Select OK to select.
If you select On, a delivery report will be sent to your
phone when a message is sent successfully.
Phrase
Select Phrase to view or edit phrases.
Signature
Select Signature to edit your signature.
Statistic
1. Select Statistic.
2. Select View to view the number of sent messages and
the number of received messages.
3. Select Clear > Sent Counter/Received Counter/All
to clear a specific statistic.
31
Page 42

6 Phonebook
The phonebook can save up to 300 contacts. The UIM
card capacity decides how many contacts it can save.
Searching a Contact
Contacts are arranged in accordance with the alphabetic
order. Do the following to search a contact:
1. Select Menu > Phonebook > Search to access the
Name window.
2. Enter the name of a contact in the Name window. Then
select OK.
3. Select View to view details of the searched contact.
4. Select Options to select:
Ø White Message to send a message to the contact.
Ø Edit to edit the name and phone number of the
contact.
Ø Copy Record to copy the contact to your phone or
the UIM card.
Ø Delete to delete the contact.
Ø View to view details.
Adding a Contact
A new contact is saved to the memory in use. To set the
storage position, see "Memory In Use" on page 36.
Do the following to add a contact:
32
Page 43

1. Select Menu > Phonebook > Add New.
2. Enter the phone number and select Save.
3. You can set the type of the phone number to:
Ø Mobile
Ø Office
Ø Home
4. Enter the name and select Save.
Groups
You can classify contacts into groups to manage. Your
phone provides ten groups.
1. Press Menu > Phonebook > Groups.
2. Press the Up and Down key to scroll to a group.
3. Select Options to view details, add contacts, rename
groups, or delete contacts.
Viewing
Select a group and select View to view details. If the
group contains contacts, your phone displays contacts. If
the group does not contain any contact, your phone
displays "Empty".
Adding
1. In a group.
2. Select Add to add contacts to the group.
33
Page 44

Renaming
1. In a group.
2. Select Rename to rename the group.
3. Select Save to confirm.
Deleting
1. In a group.
2. Select Delete.
3. Press the Up and Down key to scroll to a contact.
4. Select Select to select the contact.
5. Select Yes to delete the contact.
Speed Dial
You can assign 2 –9 numeric keys to contacts to speed
dial. When making a call, you can press and hold a key to
call the corresponding contact quickly. You can set up to
eight speed dial number.
1. Select Menu > Phonebook > Speed Dial.
2. Press the Up or Down key to scroll to 2 to 9. If a key is
not assigned, "Empty" is displayed beside it.
3. Select Options > Assign.
4. Press the Up or Down key to scroll to a contact.
5. Select Select to assign the key to the contact.
Copying All Contacts
You can copy or move contacts from or to your phone.
34
Page 45

Select Menu > Phonebook > Copy All to select:
l Copy To Phone to copy contacts in the UIM card to
your phone.
l Copy To UIM to copy contacts in your phone to the
UIM card.
l Move To Phone to move contacts in n the UIM card to
your phone.
l Move To UIM to move contacts in your phone to the
UIM card.
Deleting All Contacts
Select Menu > Phonebook > Delete All.
After entering the phone lock key, you can select:
l Phone to delete all contacts saved in your phone.
l UIM to delete all contacts saved in the UIM card.
l All to delete all contacts saved in your phone and the
UIM card.
Options
Select Menu > Phonebook > Options to view details of
My Phone No., Memory In Use and Memory Status.
My Phone Number
Select My Phone No. to view your own number.
If you do not set your own number, select Edit to enter.
35
Page 46

Memory In Use
Select Memory In Use to set the memory of saving
contacts.
l Select Phone to set the memory in use to your phone.
You can save up to 300 contacts to your phone.
l Select UIM to set the memory in use to the UIM card.
The UIM card capacity decides how many contacts it
can save.
Memory Status
Select Memory Status to view the number of contacts
saved in your phone and the UIM card.
36
Page 47

7 Call Records
Your phone records missed calls, received calls, dialed
calls and the call duration.
Missed Calls
You can do the following to check missed calls:
1. Select Menu > Call Records > Missed Calls.
2. Press the Up or Down key to scroll to a missed call.
3. Select View to view the date, time, phone number and
the name of it.
4. Select Options to select:
Ø White Message to send a message to the phone
number of the missed call.
Ø Save Number to save the phone number of the
missed call.
Ø Add To Name to add the phone number to a
contact.
Ø Delete to delete the missed call.
Answered Calls
For details of how to check answered calls and relative
operations, see Missed Calls on page 37.
37
Page 48

Caution:
Answered Calls also saves calls rejected by you.
Dialed Calls
For details of how to check dialed calls and relative
operations, see Missed Calls on page 37.
Clearing Records
Select Menu > Call Records > Delete All to select:
l Missed Calls to delete all missed calls.
l Answered Calls to delete all answer calls.
l Dialed Calls to delete all dialed calls.
l All to delete all.
Call Duration
You can check and clear the call duration.
1. Select Menu > Call Records > Call Duration.
2. Use the Up, Down, Left or Right keys to scroll to Last
Call, Answered Calls, Dialed Calls and Total.
3. Select Clear to clear the call duration.
38
Page 49

8 Extras
Your phone provides the alarm clock, calendar, calculator,
stopwatch, time zone, and game function.
Alarms
Your phone provides three alarm clocks. After you set the
alarm clock, your phone displays .
Your phone plays the alarm tone at the set time. You can
press the Power key to turn off the alarm clock.
1. Select Menu > Extras > Alarms.
2. Scroll to an alarm clock and select OK to select:
3. On or Off. Select On to enable the alarm clock.
4. After enabling the alarm clock, enter the time of the
alarm clock in the Set Time window.
Ø Press the Left or Right key to move the cursor.
Ø If you use the 12-hour format, press the Up or
Down key to select AM or PM.
5. After setting the time, set the repeat method in the Set
Repeat Method window. You can set it to Once,
Everyday, Mon-Fri or Mon-Sat.
6. After setting, select OK to save the setting.
39
Page 50

Caution:
If you do not turn off the alarm clock, your phone
automatically snoozes it and plays the alarm tone in ten
minutes. Your phone can snooze the alarm clock for three
times.
Calendar
You can check both the solar calendar. The date range is
from January 1, 1900 to December 31, 2099.
1. Select Menu > Extras > Calendar to display the
calendar of the current month.
2. Press the Up, Down, Left or Right key to select a
date.
3. Select Options to select:
Ø Go To Date. After entering a date, your phone
displays the calendar of the date.
Ø Week of Year to check the week number.
Calculator
You can use your phone to do basic calculation.
Select Menu > Extras > Calculator. Your phone displays
keys of corresponding signals.
40
Page 51

Key Function
0 – 9 Press them to enter 0 – 9
Up key Press it to enter +
Down key Press it to enter -.
Left key
Right key
Star key
Hash key Press it to enter -.
Left soft key Press it to display the result.
Right soft key Press it to clear.
Press it to enter ×.
Press it to enter ÷.
Press it to enter a decimal.
Stopwatch
The stopwatch can record up to 99: 99: 99: 9. Your phone
displays the last record and can save up to ten records.
1. Select Menu > Extras > Stopwatch.
2. Select Start to start running the stopwatch. When the
stopwatch is running, you can select Capture to
capture the current time. Or, you can select Stop to
stop the stopwatch.
3. After stopping the stop watch, select Continue to run it
again. Or, select Clear to clear records.
41
Page 52

Time Zone
Your phone provides 72 time zones for you to check the
time of different time zone.
1. Select Menu > Extras > Time Zone.
2. Select List to view the list of cities.
3. Press the Up or Down key to scroll to a city.
4. Select View > OK to select.
Games
Your phone provides the Golf and XKid games. The
games are interesting and easy to play.
For details of how to play the games, follow the instruction
of Help of the game.
42
Page 53

9 Sound
You can:
l Adjust the volume
l Set the alert type
l Set the ring tone
l Set the alarm tone
l Set the SMS receive tone
l Set other tones
Adjusting Volume
Select Menu > Sound > Volume to select:
l Ring Tone to adjust the ring tone volume.
l Earpiece to adjust the earpiece volume.
l Keypad Tone to adjust the keypad volume.
When adjusting the volume, press:
l The Up key to increase the volume.
l The Down key to decrease the volume.
l Select Select to confirm.
Setting Alert Mode
Select Menu > Sound > Alert Mode.
You can set the alert mode to Silence, Ring, Vibra, Vibra
& Ring or Ring after Vibra.
43
Page 54

Setting Ring Tone
Your phone provides 12 ring tones.
1. Select Menu > Sound > Ring Tone.
2. Press the Up or Down key to scroll to a ring tone, then
your phone plays the ring tone.
3. Select Select to confirm.
Setting the Alarm Tone
Your phone provides 12 alarm tones.
1. Select Menu > Sound > Alarm Tone.
2. Press the Up or Down key to scroll to a ring tone, then
your phone plays the ring tone.
3. Select Select to confirm.
Setting the SMS Receive Tone
Your phone provides three SMS receive tones.
1. Select Menu > Sound > SMS Receive Tone.
2. Press the Up or Down key to scroll to a ring tone, then
your phone plays the ring tone.
3. Select Select to confirm.
Setting the SMS Send Tone
Select Menu > Sound > SMS Send Tone. You can select
Enable or Disable to enable or disable the SMS send
tone.
44
Page 55

Setting Other Tones
Select Menu > Sound > Other Tones.
You can set Power On Tone, Power Off Tone, Flip Tone,
Warning Tone and Info Prompt Tone.
Power On Tone
Your phone provides two power on tones. You can also
disable the power on tone.
Power Off Tone
Your phone provides two power off tones. You can also
disable the power off tone.
Flip Tone
You can enable or disable the flip tone.
Warning Tone
You can enable or disable the warning tone.
Info Prompt Tone
You can enable or disable the info prompt tone.
45
Page 56

10 Settings
The setting items include:
l Display
l Time
l Call
l Language
l Security
l Factory restore
Display
Select Menu > Settings > Display.
You can set:
l Wallpapers
l Backlight
l LCD contrast
l Animation
l Greetings
l Operator logo
l LED
Wallpaper
Your phone provides 32 wallpapers of which one is blank.
1. Select Wallpapers.
2. Press the Up or Down key to scroll to a wallpaper.
46
Page 57

3. Select Preview to view it.
4. Select Set to select.
Backlight
1. Select Backlight.
2. Select 10 sec, 20 sec or Always On.
3. Select Select to complete the setting.
LCD Contrast
1. Select LCD Contrast.
2. Select the Up key to increase the LCD contrast.
3. Select the Down key to decrease the LCD contrast.
4. Select OK to complete the setting.
Animation
1. Select Animation.
2. Select Power On or Power Off.
3. Select Enable or Disable.
4. Select Select to complete the setting.
Greetings
1. Select Greetings.
2. Enter the content.
3. Select Save to complete the setting.
Operator Logo
1. Select Operator Logo.
2. Select Enable or Disable.
47
Page 58

3. Select Select to complete the setting.
LED
1. Select LED.
2. Select Enable or Disable.
3. Select Select to complete the setting.
Time
Select Menu > Settings > Time.
You can set:
l Time format
l Date format
l Display time
Time Format
1. Select Time Format.
2. You can select 12-hour or 24-hour.
3. Select Select to complete the setting.
Date Format
1. Select Date Format.
2. Select DD/MM/YYYY or YYYY/MM/DD.
3. Select Select to complete the setting.
Display Time
1. Select Display Time.
2. Select Enable or Disable.
3. Select Select to complete the setting.
48
Page 59

Call
Select Menu > Settings > Call.
You can set:
l Call waiting
l Call forward
l Call restriction
l Answer mode
l Auto retry
l Minute
l International call prefix
l Privacy
Call Waiting
1. Select Call Waiting.
2. Select Activate or Deactivate.
3. Select OK to complete the setting.
The call waiting is network dependent. For details, consult
your service provider.
Call Forward
You can forward incoming calls to a preset phone number.
The call forward is network dependent. For details,
consult your service provider.
1. Select Call Forward to select.
49
Page 60

l Unconditional to forward all incoming calls.
l Busy to forward an incoming call when your phone
number is busy.
l No Answer to forward an incoming call when no body
answers it.
l Busy/No Answer to forward an incoming call when
your phone number is busy or no body answers the
call.
2. Select Activate (select Deactivate to deactivate the
call forward function).
3. Enter the forwarded to phone number.
4. Select OK to complete the setting.
Call Restriction
1. Select Call Restriction.
2. You can select:
l Disable to disable the call restriction.
l Int'l Calls to restrict outgoing calls to foreign countries
or regions.
l All Calls to restrict all outgoing calls.
Answer Mode
1. Select Answer Mode.
2. You can select:
50
Page 61

l Auto to set your phone to automatically answer a call if
no body answers the call within the preset period. You
can select Disable, 5 sec, 10 sec or 15 sec.
l Any Key to press any key to answer a call. However,
you cannot press the Power key, right soft key, Up key,
Down key, Left key or Right key to answer a call.
l Open Flip to open the flip to answer a call and close
the flip may end a call.
Auto Retry
1. Select Auto Retry.
2. You can select:
l Disable
l 10 sec
l 30 sec
l 60 sec
If you enable the auto retry function, when the call attempt
fails, your phone will auto re-dial the phone number in the
preset period until the call succeeds,
Minute Alert
1. Select Minute Alert.
2. You can select:
51
Page 62

l Disable
l 45 sec
l 50 sec
l 55 sec
If you enable the minute alert function, your phone will
reminds you of the time by playing the minute alert every
minute during a call.
International Call Prefix
1. Select Int'l Call Prefix.
2. Enter the prefix.
3. Select Save to complete the setting.
52
Page 63

Privacy
1. Select Privacy.
2. Select Standard or Enhanced.
3. Select Select to complete the setting.
Language
1. Select Menu > Settings > Language.
2. Select English or Simplified Chinese.
3. Select Select to complete the setting.
Security
Select Menu > Settings > Security.
You can:
l Set the phone lock code
l Change the phone lock code
l Set the PIN1 code
l Change the PIN1 code
l Change the PIN2 code
l Set your phone to reject other UIM card
Phone Lock
The phone lock function can protects your phone from
unauthorized use. The default phone lock code of your
phone is 0000.
1. Select Phone Lock.
2. Select Enable or Disable.
53
Page 64

3. Enter the phone lock code.
4. Select OK to complete the setting.
Changing Phone Lock
1. Select Change Phone Lock.
2. Enter the default phone lock code 0000.
3. Select OK.
4. Enter the new phone lock code in the New Phone
Lock field. (The new phone lock code should be a
numeric string of four digits.)
5. Select OK.
6. Enter the new phone lock code again in the Confirm
Phone Lock field.
7. Select OK to complete the setting.
PIN1
The personal identity number (PIN) can protect your UIM
card from authorized use. The PIN code is delivered with
the UIM card.
1. Select PIN1.
2. Select Enable or Disable.
3. Enter the PIN code.
4. Select OK to complete the setting.
54
Page 65

Caution:
If you enter wrong PIN codes three times in a row, your
phone locks the UIM card. In this case, you need to use
the personal unblocking key (PUK) to unlock PIN.
Changing PIN1
1. Select Change PIN1.
2. Enter the current PIN code in the Old PIN field.
3. Select OK.
4. Enter the new PIN code in the New PIN field. (The new
PIN code should be a numeric string of four digits.)
5. Select OK.
6. Enter the new PIN code again in the Confirm PIN field.
7. Select OK to complete the setting.
Caution:
If you enter wrong PIN codes three times in a row, your
phone locks the UIM card. In this case, you need to use
the personal unblocking key (PUK) to unlock PIN. And if
you enter wrong PUK codes ten times consecutively, the
phone will be locked. Contact your service provider.
55
Page 66

Changing PIN2
The PIN2 code is delivered with the UIM card. You need
to enter the PIN2 code when you subscribe to some
services.
1. Select Change PIN2.
2. Enter the current PIN2 code in the Old PIN field.
3. Select OK.
4. Enter the new PIN2 code in the New PIN field.
5. Select OK.
6. Enter the new PIN2 code in the Confirm field.
Rejecting Other UIM
1. Select Reject Other UIM.
2. Select Enable or Disable.
3. Enter the phone lock code.
4. Select OK to complete the setting.
Restoring
1. Select Menu > Settings > Factory Restore.
2. Enter the phone lock code.
3. Select OK.
4. Your phone displays "Restore Factory Settings?".
5. Select Yes to proceed.
6. Select No to cancel the operation.
56
Page 67

Caution:
Your phone can be restored to the default setting.
However, contacts and messages saved in the phone will
not be deleted.
57
Page 68

11 Troubleshooting
If you encounter any problem when using your phone, try
to solve the problem according to the following table. If the
problem still occurs, contact the local vendor.
Problem To Make Sure…
The battery cannot
be charged
Your phone cannot
be powered on
You have inserted
the UIM card, but
your phone displays
"Please insert UIM"
or "Check UIM".
After you power on
your phone, it
displays "Locked".
Your phone displays
"Enter PUK:".
You cannot make a
cal.
The charger is properly connected to your
phone and the power socket.
The battery level is high enough.
l
The battery is installed properly.
l
Press and hold the Power key long enough.
l
The UIM card is inserted properly.
l
The UIM card is valid.
l
Enter the correct phone lock code.
Contact your service provider for the PUK code.
The phone number is correct.
l
You are in the network service area.
l
You do not enable the call restriction function.
l
58
Page 69

Problem To Make Sure…
The signal strength is strong enough.
l
Bad call quality.
If you are stay indoors, move near to a
l
window.
During a call, the
other side cannot
hear your voice.
The microphone is not covered.
l
You do not mute the microphone.
l
Your phone does
not play the ring
You have set your phone to the silence mode.
tone or vibrate.
The earpiece
volume is too low
Adjust the earpiece volume.
The signal strength
The antenna is in good condition.
is not strong enough
or your phone is
l
Move near to a place with strong signal.
l
often off line.
You are not in an area with weak magnetic
Your phone displays
"No service found",
"Service
unavailable" or
"Network problem".
l
field (in a tunnel or surrounded by buildings).
If so, move to another area and try again.
Do not visit the service option without
l
authorization from your service provider.
59
Page 70

12 Warnings and Precautions
Electronic Device
Turn off your phone near high-precision electronic devices.
The phone may affect the performance of these devices.
Such devices include hearing aids, pacemakers, fire
alarm systems, automatic gates, and other
automatic-control devices. If you are using an electronic
medical device, consult the device manufacturer to
confirm whether the radio wave affects the operation of
this device.
Hospital
Pay attention to the following points in hospitals or health
care facilities:
l Do not take your phone into the operating room (OR),
intensive care unit (ICU), or coronary care unit (CCU).
l Do not use your phone at places for medical treatment
where phone use is prohibited.
l When using your phone near someone who is suffering
from a heart disease, turn down the ring tone volume
or vibration properly so that it does not affect the
person.
Area with Inflammables and Explosives
In any area with inflammables and explosives, turn off
your phone and do not take out, install or charge the
battery to avoid explosion and fire. Areas with
60
Page 71

inflammables and explosives include, but are not limited
to:
l Gas station
l Area for storing fuels (such as the bunk under the deck
of a ship)
l Device/Vehicle for transporting and storing fuels or
chemical products
l Area with chemical substances and particles (such as:
granule, dust, metal powder) in the air
l Area with the sign of "Explosives"
l Area with the sign of "Turn off bi-direction wireless
equipment"
l Area where it is generally suggested to stop the engine
or a vehicle
Traffic Safety
l Please observe local laws and regulations on phone
use. Do not use your phone while driving to avoid
traffic accident.
l Secure the phone on its holder. Do not place the phone
on the seat or other places where it can get loose in a
sudden stop or collision.
l Use the phone after the vehicle stops at a safe place.
l If your phone supports the hands-free function, or the
phone can be used with earphones, or there is any
vehicle-mounted equipment with hands-free function,
use them in emergency.
61
Page 72

l Do not place the phone over the air bag or in the air
bag outspread area. Otherwise, the phone may hurt
you owing to the strong force when the air bag inflates.
l Observe the rules and regulations of airline companies.
When boarding or approaching a plane, turn off the
phone and take out the battery. In areas where phone
use is prohibited, turn off the phone. Otherwise, the
radio signal of the phone may disturb the plane control
signals. Turn off your phone before boarding an
aircraft.
Storage Environment
l Do not place magnetic storage media such as
magnetic cards and floppy disks near the phone.
Radiation from the phone may erase the information
stored on them.
l Do not put your phone, battery, or other accessories in
containers with strong magnetic field, such as an
induction cooker and a microwave oven. Otherwise,
circuit failure, fire, or explosion may occur.
l Do not leave your phone, battery, or charger in a very
hot or cold place. Otherwise, malfunction of the
products, fire, or explosion may occur.
l Do not place sharp metal objects such as pins near the
earpiece. The earpiece may attract these objects and
hurt you when you are using the phone.
62
Page 73

l Do not subject your phone, battery, and charger to
serious collision or shock. Otherwise, battery leakage,
phone malfunction, overheat, fire, or explosion may
occur.
l Do not put your phone in the back pocket of your
trousers or skirt to avoid phone damage while seated.
Children Safety
l Put your phone, battery, and charger in places beyond
the reach of children. Do not allow children to use the
phone, battery, or charger without guidance.
l Do not allow children to put the battery in mouth, for
electrolyte in the battery is poisonous.
l Do not allow children to touch the small fittings.
Otherwise, suffocation or gullet jam can be caused if
children swallow the small fittings.
Operating Environment
l The phone, battery, and charger are not water-resistant.
Keep them dry. Protect the phone, battery and charge
from water or vapor. Do not touch the phone with a wet
hand. Otherwise, short-circuit and malfunction of the
product or electric shock may occur.
l Do not use the phone in dusty, damp and dirty places
or places with magnetic field. Otherwise, malfunction of
the circuit may occur.
l Do not turn on or off the phone when it is near your
ears to avoid negative impact on your health.
63
Page 74

l When carrying or using the phone, keep the antenna at
least one inch (2.5 centimeters) away from your body,
to avoid negative impact on your health caused by
radio frequency leakage.
l If you feel uncomfortable (such as falling sick or qualm)
after playing games on your phone for a long time,
please go to see a doctor immediately.
l On a thunder stormy day, do not use your phone
outdoors or when it is being charged.
l Do not touch the antenna when a call is going on.
Touching the antenna may affect call quality and cause
the phone to operate with more power. As a result, the
talk time and standby time are shortened.
l The phone may interfere with nearby TV sets, radios
and PCs.
l In accordance with international standards for radio
frequency and radiation, use phone accessories
approved by the manufacturer only.
Cleaning and Maintenance
l Before you clean or maintain the phone, turn off the
phone and disconnect it from the charger. Otherwise,
electric shock or short-circuit of the battery or charger
may occur.
64
Page 75

l Do not use any chemical detergent, powder, or other
chemical agent (such as alcohol and benzene) to clean
the phone and the charge. Otherwise, part damage or
a fire can be caused. You can clean the phone and the
charger with a piece of soft antistatic cloth that is a little
wet.
l Do not scratch the shell of the phone. Otherwise, the
shed coating may cause skin allergy. Once it happens,
stop using the phone at once and go to see a doctor.
l Keep the plug dry when you clean it, to prevent fire.
l If the phone or any of its fittings does not work, turn to
the local authorize service center for help.
Environmental Protection
Please observe the local regulations regarding the
disposal of your packaging materials, exhausted battery
and old phone and please promote their recycling. Do not
dispose of exhausted battery or old phone in municipal
waste or fire. Otherwise, explosion may occur.
Emergency Call
You can use your phone for emergency calls. However,
connections in all conditions cannot be guaranteed. You
should never rely solely on the phone for essential
communications.
Battery
l Use the battery approved by the manufacturer only.
Otherwise, explosion may occur.
65
Page 76

l Do not dispose of the battery in fire. Otherwise, the
battery may ignite or explode.
l Do not connect two poles of the battery with
conductors such as cables, jewelries or any other
metal material. Otherwise, the battery is short-circuited
and it may burn your body.
l Do not disassemble the battery or solder the battery
poles. Otherwise fluid leakage, overheat, fire, or
explosion may occur.
l If there is battery leakage, smoke, or strange smell,
stop using the battery and keep it away from open
flame to avoid fire or explosion. Then turn to an
authorized maintenance engineer for help.
l If the battery fluid contacts your skin or cloth, wash with
clean water immediately to avoid irritation to the skin.
l If the battery fluid gets into eyes, do not rub your eyes.
Otherwise, your eyes can be hurt. Wash with clean
water and go to see a doctor immediately.
l If there is battery deformation, color change or
abnormal heating while you charge or store the battery,
take it out immediately and stop using it. Otherwise,
battery leakage, overheat, explosion, or fire may occur.
l When installing the battery, do not push the battery by
force lest battery fluid leak out or the battery crack.
l Do not take out the battery when the phone is turned
on.
66
Page 77

l If you do not use the battery for a long time, store it in
normal temperature after charging.
Charger
l Use the charger approved by the phone manufacturer
only. Any violation of this rule may result in fire or
malfunction of the charger.
l Do not short-circuit the charger. Short-circuiting the
charger may cause fire or malfunction of the charger.
l If the power cord is damaged (for example, the lead is
exposed or broken), or the plug becomes loose, stop
using the cable at once. Otherwise, electric shock,
short-circuit of the charger, or fire may occur.
l Keep the charger dry. Once water or other liquid leaks
into the charger, electrical leakage or other faults may
occur.
l Do not use the charger in a dusty and damp
environment. Keep the power cord away from any
heating appliance.
l Ensure the charger is properly plugged into the power
socket properly when charging the battery. Improper
insertion may result in electric shock, fire, or explosion.
To unplug the charger, pull the plug off rather than tear
the power cord.
l Use the AC power supply defined in the specifications
of the charger. An improper power voltage can cause
fire or malfunction of the charger.
67
Page 78

l Do not place any heavy object on the power cord of the
charger. Do not damage, change, or pluck the power
cord. Otherwise electric shock or fire may occur.
l When you are charging the battery with the charger, do
not touch the plug, power cord or the charger with a
wet hand. Otherwise, electric shock can be caused.
l Once the liquid such as water leaks into the charger,
remove the plug of the charger from the socket
immediately. Otherwise, overheating, fire and other
malfunction may occur.
Certification Information (SAR)
THIS DEVICE MEETS THE GOVERNMENT'S
REQUIREMENTS FOR EXPOSURE TO RADIO
FREQUENCY ELECTROMAGNETIC FIELD.
Your mobile phone is a low-power radio transmitter and
receiver. When it is powered on, it emits low levels of
radio frequency energy (also known as radio waves or
radio frequency fields).
Governments around the world have adopted
comprehensive international safety guidelines, developed
by scientific organizations, e.g. ICNIRP (International
Commission on Non-Ionizing Radiation Protection) and
IEEE (Institute of Electrical and Electronics Engineers
Inc.), through periodic and thorough evaluation of
scientific studies. These guidelines establish permitted
levels of radio wave exposure for the general population.
The levels include a safety margin designed to assure the
68
Page 79

safety of all persons, regardless of age and health, and to
account for any variations in measurements.
Specific Absorption Rate (SAR) is the unit of
measurement for the amount of radio frequency energy
absorbed by the body when using a mobile phone. The
SAR value is determined at the highest certified power
level in laboratory conditions, but the actual SAR level of
the mobile phone while operating can be well below the
value. This is because the mobile phone is designed to
use the minimum power required to reach the network.
All models of Huawei’s mobile phone are designed to
meet radio frequency exposure guidelines. Before a
phone model is available for sale to the public, it must be
tested and certified to the FCC that it does not exceed the
limit established by the government-adopted requirement
for safe exposure. The tests are performed in positions
and locations (that is, at the ear and worn on the body) as
required by the FCC for each model.
For body worn operation, this phone has been tested and
meets FCC RF exposure guidelines when the handset is
positioned a minimum of 15 mm from the body with an
accessory that contains no metal part. Use of other
accessories may not ensure compliance with FCC RF
exposure guidelines.
The SAR limit adopted by the USA and Canada is 1.6
watts/kilogram (W/kg) averaged over one gram of tissue.
69
Page 80

The highest SAR value reported to the FCC and IC for
Ver: V1.10 BOM:
this device type when tested for use at the ear is
1.18W/kg, and when properly worn on the body is 0.620
W/kg.
31016264
70
 Loading...