

Huawe SUN2000-33KTL, SUN2000-40KTL Quick Installation Manual
HUAWEI TECHNOLOGIES CO., LTD.
SUN2000-(33KTL, 40KTL)
Quick Installation Guide
Issue: 05
Part Number: 31507079
Date: 2015-11-21
1
1
System Installation
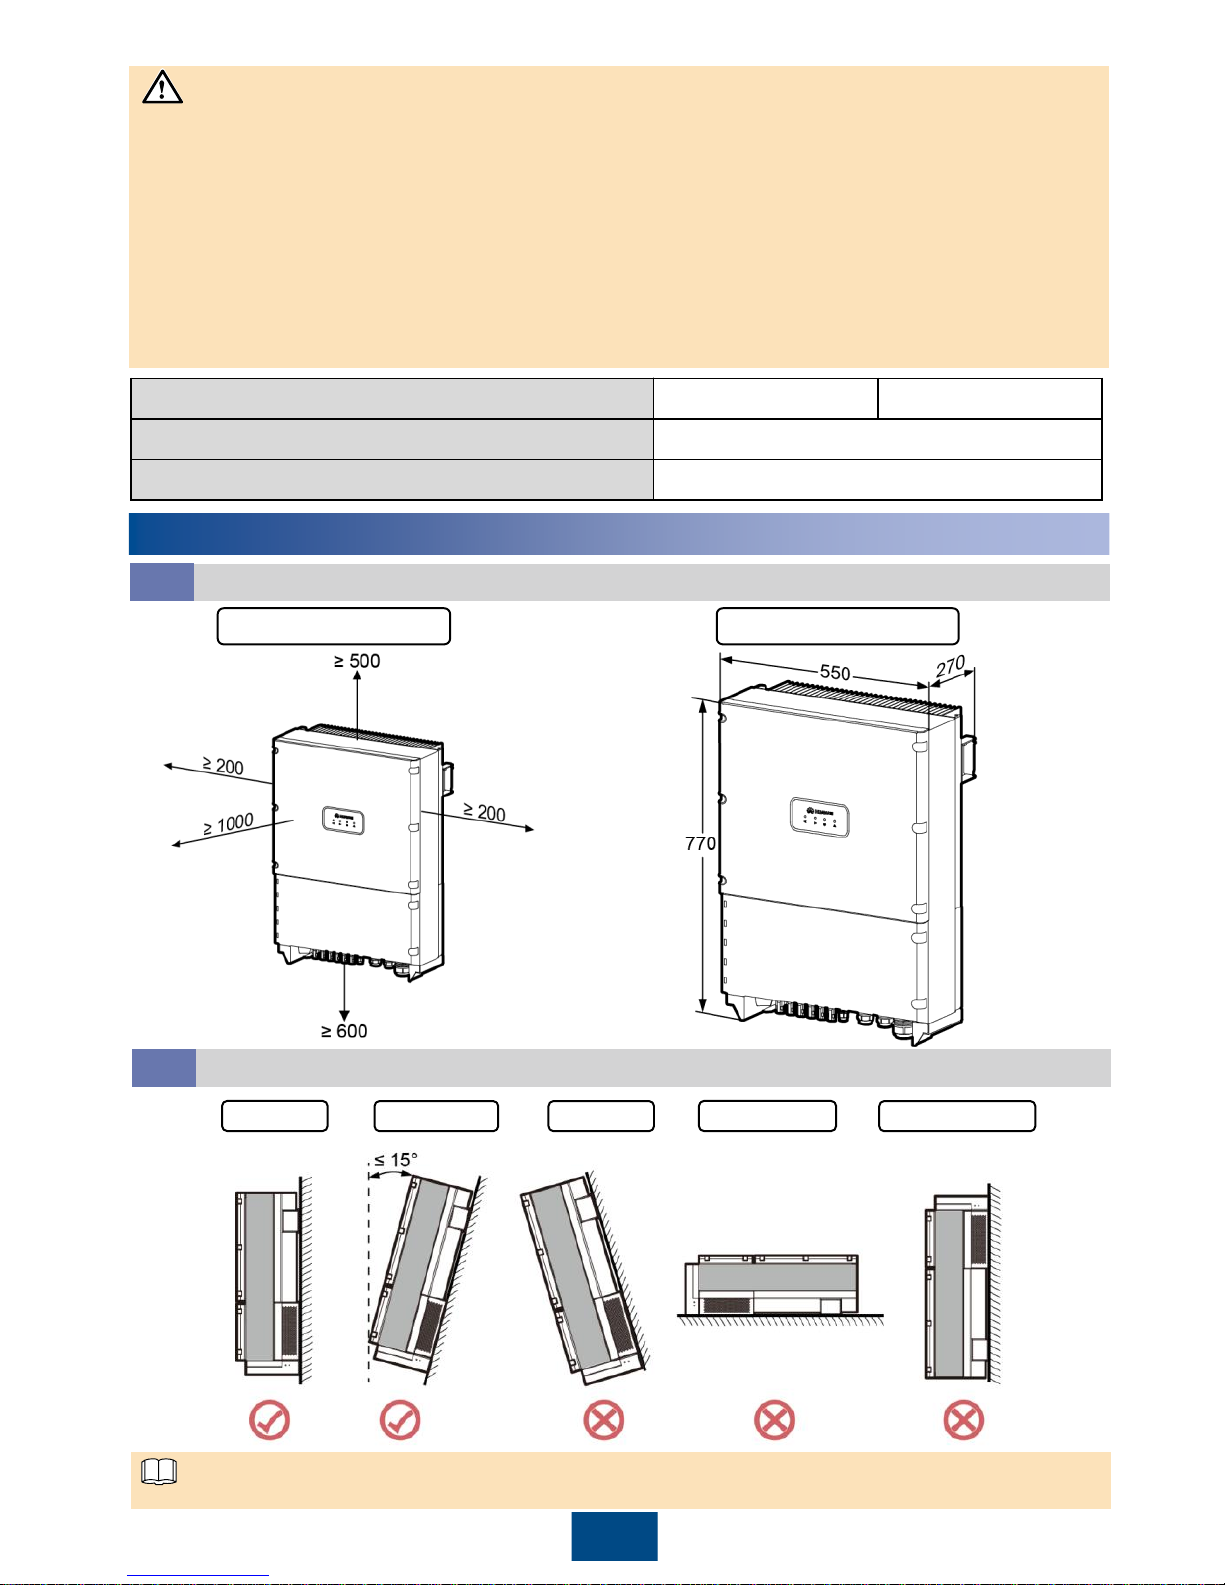
Vertical Backward Forward Horizontal Upside down
Inverter Model
SUN2000-33KTL
SUN2000-40KTL
Weight
50 kg
Dimensions (H x W x D)
770 mm x 550 mm x 270 mm
Installation dimensions Chassis dimensions
Copyright © Huawei Technologies Co., Ltd. 2015. All rights
reserved.
Determining the Installation Position (Unit: mm)
1.1
In a vertical support, install the device vertically or with a backward tilt of no more than 15 degrees.
1. The information in this document is subject to change without notice. Every effort has been
made in the preparation of this document to ensure accuracy of the contents, but all statements,
information, and recommendations in this document do not constitute a warranty of any kind,
express or implied.
2. Before installing the device, read the SUN2000-(33KTL, 40KTL) User Manual for knowledge of
product information and safety precautions. To obtain the user manual, log in to
http://support.huawei.com/carrier/ and browse or search for SUN2000 on the Product Support
page.
3. Install and use the device according to this document and the user manual. Otherwise, the
device may be damaged. Use insulated tools when installing the device.
NOTICE
NOTE
Determining the Installation Mode
1.2

2
1. The anti-theft lock is prepared by the customer.
2. For details about how to wall-mount the device, see the SUN2000-(33KTL, 40KTL) User Manual.
1. Determine the hole positions on the support
based on rear panel dimensions.
2. Drill holes.
4. Mount the inverter on the rear panel.
6. (Optional) Install an anti-theft lock.
M12 (3 PCS)
45 N·m
3. Secure the rear panel.
5. Tighten hexagon bolts.
Unit: mm
Installing an Inverter (Support-mounting Used as an Example)
1.3
NOTE
3
Inverter Model
Cable Type
Cross-sectional Area of the
Cable (Recommended)
SUN2000-33KTL
4-core outdoor cable (L1, L2, L3, N)
16 mm2 or 6 AWG
SUN2000-40KTL
3-core outdoor cable (L1, L2, L3)
The table lists only the recommended cable specifications. For more information about cable
specifications, see the SUN2000-(33KTL, 40KTL) User Manual.
2
Electrical Connection
M6 (1 PCS)
5 N·m
1. Remove the two screws from the chassis door using a hex key and set them aside.
1. Do not open the door on the upper side of
the inverter.
2. Before opening the chassis door, switch off
the upstream DC input circuit breaker and
downstream AC output circuit breaker.
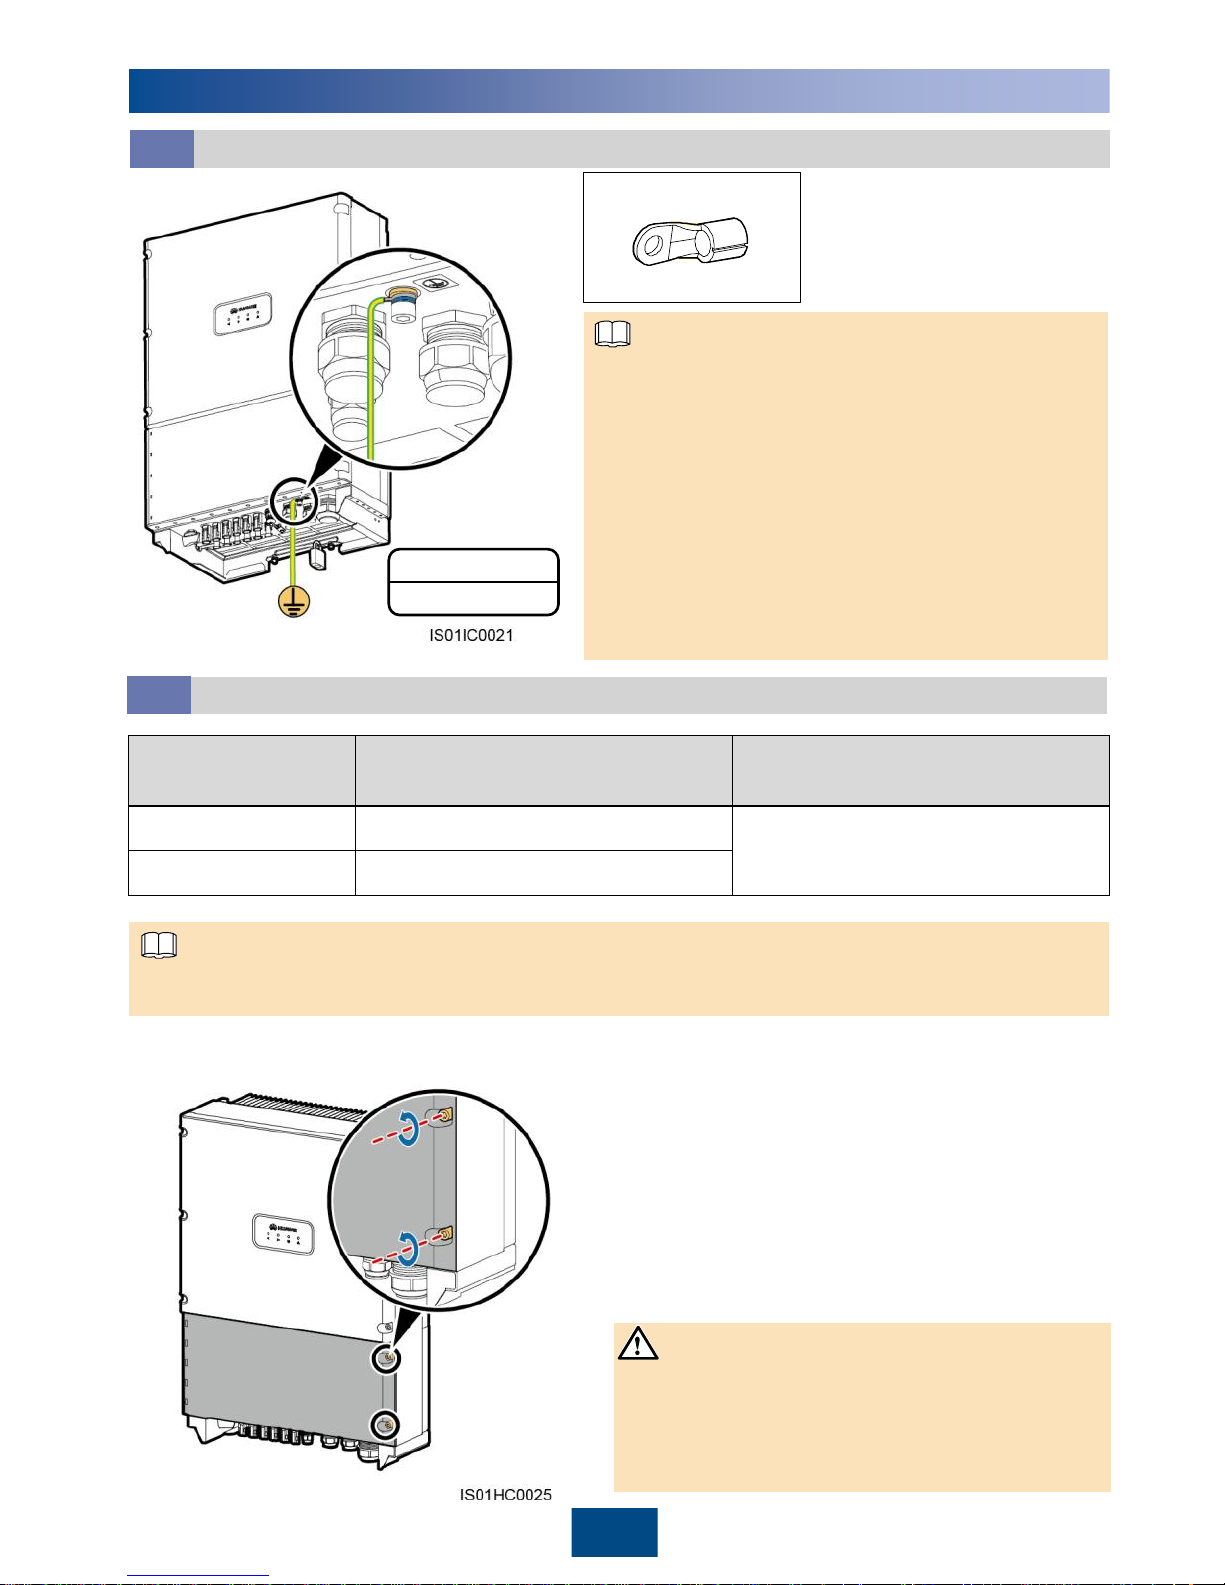
OT-M6
Installing a PGND Cable
2.1
OT-M6
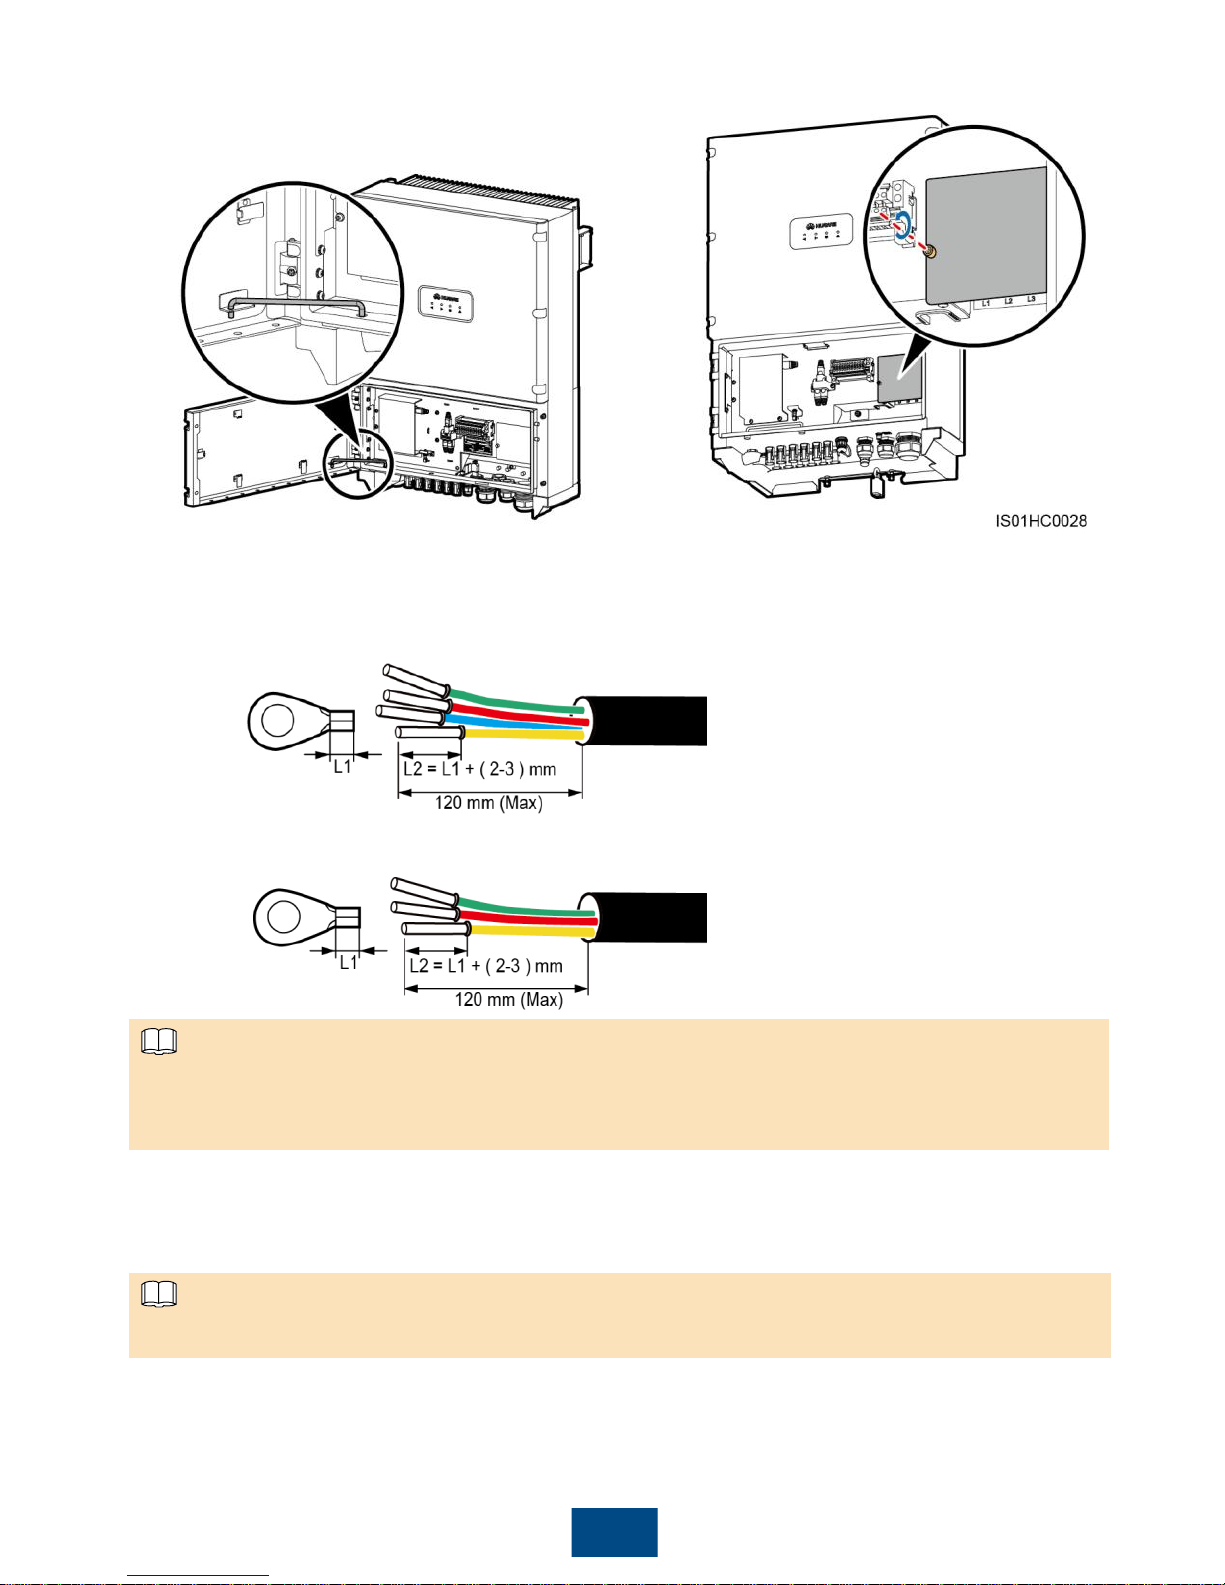
Installing AC Output Power Cables
2.2
OT-M6
PE terminal
1. It is recommended that an 8 mm2 or 8 AWG
outdoor copper-core cable be used as a ground
cable. Ground cables must be securely
connected.
2. It is recommended that the ground cable be
connected to a nearby ground position. For a
system with multiple inverters connected in
parallel, connect the ground points of all
inverters to ensure equipotential connections.
3. To prevent corrosion, apply silica gel or paint to
the PE terminal after connecting the PGND
cable.
NOTE
NOTE
NOTICE
4
2. Open the chassis door and install the support
rod available in the fitting bag bound to the
reinforcing rib at the base of the chassis.
3. Remove the AC terminal cover.
4. Remove an appropriate length of the jacket and insulation layer from the AC output cable using
a wire stripper.
7. Remove the locking cap from the AC OUTPUT waterproof cable connector at the inverter
bottom and remove the plug from the locking cap.
6. Wrap the wire crimp area with heat shrink tubing or PVC insulation tape.
8. Route the AC output power cable into the locking cap and the AC OUTPUT connector at the
inverter bottom.
5. Insert the exposed core wires into the crimp area of the OT terminal and crimp them using
hydraulic pliers.
If heat shrink tubing is used, put it through the power cable and then crimp the OT terminal.
NOTE
a. SUN2000-33KTL
b. SUN2000-40KTL
The AC output power cable for the SUN2000-33KTL is a 4-core outdoor cable (L1, L2, L3, and
N). The AC output power cable for the SUN2000-40KTL is a 3-core outdoor cable (L1, L2, and
L3).
NOTE
 Loading...