

Page 1
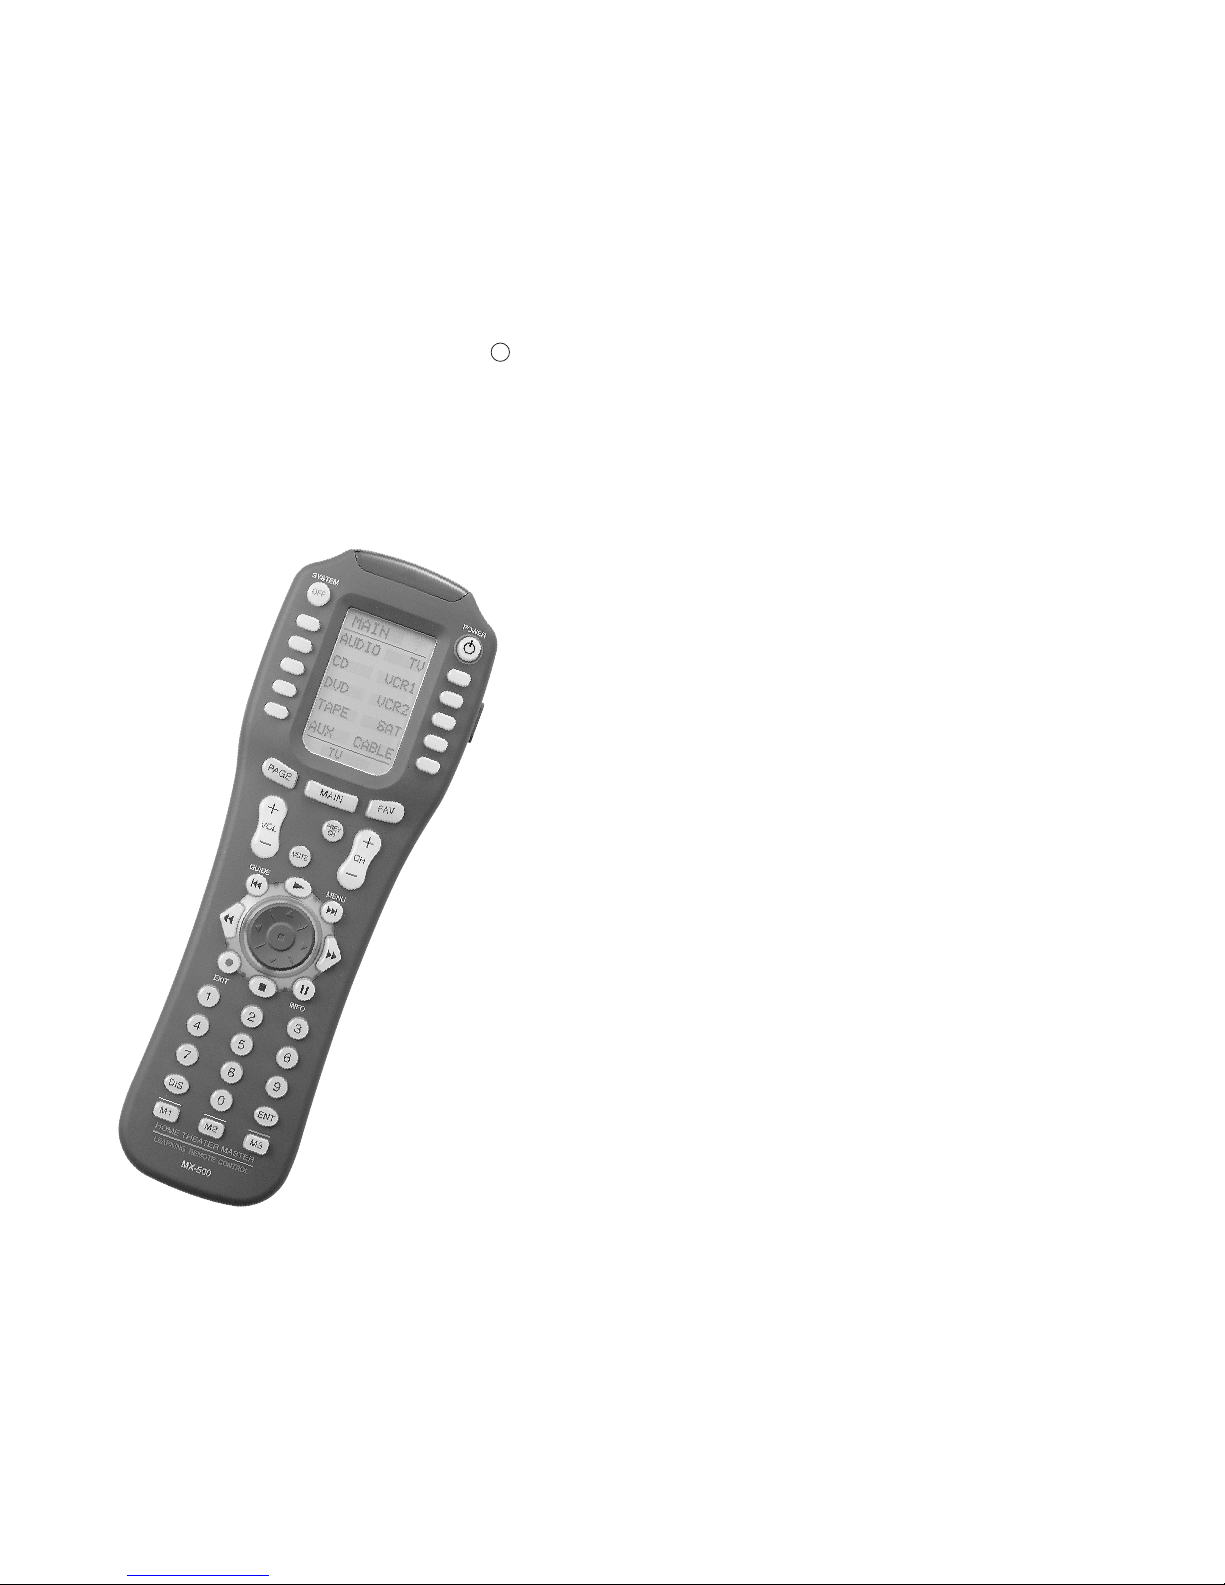
MX-500ª
Operating
Manual
Home Theater Master
LCD Screen
Preprogrammed and Learning
Remote Control
R
Page 2
1. Introduction
2. Batteries
A. Battery Installation
B. Battery Life
3. Summary of Operations
A. Description of Devices
B. Preprogrammed Codes
C. Learning From Other Remote Controls
D. Macro Operations
E. Favorite Channel Buttons
F. Punch Through Operations
G. Editing LCD Text
H. Cloning The MX-500
TM
I. All Other Operations
J. LCD Screen And Button Layout
K. System Settings
4. Programming the MX-500TMto Control Your
Components
A. Using Preprogrammed Codes
1. Three-Digit Code Number
2. Auto Scan With Three-Digit Number
B. Learning Method
1. Programming The Function Buttons
2. Programming The Ten Device Buttons
5. Programming Favorite Channels
6. Programming Macro Buttons
A. Programming Macro Functions To M1, M2, M3,
POWER and SYSTEM OFF Buttons
B. Programming Macro Functions To The Ten Device
Buttons
7. Programming Punch Through Functions
8. Erasing Existing Programming
A. Erasing Learned Buttons
B. Erasing Favorite Channel Buttons
C. Erasing Macro Functions
1. Erase M1, M2, M3, POWER and SYSTEM OFF
Buttons
2. Erase Macro Functions In The Ten Device Buttons
D. Erasing Punch Through Functions
9. LCD Button Editing
A. To Create or Edit Text on Function and Device Buttons
B. To Create or Edit Text for Favorite Channel Buttons
10. Recalling the Preprogrammed
Three-Digit Number
11. Setting Backlight
12. Cloning MX-500
TM
13. Adjustment of LCD contrast
14. Caution On Handling LCD Screen
15. Low Battery Message
16. Memory Lock
17. Glossary
18. Warranty
19. Specifications
20. Appendix
A. List of Preprogrammed LCD Text by Device
B. Three-Digit Preprogrammed Code Tables
Table of Contents Table of Contents
3
5
6
12
24
26
32
34
39
41
42
43
44
45
45
46
46
52
52
53
1 2
Page 3
Congratulations! You have purchased one of the most
sophisticated remote controls on the market.
The MX-500TMhas been designed to provide a new
standard in remote control technology offering a very
powerful and flexible preprogrammed and learning
product.
Setting up your MX-500TMto operate your components is
easy. Please follow the instructions in the manual and retain
the manual for future reference. If any words used are
unfamiliar to you, please refer to page 46 for a Glossary of
terms used in this manual.
Your MX-500
TM
can operate up to ten home entertainment
and home automation components by using the
preprogrammed code library in the remote control, by
teaching up to 530 commands into the MX-500
TM
from
your original remote controls, or a combination of both.
The MX-500TMhas many additional operating features to
add convenience and enjoyment to the operation of your
home entertainment system. You can create your own
labels of the buttons on the LCD screen; program 50
favorite channel buttons; operate the volume, channel and
transport buttons from one device when you are in another
device; and have multiple things done with one press of a
button!
1. Introduction
3
1. Introduction
There is also a list of Frequently Asked Questions (FAQ)
for the MX-500TMon the website that may prove to be
helpful. Visit www.hometheatermaster.com for FAQs.
For any questions or comments about the MX-500TM,
please visit our website, www.hometheatermaster.com or
contact us at:
Universal Remote Control, Inc.
500 Mamaroneck Avenue
Harrison, NY 10528
Tel: 914-835-4484
You can also e-mail us at [email protected].
Regular customer service hours are 9:00 AM to 6:00 PM
EST, Monday Ð Friday.
4
Page 4
2. Batteries
A. Battery Installation
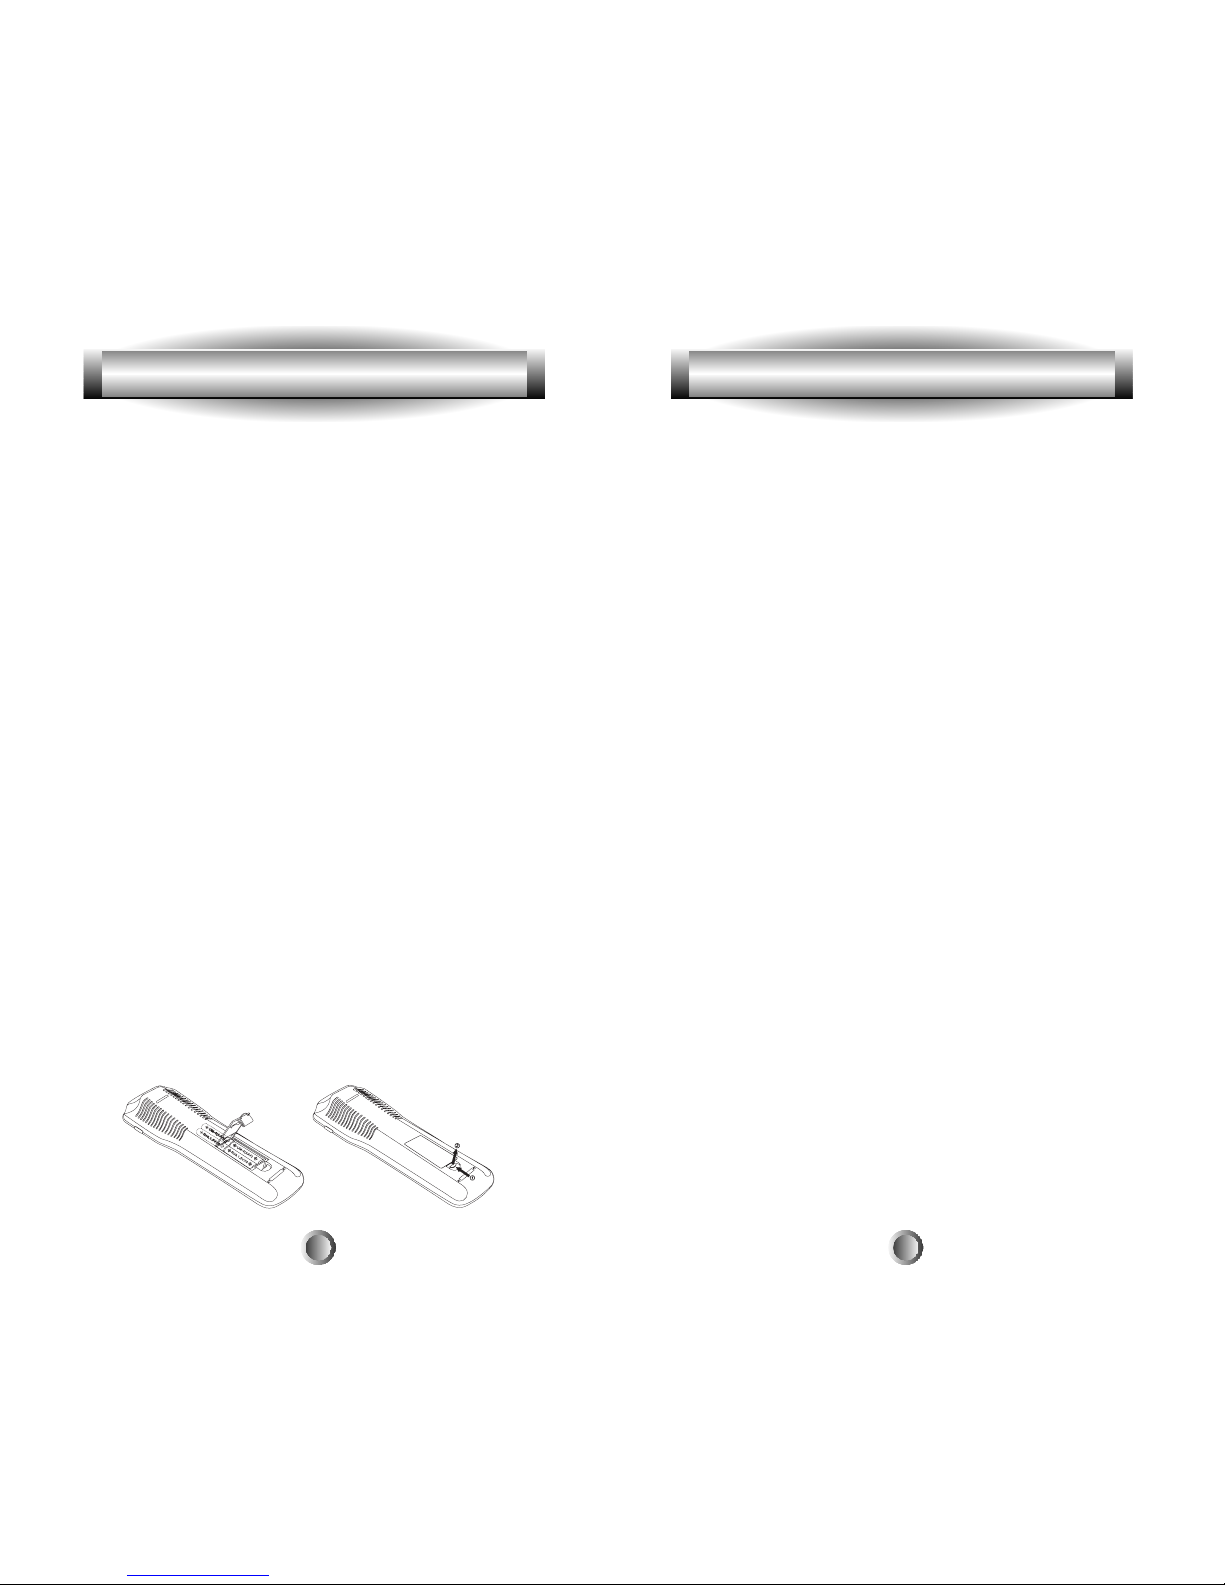
Before the remote control can be used, the batteries need to
be installed. First, remove the battery cover on the back of
the unit and install the four AAA batteries inside the
battery compartment as shown. Make sure the batteries line
up with the (+) and (-) markings. Improper installation
could damage the remote control. When you're done, slide
the battery cover back on. The remote control starts up
automatically and the default devices will appear on the
LCD screen.
B. Battery Life
Under normal operating conditions, the batteries will last
approximately six months. If the batteries are running low,
you will notice reduced range from the remote, commands
that are not sent properly, or are not sent at all. You may
also notice the backlighting of the LCD screen and the
buttons is diminished. Should any of these occur, replace
the batteries immediately. To ensure proper performance of
the unit, use 4 new AAA alkaline batteries.
The remote control will retain the commands and settings
in memory even after the batteries are low or become
discharged. See Memory Lock on page 46. However, you
should replace the worn batteries with a fresh set as soon as
possible. Do not mix new and used batteries.
5
3. Summary of Operations
A. Description of Devices
The MX-500TMis designed to operate up to ten components
including Audio Receivers, Cable and Satellite Boxes,
TV, DVD (LD), VCR1, VCR2, CD, Tape and AUX.
However, each of the device buttons and corresponding
functions can be changed to meet your individual
requirements. Almost any device that uses infrared
commands can be controlled by the MX-500TM, including
Home Automation, Personal computers and more.
Tip: The auxiliary function (AUX) could be used to operate
lighting controls; or the second VCR (VCR2) could be
changed to operate a second TV, etc.
Each device button on the main screen contains two subpages of commands and you can change the name of any
LCD button using up to five alphabet characters, numbers
and symbols to customize the unit to fit your audio/video
devices. Please refer to ÒLCD Button EditingÓ on page 39
for additional details.
B. Preprogrammed Codes
The MX-500TMcomes with extensive preprogrammed IR
codes for practically all major audio and video equipment.
You can set up and operate all of your components with the
MX-500TMby simply entering a three-digit code number
assigned to your brand of component. The code numbers
for the various brands of components are listed in the back
of this instruction manual. Please refer to the programming
instructions shown on page 13 for details.
6
Page 5
3. Summary of Operations
7
C. Learning From Other Remote Controls
The MX-500TMcan learn codes from your original remote
controls. There are 26 LCD screens in the MX-500TM. Each
screen (page) has ten function buttons, including the ten
device buttons on the main menu screen that can be taught.
In addition, there are 31 buttons and a joystick (thumbpad)
that can be taught for each of the ten devices. You can
teach up to 530 new functions into the remote control.
Please refer to page 19 in this instruction manual for
details.
D. Macro Operations
A ÒmacroÓ is a series of commands that you choose to be
sent out with the push of one button. Any function
available on your original remote control or in the
preprogrammed database can be added to a macro to
completely automate what you would normally do by
pushing buttons one at a time. It can be as simple as
turning on your TV and Cable Box, turning the TV to the
appropriate channel for operation with the Cable Box, and
changing the Cable Box channel to your favorite morning
news. A macro can be configured to Power On your TV,
DVD player and receiver, change to the appropriate inputs
and outputs, dim your lights and start a movie. It can be as
simple or as comprehensive as you want.
There are two types of macro buttons you can use for
macro operations:
M1, M2, M3, POWER and SYSTEM OFF Buttons
The M1, M2, and M3 are called Òsystem-wideÓ buttons
because they send out the same signal no matter what
device you are currently controlling. The POWER and
3. Summary of Operations
8
SYSTEM OFF buttons can be made Òsystem-wideÓ if they
are programmed with macros.
(Note: Programming the POWER or SYSTEM OFF buttons
with a macro overrides the preprogrammed or learned
code on the button.)
See page 26 of this manual for further information. Each of
these five buttons is designed to be able to send out a series
of up to 20 commands you program into the buttons. One
common use is to turn on and turn off all of your A/V
components with one button press, but the buttons can be
programmed with whatever macro you desire.
Ten Device Buttons
There are ten device buttons and each of these device
buttons can send out a series of up to 20 programmed
commands when pressed for more than one second. These
buttons are commonly used in sending audio input codes
when you press the button to go to a device. The audio
receiver would make an automatic input switch according
to the device button you pressed. However, these buttons
can be programmed with whatever macro you desire.
E. Favorite Channel Buttons
You can create up to 50 favorite channel buttons in the
MX-500TMby programming the most frequently watched
channel numbers into these buttons. Each of these buttons
can send out up to 10 commands. Please refer to page 24 of
the manual for Favorite Channel Programming.
F. Punch Through Operations
The MX-500TMcan be set up to operate your audio component
volume control buttons (VOLUME UP and DOWN and
Page 6
10
3. Summary of Operations
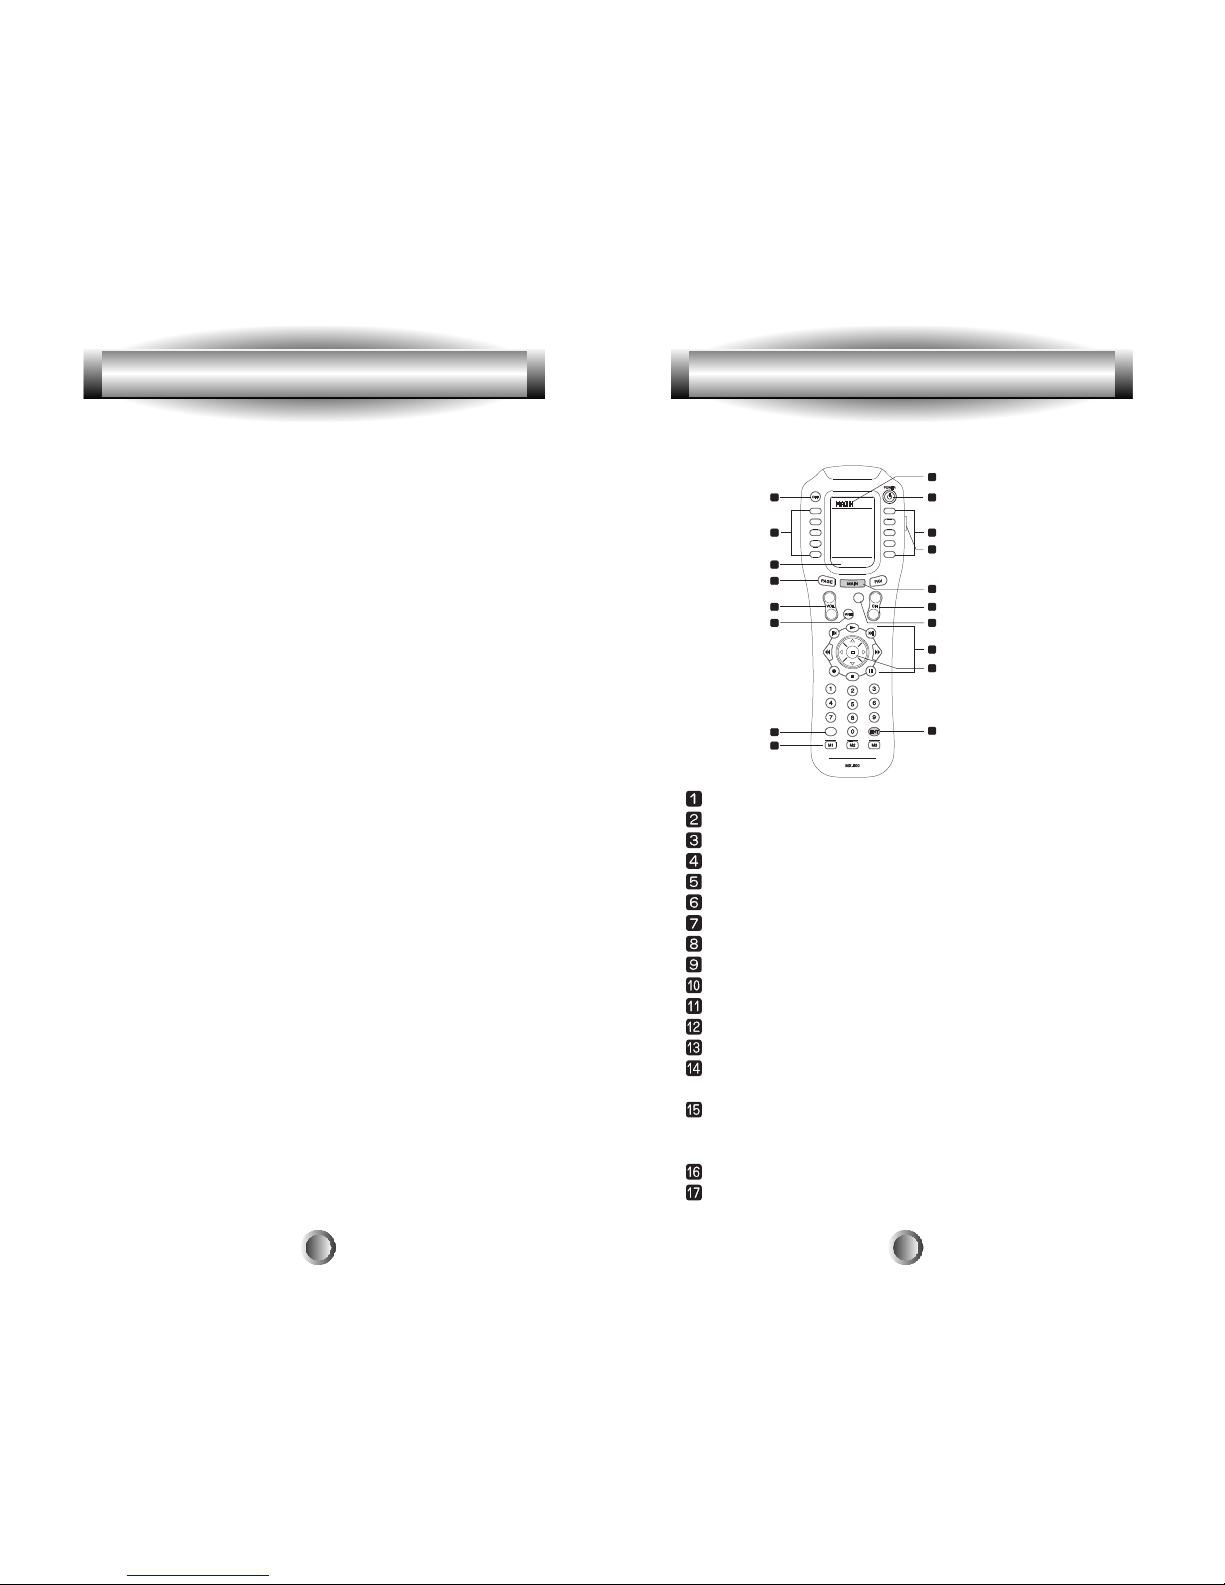
J. LCD Screen And Button Layout
Displays the name of the device selected.
System off (Power off)
Displays page number.
Displays the device and function names.
LIGHT button.
MACRO buttons.
MAIN DEVICE menu button.
LCD Page change button.
POWER
MUTE
VOLUME
CHANNEL
Previous channel button.
TRANSPORT functions(PLAY, STOP, REWIND and FF)
for VCR, CD and DVD etc.
JOYSTICK button(UP, DOWN, LEFT, RIGHT and ENTER)
to move the cursor and enter the selection by pushing down
the joystick in the center. Also called THUMBPAD.
ENTER
DISPLAY
22
33
88
1717
66
1111
1010
44
99
11
55
77
1515
1616
1212
1313
44
1414
OSDOSD
MENUMENU
GUIDE
GUIDE
EXITEXIT
INFOINFO
DISDIS
PREVPREV
CHCH
++
--
++
--
HOME THEATER MASTERHOME THEATER MASTER
LEARNING REMOTE CONTROLLEARNING REMOTE CONTROL
MUTE) while all the other buttons control other equipment.
You can also set up the remote to operate channel control and
transport functions (PLAY, STOP, REWIND, FAST
FORWARD, SKIP-, SKIP+, PAUSE and RECORD buttons)
from VCR, DVD, LD, CD or any other mode while all other
buttons in the remote control are controlling other
components. Please refer to page 32 in the manual for details.
G. Editing LCD Text
You can write your own text on each of the twenty-six
LCD screens. Please refer to page 39 in the manual for
details.
H. Cloning The MX-500
TM
The MX-500TMis capable of sending all the programmed
codes and operations from one MX-500TMto another
MX-500TM. Please refer to page 43 in the manual for
details.
I. All Other Operations
You can set the duration of the backlight on time and
change the LCD screen contrast. Please refer to pages 42
and 44 in the manual for additional details.
Note: The last Device selected will remain active when you
are on the MAIN page and will be shown at the bottom of
the LCD screen. For example, if you are using ÒTVÓ and
then return to the MAIN page, the hard buttons remain in
TV mode. The LCD buttons only change when you select
another device.
9
3. Summary of Operations
Page 7
K. System Settings
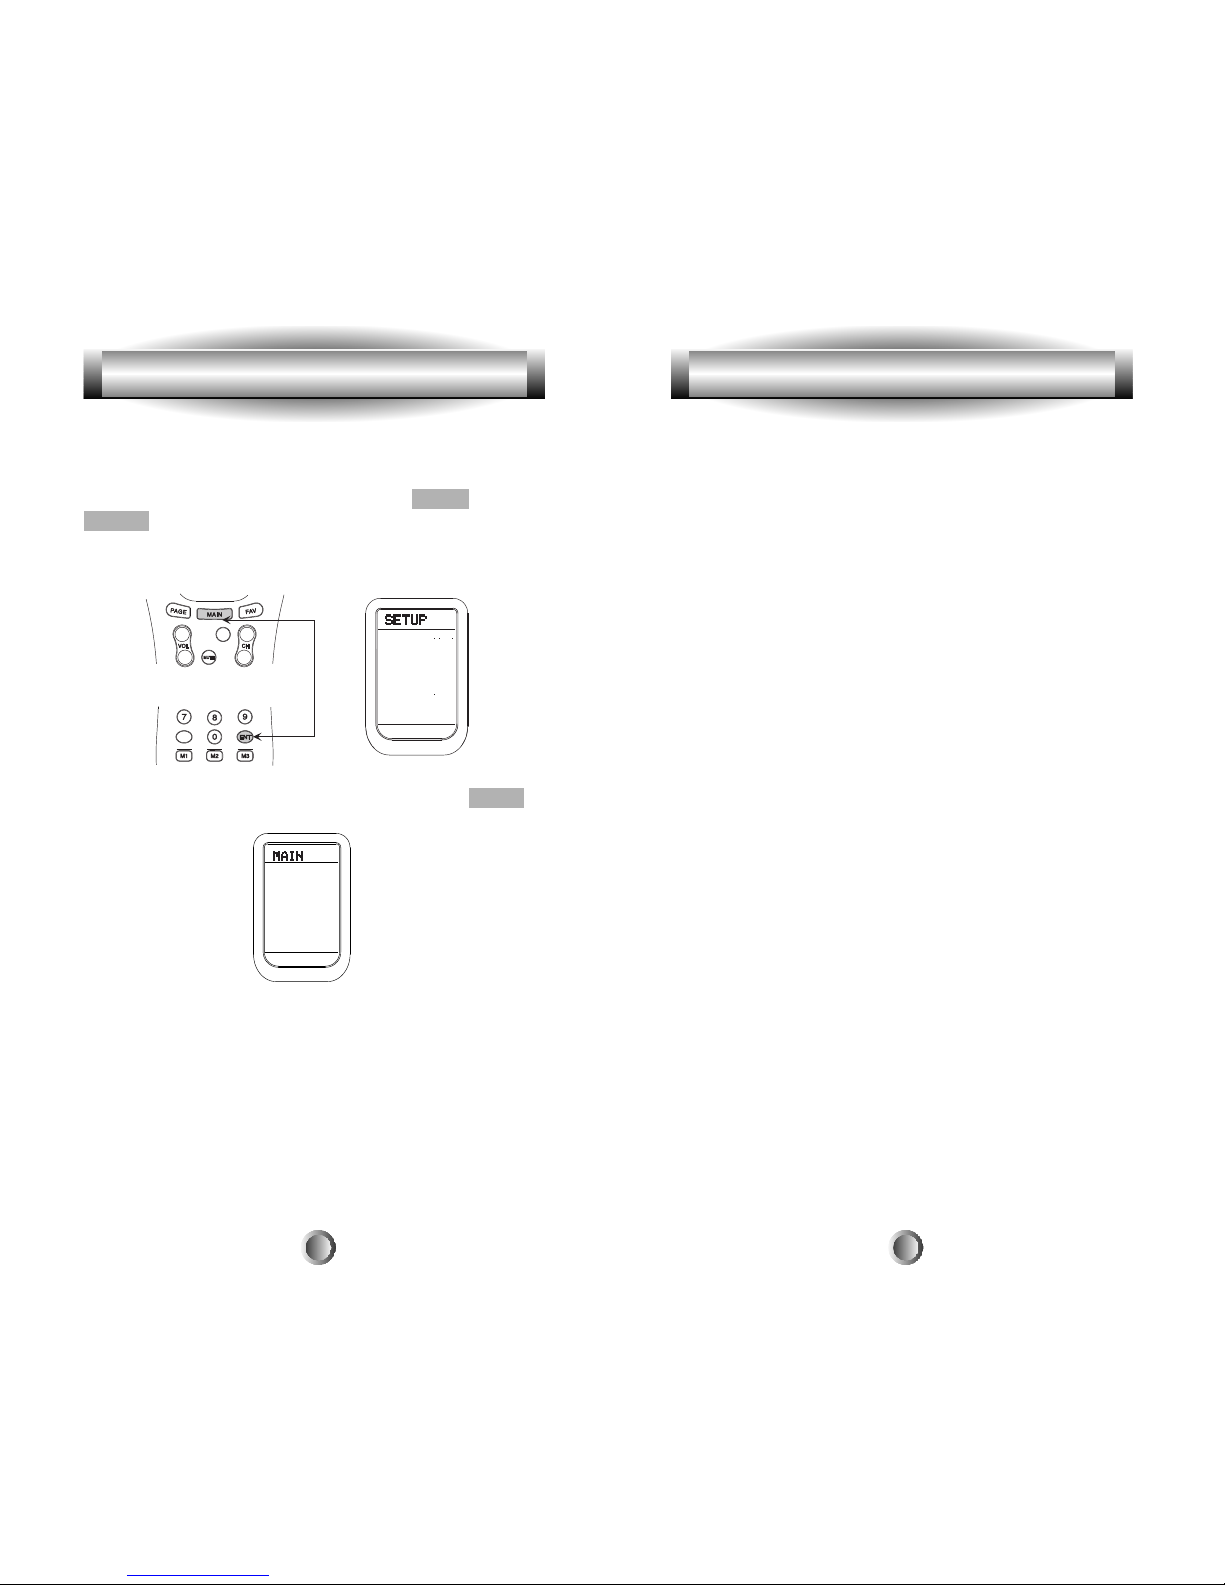
All programming
is done by first entering the SETUP
mode in the remote control. Press both the MAIN and
ENTER buttons simultaneously for three seconds to enter
the SETUP mode. SETUP will be shown at the top of the
LCD screen.
You exit the SETUP mode by simply pressing the MAIN
button.
Important: When using the Preprogramming method
starting on page 13, always use the appropriate button as
shown in the illustration above when asked ÒFROM
TABLEÓ. You may have already changed the labels of the
buttons, but the code tables are in the positions as shown.
For example, the AUDIO Code Table (refer to pages
starting at 58) will ALWAYS be the top-left button. The
SAT Code Table will always be the 4th button down on the
right side of the LCD screen, etc.
WHERE DO I START?
First of all, get all of your original remote controls together.
Find out what brands of components you have. You may
have one or more components that do not have original
remote controls, but can still be controlled by the
MX-500TM. You must use the preprogrammed method for
those devices. For the rest, you can program the MX-500
TM
to make it compatible with your components by following
the preprogrammed method instructions, by using your
original remote controls to teach the MX-500TM, or both
methods.
Next, it is a good idea to decide whether you want a
ÒDevice-basedÓ configuration, or if you want an
ÒActivity-basedÓ configuration.
A Ò Device-basedÓ configuration centers on each Device
with its two LCD pages controlling one component. All of
the functions that your original remote control has on it
would be put on to one device. The MX-500
TM
comes with
the labels and preprogrammed codes in a ÒDevice-basedÓ
setup.
If you go to the ÒList of Preprogrammed LCD Text by
DeviceÓ on page 53, you will see diagrams of how the
MX-500TMis set up at the factory. When you choose a
preprogrammed code for a component from the ÒSetup
Code TablesÓ in the Appendix of this manual, that code
will be applied to one device only.
An ÒActivity-basedÓ configuration centers on what you are
doing at the time. If you are watching a DVD on your TV,
and are using your Home Theater receiver to control the
3. Summary of Operations
11
4. Programming the MX-500TMto Control Your Components
12
DISDIS
PREVPREV
CHCH
++
--
++
--
Page 8
sound, you may want to start by setting up the DVD
Device using the preprogrammed method described below,
and then add functions from the other devices you will be
using while watching your DVD video to the DVD device.
For example, while playing a DVD, you will want to adjust
the volume of your receiver. So, you would use the ÒPunch
ThroughÓ method described on page 32 to put the
Receiver's Volume control into your DVD Device. You
may then want to adjust other functions of your Receiver
while staying in the DVD device, so you would use the
learning method described on page 19 to add those
functions to your DVD device, such as surround sound
controls, the receiver's DVD input code, the TV's power
code, etc. Everything that you need for watching a DVD on
your TV without having to jump back and forth from
Device to Device.
You can decide where on the MX-500
TM
you want your
functions to reside, relabeling the LCD screen buttons
(explained on page 39) for those functions, and choosing
preprogramming, learning, or a combination of both to
fully customize your MX-500TMwill give you a remote
totally customized to your needs.
So, let's start with learning how to Preprogram the
MX-500TM.
A. Using Preprogrammed Codes
1. Three-Digit Code Number
You can program the MX-500TMto make it compatible with
your components by using the preprogrammed method:
1. Manually turn on the device you wish to operate.
2. Go to the SETUP mode by pressing both the MAIN and
ENTER buttons simultaneously for three seconds until
SETUP appears at the top of the LCD screen.
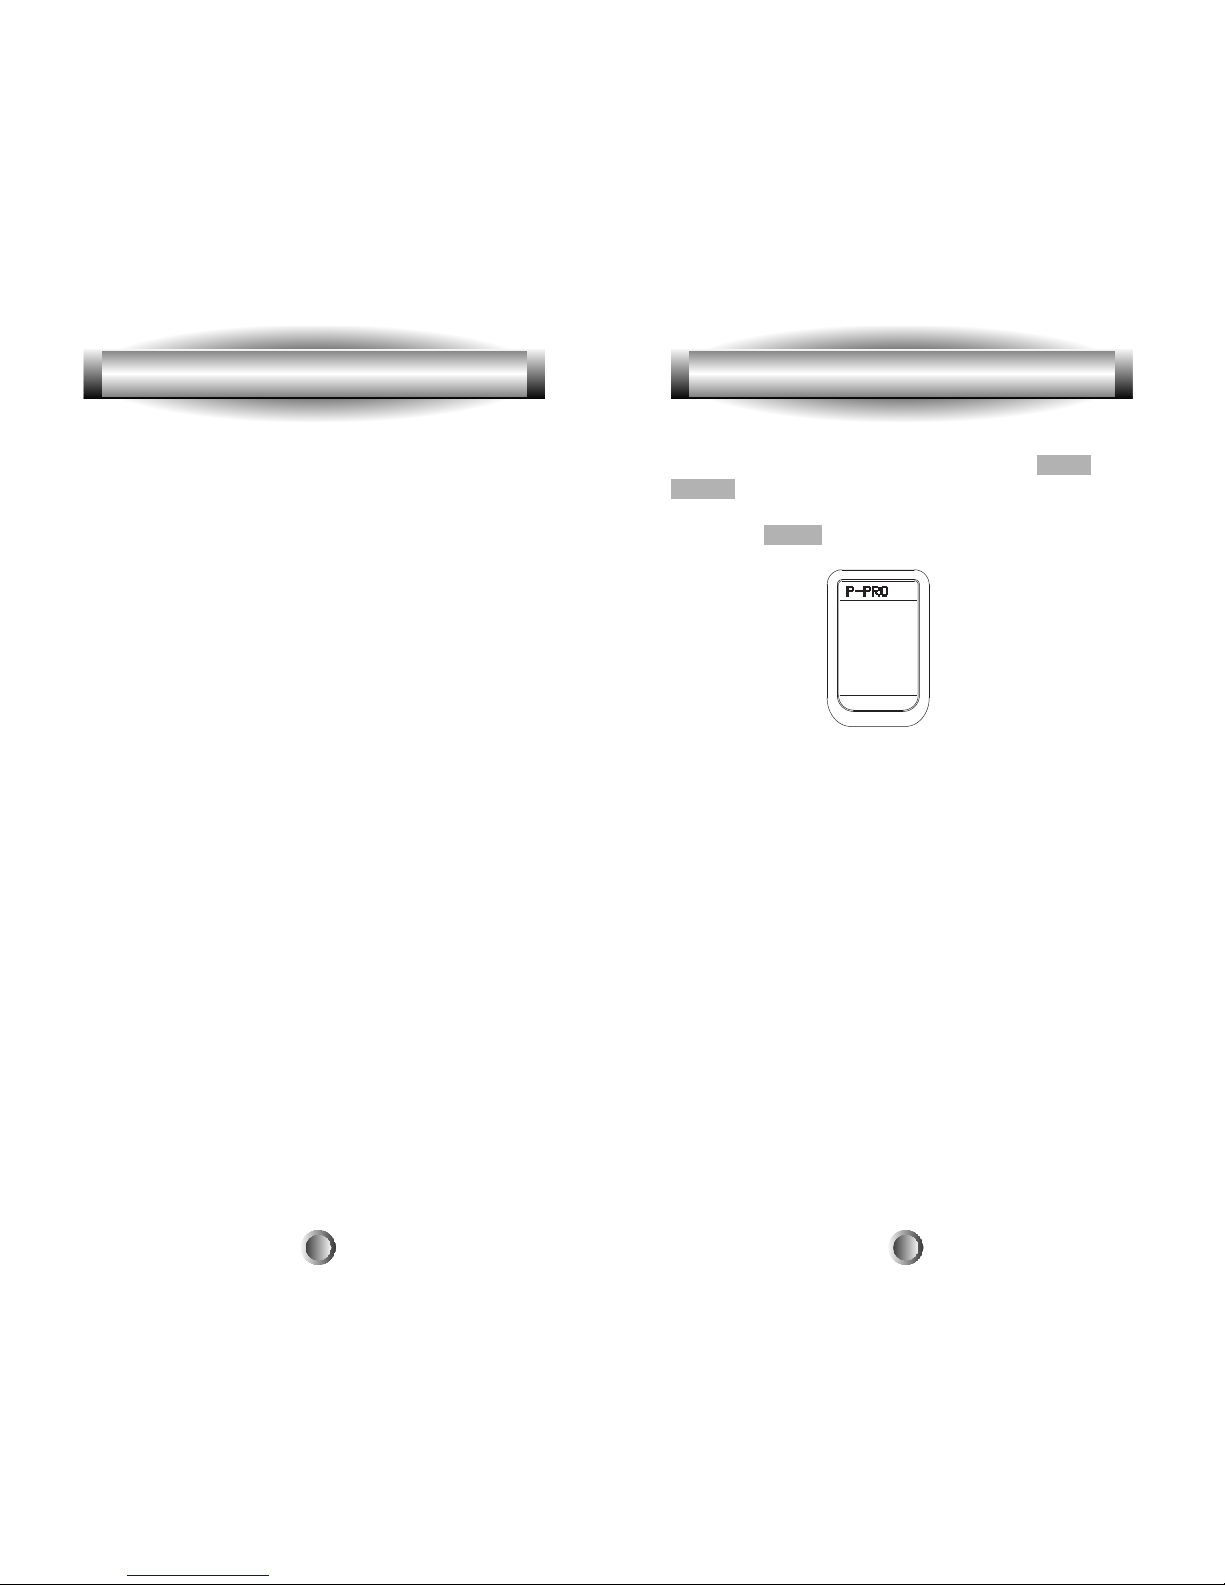
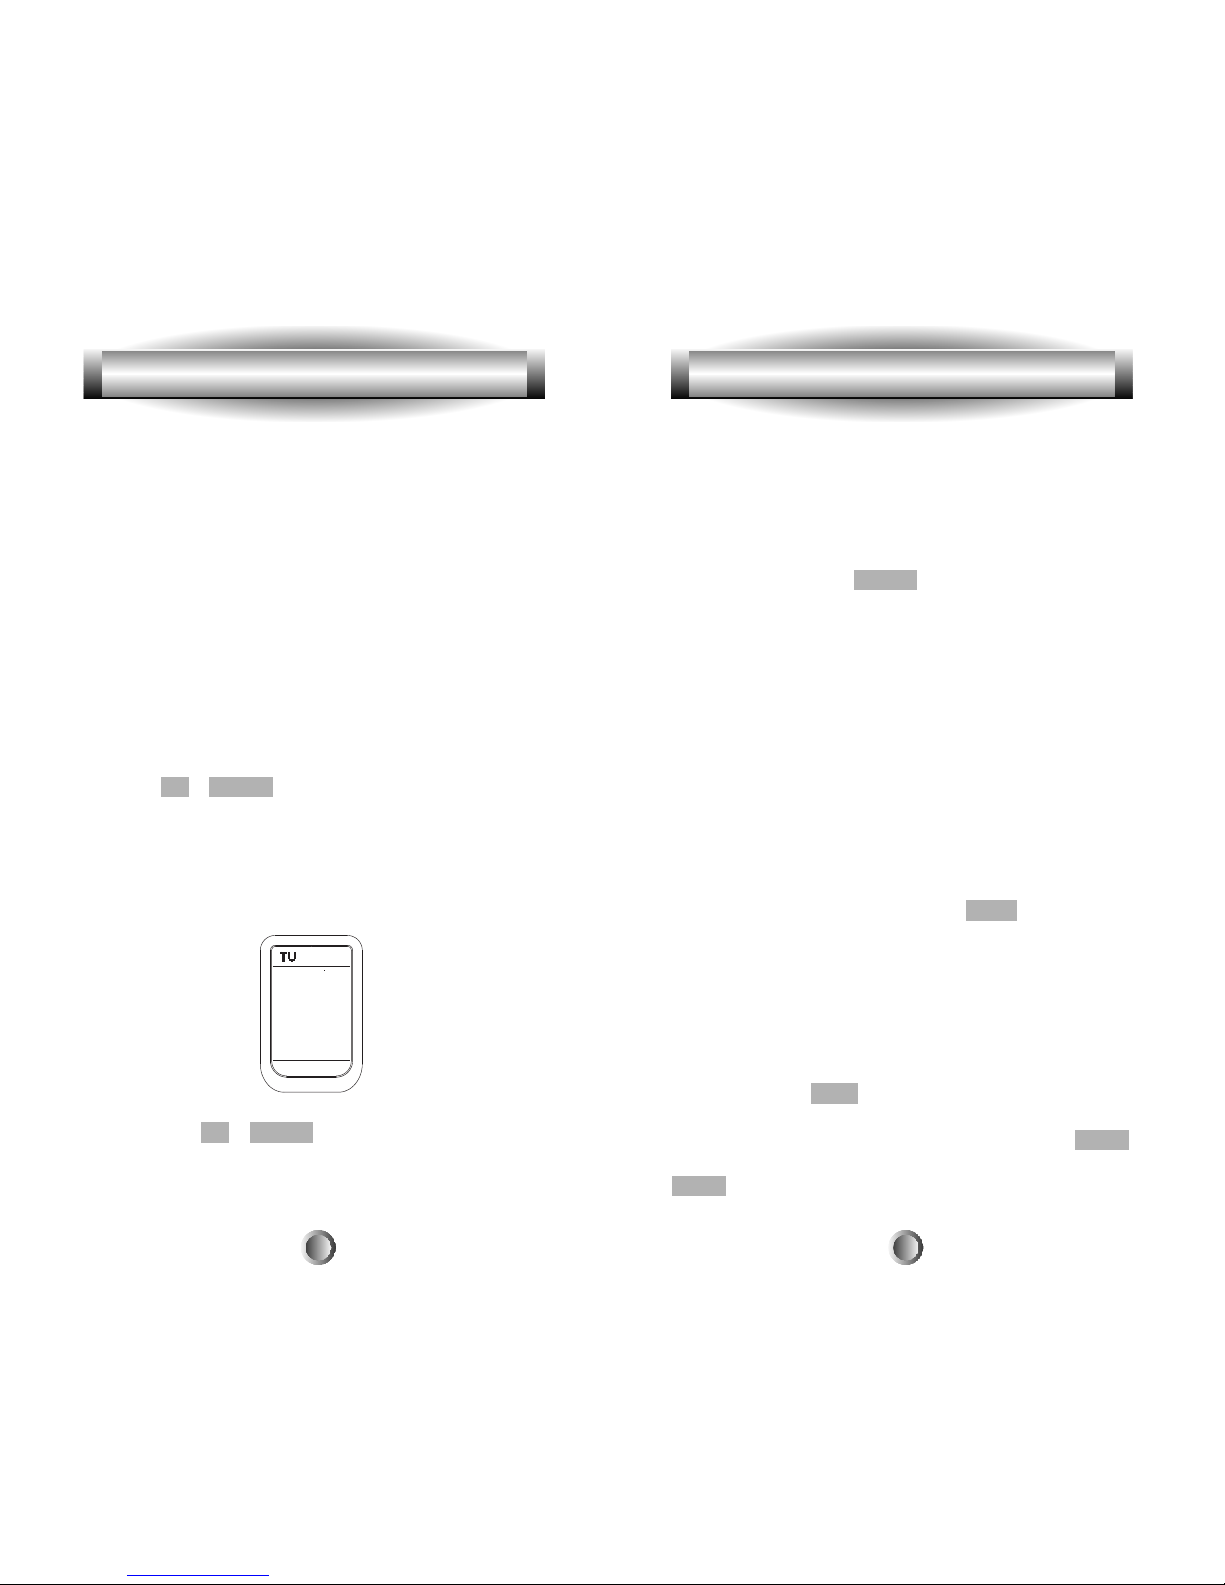
3. Press the P-PRO button next to the LCD screen.
4. The remote will be flashing ÒSELECT BUTTONÓ.
Press the button for the device you wish to program. (For
example, to program TV, press the TV button.)
5. The remote will be flashing ÒFROM TABLEÓ. Select the
device from which you want to access the code table.
Important: If you have already relabeled your device
keys, your LCD screen will not look like the illustration
above. Select the appropriate LCD button for the ÒFROM
TABLEÓ using the labels as shown in the illustration on
page 11 of this manual. For example, if you have relabeled
AUX as LIGHTS, you would still push the bottom-left
button to access the AUX Code Table.
Note: Use VCR1, not VCR2, to access the VCR code
library.
6. The remote will be flashing ÒENTER NUMBERÓ. Refer
to the tables starting on page 58 in the back of this manual
and find the manufacturer of your device. (If you are
programming the remote for the TV device, find the TV
device code table.)
7. Point the remote control toward the device and enter the
4. Programming the MX-500TMto Control Your Components
14
4. Programming the MX-500TMto Control Your Components
13
Page 9

16
4. Programming the MX-500TMto Control Your Components 4. Programming the MX-500TMto Control Your Components
first three-digit code number you selected for your device.
There is no way of knowing which code is the one that will
have the functions that more closely match your device
than the others, so it is wise to try them all. See step #9
below.
(Please enter the code number within 20 seconds of
beginning programming, otherwise the remote will revert
to the SETUP menu, and then after a period of time, it will
go back to the MAIN device page.)
If there is more than one code number assigned to your
brand, try one code number at a time until you find the
right code number (the number that
turns off your device.)
If the device turns off when you enter the three-digit code,
make note of the code. It will have at least some of the
functions in it that are needed to control your device.
8. Confirm that it is the right code by pressing the Power
button. The device should turn on. After you have
confirmed that the right code is entered, save the code by
pressing the SAVE button on the LCD.
9. At this point try ALL of the buttons on the remote, and
see which ones work with your device. The majority of the
buttons should work with your device. Make note of the
code if it seems to be the right one, and try the next one.
You are trying to find the one that has the most functions to
operate your equipment. If there are any functions missing,
you will learn them from your original remote in the
ÒLearning MethodÓ section on page 19.
10. Continue to program other components by repeating
from Step 1 above.
11. You can press EXIT at any time if you do not wish to
proceed.
15
12. When you are finished programming your remote, exit
from the preprogramming mode by pressing the MAIN
button and then exit from the SETUP mode by pressing the
MAIN button once again.
Tip: You can change the preprogrammed code for each
device at any time by following the steps above. The new
code will override the old code. For example, this would be
done if you replaced your old TV with a new one.
Tip: Please note that you use the code table from VCR1 for
VCR2 setup. The code table for Laser Disc is stored under
DVD. The code table for Tuner is stored under Audio.
2. Auto Scan With Three-Digit Number
You can also program your remote control by sending out a
series of Power Off commands for different brands stored
in the library by using the following steps. This is similar
to the first method, except it is easier to move through all
of the device codes for your device and make note of each
one that turns your device OFF.
1. Manually turn on the device you plan to operate.
2. Go to the SETUP mode by pressing both the MAIN and
ENT buttons simultaneously for three seconds.
3. Press the P-PRO button next to the LCD screen.
Page 10
1817
the device back on, and reverse your UP or DOWN one
press at a time, until the unit turns off. There is no way of
knowing which code is the one that will have the functions
that more closely match your device than the others, so it is
wise to try them all. See #9 below.
(Please press the UP or DOWN button within 20 seconds
of beginning programming, otherwise the remote will
revert to the SETUP menu, and then after a period of time,
it will go back to the MAIN device page.)
If there is more than one code number assigned to your
brand, try one code number at a time until you find the
right code number (the number that
turns off your device.)
If the device turns off when you enter the three-digit code,
make note of the code. It will have at least some of the
functions in it that are needed to control your device.
8. Confirm that it is the right code by pressing the Power
button. After you have confirmed that the right code is
entered, save the code by pressing the SAVE button on the
LCD.
9. Confirm that you entered the right code number that
matches your component by pressing other functional
buttons. If any of the buttons do not operate, as they
should, please repeat from Step 1.
10. Continue to program other components by repeating
from step 1 above.
11. You can press EXIT at any time if you do not wish to
proceed.
12. Exit from Preprogrammed mode by pressing the MAIN
button and then exit from the SETUP mode by pressing the
MAIN button once again.
4. Programming the MX-500TMto Control Your Components 4. Programming the MX-500TMto Control Your Components
4. The remote will be flashing ÒSELECT BUTTONÓ.
Press the device you wish to program. (For example, to
program TV, press the TV button.)
5. The remote will be flashing ÒFROM TABLEÓ. Select the
device from which the scanned code will be selected.
(Important: If you have already relabeled your device
keys, your LCD screen will not look like the illustration
above. Select the appropriate LCD button for the ÒFROM
TABLEÓ using the labels as shown in the illustration on
page 11 of this manual. For example, if you have relabeled
AUX as LIGHTS, you would still push the bottom-left
button to access the AUX Code Table.
Note: Use VCR1, not VCR2, to access the VCR code
library.)
6. Point the remote control toward the component and press
either the UP or DOWN button on the LCD. (It will send
out a series of Power Off codes when the button is kept
pressed and the code numbers that are being sent are shown
on the LCD.) If the right code number is sent, the
component will turn off right after the code number is
transmitted.
7. Release the UP or DOWN button you were pressing as
soon as the device is turned off. If you should happen to go
past the one that turned off you device, just manually turn
Page 11
2019
remoteÕs button until ÒGoodÓ flashes twice on the LCD
screen.
l
Try varying the distance between the remotes until you
find an optimal distance where the codes are learned on the
first or second try.
1. Programming The Function Buttons
1.
Go to the SETUP mode by pressing both the MAIN and
ENT buttons simultaneously for three seconds.
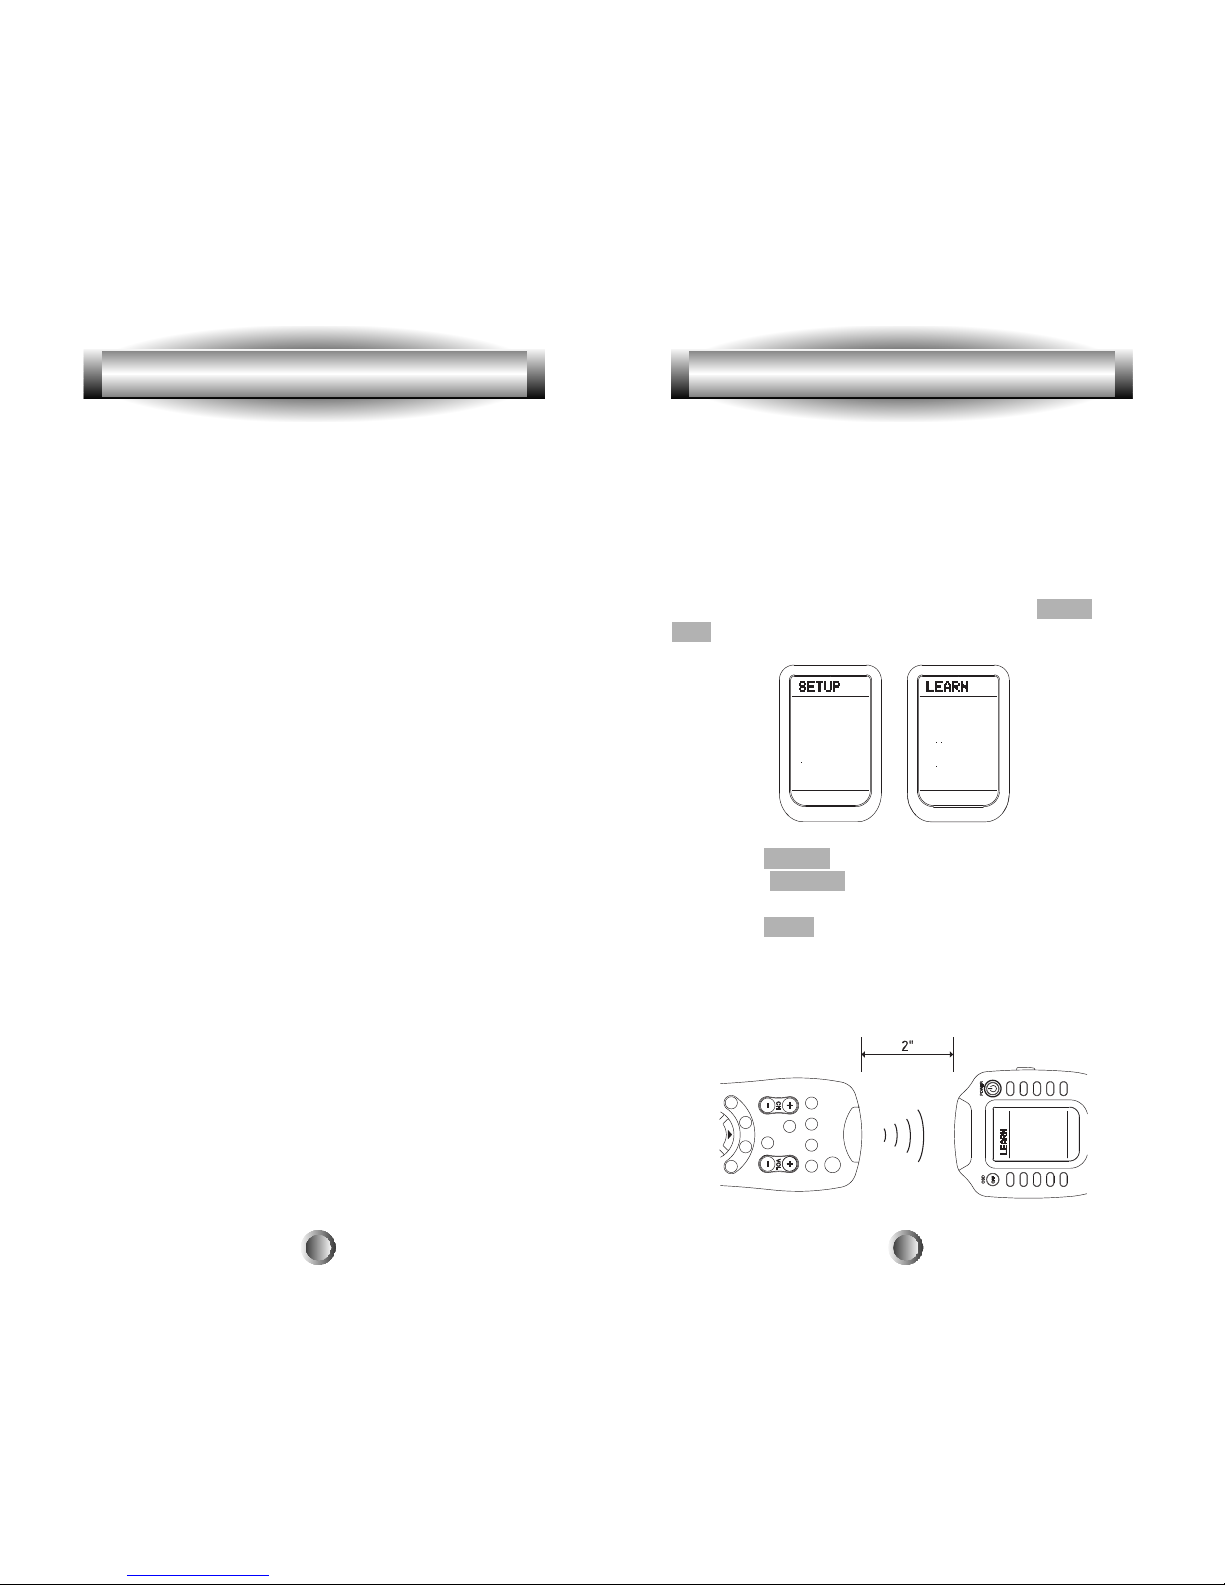
2. Press the LEARN button next to the LCD screen.
3. Select the DEVICE that contains the function button you
wish to program.
4. Press the PAGE button to go to page 2 of the device if
you need to.
5. Place your original remote control head to head with the
MX-500TMabout 2 inches apart on a flat surface as
illustrated below.
4. Programming the MX-500TMto Control Your Components 4. Programming the MX-500TMto Control Your Components
B. Learning Method
You can program the MX-500TMto operate a device by
ÒteachingÓ the correct commands to device buttons on the
main screen menu, the two sub-pages within each device
button, 31 buttons and the joystick located in the middle of
the remote control. The MX-500TMlearns these commands
by receiving infrared signals directly from your existing
remote controls. The MX-500TMreceives these signals
through its learning eye, located at the top of the unit.
Apart from the PAGE, MAIN and FAV buttons, which
cannot be taught, the MX-500
TM
has the capability of
learning up to 530 commands.
Tip: Function buttons are any buttons that can be assigned
a command to control a particular action for your device.
Commonly used function buttons include the two pages of
sub-commands within each of the 10 devices, channel up
and down, volume up and down, menu, guide, exit, info,
0-9, and the joystick.
Points to Remember
If the remote control fails to learn a function after the first try:
l
Keep the remotes stable by placing them on a flat surface.
l
Make sure the original remote is pointed at the learning
eye at the top end of the case and is not at an angle.
l
Make sure both remotesÕ batteries aren't low.
l
Avoid programming the MX-500TMunder bright lighting.
It can interfere with the infrared signals.
l
Try again. Sometimes the second or third attempt works.
l
Some buttons require a single, short push of the original
remote's button, other ÒrepeatingÓ buttons, such as the
VOL button, require that you Òpress and holdÓ the original
Page 12
22
2. Programming The Ten Device Buttons
This will program ONE learned code onto the Device
button, so that when you select that Device, it will send out
the learned signal as it changes to that Device's function
pages.
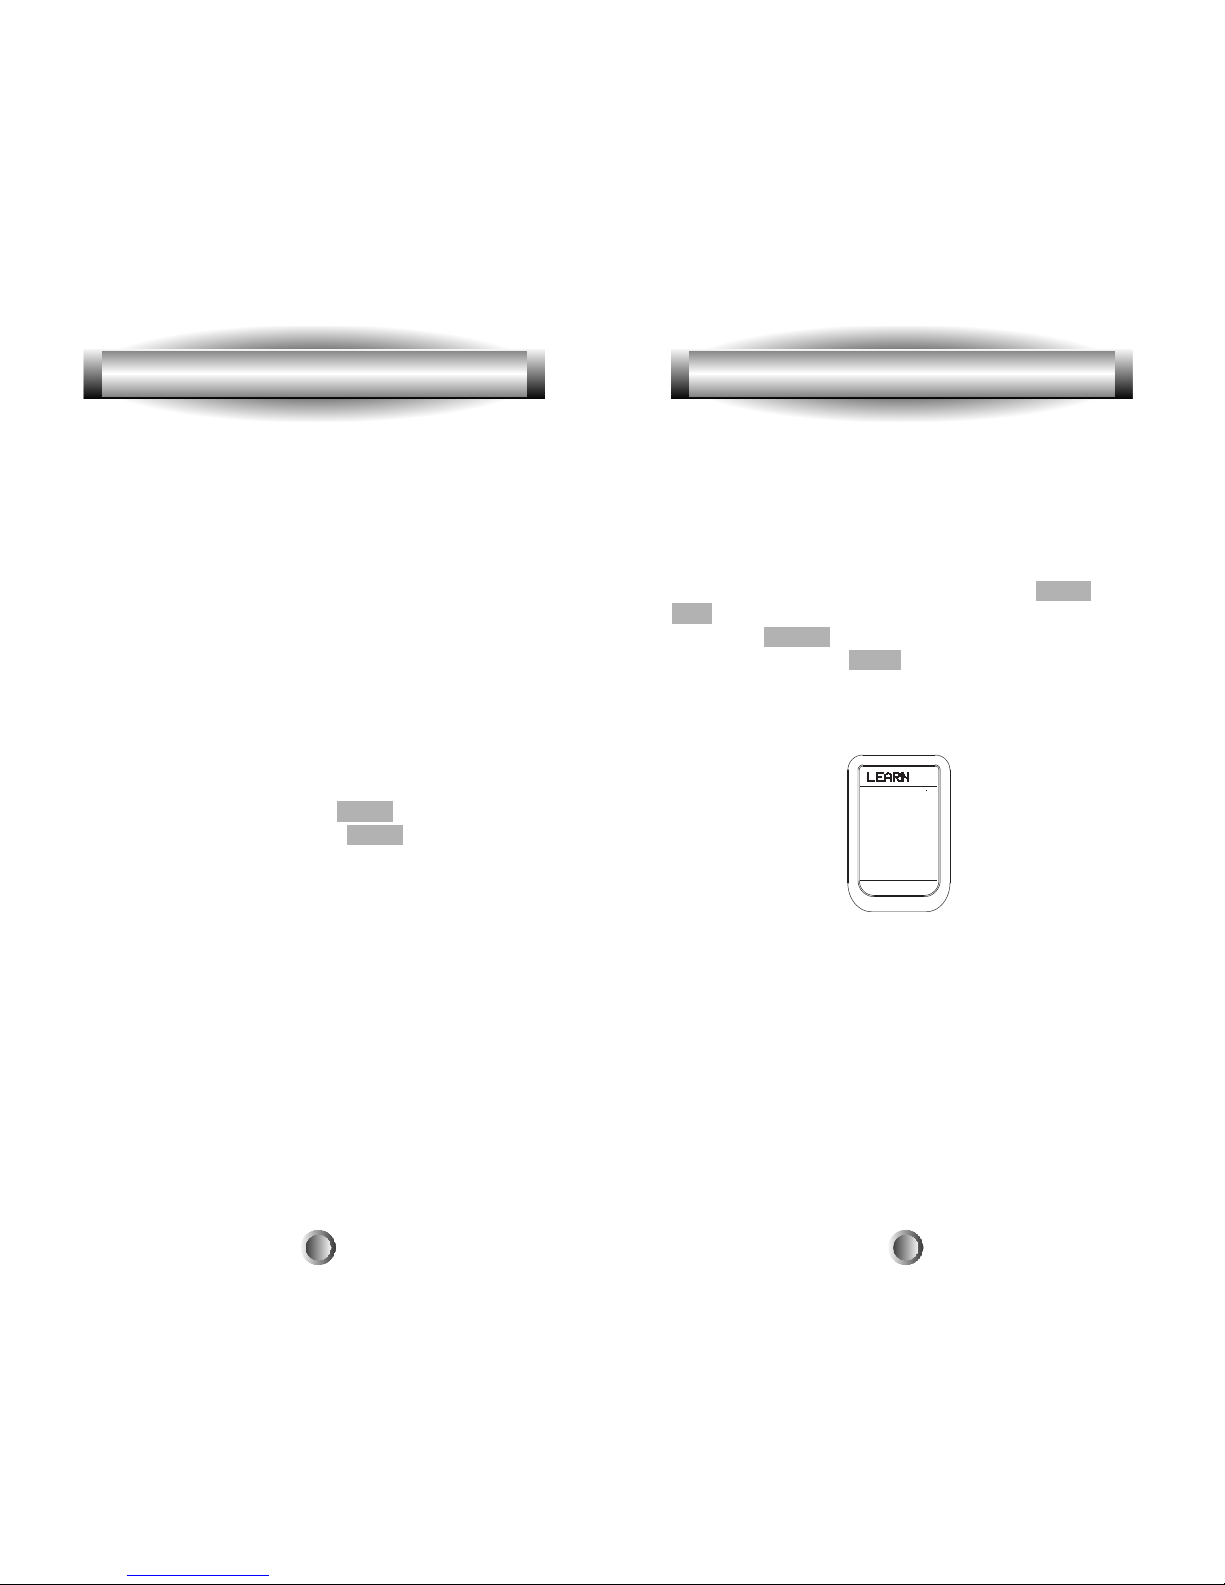
1. Go to the SETUP mode by pressing both the MAIN and
ENT buttons simultaneously for three seconds.
2. Press the LEARN button next to the LCD screen.
3. Important: Press the PAGE button.
4. Place your original remote control head to head with the
MX-500TMabout 2 inches apart on a flat surface.
5. Select any of the ten device buttons you wish to
program on the MX-500TM. Press the button on your
original remote control you wish to program into the
Device button you have chosen on the MX-500TM. Once the
MX-500TMhas received the signal, the MX-500TMwill flash
ÒGoodÓ on the LCD screen, indicating it learned the code
correctly. If it flashes ÒFailÓ, repeat from Step 4 until it
learns successfully. (Please enter the code signal within 20
seconds of programming.)
6. Return to Step #5 until you have programmed all of the
Device buttons that you require.
4. Programming the MX-500TMto Control Your Components 4. Programming the MX-500TMto Control Your Components
6. Press the button on the MX-500TMyou wish to program.
Only the three MAIN, PAGE and FAV buttons cannot be
programmed.
7. Press the button on your original remote control that you
wish to program onto the MX-500TM. Once the MX-500
TM
has received the signal, the MX-500TMwill flash ÒGoodÓ on
the LCD screen, indicating it learned the code correctly.
(Please do Step #6 within 20 seconds of Step #5, otherwise
the remote will revert to the SETUP menu, and then after a
period of time, it will go back to the MAIN device page.)
If it flashes ÒFailÓ, repeat from Step 4 until it learns
successfully.
8. Return to Step #3 until you have programmed all of the
buttons that you require.
9. Once you complete the programming and wish to exit
the LEARNING mode, press the MAIN button. Exit from
the SET UP mode by pressing the MAIN button once
again.
Tip: Learning to VOL, CH and Transport buttons: If you
are having problems learning to the Volume, Channel and
Transport buttons, it may be that you have previously
assigned a ÒPunch ThroughÓ from another device to that
device. To remove a Punch Through, just punch through
the device to itself. For example, to erase a punch through
from a TV to an Audio Device, just punch through the TV
to the TV.
(See ÒProgramming Punch ThroughÓ functions on
Page 32.)
21
Page 13
5. Programming Favorite Channels
24
You can create and program up to 50 Favorite Channel
buttons. Each favorite channel button can send out up to 10
commands with one button press.
1. Go to the SETUP mode by pressing both the MAIN and
ENT buttons simultaneously for three seconds.
2. Press the FAV button next to the LCD screen.
3. Press the device button that corresponds to the
component that your FAV channel will control. For
example, pressing the TV device will only send out the
type of code that the TV responds to. Pressing the Cable
device will only control the cable box.
4. Press the LCD button you will be assigning to the
favorite channel and enter the channel number you wish to
store in the FAVORITE channel button. You can store up to
10 digits.
5. Press the favorite channel button you selected in step 4
again to store the channel you programmed.
23
7. Once you complete the programming and wish to exit
the Learning mode, press the MAIN button. Exit from the
SETUP mode by pressing the MAIN button once again.
Tip: Only follow these instructions if you actually want a
code sent when changing devices. Some users do not want
a Device to send out a code when changing to that device.
For example: You program the AMP's TV input code on the
TV device, and are in the DVD device pages because you
are controlling the DVD player. The AMP's input is set to
DVD. Now you want to quickly adjust the picture on the TV.
If you push the TV Device button, it will change the input
on your AMP to TV and you will not be able to adjust the
picture for your DVD. In this case, it would be better not to
program a code to the TV device. However, your
circumstances may be different.
4. Programming the MX-500TMto Control Your Components
Page 14
6. Programming Macro Buttons
A ÒmacroÓ is a series of commands that you choose to be
sent out with the push of one button.
There are two types of macro functions you can program
with the MX-500TM:
The M1, M2, M3, POWER and SYSTEM OFF buttons
are designed to send out up to twenty commands from each
of the five hard buttons. The ten device buttons can each
send a macro of up to 20 commands when the device
button is pressed for more than 1 second while on the
MAIN page of the remote control.
Important: If you program the POWER or SYSTEM OFF
buttons with a macro, they will no longer function as ON
and OFF buttons for your components. Just erase any
macros you have programmed on to these buttons if you
want to restore the original ON and OFF function.
See the ÒTipsÓ at the end of this section for help on
programming macros.
A. Programming Macro Functions To M1, M2, M3,
POWER And SYSTEM OFF Buttons
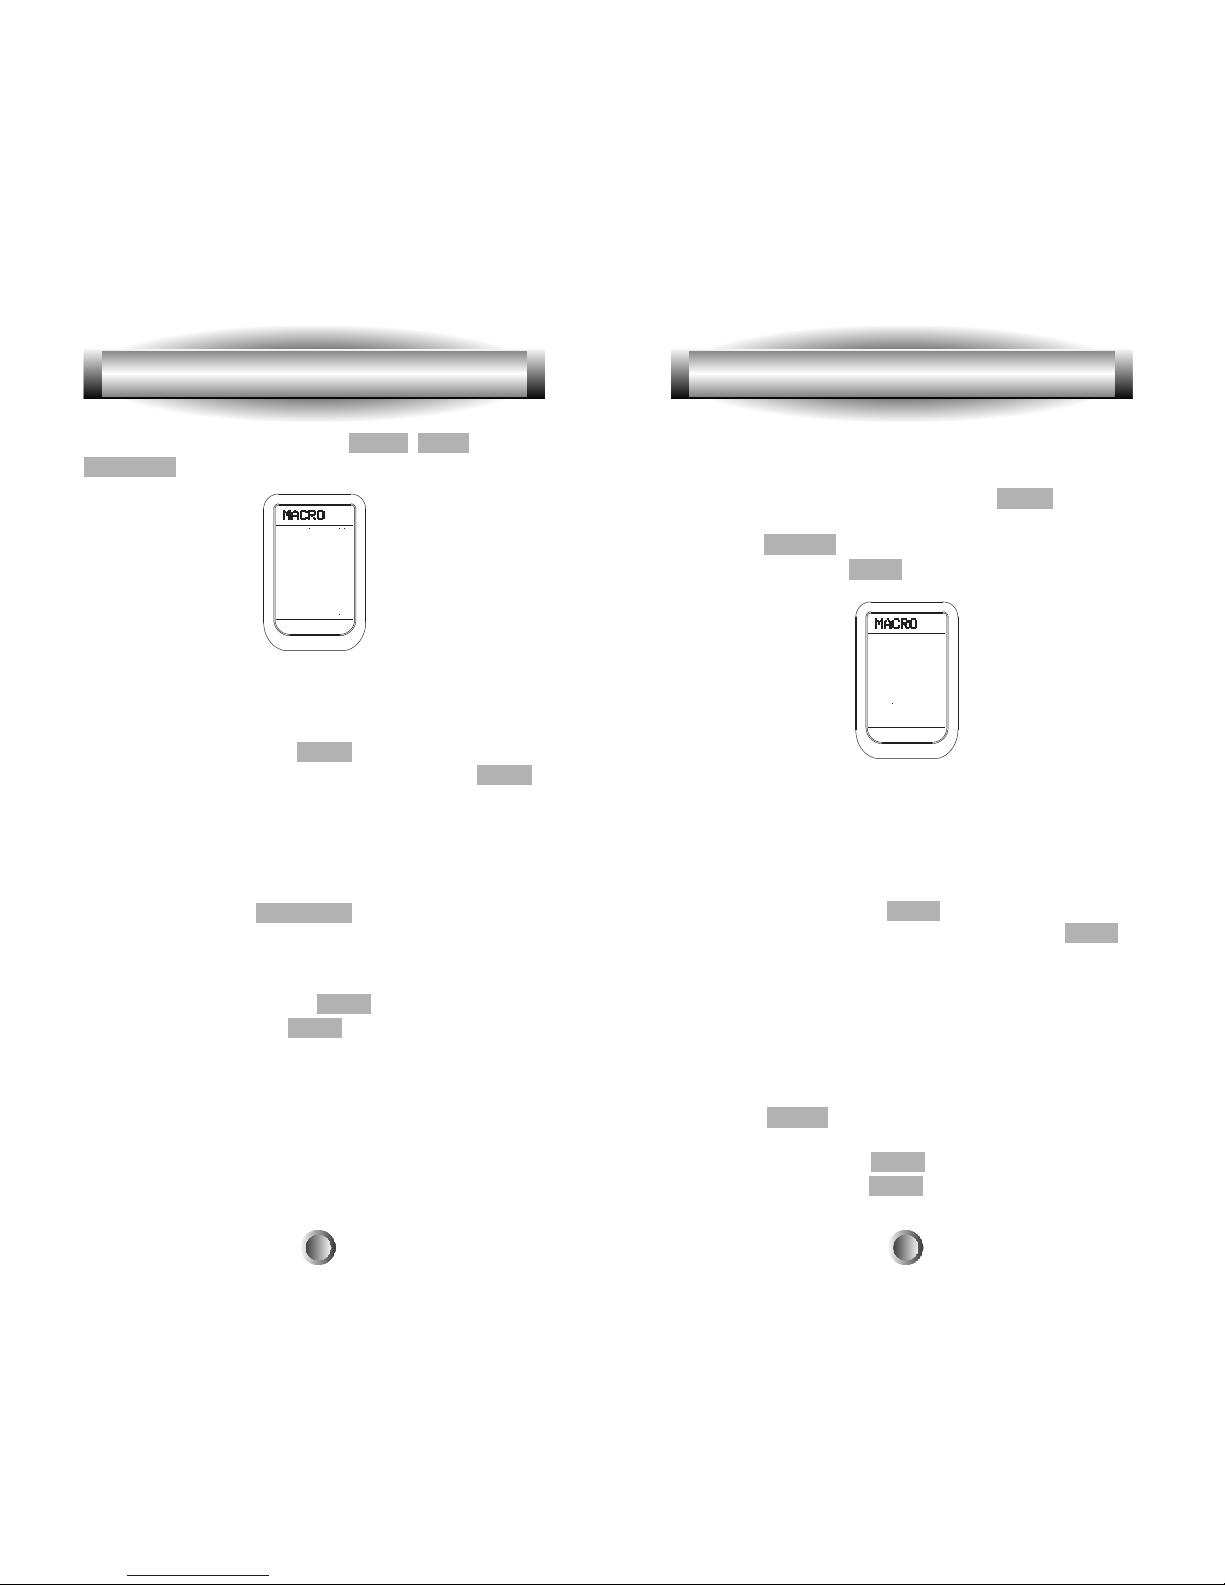
1. Go to the SETUP mode by pressing the MAIN and
ENTER button simultaneously for three seconds.
2. Press the MACRO button next to the LCD screen.
26
5. Programming Favorite Channels
Tip: If you press a wrong channel number, move the cursor
by using the left or right button of the joystick and then
reassign the correct channel number.
6. Return to Step #3 until you have programmed all of the
FAV channel buttons that you require.
7. Once you have completed the programming and wish to
exit from the Favorite Channel mode, press the MAIN
button. Exit from the SETUP mode by pressing the MAIN
button once again.
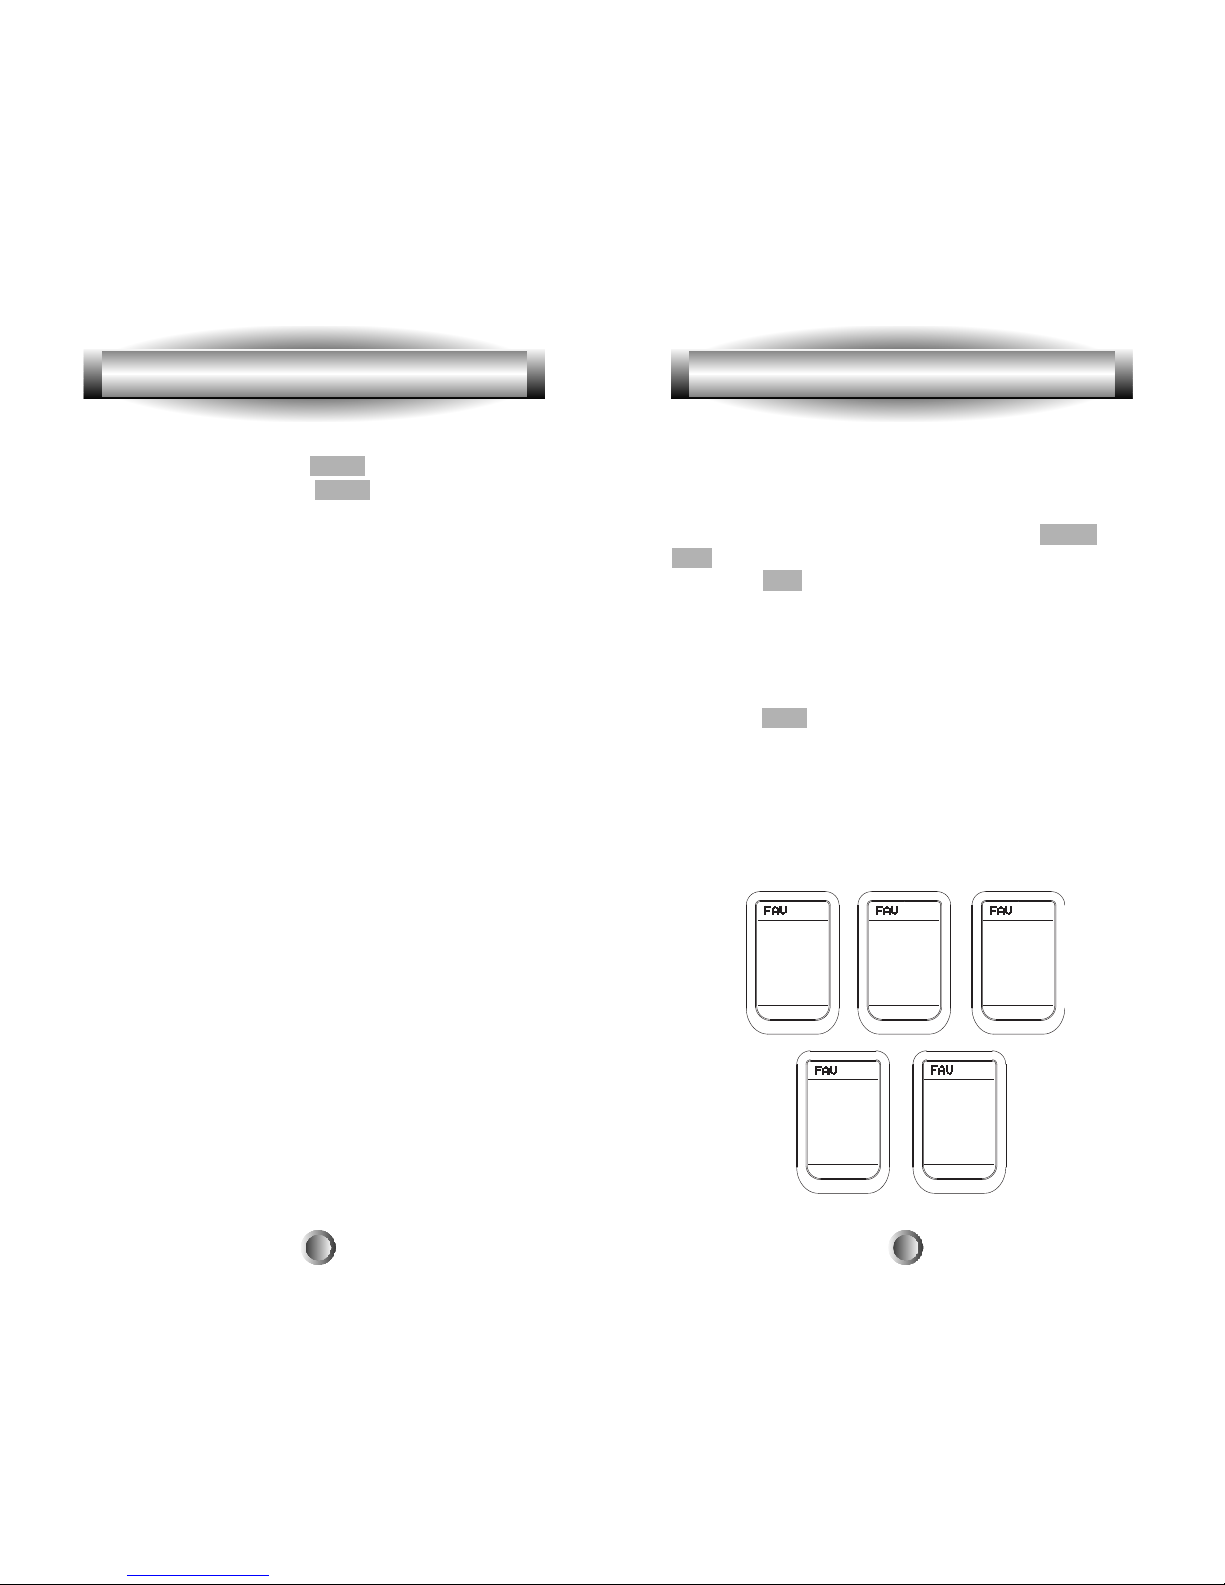
Tip: There are five pages of LCD screens for favorite
channel programming. You move to other pages by
pressing the PAGE or FAV button.
Tip: You can use the following buttons: 0-9, ENTER,
DISPLAY, POWER, SYSTEM OFF, and INFO/PAUSE in
your FAV macro.
Tip: (For Advanced Users) To make even more powerful
FAV macros, you can learn codes from your original
remote(s) to the 0-9, ENTER, DISPLAY, POWER, SYSTEM
OFF, and INFO/PAUSE buttons in any device, and use
them in your FAV macros. (This will not work if you have
already applied a preprogrammed device code to those
buttons.)
For example: Some televisions require you to send out a
code after the digits other than the ENTER code in order to
change channels. For this, you could LEARN the proper
code to the ENTER button from your original television
remote, and use that in your FAV macro. If you are
creative, you can learn any codes to these buttons and
make your FAV macros do almost anything!
25
Page 15
28
B. Programming Macro Functions To The Ten Device
Buttons
1.
Go to the SETUP mode by pressing the MAIN and
ENTER buttons simultaneously for three seconds.
2. Press the MACRO button next to the LCD screen.
3. Important: Press the PAGE button.
4. Press one of the ten device buttons you wish to store
your macro on.
5. Press the functional buttons you wish to store in the
device macro button you selected in the order you want
them stored. You can store up to 20 commands.
Important: Do not press the MAIN button at the beginning
of your macro, or it will not work. You can use the MAIN
button at any other step in your macro.
6. Be sure to end your macro on the Device page that you
would like it to remain on when the macro is sent in normal
use.
7. Return to Step #4 until you have programmed all of the
Macros that you require.
8. Save the commands you selected to the macro button by
pressing the CH UP button.
9. Once you complete the programming and wish to exit
from this mode, press the MAIN button. Exit from the SET
UP mode by pressing the MAIN button once again.
27
3. Press one of the macro buttons, M1-M3, Power or
System Off you wish to store your macro on.
4. Press the functional buttons you wish to store in the
device macro button you selected, in the order you want
them stored. You can store up to 20 commands.
Important: Do not press the MAIN button at the beginning
of your macro, or it will not work. You can use the MAIN
button at any other step in your macro.
5. Be sure to end your macro on the Device page that you
would like it to remain on when the macro is sent in normal
use.
6. Store the commands you programmed into the macro
button by pressing the Channel Up button.
7. Return to Step #3 until you have programmed all of the
Macros that you require.
8. Once you have completed the programming and wish to
exit from this mode, press the MAIN button. Exit from the
SETUP mode by pressing MAIN button once again.
Tip: The M1, M2, M3, POWER and SYSTEM OFF macros
are Òsystem-wideÓ, meaning they will function the same no
matter what device you are in when you use them.
6. Programming Macro Buttons 6. Programming Macro Buttons
Page 16
30
In this case we are going to use the M1 button to turn on
the TV, the receiver, the Cable box, choose the appropriate
inputs, and tune in the channel where we normally watch
the morning news.
1. Press MAIN and ENTER simultaneously for three
seconds.
2. Press MACRO.
3. Press M1.
4. Press AUDIO. (Takes you to the Audio device page.)
5. Press POWER. (The button on the top right of the
remote.)
6. Press TV. (This takes you to the TV device page.)
7. Press POWER.
8. Press MAIN.
9. Press CABLE. (This takes you to the Cable device page.)
10. Press POWER.
11. Press MAIN.
12. Press AUDIO. (We are returning to this page because
most receivers and amps take time to Òcycle upÓ and can't
receive any commands, such as input, until the device is
ready. So we have had the other steps of the macro running
while the Audio device is Òcycling upÓ.)
13. Press PAUSE three times. (The button on the bottom
right of the joystick. We've done this since our particular
receiver takes longer than normal to Òcycle upÓ, so we
have pressed the PAUSE button to insert more time for the
receiver to get to the point where it will receive another
command. Pressing the PAUSE button three times allows
for an extra. 6 seconds of wait time. 3 x .2 seconds
per push=.6 seconds)
14. Press CATV. (Since you are in the Audio device, this
selects the ÒCAbleTVÓ input on that device.)
6. Programming Macro Buttons 6. Programming Macro Buttons
29
Tip: Remember that a single push of a Device Button that
has a macro connected to it will take you to that device's
function pages. You will need to hold the Device Button
down for 1 second in order to send out the macro that you
have created for that Device Button.
Tip: Pressing the PAUSE button (the key to the bottom
right of the cursor pad) during the macro programming
will add a time delay of 0.2 seconds between the
commands. For example, pressing the PAUSE button three
times will create a pause of 0.6 seconds between the
commands where the delay was inserted. Pressing the
PAUSE button does not count as a macro step.
Tip: When using a macro, remember to keep the remote
pointed toward your components until the macro is finished
being transmitted. You will notice the ÒSendingÓ icon flash
in the upper right corner of the LCD screen as the macro is
sending out each command. It will not show when a series
of PAUSE commands are being executed. Wait until the
icon finishes flashing before using other functions or
putting the remote down.
Sample Macro: The following is a sample macro, to give
you a quick idea of what a macro can do, in an easy stepby-step form. Please refer to ÒProgramming Macro
ButtonsÓ above if you need to refresh your memory on
programming macros. This example assumes you have not
changed the names of the devices and that you have used
Òpunch throughÓ to assign the VOL to your receiver. If you
have changed the labels, just insert your changed names in
the example below.
Page 17
3231
You can use the audio receiver volume control in a
different mode (for example, Audio receiver Volume Up
and Volume Down and Mute in Satellite mode) using the
volume punch through feature. You can also have channel
punch through (Channel Up, Channel Down) as well as
eight VCR (or DVD) transport buttons (Play, Stop, Fast
Forward and Rewind, Skip-, Skip+, Pause, Record) operate
in another mode such as in Satellite, Cable and Audio
modes.
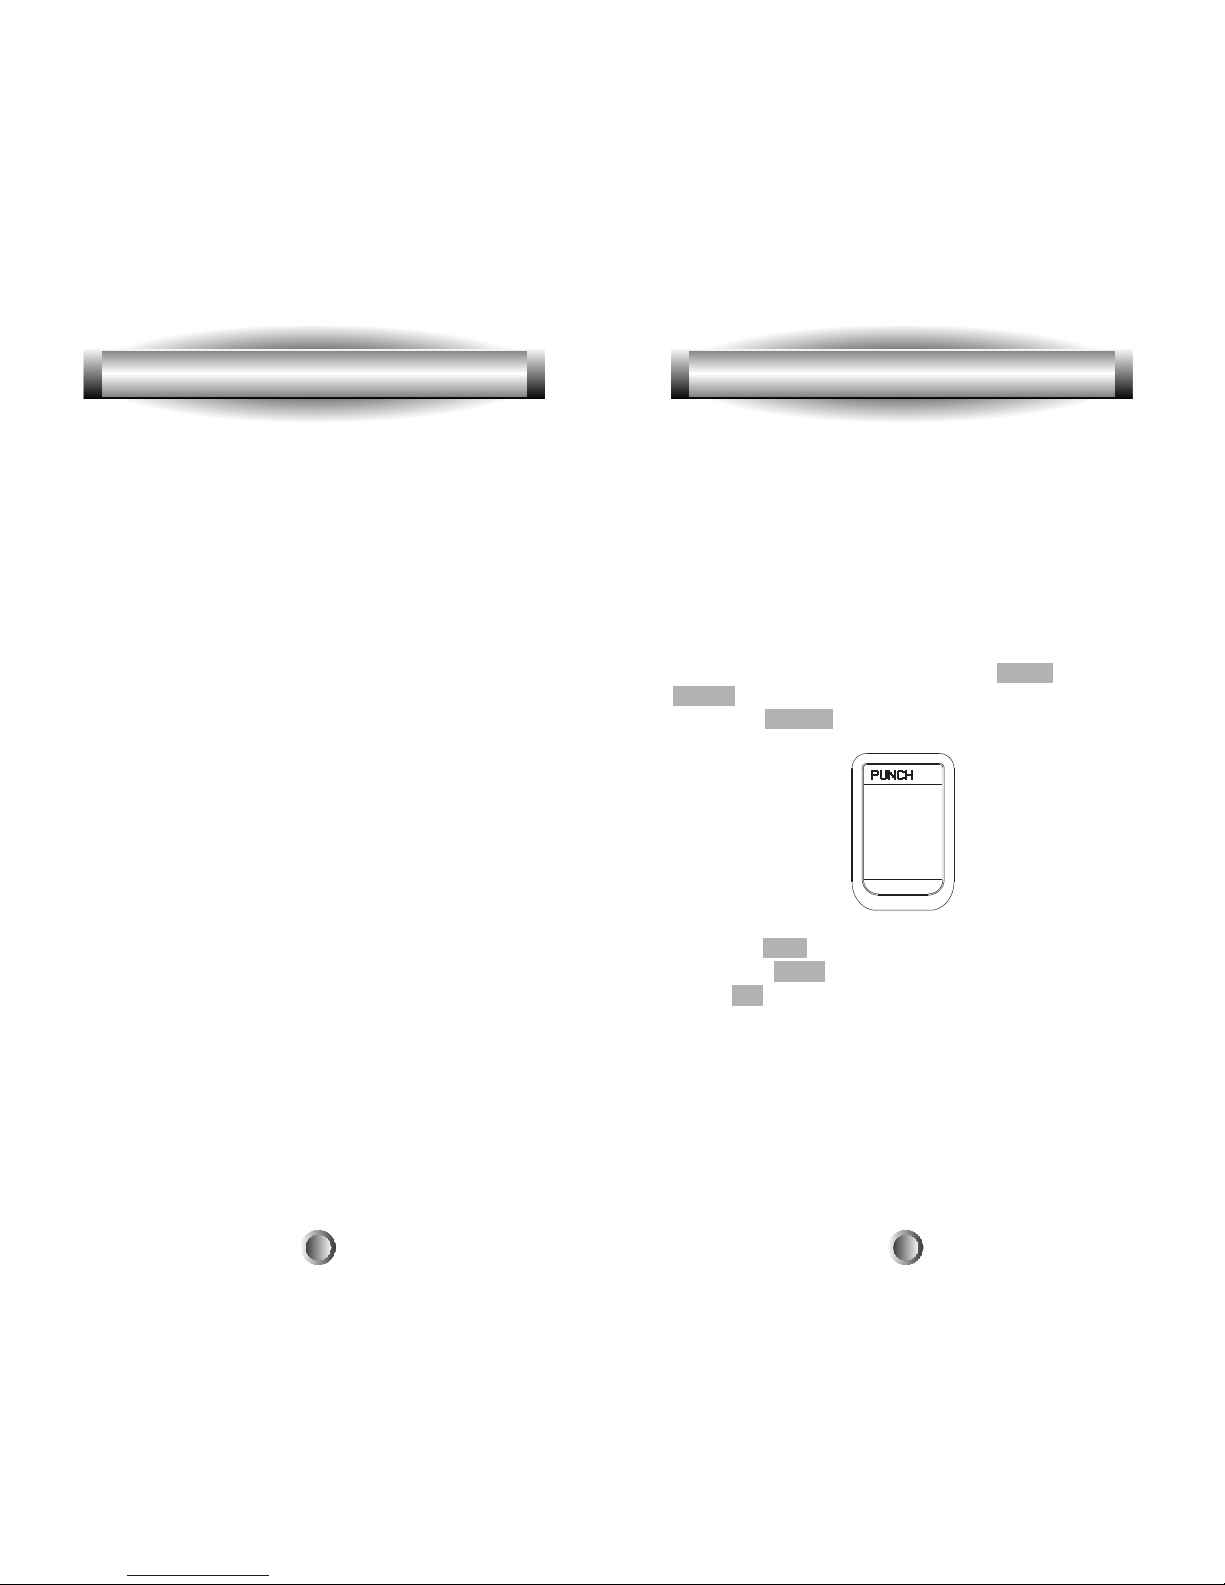
1. Go to the SETUP mode by pressing the MAIN and
ENTER buttons simultaneously for three seconds.
2. Press the PUNCH button next to the LCD screen.
3. Press the VOL button on the LCD for Volume Punch
Through, the PLAY button for Transport Punch Through
and the CH button for Channel Punch Through.
4. Select the device you wish to punch through to (1st
device example - Television or Cable box.)
5. Select the device you wish to punch through from (2nd
device example - Audio receiver.)
You are punching through the controls of the second device
to the device that is currently being controlled by any other
buttons.
7. Programming Punch Through Functions
6. Programming Macro Buttons
15. Press MAIN.
16. Press CABLE. (Back to the this device to enter the
appropriate channel.)
17. Press 1, then 3, then 5. (Then press the ENT button if
your cable device requires it.)
18. Press CH UP to save the macro.
19. Press MAIN twice.
Press M1 to test your macro.
It should turn on your Audio device (receiver for example),
then your TV, then your Cable box, then change the input
to Cable on your receiver, then change the Channel on your
Cable box to 135.
Note: You can end your macro on any page you like,
including the MAIN page. We deliberately ended our macro
on the Cable page before we saved it, since that is where
we wanted to be at the end of our macro.
Page 18
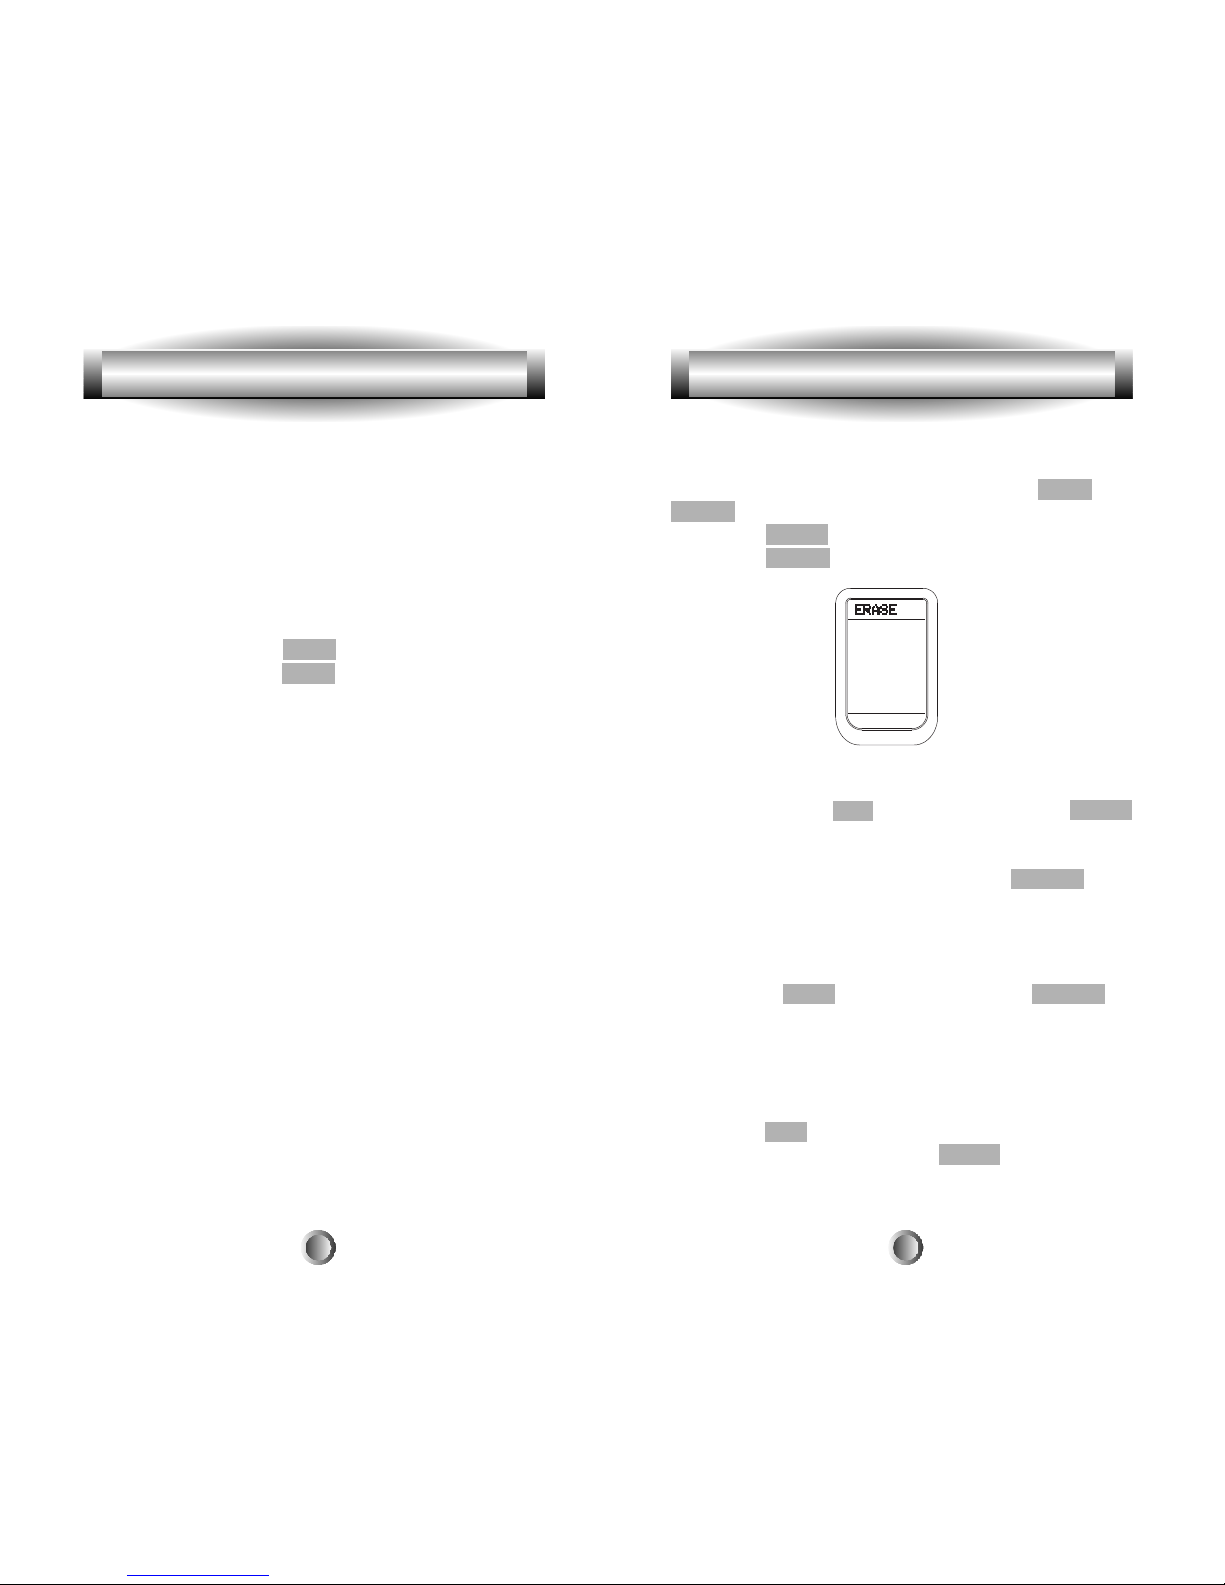
A. Erasing Learned Buttons
1. Go to the SETUP mode by pressing both the MAIN and
ENTER buttons simultaneously for three seconds.
2. Press the ERASE button next to the LCD screen.
3. Press the LEARN button.
4. If you wish to erase all the learned functions in the
MX-500TM, press the ALL button and then press the SURE?
button at the next LCD screen.
5. If you wish to erase all the buttons in a single device or
an individual button in the device, press the DEVICE
button.
6. Press the device button (TV, VCR, Audio, etc.) to erase
the button(s) from the device.
Tip: Press the PAGE button and then press the DEVICE
button (TV, VCR, Audio, etc.) to erase the learned function
in the device button itself. Programming this learned
function to the Device button was explained in
ÒProgramming the Ten Device ButtonsÓ earlier.
7. Press the ALL button if you wish to erase all the learned
buttons in the device and press the SURE? button at the
next LCD screen.
For example, for VOL you are punching through the
controls of the Audio receiver's VOL to the TV or Cable
box, enabling you to control the Audio receiver's VOL
when in the TV or Cable box screen.
6. Punch Through is saved when the second device is
pressed.
7. Repeat from Step #2 to program Punch Through for
other devices.
8. Once you complete the programming and wish to exit
from this mode, press the MAIN button. Exit from the SET
UP mode by pressing the MAIN button once again.
Tip: When using Punch Through, think of the first Device
you select as the Device that now controls the functions,
and think of the second Device as the device that you want
to control those functions. You are taking the controls of the
second device and Òpunching them throughÓ to the first
device.
7. Programming Punch Through Functions
8. Erasing Existing Programming
3433
Page 19
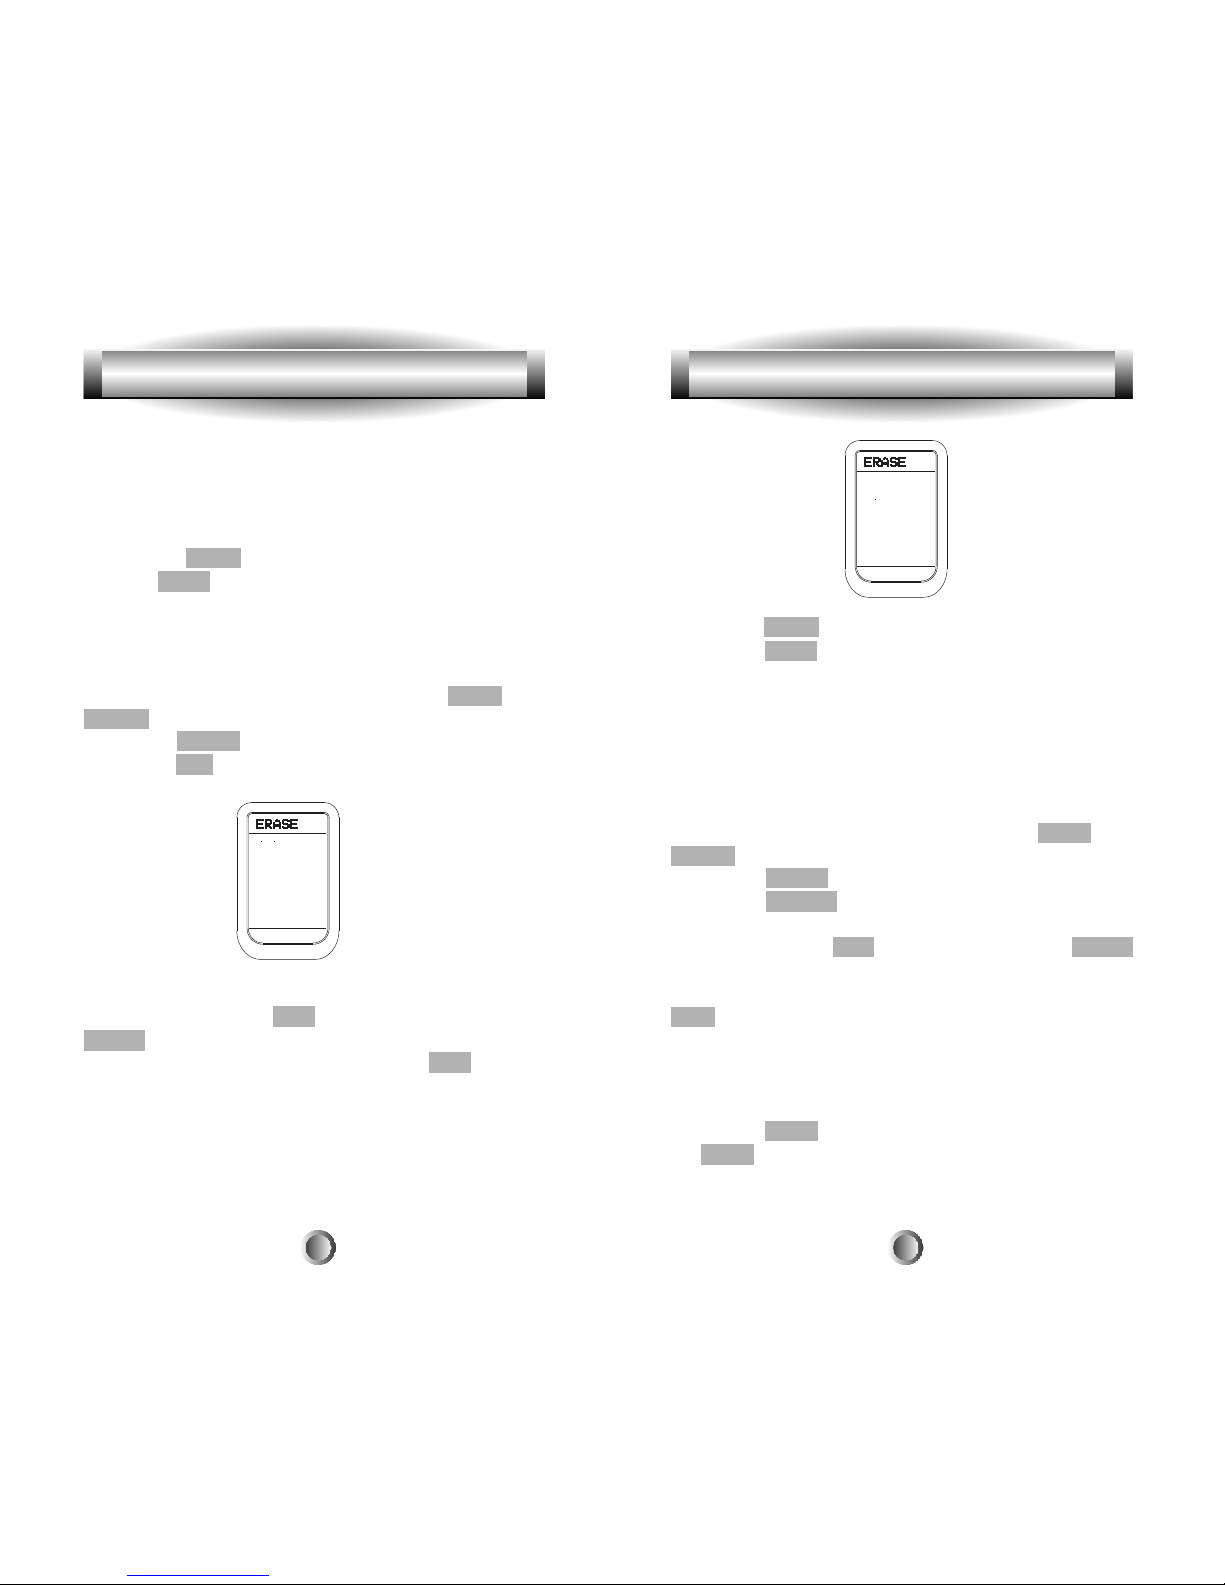
7. Press the MAIN button to exit to main Erase mode.
8. Press the MAIN button once again to exit the SETUP
mode.
C. Erasing Macro Functions
1. Erase M1, M2, M3, POWER and SYSTEM OFF
Buttons
1. Go to the SETUP mode by pressing both the MAIN and
ENTER buttons simultaneously for three seconds.
2. Press the ERASE button next to the LCD screen.
3. Press the MACRO button.
4. If you wish to erase all of the macro buttons in the
MX-500TM, press the ALL button and then press the SURE?
button at the next LCD screen.
5. If you wish to erase just one of the macros, press the
KEY button at step 4 and then one of the M1, M2, M3,
POWER or SYSTEM OFF buttons to erase the macro
functions from that button.
6. Repeat from Step #5 to erase any other macro buttons
you require.
7. Press the MAIN button to exit to main Erase mode. Press
the MAIN button once again to exit the SETUP mode.
8. Press a single button if you wish to erase individual
buttons one at a time. This will show all the functions in
the device. Press the button you wish to erase.
9. Repeat from Step #5 to erase any other devices or
learned buttons you require.
10. Press the MAIN button to exit to main Erase mode.
Press the MAIN button once again to exit the SETUP
mode.
B. Erasing Favorite Channel Buttons
1. Go to the SETUP mode by pressing both the MAIN and
ENTER buttons simultaneously for
three seconds.
2. Press the ERASE button next to the LCD screen.
3. Press the FAV button.
4. If you wish to erase all the favorite channel buttons in
the MX-500TM, press the ALL button and then press the
SURE? button at the next LCD screen.
5. If you wish to erase one button, press the KEY button.
Press the individual button you want to erase and continue
with any other individual buttons you want to erase.
6. Repeat from Step #5 to erase any favorite channel
buttons you require.
8. Erasing Existing Programming 8. Erasing Existing Programming
3635
Page 20
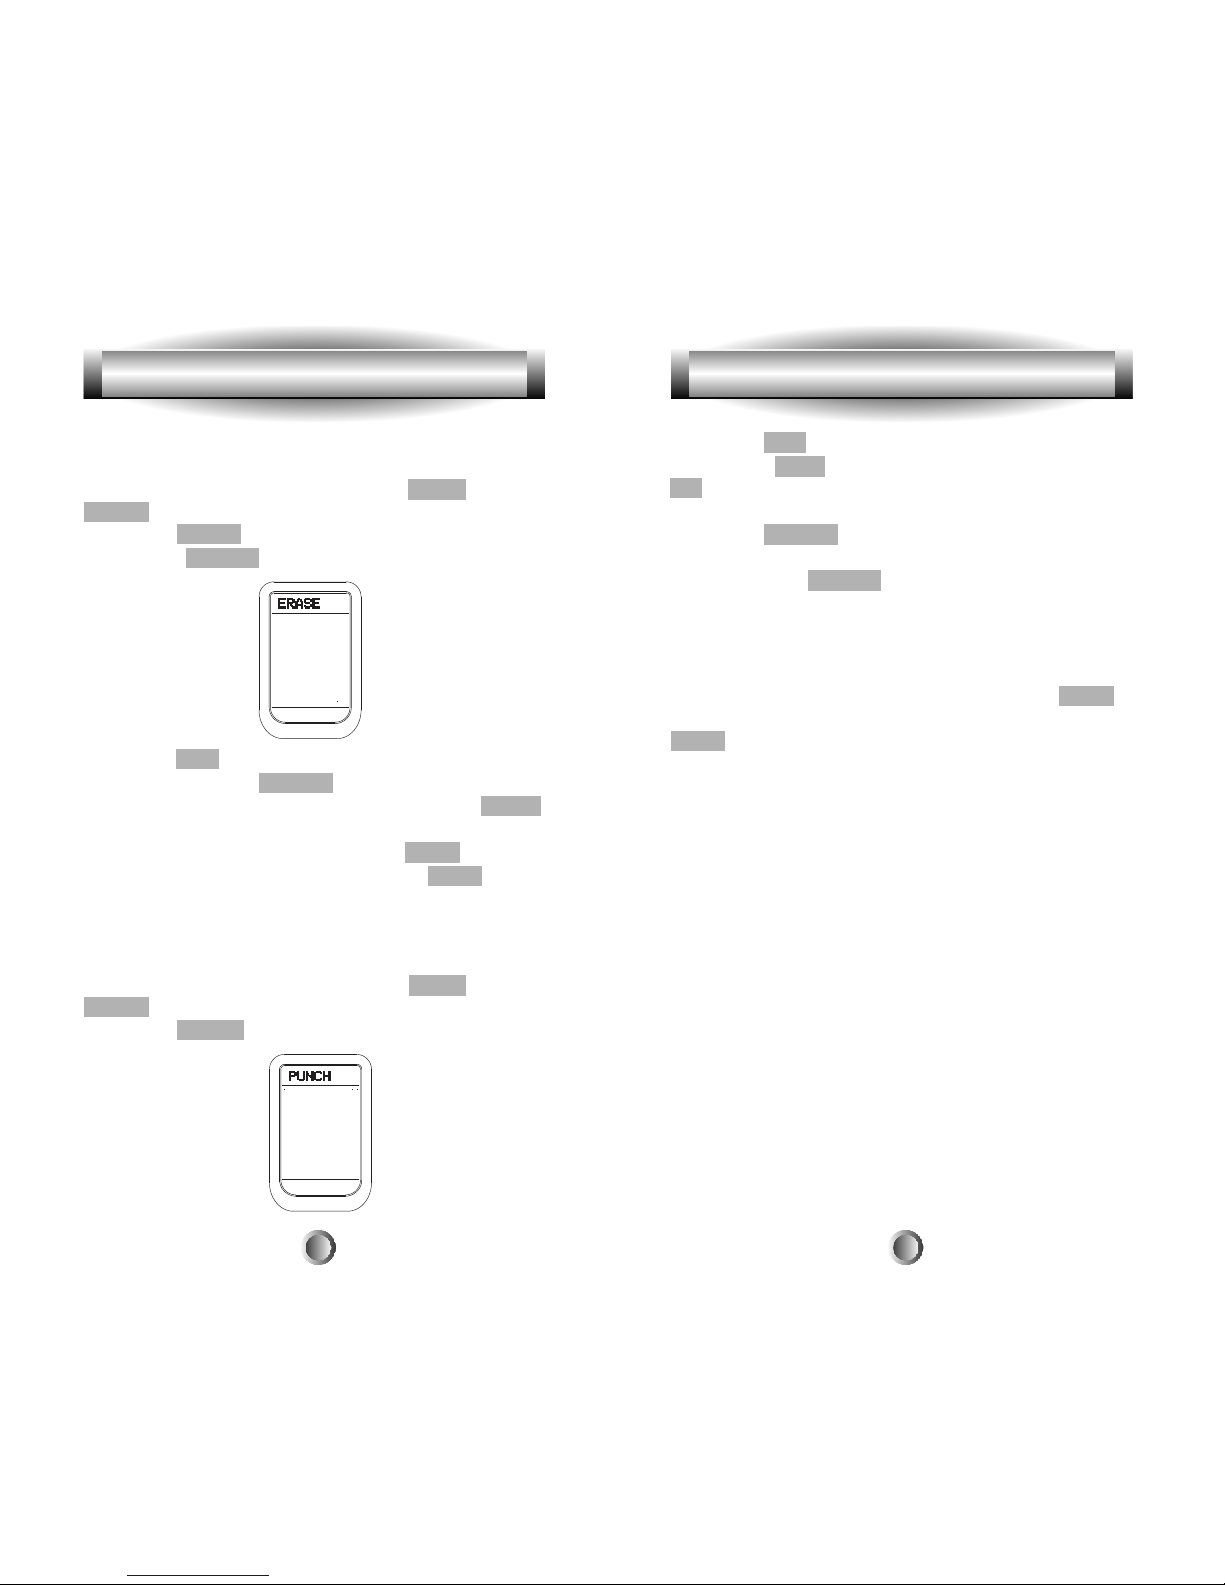
3. Press the VOL button on the LCD for Volume Punch
Through, the PLAY for Transport Punch Through or the
CH for Channel Punch Through depending upon which
Punch Through you want to erase.
4. Press the DEVICE button from which you wish to erase
punch through.
5. Press the same DEVICE button once again.
6. Punch through is erased when the same device button is
pressed the second time.
7. Repeat from Step 2 to erase the Punch Through for other
devices.
8. Exit from Punch Through mode by pressing the MAIN
button and then exit from the SETUP mode by pressing the
MAIN button once again.
2. Erase Macro Functions In The Ten Device Buttons
1. Go to the SETUP mode by pressing the MAIN and
ENTER buttons simultaneously for three seconds.
2. Press the ERASE button next to the LCD screen.
3. Press the MACRO button.
4. Press the KEY button.
5. Press one of the ten DEVICE buttons from which you
wish to erase the macro function and then press the SURE?
button at the next LCD screen.
6. Exit from Macro mode by pressing the MAIN button and
then exit from SETUP mode by pressing the MAIN button
once again.
D. Erasing Punch Through Functions
1.
Go to the SETUP mode by pressing the MAIN and
ENTER buttons simultaneously for three seconds.
2. Press the PUNCH button next to the LCD screen.
8. Erasing Existing Programming 8. Erasing Existing Programming
3837
Page 21
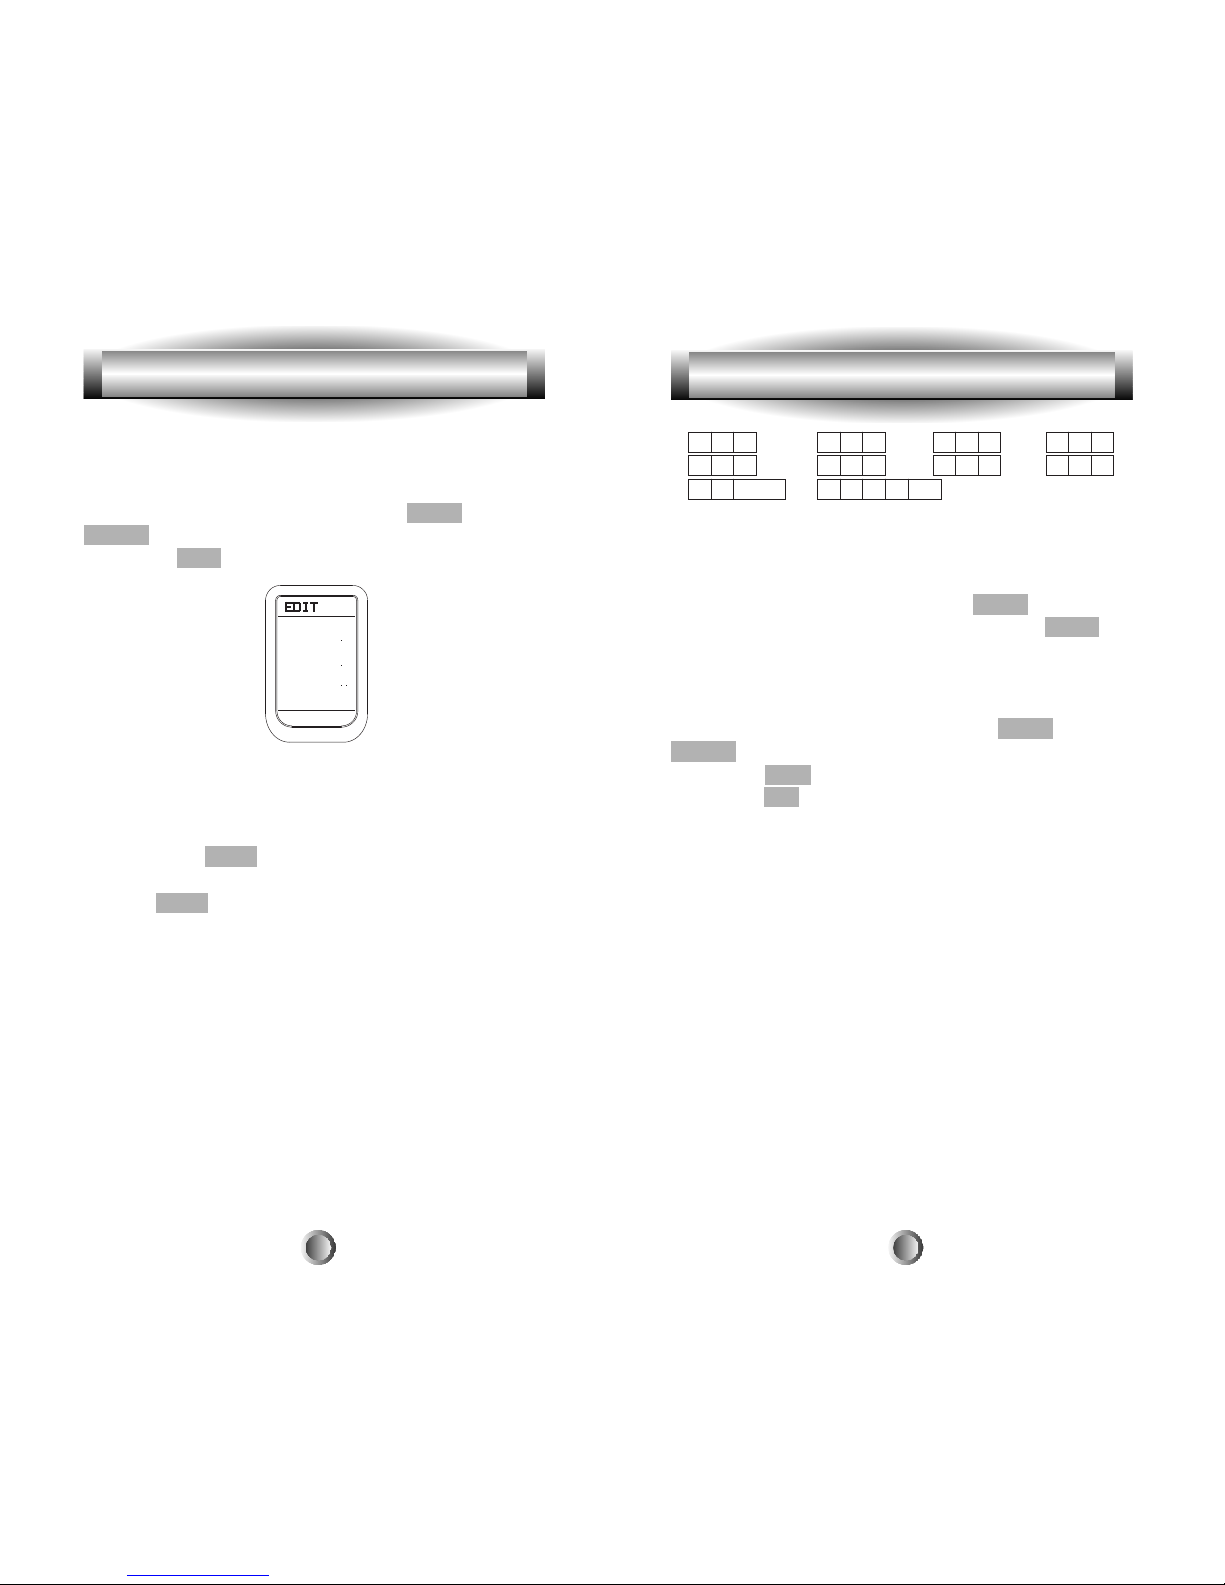
1. A B C 2. D E F 3. G H I 4. J K L
5. M N O 6. P Q R 7. S T U 8. V W X
9. Y Z Blank 0. + - < > etc
7. Save the text you completed by pressing the button you
were writing on (the same function button you selected in
step 3 or device button in step 4.)
8. Exit from Edit mode by pressing the MAIN button and
then exit from the SETUP mode by pressing the MAIN
button once again.
B. To Create Or Edit Text for Favorite Channel Buttons
1.
Go to the SETUP mode by pressing the MAIN and
ENTER buttons simultaneously for three seconds.
2. Press the EDIT button next to the LCD screen.
3. Press the FAV button and then the favorite channel
button on which you wish to write text. There are five LCD
pages of favorite channels. Select the page you wish to
write on by pressing the PAGE button.
4. The character to be changed on the button you selected
will blink and you can change the character using the
number pad buttons on the remote control. The characters
assigned to each number pad button are shown below. It
will be rotated to different character each time the same
number pad button is pressed.
Tip: You move the cursor left or right using the joystick.
You can also delete a current character by using the cursor
down of the joystick. Using the Òcursor downÓ technique is
a quick way to delete all of the text on a label.
A. To Create or Edit Text on Function and
Device Buttons
1. Enter the SETUP mode by pressing the MAIN and
ENTER buttons simultaneously for three seconds.
2. Press the EDIT button next to the LCD screen.
3. Press the DEVICE button to display the function buttons
for that device.
4. Press the function button on which you wish to write or
edit text. You can also go to the second page of the device
by pressing the PAGE button.
5. To edit DEVICE button text, skip Steps 3 & 4 and
press the PAGE button before selecting the Device button.
6. The character to be changed will blink and you can
change the character using the number pad buttons on the
remote control. The characters assigned to each number
pad button are shown below. It will be rotated to a different
character each time the same number pad button is pressed.
Tip: You move the cursor left or right using the joystick.
You can also delete a current character by using the cursor
down of the joystick. Using the Òcursor downÓ technique is
a quick way to delete all of the text on a label.
9. LCD Button Editing
9. LCD Button Editing
4039
Page 22
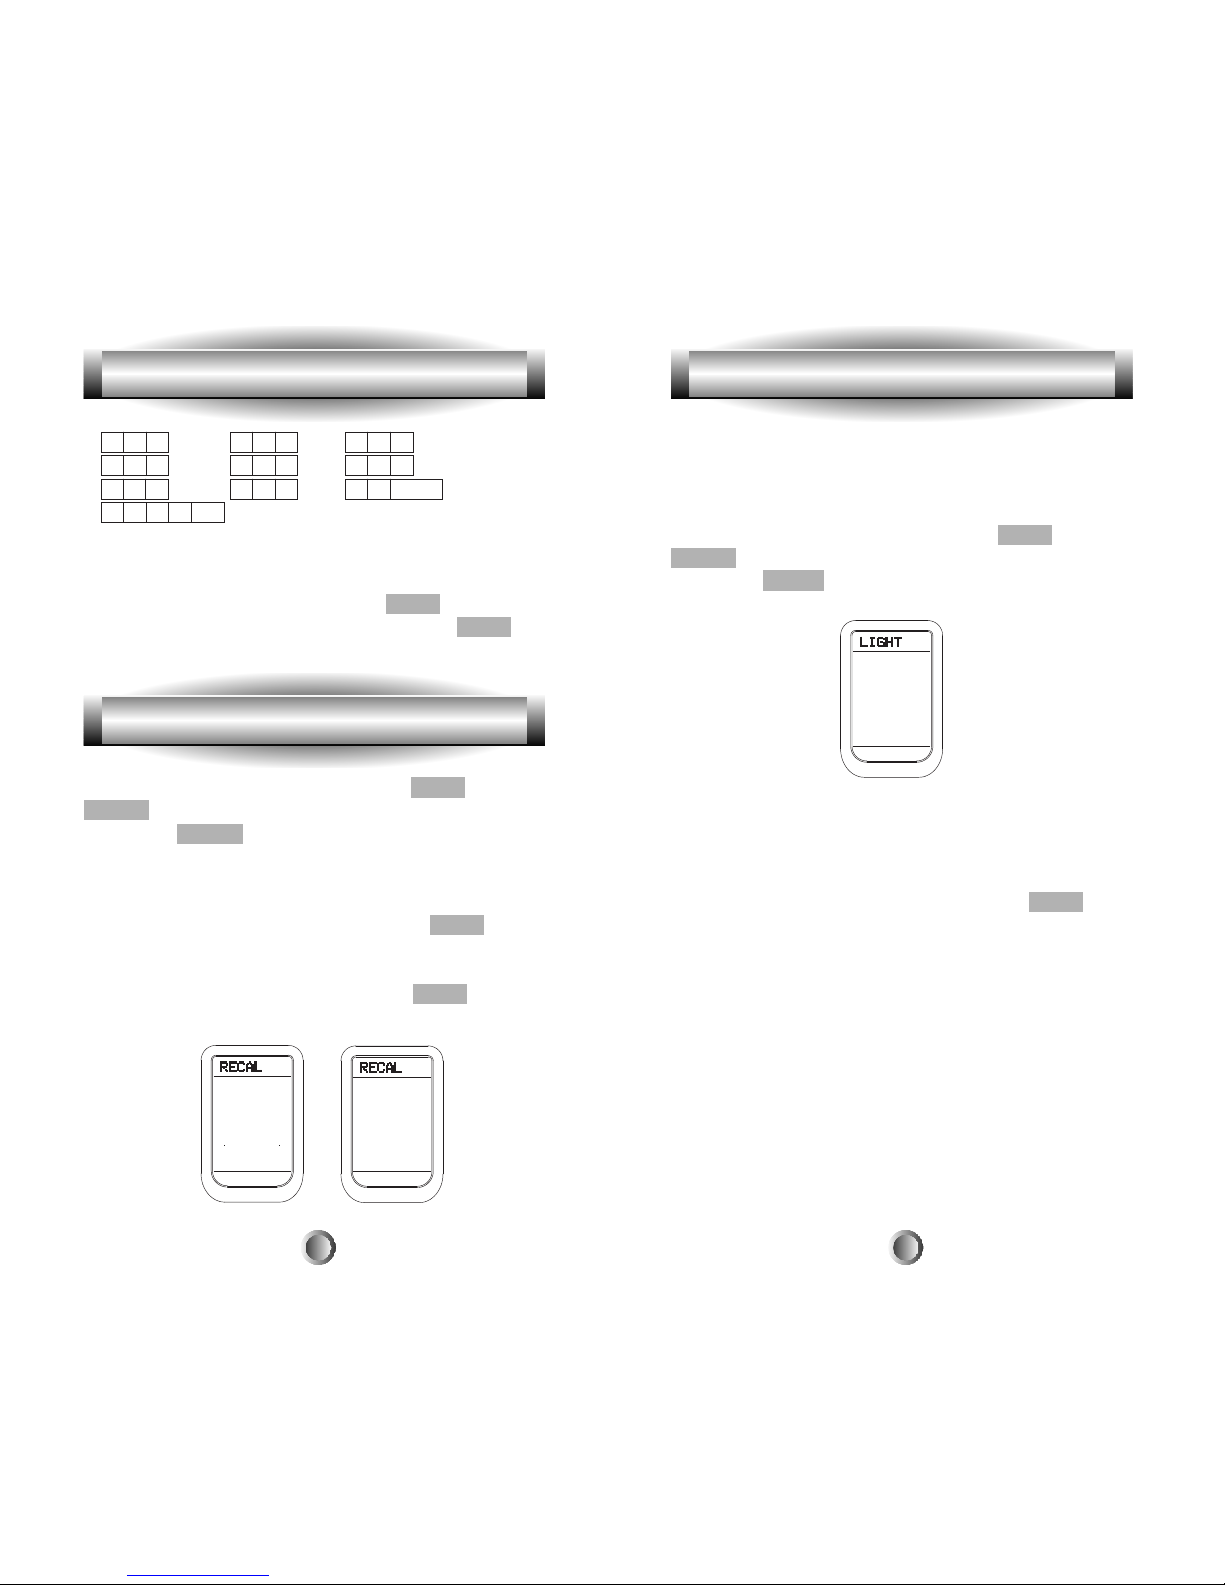
The Backlight can be toggled On and Off just by pushing
the LIGHT button on the top right side of the remote. It can
also be set to go off at a predetermined time, as shown
below.
1. Go to the SETUP mode by pressing the MAIN and
ENTER buttons simultaneously for three seconds.
2. Press the LIGHT button next to the LCD screen.
3. Using the number pad buttons, enter the desired
backlight time (in seconds). It can go up to 99 seconds.
Save the time by pressing the button at the right side of the
time you just assigned.
4. Exit from the SETUP mode by pressing the MAIN
button.
Tip: Note that the time you've entered in SETUP for the
Backlight to go off is extended each time you push a button.
So the light will go off at the predetermined interval
AFTER you have pushed the last button on the remote.
1. A B C 2. D E F 3. G H I
4. J K L 5. M N O 6. P Q R
7. S T U 8. V W X 9. Y Z Blank
0. + - < > etc
5. Save the text you completed by pressing the same
function button you selected in step 4.
6. Exit from Edit mode by pressing the MAIN button and
then exit from the SETUP mode by pressing the MAIN
button once again.
1. Go to the SETUP mode by pressing the MAIN and
ENTER buttons simultaneously for three seconds.
2. Press the RECAL button next to the LCD screen.
3. The LCD display will alternately flash device names and
the three-digit code number assigned to the device for 10
seconds and then exit to the SETUP mode.
4. Before the 10 seconds are up, pressing the MAIN button
on the remote will stop the flashing and exit to the SETUP
mode.
5. Exit from SETUP mode by pressing the MAIN button
once again.
11. Setting Backlight
9. LCD Button Editing
4241
10. Recalling the Preprogrammed Three-Digit Number
Page 23
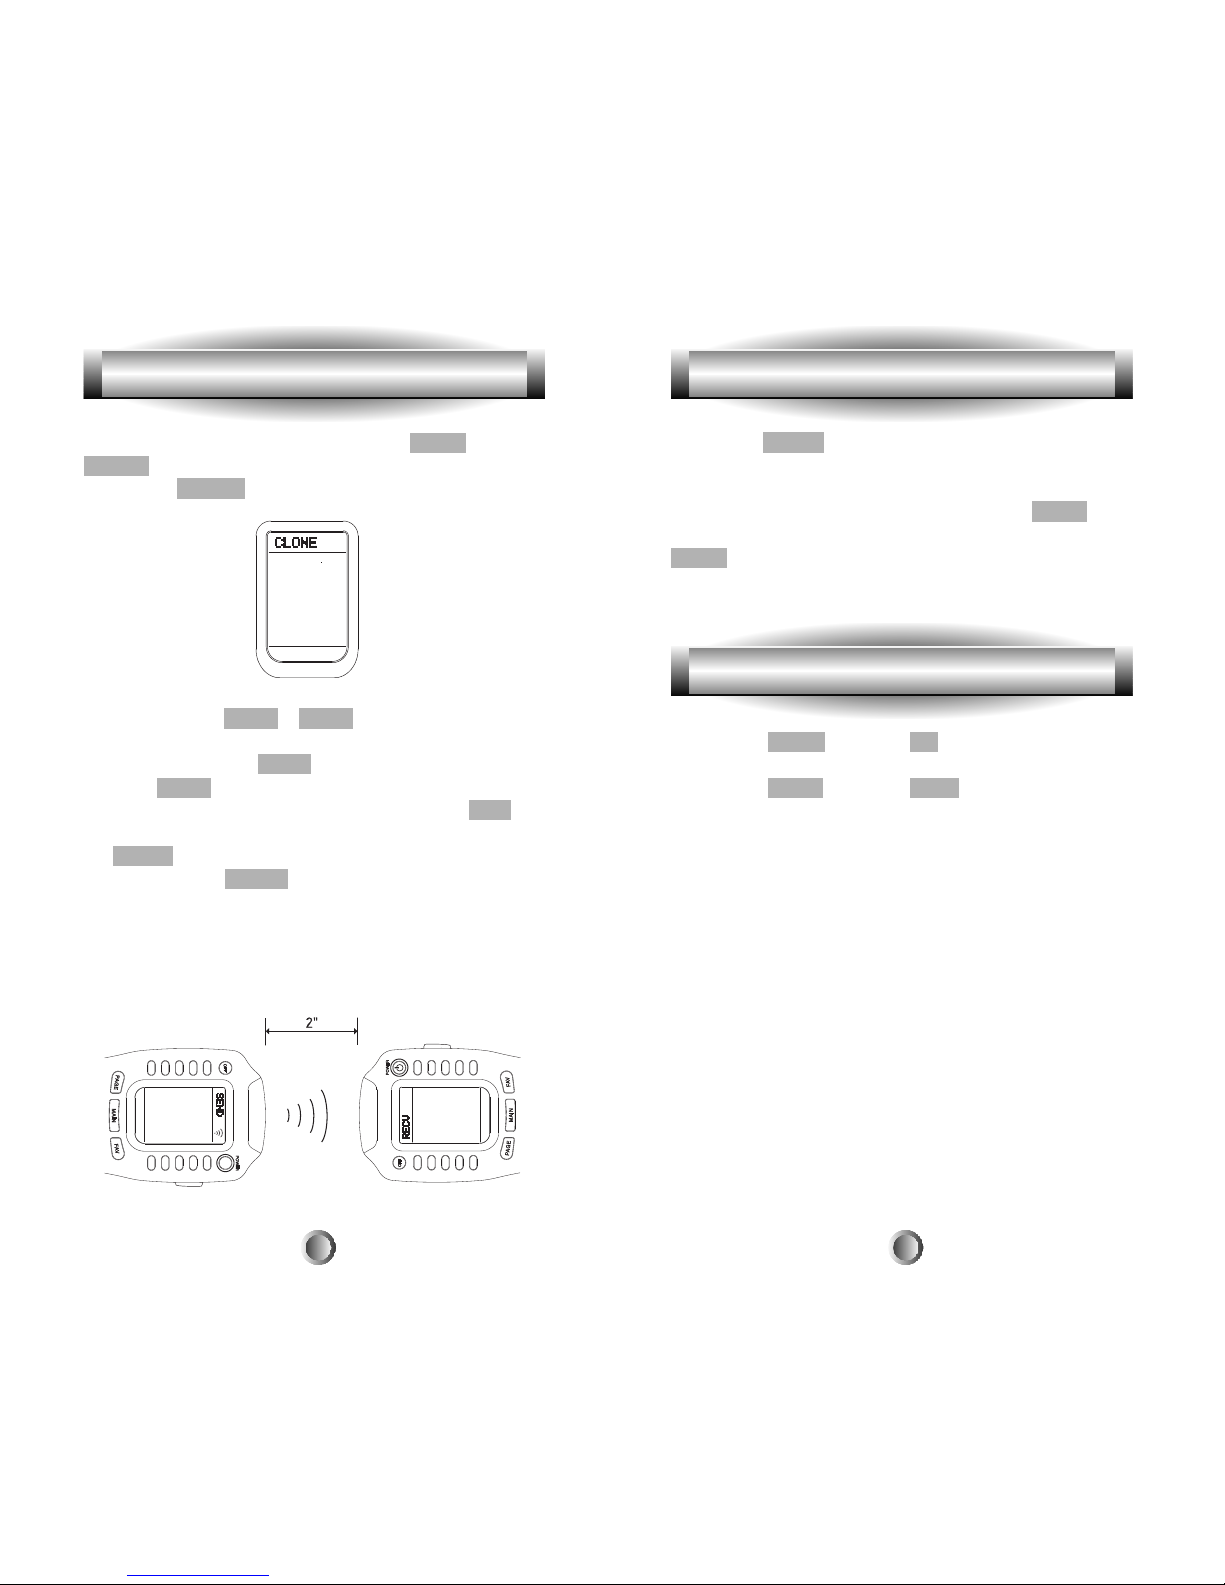
7. Press the START button on both units to begin cloning.
It will take about 40 seconds to complete the cloning and it
will flash Ò GOODÓ upon completion of the cloning.
8. Exit from the Cloning mode by pressing the MAIN
button and then exit from the SETUP mode by pressing the
MAIN button once again.
Pressing the MAIN button and Up on the joystick
simultaneously will make the LCD contrast darker and
pressing the MAIN button and Down on the joystick
simultaneously will make the LCD contrast brighter.
1. Go to the SETUP mode by pressing the MAIN and
ENTER buttons simultaneously for three seconds.
2. Press the CLONE button next to the LCD screen.
3. Press either the SEND or RECV button depending upon
the role of the remote control. If the MX-500TMis to be
copied from, press the SEND button. If it is to be copied to,
press the RECV button.
4. If you wish to clone the entire device, press the ALL
button. If you wish to clone only one device at a time, press
the DEVIC button.
5. If you press the DEVIC button, it will show all the
devices. Press the device button you wish to clone.
6. Set the MX-500TMhead to head with another MX-500
TM
to be cloned from as shown below. Each unit should be in
either cloning from or cloning to mode based on the above
steps.
12. Cloning MX-500ª 12. Cloning MX-500ª
13. Adjustment of LCD Contrast
OSDOSD
ON
ON
OSDOSD
4443
Page 24
The MX-500TMhas an internal memory lock system that
retains all of the programs and learned functions for an
extended period in the event of battery loss.
Backlight: A feature that illuminates the LCD screen or
keypad for use in low light or dark conditions.
Battery type: The MX-500TMuses 4 standard disposable
alkaline AAA batteries, or the new rechargeable alkaline
batteries.
Codes: Can refer to either the numeric codes needed to
program a preprogrammed remote control, or the actual
infrared signals transmitted by remote controls to devices.
Component: See device.
Contrast: Either an arbitrary description of how "clear" an
LCD screen is for viewing, or a specific adjustment that
allows you to customize the screen's visible characteristics.
Delay: Usually a pause placed between two steps in a
macro. Delays may be required in order for some devices
to properly sense two separate commands, or may be used
to wait for a device to finish powering up. The MX-500
TM
allows you to change that delay.
Please note the LCD screen is breakable glass. Please
exercise the following precautions when using the
MX-500
TM
:
l
Do not tap the LCD screen to active devices. Use the
rubber buttons beside the labels on the screen.
l
Keep the LCD screen dry. Wipe off any spill immediately.
The MX-500TMis not waterproof. Never immerse it in
water.
l
Don't expose the MX-500TMto extreme temperatures.
Keep it away from any heat sources.
l
Avoid dropping the remote control.
l
Clean the LCD screen with a soft cloth. Never use
abrasives or cleaning solutions on the soft cloth.
If the batteries are running low, the LCD displays Ò LOW
BATTERYÓ whenever you press the POWER button or
you press the MAIN and ENTER button simultaneously.
14. Caution On Handling LCD Screen 16. Memory Lock
15. Low Battery Message
4645
17. Glossary
Page 25
frequencies higher than the industry standard. Some
examples would be Bang & Olufsen, Kenwood (455KHz)
and older Pioneer Elite (1.125MHz). Such devices are
never preprogrammed into off-the-shelf remote controls
and can generally only be used with very specific learning
remote controls.
Infrared: "IR" A portion of the light spectrum below our
visible range, used by many modern remote controls to
transmit signals. The MX-500TMuses IR signals.
Infrared emitter: A light emitting diode used to transmit
infrared signals from a remote control. Generally, the more
and better the emitters, the stronger and wider the resulting
signal. A remote with strong emitters can generally be used
without pointing at the desired device. Emitters are also
partially responsible for any limits on the range of
frequencies that can be controlled. Emitters are always
placed at the "top" of a remote control and are typically
shielded by a red plastic window. The MX-500
TM
has 2 very
strong IR emitters.
Infrared receiver: The portion of a device that receives
infrared commands from a remote control. Since infrared is
actually light, it requires line-of-sight visibility for best
operation, but can still be reflected by items such as walls
and glass. Poorly placed IR receivers can also result in
what is called "tunnel vision," where they are set so far
back into the chassis of a device that the operational range
of any remote control is severely reduced.
Joystick: A feature on some remote controls, the joystick
is a single pointer which replicates five functions for menu
Discrete codes: Versions of toggle codes that only perform
one function. Some examples would be "POWER ON" and
"POWER OFF" or "VCR," "TUNER" and "DVD" receiver
inputs. These types of signals are most often used to ensure
your home theater components stay completely in sync for
powering on and off and changing device inputs. Some of
the preprogrammed codes in the MX-500TMcontain discrete
codes. If your original remote contains discrete codes,
these can be taught to the MX-500TMas well.
Device: The MX-500TMremote control is capable of
controlling a certain number of devices, or pieces of
equipment. Examples of devices would be televisions,
DVD players, receivers or VCRs. Some devices, such as
receivers or dual-cassette decks, may be treated by some
remotes as more than one device. Also known as
components.
Firmware: Indicates the programming software stored on
the remote control. The MX-500TMremote can have its
firmware flashed (upgraded) to a newer version.
Frequencies: The range of infrared carrier frequencies that
a remote control is capable of learning or controlling. Most
remotes operate between 30 and 60kHz, however some use
higher and are thus known as high frequency.
The MX-500TMoperates and can learn frequencies between
10 kHz and 100kHz.
Hard buttons: Refers to all physical (mechanical) buttons
on a remote control.
High frequency: Indicates an infrared system that employs
17. Glossary 17. Glossary
4847
Page 26
control: up, down, left, right and enter. The Joystick on the
MX-500TMcan be programmed with other commands as
well. The Joystick on the MX-500TMis sometimes referred
to as a Thumbpad.
Keypad: Generally refers to all hard buttons on a remote
control, or more specifically the numeric keypad (0 through 9).
LCD screen: The display device built into the MX-500TM.
The MX-500TMLCD screen displays mode and
programming information, along with macro commands
and soft buttons.
Learning: The process through which a remote control
captures and stores infrared signals (codes) from other
remotes for later use. Some factors which can affect the
ability of one remote to learn another would be code
length, signal frequency, type of signal and the amount of
learning memory available. The MX-500TMis capable of
learning to every button, including the joystick, except the
Page, Main, Fav buttons.
Macro: Macros are sequences of infrared commands that
are played back, in order, by a remote control at the push of
a single button. Macros can be used to automate the
powering on or off of your system, playing a movie or
changing inputs, or in Home Automation.
Memory: The amount of space included on a remote
control for storing all settings, such as preprogrammed
codes, learned signals, macros, and more. The MX-500
TM
has a large memory reserve for learning new codes.
17. Glossary 17. Glossary
Memory backup: The MX-500TMcan retain its programming
information for an indefinite amount of time without
batteries installed. Remotes that do not feature this may
have their programming erased when changing batteries.
Operating distance: The distance from which a remote
control can still reliably operate devices. The average
infrared range is thirty feet, although the MX-500TMis
capable of greater distances.
Page: Refers to a single screen of buttons or information
displayed on the LCD panel.
Pause: See Delay.
Power off: A feature used by many LCD remote controls
to save battery power, it represents entering a "standby"
mode after a certain length of inactivity. The MX-500
TM
uses very little power with the LCD screen on, so the
screen remains on at all times.
Preprogrammed: Indicates a library of infrared codes
built in to a particular remote. This feature allows a remote
to control your equipment without needing to learn
individual signals, or replace a particular remote that is lost
or broken. The database used for the preprogrammed
Device codes may not be able to control all your devices.
In this case you can simply use the learning capabilities of
the remote.
Punch Through: A term coined to represent the ability to
use certain functions from one device under another. For
instance, when a remote is set to the "Television" device,
the transport keys may be "punched through" to operate the
5049
Page 27
The MX-500TMis covered against any manufacturer's
defects or workmanship for a period of one year from the
date of purchase. The warranty does not cover the
following items:
l
Batteries or damage to the remote from faulty batteries.
l
Damage from misuse, neglect, or acts of nature.
l
Products that have been modified or incorporated into
other products.
l
Products purchased more than 12 months from the current
date.
l
Units purchased in ÒAS ISÓ condition or units purchased
as Ò Distressed Merchandise.Ó
- Range: 40 to 60 feet, depending upon components
- Weight: 8 oz. (with batteries)
- Size: 9.0 x 3.0 x 1.3
- Batteries: Four AAA Alkaline batteries
- LCD Size: 1.4 x 2.1
VCR, while the volume keys may be "punched through" to
operate the audio receiver.
Signals: See Ò codesÓ or Ò infrared.Ó
Thumbpad: A feature on certain remote controls, the
thumbpad is a single disc-shaped pointer which replicates
five functions for menu control: up, down, left, right and
enter. Also referred to as a Ò joystick.Ó
Transport control: A common term for the group of
VCR/LD/DVD media operation controls, such as fastforward, rewind, play, stop, pause, etc.
Two-way: Some devices actually send information back to
a remote control during use. This is known as 2-way
communications. Most 2-way components can still be
controlled via a 1-way remote, although certain
workarounds must be used when learning signals. The
MX-500TMis capable of controlling most 2-way
components.
Glossary based, by permission, on the the General
Glossary on Remote Central.com Daniel Tonks
18. Warranty
17. Glossary
19. Specifications
5251
c
Page 28
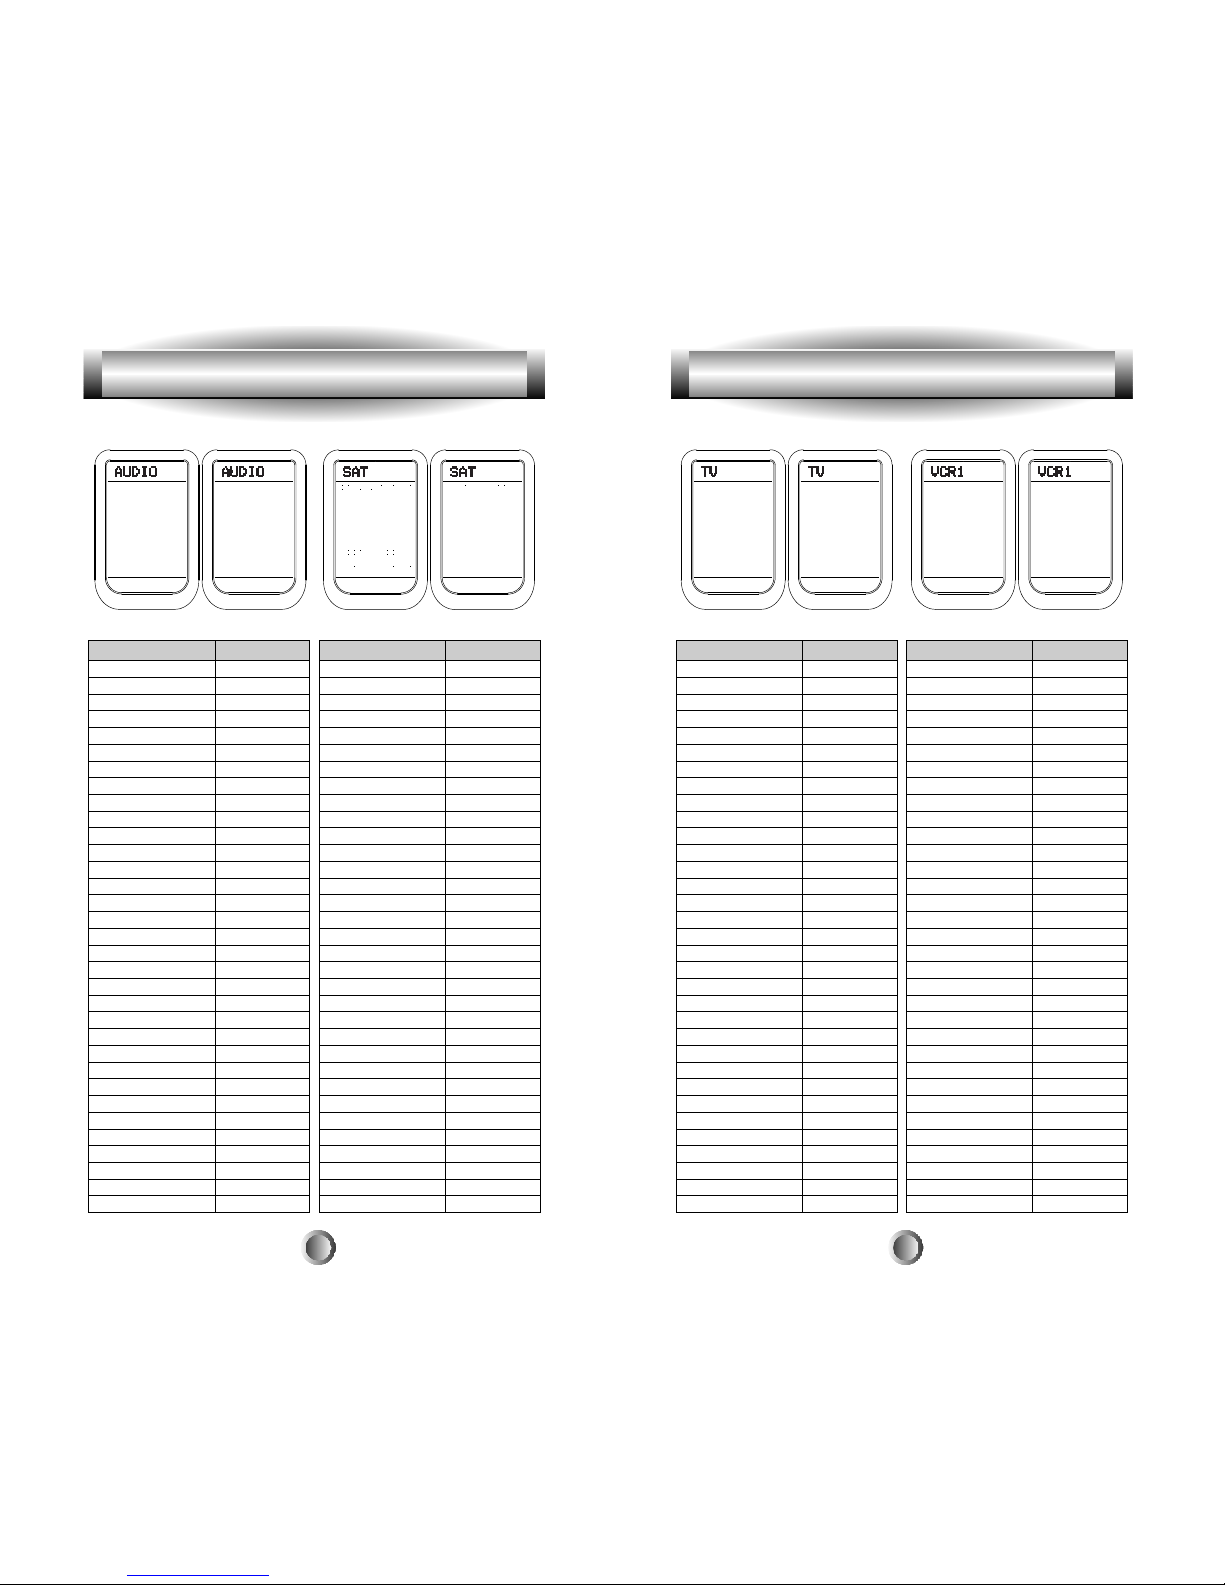
20. APPENDIX
Button Name Functions
54
TV
System-OFF
POWER
VOL UP
VOL DN
CH UP
CH DN
MUTE
PRE-CH
UP
DN
LEFT
RIGHT
SELECT
PLAY
STOP
REW
FF
I<<, MENU
>>I, GUIDE
O, EXIT
II, INFO
1
2
3
4
5
6
7
8
9
0
DISPLAY
ENTER
OFF
ON/OFF
VOL UP
VOL DN
CH UP
CH DN
MUTE
PREV CH
UP
DN
LEFT
RIGHT
SELECT
MEMU
GUIDE
CANCEL
INFO
1
2
3
4
5
6
7
8
9
0
DISPLAY
ENTER
Button Name Functions
VCR1/VCR2
System-OFF
POWER
VOL UP
VOL DN
CH UP
CH DN
MUTE
PRE-CH
UP
DN
LEFT
RIGHT
SELECT
PLAY
STOP
REW
FF
I<<, MENU
>>I, GUIDE
O, EXIT
II, INFO
1
2
3
4
5
6
7
8
9
0
DISPLAY
ENTER
OFF
ON/OFF
VOL UP
VOL DN
CH UP
CH DN
MUTE
PREV CH
UP
DN
LEFT
RIGHT
SELECT
PLAY
STOP
REW
FF
I<<
>>I
RECORD
PAUSE
1
2
3
4
5
6
7
8
9
0
DISPLAY
ENTER
20. APPENDIX
Button Name Functions
53
AUDIO
System-OFF
POWER
VOL UP
VOL DN
CH UP
CH DN
MUTE
PRE-CH
UP
DN
LEFT
RIGHT
SELECT
PLAY
STOP
REW
FF
I<<, MENU
>>I, GUIDE
O, EXIT
II, INFO
1
2
3
4
5
6
7
8
9
0
DISPLAY
ENTER
OFF
ON/OFF
VOL UP
VOL DN
PRESET+
PRESET MUTE
SCAN
UP
DN
LEFT
RIGHT
SELECT
REAR UP
REAR DN
CENTER DN
CENTER UP
MENU/Surr
GUIDE/Center
EXIT/Delay
INFO
1
2
3
4
5
6
7
8
9
0
DISPLAY
SHIFT
Button Name Functions
SAT
System-OFF
POWER
VOL UP
VOL DN
CH UP
CH DN
MUTE
PRE-CH
UP
DN
LEFT
RIGHT
SELECT
PLAY
STOP
REW
FF
I<<, MENU
>>I, GUIDE
O, EXIT
II, INFO
1
2
3
4
5
6
7
8
9
0
DISPLAY
ENTER
OFF
ON/OFF
VOL UP
VOL DN
CH UP
CH DN
MUTE
PREV CH
UP
DN
LEFT
RIGHT
SELECT
MENU
GUIDE
EXIT
INFO
1
2
3
4
5
6
7
8
9
0
DISPLAY
ENTER
A. List of Preprogrammed LCD Text by Device
Page 29
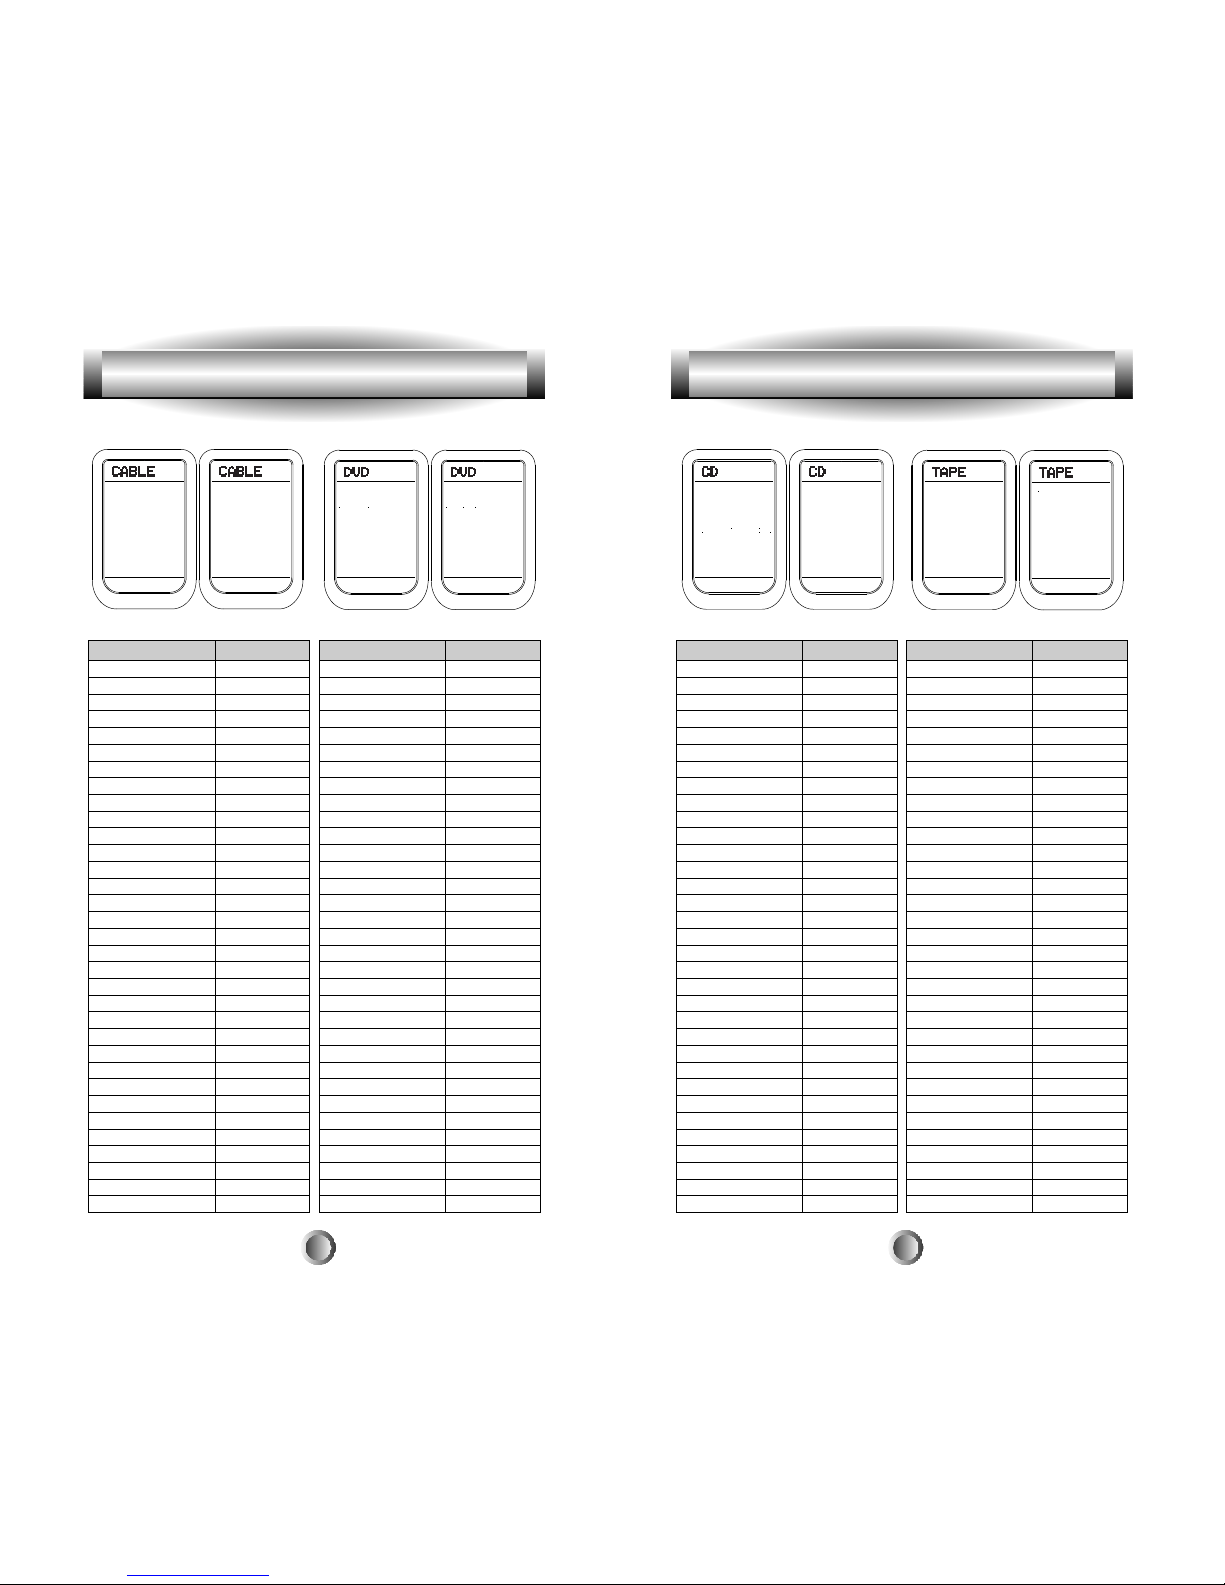
20. APPENDIX
Button Name Functions
TAPE
System-OFF
POWER
VOL UP
VOL DN
CH UP
CH DN
MUTE
PRE-CH
UP
DN
LEFT
RIGHT
SELECT
PLAY
STOP
REW
FF
I<<, MENU
>>I, GUIDE
O, EXIT
II, INFO
1
2
3
4
5
6
7
8
9
0
DISPLAY
ENTER
OFF
ON/OFF
PLAY(A)
STOP(A)
REW(A)
FF(A)
R-PLAY(A)
Rec-MUTE(A)
RECORD(A)
PAUSE(A)
56
Button Name Functions
CD
System-OFF
POWER
VOL UP
VOL DN
CH UP
CH DN
MUTE
PRE-CH
UP
DN
LEFT
RIGHT
SELECT
PLAY
STOP
REW
FF
I<<, MENU
>>I, GUIDE
O, EXIT
II, INFO
1
2
3
4
5
6
7
8
9
0
DISPLAY
ENTER
OFF
ON/OFF
TRACK+
TRACK -
RANDOM
SKIP SKIP +
PLAY
STOP
REW
FF
I<<
>>I
EJECT
PAUSE
1
2
3
4
5
6
7
8
9
0
DISC
20. APPENDIX
55
Button Name Functions
CABLE
System-OFF
POWER
VOL UP
VOL DN
CH UP
CH DN
MUTE
PRE-CH
UP
DN
LEFT
RIGHT
SELECT
PLAY
STOP
REW
FF
I<<, MENU
>>I, GUIDE
O, EXIT
II, INFO
1
2
3
4
5
6
7
8
9
0
DISPLAY
ENTER
OFF
ON/OFF
VOL UP
VOL DN
CH UP
CH DN
MUTE
PREV CH
UP
DN
LEFT
RIGHT
SELECT
PLAY
STOP
REW
FF
MENU
GUIDE
EXIT
INFO
1
2
3
4
5
6
7
8
9
0
DISPLAY
ENTER
Button Name Functions
DVD/LD
System-OFF
POWER
VOL UP
VOL DN
CH UP
CH DN
MUTE
PRE-CH
UP
DN
LEFT
RIGHT
SELECT
PLAY
STOP
REW
FF
I<<, MENU
>>I, GUIDE
O, EXIT
II, INFO
1
2
3
4
5
6
7
8
9
0
DISPLAY
ENTER
OFF
ON/OFF
SKIP+
SKIP -
SEARCH
UP
DN
LEFT
RIGHT
SELECT
PLAY
STOP
REW
FF
I<<
>>I
EJECT
PAUSE
1
2
3
4
5
6
7
8
9
0
DISPLAY
ENTER
Page 30
Set-Up Code Table
Set-Up Code Number
007
082 092 225 161 269
018 104 170 202 203 213 211 188
138 189
125 126 127 128 258 281 282
054
196
142
141
147
135
194 221 011
021 196 207
071
167
273
134
096 097
070 170 224
023
006 028 061 071 201 214 226 180 185 022 029 077 284
076
140
034 134
148 272
026
076
002 034 109 215 229 230 027 037 234 259
149
057
099 098
047 214 180 182
062 231
056 260
008
174
231 233 254 153 154 118 121 227 277
020
197
263
076 216
206
058
240 163 191 114 266 279
026 066 145 146 181 190 197 192 182 199 151 222 180 005 280
220 140
216
150 072
007
120 235 236 237
124
137 139 052 165 115 004 009
076 056
086 164 152 208
006 028 031 040 063 185 186 251 265
238
076
100 012 013
242 243 204
157 158 042 043 081 112
276
186 113 283
Manufacturer/Brand
ADC
ADCOM
AIWA
AKAI
AMC
AMEND
AMX
ANGSTROM
ARCAM
AUDIO ACCESS
AUDIO ALCHEMY
AUDIO DESIGN
AUDIO EASE
AUDIO FILE
AUDIO MATRIX
AUDIO SOURCE
AUDIO TECHNICA
B & K
BOSE
BRYSTON
CARVER
CASIO
CHIRO
CINEMA SOUND
CITATION
CLARION
CURTIS MATHES
DENON
EIGER
ELAN
ENLIGHTENED AUDIO
FISHER
FOSGATE
GE
GOLDSTAR
HAFLER
HARMAN KARDON
HITACHI
INKEL
JBL
JCPENNY
JEFF ROWLAND
JENSEN
JVC
KENWOOD
KINERGETICS
KOSS
KRELL
KYOCERA
LEXICON
LINN
LUXMAN
LXI
MAGNAVOX
MARANTZ
MCINTOSH
MCS
MERIDIAN
MITSUBISHI
MONDIAL
MYRYAD
NAD
58
AUDIO
B. Three-Digit Preprogrammed Code Table
20. APPENDIX
Button Name Functions
57
AUX
System-OFF
POWER
VOL UP
VOL DN
CH UP
CH DN
MUTE
PRE-CH
UP
DN
LEFT
RIGHT
SELECT
PLAY
STOP
REW
FF
I<<, MENU
>>I, GUIDE
O, EXIT
II, INFO
1
2
3
4
5
6
7
8
9
0
DISPLAY
ENTER
OFF
ON/OFF
VOL UP
VOL DN
CH UP
CH DN
MUTE
PREV
UP
DN
LEFT
RIGHT
SELECT
MENU
GUIDE
EXIT
INFO
1
2
3
4
5
6
7
8
9
0
DISPLAY
ENTER
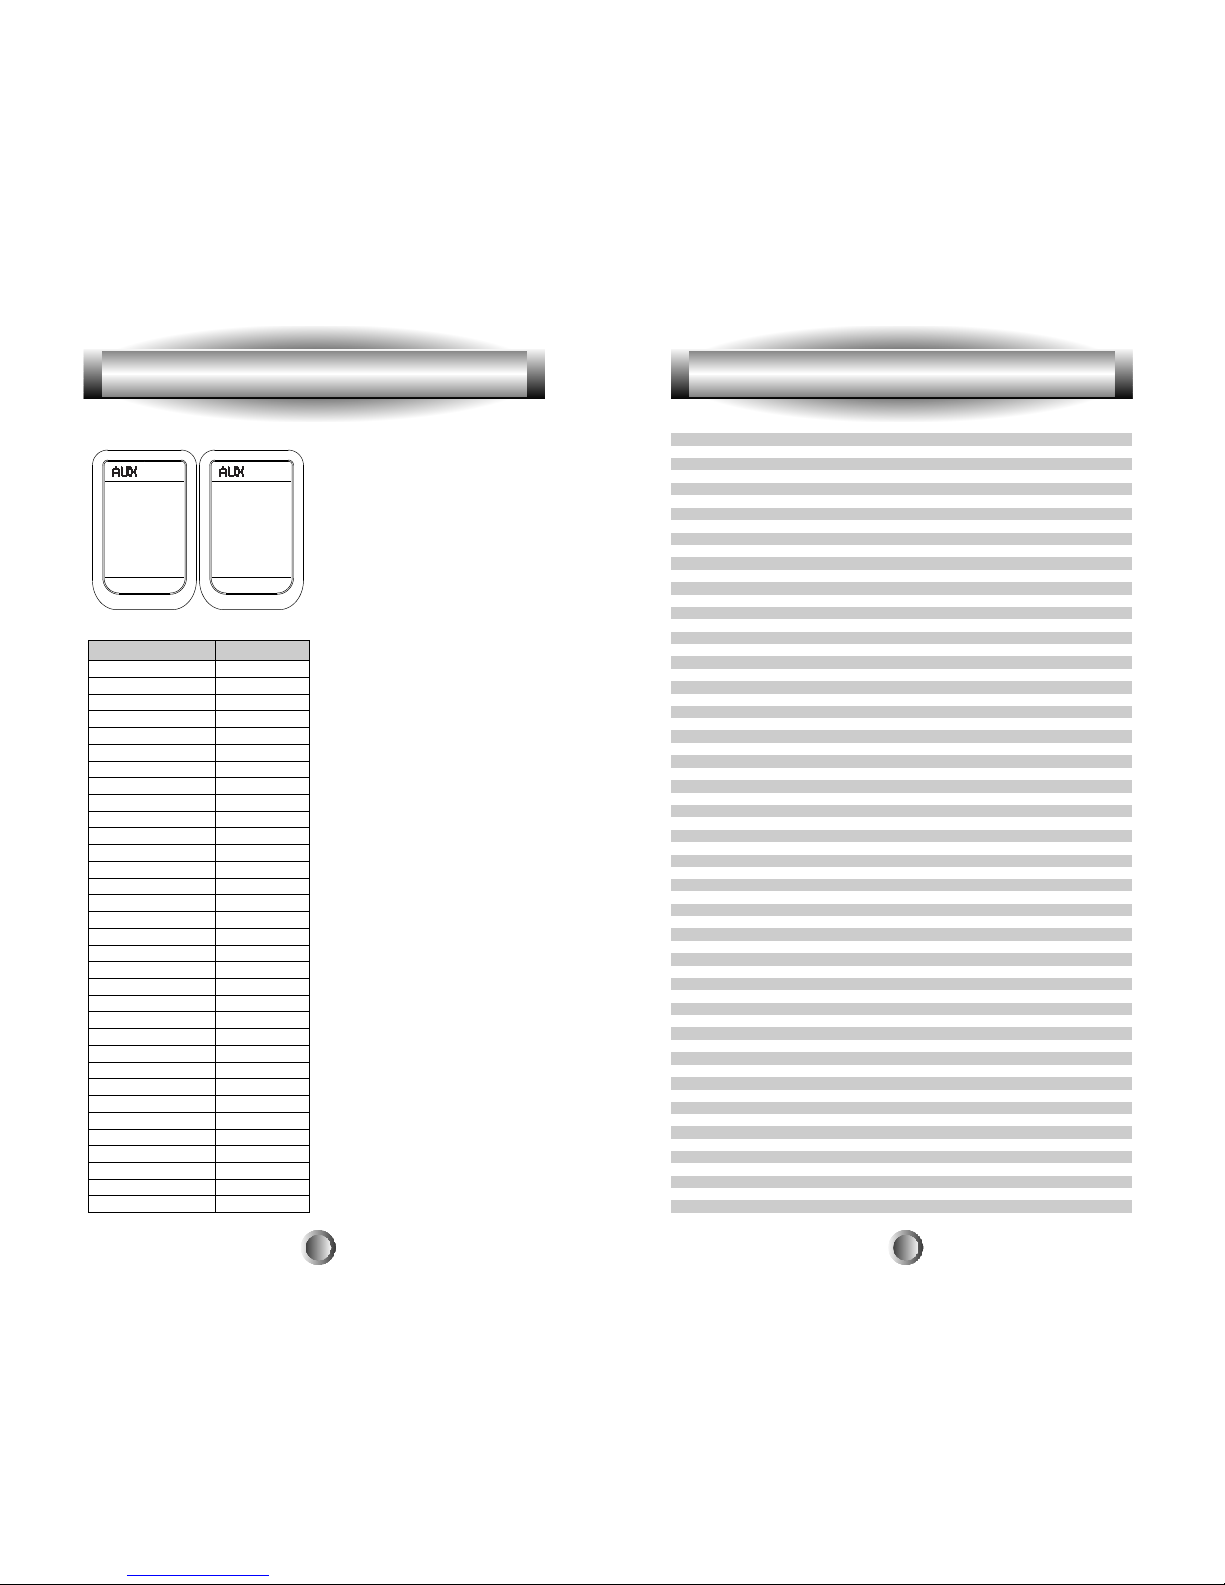
l
Note : Because of the variety of
function names for
different components in
this mode, we list them
in A, B, C, D......on the
LCD. Please write the
appropriate names that
apply to your components.
Page 31
Set-Up Code Table
Manufacturer/Brand
ALPHASTAR
AMPLICA
BIRDVIEW
BSR
CAPETRONICS
CHANNEL MASTER
CHAPARRAL
CITOH
CURTIS MATHES
DRAKE
DX ANTENNA
ECHOSTAR
ELECTROHOME
EUROSAT
FUJITSU
GENERAL ELECTRIC
GENERAL INSTRUMENT
HITACHI
HOME CABLE
HOUSTON TRACKER
HUGHES
HYTEK
HYUNDAI
ICR
JANIEL
KATHREIN
LEGEND
LUTRON
LUXOR
MACOM
MEMOREX
NEXTWAVE
NORSAT
PACE
PANASONIC
PANSAT
PERSONAL CABLE
PHILIPS
PL
PRESIDENT
PRIMESTAR
PROSAT
PROSCAN
RCA
REALISTIC
SAMSUNG
SATELLITE SERVICE
SONY
STARCAST
SUPERGUIDE
TEECOM
TOSHIBA
TOWN & COUNTRY
UNIDEN
VIEWSTAR
WINEGARD
ZENITH
Set-Up Code Number
123
050
129 113 051 126
053
053
013 014 015 018 036 055
008 009 012 077
054
050
005 006 007 010 011 112 116 141 052
024 046 056 076
038 040 057 058 093 094 095 096 097 098 099 100 122
089
114
017 021 022 027 133 134
151 106 150
003 004 016 029 031 059 101 148
139 140
080 044 029
033 037 039 104 057 051
068 154
053
149
023
060 147
108
057
132
144 062
010 059 063 064 065
057
028 124 125
069 070
143
142 060
121
117
071 152 153
023 026
019 102
110 030
072
151 106 150
151 106 150
043 074
123
028 035 047 085
103
041
020 124 125
023 026 075 087 088 090 107 130 137
002 127
023 026
016 025 042 043 044 045 048 049 078 079 080 086 101 135 136
115
128 146
081 082 083 084 091 120
60
SAT
Set-Up Code Table
Manufacturer/Brand
NAKAMICHI
NEC
ONKYO
OPTIMUS
PANASONIC
PARASOUND
PHAST
PHILIPS
PIONEER
PROCEED
RCA
REALISTIC
REVOX
ROTEL
SAMSUNG
SANSUI
SANYO
SCOTT
SEARS
SHARP
SHERWOOD
SONY
SOUNDESIGN
SOUNDSTREAM
SSI
SUMO
TAEKWANG
TEAC
TECHNICS
THETA DIGITAL
TOSHIBA
WARDS
YAMAHA
ZENITH
Set-Up Code Number
111 244 245 172 183
176
017 046 064 107 108 187 079 080 090 179 209 270 275
026 041 138
032 195 219 177
129 130 132 261
196
249 250 251 063
014 033 039 044 045 050 069 159 168 116 035 078 198
144 268
010 048 117 156 067
019 056 073 075 095
162
074 083 085
016
040 048 110 119 065 228
047 059
019 091
076
026 094 131 175 181
024 038 055 102 103 105 106 051 030
018 093 223 247 248 160 166 015 101 184 218 271
036
084 088
068
171
138
005 019 049 111 212 217
122 176 193 219 178 177 200 257 262
136
060 087 198 278
180
026 253 169 067 173 205 264 232 089 264 274 285
143 210
59
AUDIO
Page 32
Set-Up Code Table
Manufacturer/Brand
NAD
NEC
NIKEI
ONKING
ONWA
OPTONICA
ORION
PANASONIC
PHILCO
PHILIPS
PIONEER
PORTLAND
PROSCAN
PROTON
QUASAR
RADIO SHACK
RCA
REALISTIC
ROCTEC
RUNCO
SAMPO
SAMSUNG
SANYO
SCOTT
SEARS
SELECO
SHARP
SIEMENS
SIGNATURE
SONY
SOUNDESIGN
SPECTRICON
SSS
SUPRE MACY
SYLVANIA
TANDY
TATUNG
TECHNICS
TECHWOOD
TEKNIKA
TELEFUNKEN
TELERENT
TERA
TMK
TOSHIBA
TOTEVISION
UNIVERSAL
VIDEO CONCEPTS
VIDIKRON
VIDTECH
WARDS
WESTING HOUSE
YAMAHA
YORK
YUPITERU
ZENITH
ZONDA
Set-Up Code Number
015 025
132 130 134 197 040 016 024 056 019
043
043
043
019 081
096
034 056 080 092 164
197 003 024 056 059 060 063 064 164 004
197 003 004 005 038 059 093 164 127
197 018 023 025 116 135 190 203 204
004 143
144 160 161 165 167
004 058 131 143 171 173 193
034 056 092
019 043 143 004 127
160 161 165 065 156 144 197 004 023 024 056 074 152
007 019 043 047
186
168 169 178 179 180 181 182 183 073 157
197 058 004 202
004 050 089 101 105 127 143 160
166 007 020 053 057 082 187
004 028 043 048 143
015 030 004 007 028 057 143 094 160 082 165 166
189 200
170 081 019 028 029 014 004 022 143 175
088
072
070 085 139 147 126 185 194
004 028 003 043
112
004 043
002
197 003 059 060 063 064 164 044 160 127
081
056 062
034 080
004
002 003 004 024 028 043 072 101 143
037 046 086 087
072
172
004
007 015 030 040 062 101 138
143
008 009
146
174 184 188 192
004
004 008 009 019 028 060 061 063 064 072 074 143 164 034
076
197 004
004
043
072 073 095 103 157 183
112
TV
62
Set-Up Code Table
Manufacturer/Brand
ADMIRAL
AKAI
AMARK
AMPRO
AMSTRAD
ANAM
AOC
AUDIOVOX
BLAUPUNKT
CAIRN
CANDLE
CAPEHART
CETRONIC
CITIZEN
CLASSIC
CONCERTO
CONTEC
CORONADO
CRAIG
CROWN
CURTIS MATHES
CXC
DAEWOO
DAYTRON
DWIN
DYNASTY
DYNATECH
EIKI
ELECTROHOME
EMERSON
FISHER
FUJITSU
FUNAI
FUTURETECH
GE
GOLDSTAR
HALL MARK
HITACHI
INFINITY
JBL
JCPENNY
JENSEN
JVC
KEC
KENWOOD
KLOSS
KMC
KTV
LODGENET
LOGIK
LUXMAN
LXI
MAGNAVOX
MARANTZ
MATSUI
MEMOREX
METZ
MGA
MINERVA
MITSUBISHI
MTC
Set-Up Code Number
072 081 161 160
197 146
112 143
073 167 157 183
052
043 054 056 080 112 131
197 004 112 058
076
088
201
197 002 003 004
058
043
197 002 003 004 043 101 103 143
043
004
043 050 051
143
043 054
043 143
197 101 004 143
043
004 016 043 044 076 103 114 125 127 143
004 143
177
043
062
187
024 076 143 196
197 004 005 028 043 047 048 050 051 076 096 143 151 153 154 155
007 057
198
028 043
043
004 102 106 112 113 116 119 127 143
004
004 009 010 011 012 023 075 143 158 163 166 072
164
164
197 004 008 009 024 030 065 101 143 156 160
013
034 038 070 083 145 199
043
197 070
002 059
143
197 043 143 154
072
072
004
166 007 015 052 081 160 164
197 003 004 022 059 060 061 063 064 127 160 164 094
197 164
164
007 072 004
088
197 004 024 028 042
088
004 024 028 040 042 109 124 146 191
197 004 062 101
TV
61
197 008 009 034 056 073 074 130 144 155 160 161 165 004 091
157 183
Page 33
Set-Up Code Table
Manufacturer/Brand
RUNCO
SALORA
SAMSUNG
SANSUI
SANYO
SCOTT
SEARS
SHARP
SHINTOM
SIGNATURE
SONY
SOUNDESIGN
STS
SYLVANIA
SYMPHONIC
TANDY
TATUNG
TEAC
TECHNICS
TEKNIKA
THOMAS
TMK
TOSHIBA
TOTEVISION
UNITECH
VECTOR RESEARCH
VICTOR
VIDEO CONCEPTS
VIDEOSONIC
WARDS
YAMAHA
ZENITH
Set-Up Code Number
148
014
032 040 066 102 104 107 109 112 113 115 120 122 125
022 043 048 135
003 007 010 014 134 102
017 037 112 129 131
003 008 009 010 013 014 081 101 017 073 112
031 054 149 159 165
024
034
003 031 052 056 057 058 076 077 078 149 154
034
013
031 034 059 067
034
010 034
039 043
034 039 043
031 070
019 031 034 101
034
006
008 013 042 047 059 079 082 112 131 081
040 101
040
012
048
012 034 046 141
040
003 013 017 024 031 034 040 053 054 131
012 034 039 043
034 048 056 058 072 080 101
64
VCR
Set-Up Code Table
Manufacturer/Brand
AIWA
AKAI
AMPRO
ANAM
AUDIO DYNAMICS
BROOKSONIC
CANON
CAPEHART
CRAIG
CURTIS MATHES
DAEWOO
DAYTRON
DBX
DYNATECH
ELECTROHOME
FISHER
FUNAI
GE
GO VIDEO
GOLDSTAR
HARMAN KARDON
HITACHI
INSTANTREPLAY
JCL
JCPENNY
JENSEN
JVC
KENWOOD
LLOYD
LXI
MAGIN
MAGNAVOX
MARANTZ
MARTA
MATSUI
MEI
MEMOREX
MGA
MINOLTA
MITSUBISHI
MTC
MULTITECH
NEC
NORDMENDE
OPTONICA
ORION
PANASONIC
PENTAX
PHILCO
PHILIPS
PILOT
PIONEER
PORTLAND
PULSAR
QUARTZ
QUASAR
RADIO SHACK
RCA
REALISTIC
RICO
Set-Up Code Number
034 161
016 043 046 124 125 142 146
072
031
012 023 039 043
035 037 129
028 031
108
003 040 135
031 041
005 007 010 065 108 110 111 112 116 117 119
108
012 023 039 043
034 053
059
003 008 009 010
034
031 063 072 107 109 144 147
132 136 155 040 115
012 013 020 101 106 114 123
012 045
004 018 026 034 043 063 137 150 160 013
031
031
012 013 015 040 066 101
043
012 031 043 048 050 055 060 130 150 152
014 048 034 047
034
003 009 017 034 106
040
031 034 041 067 068 156 164
012 031 067 069
101
027 030
031
003 010 014 031 034 053 072 101 102 134 139
045 046 059
013 020
013 020 045 046 051 059 061 142 151 049
034 040
024 034
012 023 039 043 048
043
053 054
025
066 070 083 133 140 145 157 163 074
013 020 031 063
031 034 067
031 034 054 067 071 101
101
013 021 048
108
072
002 014
066 145 075
123
013 020 041 107 109 140 144 145 147 034 040 158
003 008 010 014 031 034 040 053 054 101
058
63
VCR
EMERSON
006 017 025 027 029 031 034 035 036 037 046 101 129 131 138
153 162 116
Tip: When programming VCR2, use this code table.
When you are in P-PRO in SETUP mode, use the VCR1
button when ÒFROM TABLEÓ is flashing at the bottom of
the LCD screen.
Page 34
Set-Up Code Table
Manufacturer/Brand
APEX DIGITAL
DENON
GE
HARMAN KARDON
JVC
LG
MAGNAVOX
MARANTZ
MITSUBISHI
NAD
ONKYO
PANASONIC
PHILIPS
PIONEER
PROCEED
PROSCAN
RCA
SAMSUNG
SHARP
SONY
THETA DIGITAL
THOMPSON
TOSHIBA
YAMAHA
ZENITH
Set-Up Code Number
087
007 080
026 027
084
012
091 057 074
066
083
017
088
076 035
021 042
066
023 092 107 108
086
026 027
026 027
056 070
094
033
032
026 027
035 034
042 089
057 074 091
66
DVD
Set-Up Code Table
Manufacturer/Brand
ABC
AMERICAST
ANTRONIX
ARCHER
BELL SOUTH
CENTURION
CENTURY
CITIZEN
COMBANO
COMSAT
COMTRONICS
DIGICABLE
EAGLE
EASTERN
ECHOSTAR
ELECTRICORD
GEMINI
GENERAL ELECTRIC
GENERAL INSTRUMENT
GNC
GOLDEN CHANNEL
HAMLIN
HITACHI
JERROLD
MAGNAVOX
MEDIA ONE
MEMOREX
MITSUBISHI
M-NET
MOVIE TIME
NOVAPLEX
NSC
OAK
PANASONIC
PARAGON
PHILIPS
PIONEER
PRUCER
PTS
PULSAR
RCA
RECOTON
REGAL
REGENCY
SAMSUNG
SCIENTIFIC ATLANTA
SIGNAL
SIGNATURE
SL MARX
SONY
SPRUCER
STARCOM
STARGATE
TADIRAN
TIME WARNER
TOCOM
TOSHIBA
UNIKA
UNITED CABLE
UNIVERSAL
VIEWSTAR
ZENITH
Set-Up Code Number
103 003 004 039 042 046 053
099
014
005 007 014
099
092
007
007
080 081
074
030
101
020 030 040
057 066
106
032
008 054
072
103 074 104
099
030
049 050 055
103 055
103 002 003 004 008 009 010 069 074
010 012 064 079 095 094
107
052
102
037
028 032
092
015 028 038 071
031 037 053
044 047
052
006 012 013 020 085 095
103 034 051 063 076 105
059
011 071 074
052
047
098
049 050
057
030
003 011 041 042 043 045 046
030
103
030
096
047 078
002 004 008 009
008 030 097 104
030
043
039 040 056
052
007 014
004 053
005 007 014 032 035
012 015 018 086 087 088 089
052 060 093 100
65
CABLE
Page 35
Set-Up Code Table
Manufacturer/Brand
QUASAR
RADIO SHACK
RCA
REALISTIC
ROTEL
SAE
SANSUI
SANYO
SCOTT
SHARP
SHERWOOD
SIGNATURE
SONY
SOUNDESIGN
SUMO
SYLVANIA
SYMPHONIC
TAEKWANG
TANDY
TEAC
TECHNICS
TECHWOOD
THETA DIGITAL
TOSHIBA
VECTOR RESEARCH
VICTOR
WARDS
YAMAHA
YORX
Set-Up Code Number
103 008
182
017 042 150
042 050 051 102 181 182 187
044 107 161 178 250
044 107
044 069 107 128 171 190 125
050
069 102
026 031 051 066
003 019 051 096 112 115 119 166
033
048 081 097 126 133 177 225 226 164
251
155
044 107
052 181
195 085
010
015 034 036 051 052 101 131 140 079
060 103 200 172 184 008 068
076
234 235
006 067 091 160 148
080
004 022 114 124
185 033
024 046 054 186 183 245
182
68
CD
Set-Up Code Table
Manufacturer/Brand
ADCOM
AIWA
AKAI
AMC
AMEND
ARCAM
AUDIO ACCESS
AUDIO EASE
AUDIO TECHNICA
BSR
CALIFORNIA AUDIO
CAPETRONIC
CARRERA
CARVER
CASIO
CLARINETTE
CREEK
CROWN
DENON
EMERSON
FISHER
FRABA
GENEXXA
GOLDSTAR
HAITAI
HARMAN KARDON
HITACHI
INKEL
JC PENNY
JENSEN
JVC
KENWOOD
KOSS
KRELL
KYOCERA
LOTTE
LUXMAN
LXI
MAGNAVOX
MARANTZ
MCINTOSH
MCS
MEMOREX
MISSION
MITSUBISHI
MITSUMI
MODULAIRE
MONDIAL
MYRYAD
NAD
NAKAMICHI
NEC
NIKKO
NSM
ONKYO
OPTIMUS
PANASONIC
PARASOUND
PHILIPS
PIONEER
PROCEED
PROTON
Set-Up Code Number
062 042
059 065 088 089 105 122 170 187
085 195 202
231 232
118
238
119 147
165
046
037 057
103 008
063
057 080
185 041 044 050 086 107 130 134 135 138 139 203 204 167
111 182
182
159
035
002 123
042 069 102
050 185 134 008
111
010 069 102
080
093
018 033 047 208
042 175
130 143 144
014 061 092 141
158
004 022 136 163 213 214 242 243
185 007 023 055 071 072 142 137
061
241
005
102
011 028 070 076
059
044 107
027 041 044 051 077 107 209
212
014 073 092
010
044 107
179
153
182
147
244
006 005 067 178
217 218 219 095
014 062
046
044 107
030 038 039 168 169
010 050 057 058 081 082 083 085 093 195
103 201 172 008 068
233
041 044
010 020 025 056 174 175 176
239
044 107 228
67
CD
Page 36
Set-Up Code Table
Manufacturer/Brand
AIWA
CARVER
DENON
FISHER
GOLDSTAR
HARMAN KARDON
JVC
KENWOOD
LINN
LUXMAN
MAGNAVOX
MARANTZ
MCINTOSH
MITSUBISHI
NAD
NAKAMICHI
ONKYO
OPTIMUS
PANASONIC
PHILIPS
PIONEER
QUASAR
SANSUI
SHARP
SHERWOOD
SONY
TEAC
TECHNICS
TOSHIBA
VICTOR
YAMAHA
Set-Up Code Number
015 071 100 114
006 008 027 024 036
105 227 229
064
011
233
106 116 239 240
005 013 023 026 064 145 146 181 190
124
035 137 139
027
014 027 056 065 087
238
242 243
029 048
244 245 025
002 012 016 017 018 019 115
026 054 055
007 010 032 088 195
027 087
003 039 047 050 066 098 222
007 088
027 113 119 224
026 057 131 175 181
038 004 028 030 033 034
020 022 052 084 089
009 059 212
007 010 076 088 109 122 193
112
106
021 026 031 067 040
70
TAPE
Set-Up Code Table
Manufacturer/Brand
DENON
FUNAI
KENWOOD
MAGNAVOX
MARANTZ
MITSUBISHI
NAD
OPTIMUS
PANASONIC
PHILIPS
PIONEER
RADIO SHACK
RCA
REALISTIC
RUNCO
SANYO
SHARP
SONY
TECHNICS
THETA DIGITAL
TOSHIBA
YAMAHA
Set-Up Code Number
206 207
120
152 013
032 121
211
121
121
049 013
113
032
106 117 121
120
002
049
127
075
152 013
053 110
113
032
152 106
043 129
69
LD
l
Note : These codes are stored in DVD.
Page 37

Rev 3.0 0EE - 0042K
Set-Up Code Table
Manufacturer/Brand
3M
AIWA
ARCHER
AUTON
DMX
DRAPER SCREEN
DWIN
EVERQUEST
EXTRON
FAROUDJA
FUJI
JERROLD
JVC
KENWOOD
LITE-TOUCH
LUTRON
MAKITA
MINDPATH
NILES
NSM
PIANO DISC PLUS
PHILIPS
POLK AUDIO
REPLAY
RUSSOUND
SCIENTIFIC ATLANTA
SIMA
SOLO ELECTRONICS
SOMFY
SONY
STARCOM
TURBOSCAN
VELODYNE
X-10
XANTECH
Set-Up Code Number
152
164
155
191
156
204
080
206
151
184
209
153
185
185
208
077 158 159
186 201
205
160 187
161
085
090
162
075
081
156 163
082
207
078 079
104 164 165 166
153
167
203
093 183
168 169 170 171 172 188 189
71
AUX
l
AUX - Light, Switch, Tivo, etc.
 Loading...