

HTD LyncTouch Installation And User Manual

LyncTouch Installation
and User Manual
LyncTouch is a combination touch-screen and keypad controller that can be installed before or after you
have the rest of your system set up and controllable via the HTD Lync app.
Getting started with LyncTouch when you are already controlling the system via the HTD Lync app:
1. Power off all zones. This is most easily accomplished from a single button on the app.
2. Power off the amplier(s). If your system was installed using the recommended Trigger feature,
step 1. should also put your multi-channel amplier(s) into stand-by mode. If instead, your amplier(s)
is set to always be powered on, then you will need to power off each amplier using the button on
the front. It is not necessary to press the power button on the front of the amplier if it is already in
stand-by mode.
3. Power off your central Lync controller (model Lync 6 or Lync 12) using the power button on the front.
4. Install each LyncTouch following the directions below on page 2.
5. After all LyncTouch have been installed, power on the Lync controller by pressing the button on the
front. It is at this point that the Lync controller searches for connected devices. Devices are only
recognized by the system when the Lync controller is rst powered on. If your amplier(s) was left
powered on and in stand-by mode that is all you need to do. If the power button on the front of your
amplier was previously turned off (out position), then press it back in.
Using LyncTouch with a Lync system that is being set up for the rst time:
1. Follow the instructions provided with your system to connect cables between the central Lync
controller and amplier(s) and between the amplier(s) and your speakers.
2. Make sure the amplier(s) and Lync Controller are powered off using the button on the front. It is
not necessary to press the power button on the front of the amplier if it is already in stand-by mode.
3. Install each LyncTouch following the directions below on page 2.
4. After all LyncTouch have been installed, power on the Lync controller by pressing the button on the
front. It is at this point that the Lync controller searches for connected devices. Devices are only
recognized by the system when the Lync controller is rst powered on. Similarly press the button on
the front of each amplier to turn it on.
Overview of how to install a LyncTouch:
We have made installing LyncTouch super easy with our patent-pending design. The enclosure on
the backside of the LyncTouch has been matched in size to a custom-made metal ring that you install
into a at surface, typically a wall. Once installed, you simply plug the Cat 5 or Cat 6 cable (already
terminated with an RJ45 connector) into either of the RJ45 ports on the back of the LyncTouch and push
the LyncTouch in until it is ush with the wall. Strong, neodymium magnets mounted to either side of the
LyncTouch enclosure adhere to the metal ring and keep it in place.
V.10.17.2019
1
Installing and Connecting
ouch
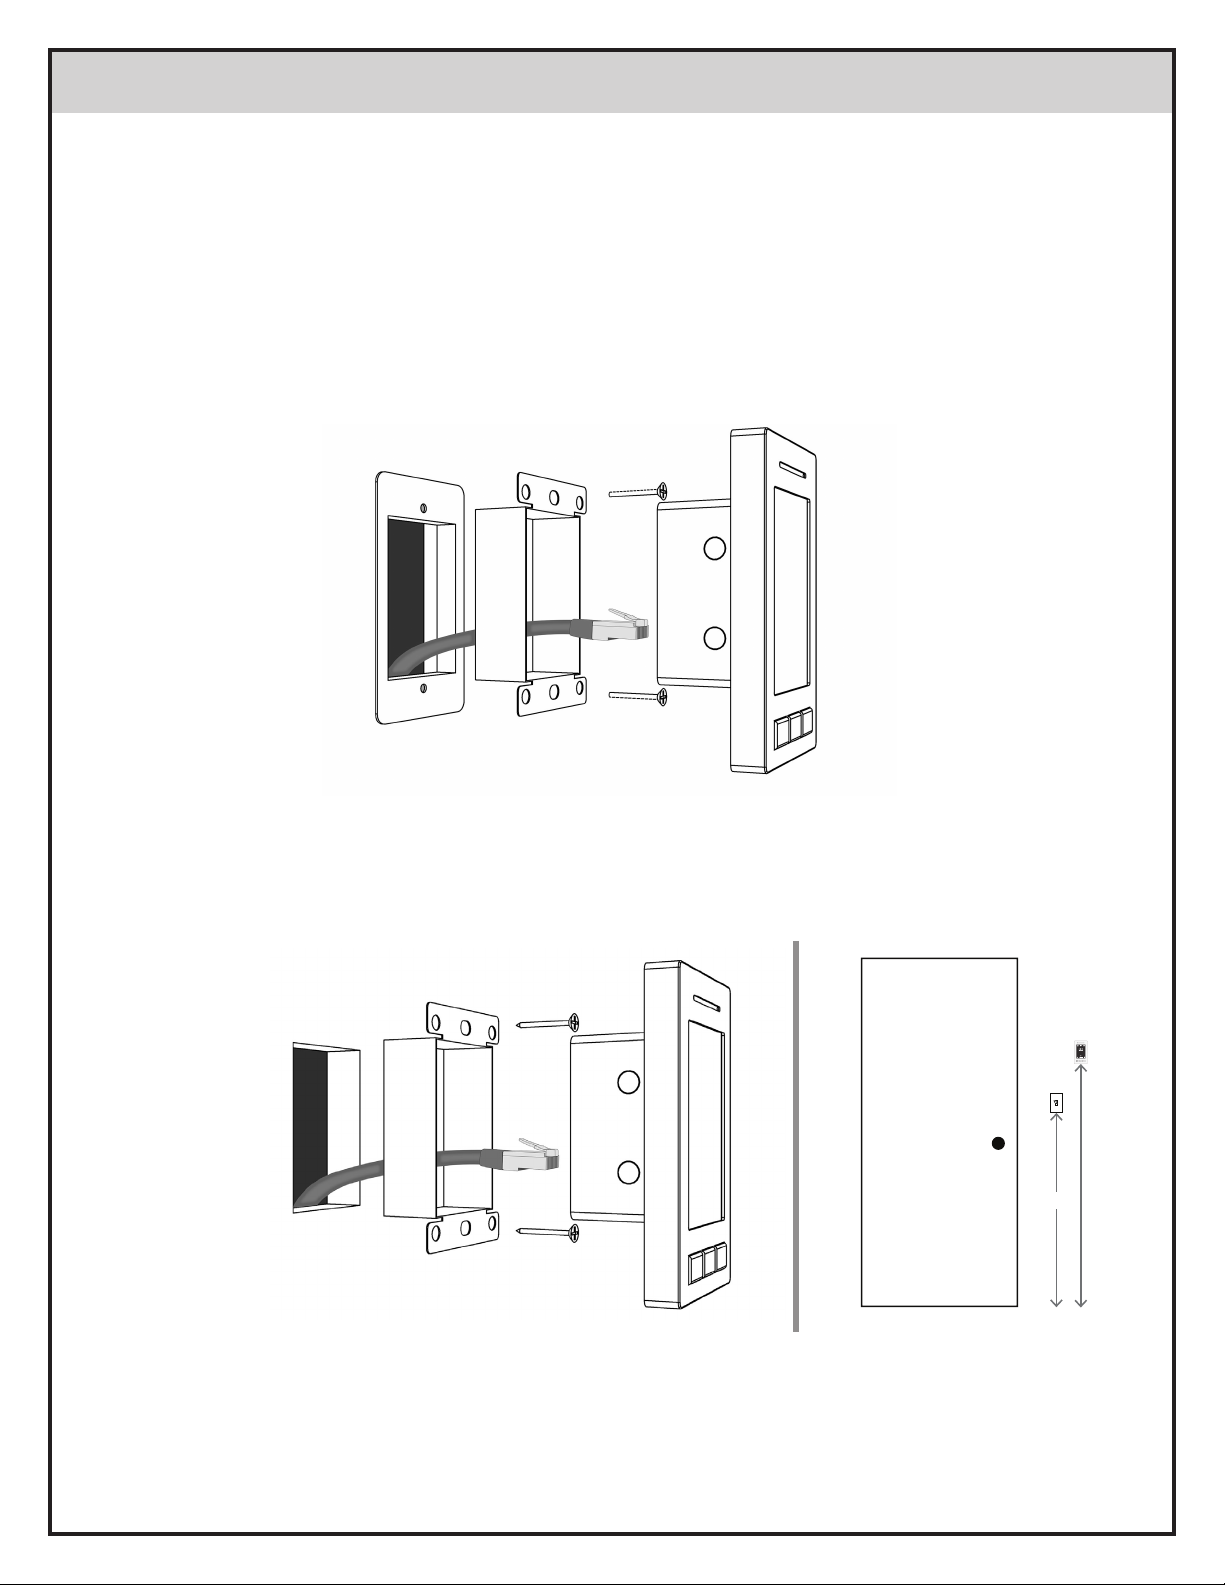
Mounting into a wall using a low-voltage mounting bracket or junction box
When installing into a wall, we recommend using an OPEN BACK Junction Box or Low-Voltage Mounting
Ring. It is important that the LyncTouch be able to slide easily into the available space. This means
keeping the space clear of debris and unnecessary cables and connectors. The cable(s) that connects
to the back of the LyncTouch needs to be able to move freely in and out of the space. If your junction box
or mounting bracket includes a back that is inhibiting the free movement of your cable(s), we recommend
using a rotary (or similar) tool to cut out or widen the opening through which the cable moves. Keep
in mind that most building codes only require a closed back junction box for low voltage items such as
LyncTouch when they are installed into a wall where the adjoining space is not conditioned, such as an
attic or exterior wall.
Mounting into a Surface without a Junction Box or Low-Voltage Mounting Ring
LyncTouch can also be mounted directly into a at surface without the need for a junction box or lowvoltage mounting ring. This method is not recommended for dry-wall, but works well with hard surfaces
like wood. For this type of installation, HTD relies on the customer to determine what type of fastener
(e.g. wood screw) will work best with their surface.
LyncT
Light
switch
~4 ft.
Recommended Mounting Height
Unlike a light switch which is often positioned about four feet from the oor, LyncTouch is best mounted
slightly below eye level. This places LyncTouch in the most ergonomic position for the touch-screen
display. Whenever possible, avoid placing LyncTouch within the same stud space as electrical cables
operating at high voltage in order to mitigate the potential of adding electrical noise into your system.
2
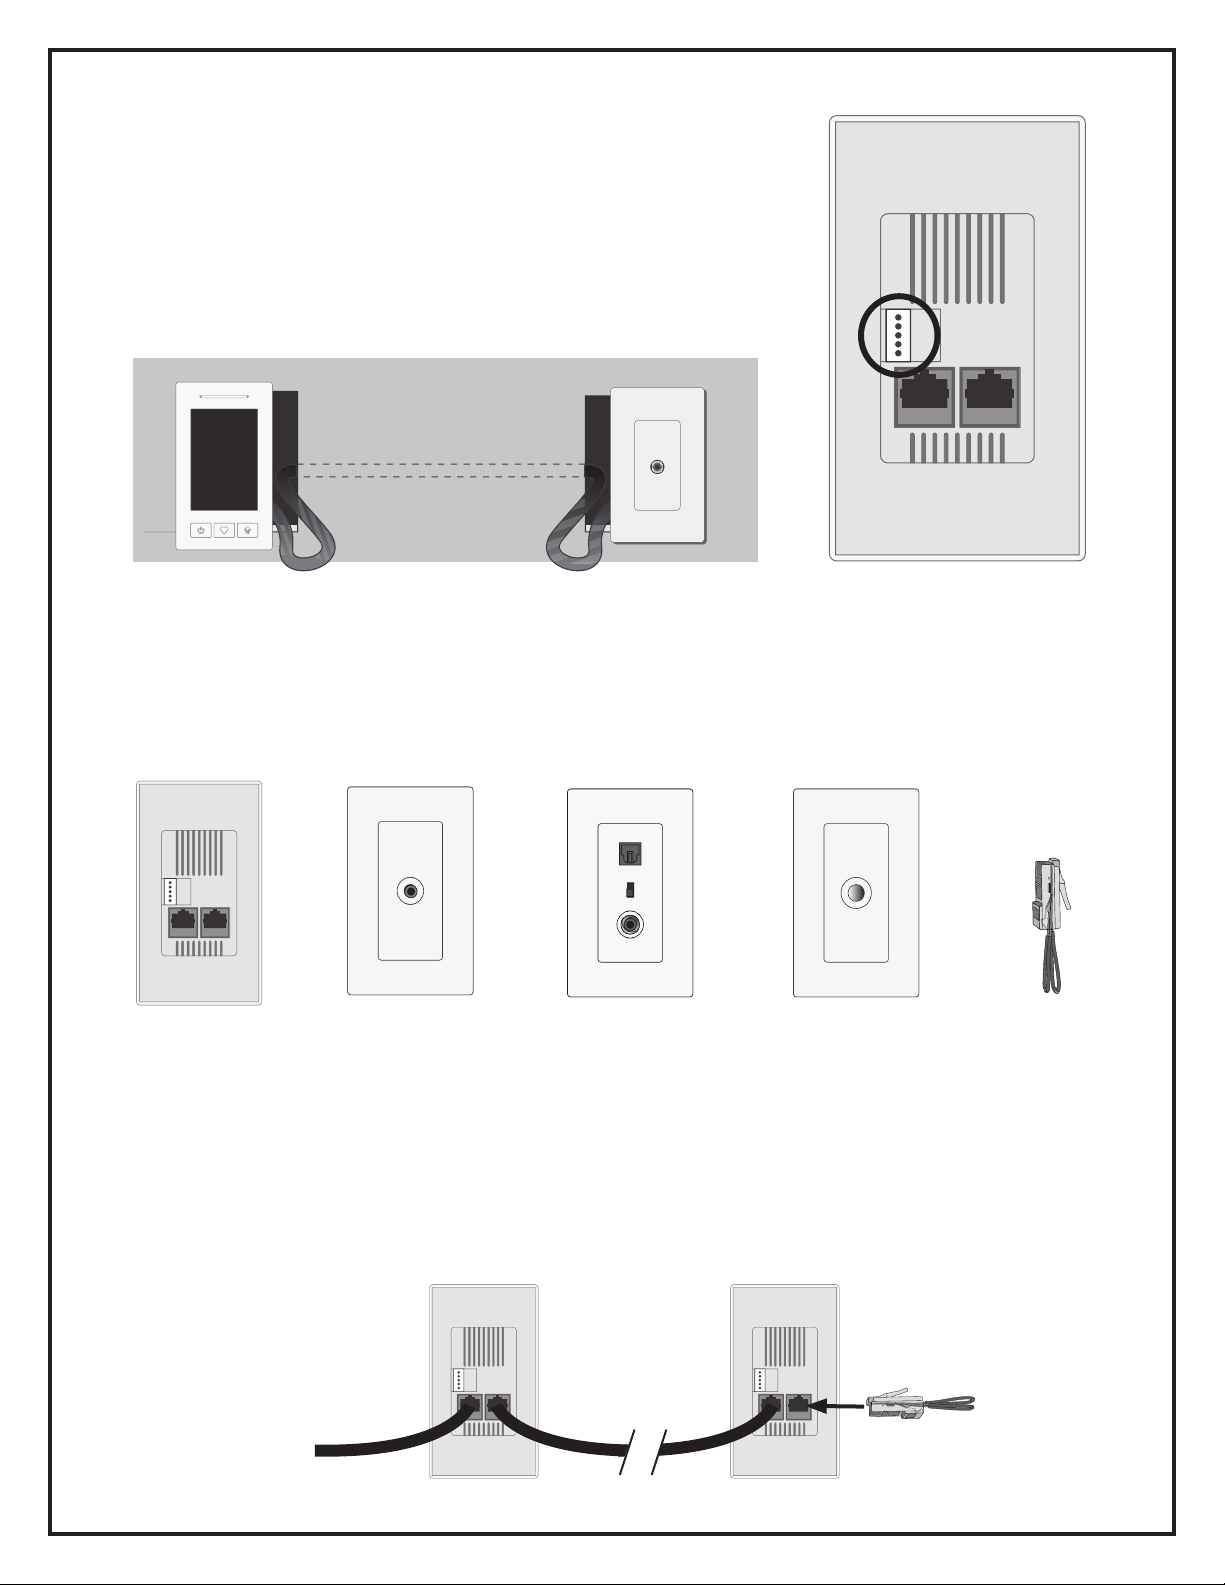
Connecting a Standard Input Panel
A Standard Input Panel (SIP) offers an easy and economical
connection point for attaching an audio source component within
the same room as the LyncTouch. That source can then be
made available to every zone. The SIP connects to the back of a
LyncTouch using 5 of the 8 conductors found in a Cat cable and
a special 5-pin adapter included with the SIP. That adapter plugs
into the white connector shown in the image at right. A SIP can be
installed directly next to the LyncTouch or up to 80 feet away.
LyncTouch (Back)
Connecting an Analog Input Panel (AIP), Digital Input Panel (DIP) or Bluetooth Input Panel (BIP)
These three active devices can be connected directly to the central Lync controller or to the back of a
LyncTouch using the available RJ45 port. When this is done, be sure to insert an RJ45 termination plug
included with every LyncTouch, AIP, DIP, and BIP into any open port to ensure proper operation.
LyncTouch (Back) Analog Input Panel (AIP) Digital Input Panel (DIP) Bluetooth Input Panel (BIP) RJ45 Terminator
Connecting a second LyncTouch within the same zone
In larger rooms, it is often convenient to install more than one LyncTouch. Similar to adding an AIP, DIP,
or BIP (see above), a second LyncTouch can be connected to the open port on the rst LyncTouch or
back at the central Lync controller with a special “Y” adapter (call for more info). When this is done, be
sure to insert an RJ45 termination plug included with every LyncTouch, AIP, DIP, and BIP into any open
port to ensure proper operation. Also to ensure proper operation, the “address” of the rst and second
LyncTouch need to be unique. See “Address” on page 5 for more information.
To central
Lync Controller
3
RJ45 Terminator
 Loading...