

Page 1
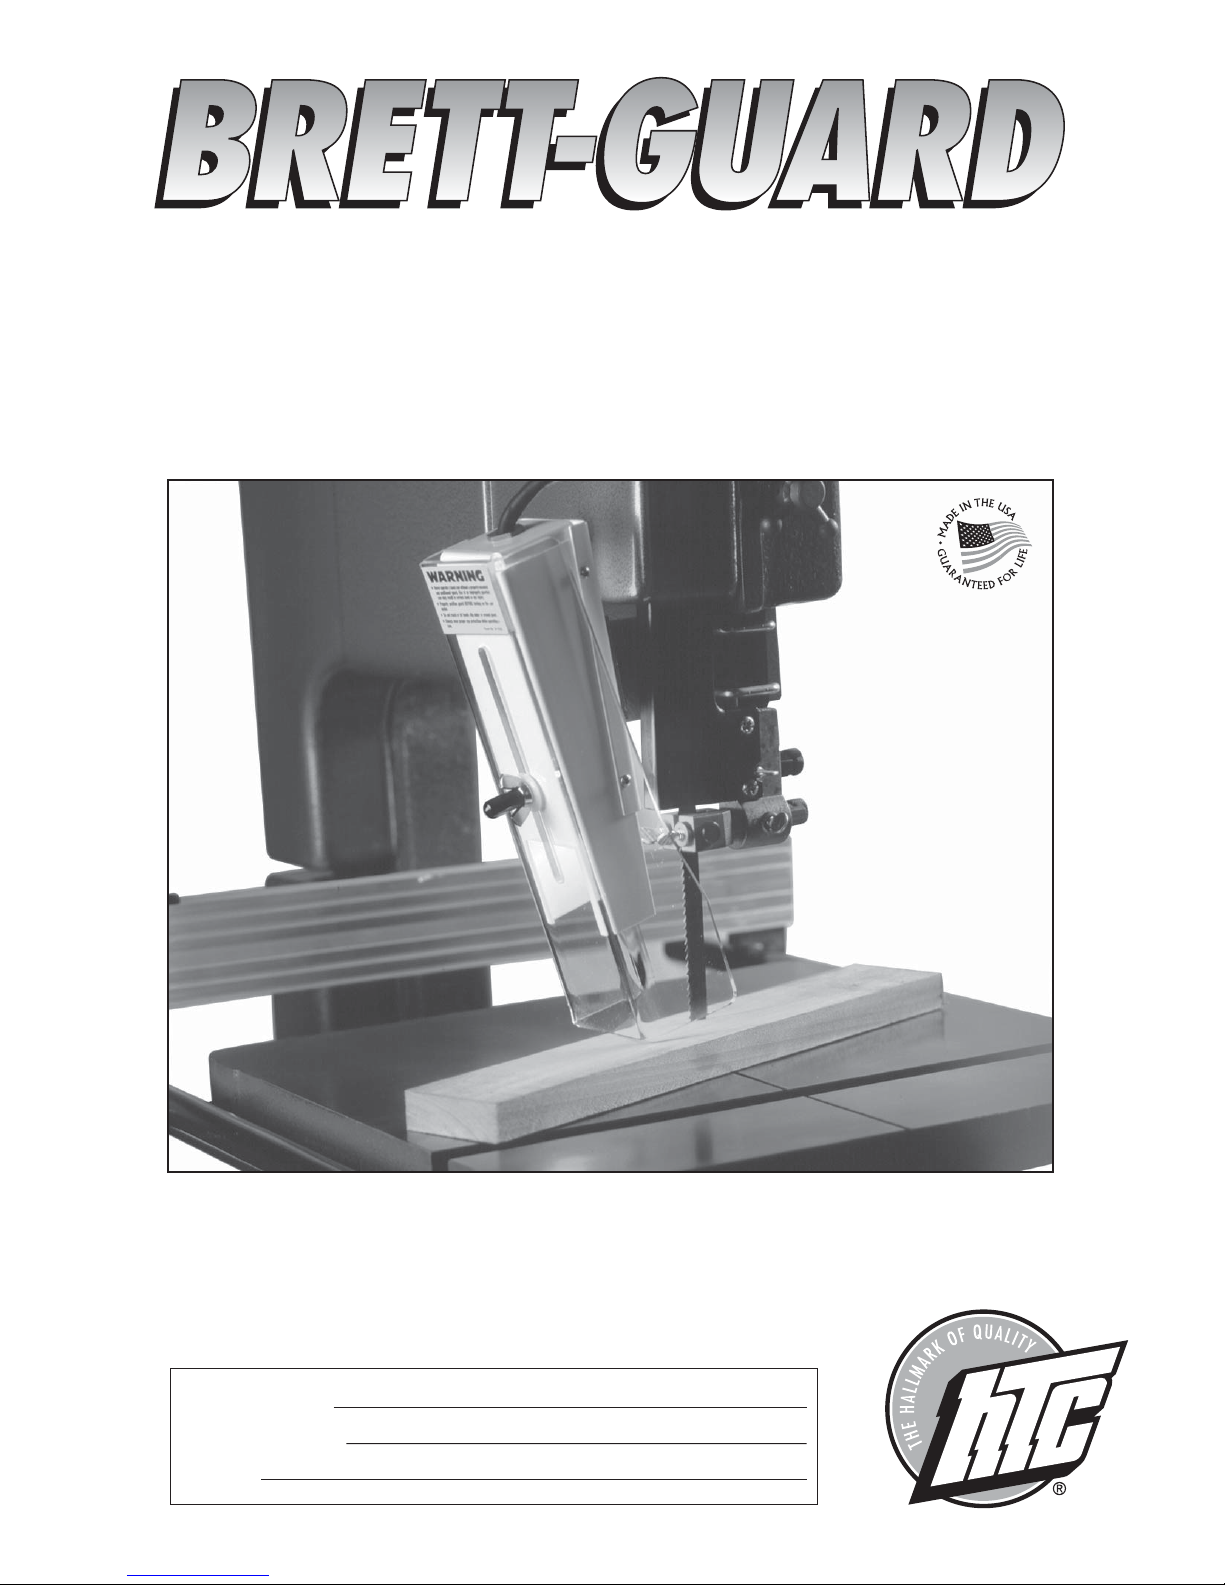
OPERATORS MANUAL
FOR BAND SAW MODELS:
A-100-9, A-100, B-200
®
Caution: Read all instructions carefully.
SAVE THESE INSTRUCTIONS.
Refer to them often and use them to instruct others.
Date Purchased:
Where Purchased:
Address:
Page 2

Table of Contents
Safety Rules ......................................2 - 5
Operation Instructions ............................. 5
Installation A-100-9 ................................ 6
Installation A-100X, B200X ..................... 7
Warranty ................................................. 8
Thank You and Congratulations!
Thank you for purchasing one of the many HTC products manufactured
in the USA by craftsmen dedicated to making reliable, high quality products.
All HTC products are backed by our lifetime* warranty and a responsive,
dedicated customer service department. We would appreciate hearing your
comments or suggestions. Please feel free to call or write anytime. We
welcome correspondence from everyone who has ever purchased or used
one of our fine products.
A Word About Your New Brett-Guard
The Brett-Guard Band Saw Safety Tool is designed for the discriminating
woodworker — The craftsman who wants quality, function, and performance
without sacrificing safety and flexibility. Brett-Guard is designed to overcome
the objection “you can’t guard that operation.” It’s patented features make it
more than just a guard, it’s really a safety tool integral to the cutting operation.
General Product Safety Warning
As with all products there are certain hazards involved with their
operation and use. Using any product with respect, caution, and common
sense will considerably lessen the possibility of personal injury. Safety is a
combination of staying alert, knowing how the product works, and knowing
how to properly use the product. To use any product safely you should plan
ahead and practice the proper steps prior to actually using the product. If
safety rules and instructions are overlooked or ignored, personal injury to the
operator or other people in the area may result. Safe operation of any product
requires that you read and understand the product instructions and all labels
affixed to the product.
Always read and follow all instructions and safety rules carefully.
This product is designed for certain uses only. This product or any of
it’s parts shall NOT be altered, changed, or modified in any way and/or used
for any other use than it’s designed for. If you have any questions about it’s
proper care or use DO NOT use the product until you have written HTC and
we have advised you in writing.
HTC Products, Inc. — Technical Support
332 E. Lincoln
Royal Oak, MI 48067
(248) 399-6185 • (800) 624-2027
www.htcproductsinc.com
* See back cover for complete Warranty Information
2
Page 3

General Safety Rules
1. For your own safety, read instruction manual before operating the
tool, Know the tool. Read and understand the owner’s manual and labels
affixed to the tool.
2. Keep work area clean. Cluttered areas and benches invite accidents and
create fire hazards.
3. Wear proper apparel. Do not wear loose clothing, gloves, neckties,
bracelets, drawstring, necklaces, ornaments, rings, wristwatches, or jewelry
of any kind. They can get caught and pull you into moving parts.
4. Avoid dangerous environment. Keep alert to potential hazards in the
working environment. Do not use tool in situations such as damp or wet
locations or in the presence of highly combustible materials, dust, and
flammable liquids, fumes, vapors or gases.
5. Keep children and visitors away. All visitors should be kept a safe
distance from work area. Don’t let visitors contact tool or power cord.
Anyone visiting the work area should wear appropriate protective devices.
6. Wear safety goggles. Wear safety goggles (not glasses) at all times.
All eye protection must comply with the ANSI Z87.1 standard for eye
protection. Everyday eyeglasses only have impact resistant lenses, they are
NOT safety glasses.
7 Drugs, alcohol, or medication. Stay alert. Watch what you are doing.
Use common sense. Do not operate tool when you are tired, upset, ill, or
while under the influence of drugs, alcohol, or medication.
8. First aid. Have at least one person with first aid training and first aid kits
approved by American National Red Cross available at all times.
9. Fire extinguisher. Familiarize yourself in the use of a portable fire
extinguisher. Post the telephone number of the local fire department. Also
develop and know emergency procedures in case of fire.
10. Smoke Detector. To increase protection against fire install smoke
detectors. For proper selection and installation guidelines contact your local
fire department.
11. Use right tool. Don’t force tool or attachment to do a job it was not
designed for.
12. Don’t force tool. It will do the job better and safer at the rate for which it
was designed.
13. Secure work. Keep hands well away from moving parts, saw blades, and
other cutting tools. Use a push stick or push block to hold or guide the
work when working close to cutting tool. Use jigs, fixtures, miter gauge,
clamps or vises to hold work when practical.
14. Never leave tool running unattended. Turn power off. Don’t leave tool
until it comes to a complete stop.
15. Keep guards in place. Be sure that guards, hold-downs, and antikickback devices are in working order, are positioned properly, and are in
proper adjustment and alignment.
16. Remove adjusting keys and wrenches. Form the habit of checking to
see that keys and adjusting wrenches are removed from the tool before
turning the tool on.
17. Cutting tool exposure. Adjust the tool for minimum exposure of cutting
tool necessary to perform the operation.
3
Page 4

18. Direction of feed. Feed work into a blade or cutting tool against the
direction of rotation of the blade or cutting tool only.
19. Don’t overreach. Keep proper footing and balance at all times.
20. Never stand on tool. Serious injury could occur if the tool is tipped or
if the cutting tool is accidentally contacted. Do not store materials above
or near the tool in such a way that it is necessary to stand on the tool to
reach them.
21. Avoid accidental starting. Make sure switch is in the “OFF” position
before plugging in tool. Do not carry a plugged in tool with finger on
switch.
22. Inspect workpiece. Always inspect workpiece to make sure there aren’t
any nails or foreign objects in the part of the workpiece to be worked on.
23. Plan ahead. Mentally plan ahead to protect your eyes, hands, body,
face and hearing. Do layout assembly, setup work, material handling, and
planning before using tool.
23. Disconnect tools. Always turn tool “OFF” and disconnect the cord from
the power source before tool is serviced or when installing or removing
accessories such as blades, bits, or cutters, etc.
25. Maintain tools with care. Inspect tool before each use. It is
recommended that the general condition of any tool be examined before
it is used.
26. Check damaged parts. Before further use of the tool, a guard or other
part that is damaged should be carefully checked to ensure that it will
operate properly and perform its intended function.
27. Ground all tools. Make sure wiring codes and recommended electrical
connections are followed and that tool is properly grounded.
28. Outdoor use extension cords. When tool is used outdoors, use only
extension cords marked “suitable for use with outdoor appliances - store
indoors when not in use.”
29. Ground Fault Circuit Interrupters - (GFCI’s) provide additional means
to reduce serious electrical shock while using a power tool. They are
easily installed between the power receptacle and the cord. Leakage
of current will shut off the tool, preventing possible serious injury from
electrocution.
WARNING
The dust generated by most materials including plastics, metals, wood,
and wood tools can be injurious to your health. Always operate tool in a
well ventilated area and provide for proper dust removal. Use appropriate
dust collection systems whenever possible.
4
Page 5

Band Saws are Very Dangerous
All Band Saws are inherently dangerous and should never be used by
anyone who is not thoroughly trained and experienced.
The Brett-Guard Band Saw Safety Tool, properly installed and used under
proper supervision, can help to protect an operator against injury from many
saw hazards such as coming in contact with the saw blade. NOTHING can
protect an operator if proper safety and operating procedures are not followed
WARNINGS
1. Never operate a Band Saw without a properly mounted and positioned
Saw Guard. Use of an improperly guarded saw will result in serious injury.
2. Properly position guard BEFORE turning on the saw motor.
3. Do not adjust guard or blade guide while saw motor is running or even
while blade is rotating.
4. Lower edge of the transparent Safety Shield should contact the workpiece.
5. Never reach or let hands slip under the shield.
6. Always use a push stick when feeding narrow stock.
7. Always wear proper eye protection while operating a band saw.
8. LOCKOUT POWER before changing the blade or servicing the machine.
9. Worn or damaged parts on the saw, or the guard, must be replaced before
operation is continued.
Operating Instructions
1. Following the machine manufacturer’s instructions, adjust the guide bar up
or down to accommodate material to be machined. Plexi-shield wing nut
should be loose to allow free up/down movement.
2. Lift plexi-shield and slide stock under. The shield should rest on the stock
being cut and be free to drop to the table top after making the cut.
NOTE: In special cases, the plexi-shield may be adjusted, and held in
position by tightening the wing nut.
Replacing Band Saw Blade
1. Raise the guide bar up, as high as possible, while still maintaining plexishield contact with the saw table surface. Tighten plexi-shield in place
using wing nut. This will allow maximum clearance between the blade
guides and the table, easing blade change, while using the plexi-shield to
index the remounting of the guard after the change has been made.
2. Loosen the U-bolts used to mount the housing to the guide bar, and swing
the guard out of the way to gain access to the blade. Mounts on square
guide bars will require complete removal.
3. Install new blade per manufacturer’s instructions.
4. Swing guard back into position and secure.
5. Loosen plexi-shield wing nut, adjust blade guides per manufacturer
instructions, and resume normal operations.
NOTE: If blades require frequent changing, wing nuts can be used to
secure the guard to the guide bar for added convenience.
5
Page 6
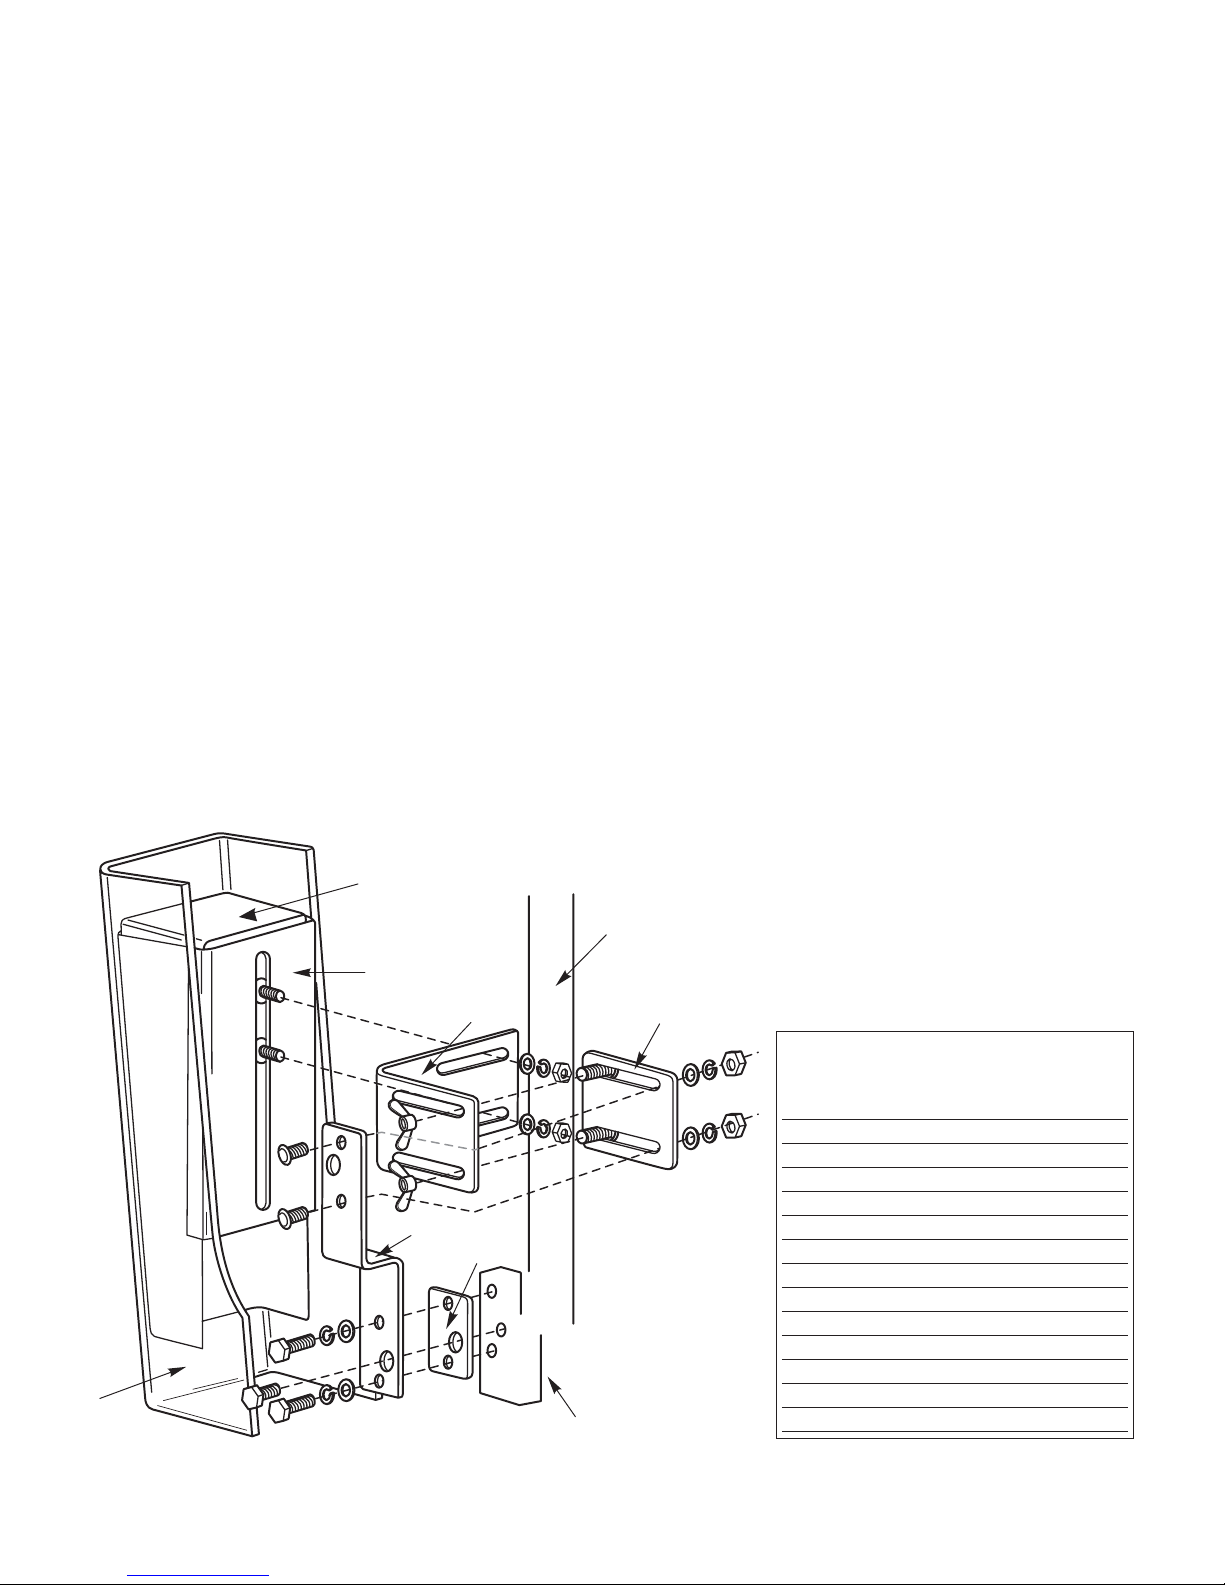
Installation Instructions for
Model A-100-9 Only
1. Unpack, layout, and identify parts and hardware.
2. Fasten 21006 adapter plate to 21001 mounting bracket using (2) 1/4" -20 x
3/4" carriage bolts, lock washers, flat washers, and (2) 1/4" - 20 nuts.
3. Attach 21001 mounting bracket to guide bar casting, (part of the saw) with
spacer 21003 between 21001 and guide bar casting. Use 1/4" - 20 x 3/4"
hex bolts, lock washers and flat washers.
4. Slip (2) 1/4" - 20 x 3/4" carriage bolts into the slot on the back of the
housing (head of the carriage bolt on the inside of the housing). Attach
adjustment bracket 21002 to the protruding carriage bolts using flat
washers, lock washers, and 1/4" - 20 nuts.
NOTE: Short leg of bracket 21002 should be attached to the housing.
Finger tighten only.
5. Mount above assembly (housing and 21002 adjustment bracket) to the
21006 adapter bracket studs using flat washers and wing nuts.
6. Center plexi-shield and housing in front of saw blade by sliding left or right
on the adjustment bracket. Secure in place. Shield should be 1” to 1.5”
from front edge of blade. Entire assembly should tilt out at the top, slightly
toward the operator.
7. With plexi-shield loosened, slide guide bar up as far as possible. Be sure
shield clears the saw blade at this maximum machine setting. If not, adjust
and re-secure into position.
NOTE: The Brett-Guard Band Saw Guard is also equipped with a 60 watt
light socket within the housing. Final electrical connection of the light
receptacle to the machine on/off switch should be completed by a qualified
person, using the green lead as ground.
10703
21004
21007
21001
21002
21003
Guide Bar Casting
Guide Bar
21006
Parts List & Hardware
Part No. Description Qty.
21004 Housing Outer 1
21007 Housing Inner 1
10703 Plexi-Shield 1
21001 Mounting Bracket 1
21002 Adjustment Bracket 1
21003 Spacer 1
21006 Adapter Plate 1
1/4"-20 x 3/4" Hex Bolts 2
1/4"-20 x 3/4" Carriage Bolts 4
1/4"-20 Nuts 4
1/4"-20 Wing Nuts 2
1/4" Lock Washers 8
1/4" Flat Washers 8
6
Page 7
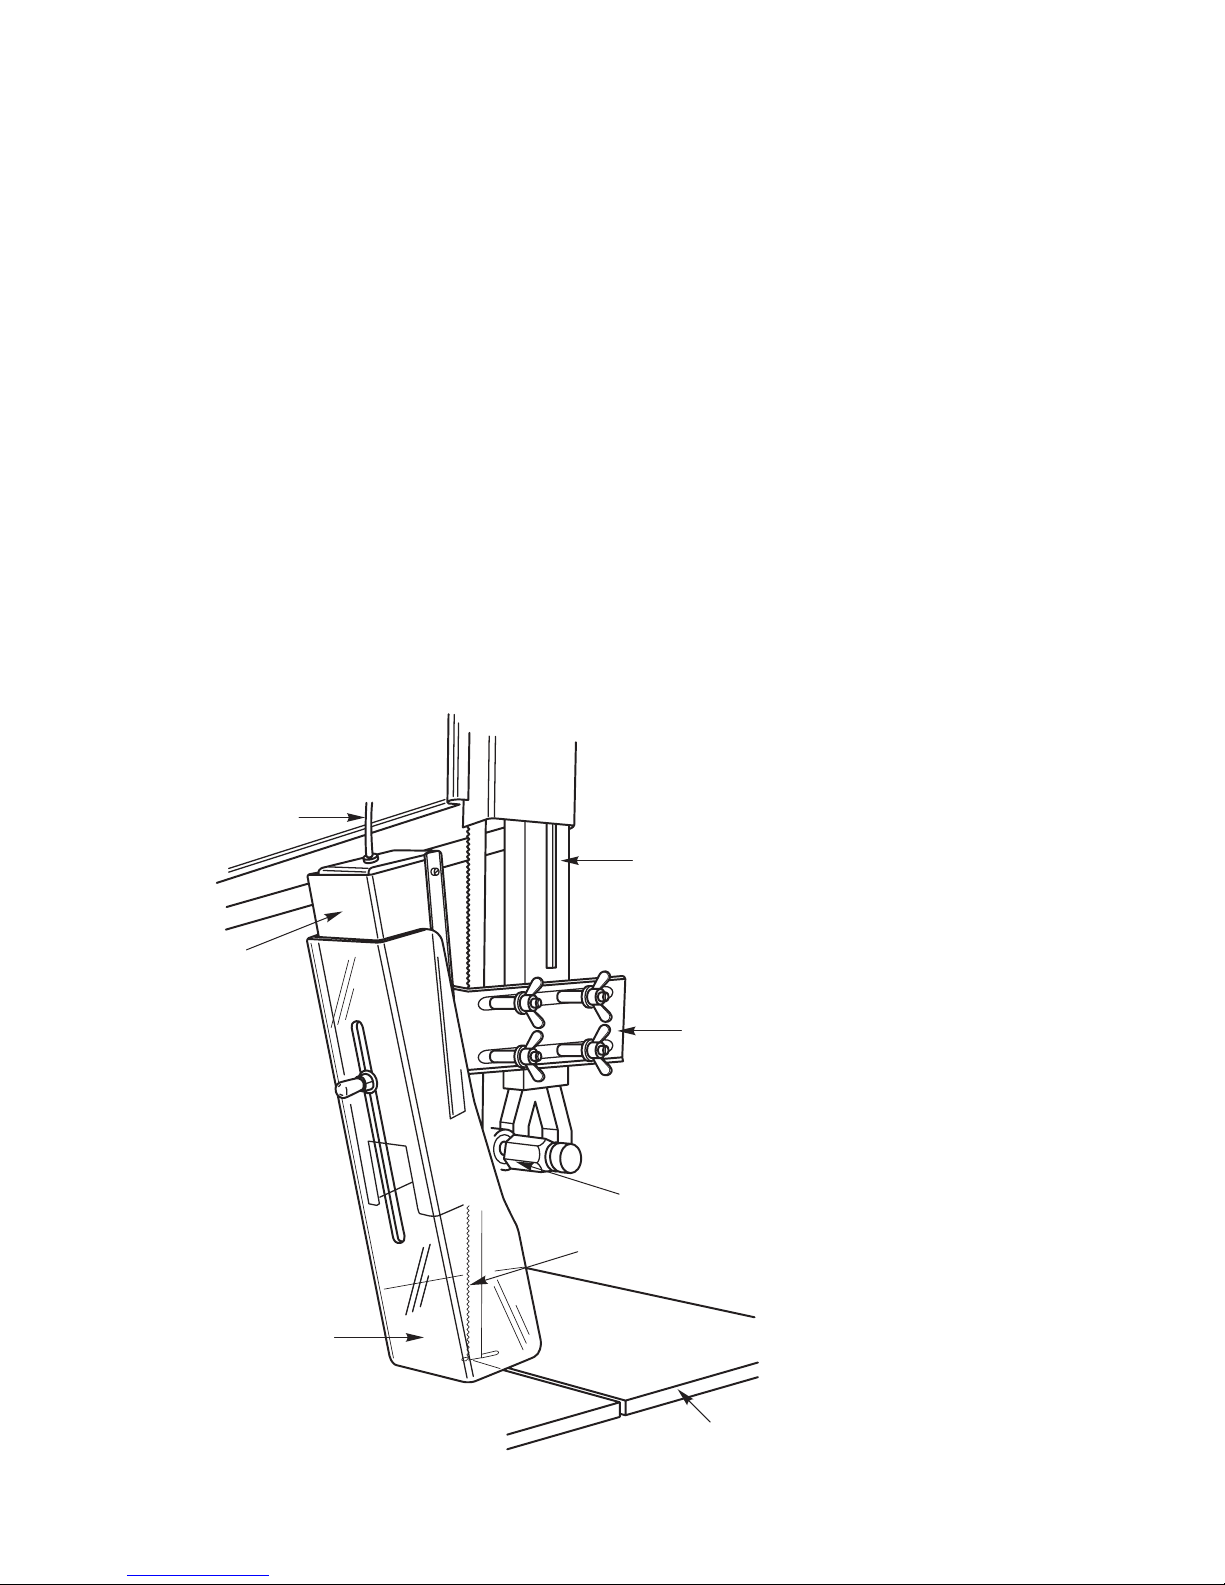
Installation Instructions for
Models A-100 and B-200
The Brett-Guard Band Saw Guard installation will vary slightly depending
on the make, model, and size of the tool. Installation will include attaching
housing, bracket and enclosed hardware to the guide bar of the tool. Follow
these steps to installation:
1. Lower guide bar of the band saw down to the table top.
2. Slide plexi-shield into top position on the housing (End with cord). Hold
plexi-shield in place by tightening the wing nut on the front of the guard.
3. Slip (2) 1/4” - 20 x 3/4” carriage bolts into the slot on the back of the
short leg of mounting bracket to the carriage bolts with flat washers, lock
washers and 1/4” - 20 nuts. Finger tighten only.
4. Attach mounting bracket and housing to guide bar, using U-bolts placed
around the guide bar, through the mounting bracket and secure in place
with flat washers, lock washers, and hex nuts. Finger tighten only.
NOTE: In environments which require frequent blade changes, above hex
nuts can be replaced with wing nuts.
5. Adjust shield left or right on mounting bracket to center guard on the
blade. Housing should be mounted as low as possible. Secure in place.
Shield should be approximately 1” to 1.5” from the front of the saw blade.
NOTE: Brett-Guard housing will be tilted out at the top. Raise guide
bar up to check that the shield will clear the saw blade at the maximum
cut setting.
Lamp Cord
Housing
Plexi-Shield
Guide Bar
Mounting
Brackets
Blade Guides
Blade
Machine Table
7
Page 8

LIMITED LIFETIME WARRANTY
Products manufactured by HTC Products, Inc. are
guaranteed to be free from defects in material and
workmanship under normal use and service. HTC’s
obligation under this warranty shall be limited to repairing
or replacing for the original owner, at our option, any part of
said equipment which HTC’s examination shall disclose to
its satisfaction to be thus defective.
Any product or component claimed to be defective is to be
sent prepaid to: HTC Products, 332 E. Lincoln, Royal Oak,
MI, 48067 Attn: Warranty Department, together with a copy
of the original, dated sales receipt. Call for authorization
number before shipping.
This warranty does not apply to damages resulting from
shipping, accident, misuse, abuse or alteration.
Wear items (wheels, bearings, bushings, rubber feet, etc.)
are warranted for a period of 1 year. Consumable items (saw
guard shields) are warranted for a period of 60 days.
HTC Products, Inc.
332 E. Lincoln
Royal Oak, MI 48067
800-624-2027
www.htcproductsinc.com
© 2006 HTC Products, Inc. Part No. P008
 Loading...